May 23-29, 2024: If you’ve ever had bugs or mice or snakes (!!!) in your house, they probably got in through gaps, seams or rotted sections of the sill plate and adjacent framing. The sill plate is the very first piece of wood that gets laid down on top of a foundation wall in a typical wood framed home. Any joining of two different building materials is vulnerable to seasonal expansion and contraction, resulting in micro gaps just the right size for bugs. When wood gets wet and can’t dry out (like when it’s located close to the ground), it can rot, inviting more trouble.
Building Codes give some guidance for installing sill plates, but the quality of execution is left up to the builder. For a high performance home like we’re building (one that’s energy and resource efficient as well as durable over the long haul), you want high quality materials, redundant layers, and better-than-average workmanship.
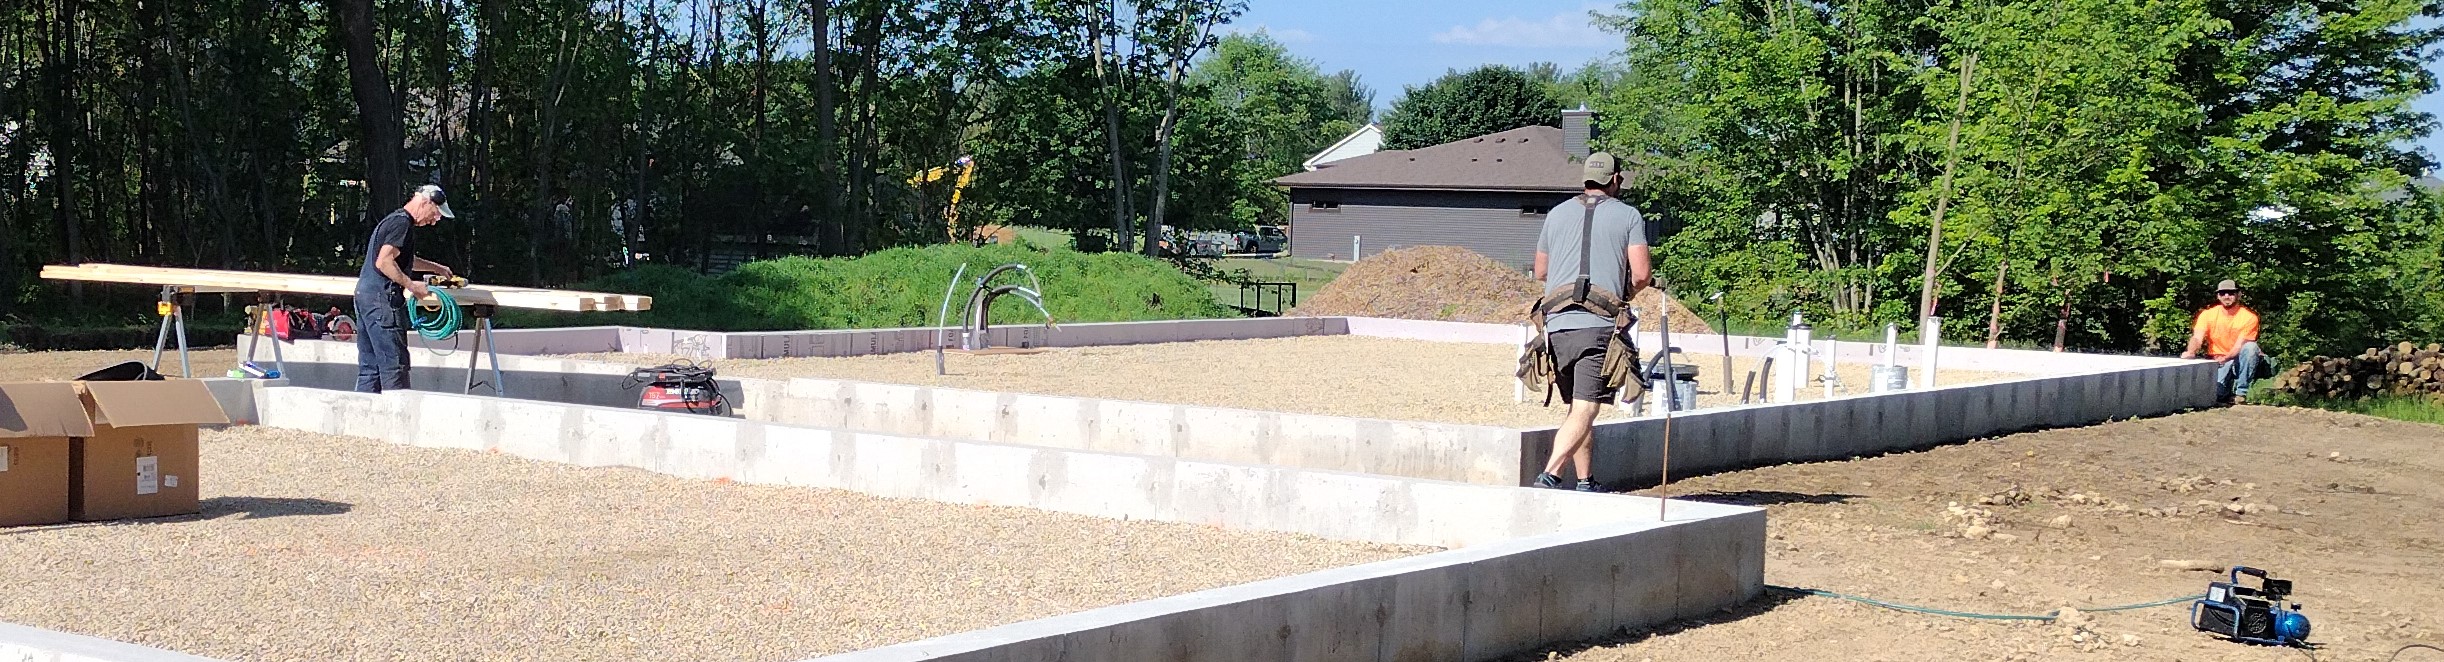
My carpentry crew, headed up by Mike Larson with help from Blake and Dave, began by squaring up the sill plates on the pretty-good but not-perfect foundation wall and setting up the saw station. I’d ordered a pile of fine-looking Western Red Cedar 2×6-16′ lumber in place of the usual chemical-laden pressure treated Southern Yellow Pine. Cedar is more expensive, but naturally decay resistant. These “appearance grade” boards were arrow-straight and a joy to work with. To save money and minimize waste, I handed the carpenters a “cut sheet” that called out the placement of each board. The few “shorts” left can be used later for hobby projects or firewood. No lumber will end up in a dumpster or a landfill.

Next, the crew marked out and drilled holes for the anchor bolts.

With the holes and surface of the concrete wall blown clean of dust, we laid down a bead of adhesive caulk around and between the bolt locations. This non-toxic, ultra-low-VOC product from 475 Supply makes a permanently elastic bond between the blue 6 mil polyethylene vapor barrier and the concrete wall, our first bug-and-rodent defense mechanism. As important, the adhesive will seal the inside of the home from the exterior, stopping all air and vapor movement.

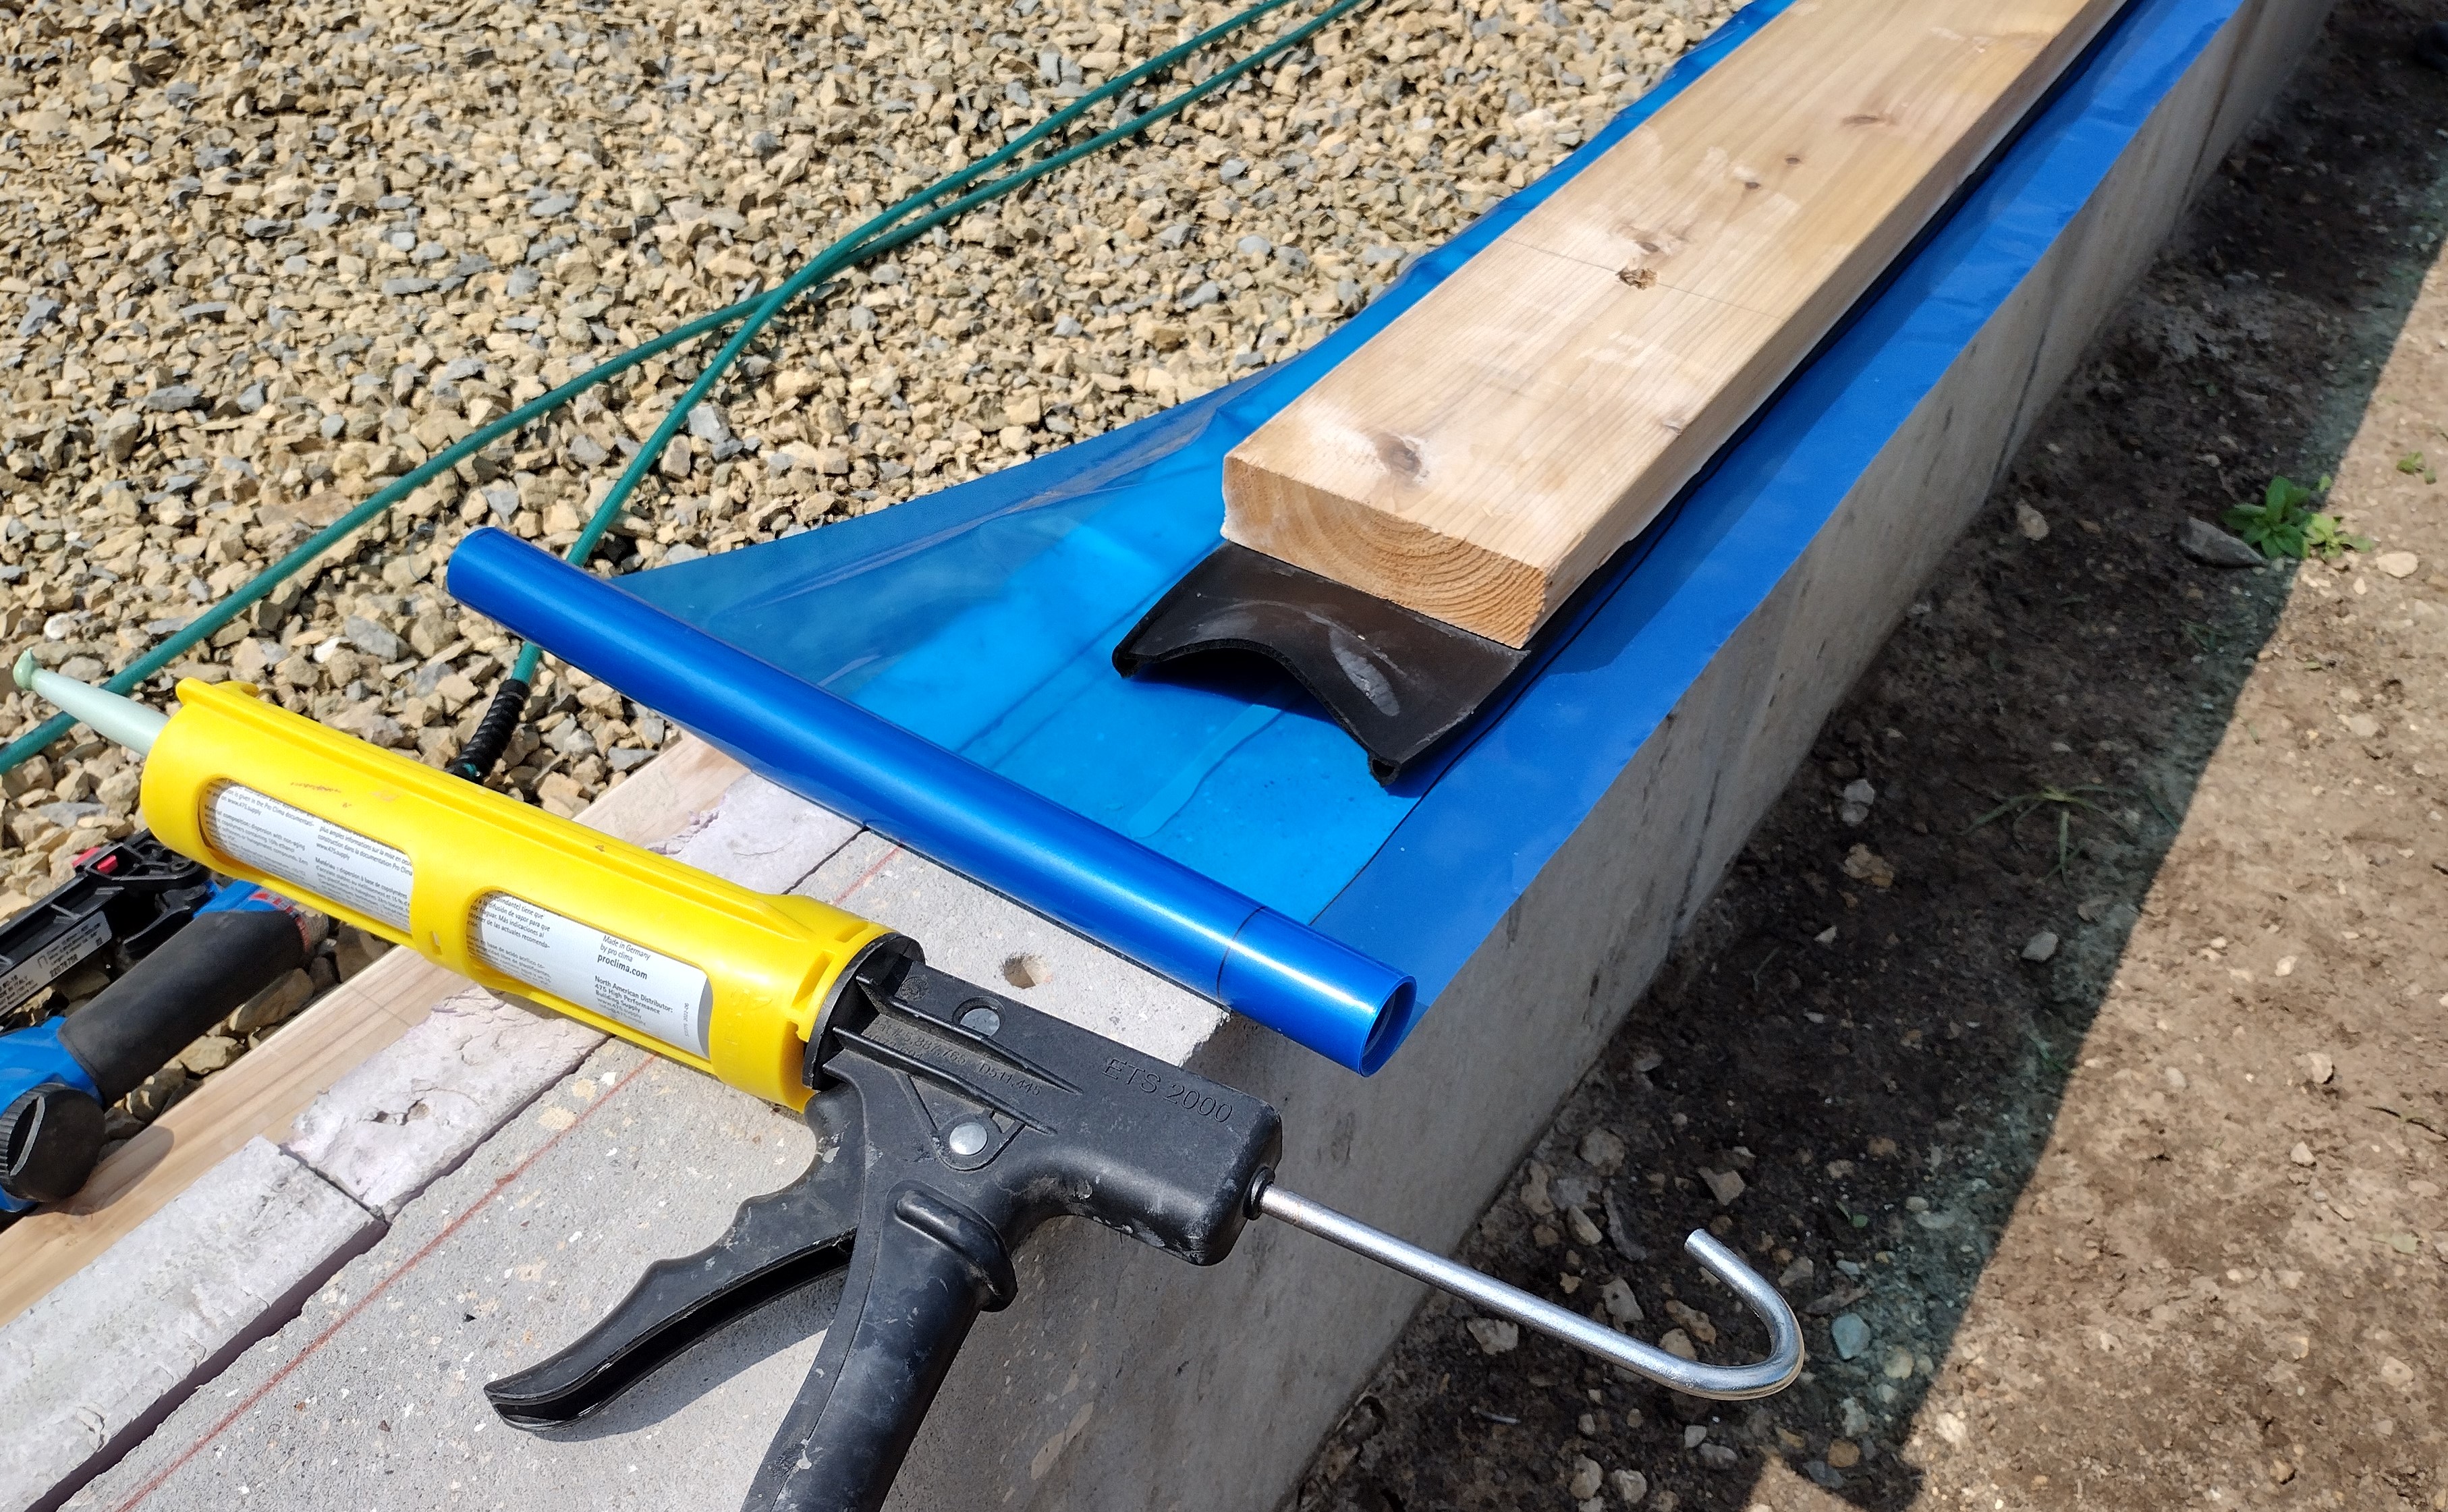
Instead of the usual (flimsy) foam gasket commonly called “sill seal”, I upgraded to this black EPDM (synthetic rubber) structural gasket from Conservation Technology. Stapled to the underside of our 2×6 cedar sill plate, the 3/8″ bulbs on each edge can “ride” the irregularities in the top of the foundation wall for a better long-term seal; our second bug-and-rodent and air-and-vapor defense mechanism.
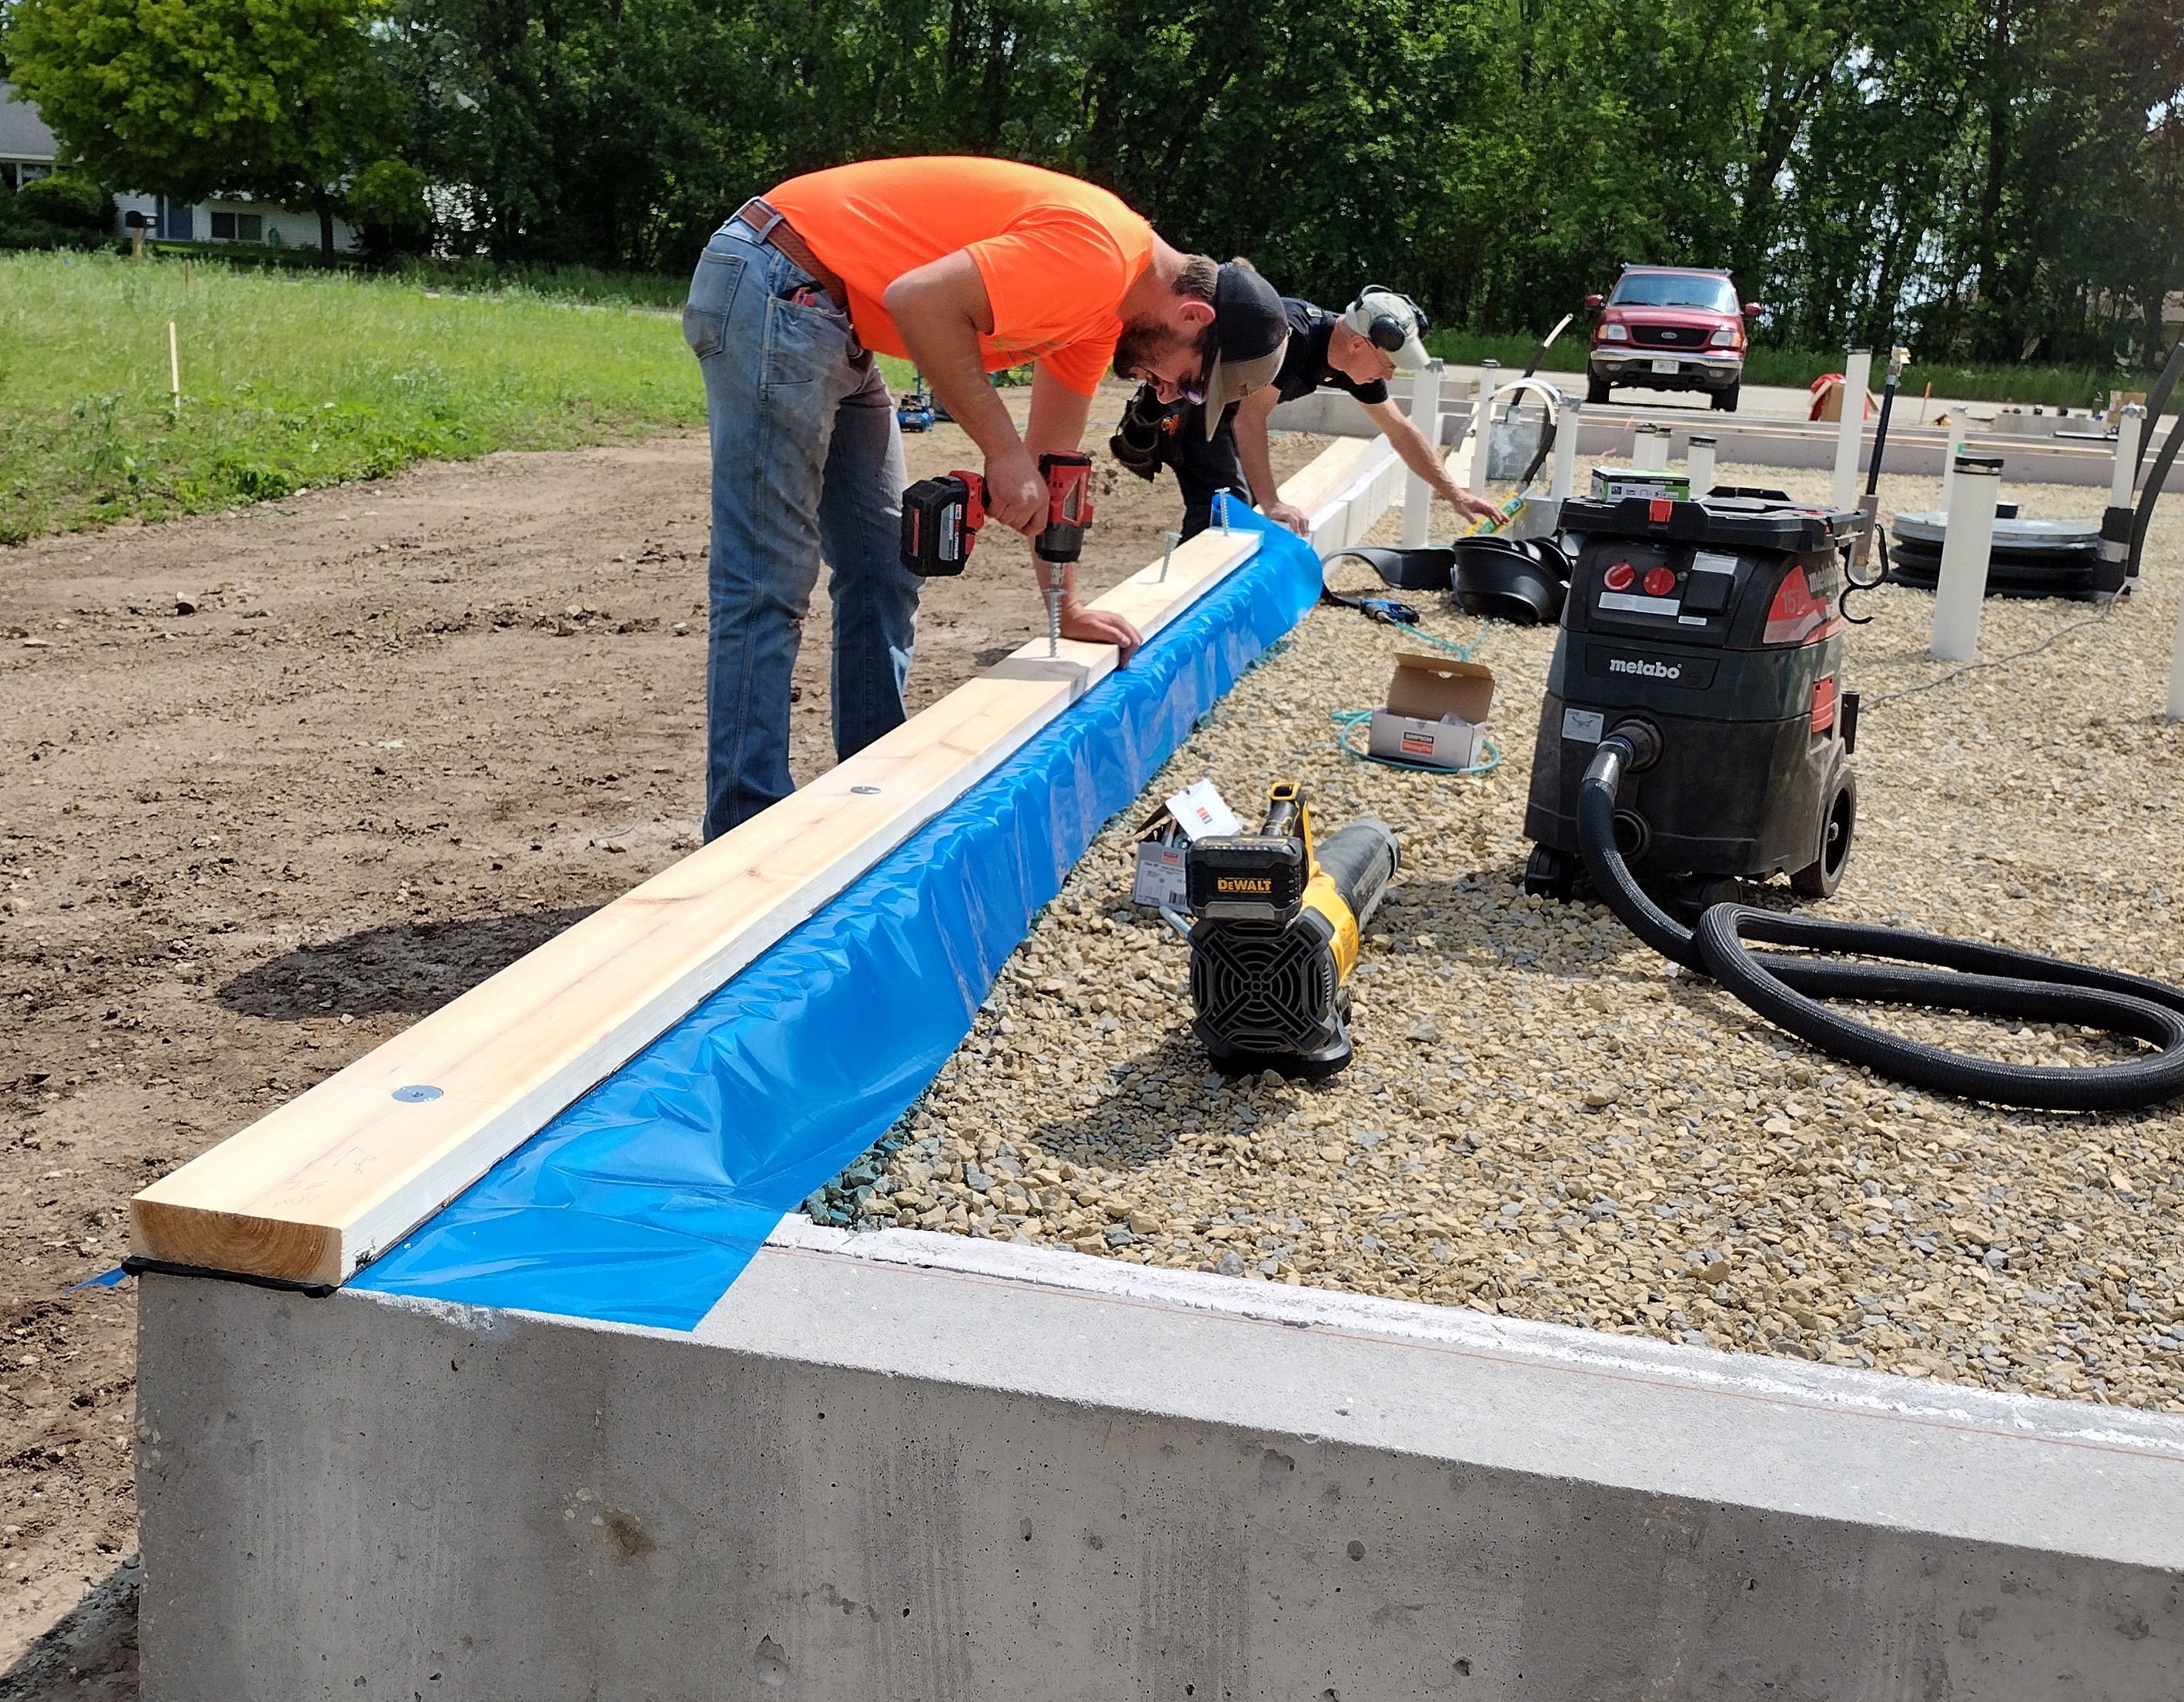
To increase wind resistance well above Code minimum, I specified a tighter spacing of the anchor bolts. I like the ease and accuracy of screwed in place anchor bolts (instead of the usual poured-in-place bolts) and also the integral washer available from Simpson Titen HD. It’s part of my strategy for greater resiliancy in the face of the more severe storms predicted as a result of global climate change.

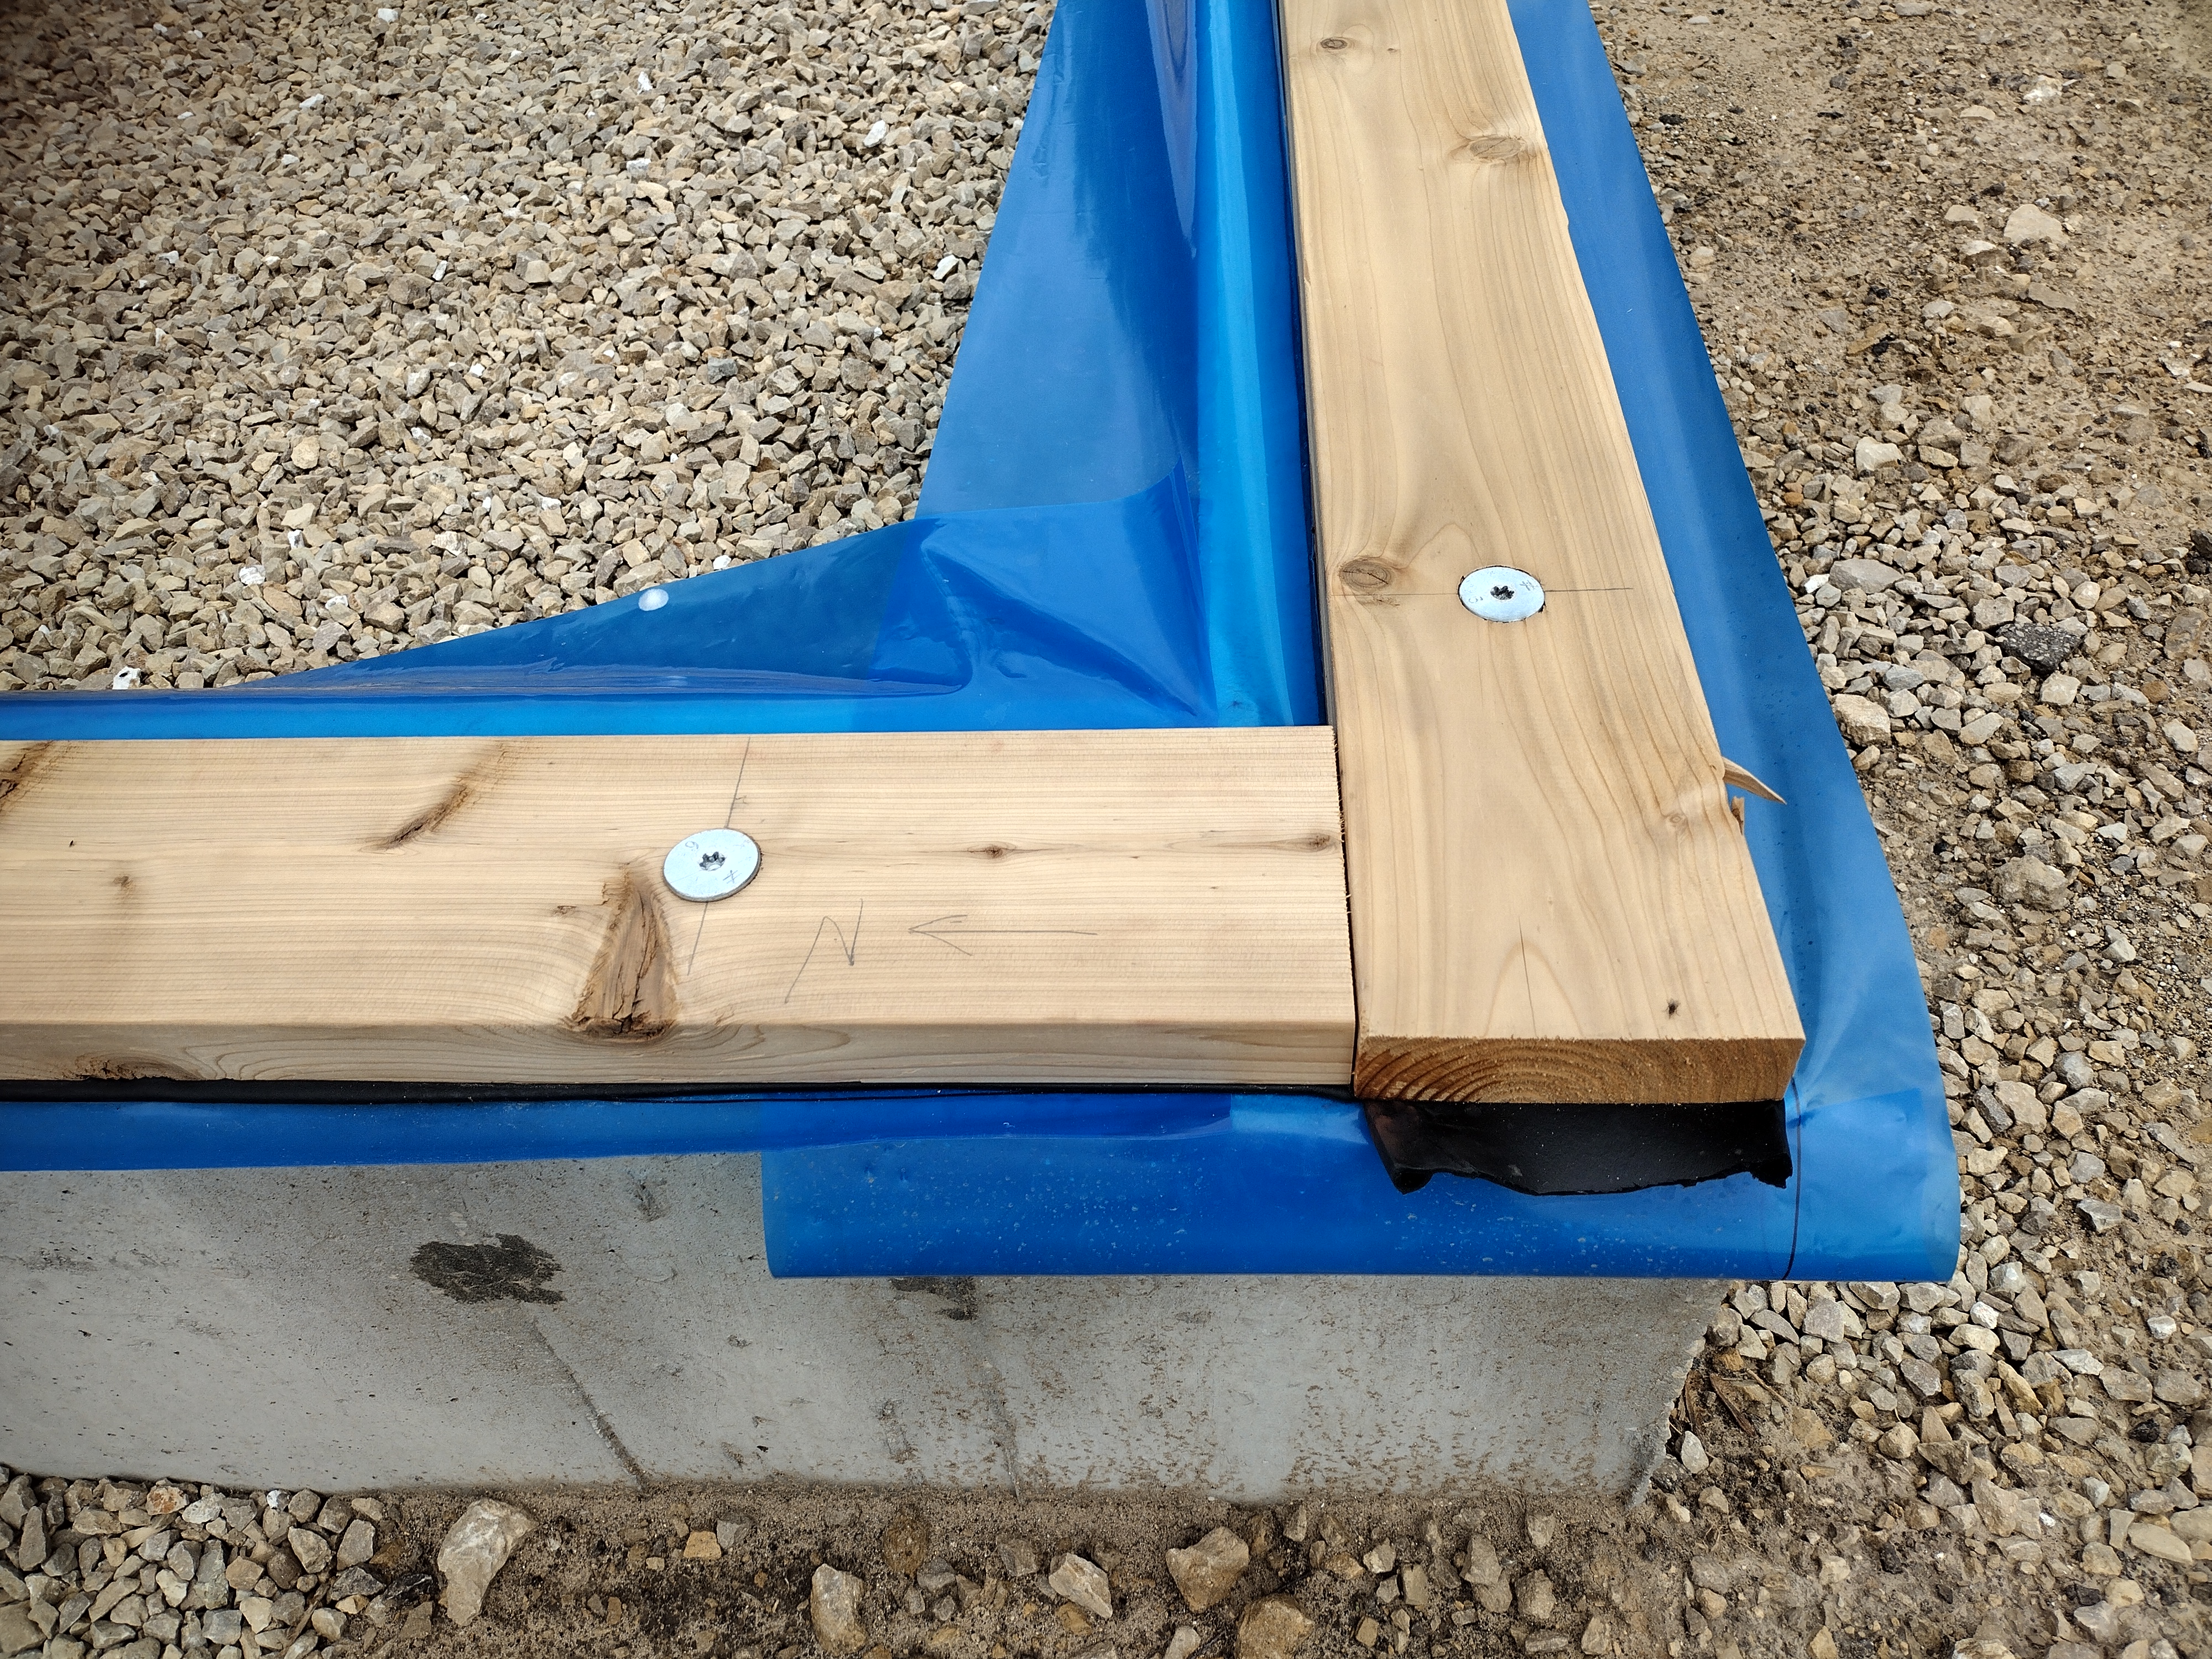
Here is my section drawing showing the sill plate and surrounding materials. The 2×6 cedar sill plate is bolted to the foundation wall. Next week, before we stand up the exterior 2×4 wall, the carpenters will drill a 1/8″ deep hole in the underside of the bottom plate to accomodate the depth of the washer. The cedar sill sits atop the black EPDM gasket and blue vapor barrier. Later, the blue vapor barrier will be folded up and taped or caulked to the plywood wall sheathing on the exterior and folded down and taped or caulked to the red vapor barrier before the slab is poured, creating a continuous barrier against air and vapor.
There a many interesting and effective ways to solve the sill plate problem. I “cut and pasted” my own solutions from the examples so generously contributed by my fellow designers and builders, who can be found at Journal of Light Construction, Fine Homebuilding and Green Building Advisor.
