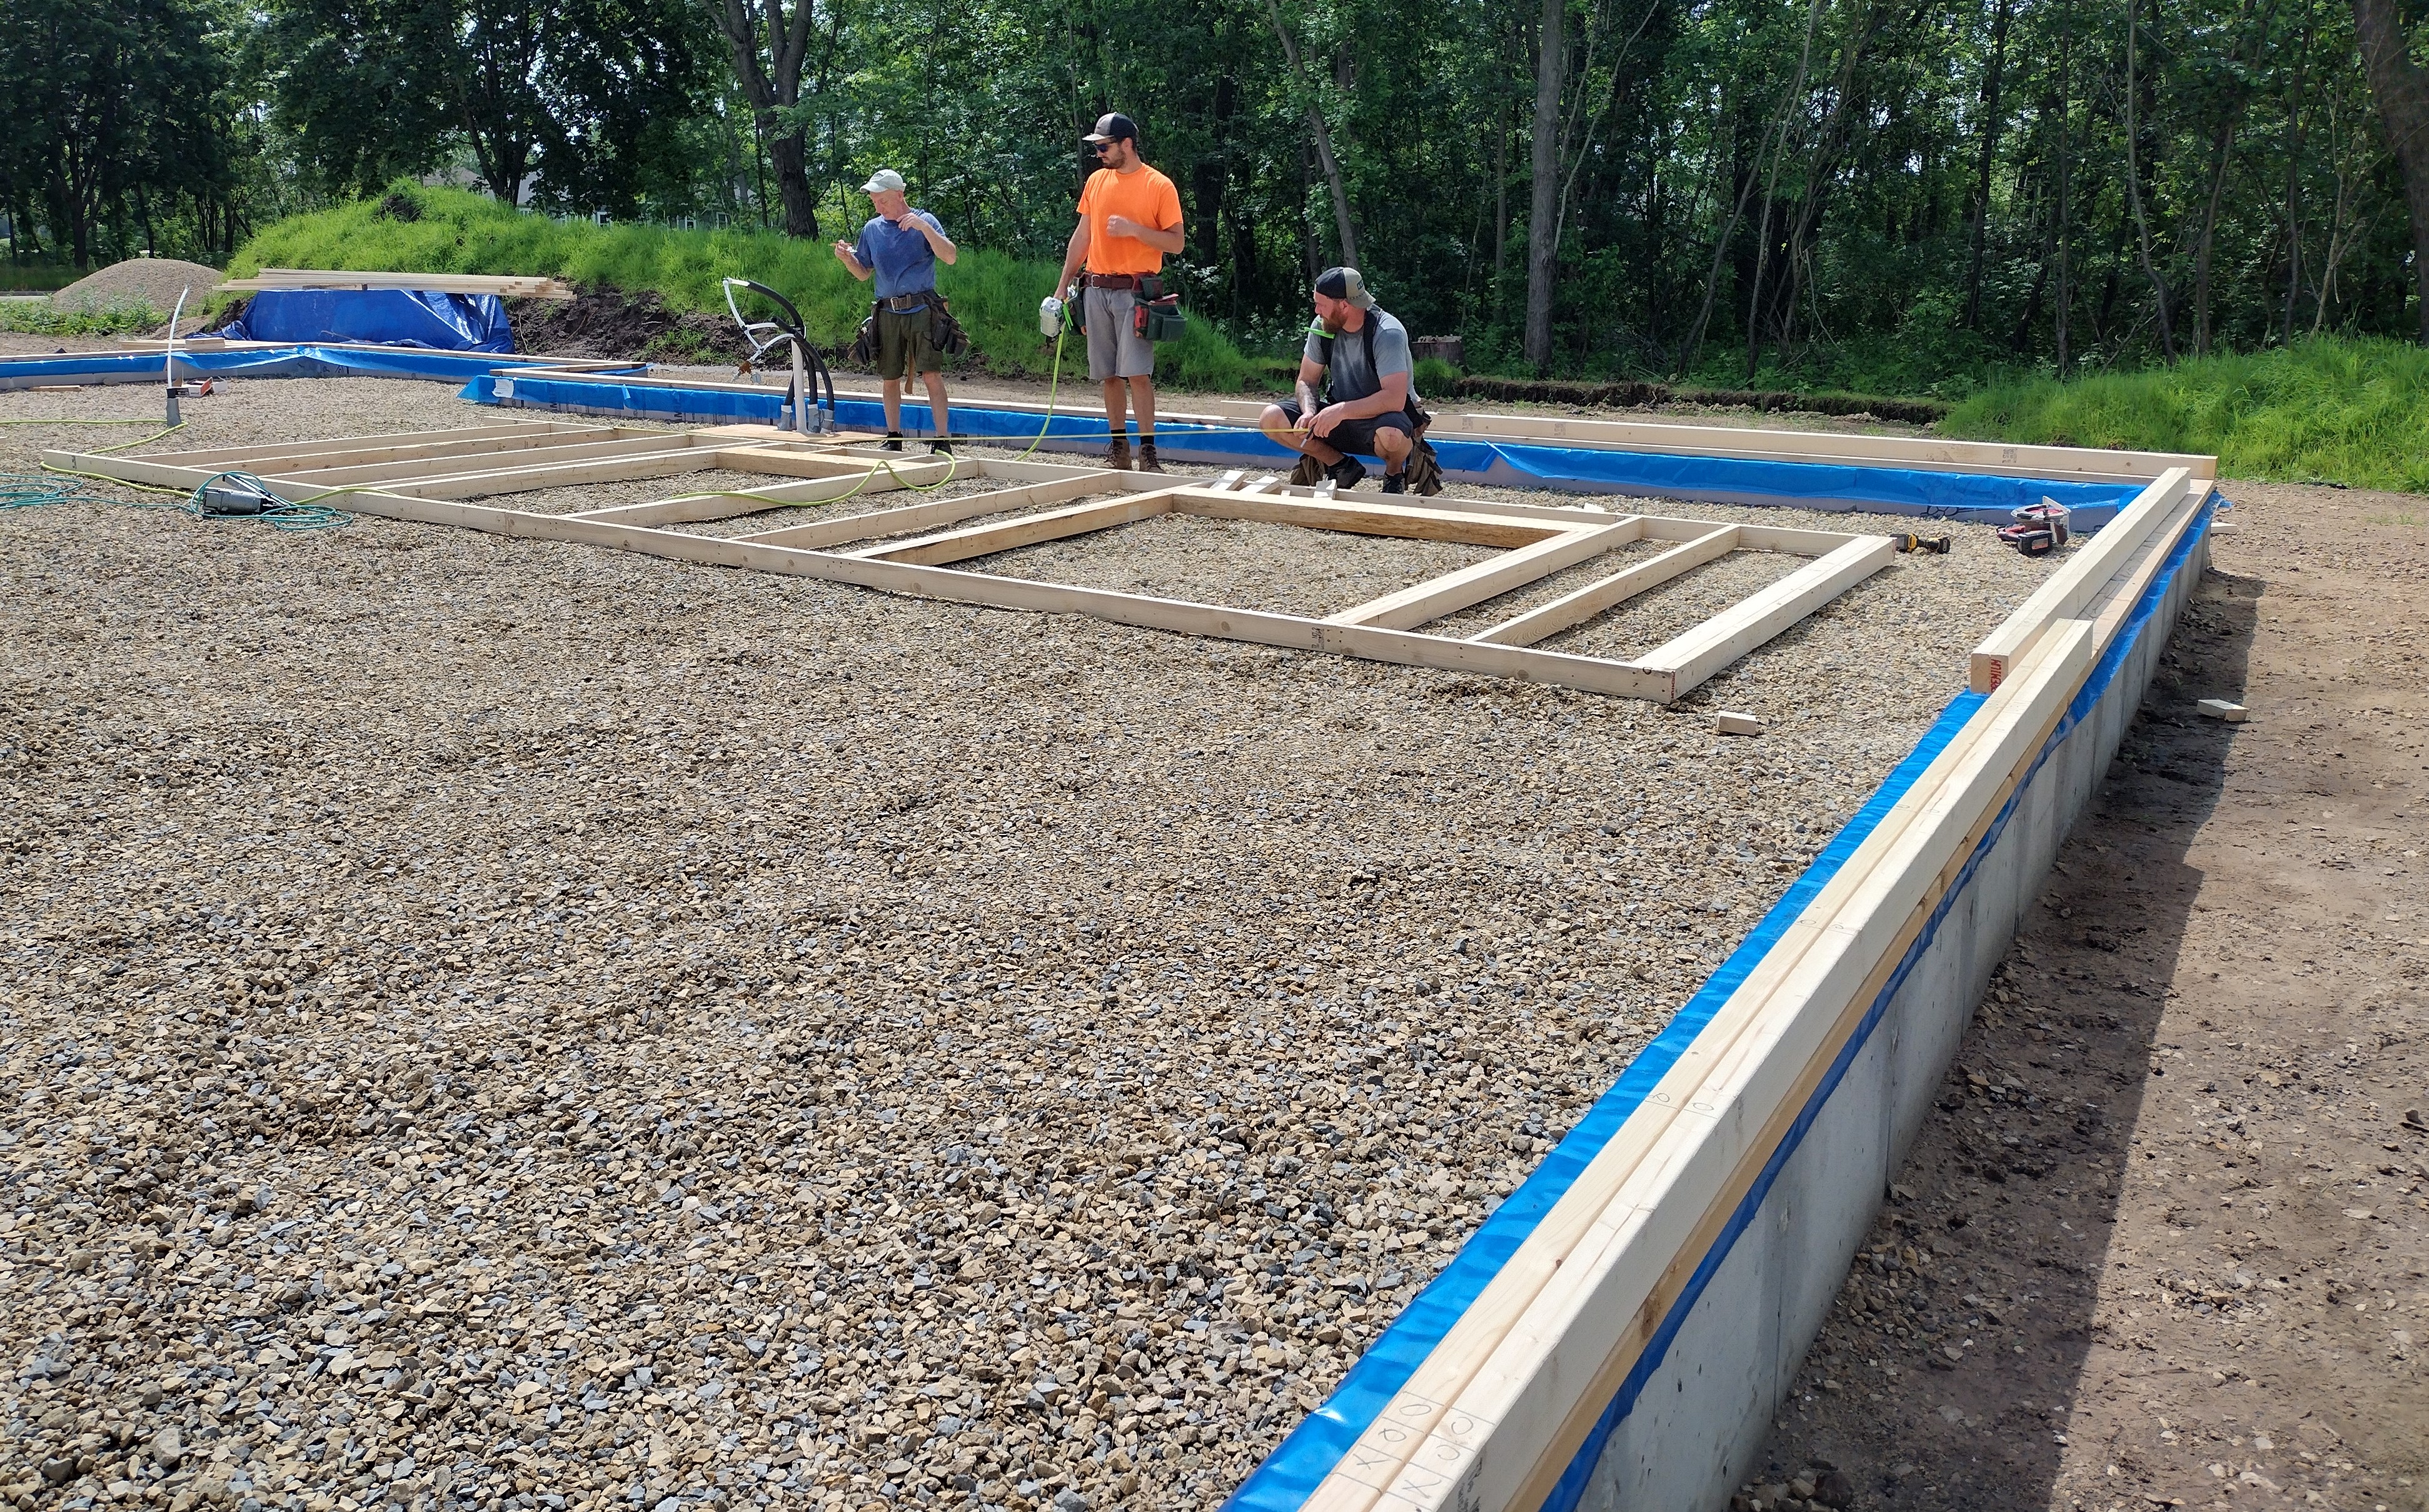
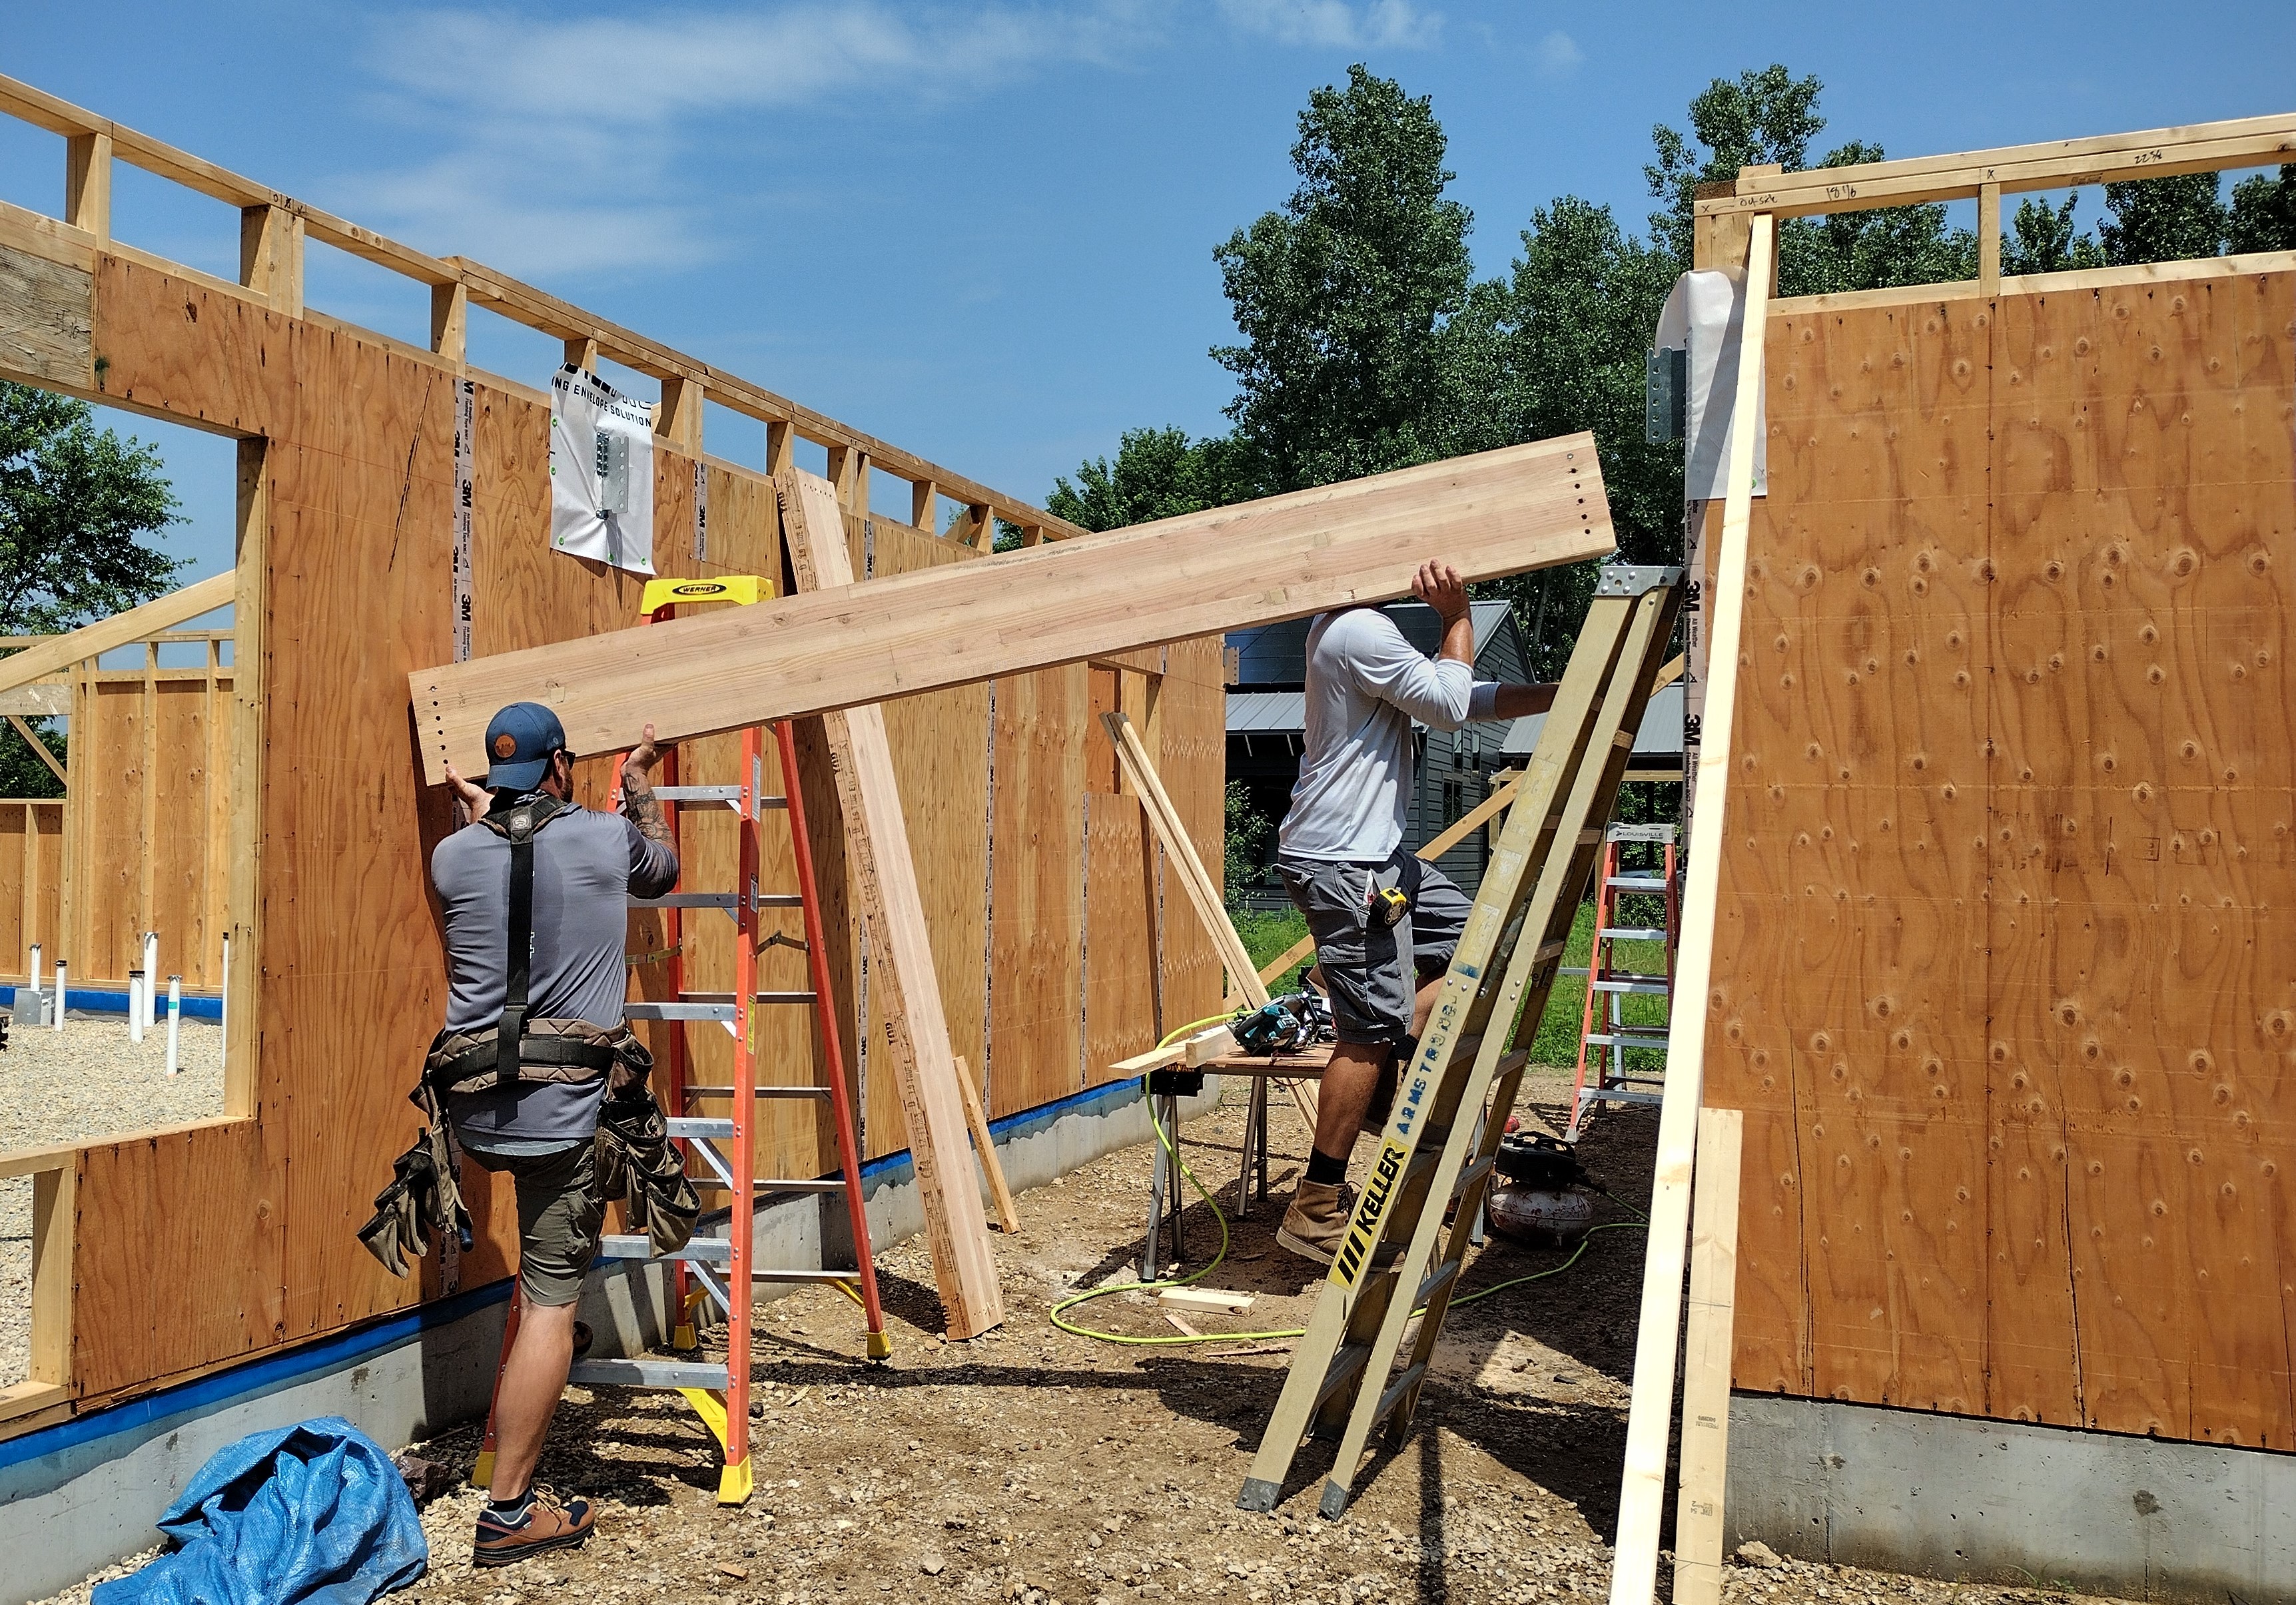
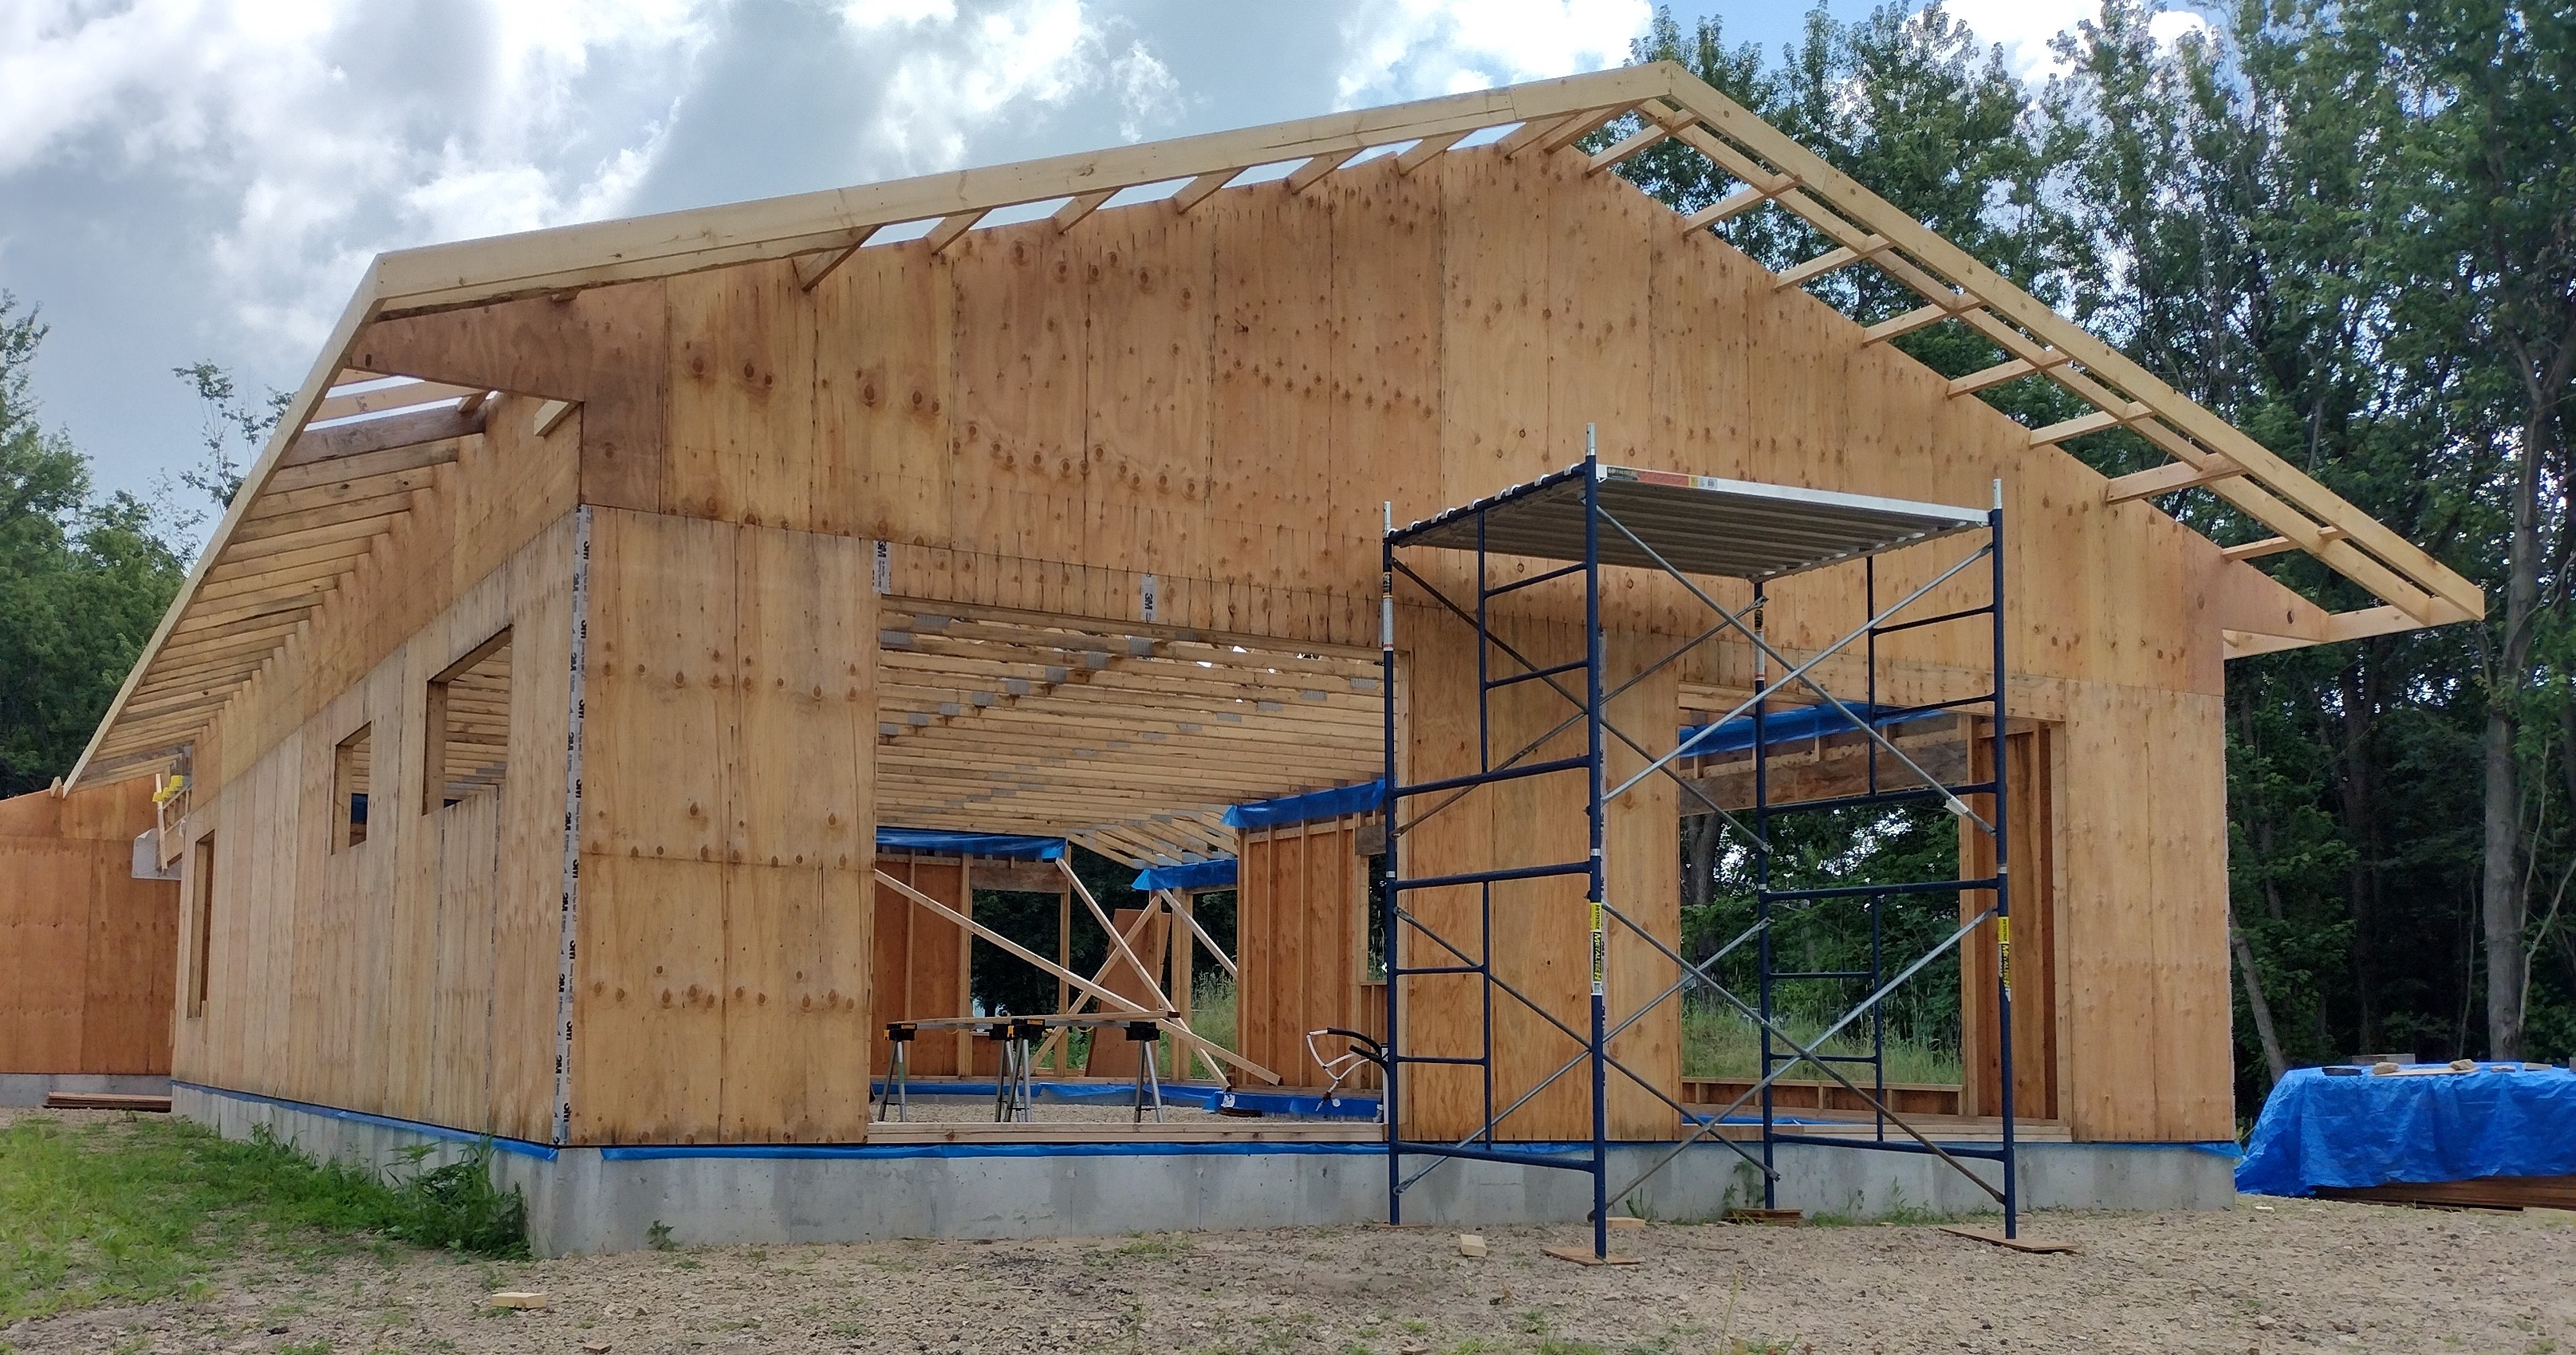
June 4-July 22, 2024: As soon as the cedar sills were set, the crew laid out their stud pattern on the plates and began framing up the walls. Working on rough gravel instead of a typical (flat and smooth) wood subfloor wasn’t as difficult or time-consuming as predicted, but it did mean that the wall couldn’t simply be framed, sheathed, and tipped up: each section had to be hand-carried into place. To reduce weight, the wall sheathing was installed later. Shown here is Mike Larson’s crew: Cale, Dave, Blake, and Wilmer.
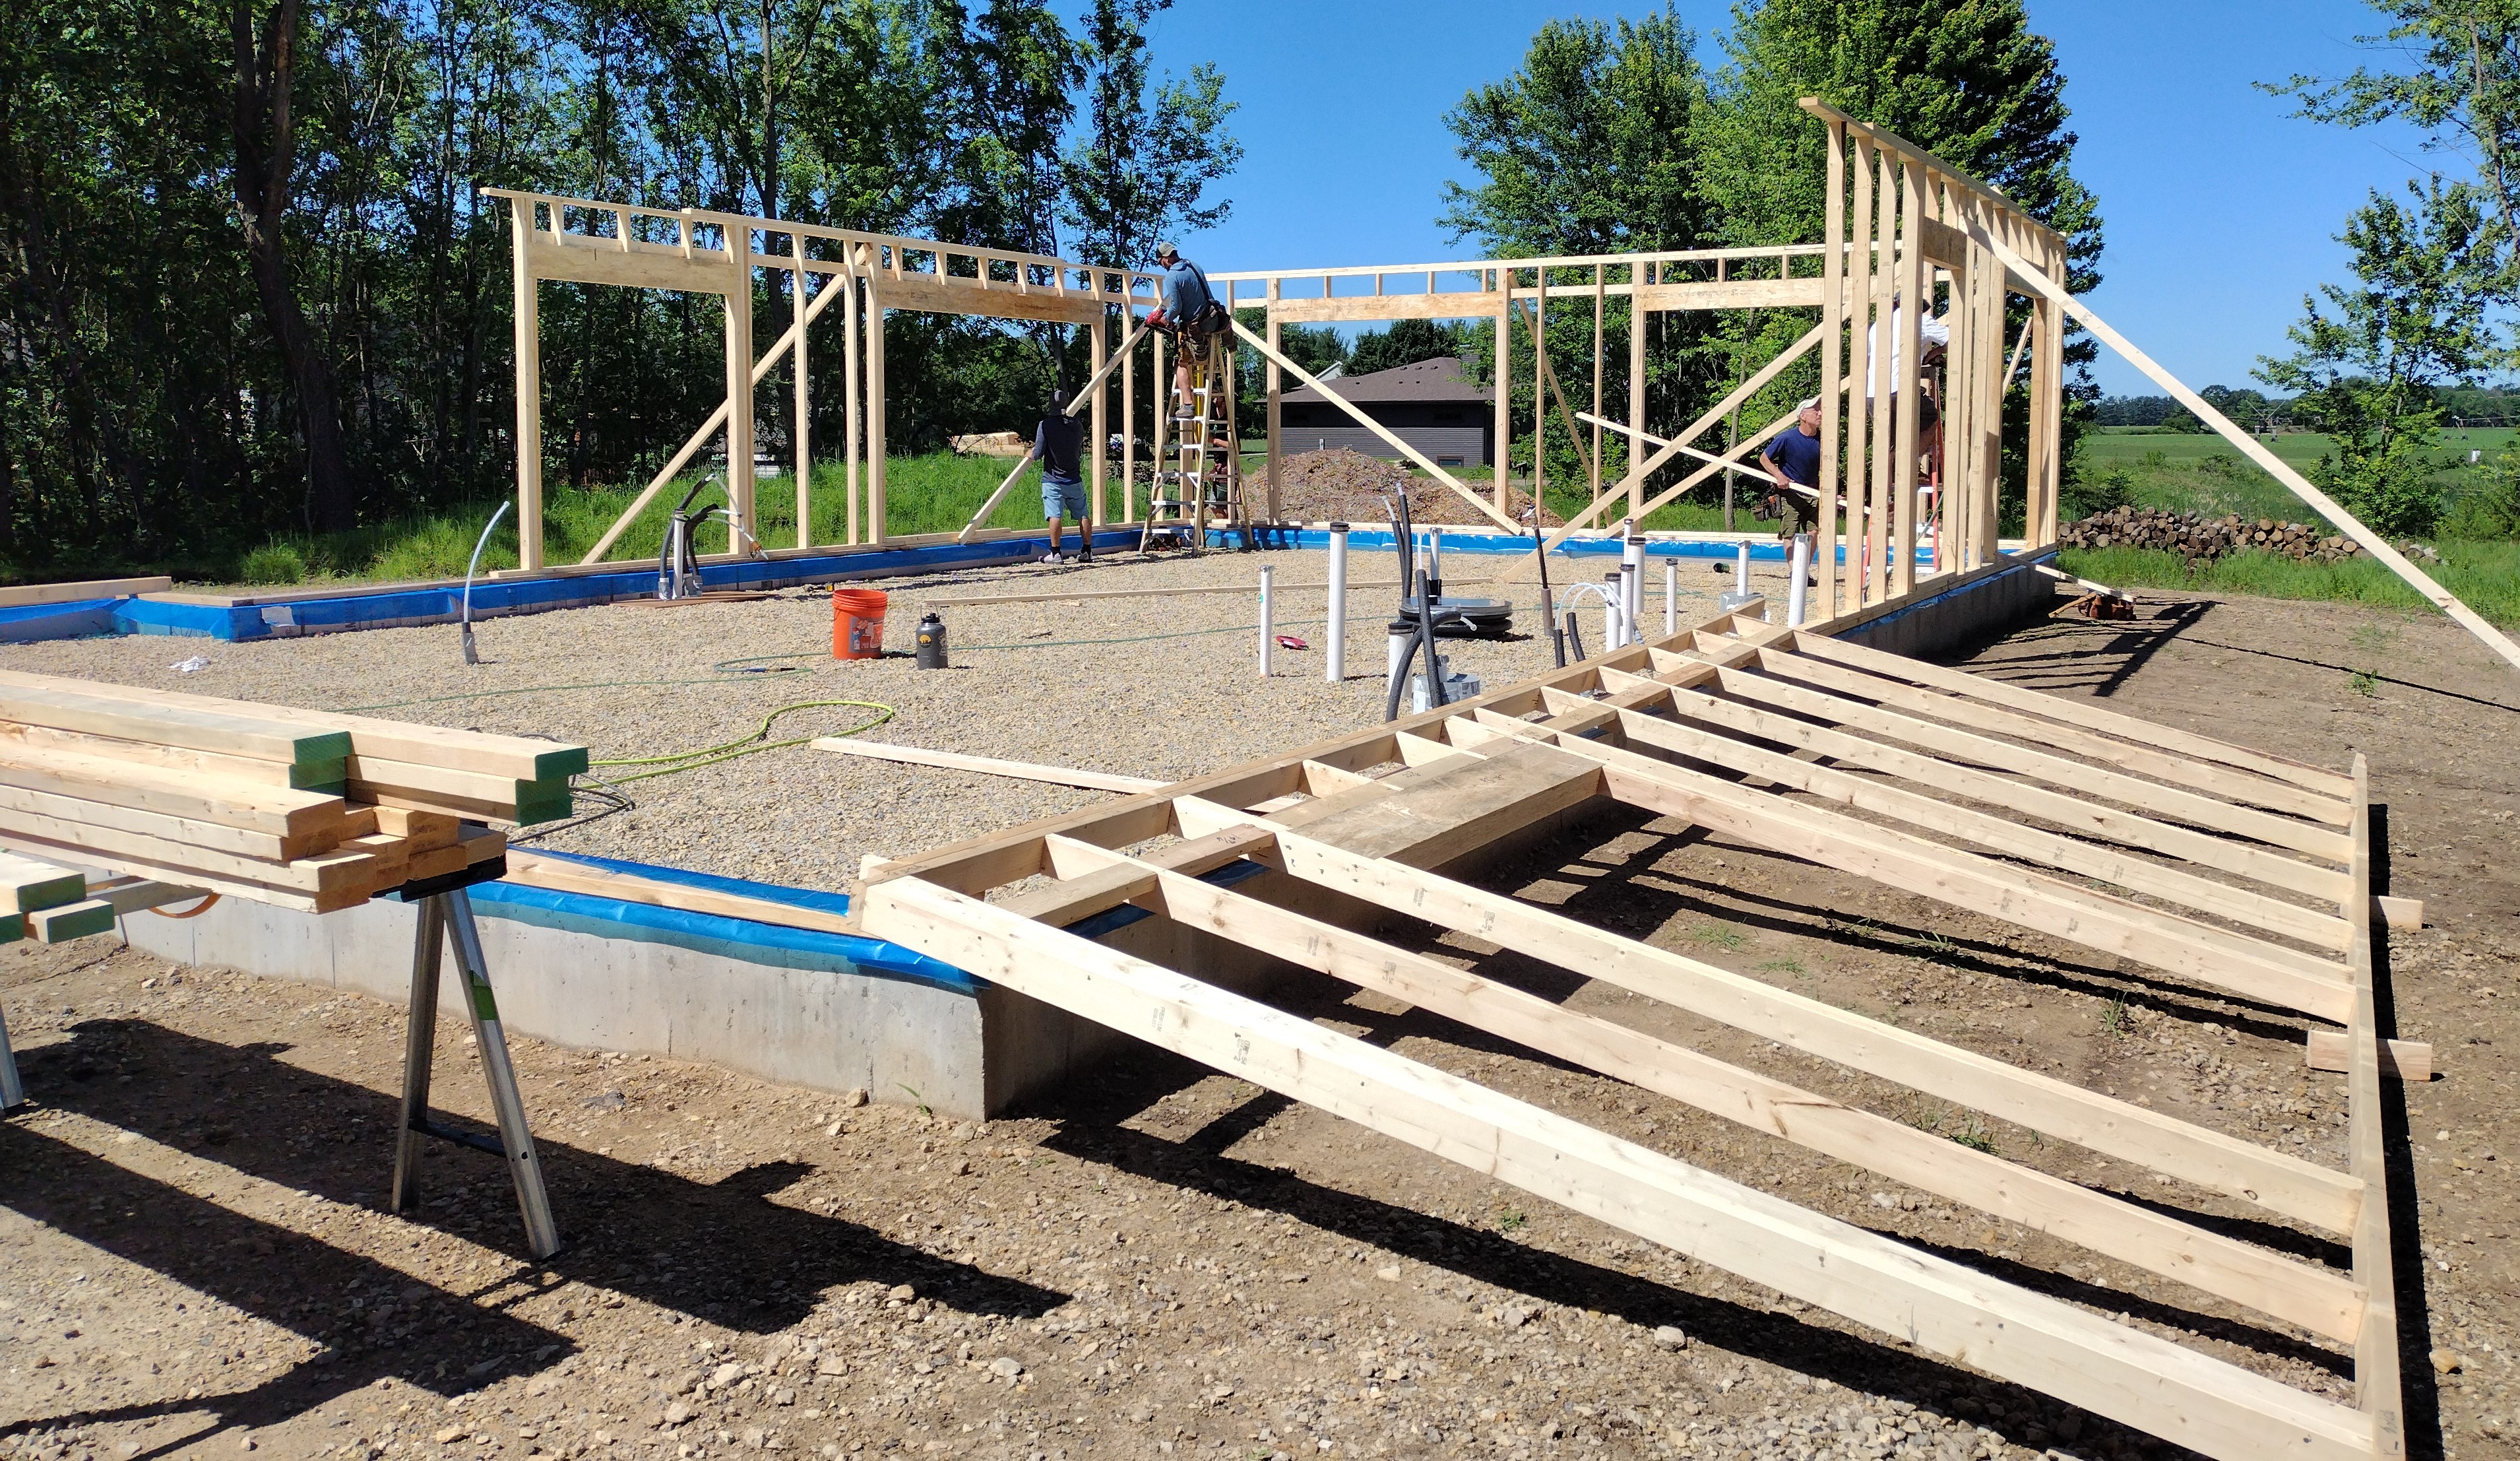

The exterior 2×4 wall is the bearing wall for the roof, and studs align with the roof trusses at 24″ on center. Corners have 2 studs, instead of the usual 3 to save on wood and allow for more room for insulation. Other resource-efficient strategies recommended by the American Plywood Association’s “Advanced Framing” protocol include: single top plates, minimal jack studs, minimal cripples, and single ply headers or no headers at non-bearing walls. For this project, we stuck with the usual double top plate for ease of constructability and for compatibility with standard drywall, and solid engineered headers at all window openings.

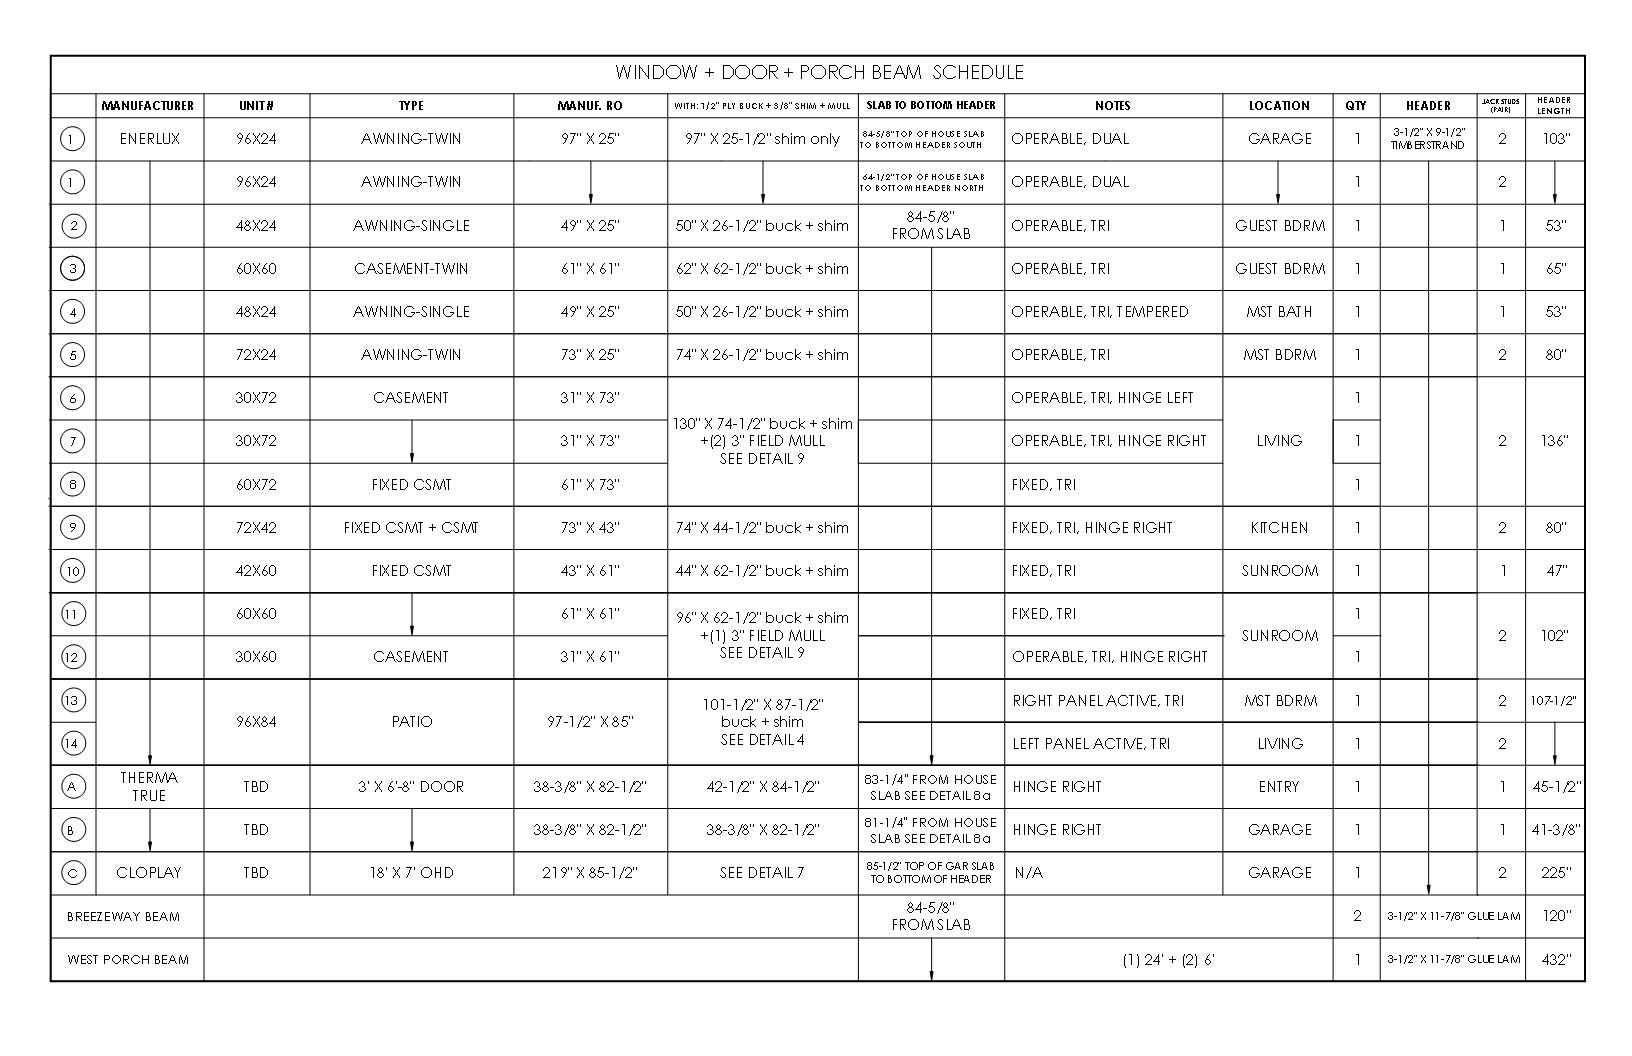
This was my first project using Timberstrand engineered headers. The price, including my estimate for labor, was less than for built-up headers (2×10’s or 2×12’s or LVL’s gang-nailed on site). The only hitch was that the material had to be pre-ordered well ahead of time. To ward off mistakes and do my part to keep things moving along quickly under the hot sun, I created a detailed plan, cut sheet, and window schedule for the carpenters to follow.
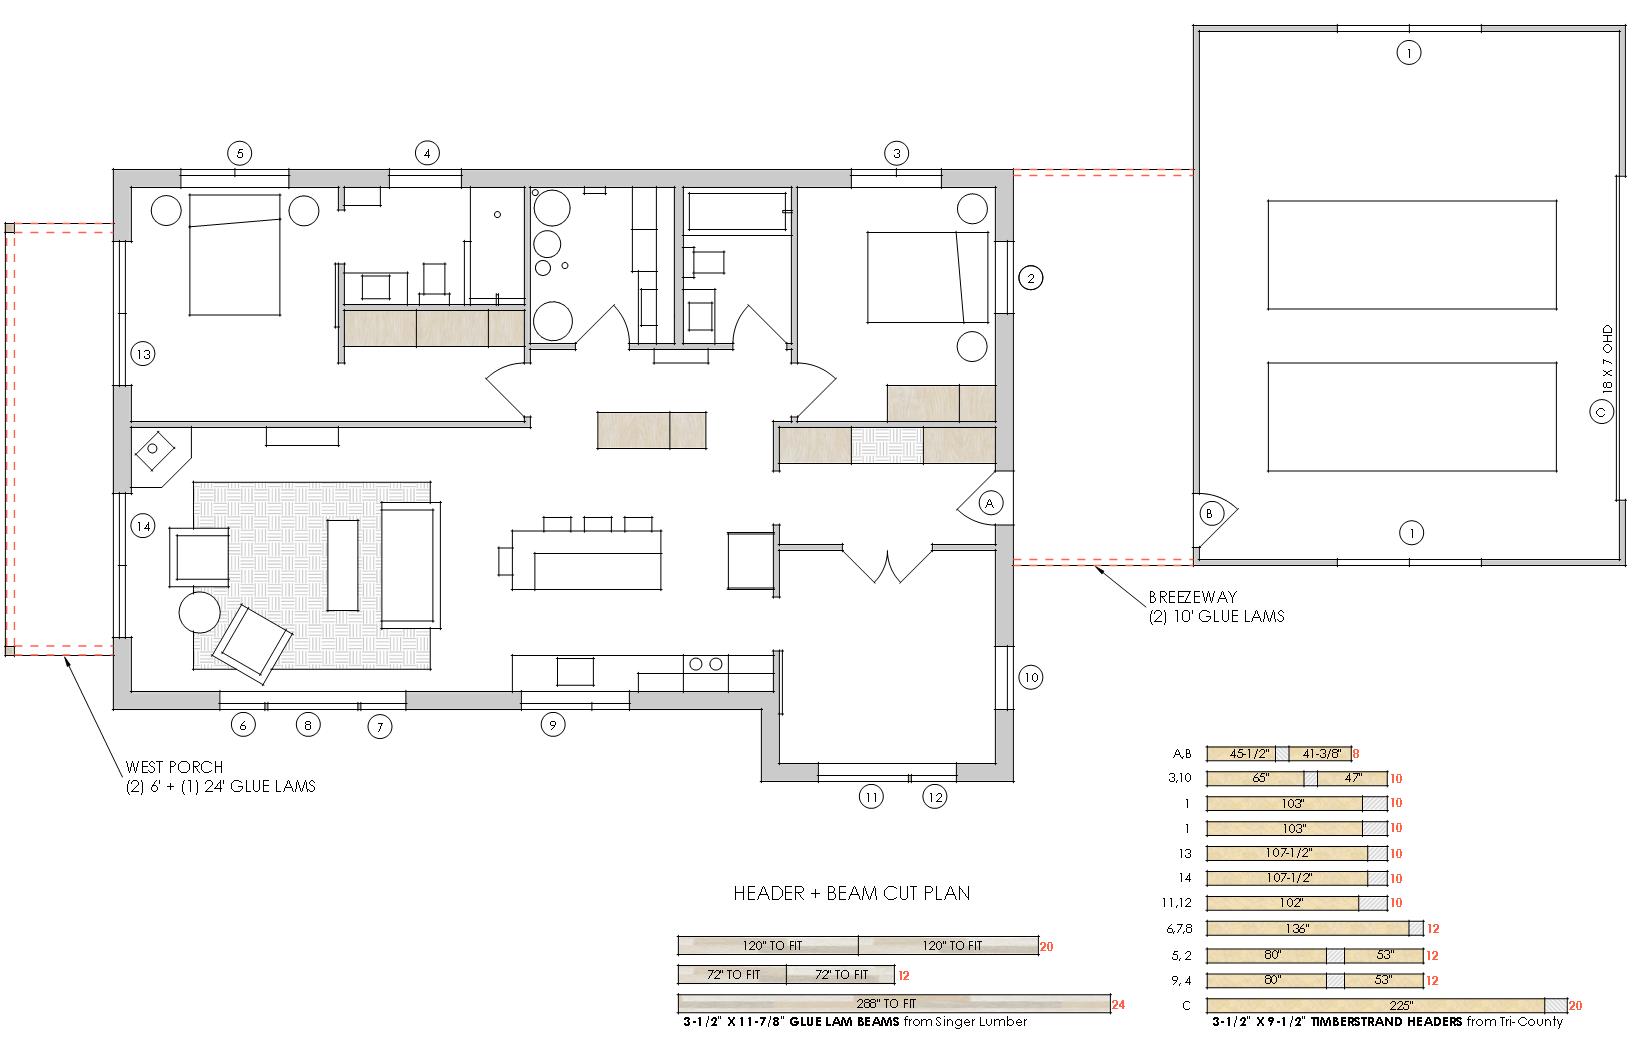
For the same reasons of speed and economy, I chose appearance grade Glue Lam’s for the porch beams. This one-and-done solution works well with my overall aesthetic of “honest use of materials”. It’s also more durable: a typical beam is built up from multiple layers of 2x dimensional lumber, pocketed into the wall framing, then covered with finish boards. If or when seams fail and moisture creeps in, the assembly would have a hard time drying out.
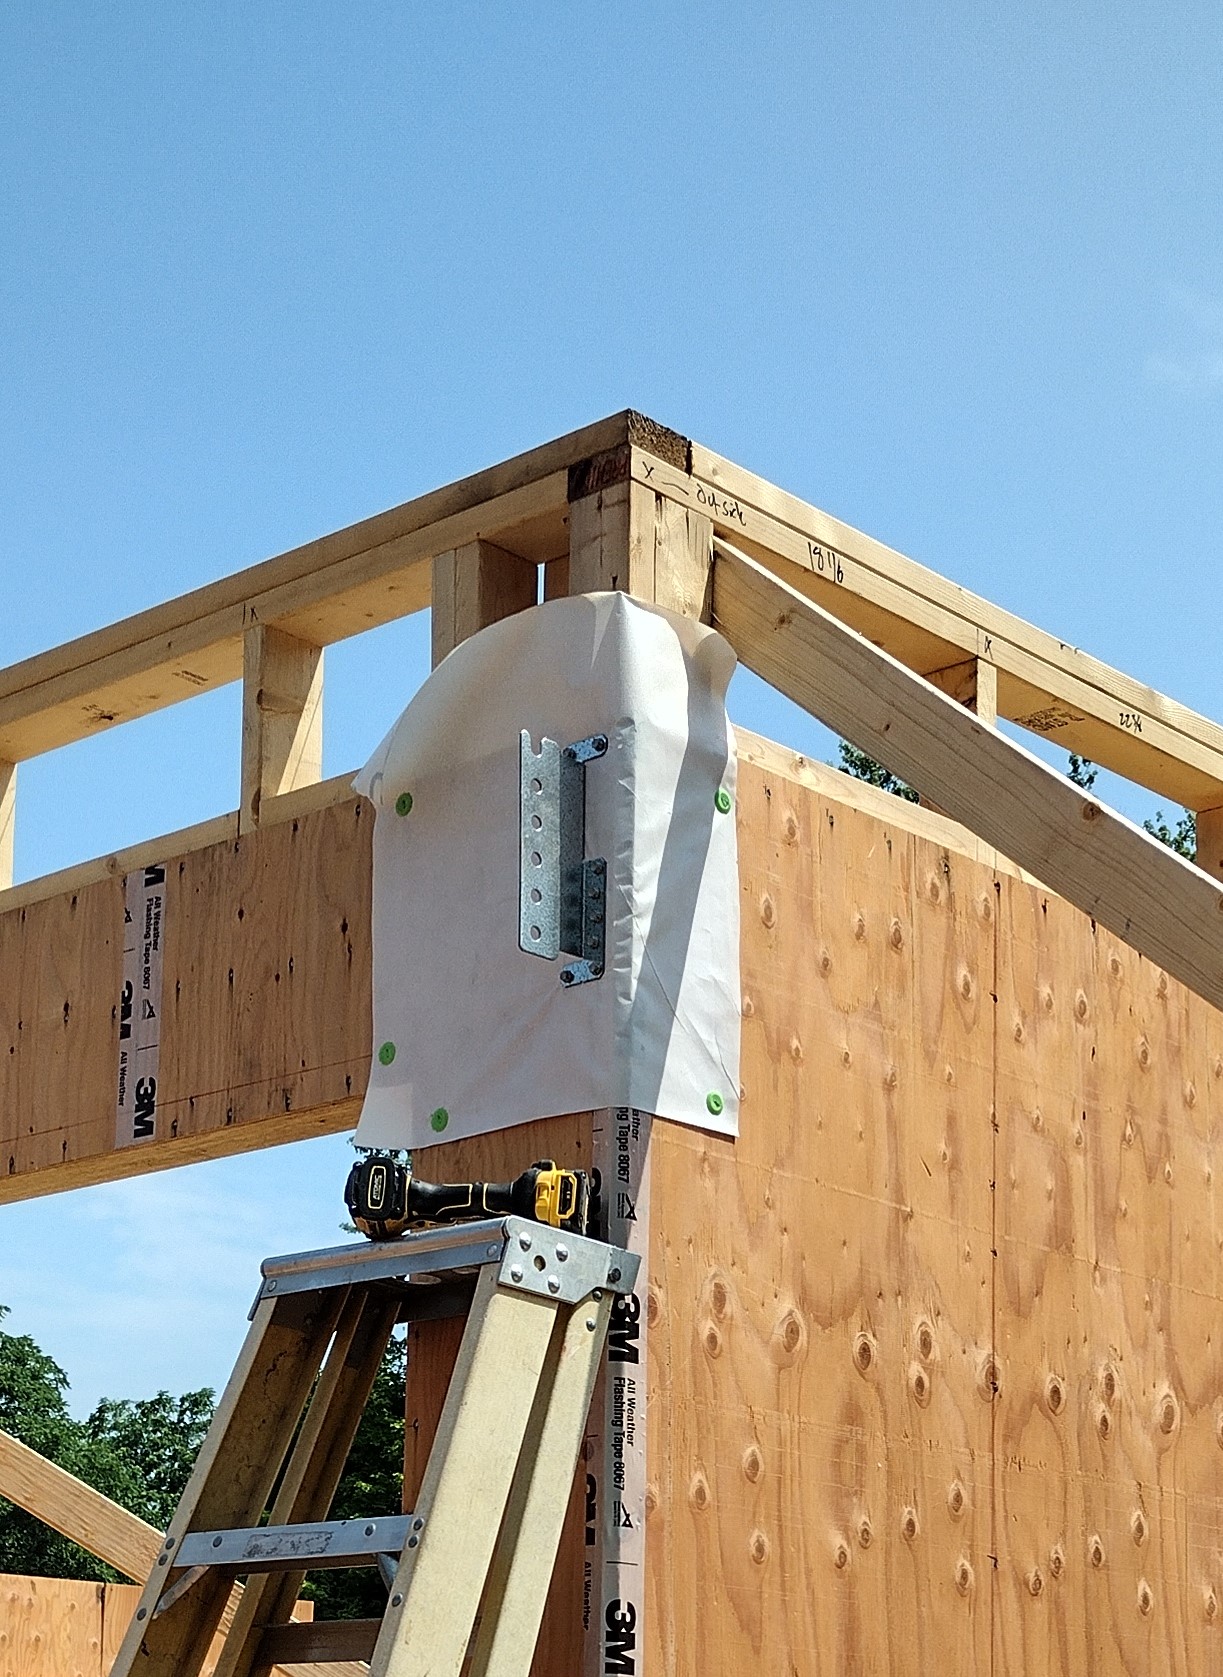

The Glue Lam’s are installed on Simpson’s Concealed Joist Ties, which gap them away from the house wall, allowing the beam to dry through its end grain. A section of WRB (water resistive barrier, or housewrap), was cap-stapled in place prior to bolting the connector.
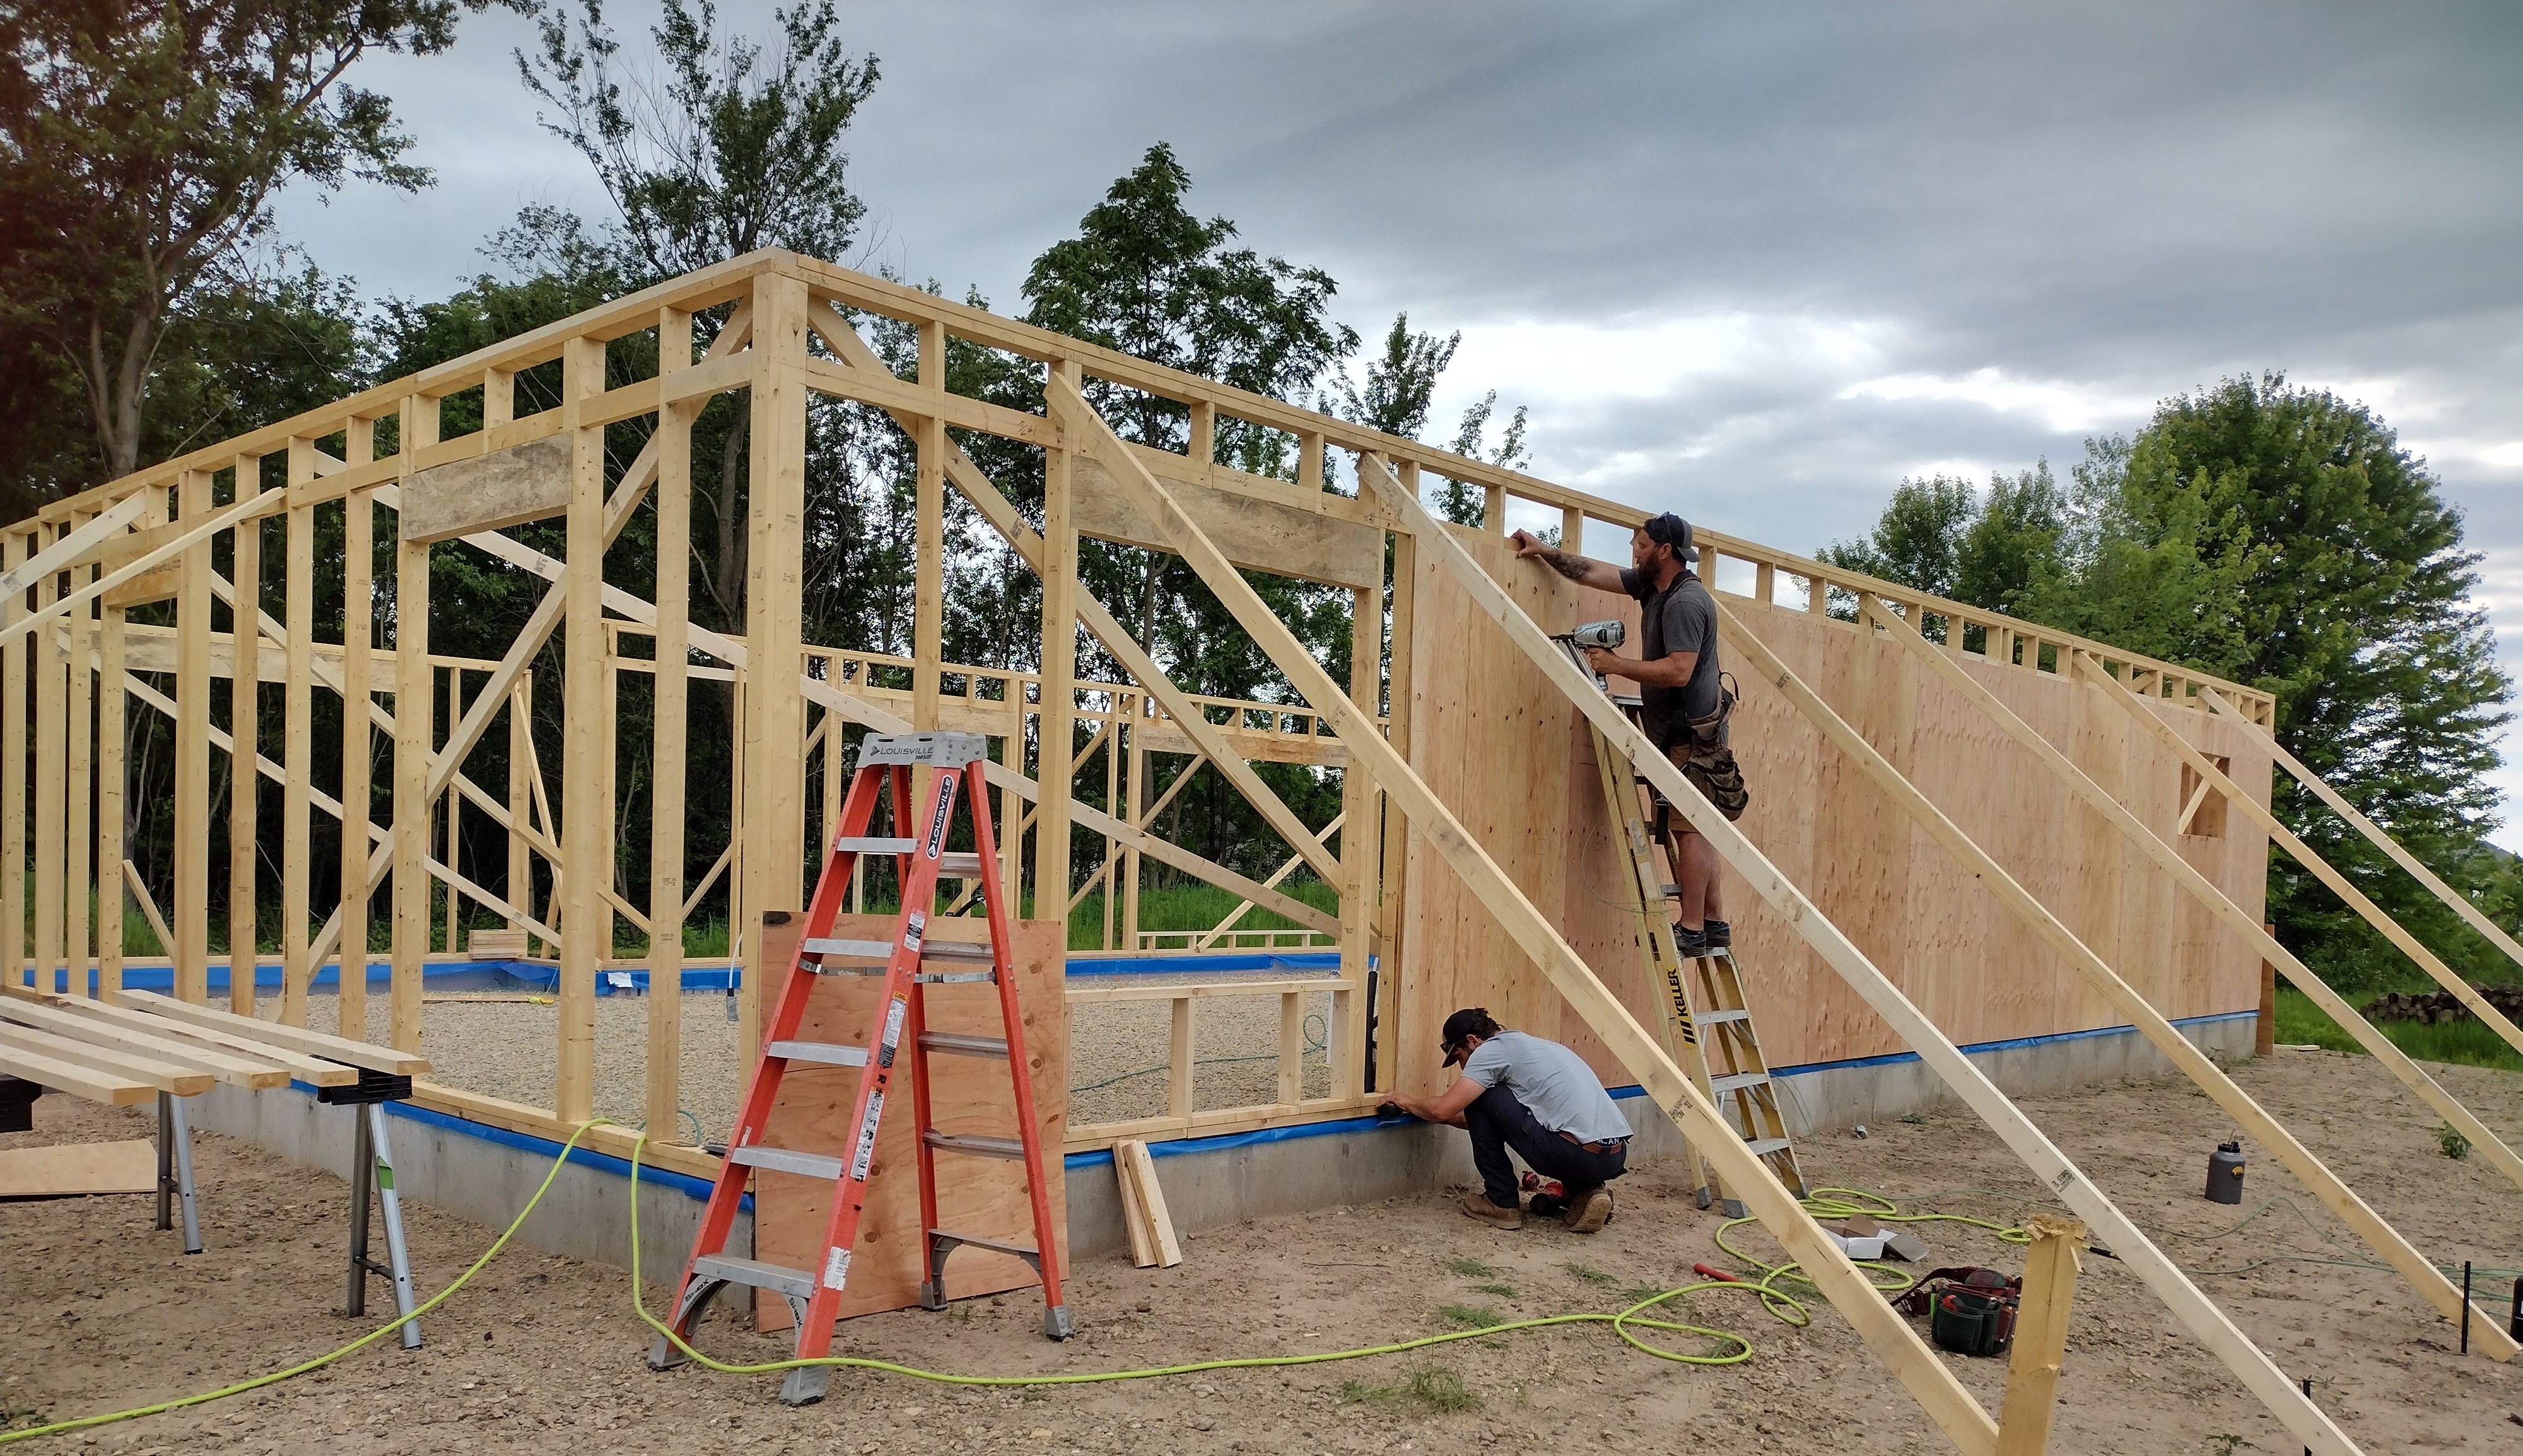
Plywood sheathing is preferred over OSB (oriented strand board) sheathing for super-insulated walls like ours, according to many builders and building scientists who have studied the moisture resiliency of the two competing products. Here’s a great article from my favorite magazine, Fine Homebuilding, about the kind of walls we’re building:
We installed vertical 2×4 blocking to catch the top edge of the 4×8 foot plywood sheathing panels. Later a 30 inch strip of plywood will be installed above to tie the 9 foot stud wall to the roof trusses, a very strong shear connection that contributes to our upgraded wind resistant construction protocol. Our nailing pattern goes above and beyond Code Minimum too, with nails 4 inches on center at panel edges and 6″ on center within the panel field. The roof sheathing (also plywood), will be nailed at 4 inches on center at all locations within 48 inches of roof edges, and elsewhere at 6″ at panel edges and 12″ in the field.
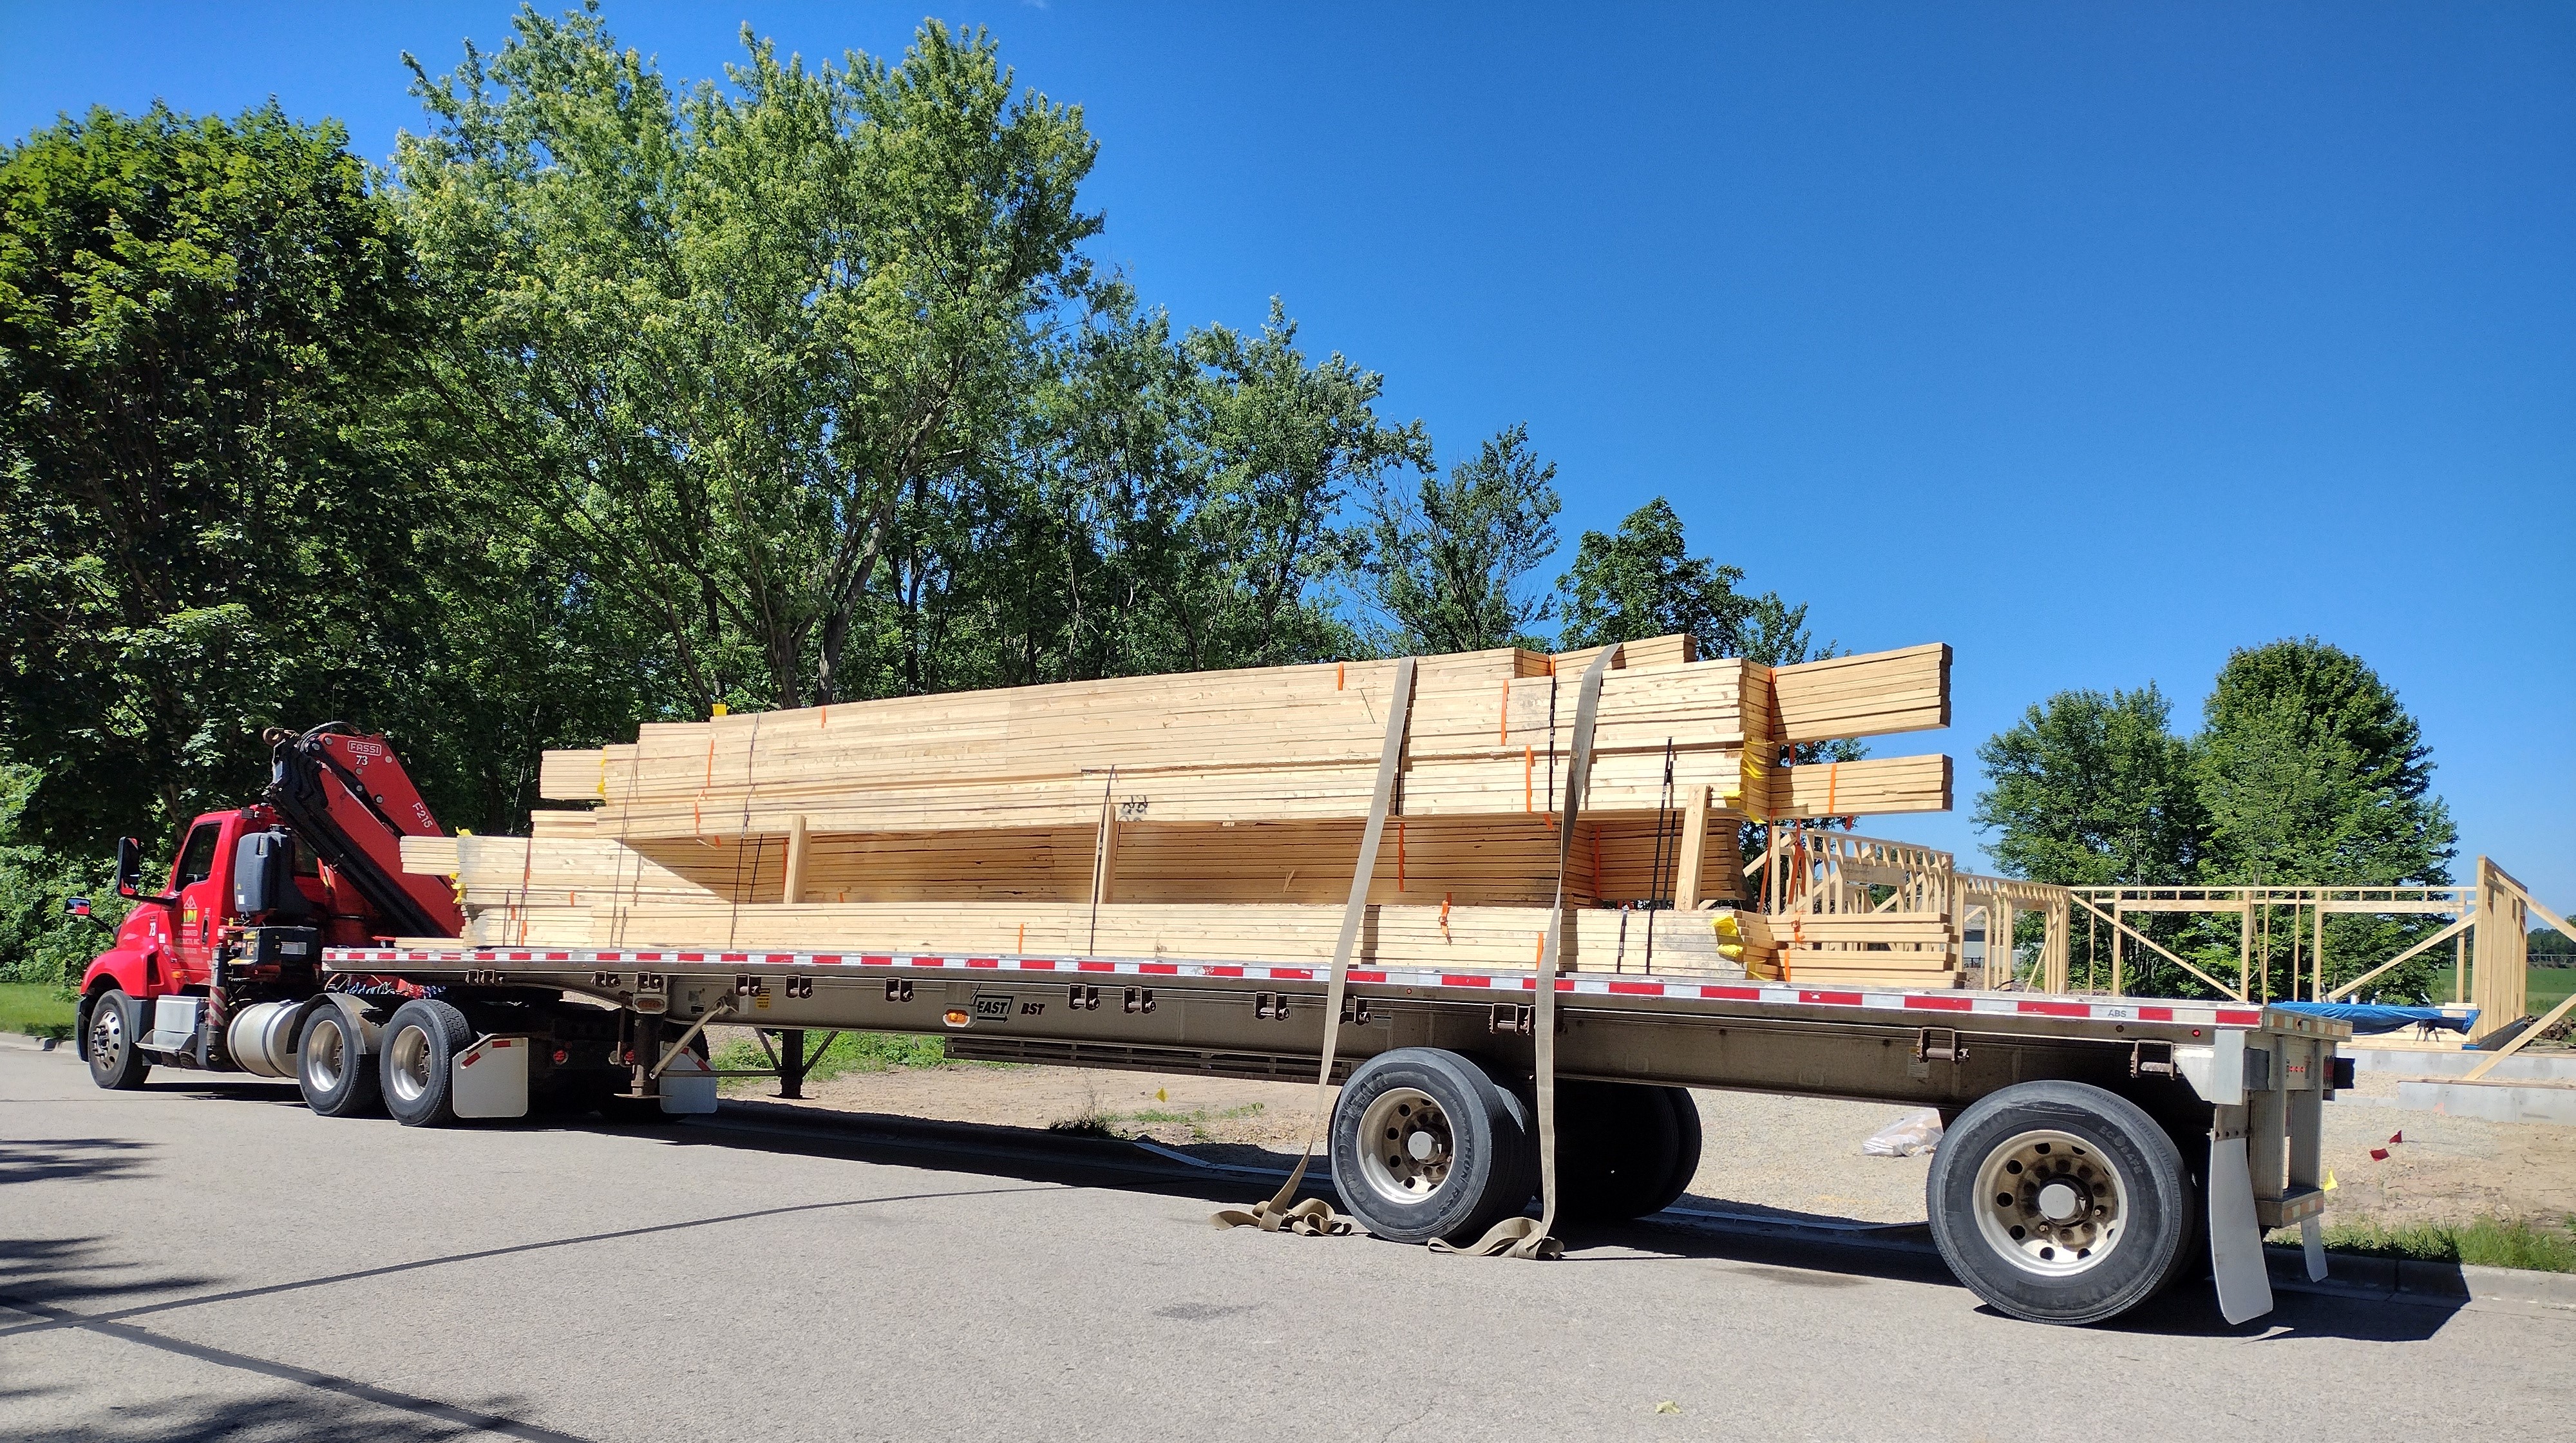

The trusses were boomed into place in quick order. My crew had already unbound the truss bundles, sorted them for pickup from west to east, and rolled out and stapled a strip of 6 mil polyethylene to the top plate (blue plastic).

Shade at last!
The overhangs and east and west rakes extend 3 feet beyond the wall, creating a robust shelter from driving rain. The wall sheathing was notched to accept the truss tails and outriggers, leaving a 2″ gap at the top for attic venting. The 2×8 fascia ties it all together.

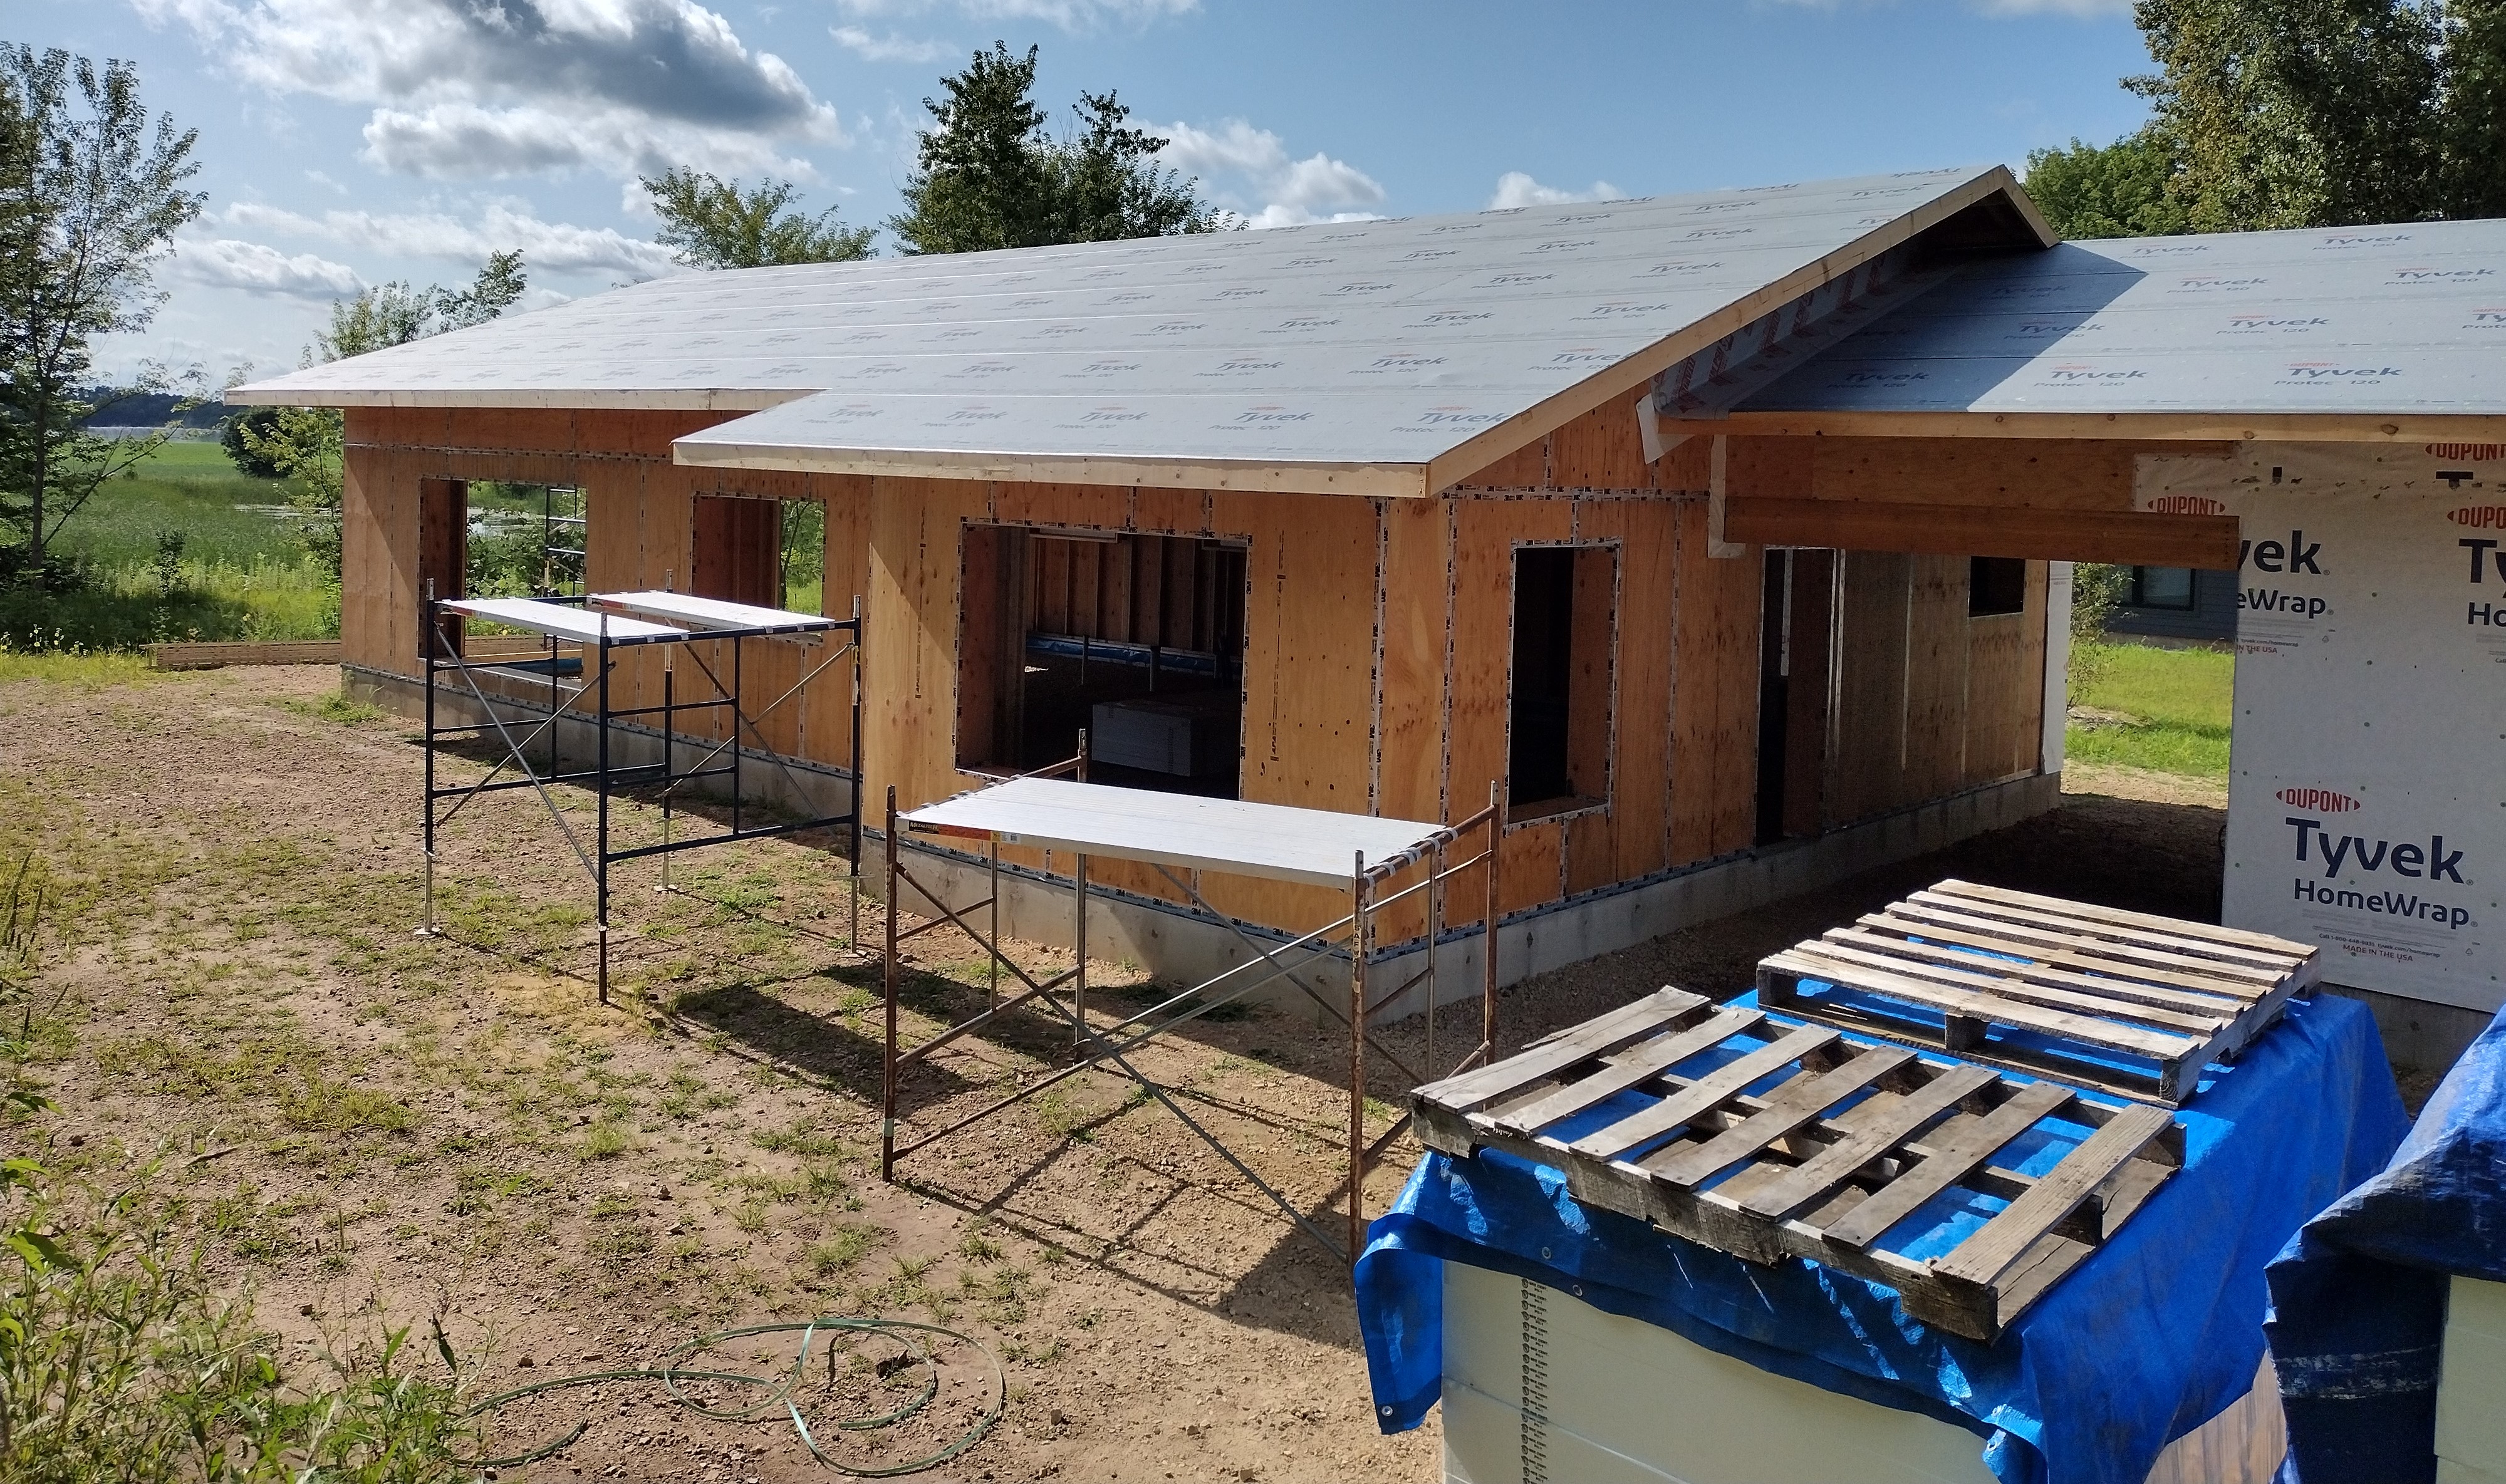
A strip of WRB (water resistive barrier, or housewrap) was installed on the house wall prior to setting the breezeway/garage trusses. Later, a strip of peel-and-stick membrane sealed the wall to the roof sheathing, prior to rolling out synthetic roof underlayment.

This detail shows the assemblies we installed, as described above:
- Timberstrand window header
- Vertical 2×4 blocking to catch the top edge of the 4×8 plywood sheathing
- Plywood strip above, tying the 9 foot stud wall to the 20″ truss heel
- That same plywood strip notched for the truss tail but held short 2″ for attic ventilation
- Strip of blue vapor barrier used to tie the exterior air barrier (wall sheathing) to the interior air barrier (red vapor retarder)
- 36″ overhang and 2×8 fascia
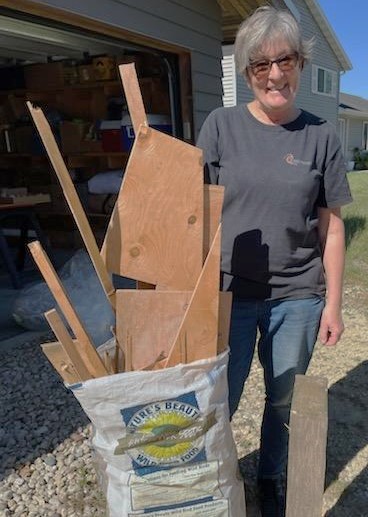
Our construction site has no dumpster. At the end of each day, my crew and I sweep up and sort out material. Lumber scraps are saved for future blocking, or if too small, for firewood. Engineered lumber, like the glue lam beam and header cut-offs, as well as plywood scraps are stacked and taken to a wood recycling facility. Cardboard packaging is flattened, and one-time use cans or plastic bottles are tossed into a recycling bin. Crates and pallets are set at the curb: so far, they’ve all been taken.
