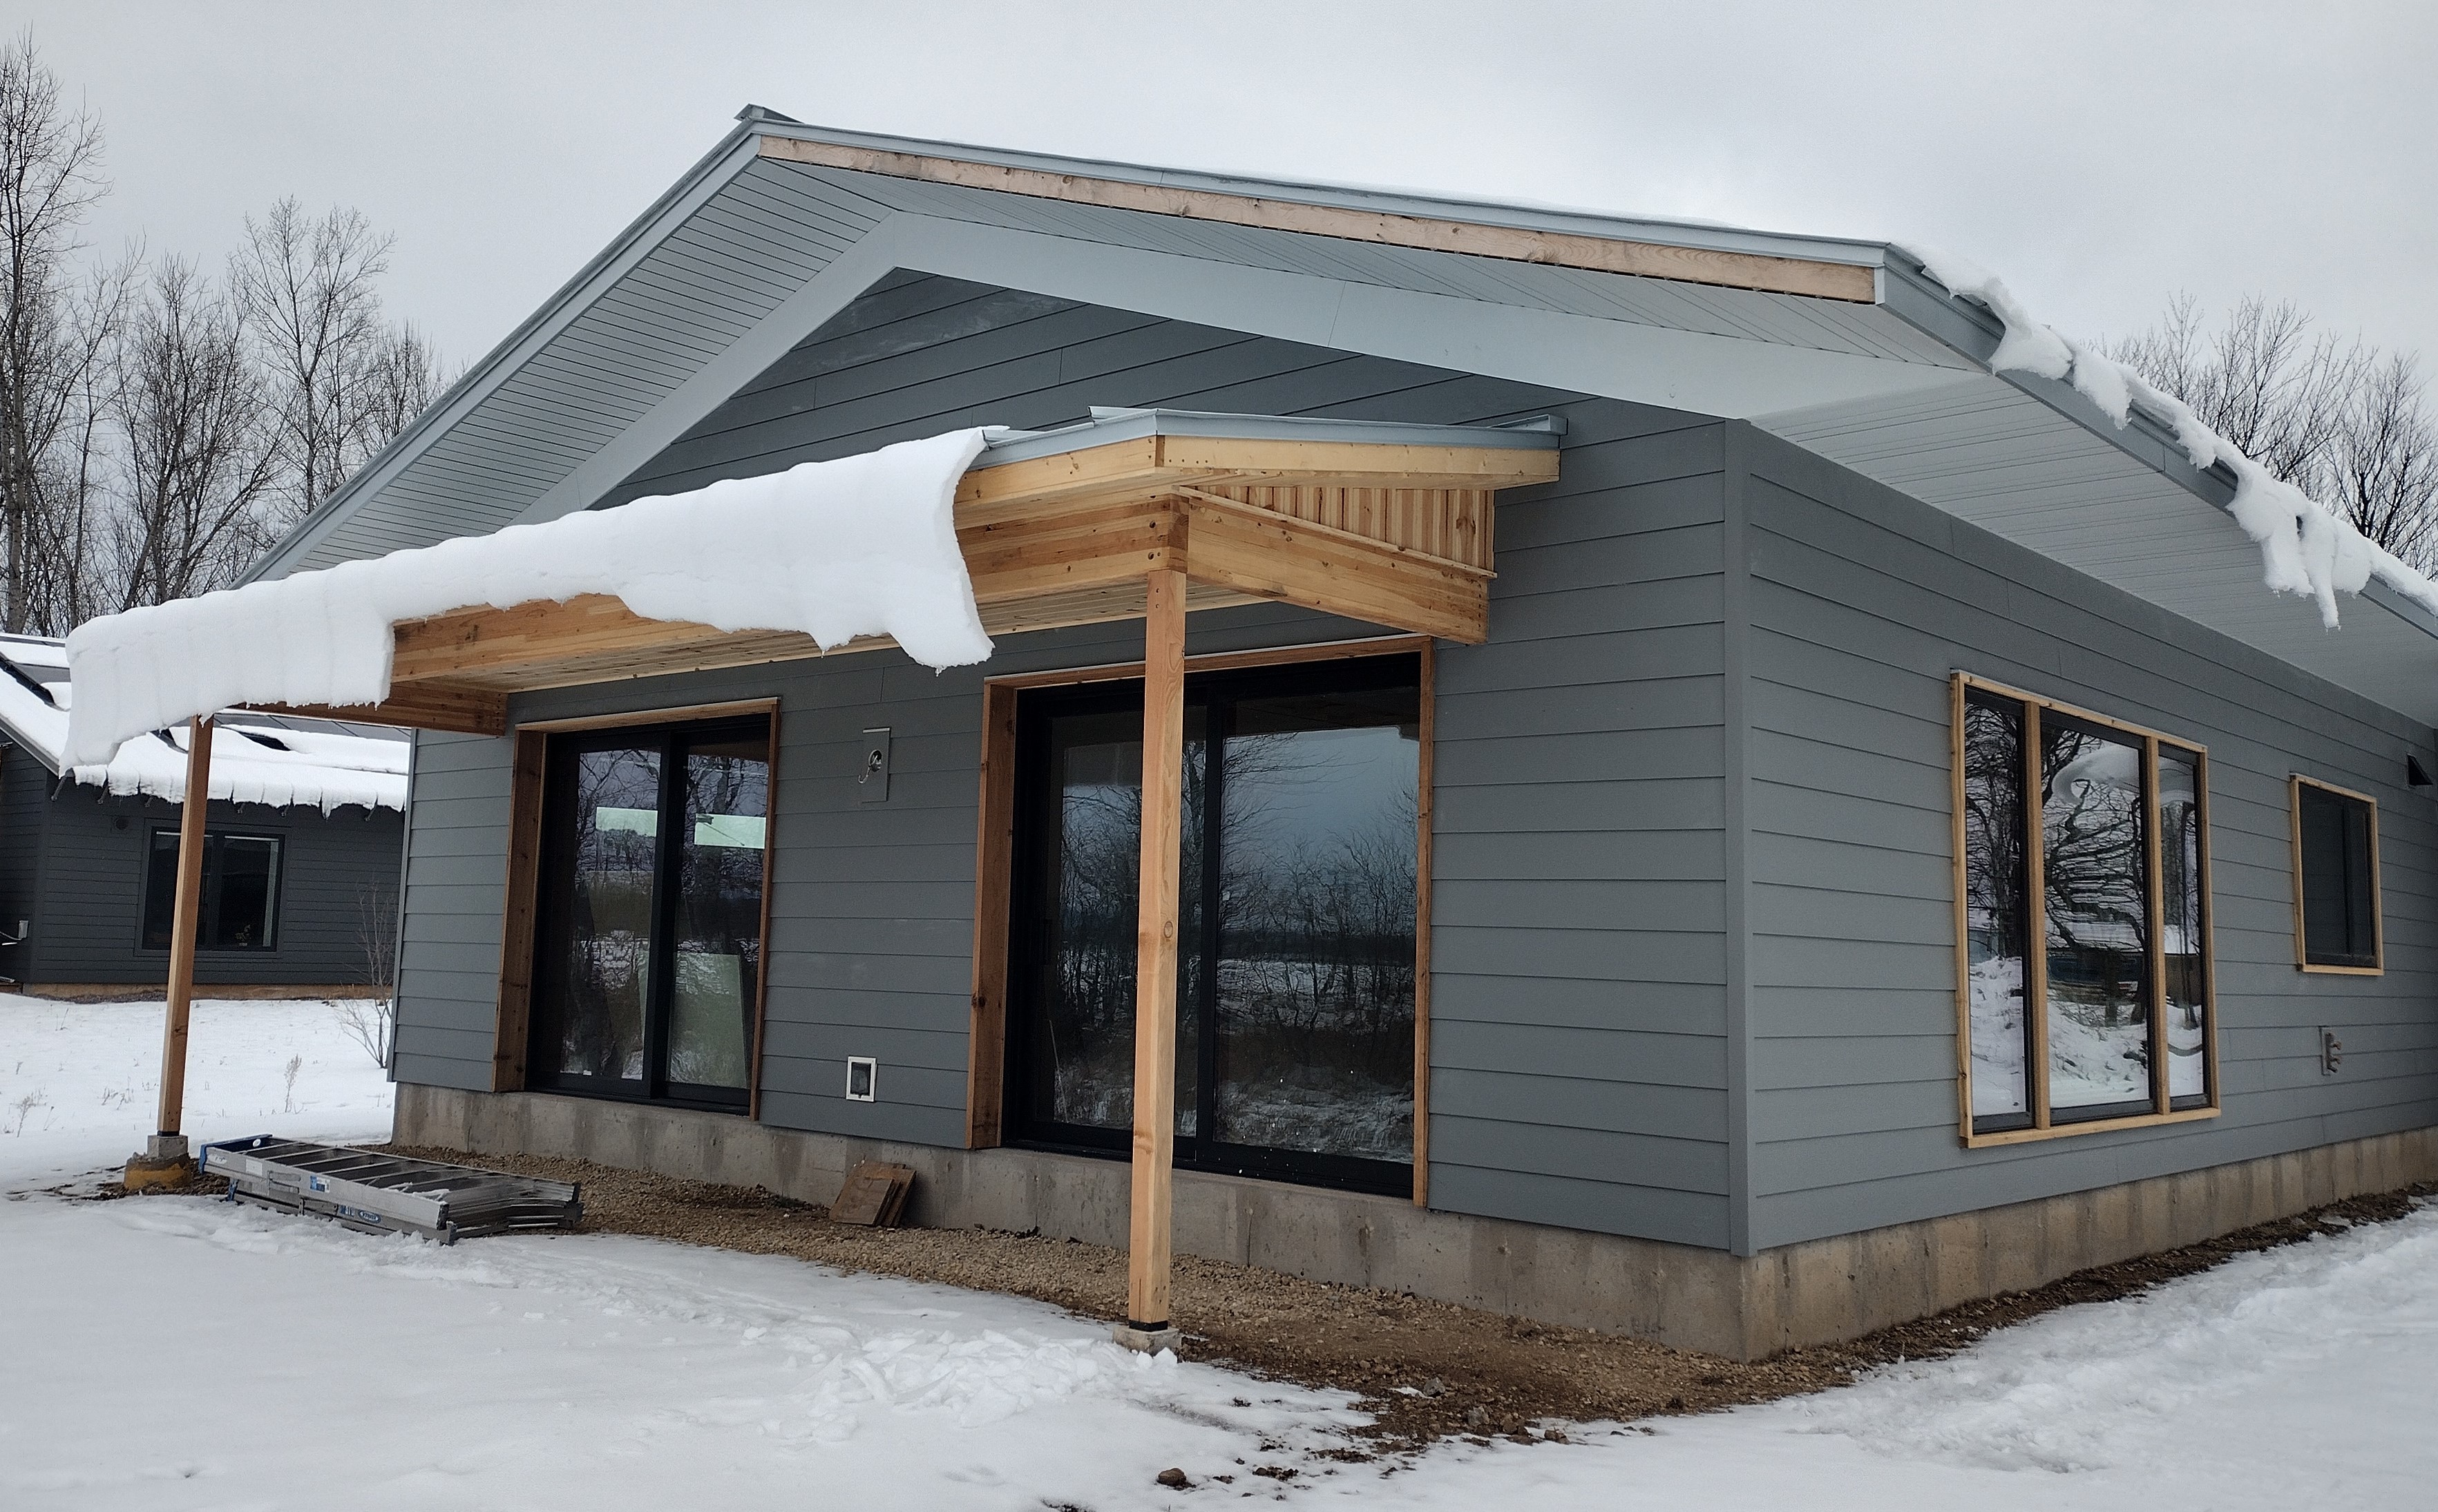
August 21-December18: The work of installing high quality, durable, and attractive roofing, siding, soffits, and trims extended over several months as weather and time permitted. Choosing materials that met these criteria, while also weighing the environmental impacts and the impact on my budget came with some compromises.
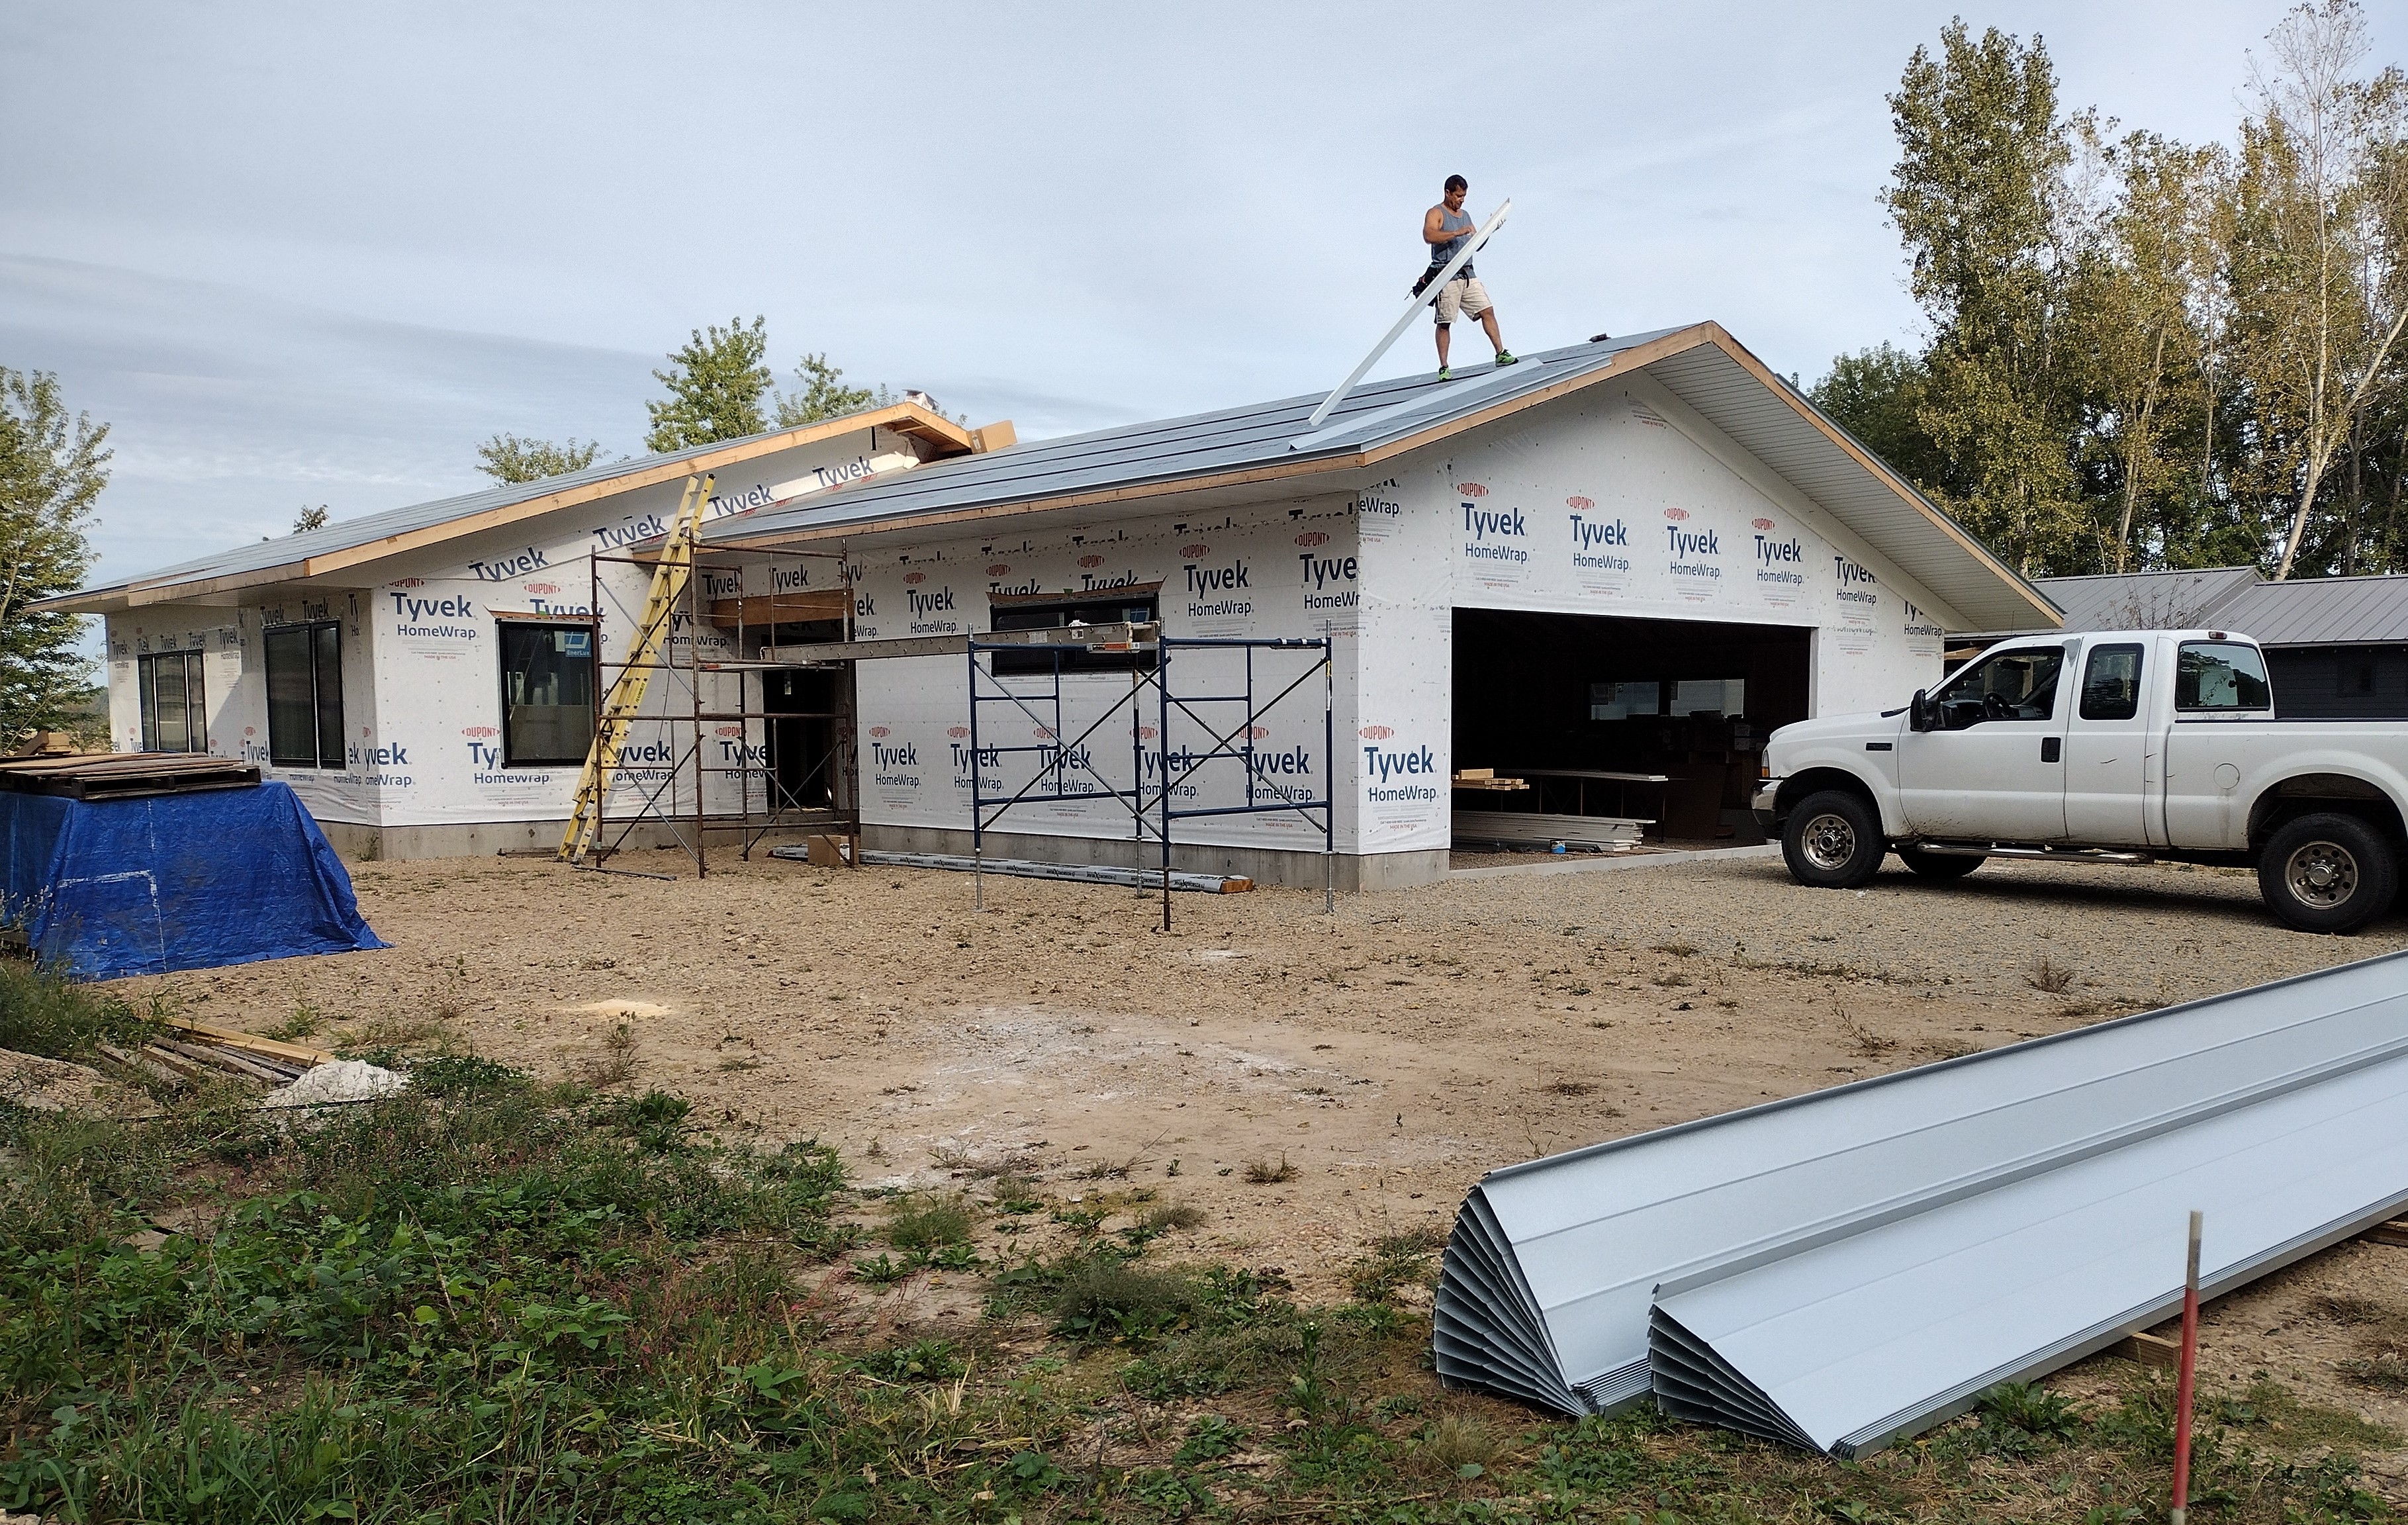
There was no debate in my mind about what type of roofing to choose: it had to be standing seam steel. This concealed fastener “snap” panel system promises to be maintenance-free and rust-free for 50 or 60 years and beyond. It pairs beautifully with PV solar panels, which will be attached to a rack system that merely clips on to the standing seams—no penetrations through the roofing will be needed. The roofing will outlast the PV solar panels. This roof is cost competitive over the long term in part because my design has no valleys, hips, dormers, or other complex shapes, the 4:12 roof pitch is walkable, and ground access is easy. Steel roofs are fireproof and very hail-resistant. While steel imposes three times the manufacturing burden on the environment compared to asphalt shingles, its longevity and the likelihood that it will be recycled at the end of its useful life may be considered an offset. See BEAM carbon calculator. We were careful to save every cut-off and scrap and send it to recycling.
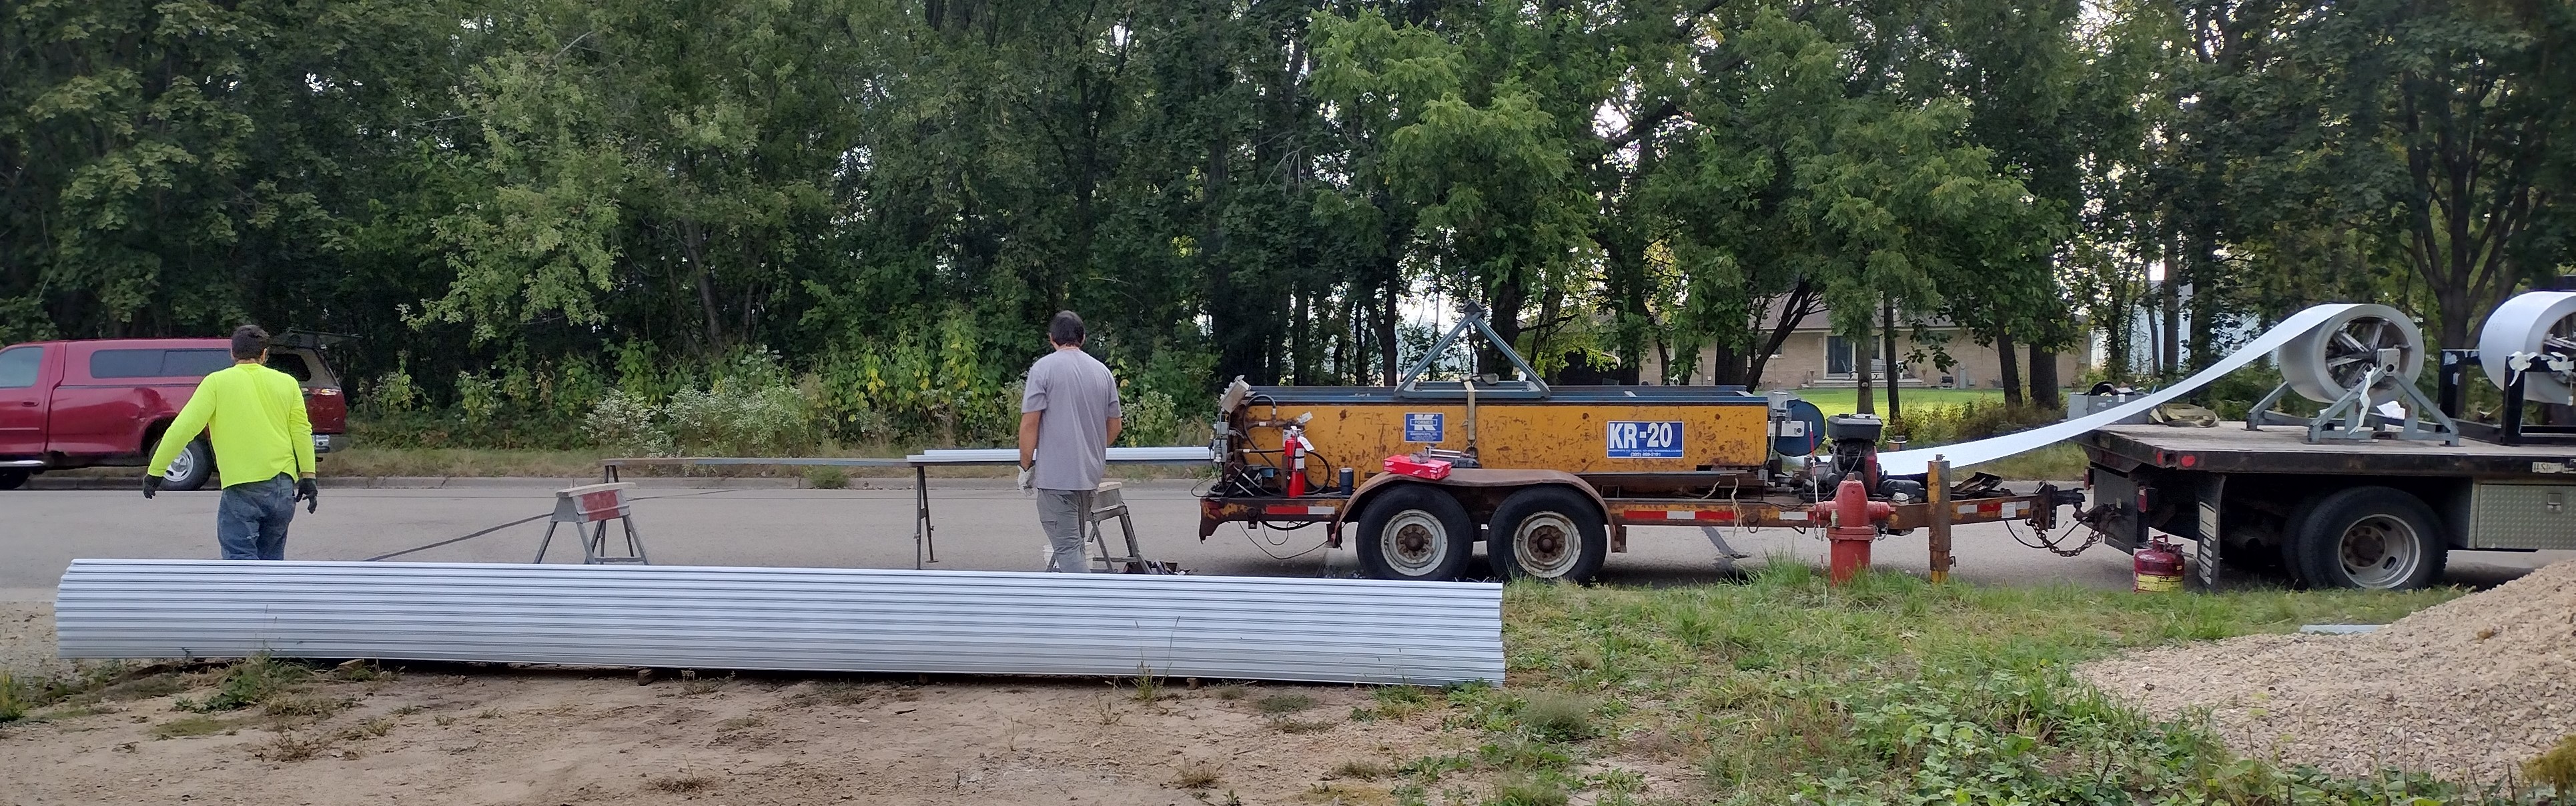
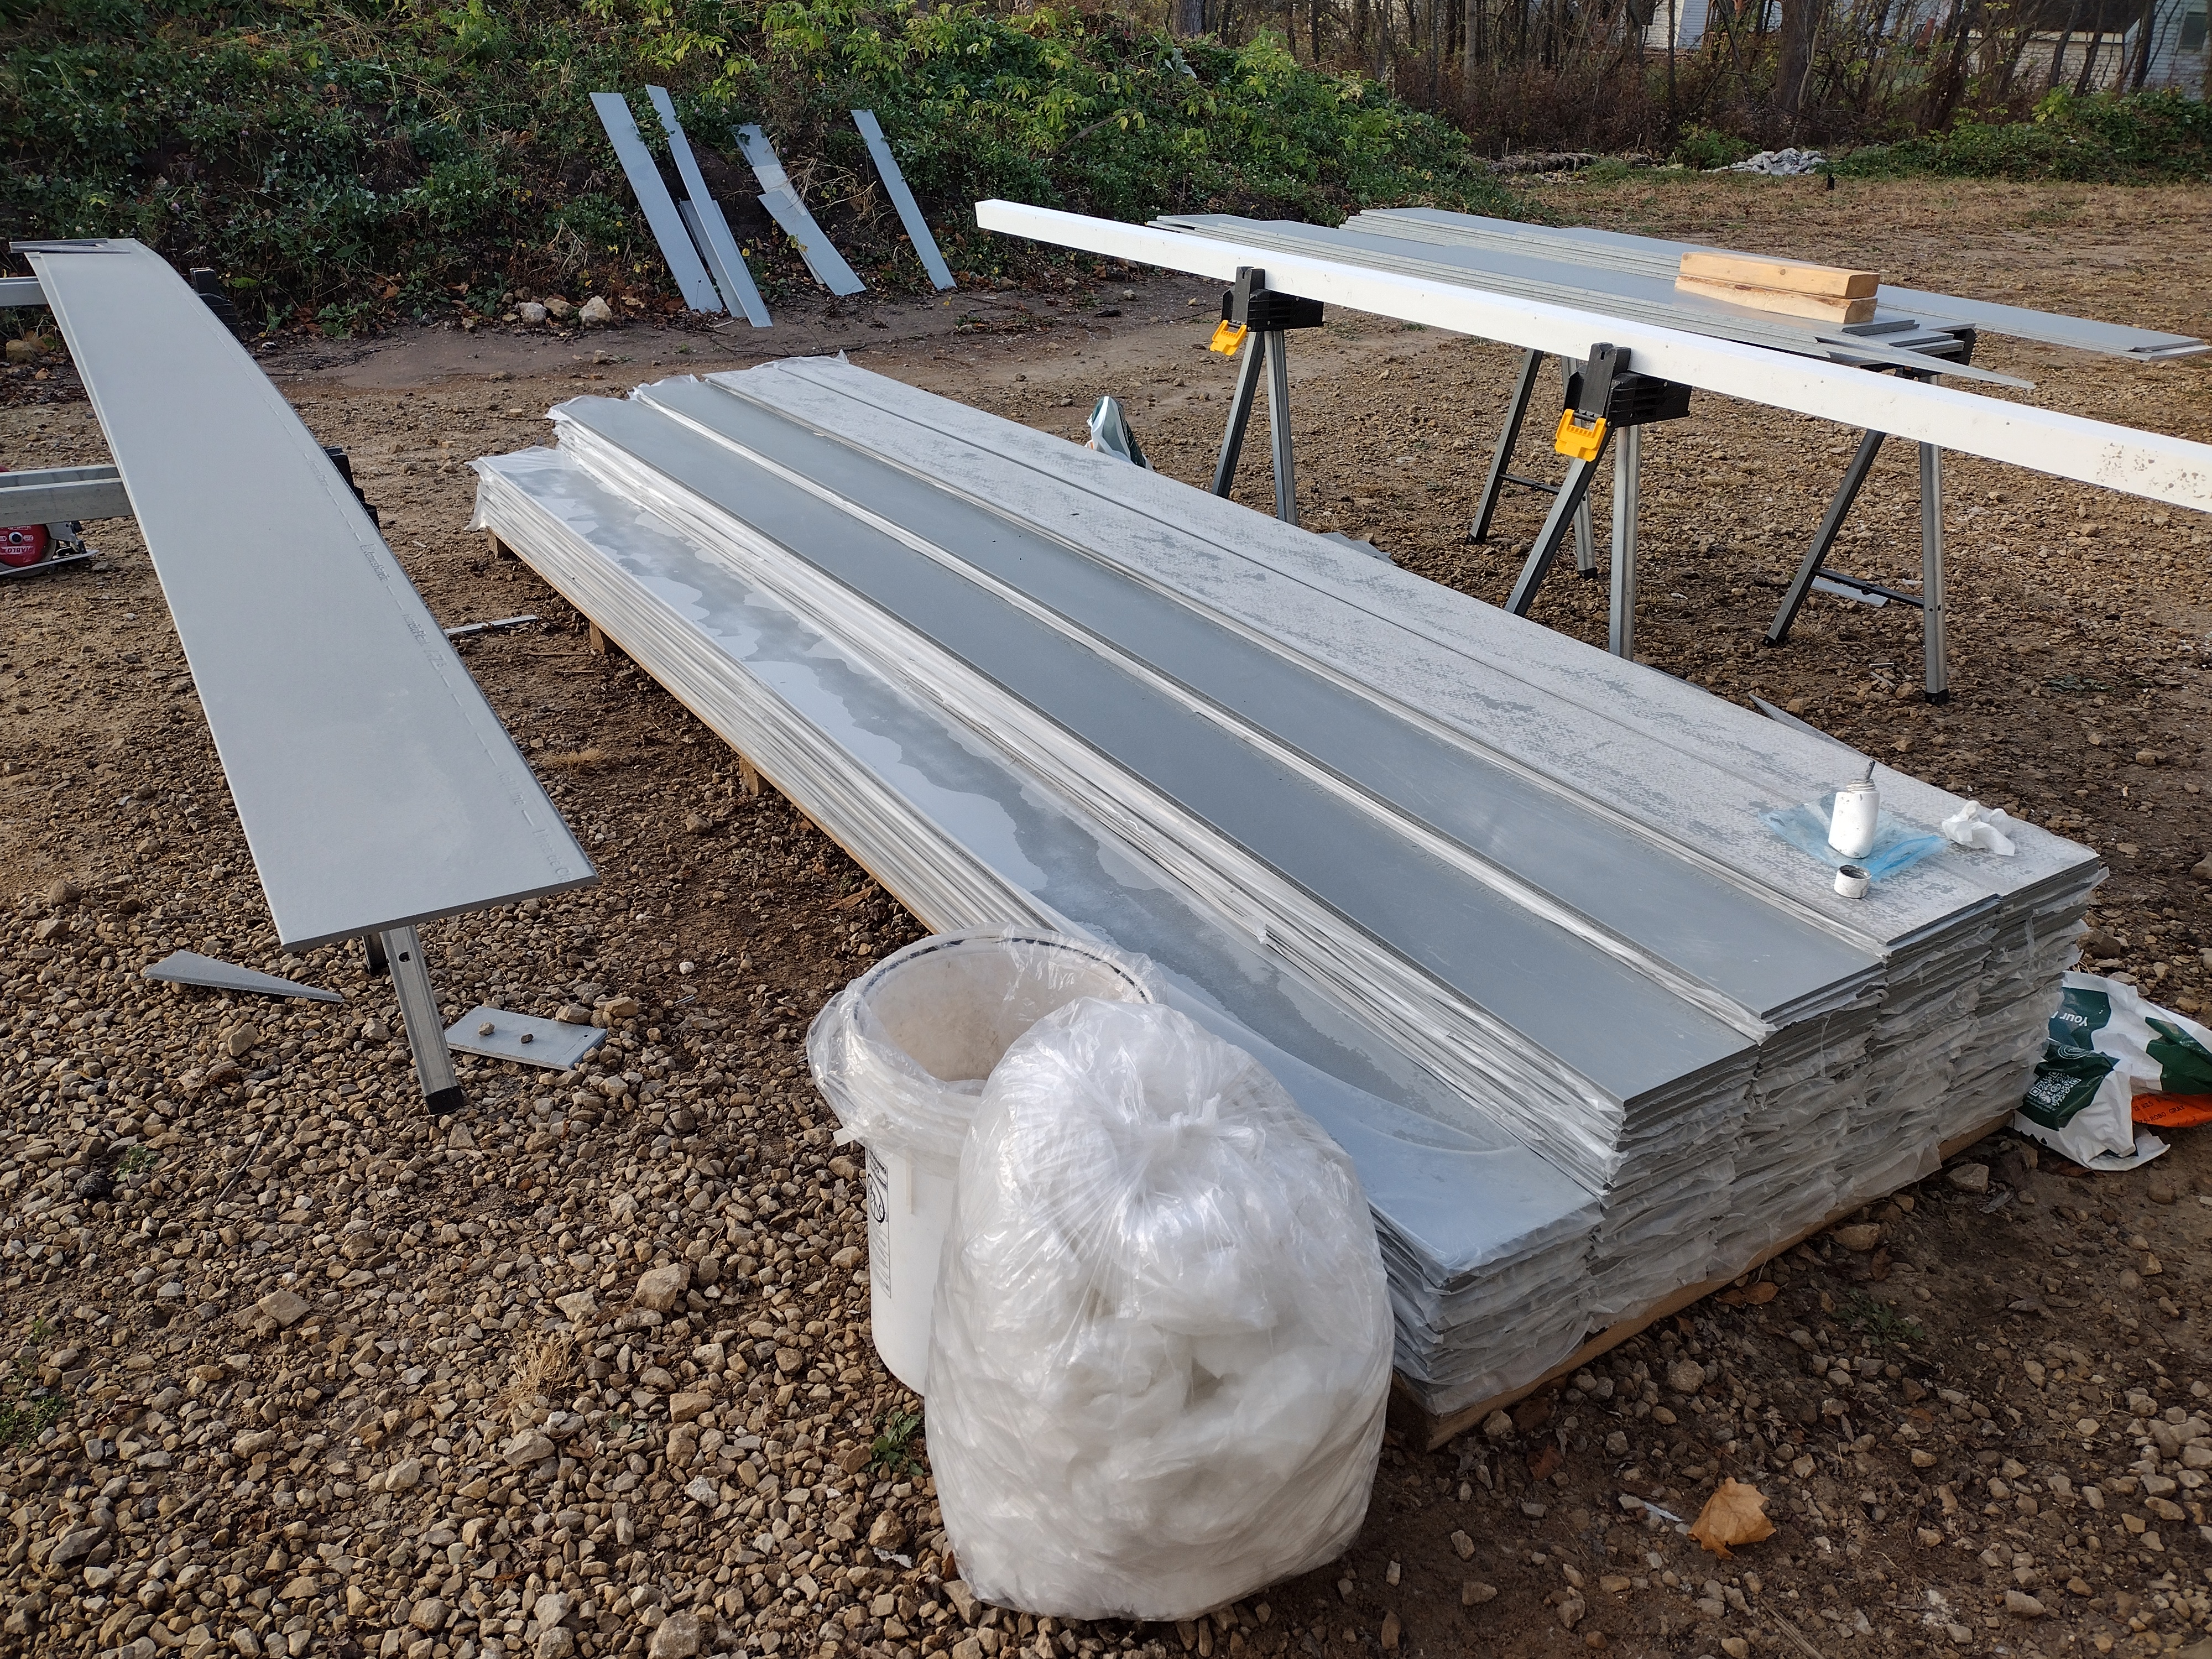
The panels were fabricated on site from rolls of stock material. I chose the “pencil rib” profile over a flat pan, for added stiffness and to conceal any “oil-canning”. I chose a galvalume finish for its authentic good looks and for its environmental qualities. Instead of a painted finish using something called a “PVDF” coating, which contains PFAS and other “forever chemicals”, galvalume is bare steel coated with an alloy of zinc and aluminum. However, it does have a clear acrylic coating of unknown impact, and the 20 year warranty on the finish is less than for PVDF. For more information see Habitable Future. As a bonus, galvalume is highly reflective and will help keep the home (and adjacent outdoor living spaces) cooler in the summer. Lots of thanks to Pete Faust and his crew for their hard work and attention to detail.
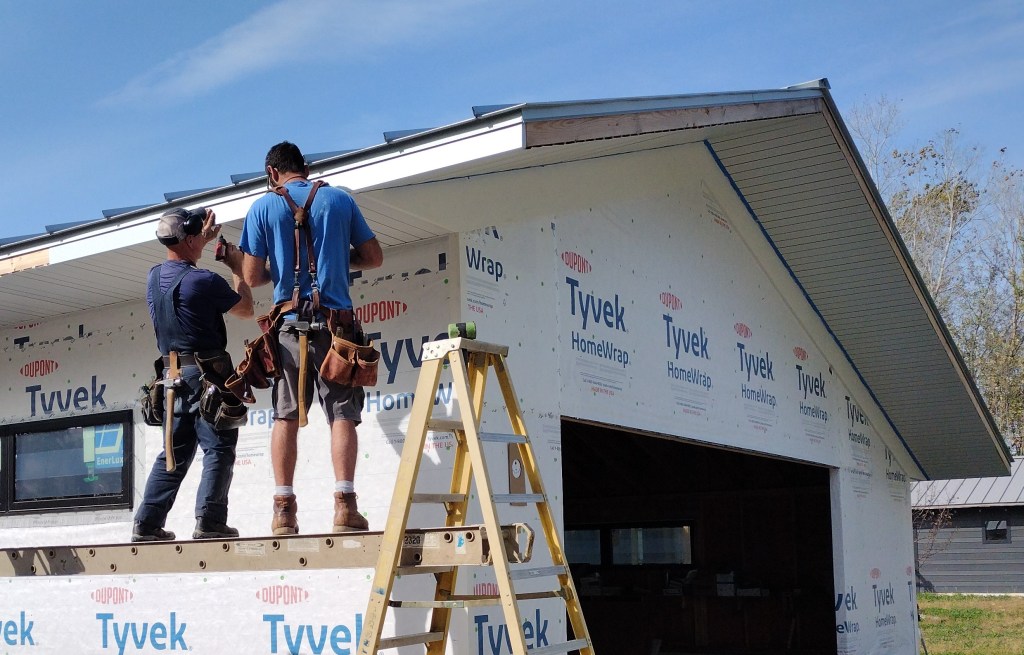
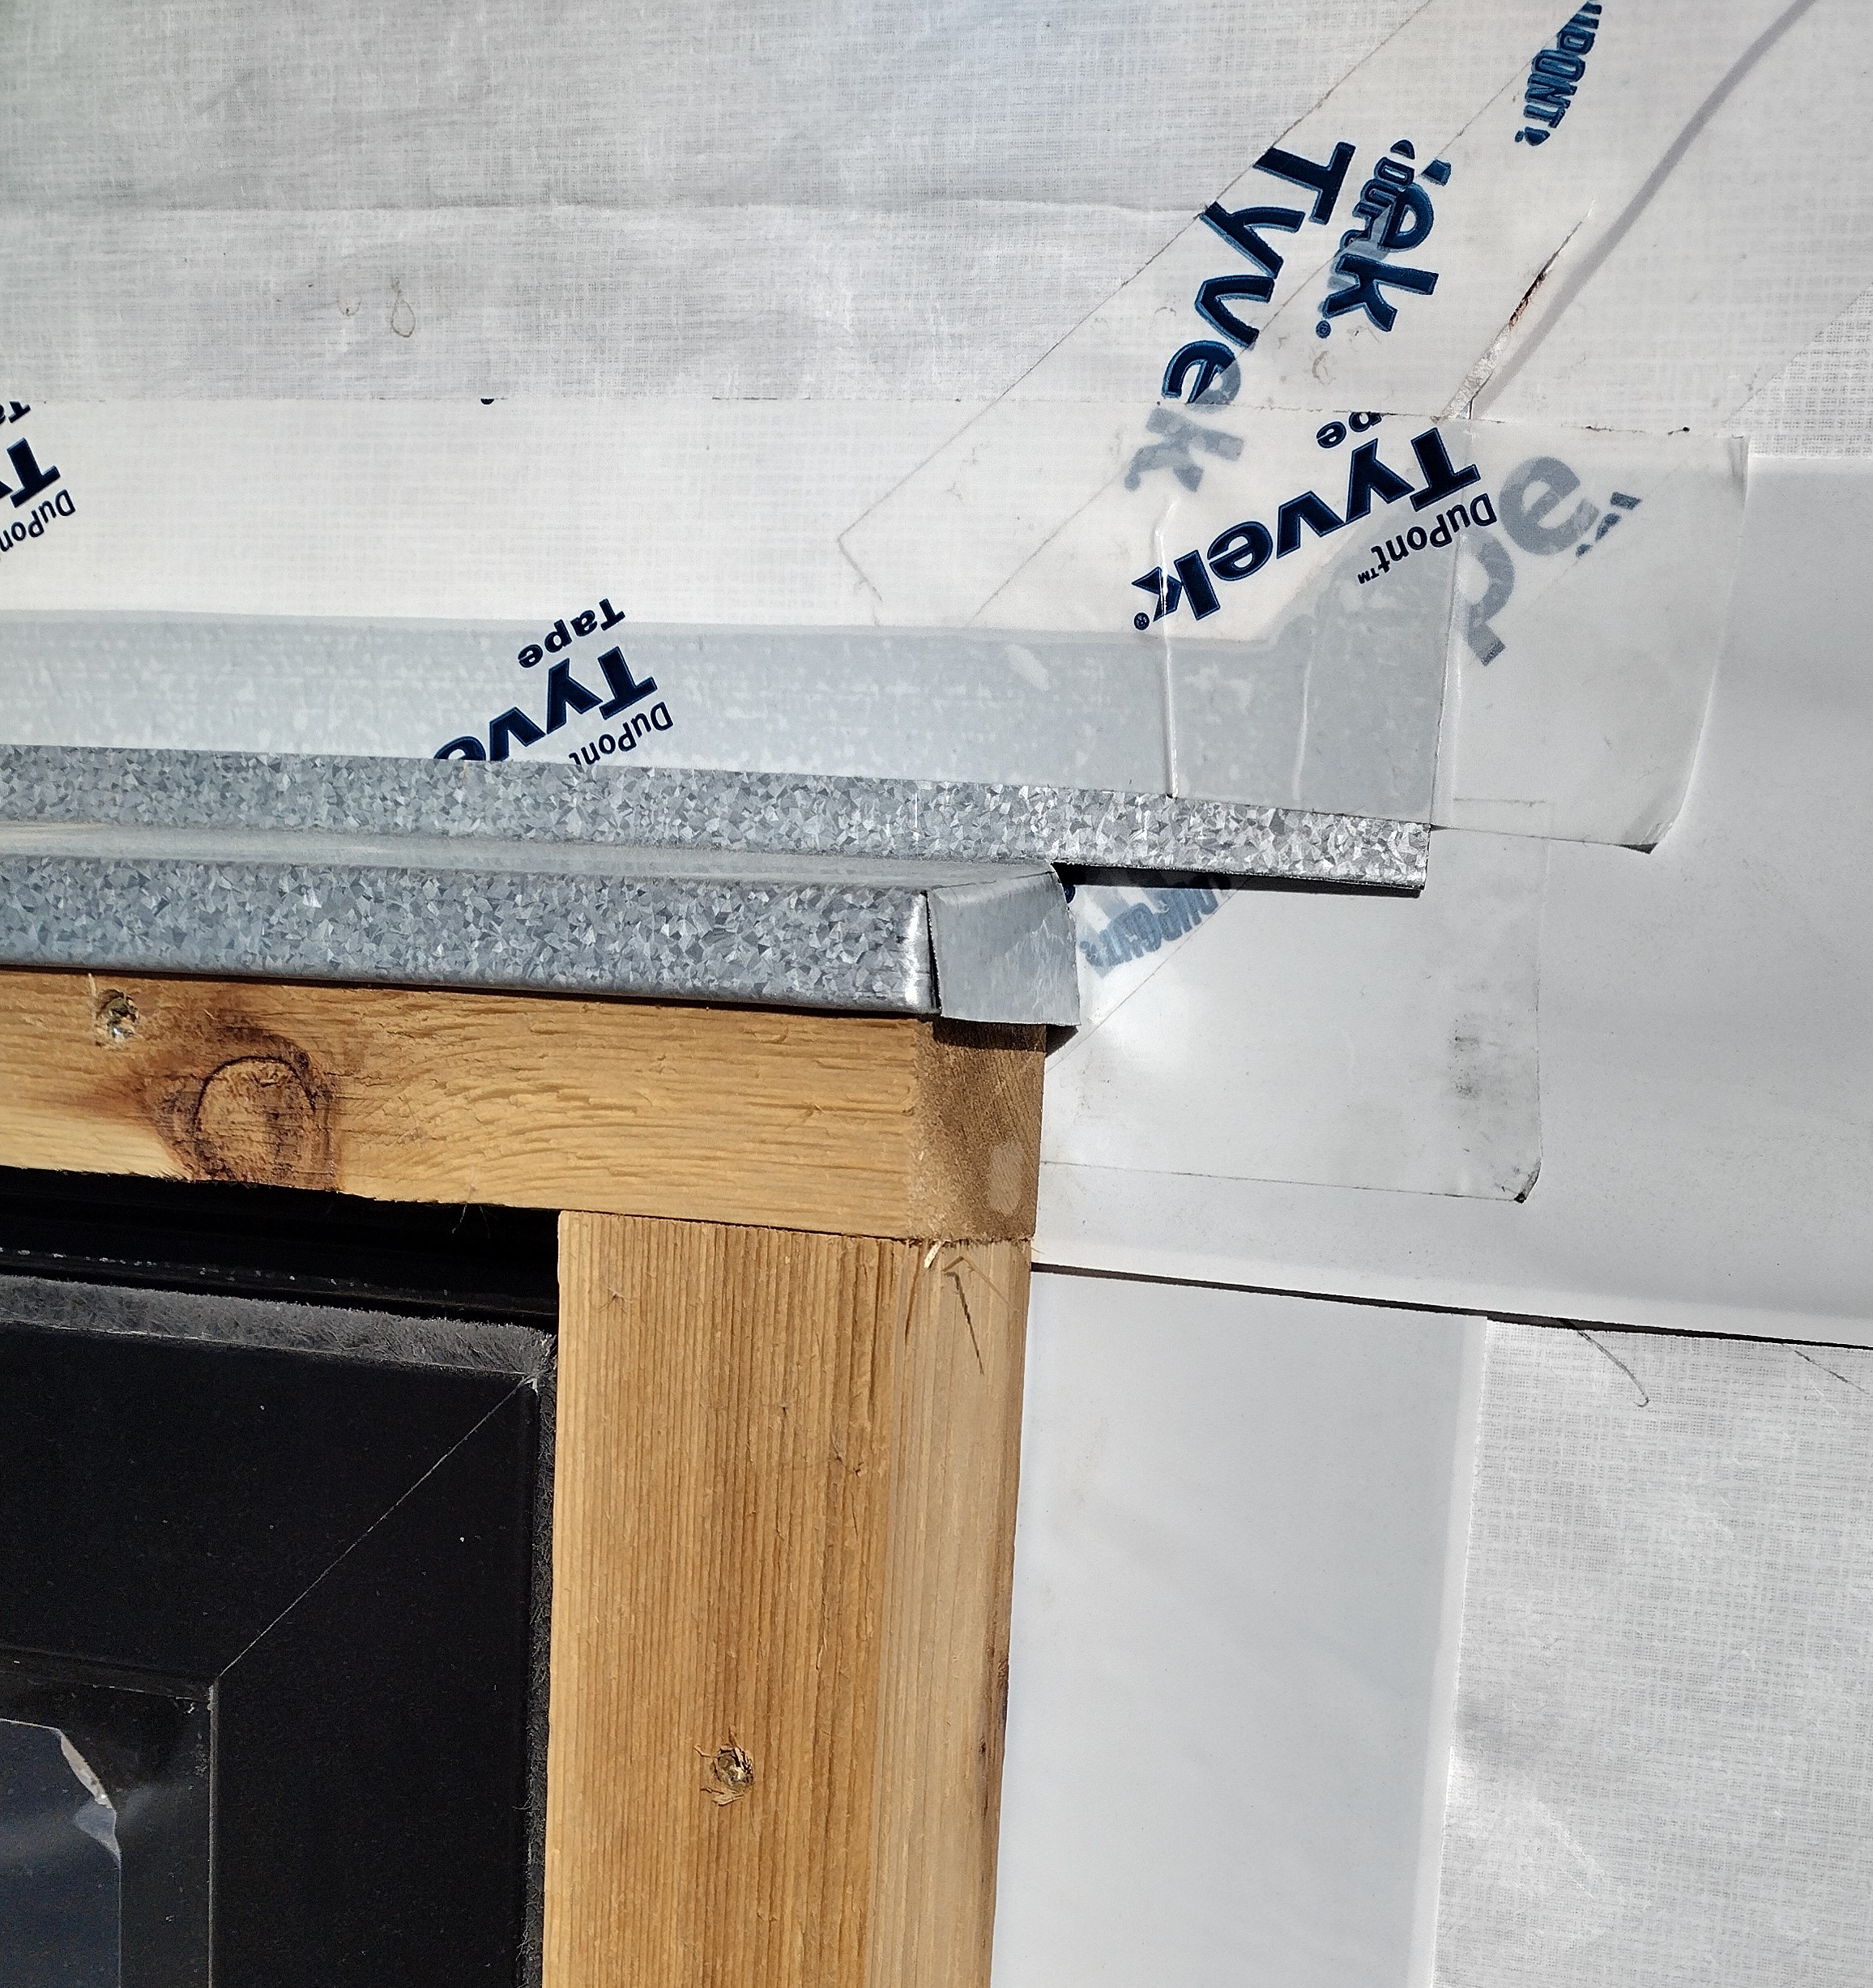
Pete also supplied custom galvanized steel fascia covers in a simple “L” shape that slips under the roof’s drip edge. Here, Dave and Cale are using exposed screws on the narrow face to secure it and cover the raw edge of the aluminum soffit. The soffit material is Rollex Stealth, a unique design with concealed vent holes. Instead of the customary “punched tin” look of the typical soffit, this product simulates tongue-and-groove boards and its folded design makes it uber-sturdy. Together, these two materials look sharp and are more than several notches above in long-term durability. The steel and aluminum scraps were saved and sent to recycling.
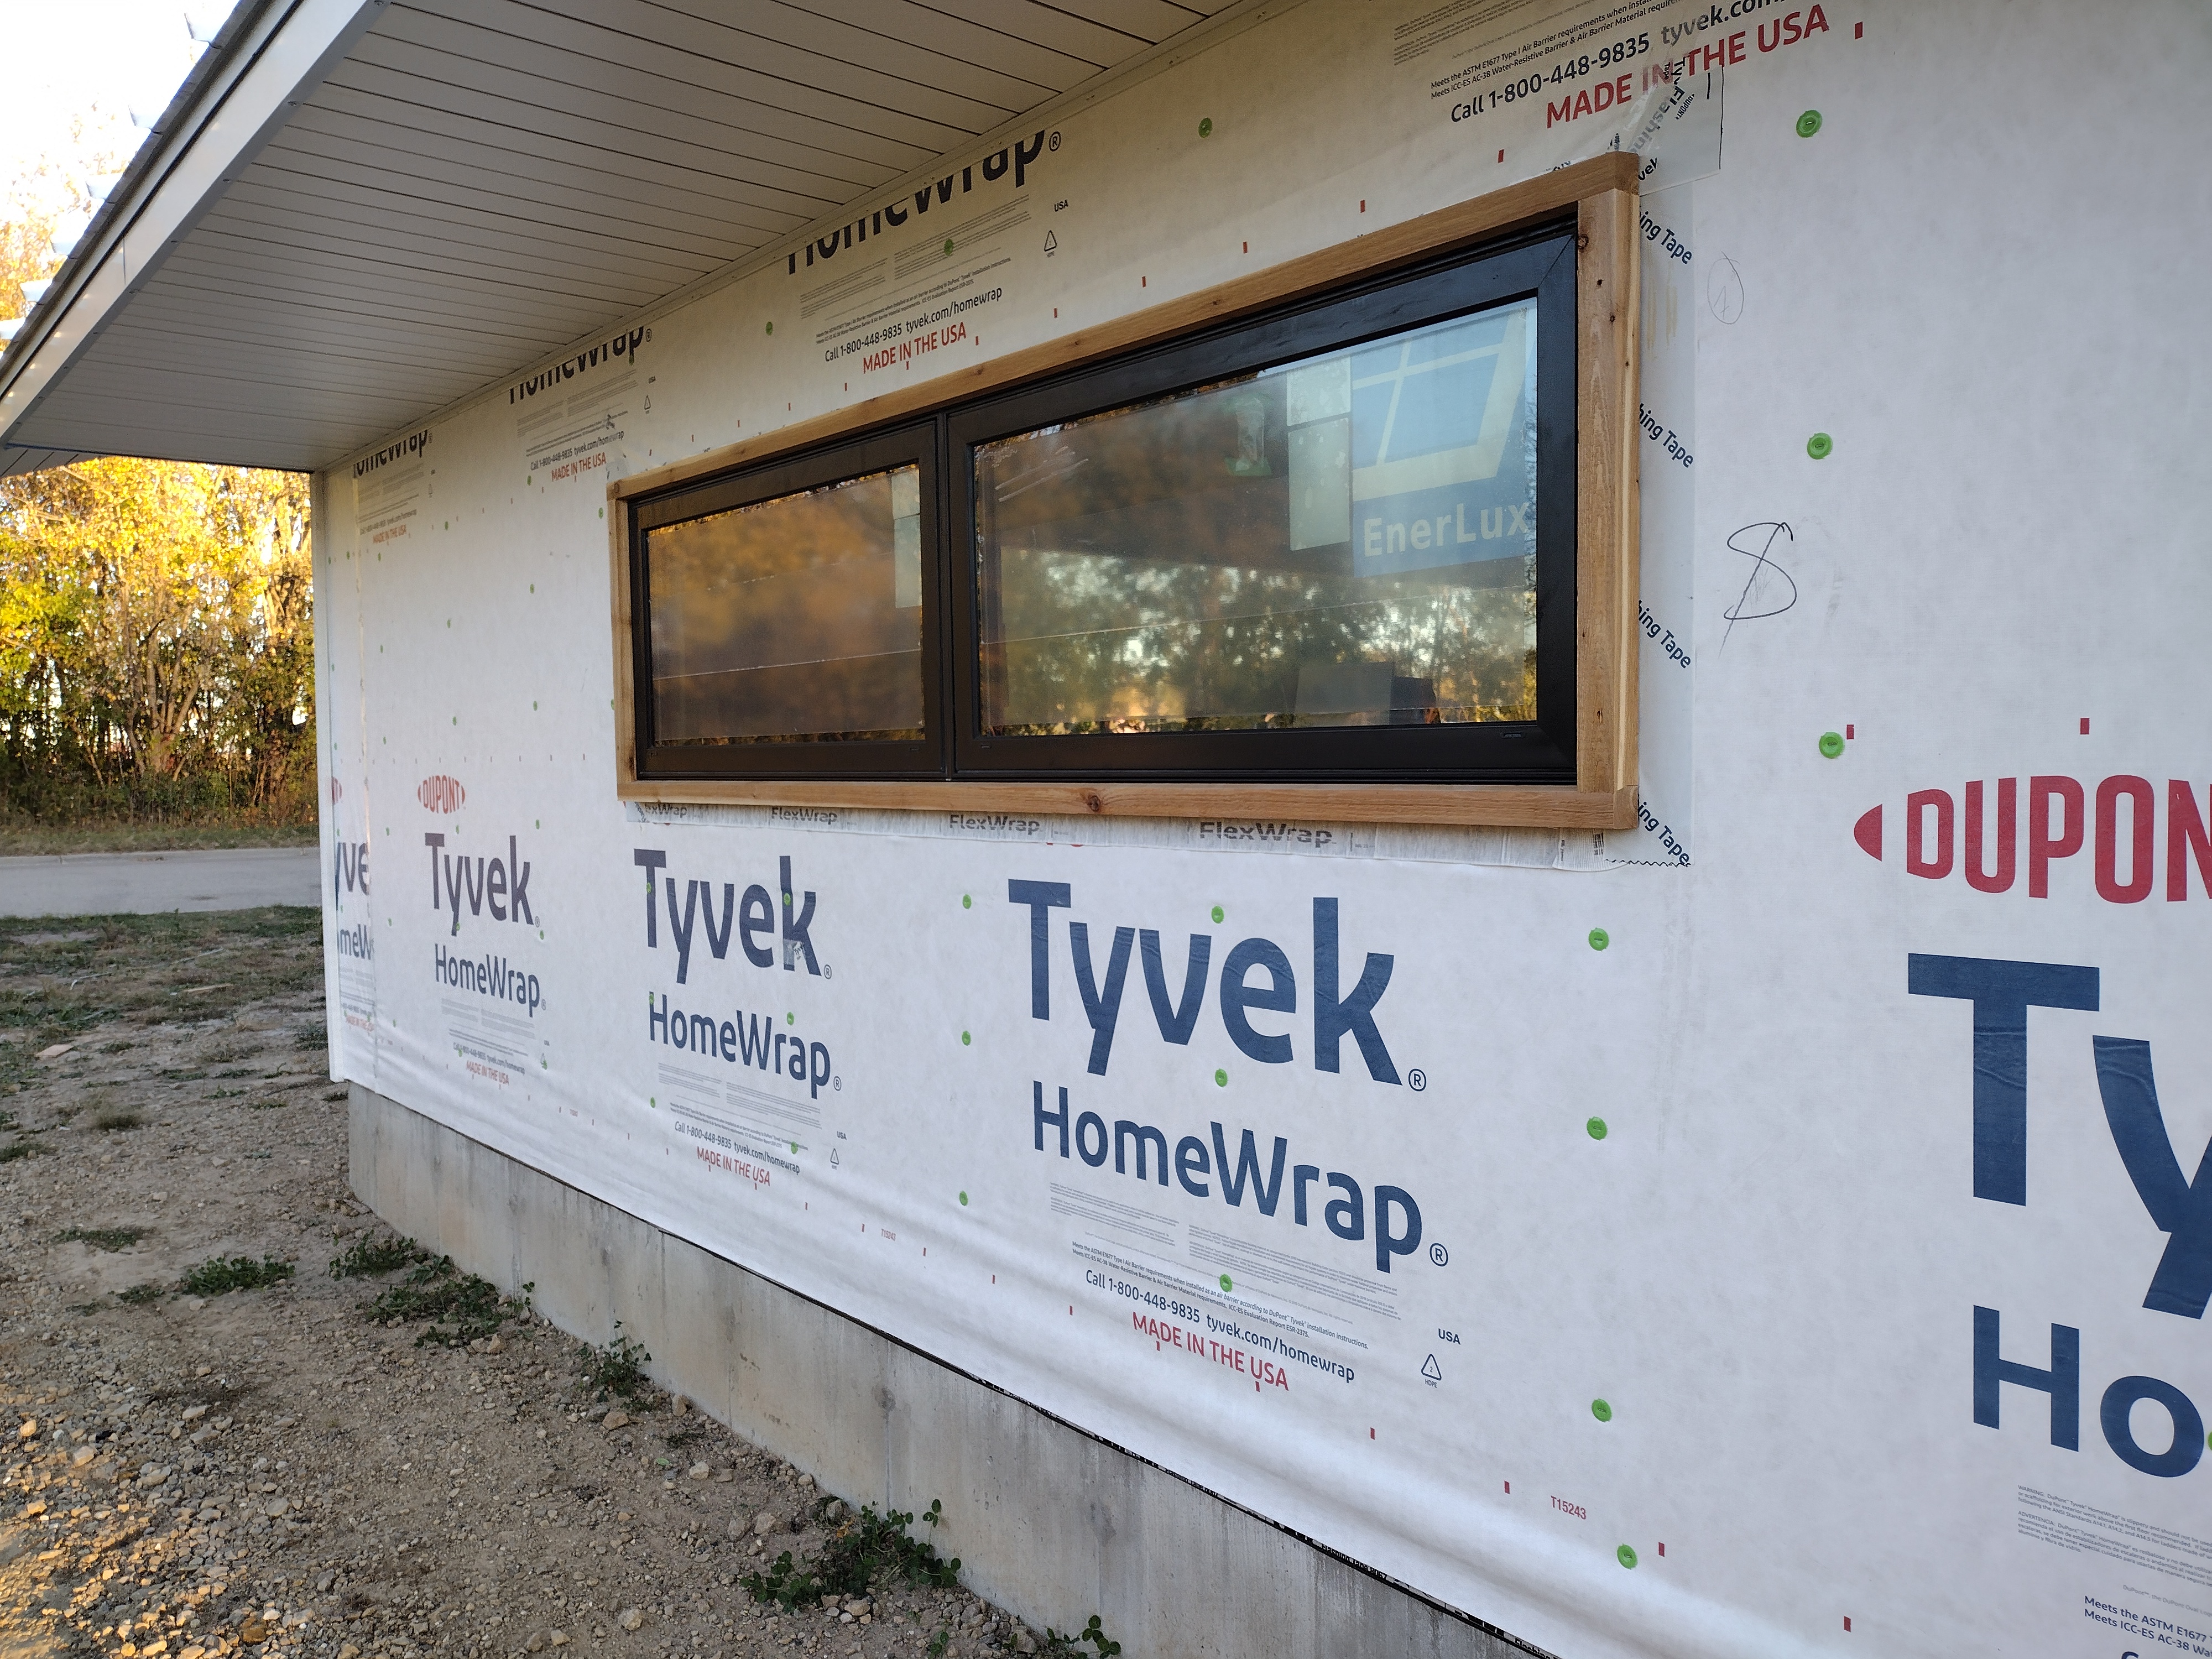
The crew built frames for the windows out of 2x rough sawn cedar, and capped them with another Pete fabrication—a robust head flashing that was slipped under the Tyvek housewrap and taped securely. The cedar frames present a small but impactful touch of natural material to the exterior, and will require the homeowner to apply a couple coats of clear penetrating sealer every few years to maintain UV and moisture resistance. We used Vermont Natural Coating’s PolyWhey, a safe, effective, and easy-to-apply product that replaces typical toxic ingredients with whey proteins, a byproduct of the state’s cheesemaking industry.

For trims and mechanical blocks, I chose Skytrim, a cellular PVC board supplied by my local lumberyard. This product is bomb-proof (it’s pure plastic) and when applied smooth side out, looks clean and modern. The large white rectangle seen on the right is where the electrical meter and other utility boxes will go. The crew cut a slope on the top edge and capped it with a galvanized steel flashing.
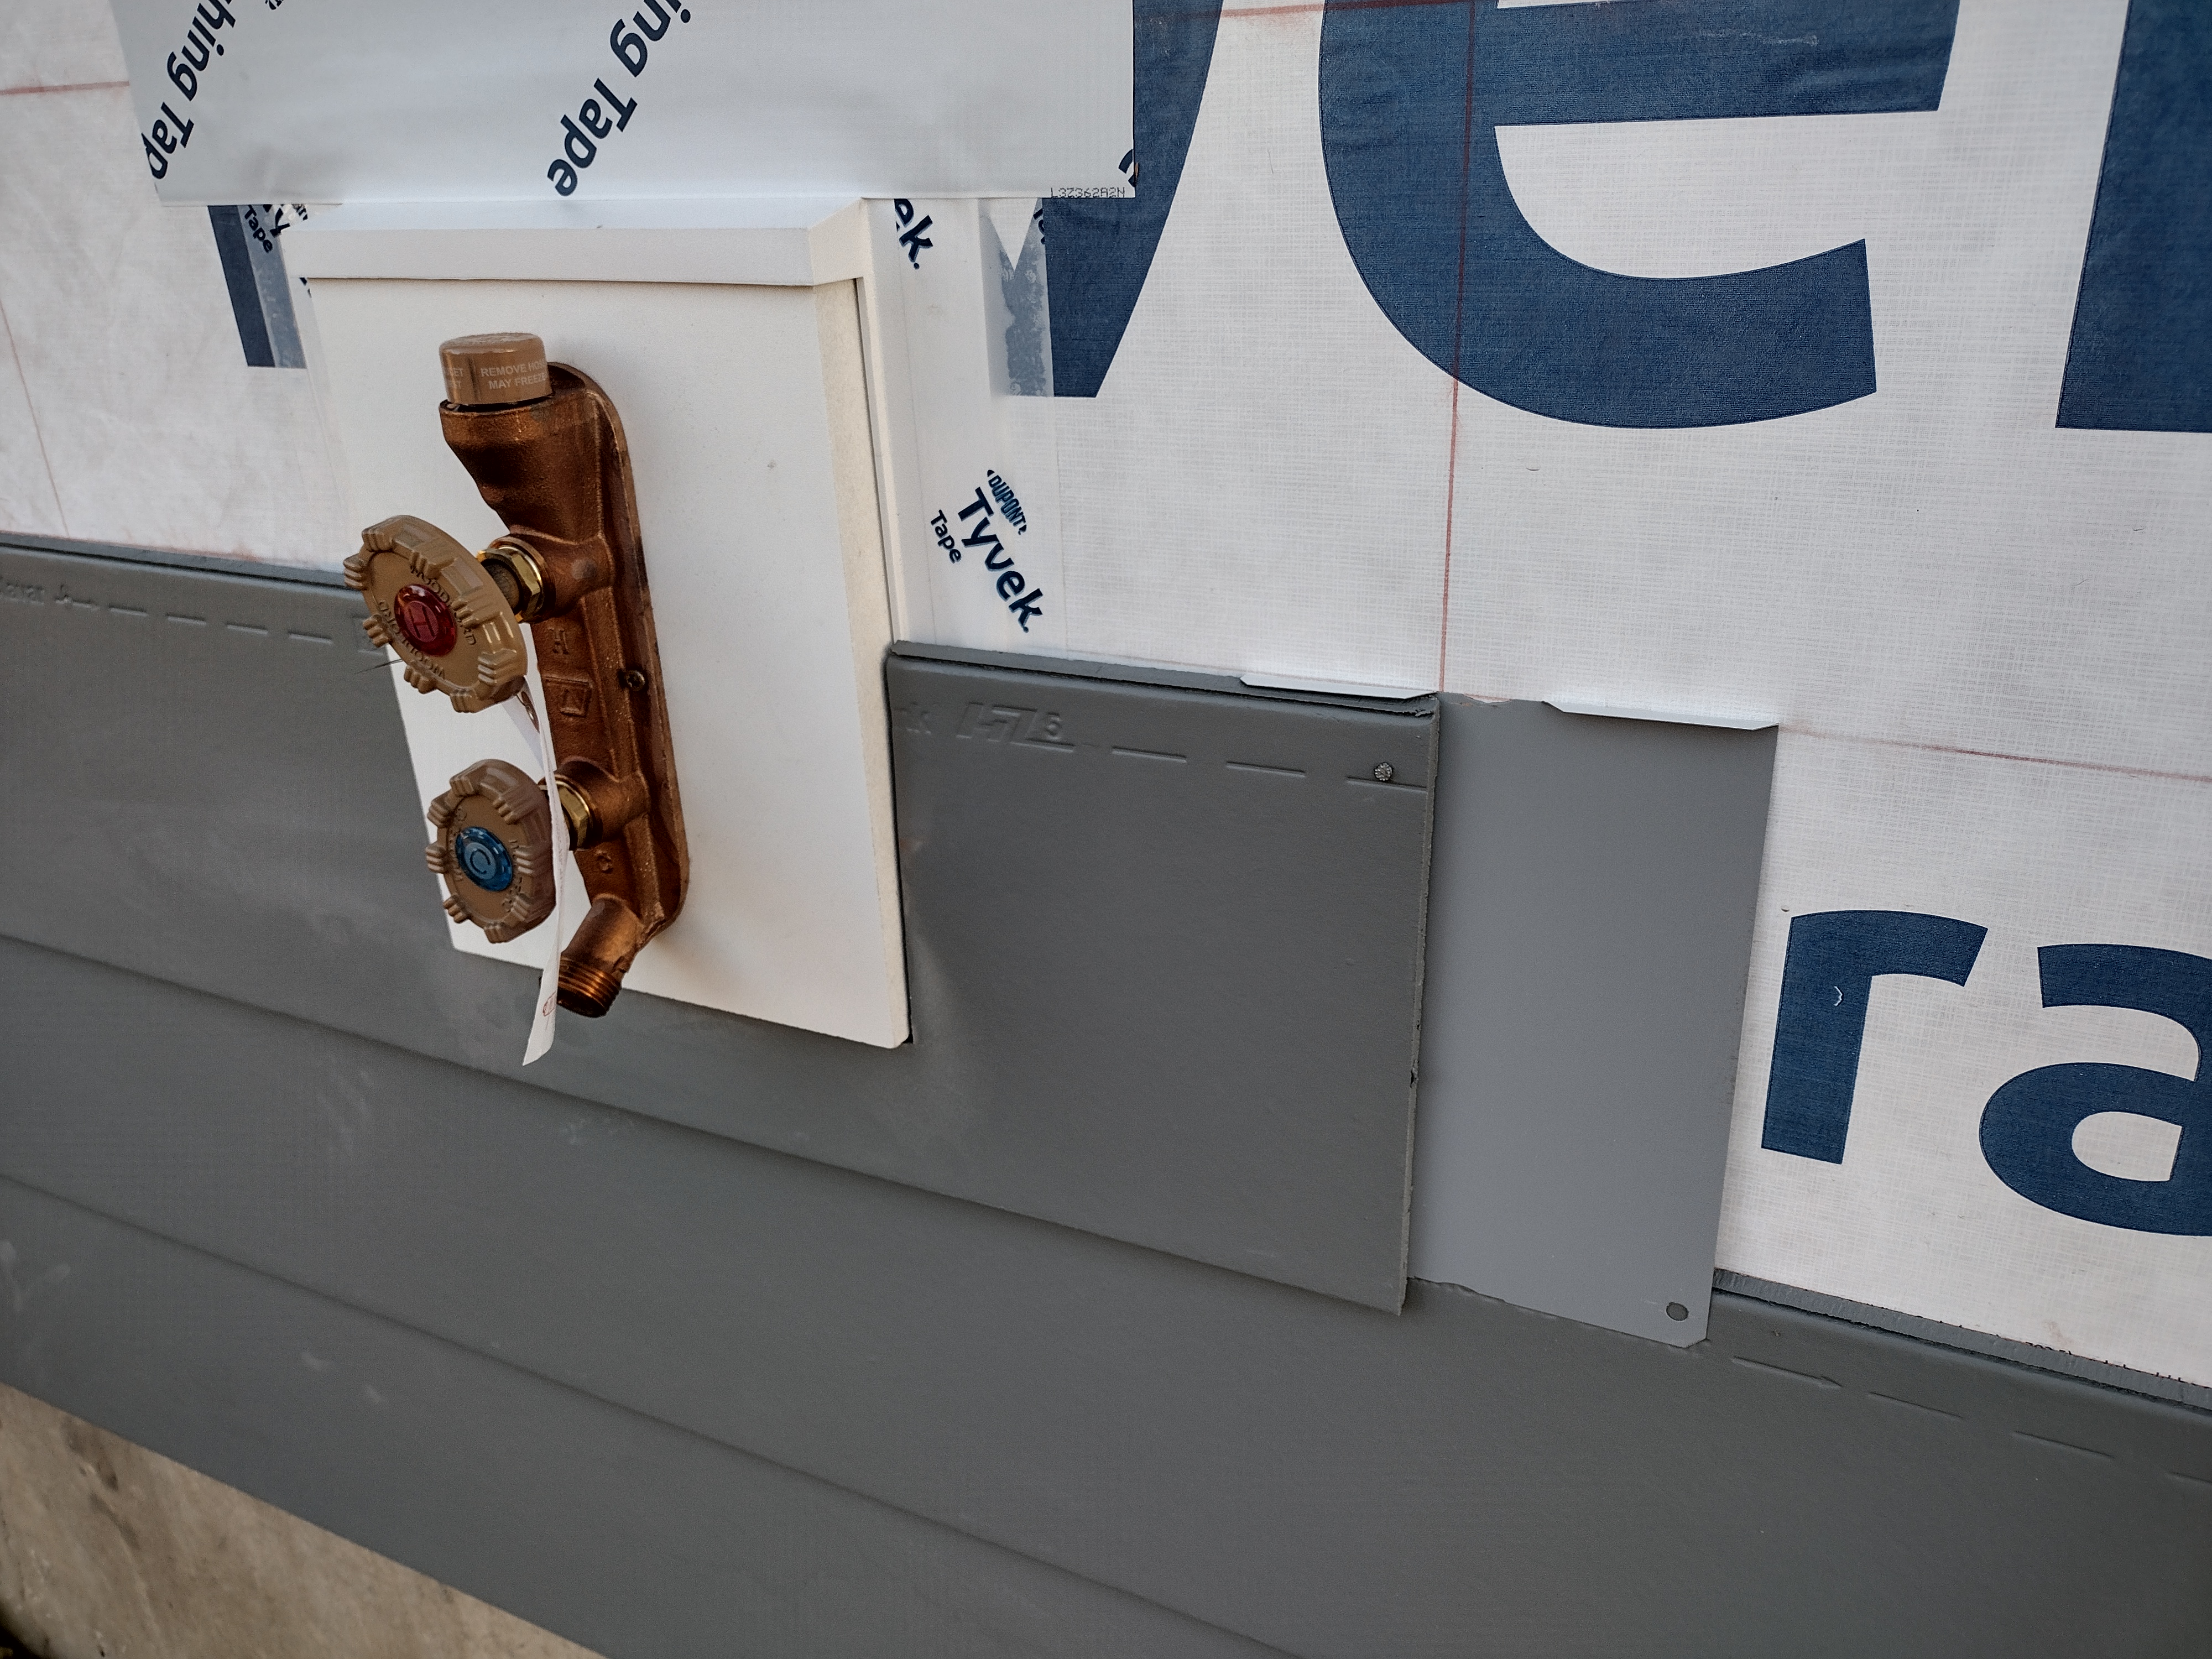
For the (hot + cold) hose bib mounts, I chose Sturdi-Mount, a one-and-done product that comes with an integral nailing flange and sloped cap (no extra flashing required). I’d purchased a variety of these mounts, hoping to use them for electrical boxes and lighting fixtures but the sizes and shapes available turned out to be too clunky for my use. Instead, the carpenters custom cut blocks of Skytrim.
For siding, I chose James Hardie’s planks with a 7″ exposure, and Tamlyn’s plank flashing to back the seams. Together with caulked seams, this “armor” is the first line of defense against water intrusion. The siding and trims are installed on Tyvek’s HomeWrap, a waterproof and vapor-open material that meets Code’s requirement for a “water-resistive barrier”, and is the second line of defense against water intrusion.
There are many material up-grades to conventional Tyvek including bumpy or textured wraps that create a drainage and drying space behind the siding. Another upgrade is to “strap” the wall with 1×2 or similar battens for a robust 3/4″ gap for maximum drying. These various materials and methods are often called “rainscreens”, and are used where extra insurance against water or vapor damage is needed, or to extend the life of the siding (especially effective for wood with a painted finish). For more discussion, see Moisture Protection for Walls in Journal of Light Construction.
Because the walls of this house are only one story, and are well protected by 36 inch overhangs and rakes, I feel confident using conventional Tyvek. Additionally, the plank siding inherently creates triangular “drying” gaps behind each row. Our meticulous attention to air- and water-tightness on the exterior, and air- and vapor-tightness on the interior serve to keep the walls dry and free of mold, mildew, rot, and insect intrusion.
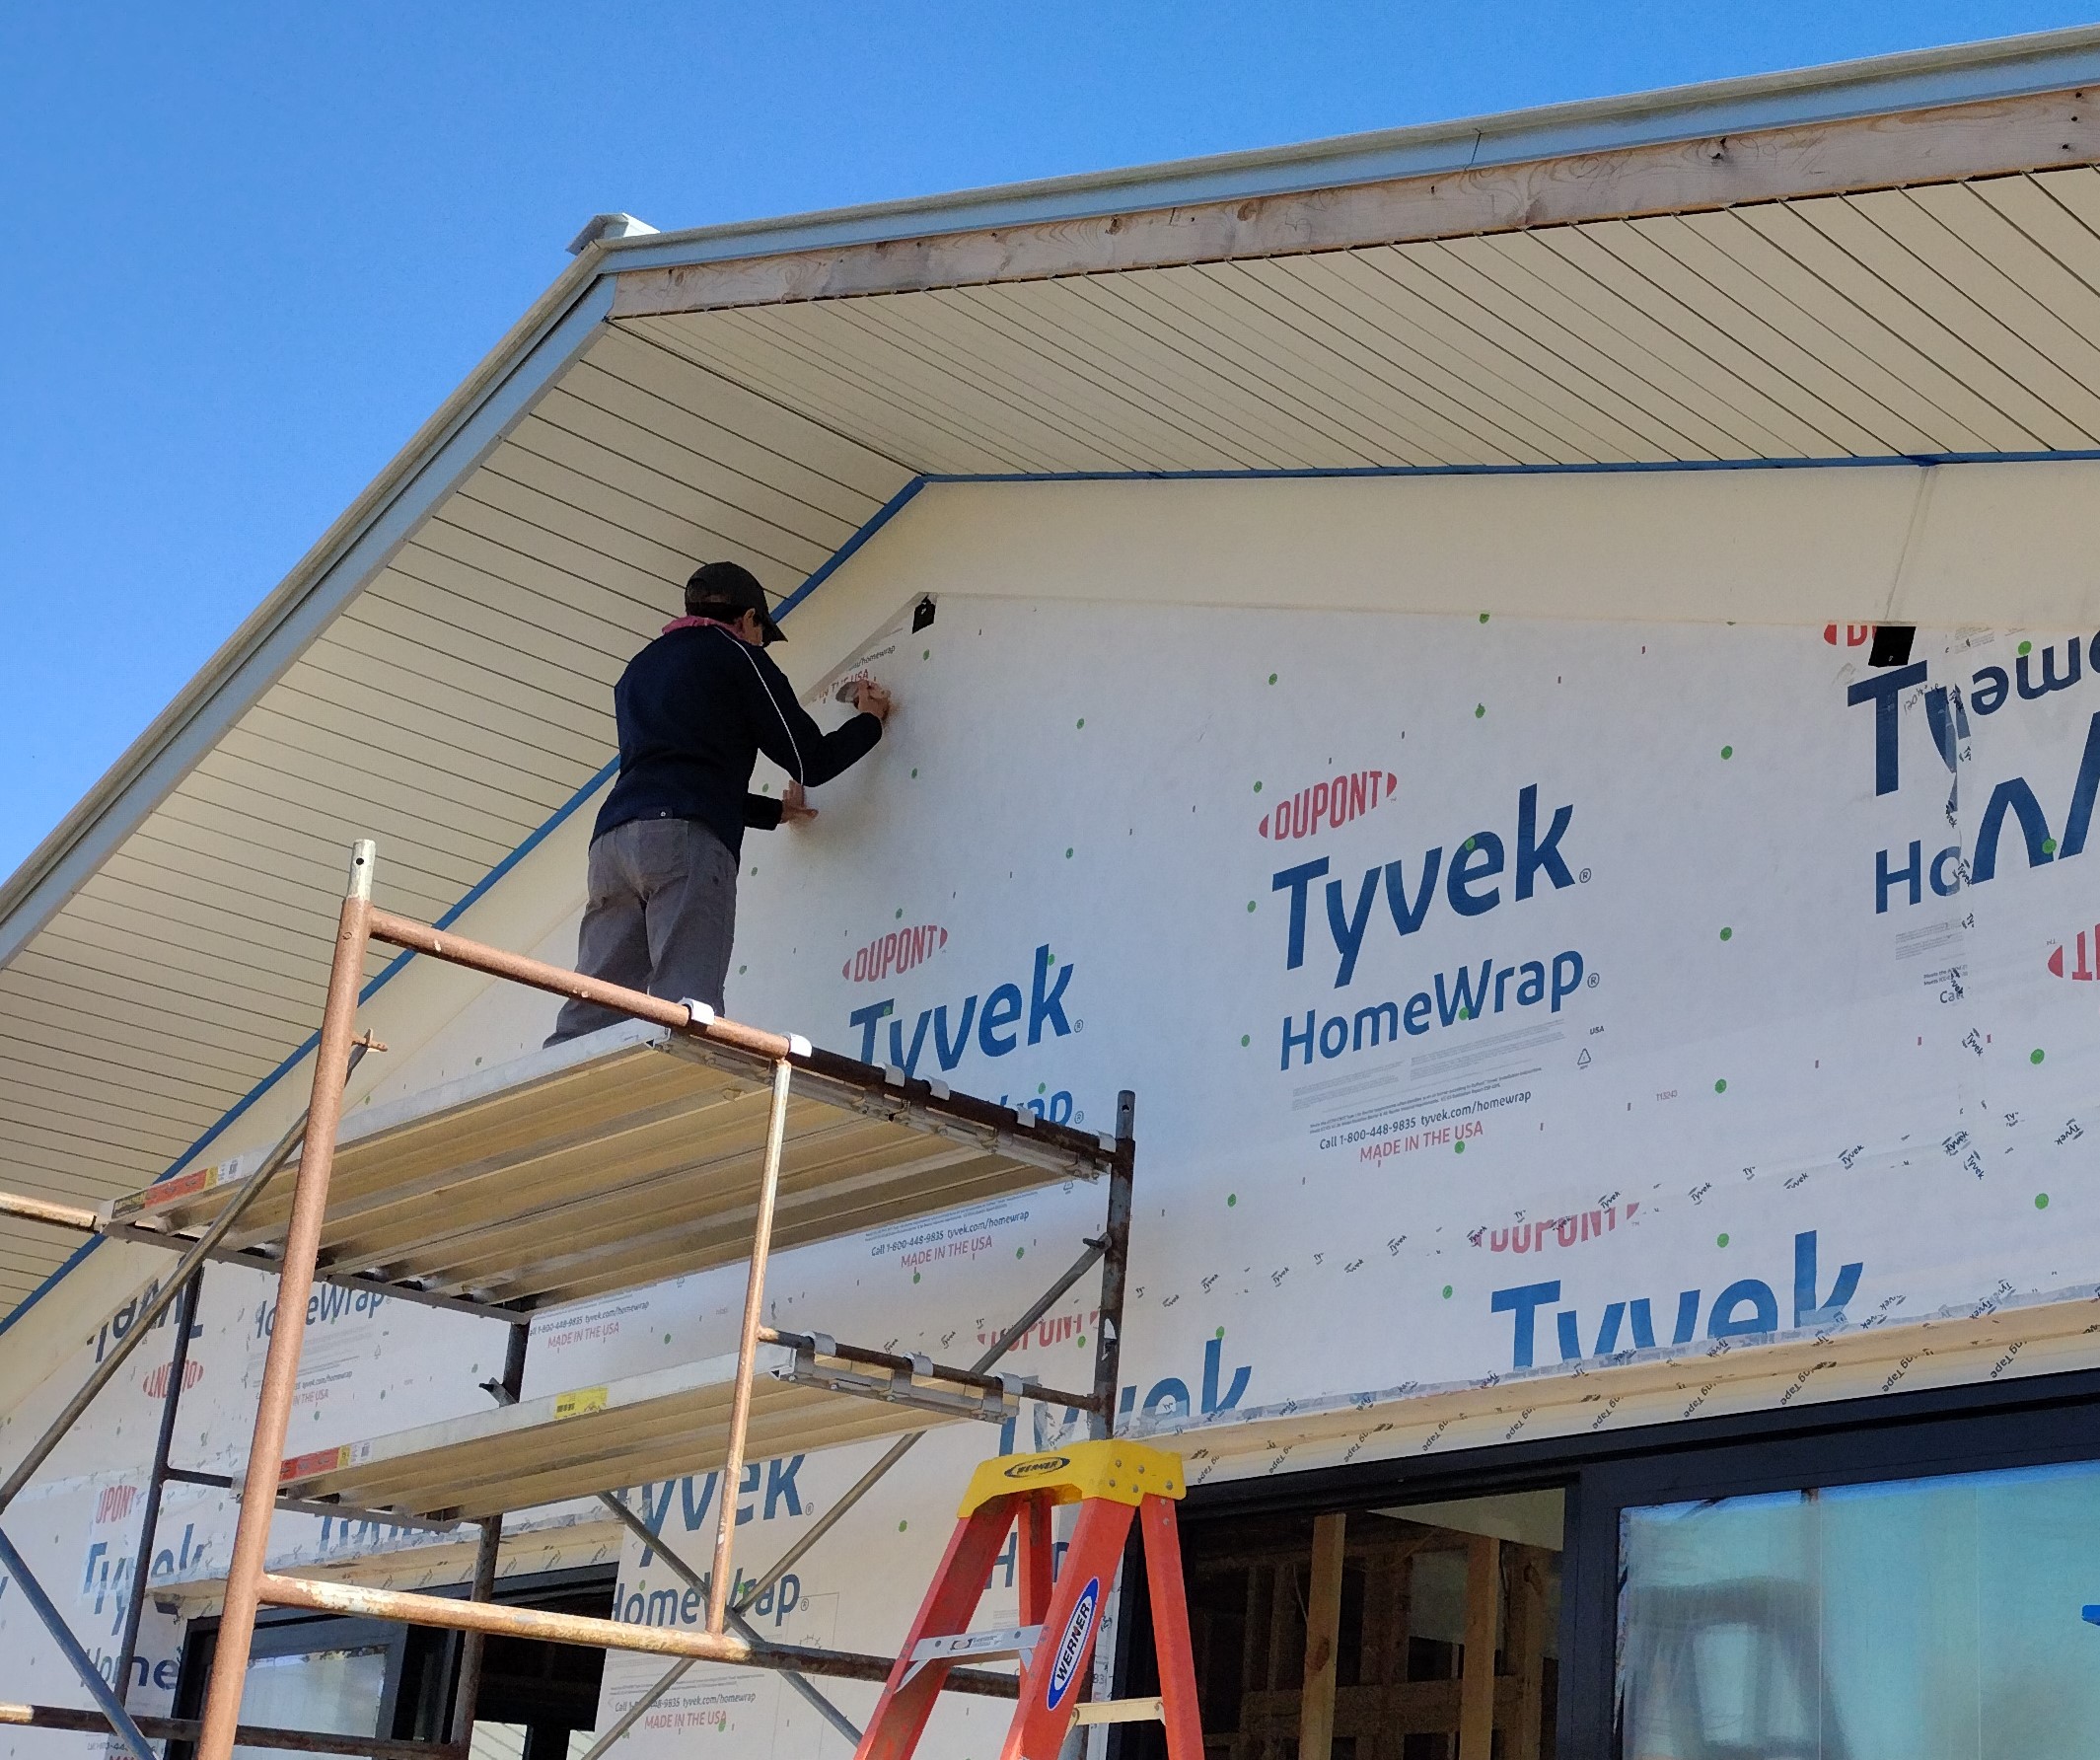
I began to regret the choice of Skytrim, not for its durability or ease-of-use, but because of the environmental impact of the product (see Habitable Future), and the hassle of painting it in the field. Here, the “weekend warrior” crew is applying blue masking tape in preparation for painting the gable end frieze boards. Only a few manufacturers formulate paint for use on PVC, and so I was not able to use a product from Ecos Paints, my preferred vendor. And if that wasn’t enough to sink the heart of this “eco-friendly” builder (me), my plan to send the cut offs to recycling turned out to be wishful thinking. I’m still hanging on to the larger scraps in hopes of using them elsewhere and am still looking around and making calls to recyclers.
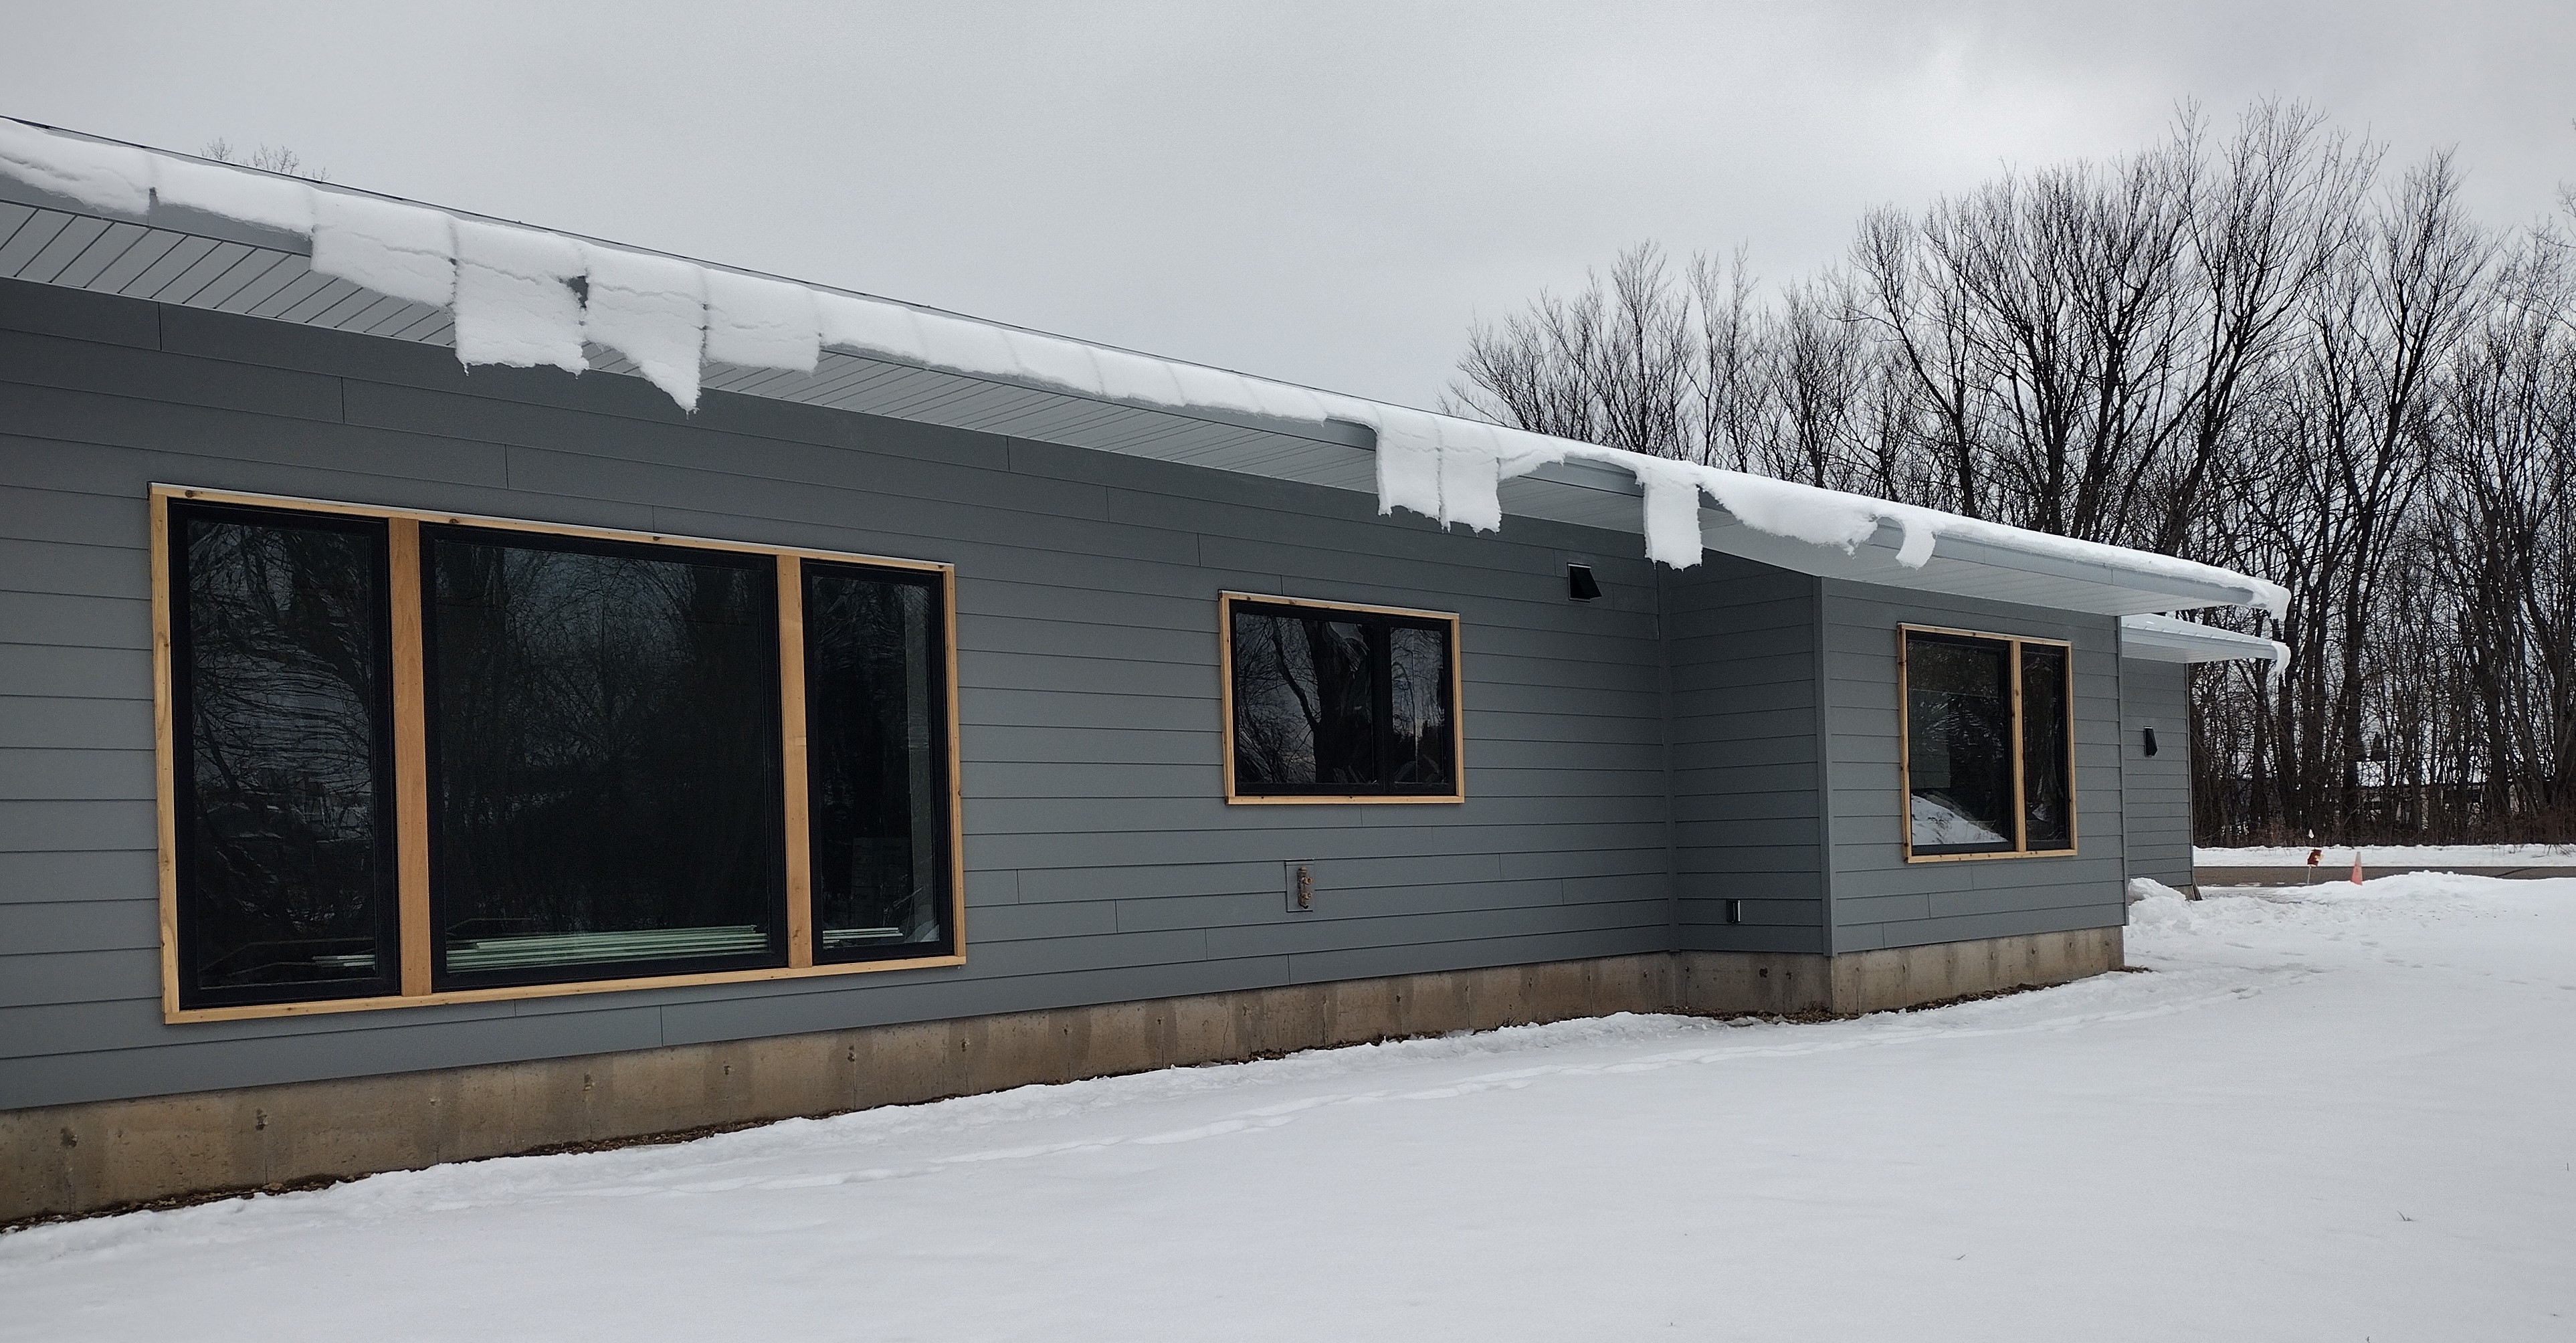
The smooth, cool gray plank cement board siding is a nice contrast to the warm tones of the rough sawn cedar window trim. This James Hardie product should last for decades: the finish comes with a 15 year warranty. It’s considered fire-resistant (it’s non-combustible), hail-resistant, and non-toxic once in place (our crew worked outside to avoid inhaling the silica dust it releases when cut). Except for the factory applied painted finish and certain undisclosed “additives”, it’s made from raw and natural materials (Portland cement, cellulose, sand, water).
However, to manufacture and transport it comes with a high environmental cost (see Habitable Future). Moreover, Builders for Climate Action’s BEAM carbon footprint calculator finds that cement board siding has 4.5 times the carbon footprint of vinyl siding. It’s helpful to know that James Hardie has goals to reduce their carbon footprint, including energy and water consumption and waste reduction.

The siding came protected with a thin plastic sheet between each plank, which was sent to recycling. The cut-offs were sent to the landfill.
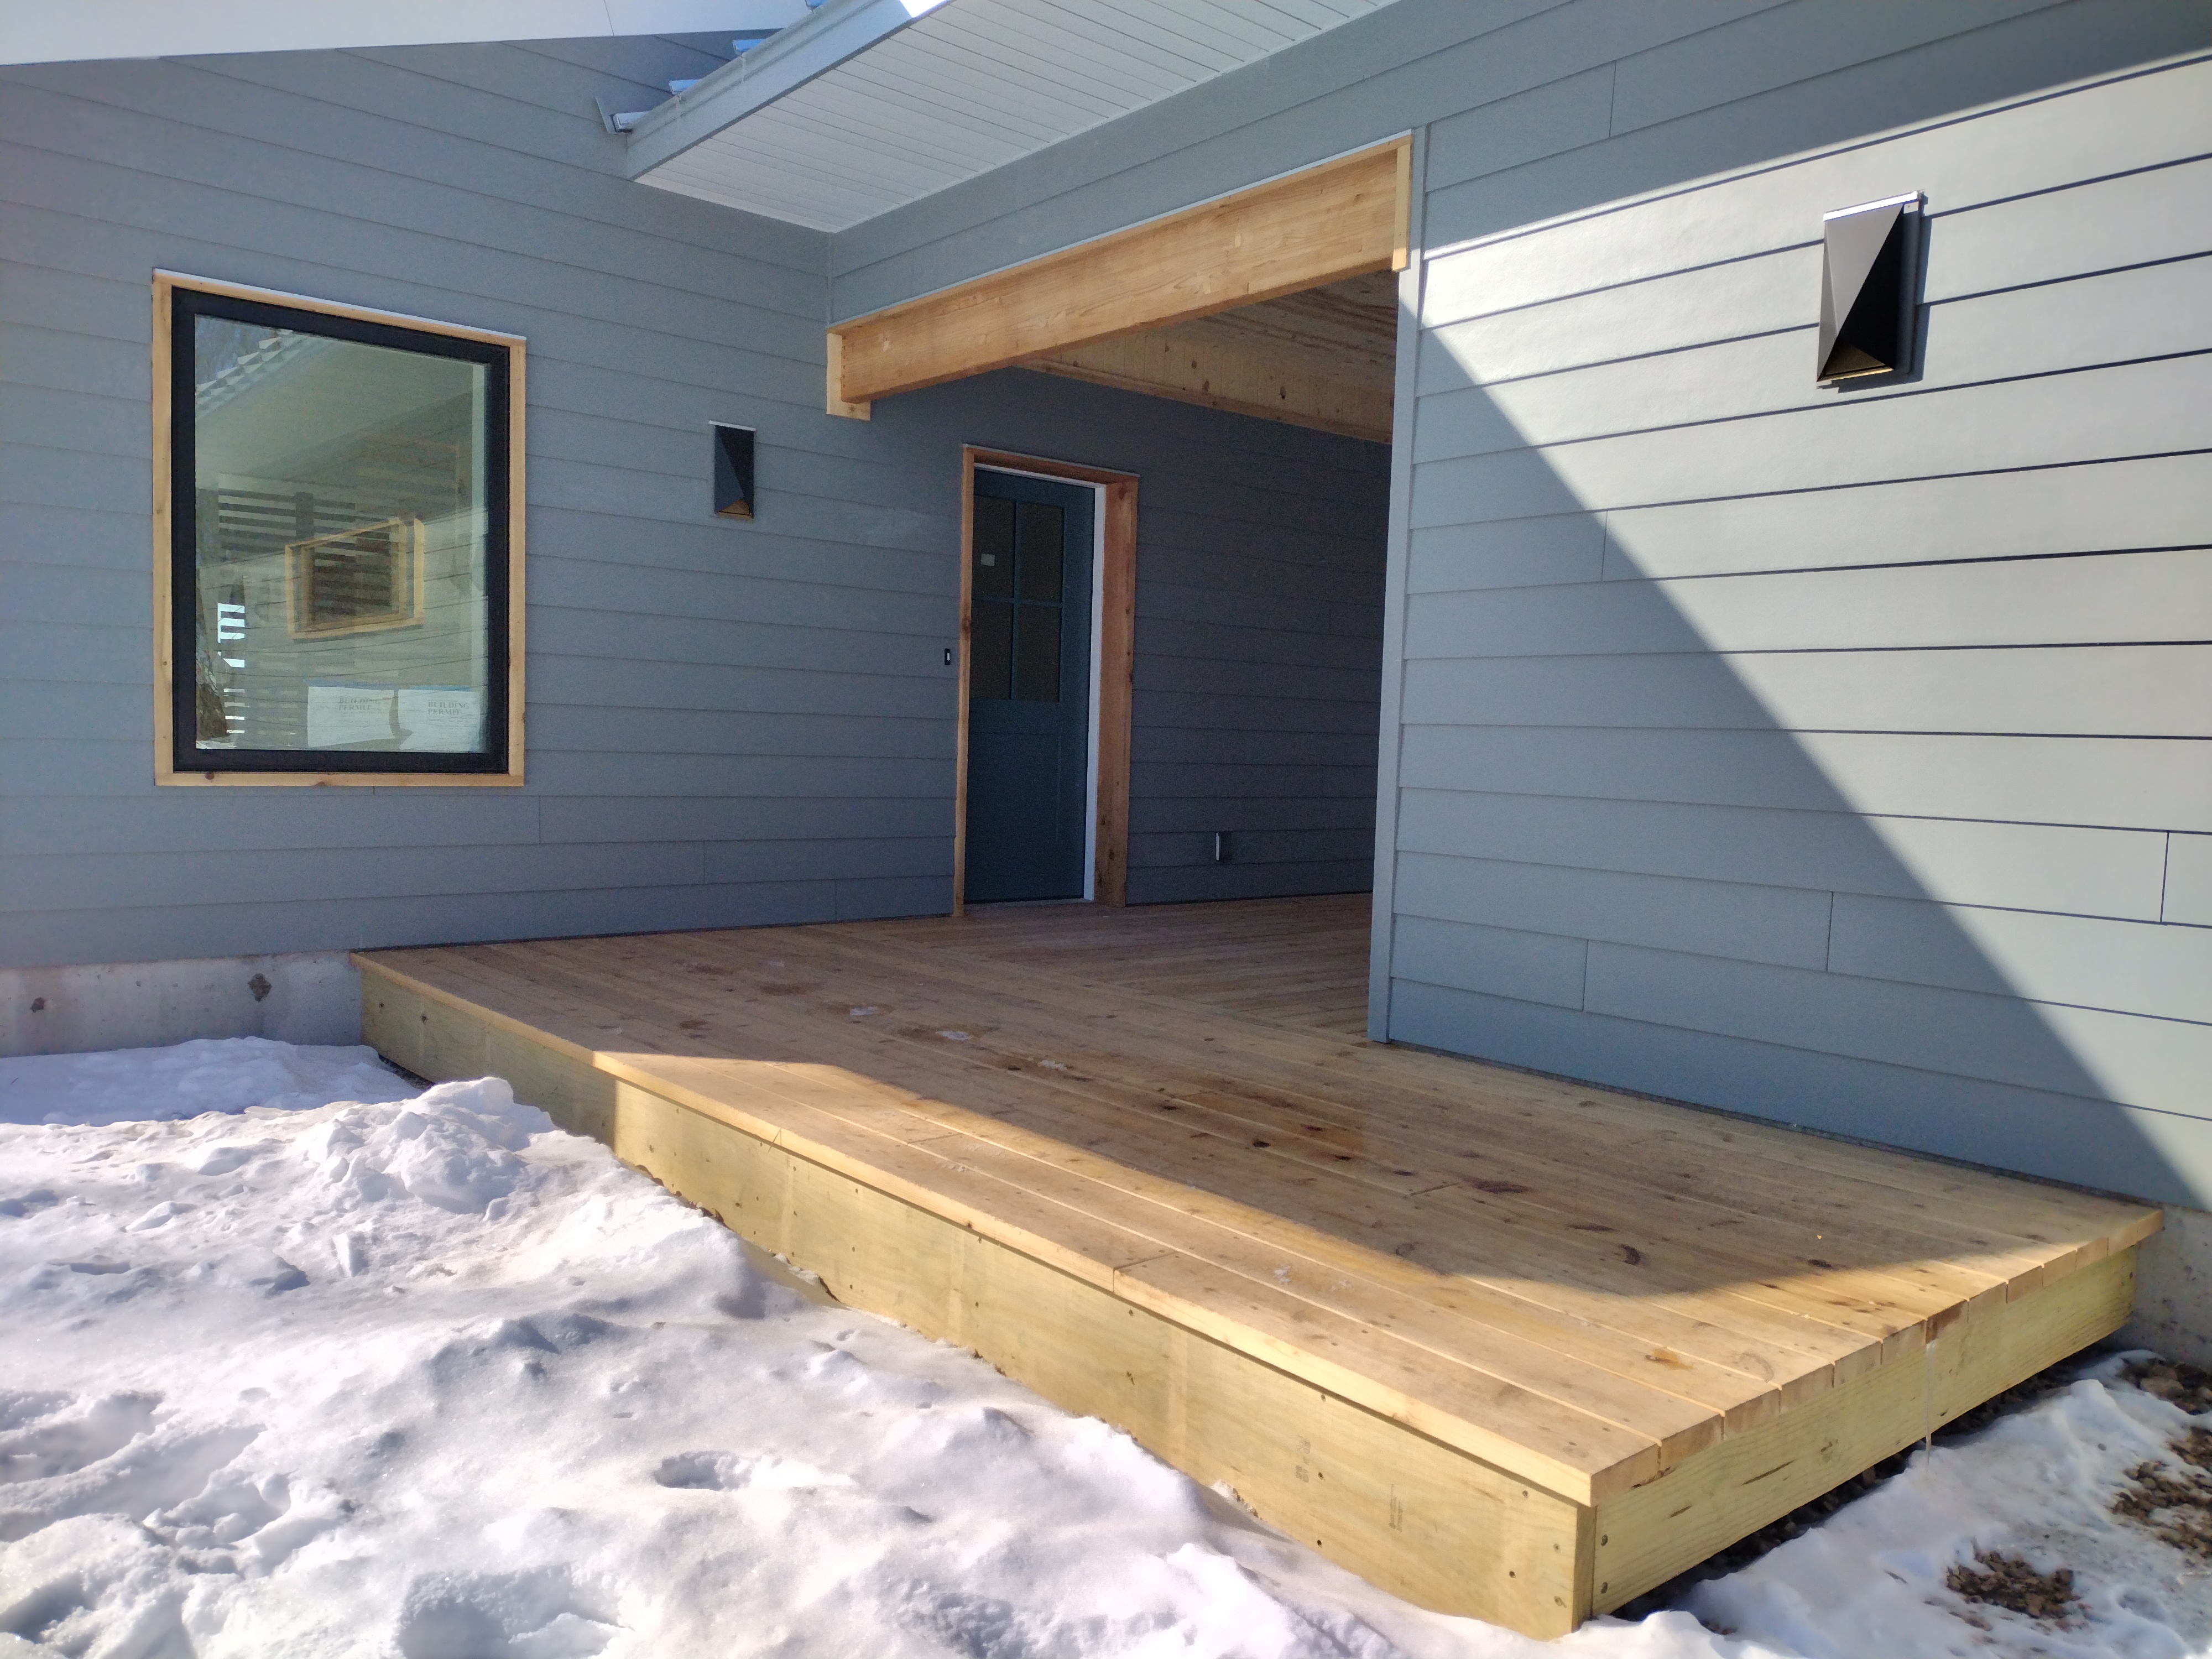
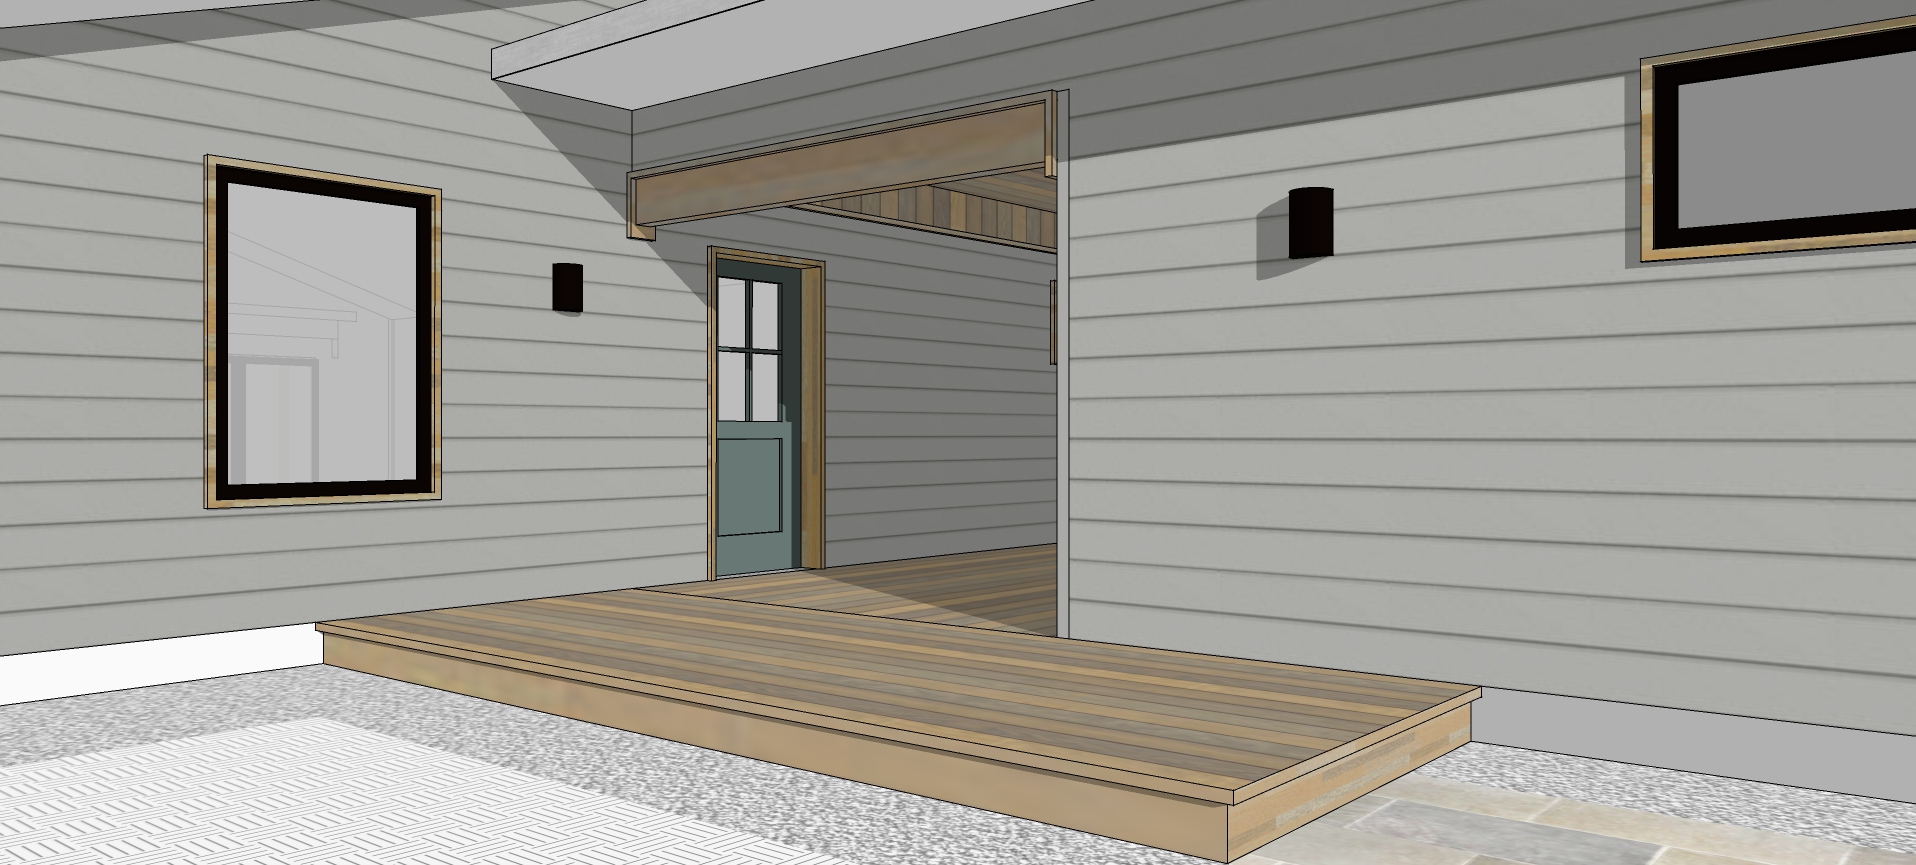
It’s rewarding to see my design from a year ago finally built (drawing on right). The breezeway turned out beautifully, and features 2×6 cedar decking and a pine shiplap ceiling. The front door is of fiberglass construction from Therma-Tru, with a factory painted finish in the same hue as the siding, but darker.
