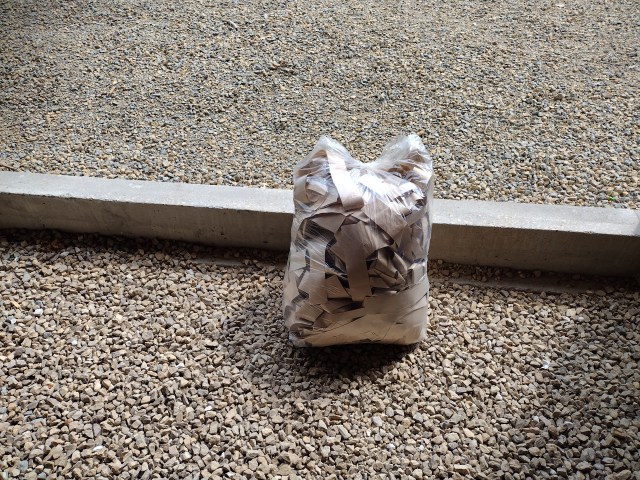
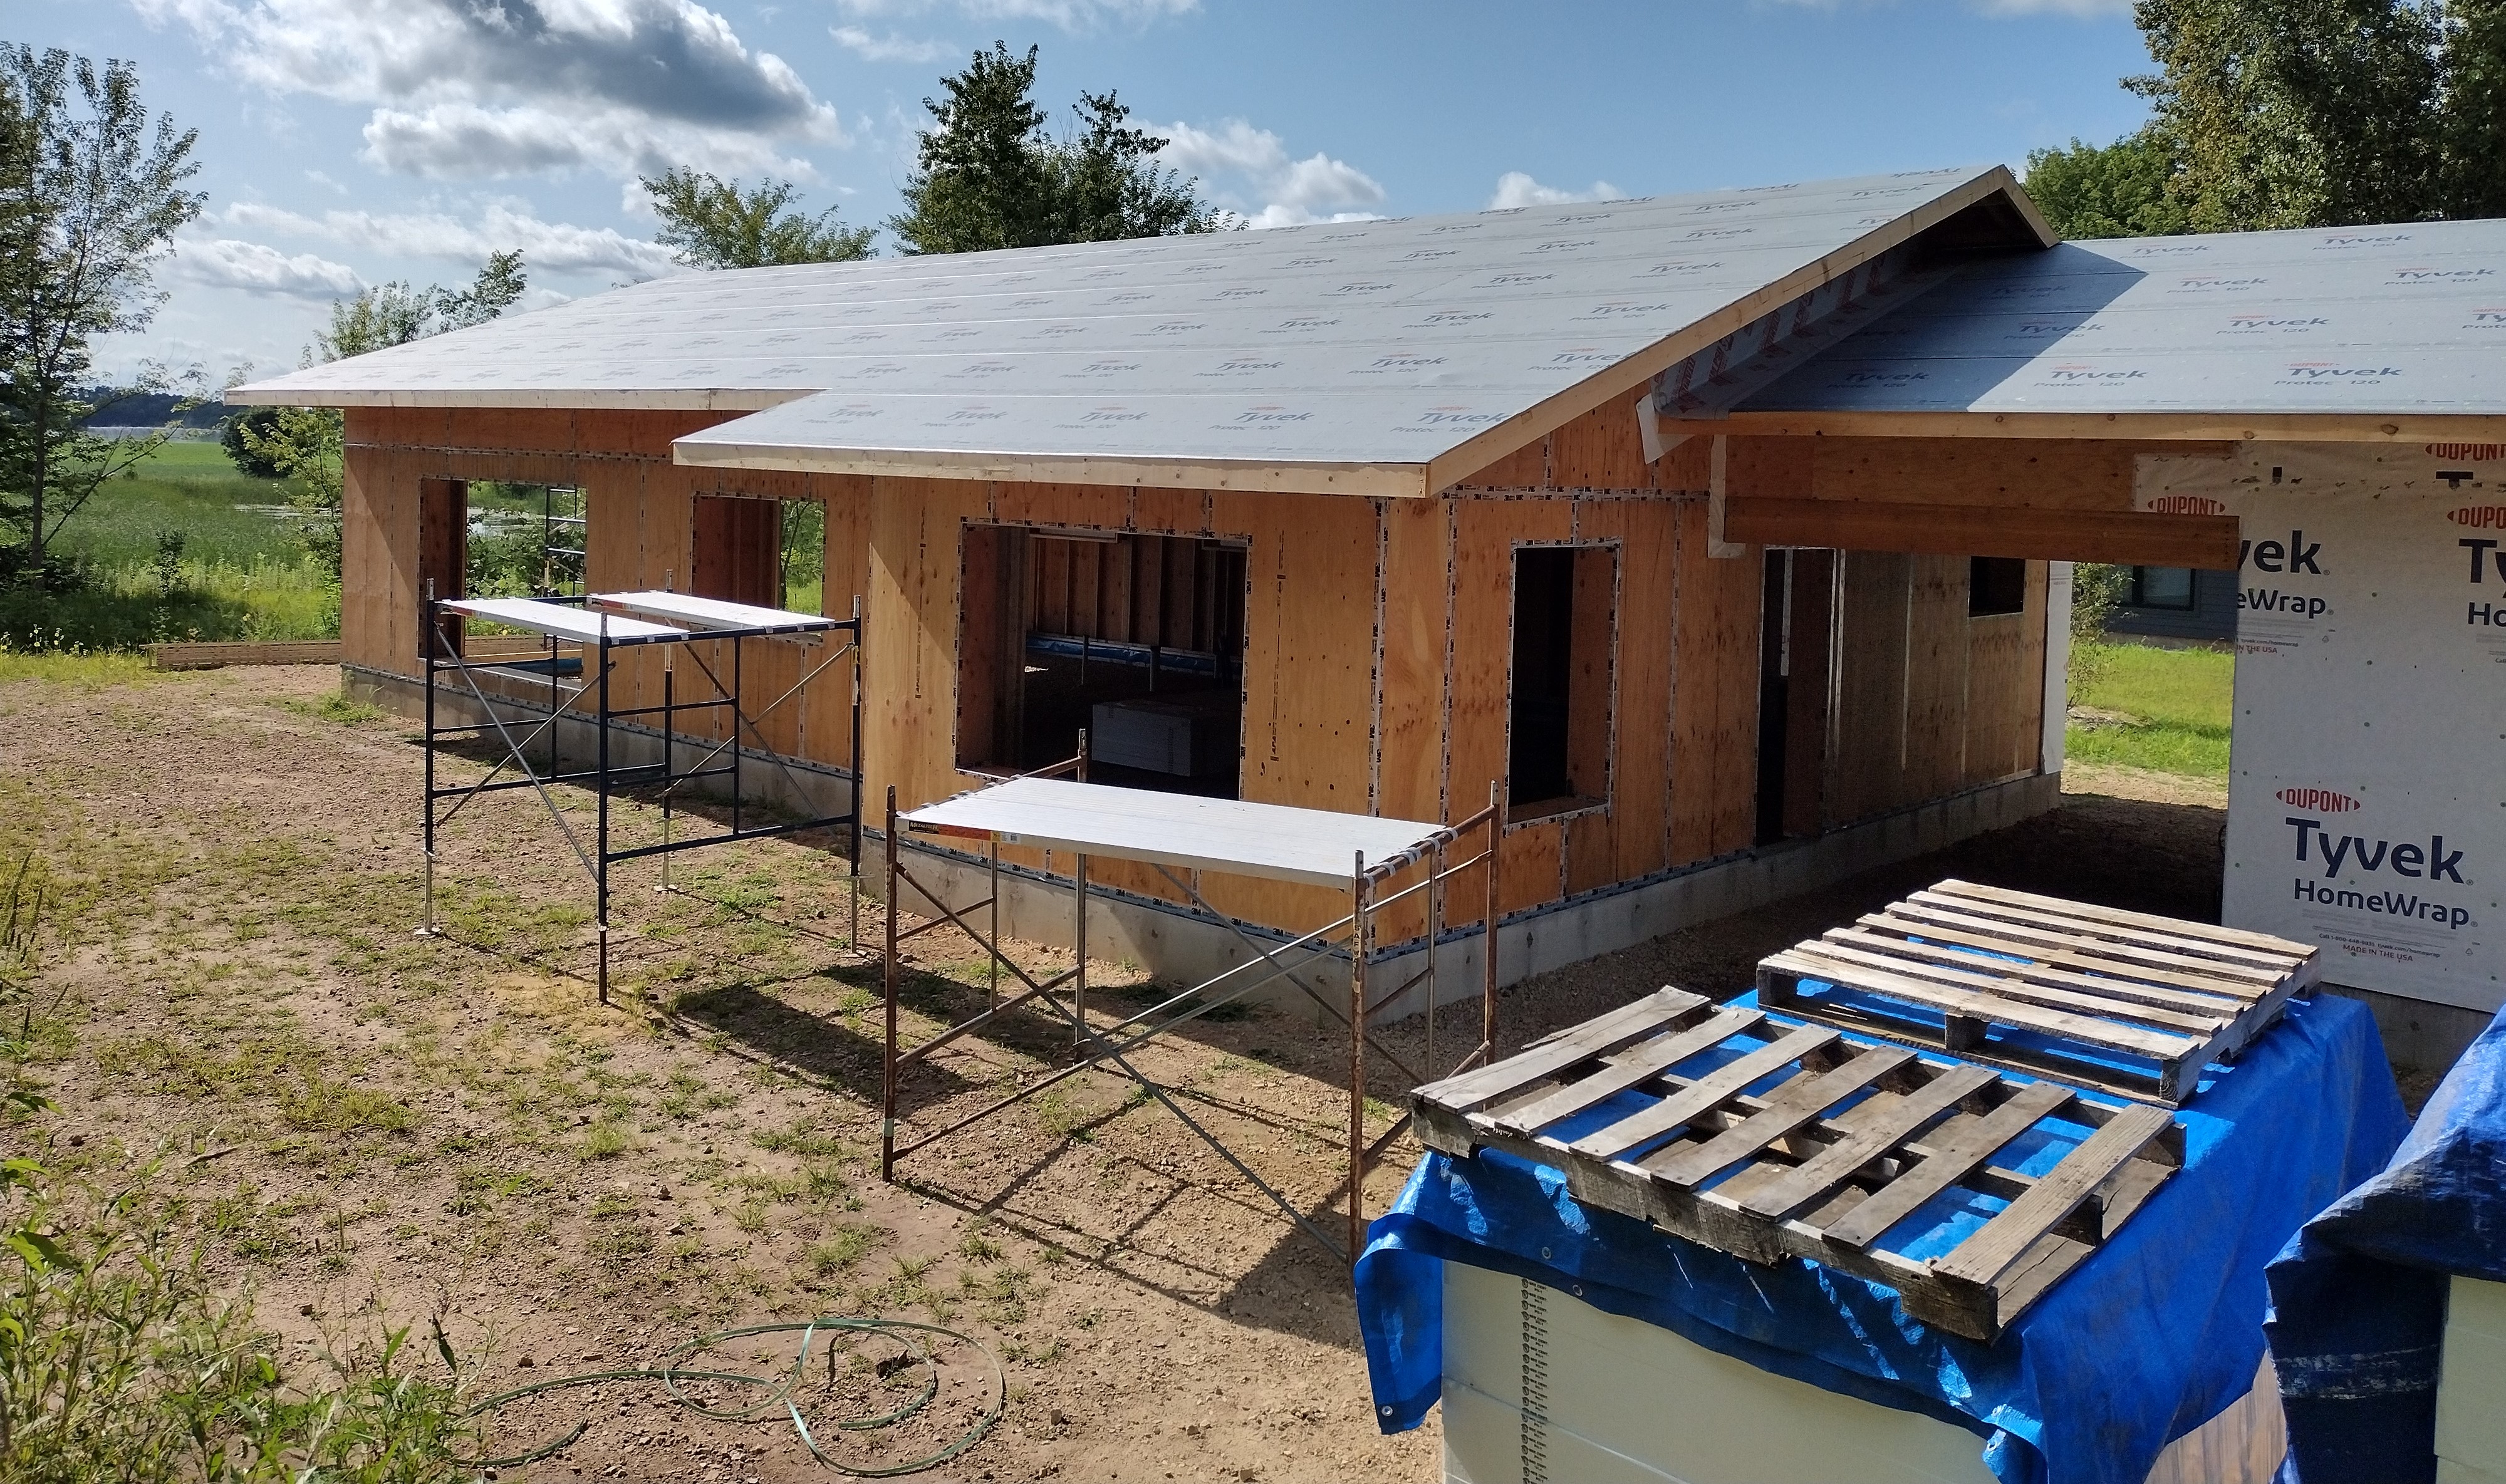
April 2, 2025: We never, ever had a dumpster at our construction site. Of course, we had our share of waste: this is America and things tend to come well packaged. But, we never resorted to a dumpster and never paid someone to haul our trash away. How did we do it?
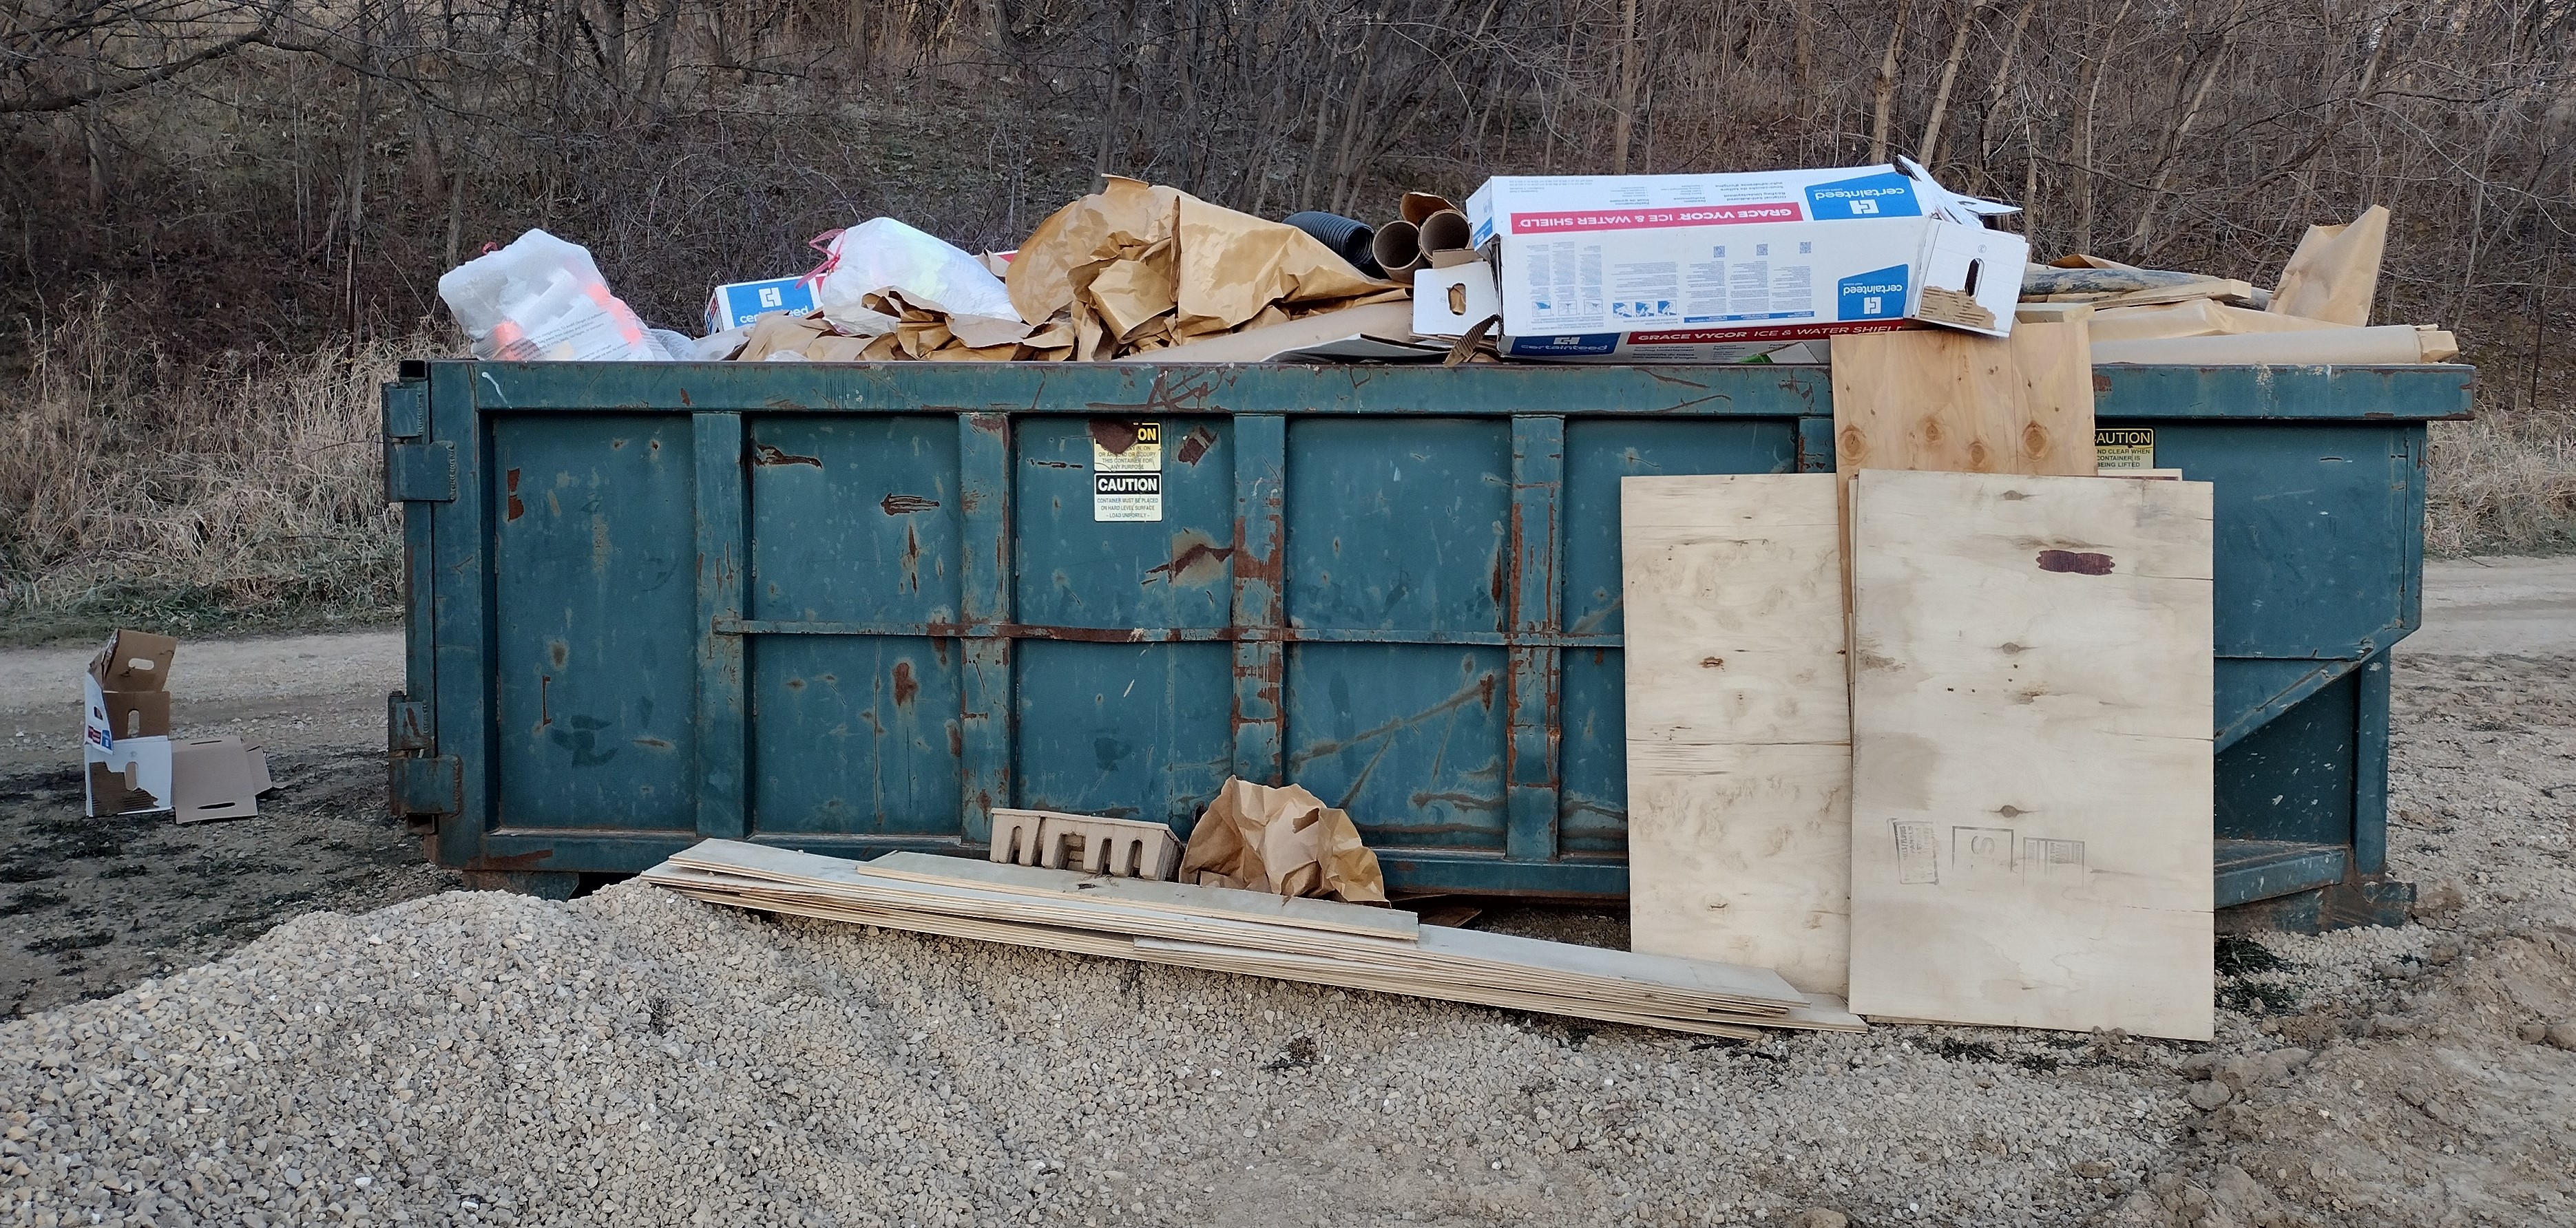
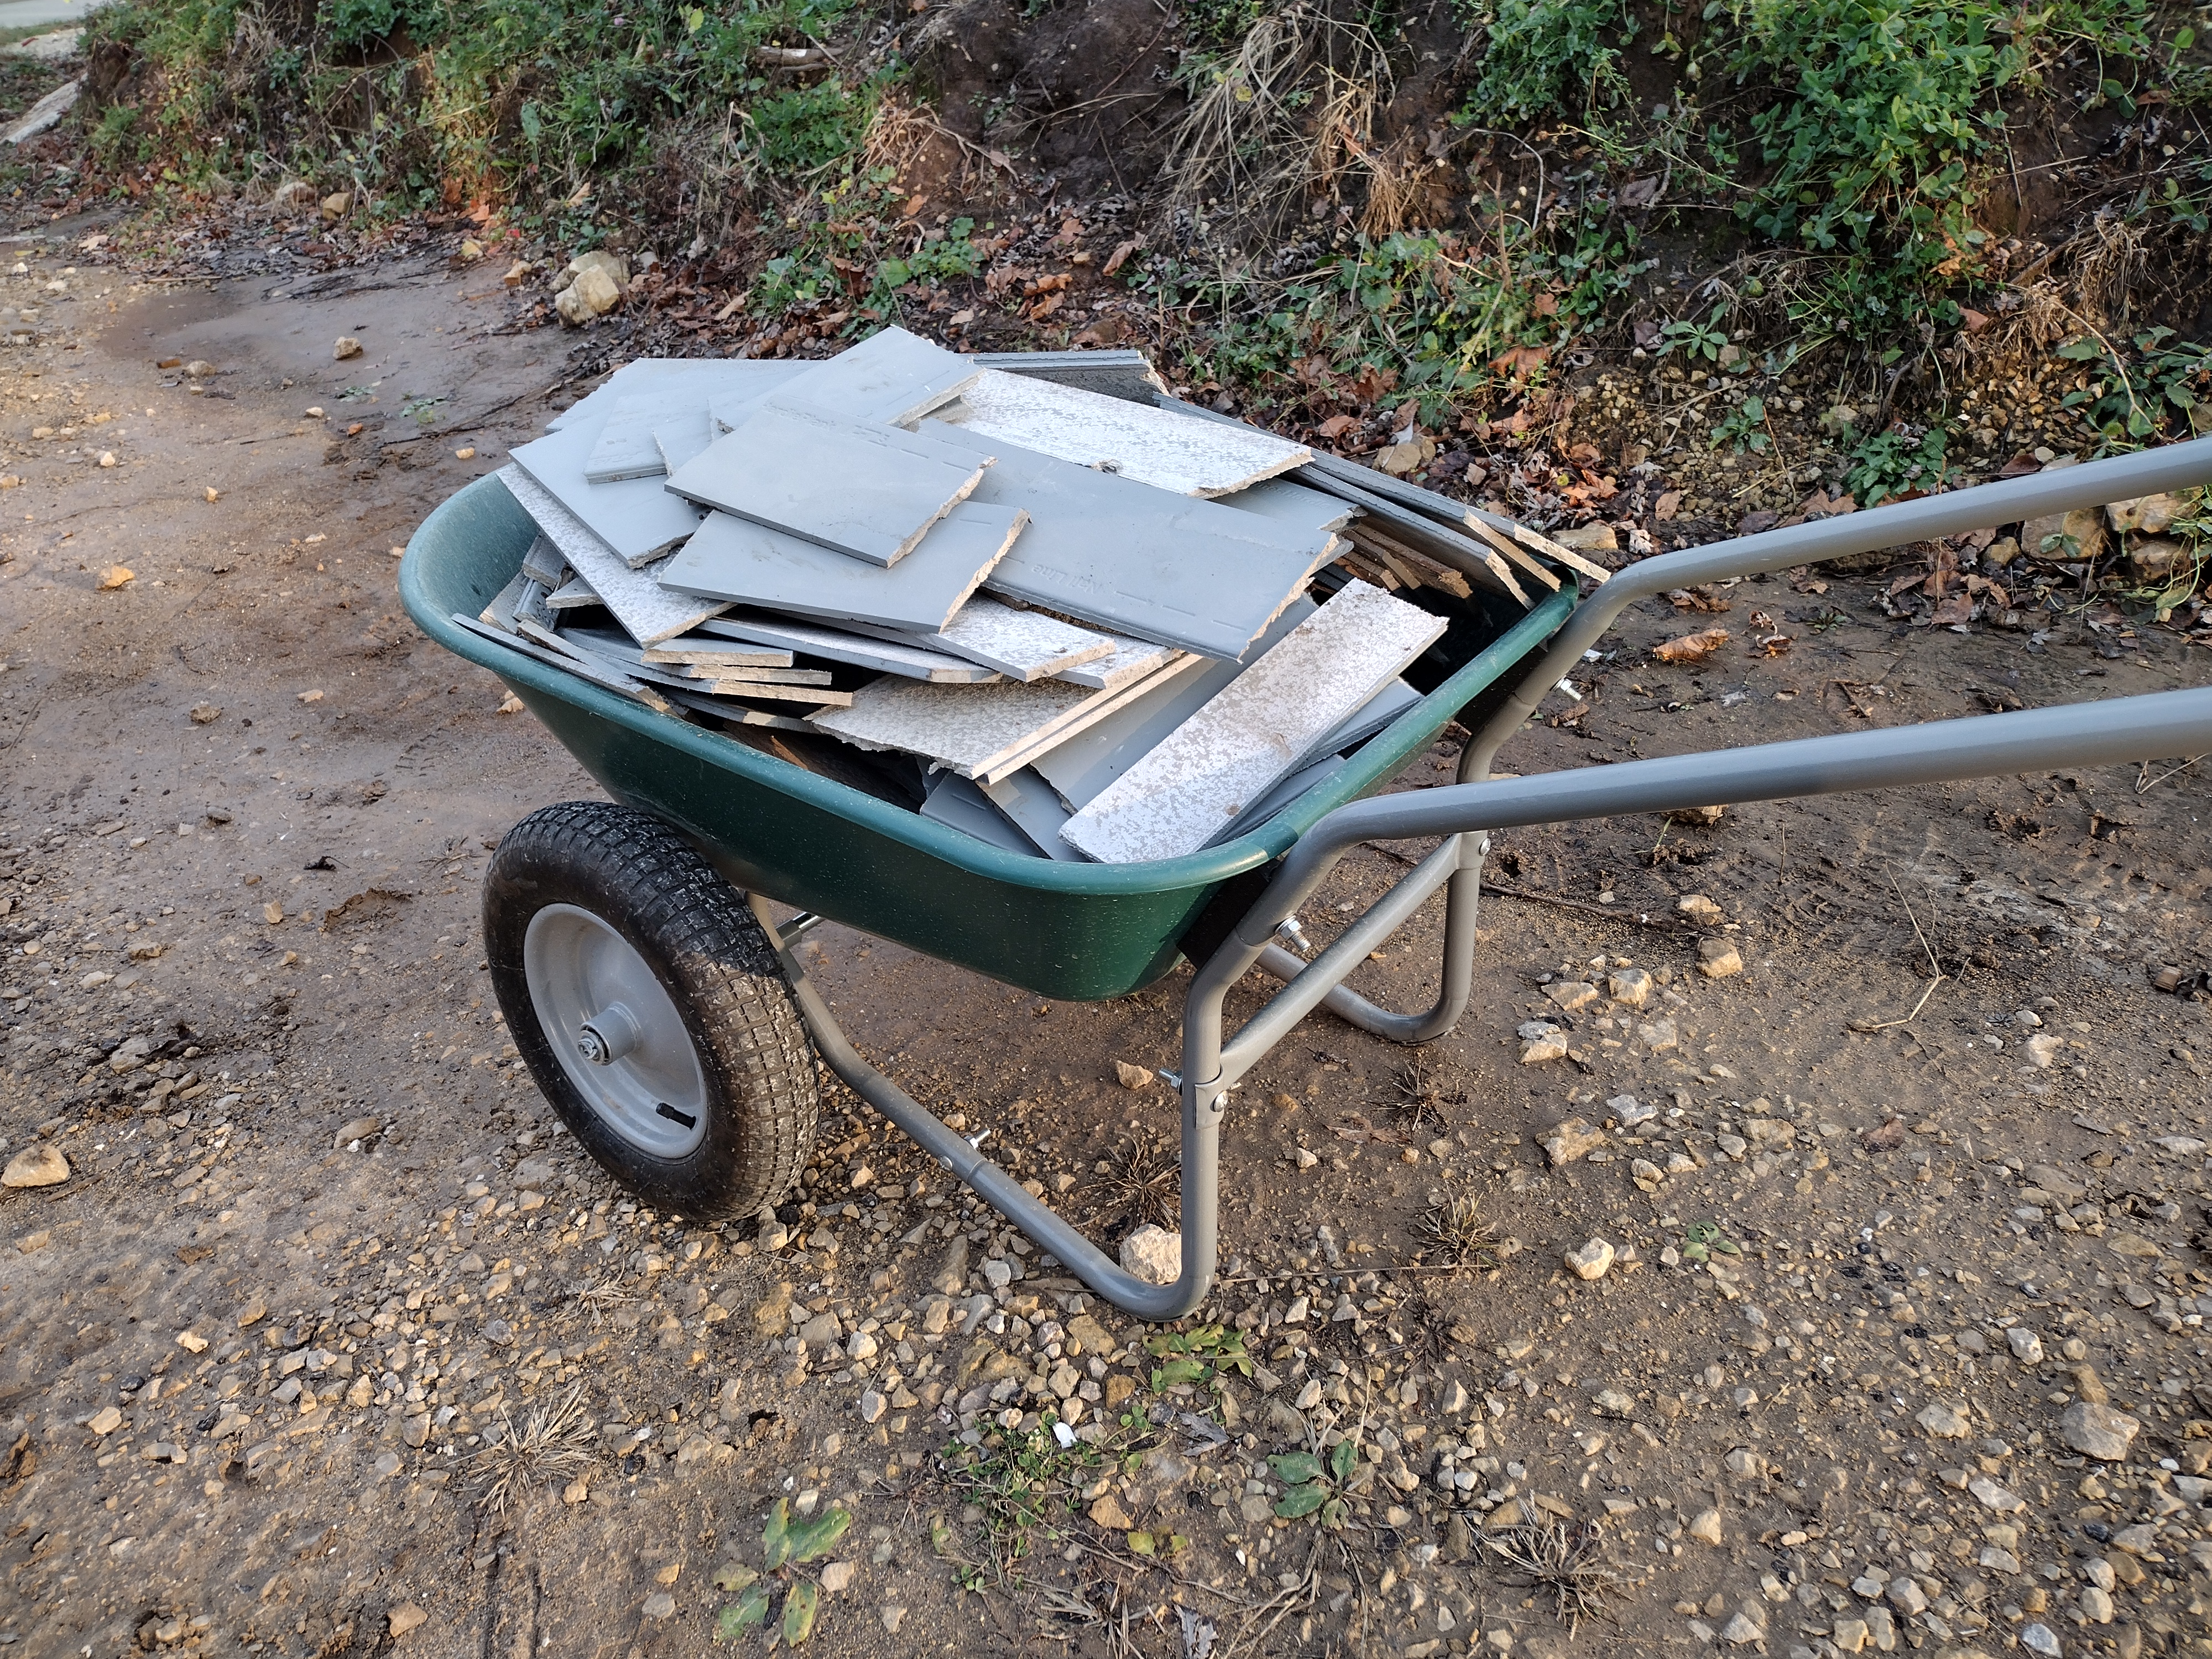
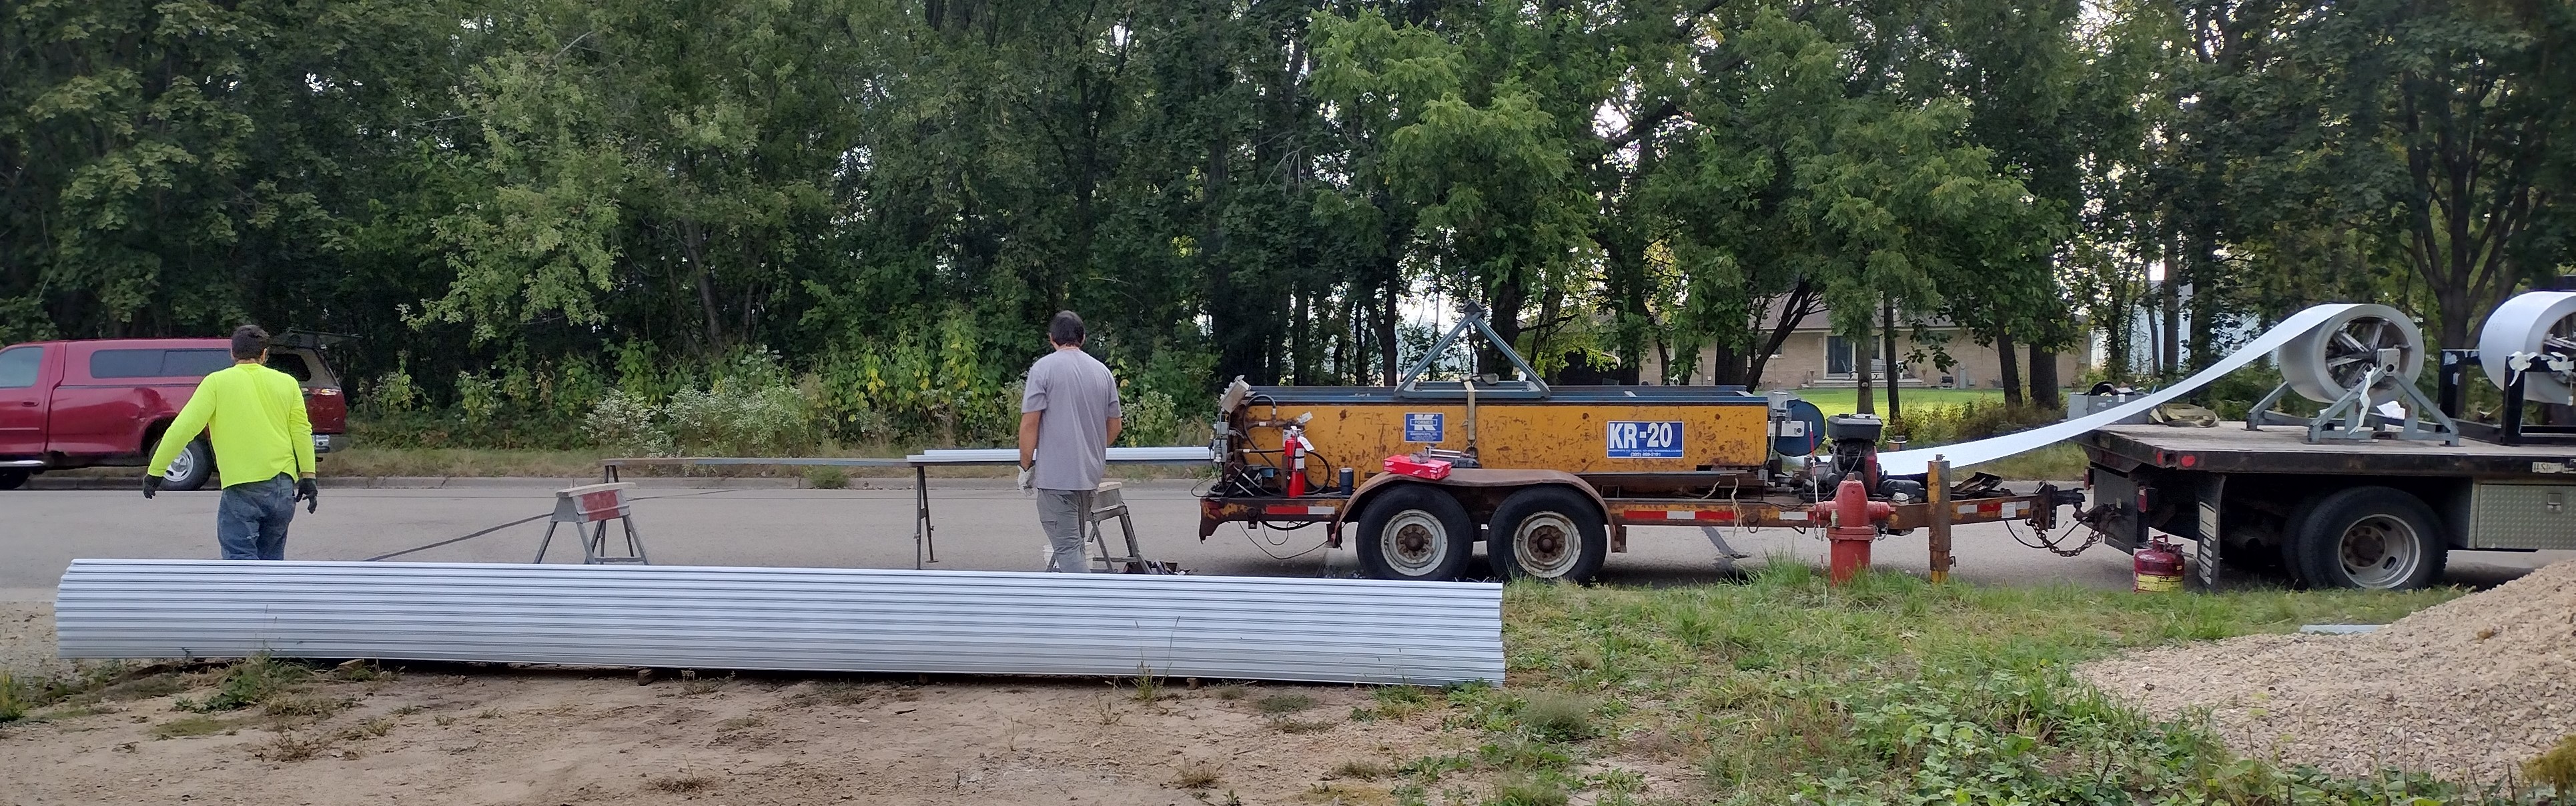
This is not ours. It’s from a new home construction site similar in size and type to ours. The Environmental Protection Agency has estimated that the construction of a typical 2000 square foot new home generates 4 tons of waste, or about 4 pounds per square foot. Four tons can fit into a typical 40 yard dumpster.
We saved at least $850 by not renting a dumpster.
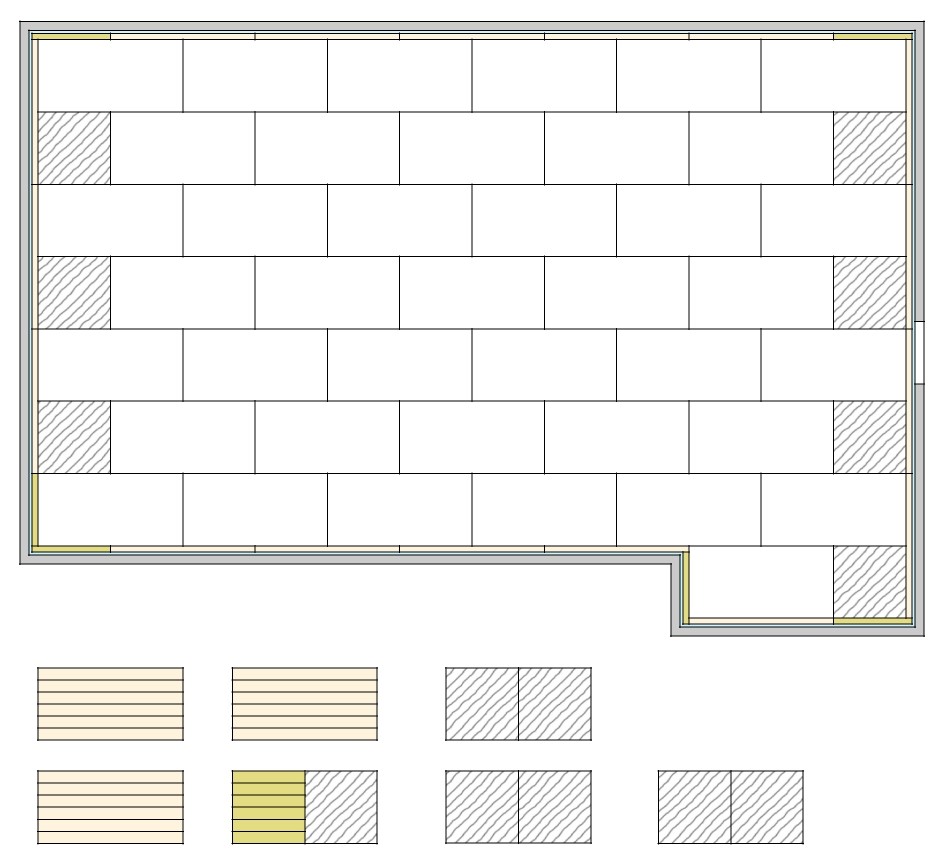
Preventing waste starts with a design that’s simple in shape and proportioned to work with conventional building materials that are sold in 2 foot increments (think plywood, dimensional lumber, and siding). Before ordering materials, I worked out quantities and layouts so that instead of picking off the top of the pile, the crew had a clear plan for what pieces went where. Here is the Cut List for the under slab foam insulation. White 4×8 sheets are to be laid down full. Hatched 4×4 sheets offset the pattern so that edge seams jog for enhanced air-tightness. Yellow sheets are to be ripped for the perimeter. See my blog post Insulated Concrete Slabs.
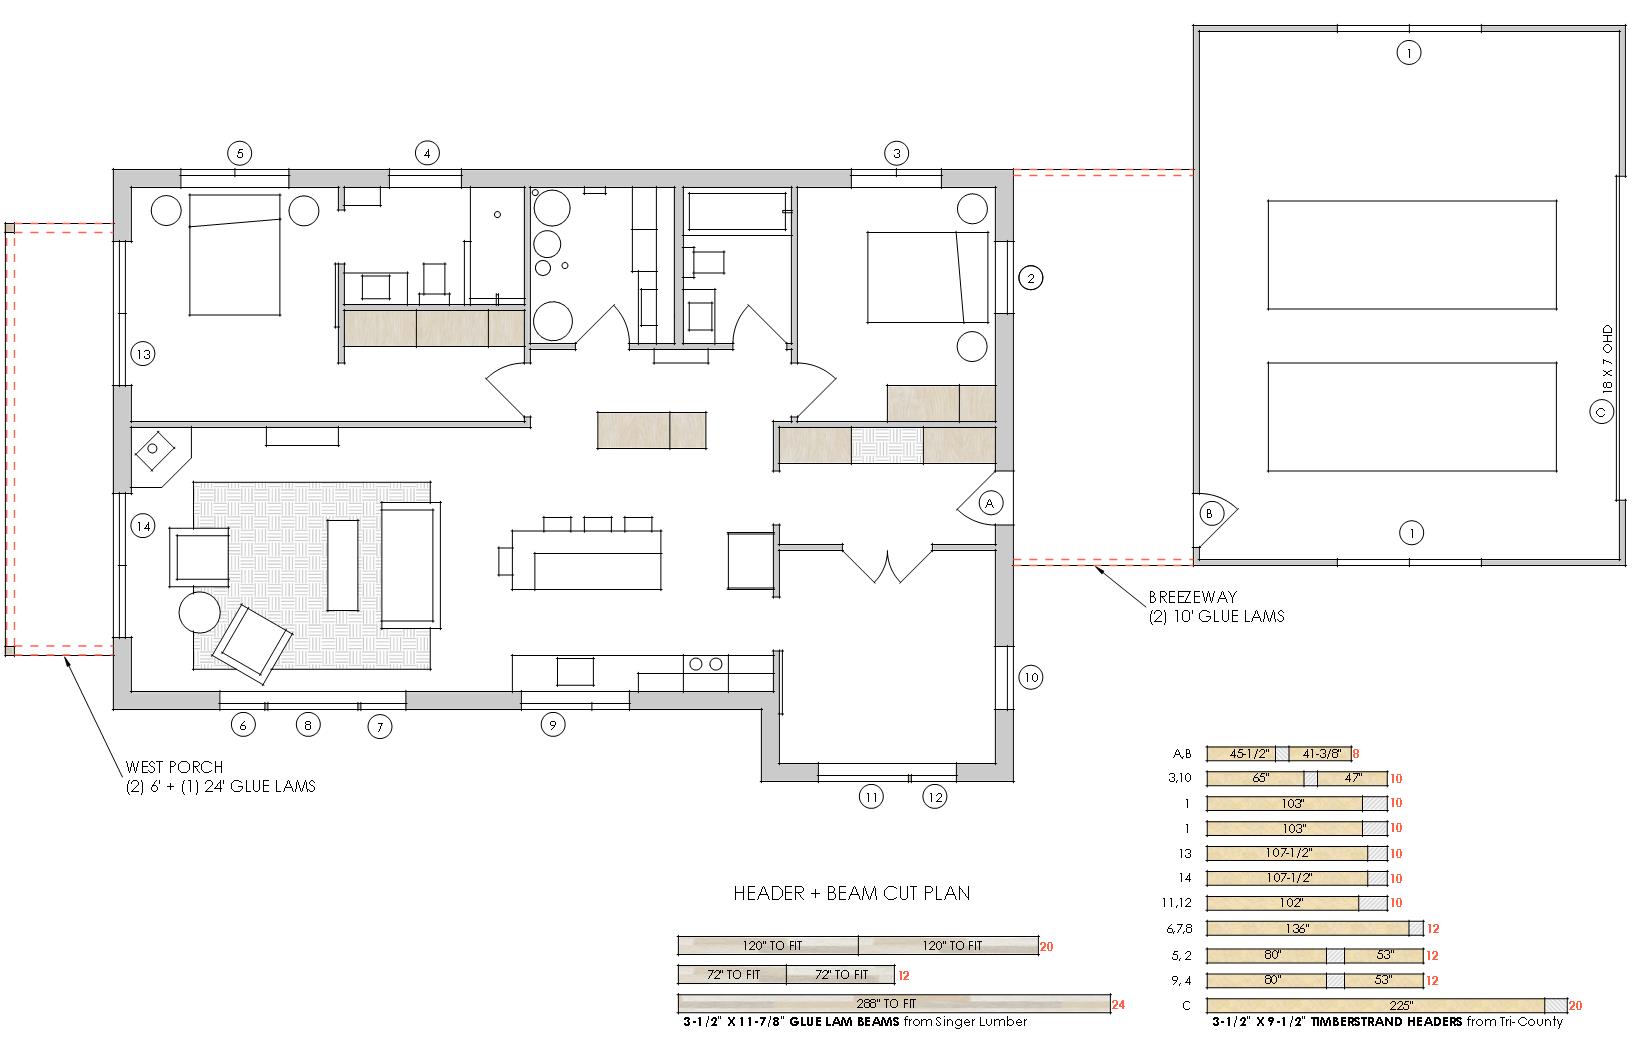
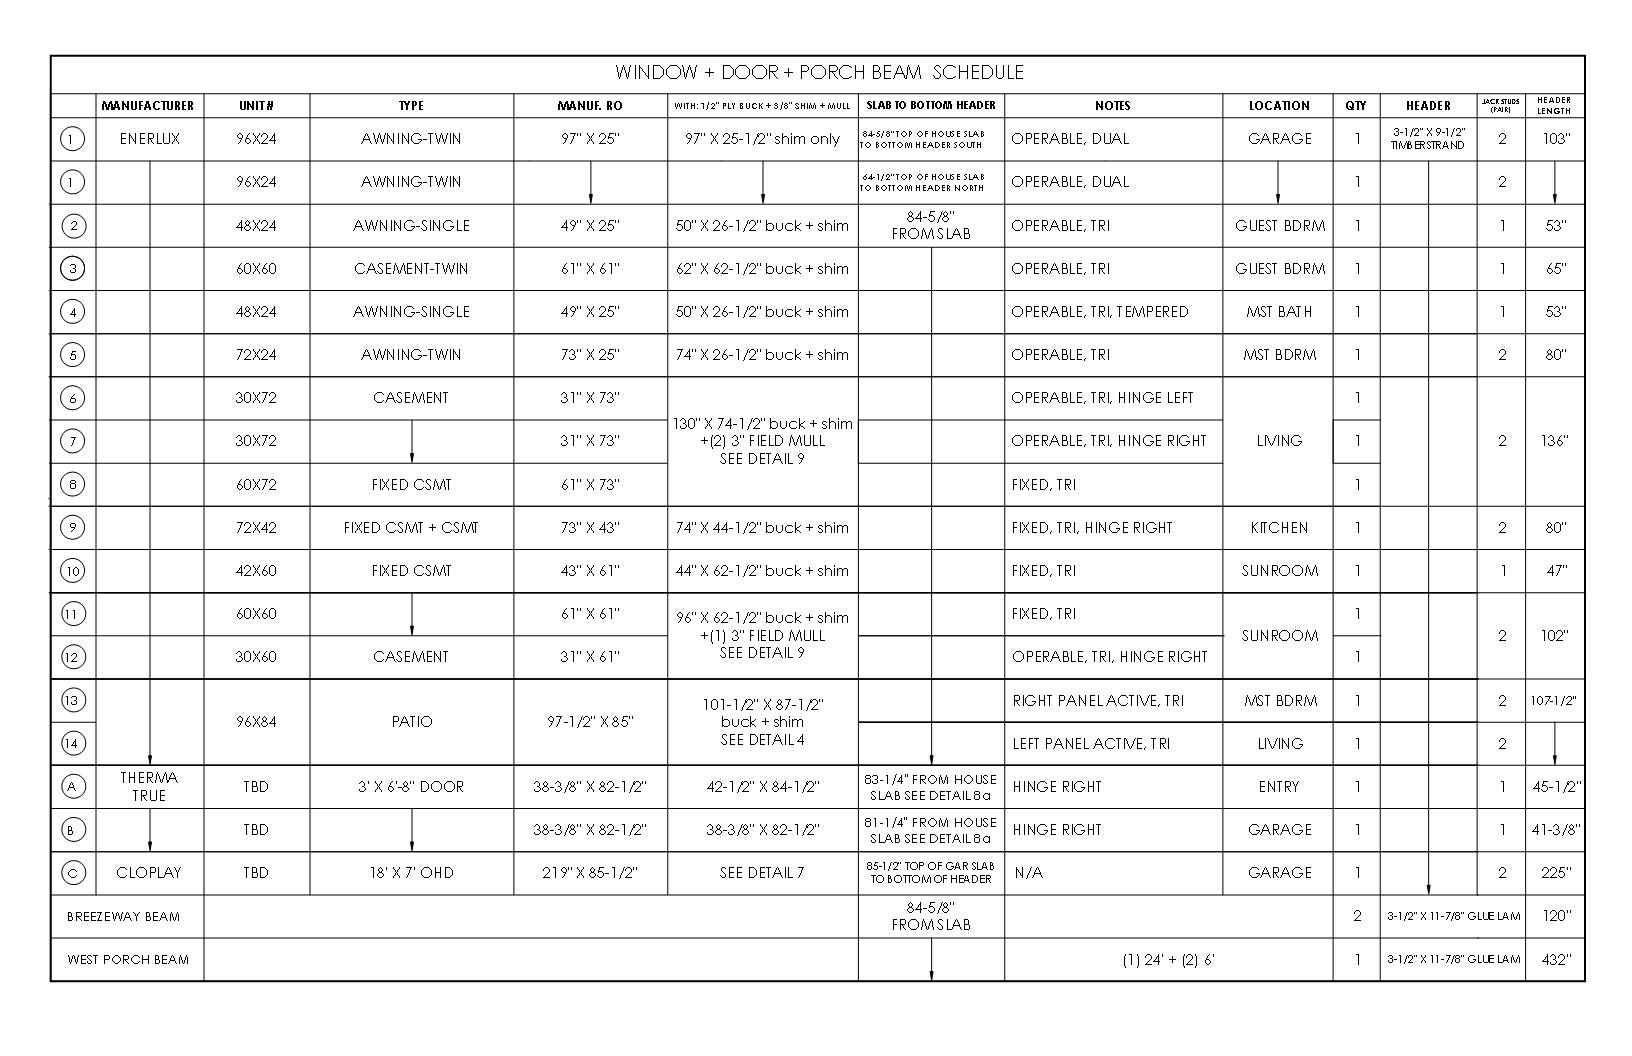
Another Cut Sheet shows the Engineered Lumber headers and porch beams keyed to the floor plan for proper placement. These babies are expensive, so I carefully worked out what lengths to order. The lead time scared me: the carpenters couldn’t make any mistakes or we’d be set back several weeks. This example of “just-in-time” material sourcing can reduce waste by keeping everyone on their toes and by minimizing damage to material that sits around the job site too long.See my blog post Exterior Framing.
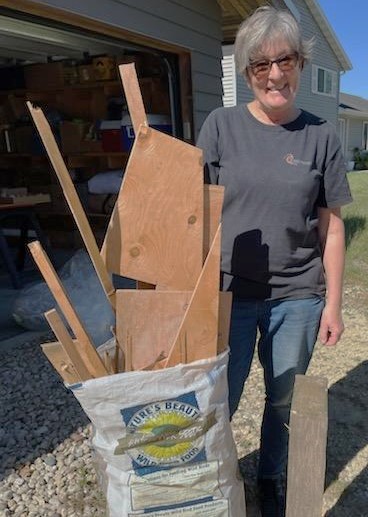
The garage became the holding place for scrap wood. We had a lot of 2×4 “shorts” partly because instead of running a second top plate for the 9 foot tall interior partition walls, I ordered 10 footers—still a savings in lumber. We used some shorts for blocking and to build insulated can light boxes. The rest were gifted to friends who heat with wood in the wintertime or who like camp fires.
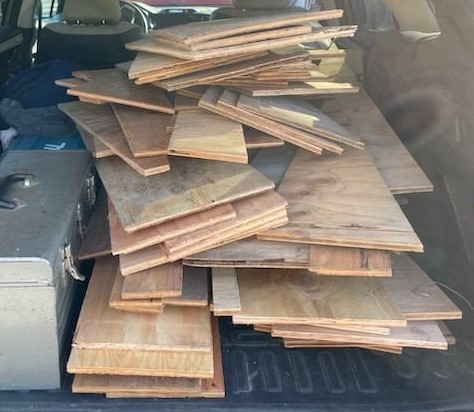
The HVAC and plumbing contractors requested some kind of solid backing in the mechanical room to hang their equipment. We used plywood scraps for blocking between the studs, prior to hanging drywall. We stockpiled every scrap until the bitter end, when we finally hauled them off to a nearby recycling facility.
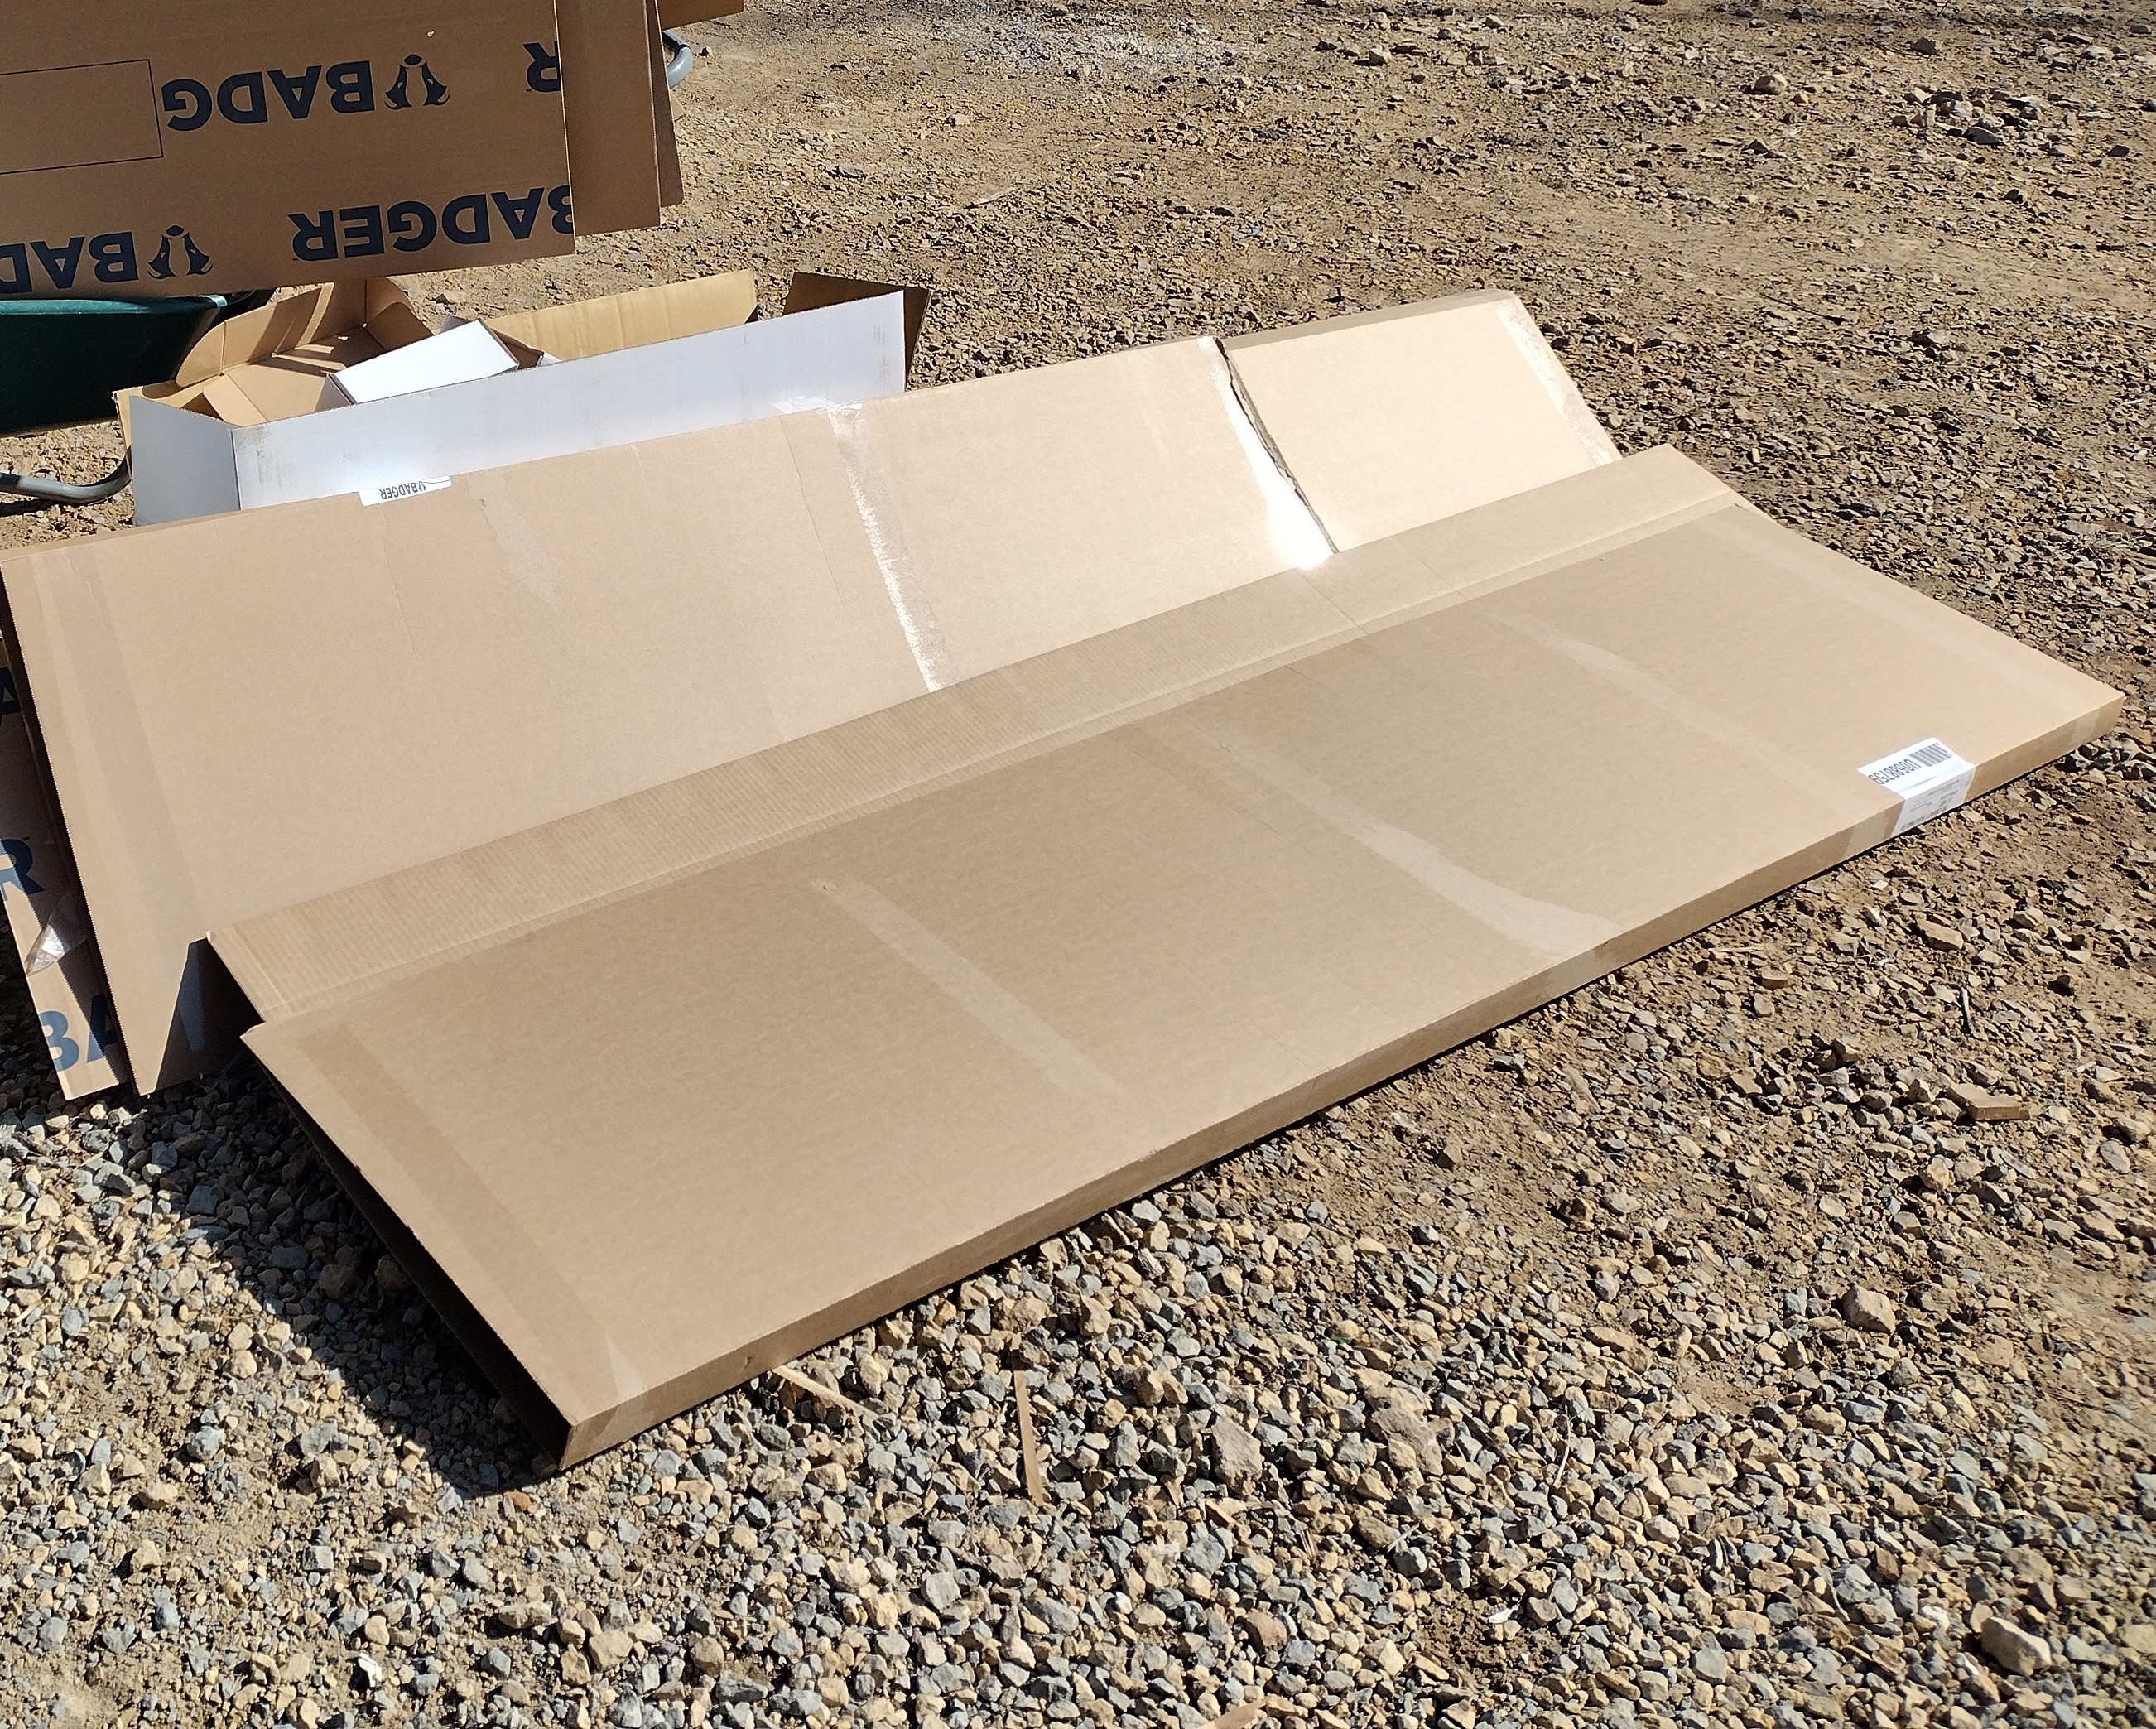
Cardboard is a no-brainer. There was a lot of it. Every box was broken down and set out for recycling.
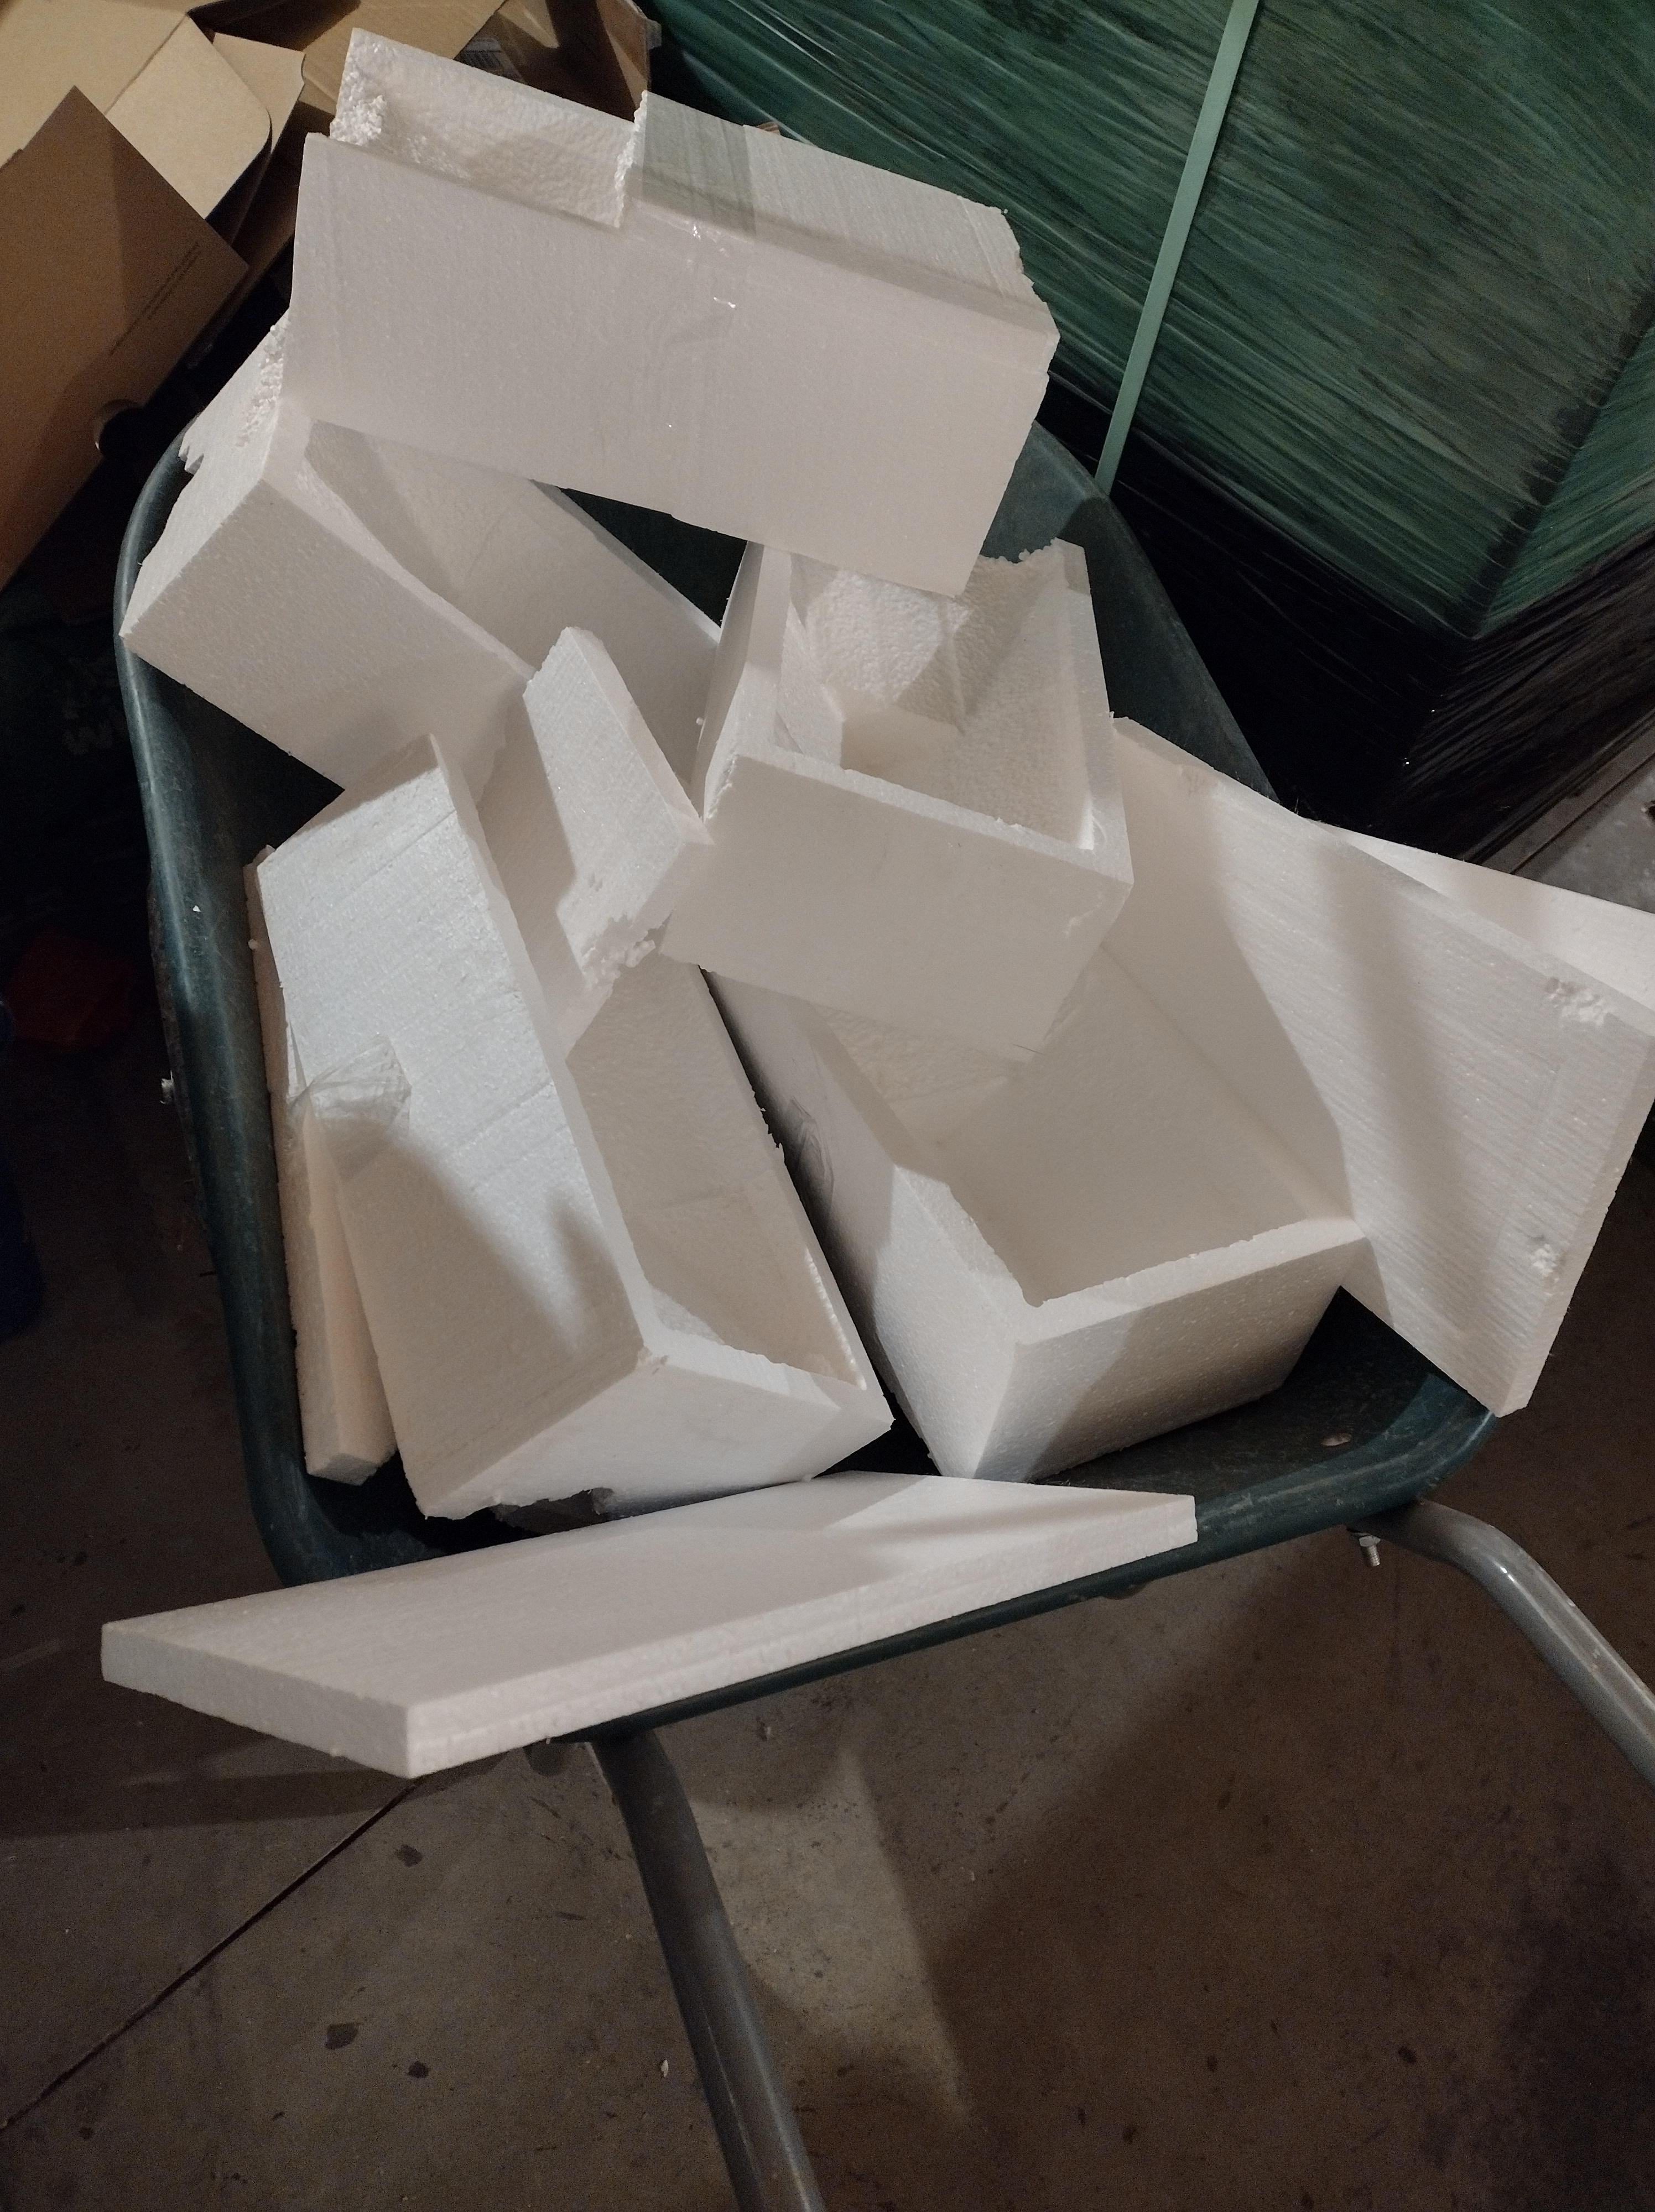
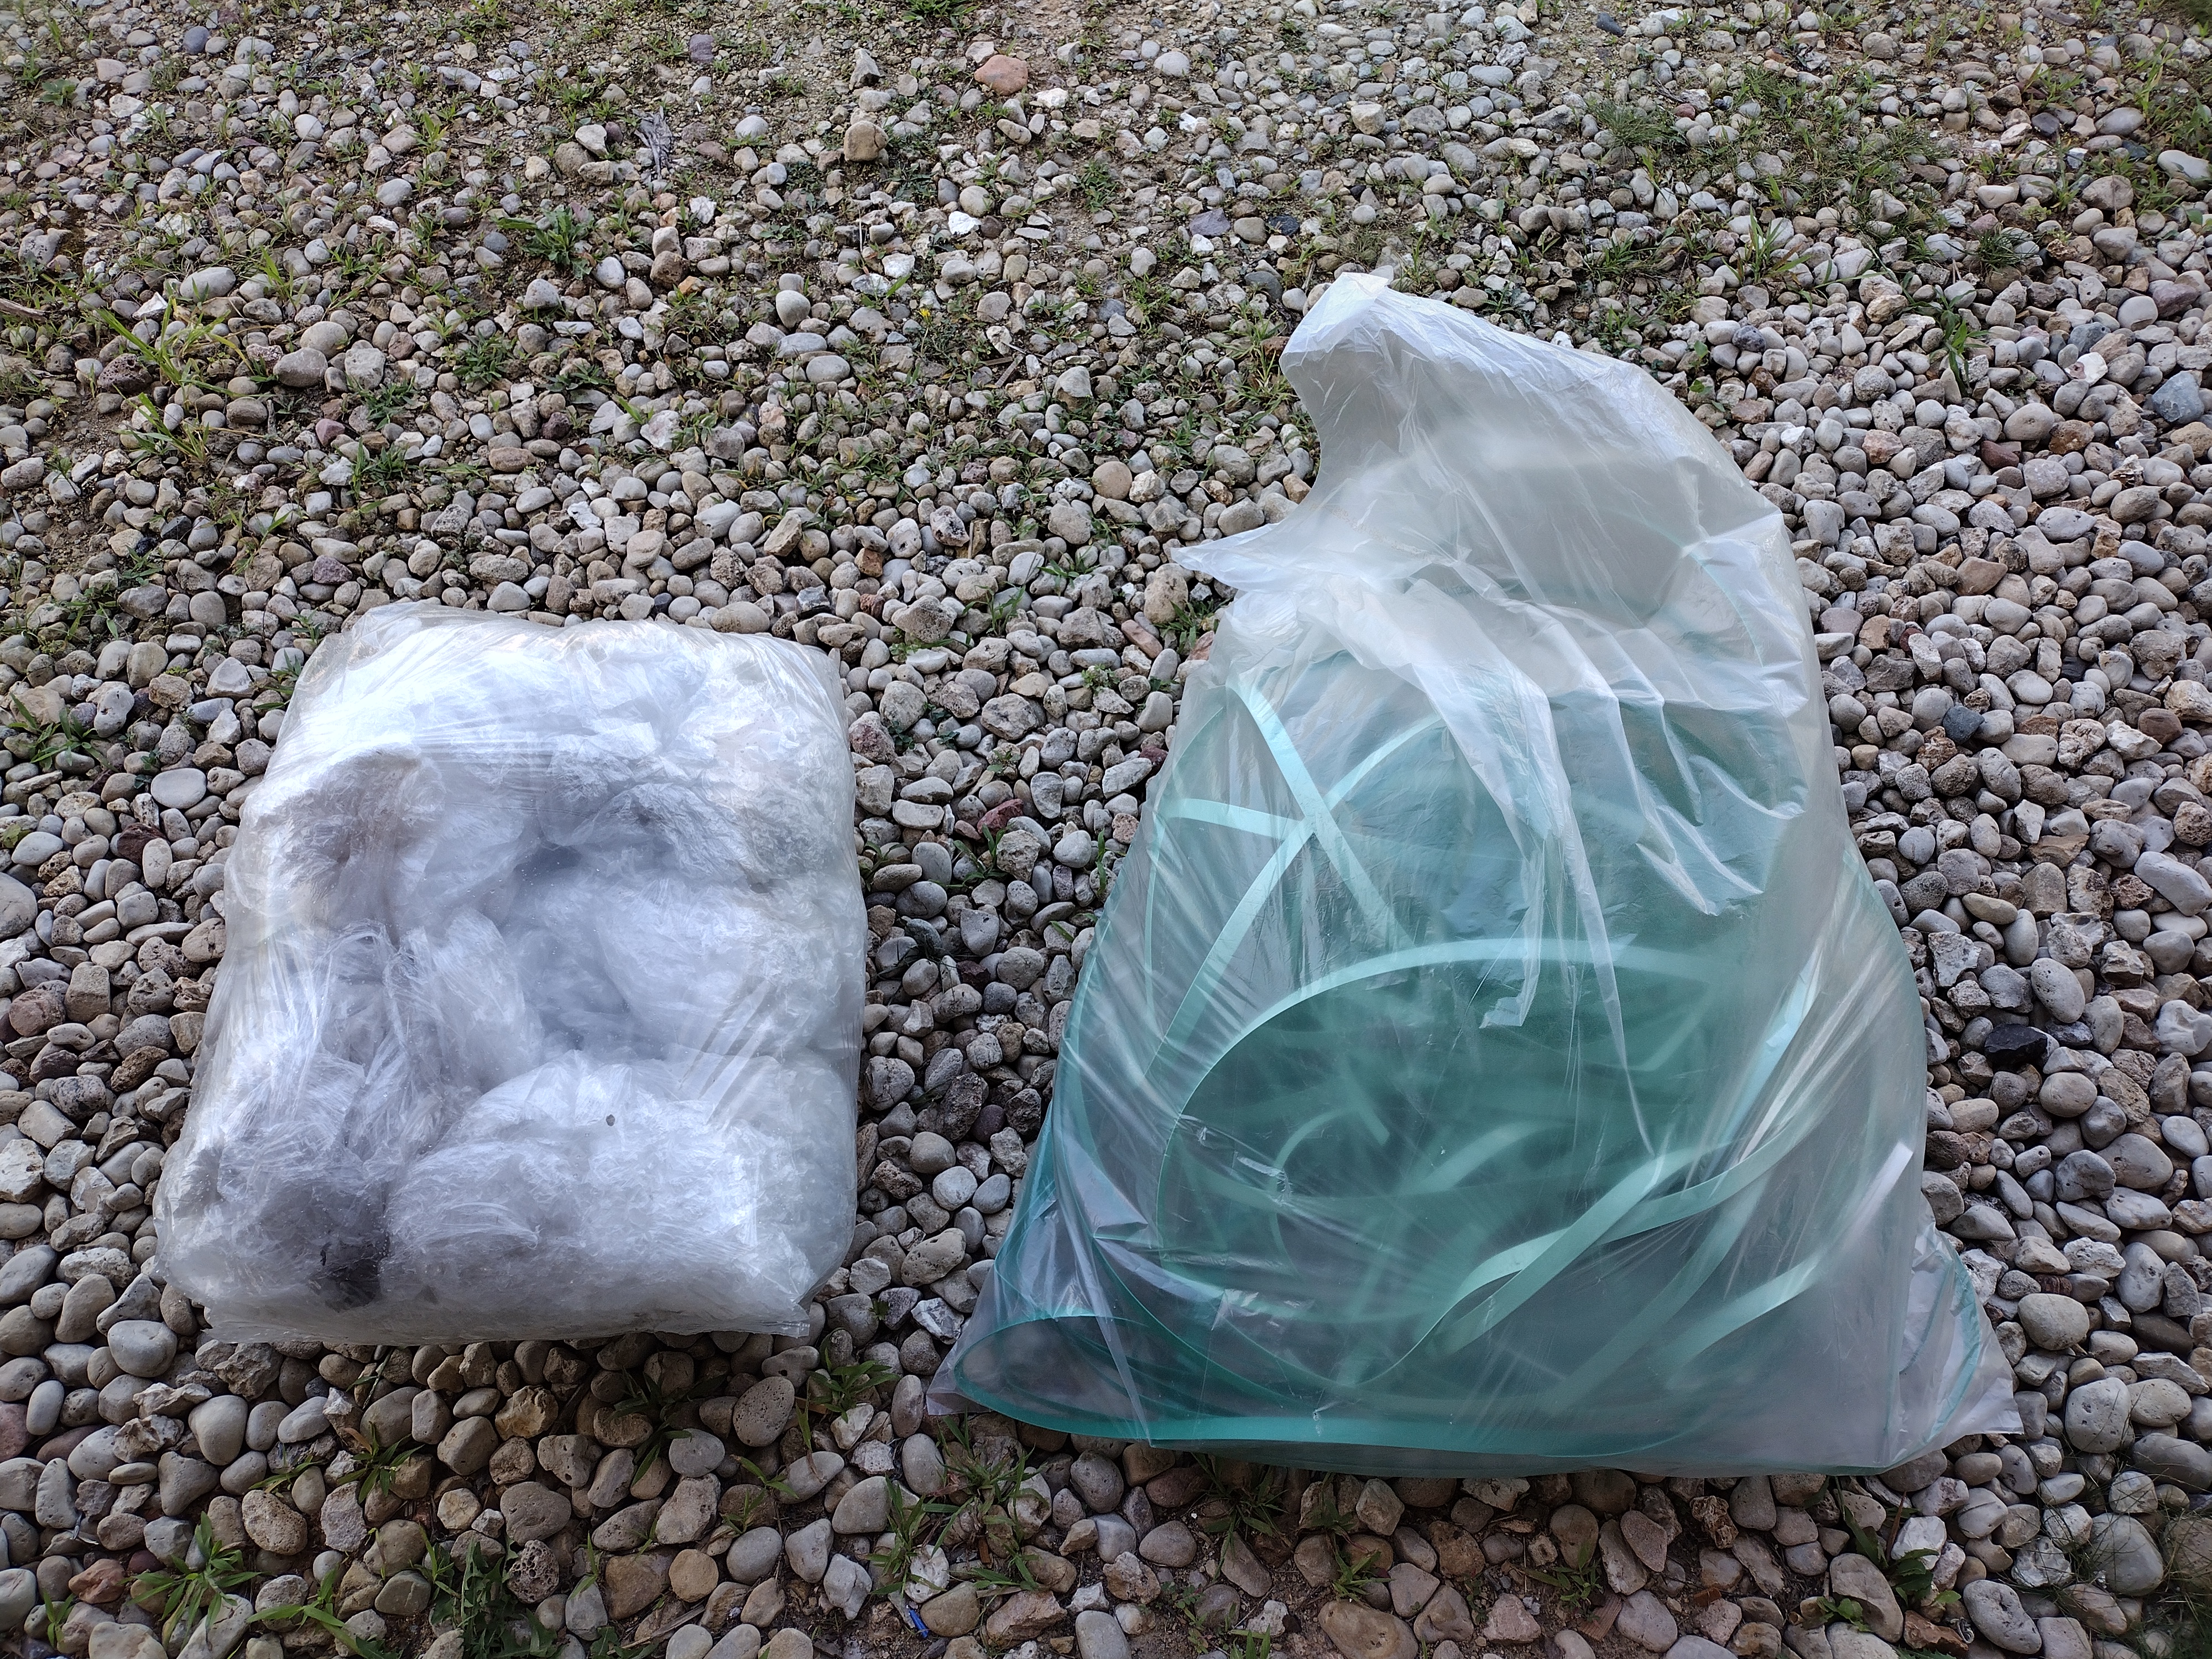
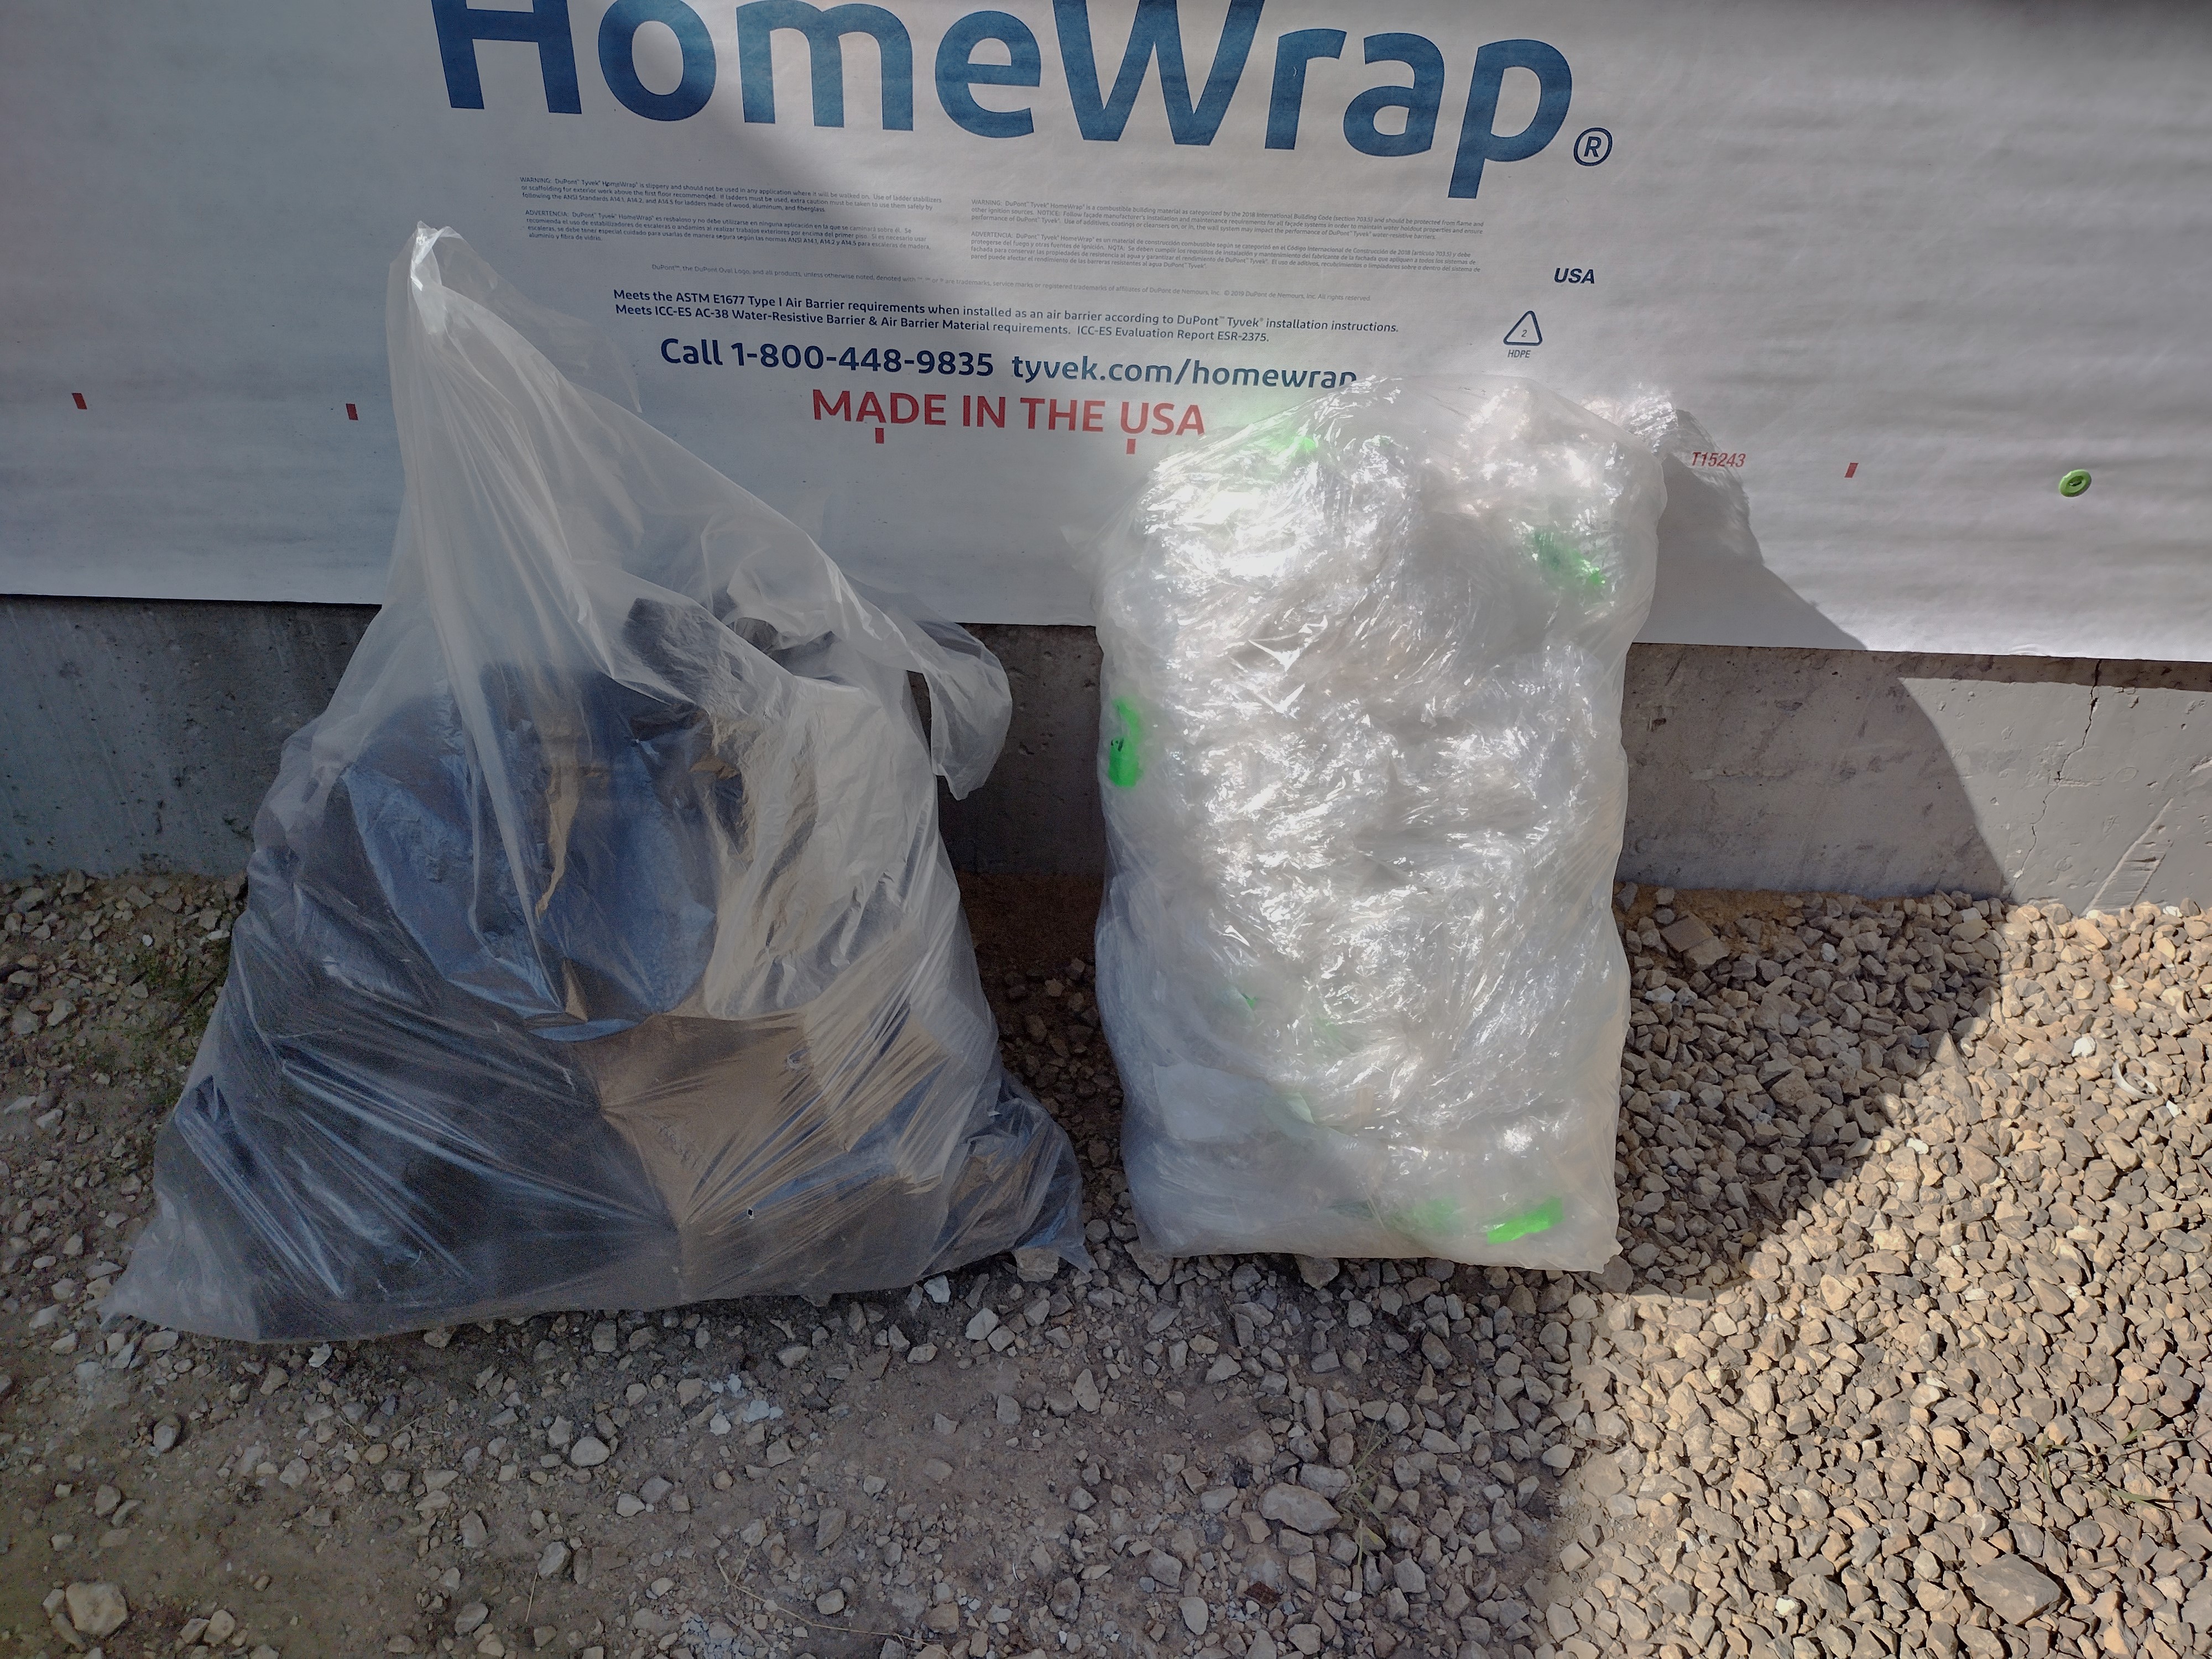
Plastic is hard. I couldn’t find a recycling facility nearby to take sheet foam or rigid packaging foam, though I know there are places out there. Plastic wrap and shrink wrap was readily accepted, if clear. Plastic ties and zip ties, no.
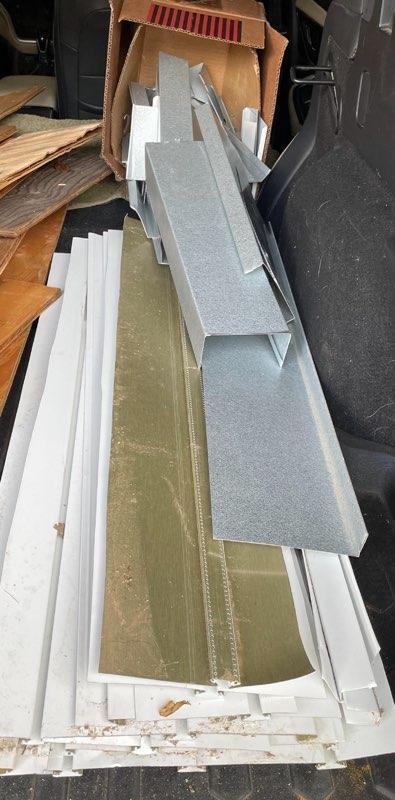
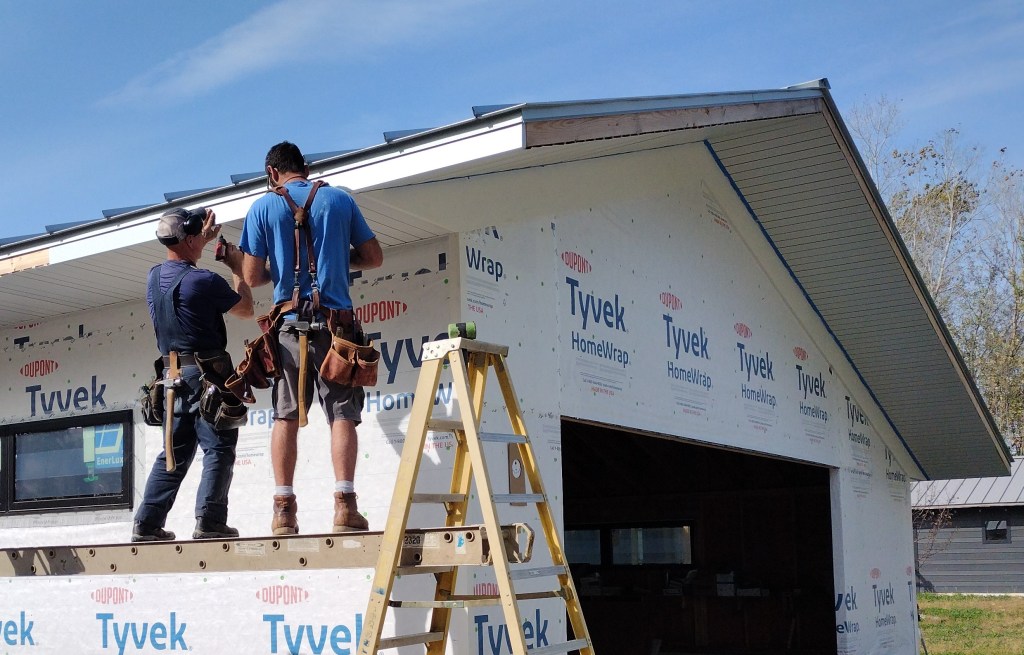
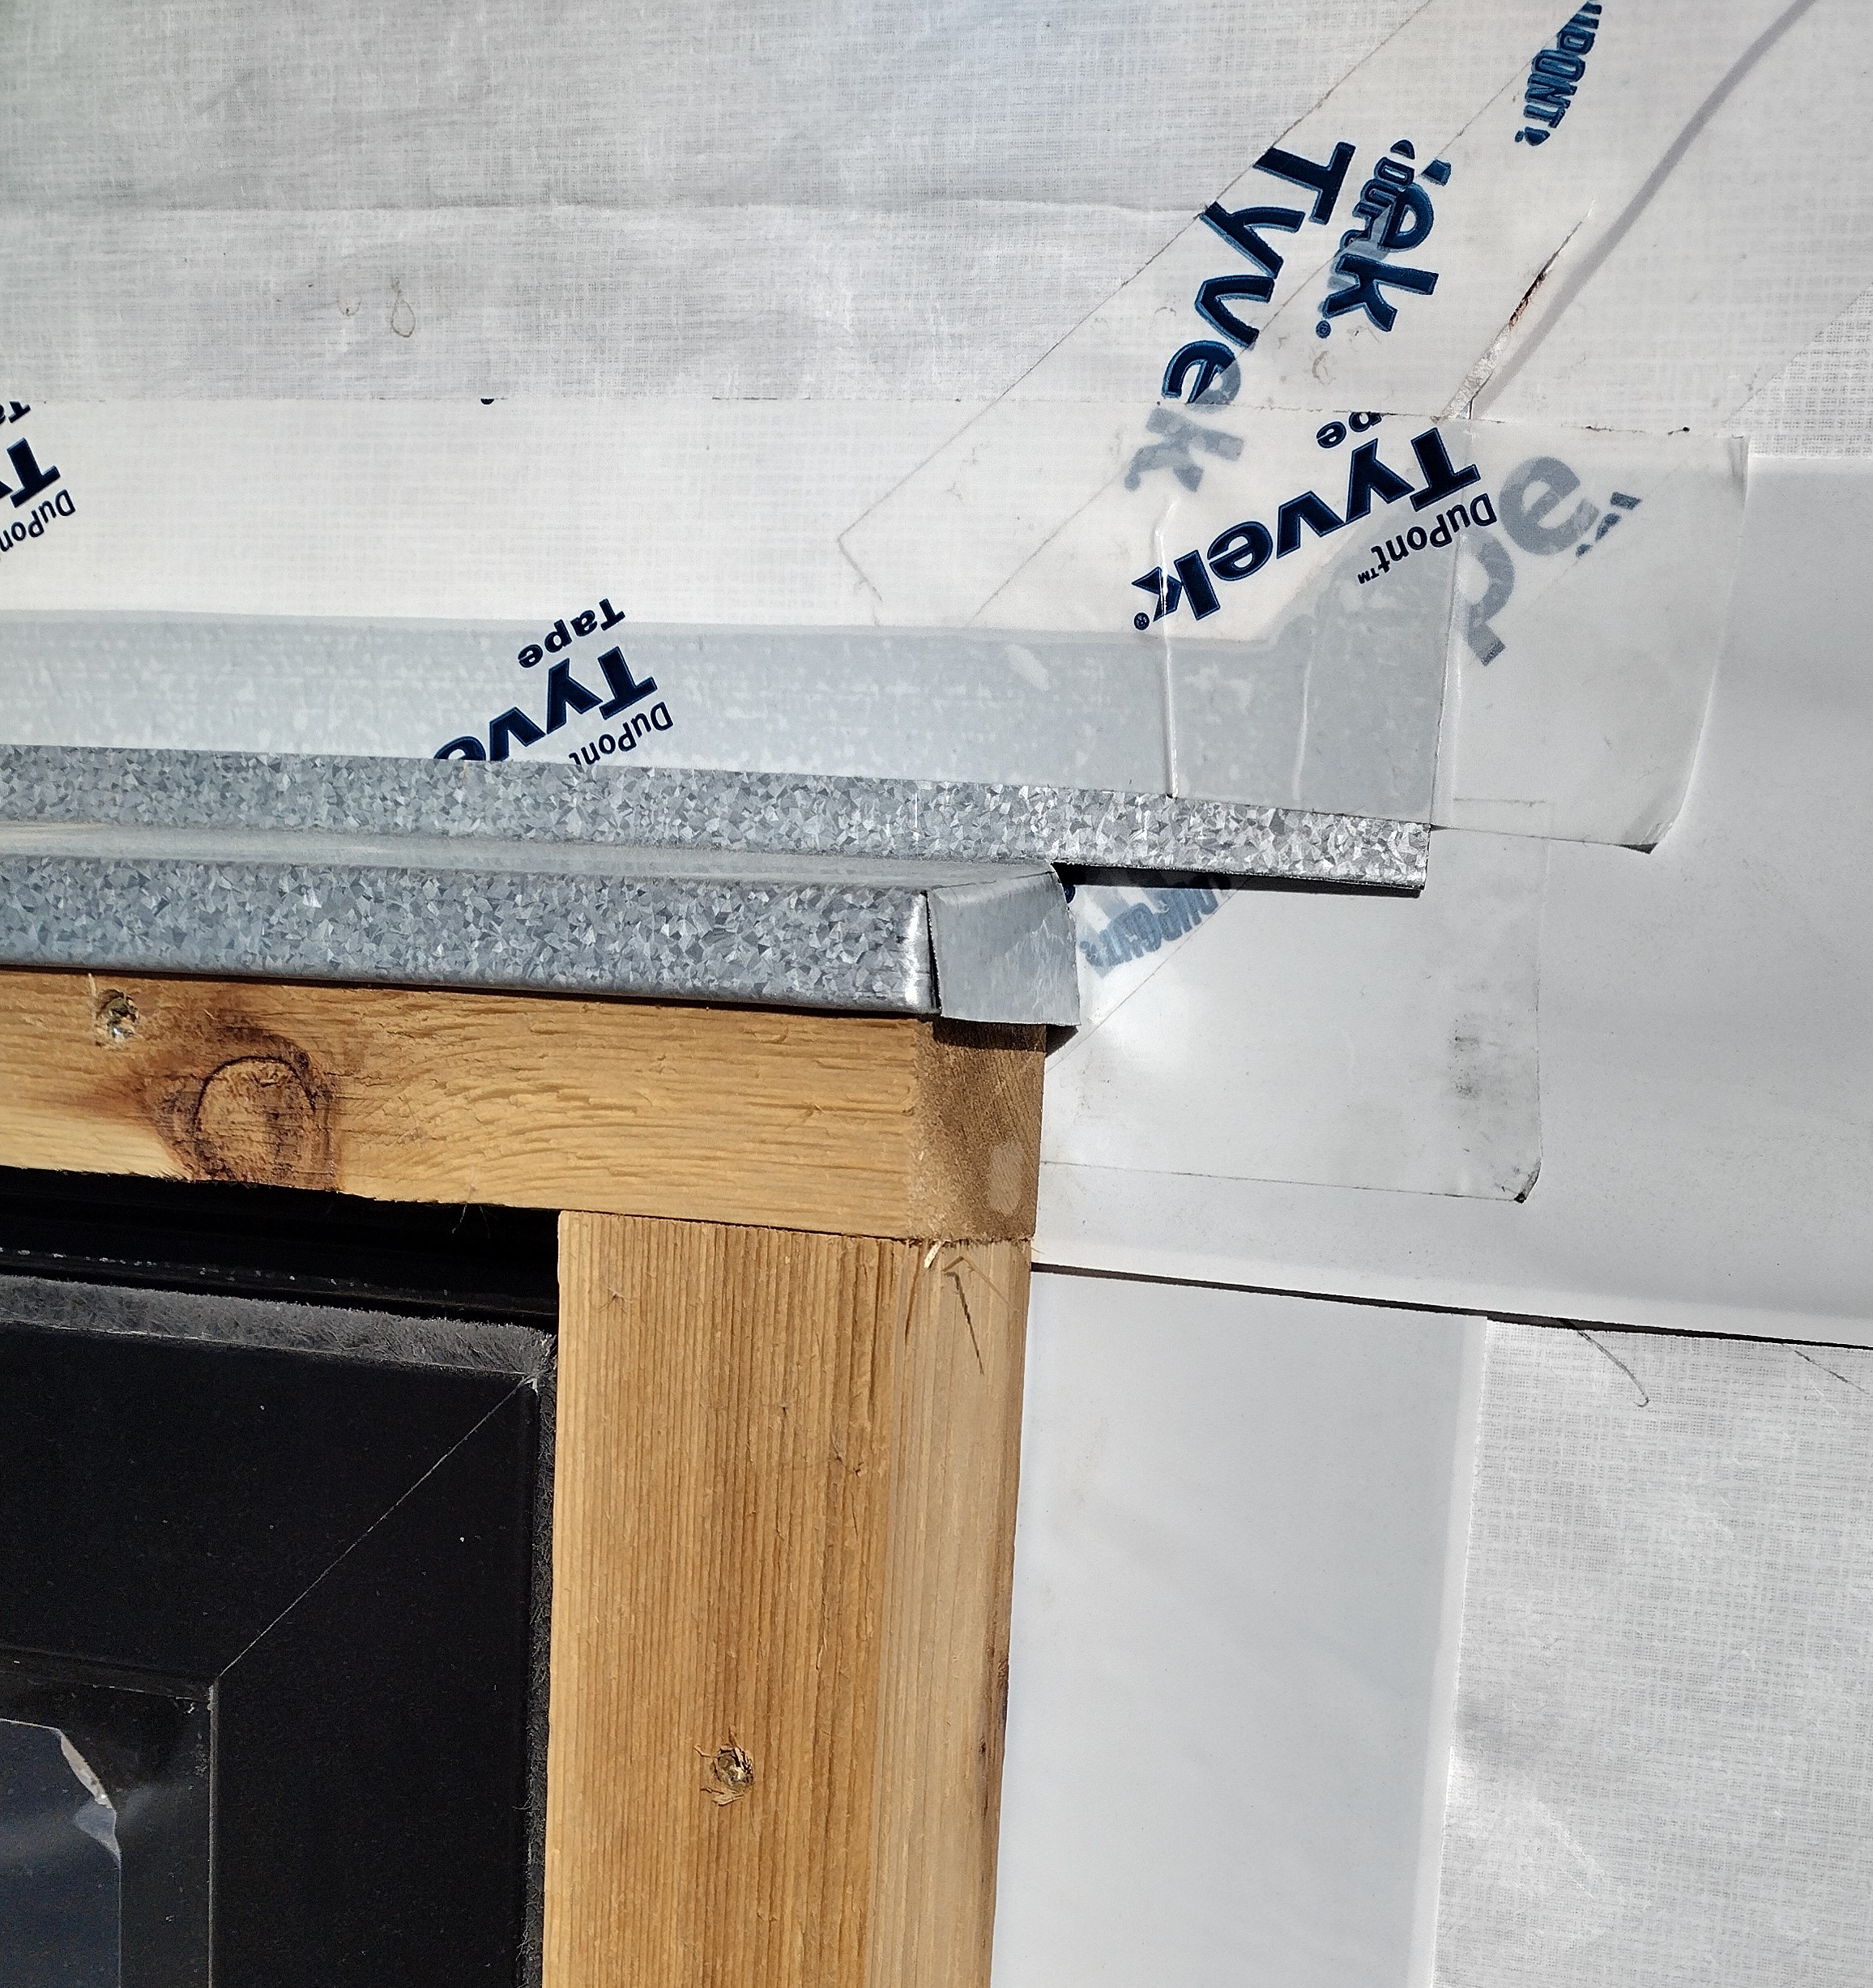
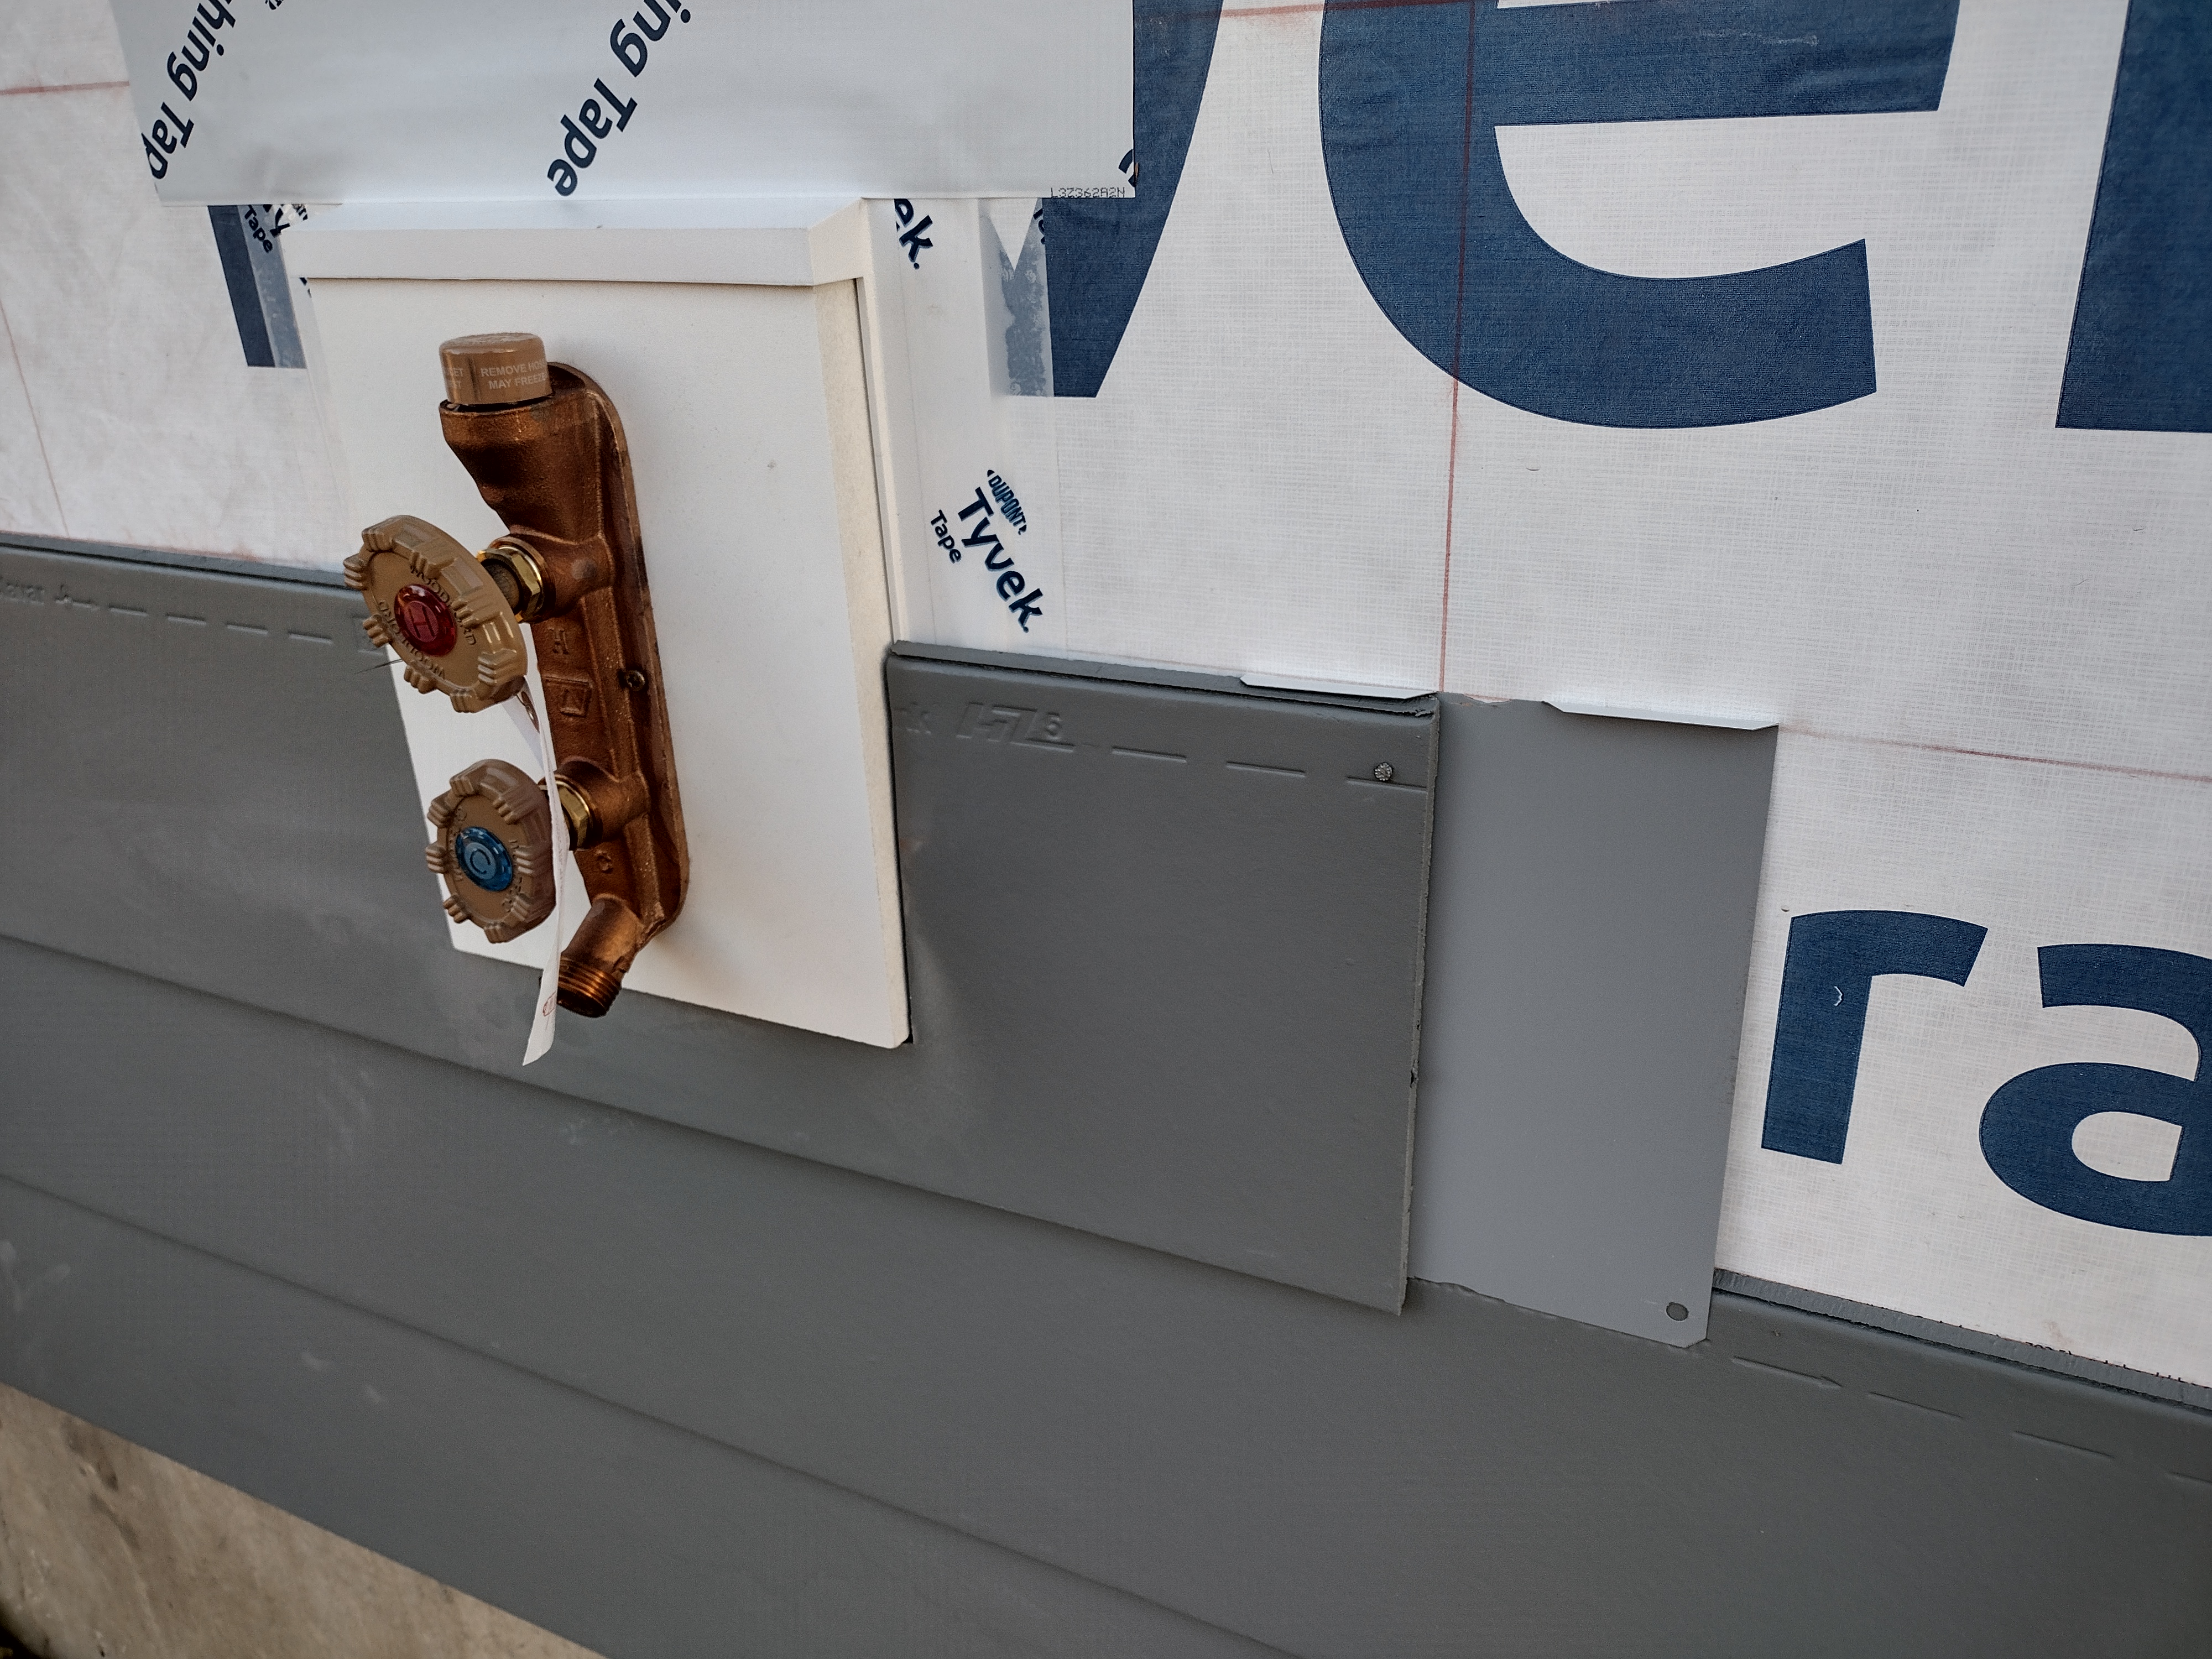
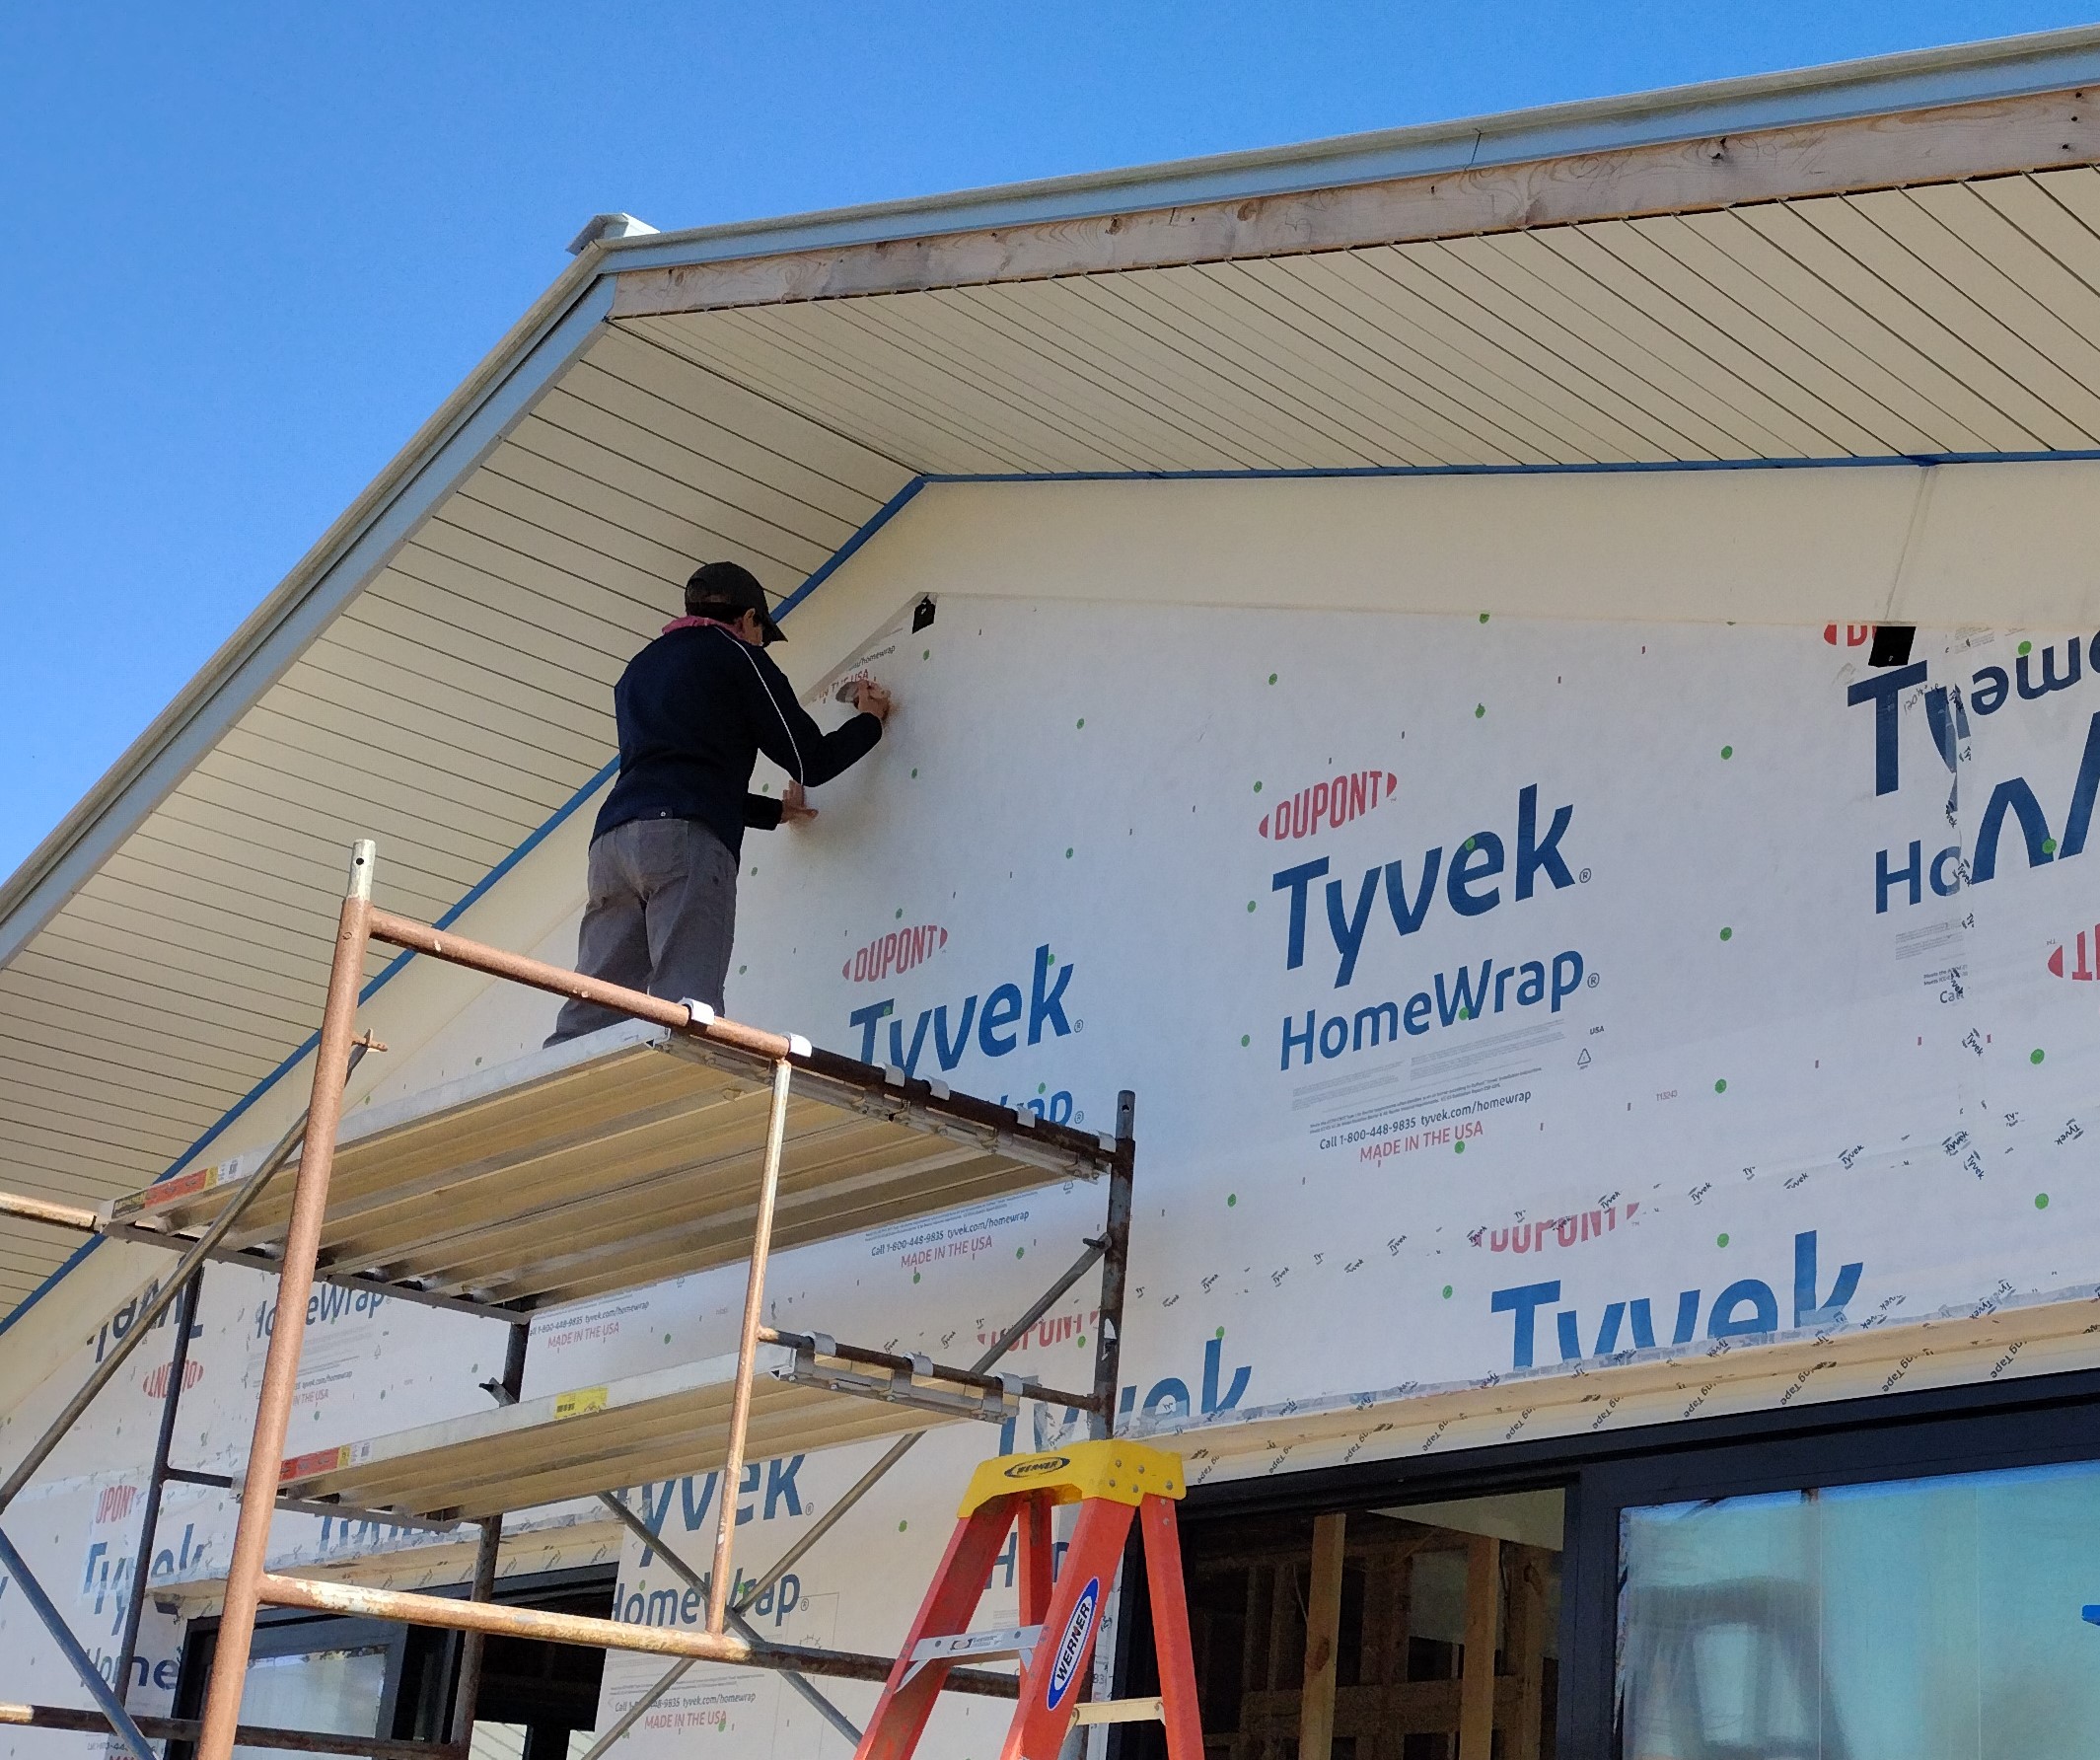
Metal is easy. Both painted aluminum (like this soffit material) and galvanized metal (like this flashing) is readily accepted. Cement board siding, while mostly biodegradable, is not.
I have a confession to make: the construction debris I wasn’t able to recycle ended up surreptitiously slipped into my household trash, in heavy-duty black plastic bags—-just one or two every few weeks so as not to raise alarms. It’s a fudge I justified by keeping the volume very low.
Some environmentally-minded builders go to great lengths to set up recycling bins at their job sites or have meetings or put language in their contracts requiring subs to recycle, but that wasn’t my style. Instead, I made it my job to clean up the job site everyday, to sort and stack, to separate and surreptitiously slip. I wasn’t above digging through the trash to retrieve a pop can tossed in by a sub.
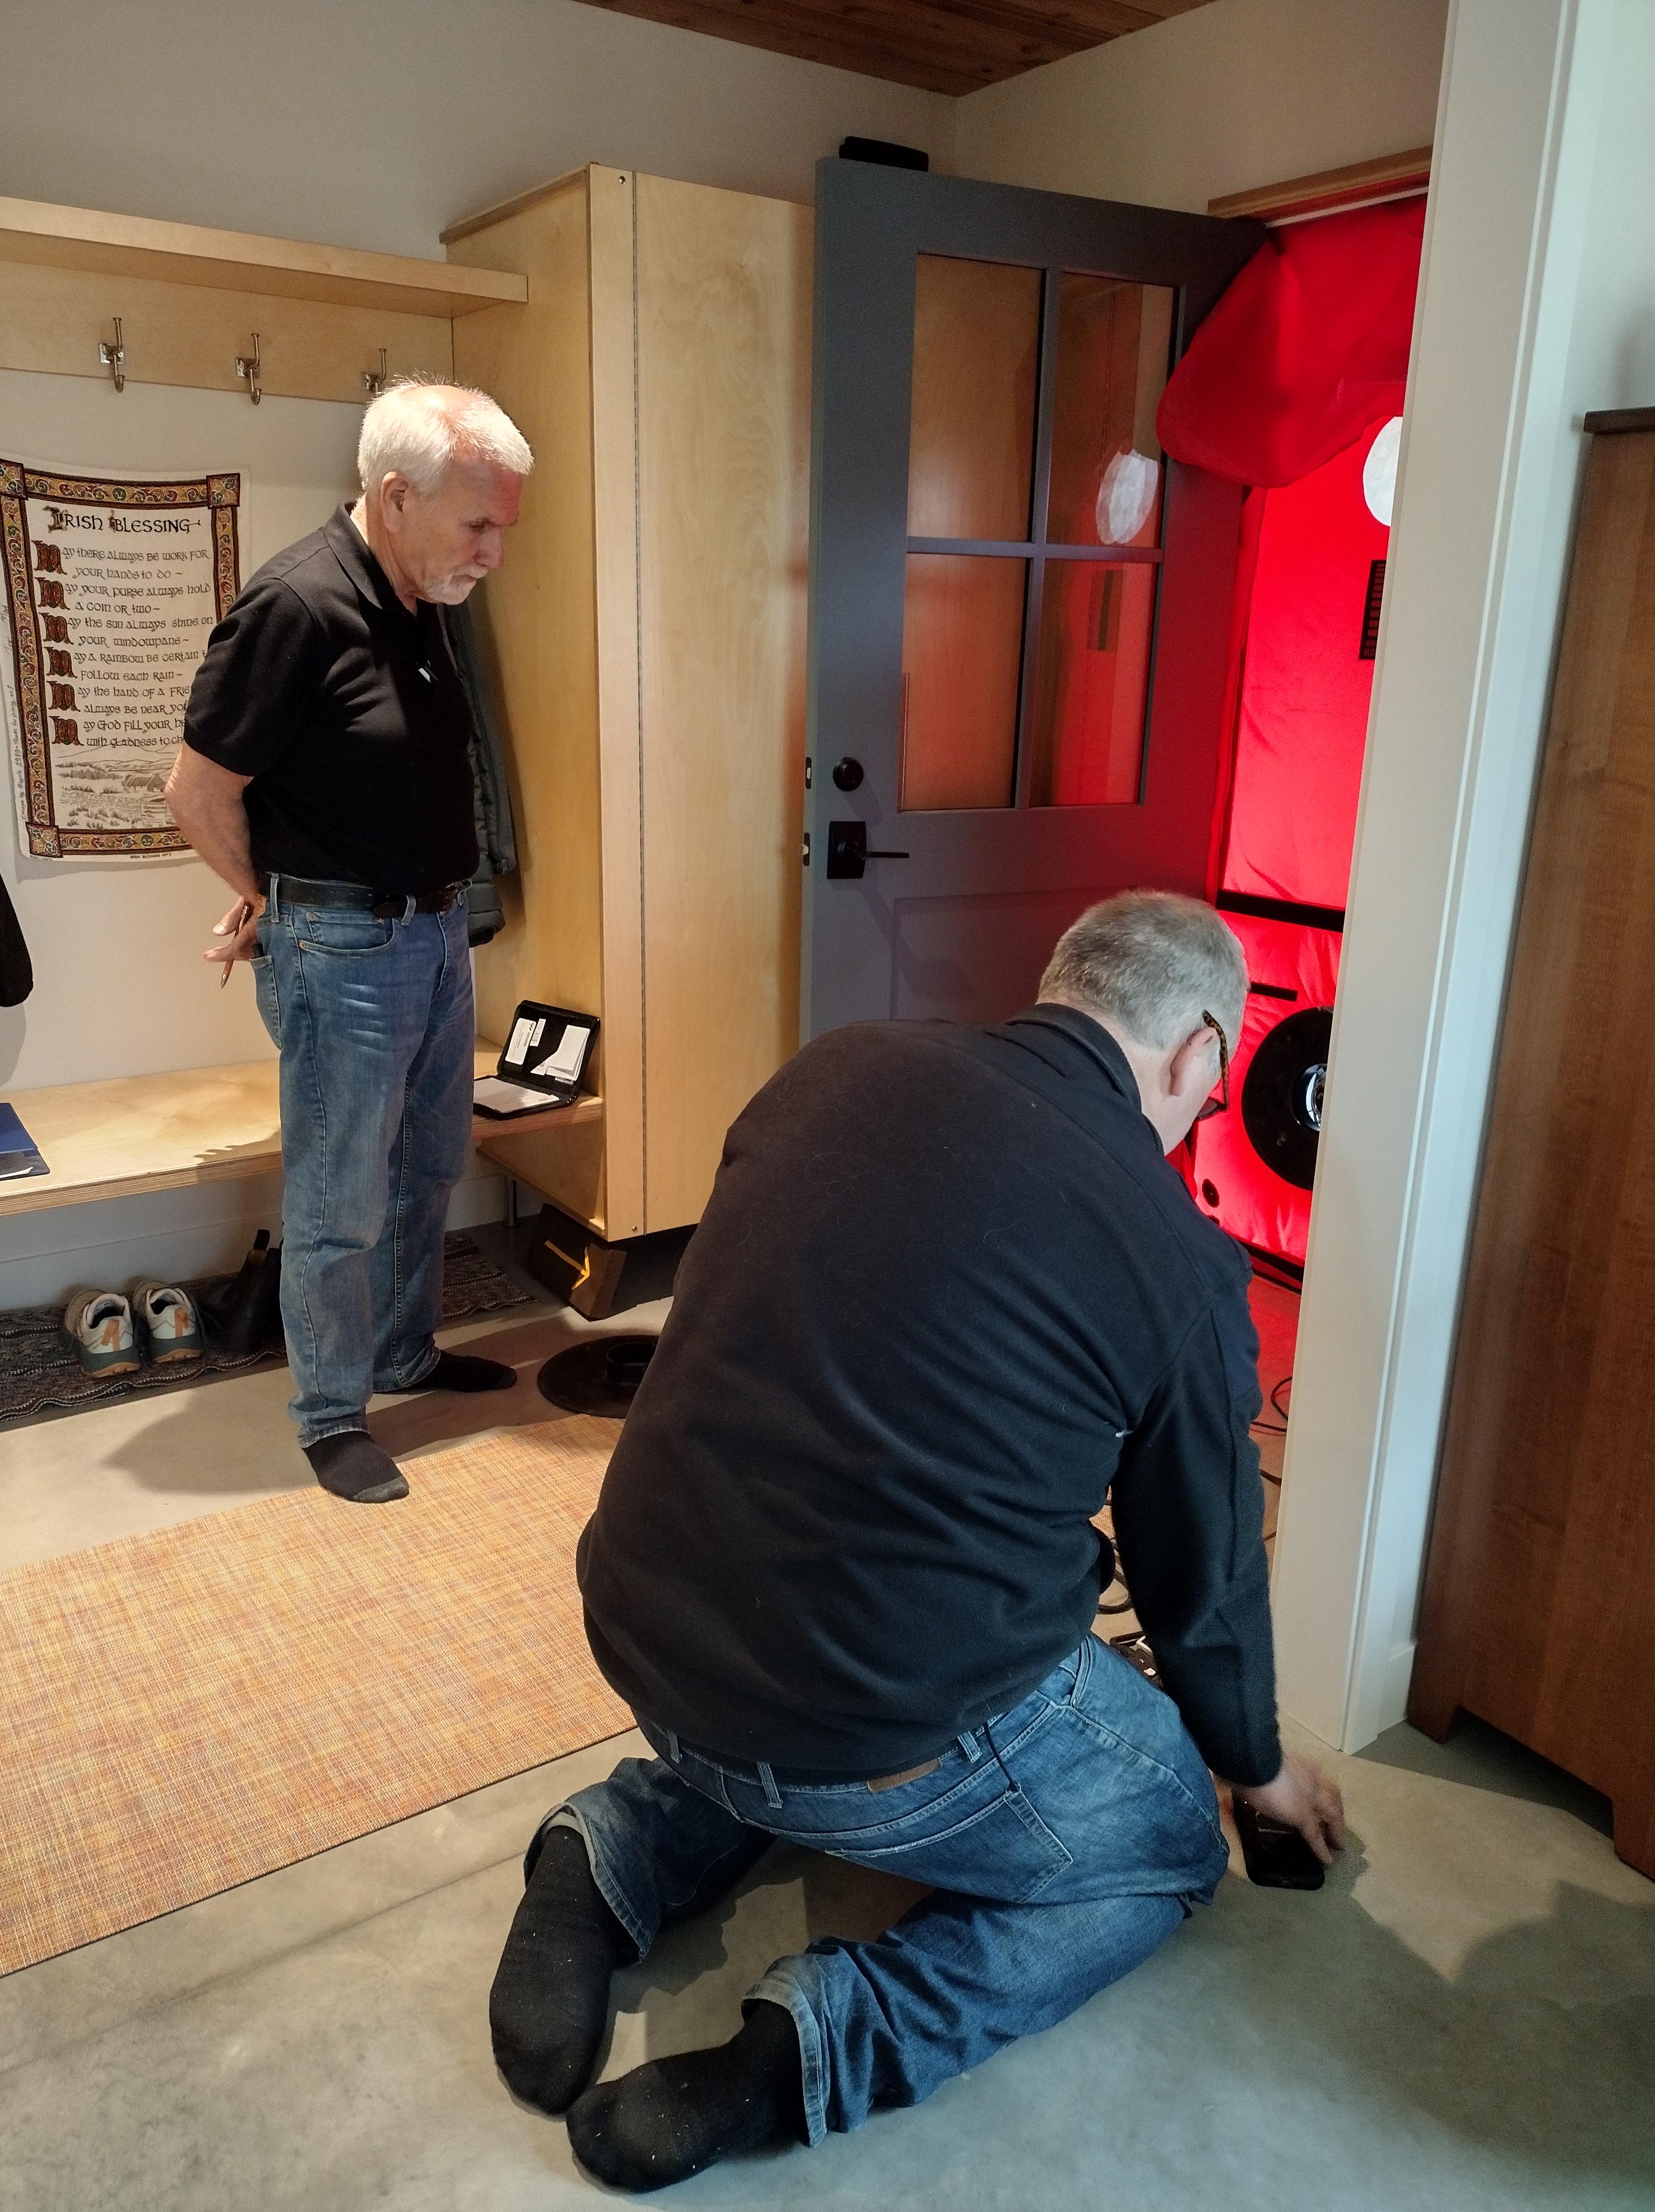
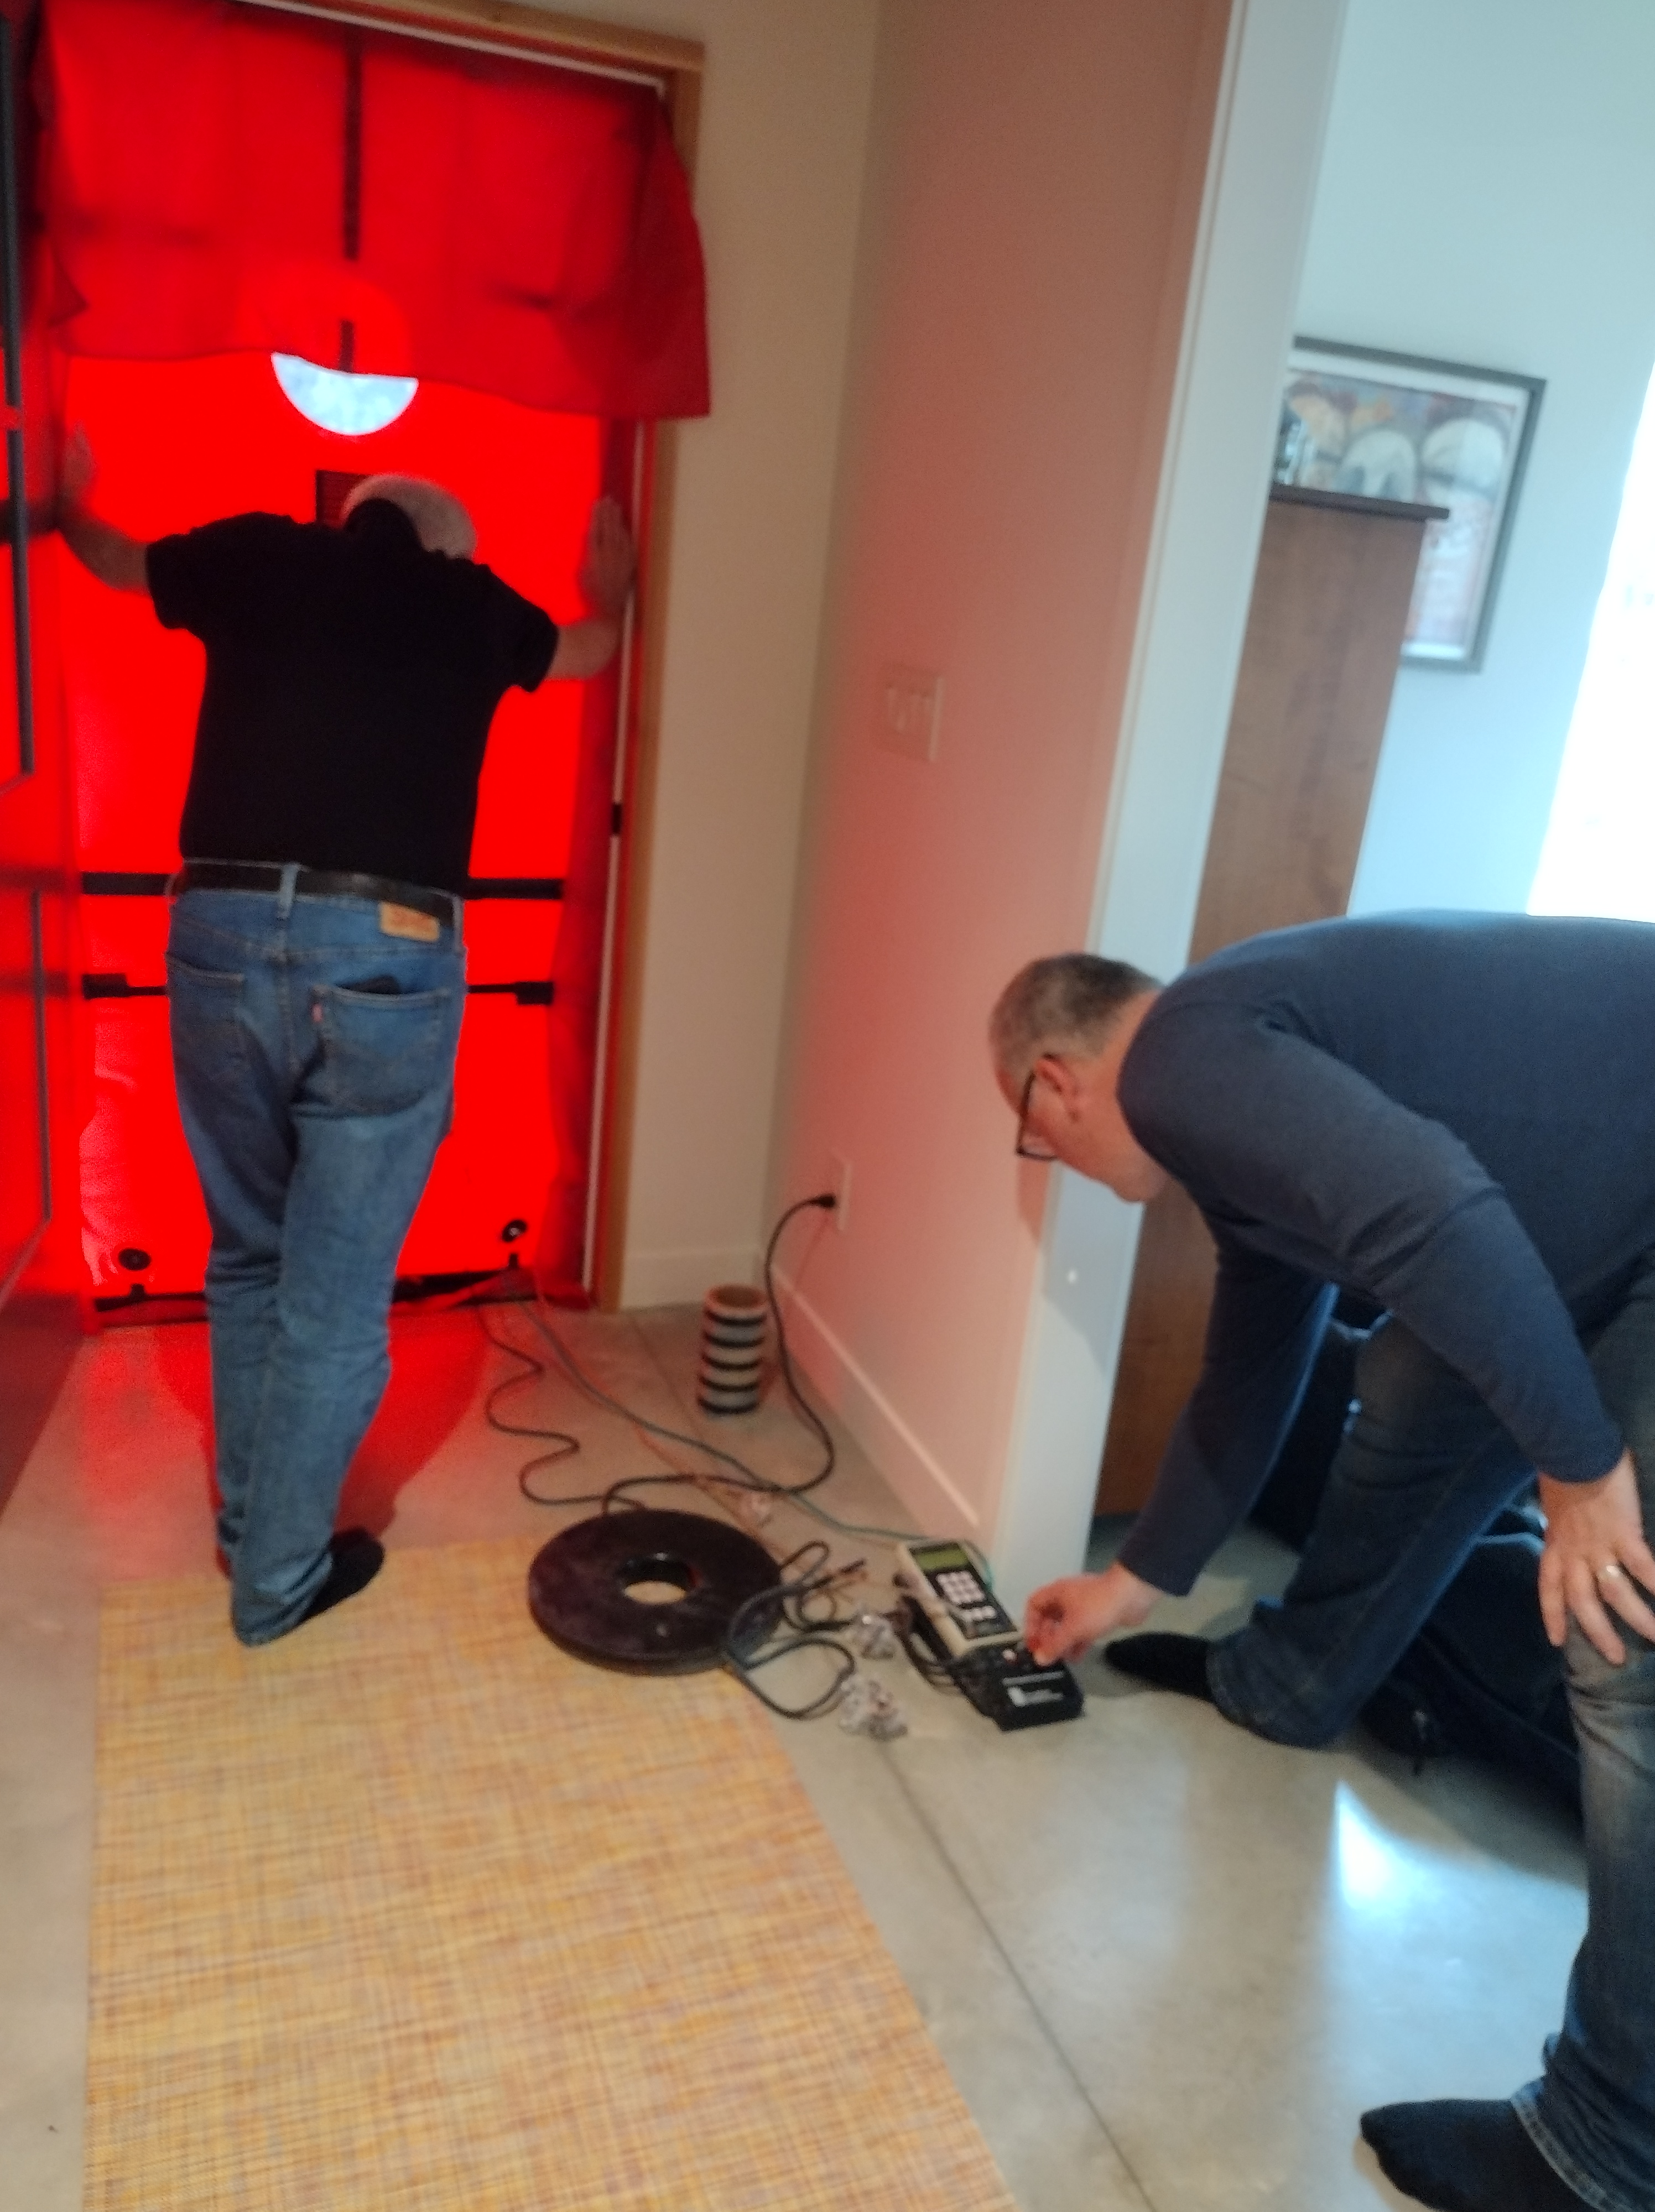
April 25, 2025: New homeowners Laura and JC were already comfortably settled in when we asked to come back and perform a final blower door test. We all enjoyed our visit, cups of freshly brewed coffee, and the work of testing, calibrating, and fine-tuning. Our crew today was led by Joe Paprocki from Trinity Environmental and aided by Joe Nagan from Home Building Technology Services. Both Joes are well versed in building science and specifically, testing homes to meet Wisconsin’s Focus on Energy New Homes Certification.
If our project passes, we will be awarded $1044
Here are the two Joes setting up the blower door equipment. This test is our second one: Joe P. was here back in December to make sure we were on the right track before insulation and drywall was installed. See my blog post Testing Our Work.
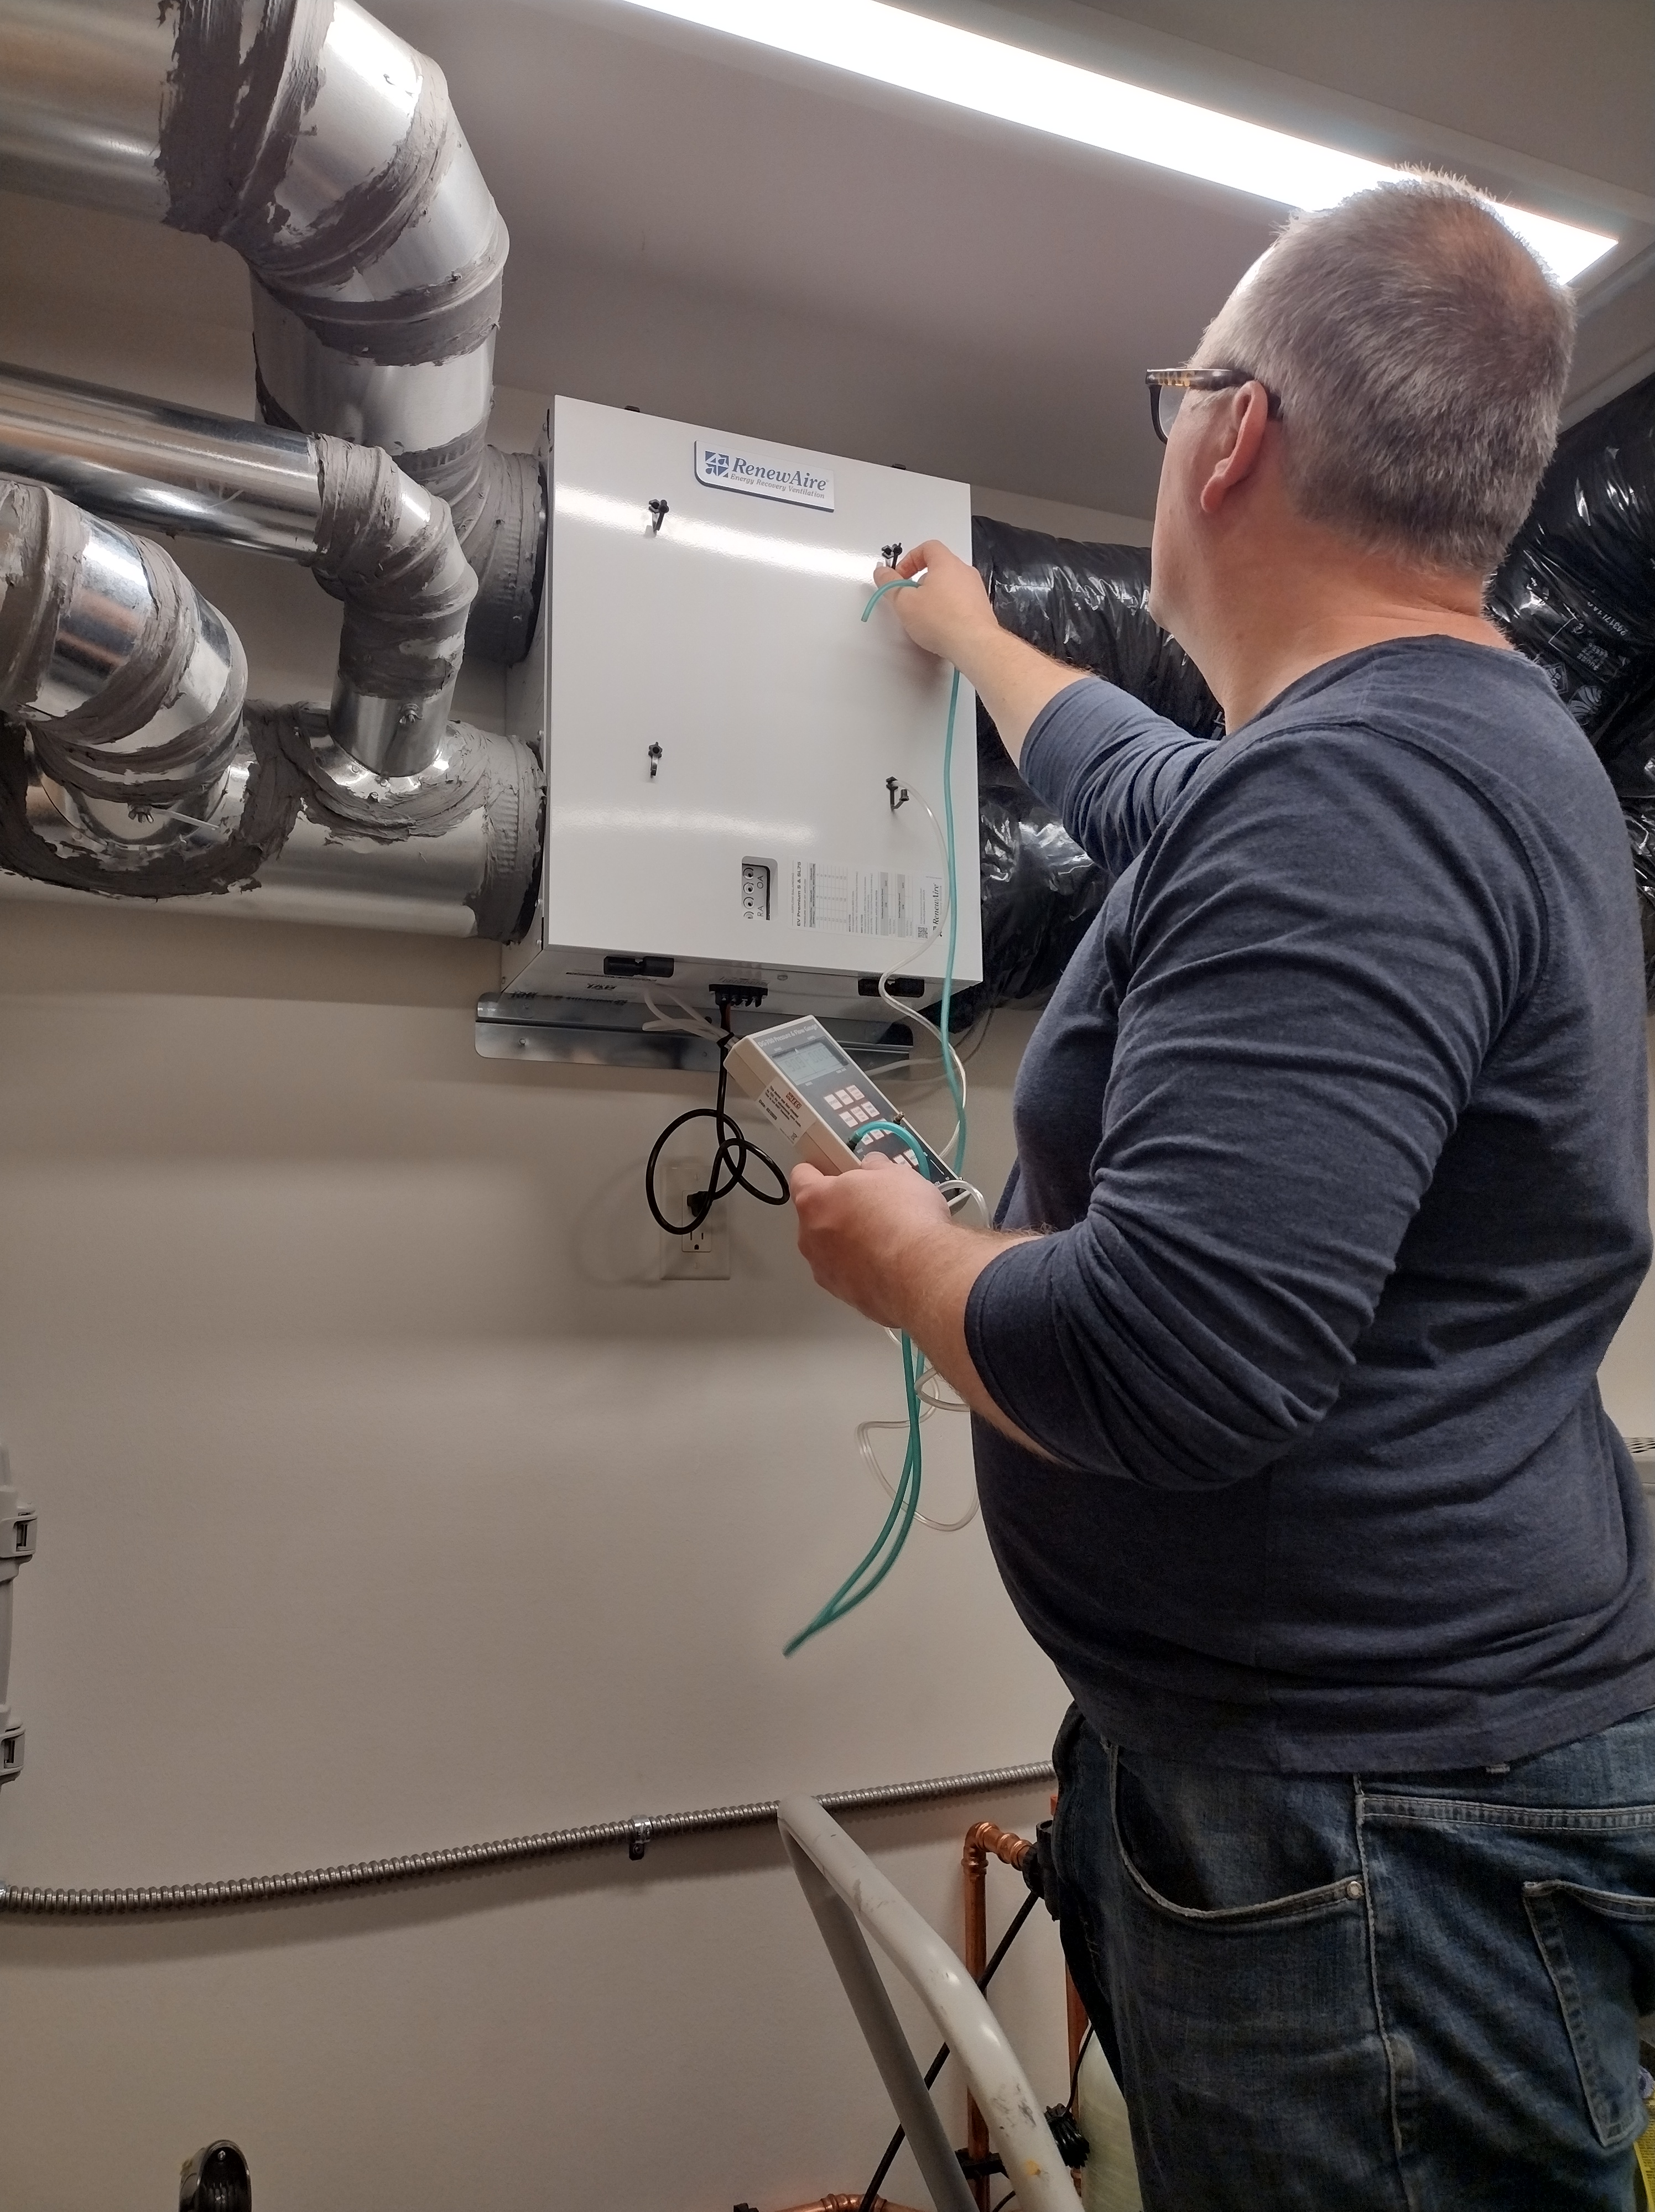
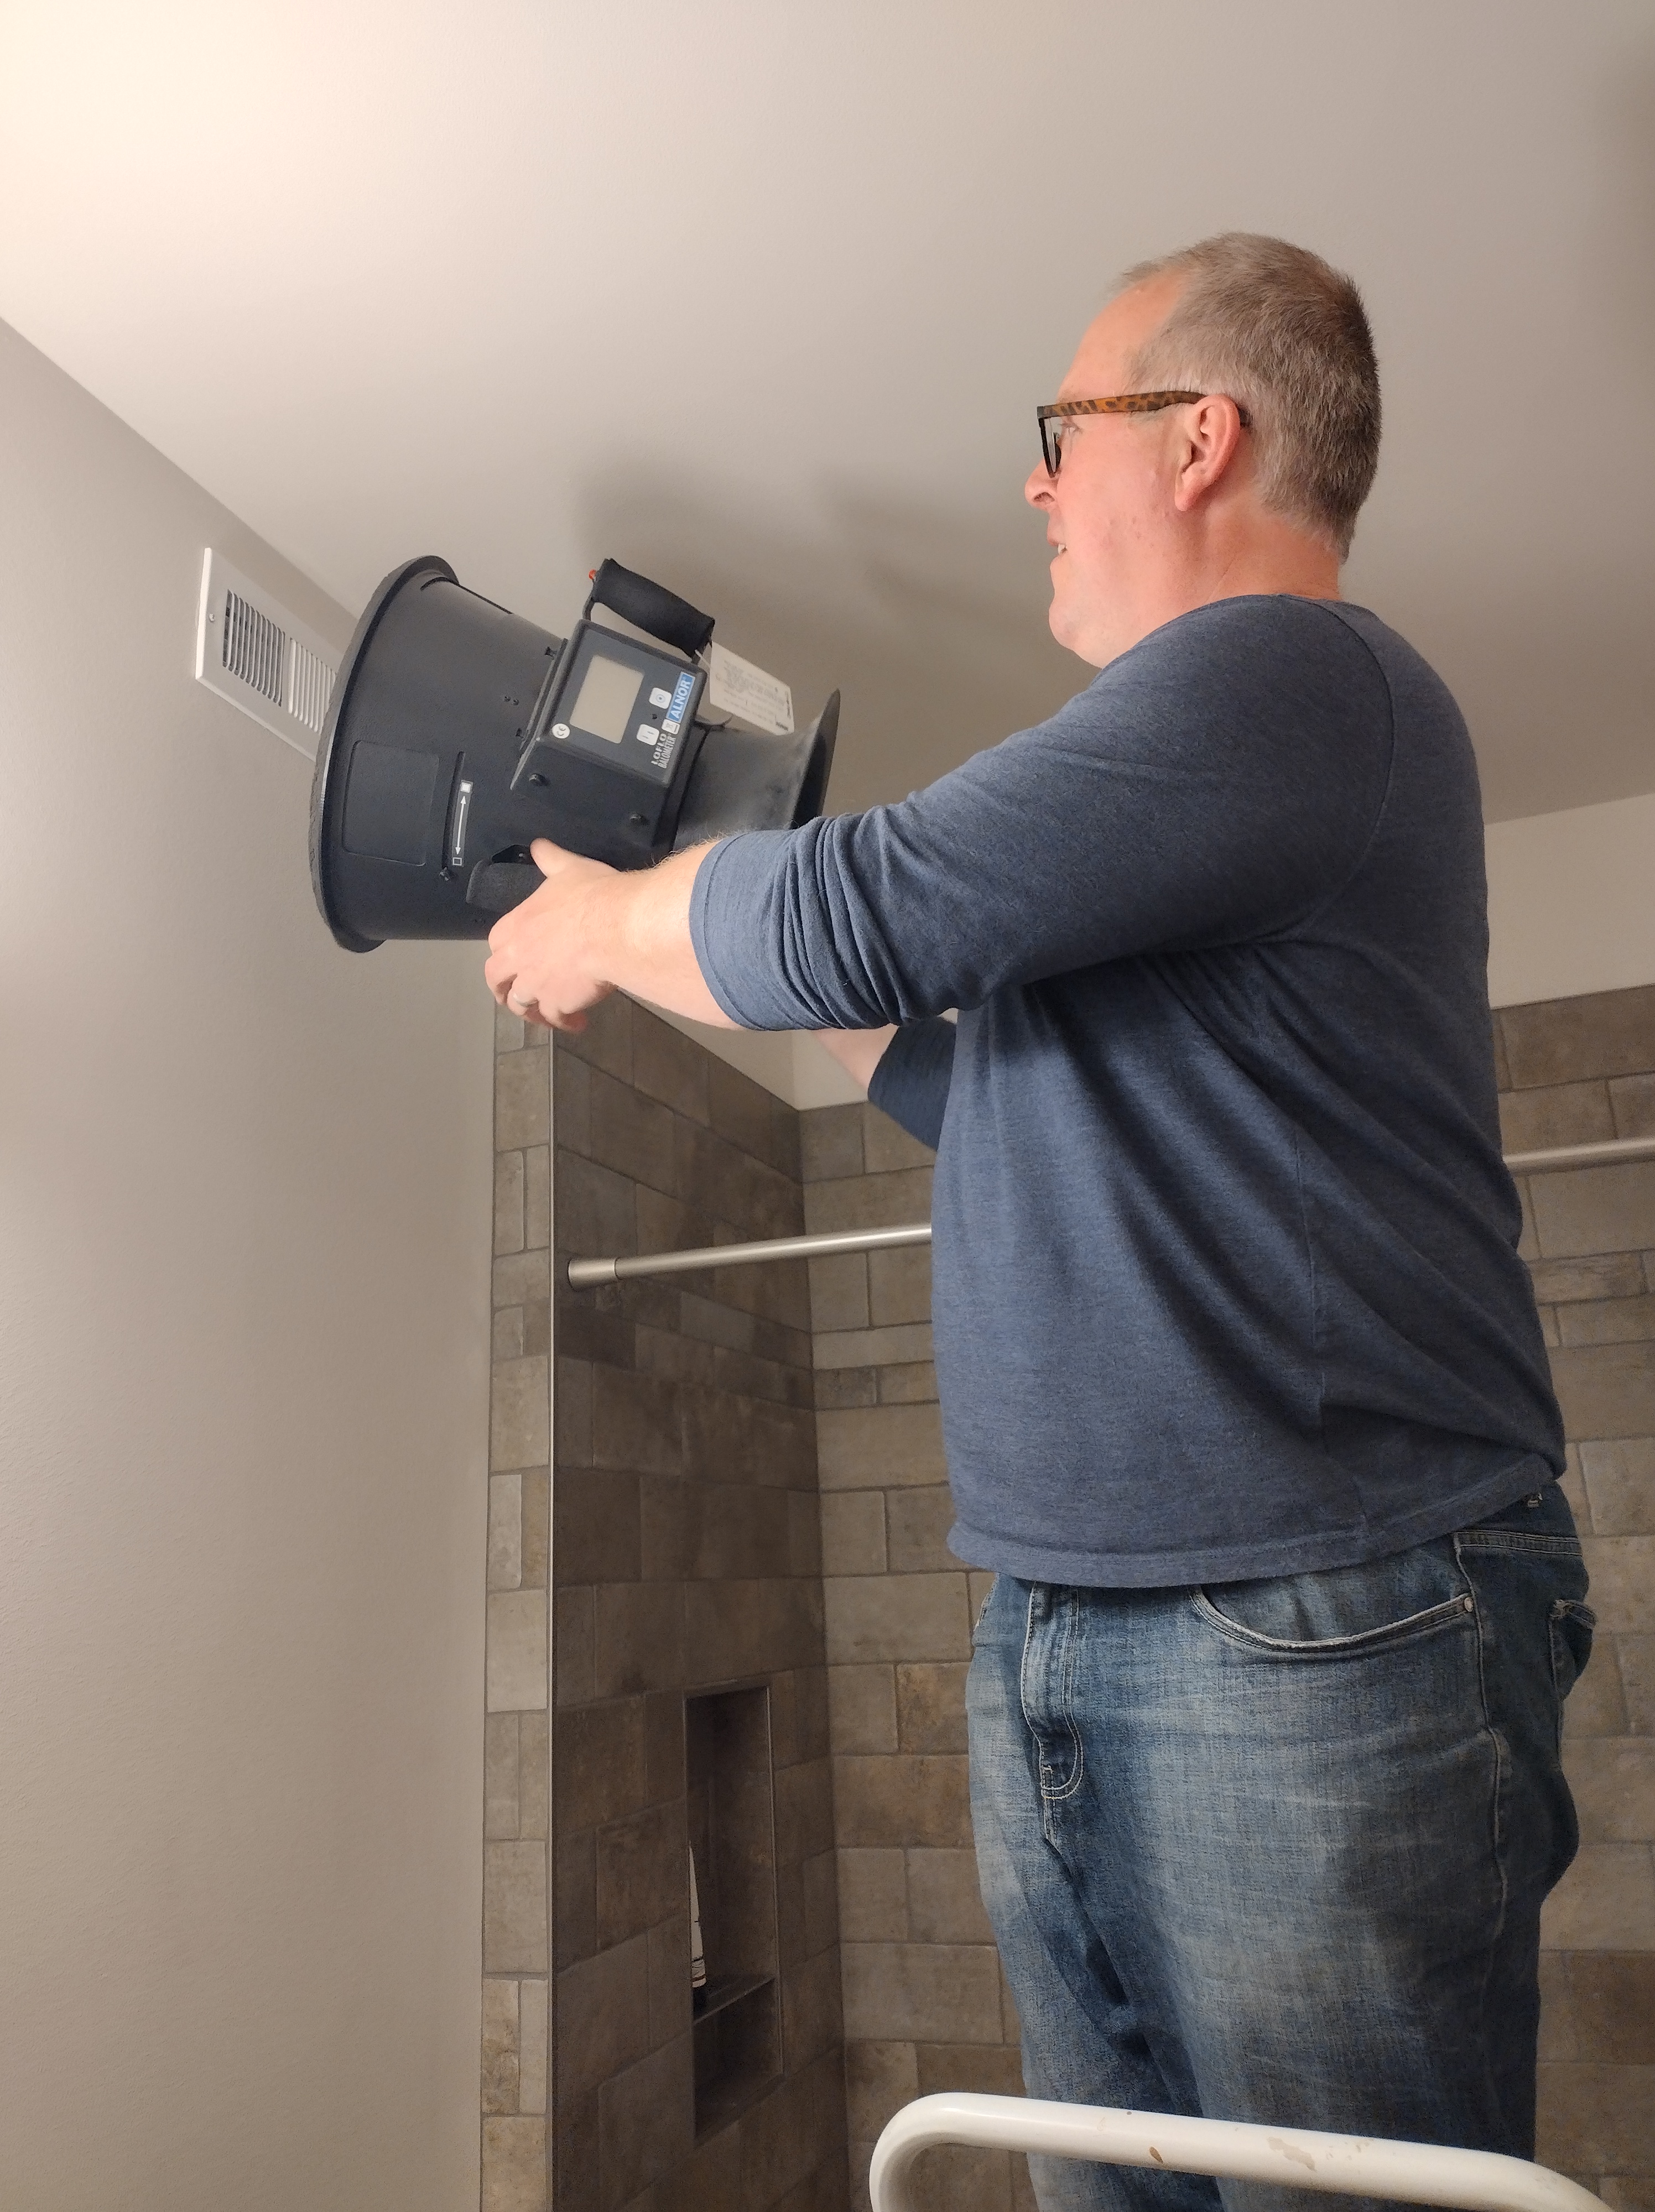
Here’s Joe P. fine-tuning the settings on the Energy Recovery Ventilator or ERV and verifying the Cubic Feet per Minute or CFM exhaust in the main bathroom.
Our crew: Joe Nagan, Amber Westerman, JC Love, Laura Love, and Joe Paprocki.
March 17-April 2, 2025: What if you could install HVAC equipment that’s less than half in size compared to your neighbors? You can when you build like we do. The smaller check you cut to your installer is the first payoff you get for doing a bang-up job with your thermal envelope, explained in my blog post Testing Our Work. The payoff continues month after month: my energy model predicts it will cost a mere $50 a month to keep the 2025 Poem Home comfortable, in weather over 100 degrees in summer or minus 20 in winter.
Our super-insulated and super-air-tight home can be heated and cooled with a single 9,000 Btu/hour ductless mini-split. A new home passing inspection under Wisconsin’s Uniform Dwelling Code’s minimum standard can be so poorly built that it would require three of these units. By spending more upfront on insulation, tape, and caulk, our homeowner saved approximately $12,000 on equipment not purchased.
The 2025 Poem Home’s heating load is predicted to be 6.9 Btu/hour/square foot.
The same home in shape and size built to Wisconsin’s Code would have a heating load of 17 Btu/hour/square foot.
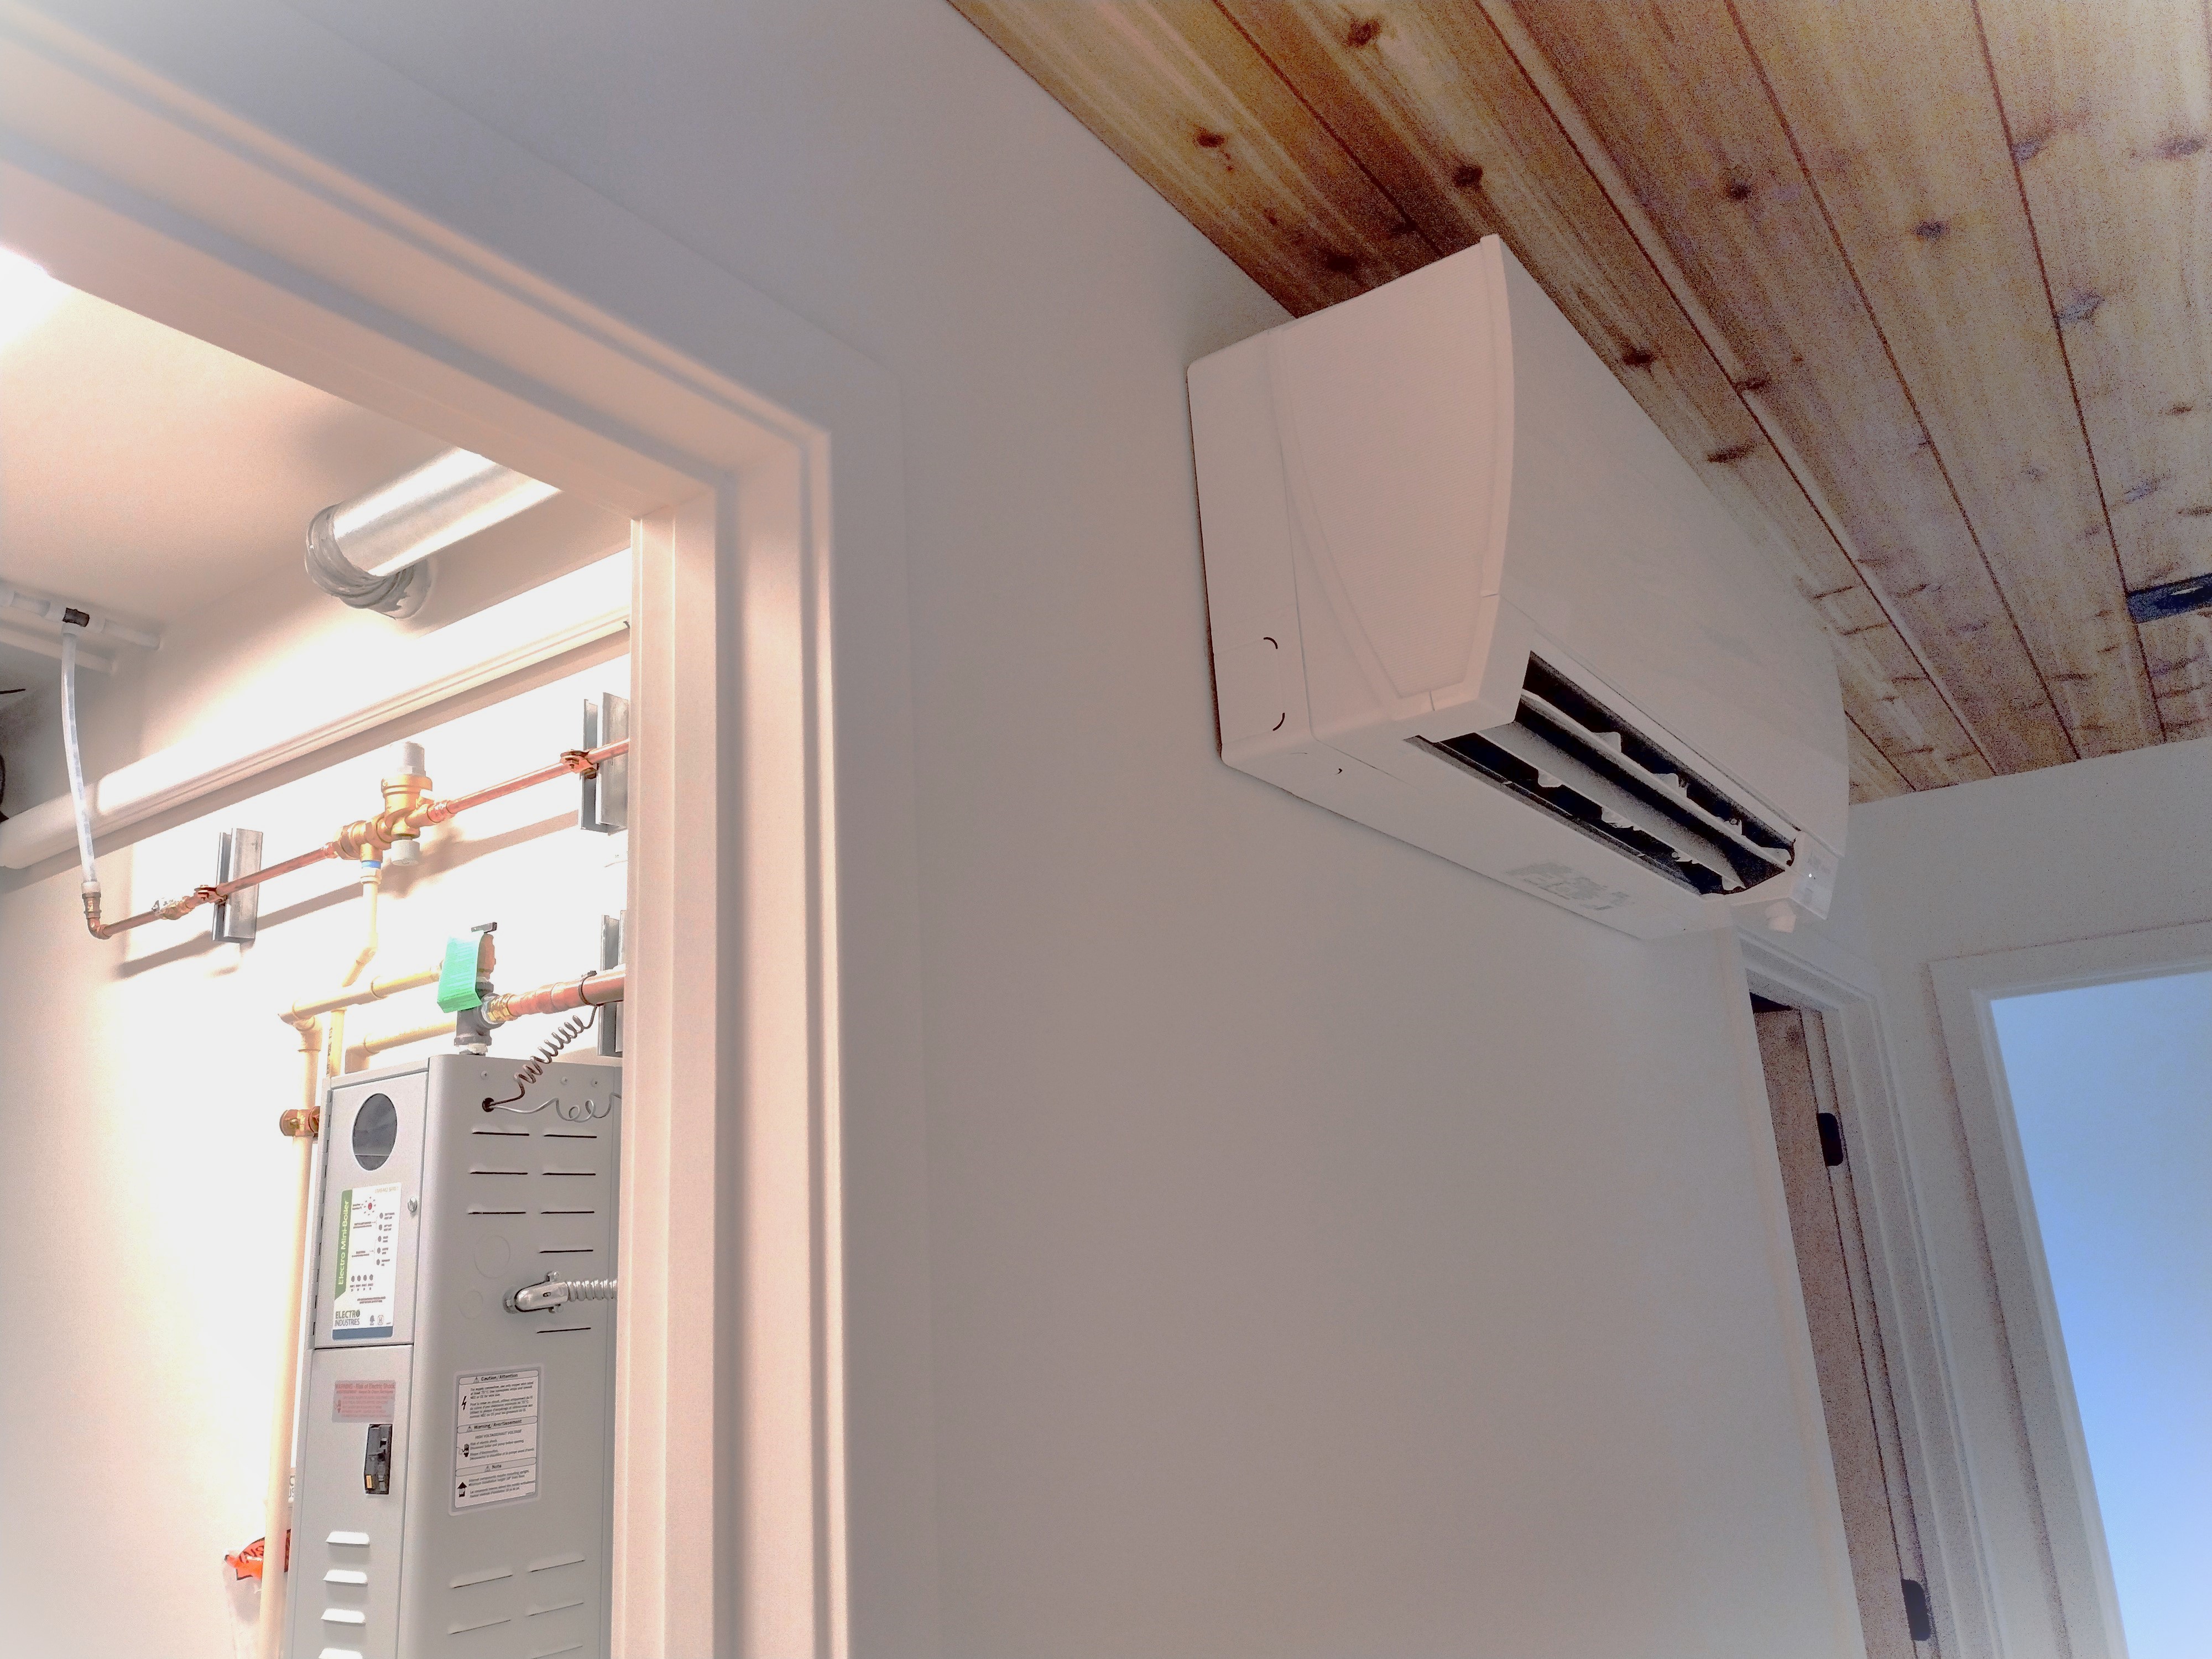
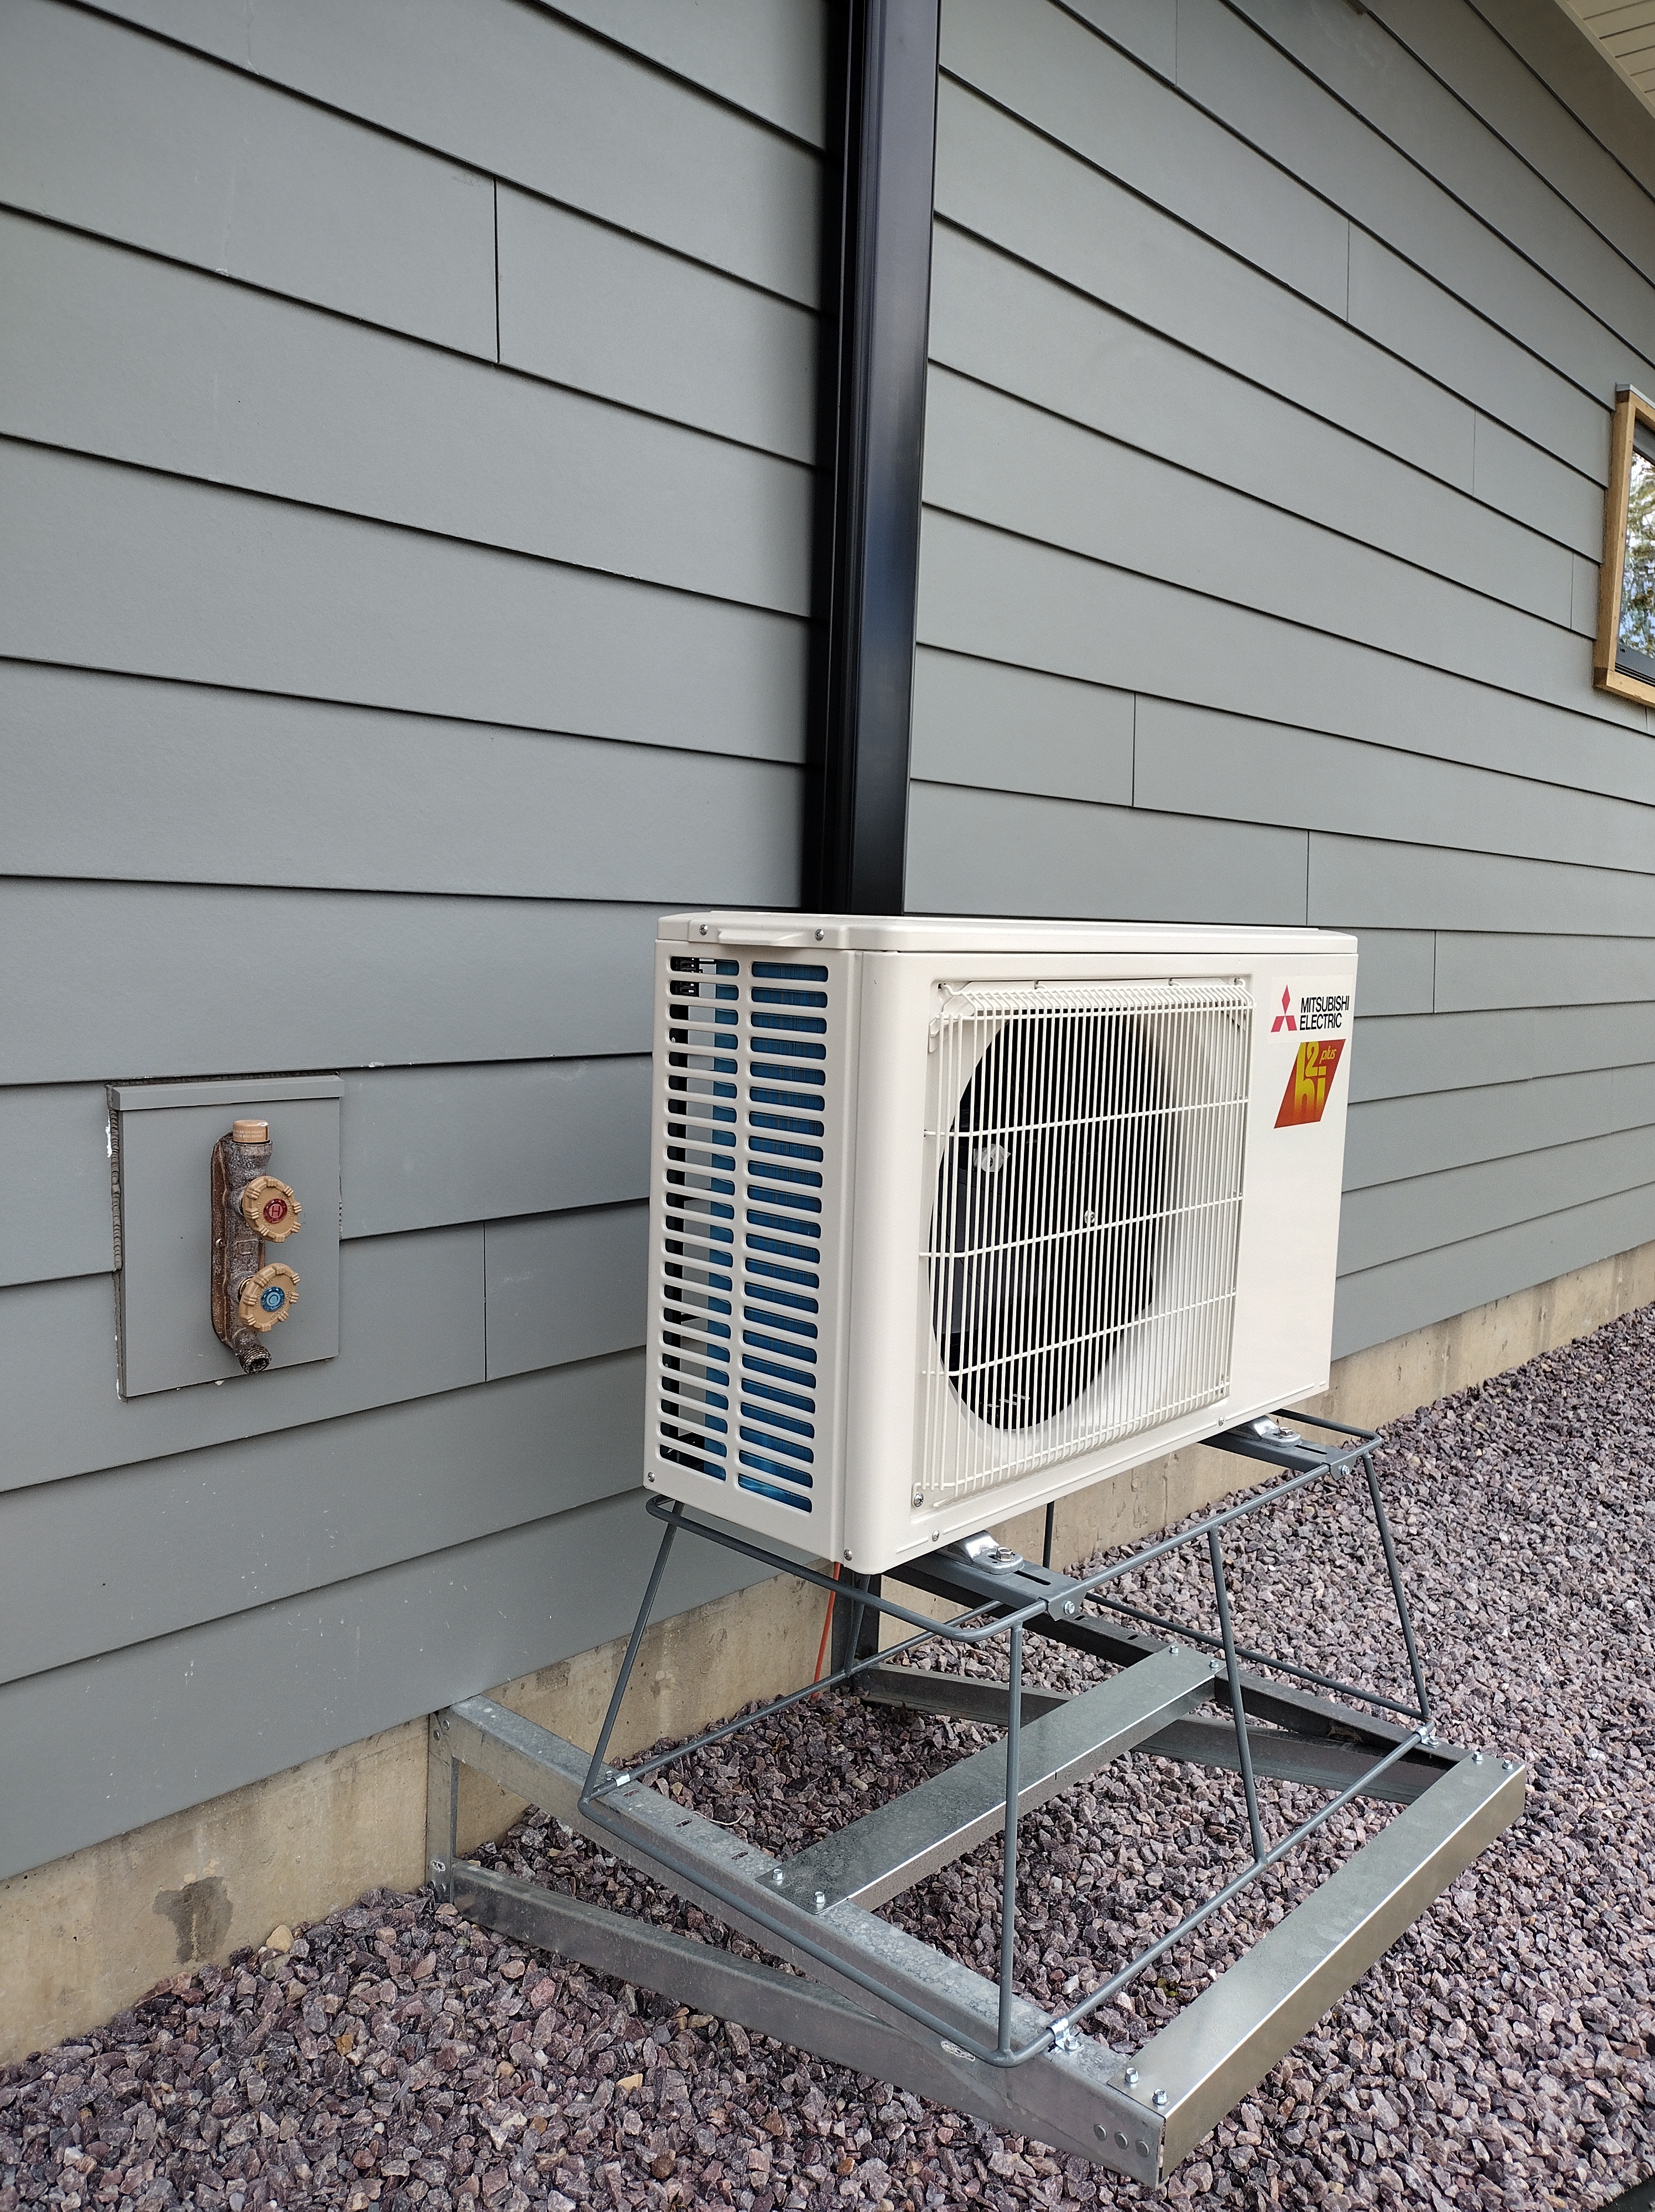
Here’s the ductless mini-split system my contractor installed. I chose Mitsubishi’s Hyper-Heat model. The indoor unit, located in the hallway next to the mechanical room, opens its vanes to push either cool or warm air downward for distribution throughout the house. The outdoor heat pump, located directly behind the mechanical room on the north side of the house, works in concert with the indoor unit to transfer thermal energy back and forth, in a way similar to your refrigerator. When the deep cold of winter arrives and temperatures drop to minus 13 degrees, the equipment will still hum along, squeezing heat energy out of the dense, biting air.
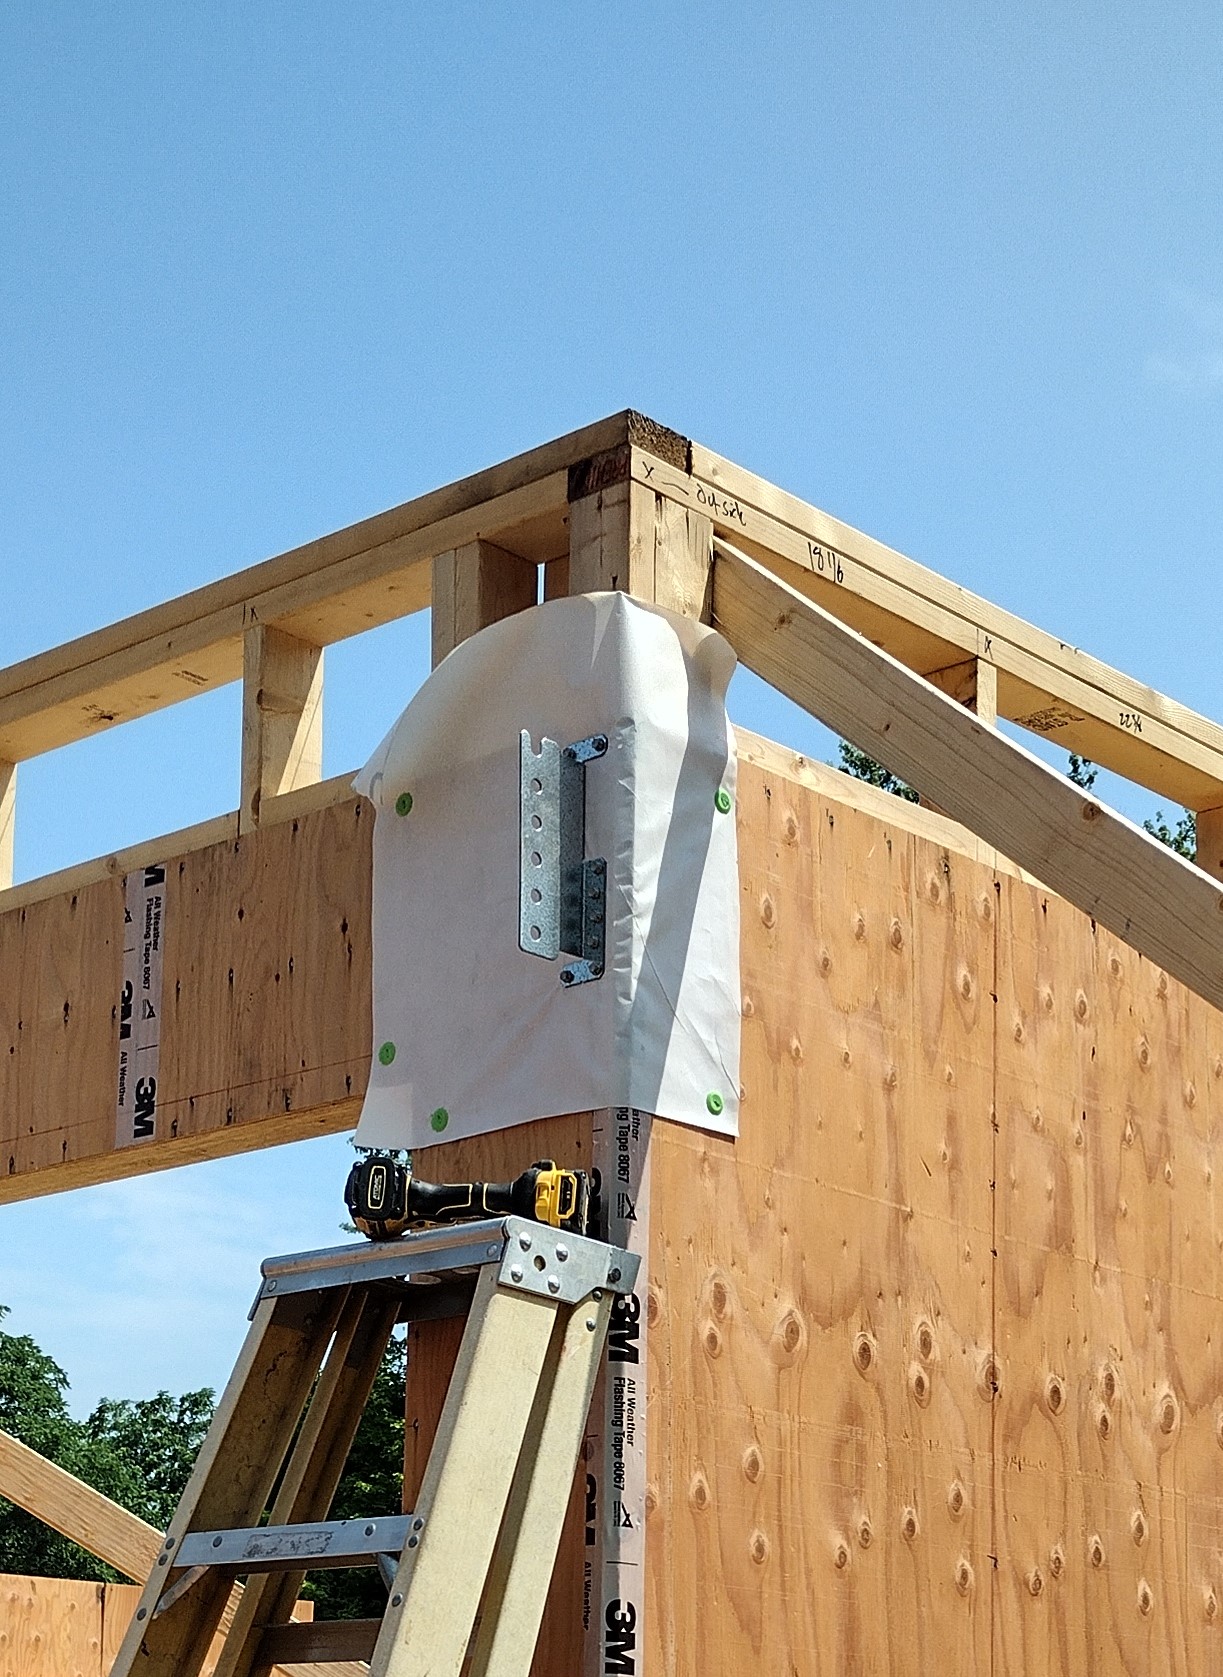
The Air Source Heat Pump or ASHP is mounted on a metal stand that is in turn mounted to galvanized steel angles assembled as a bracket bolted to the foundation. Any vibrations or noise will be absorbed by the concrete, not transmitted through the walls. This arrangement eliminates any settling, often experienced with ground-mounted pads, and allows for good air circulation and snow removal.
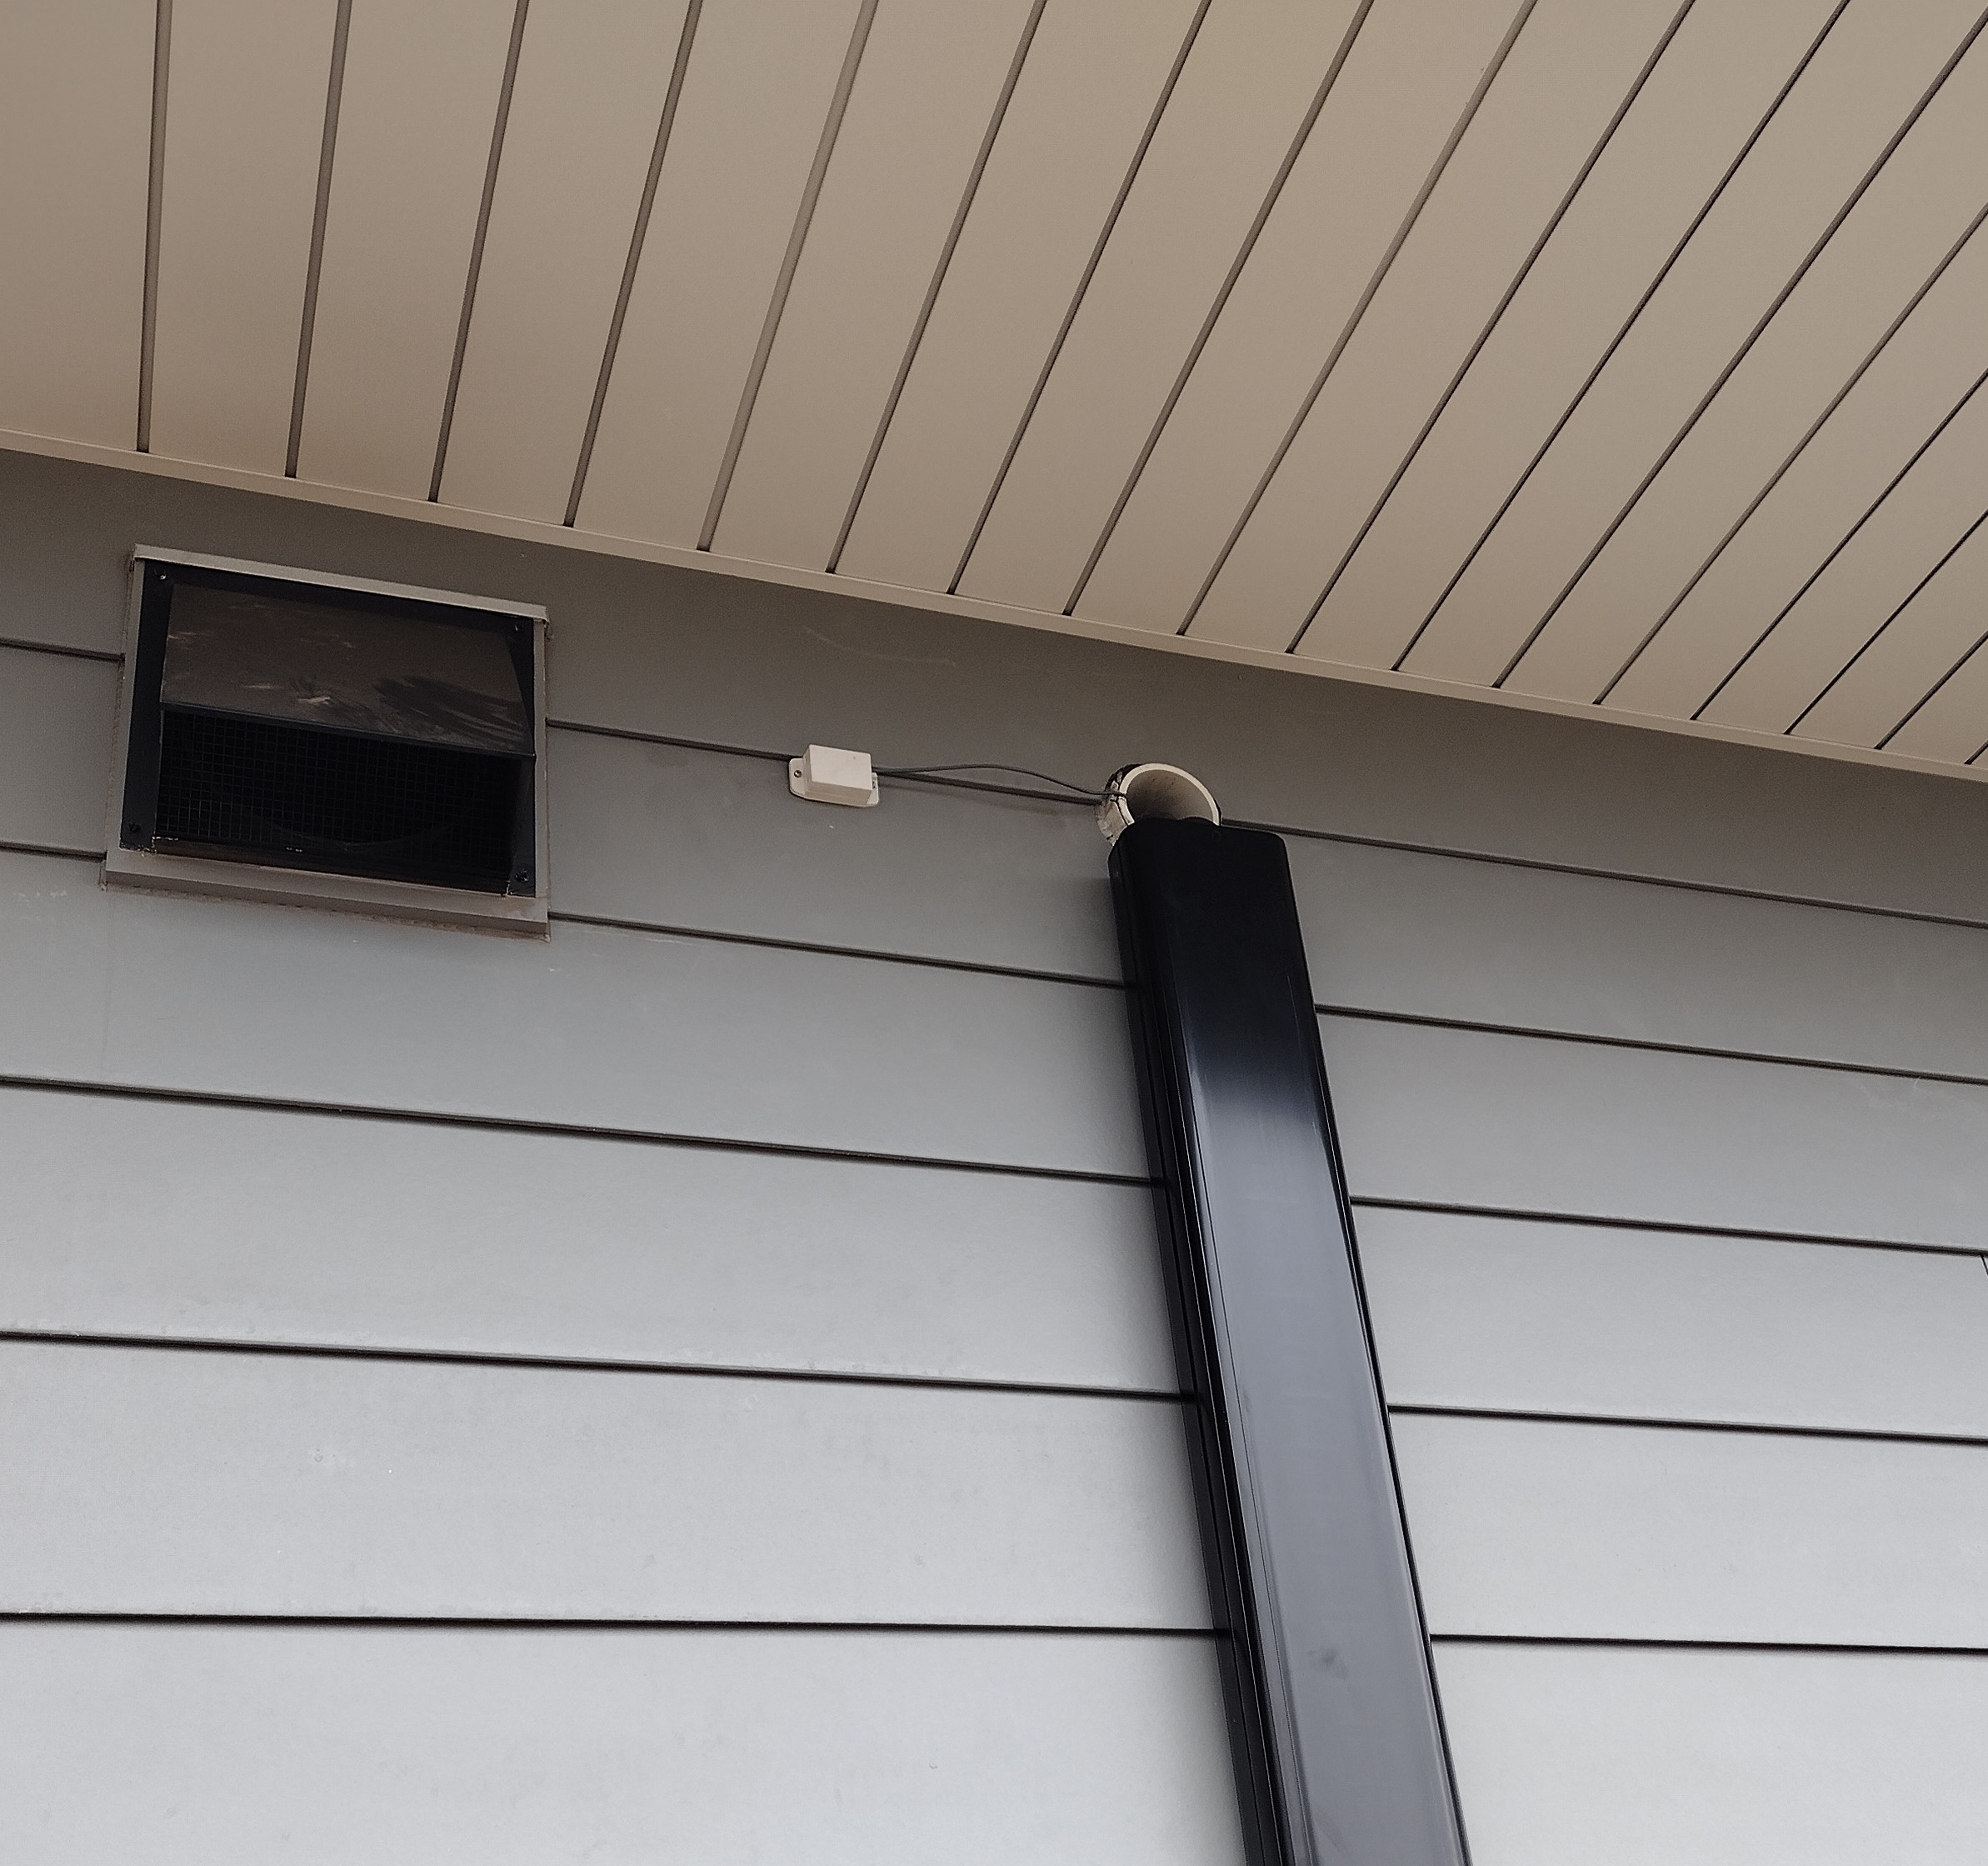
Instead of burying the refrigerant lines inside the wall, we surface mounted them to the siding, seen here protected by a black plastic line set cover. In the mechanical room, the refrigerant lines are concealed behind a white plastic cover.
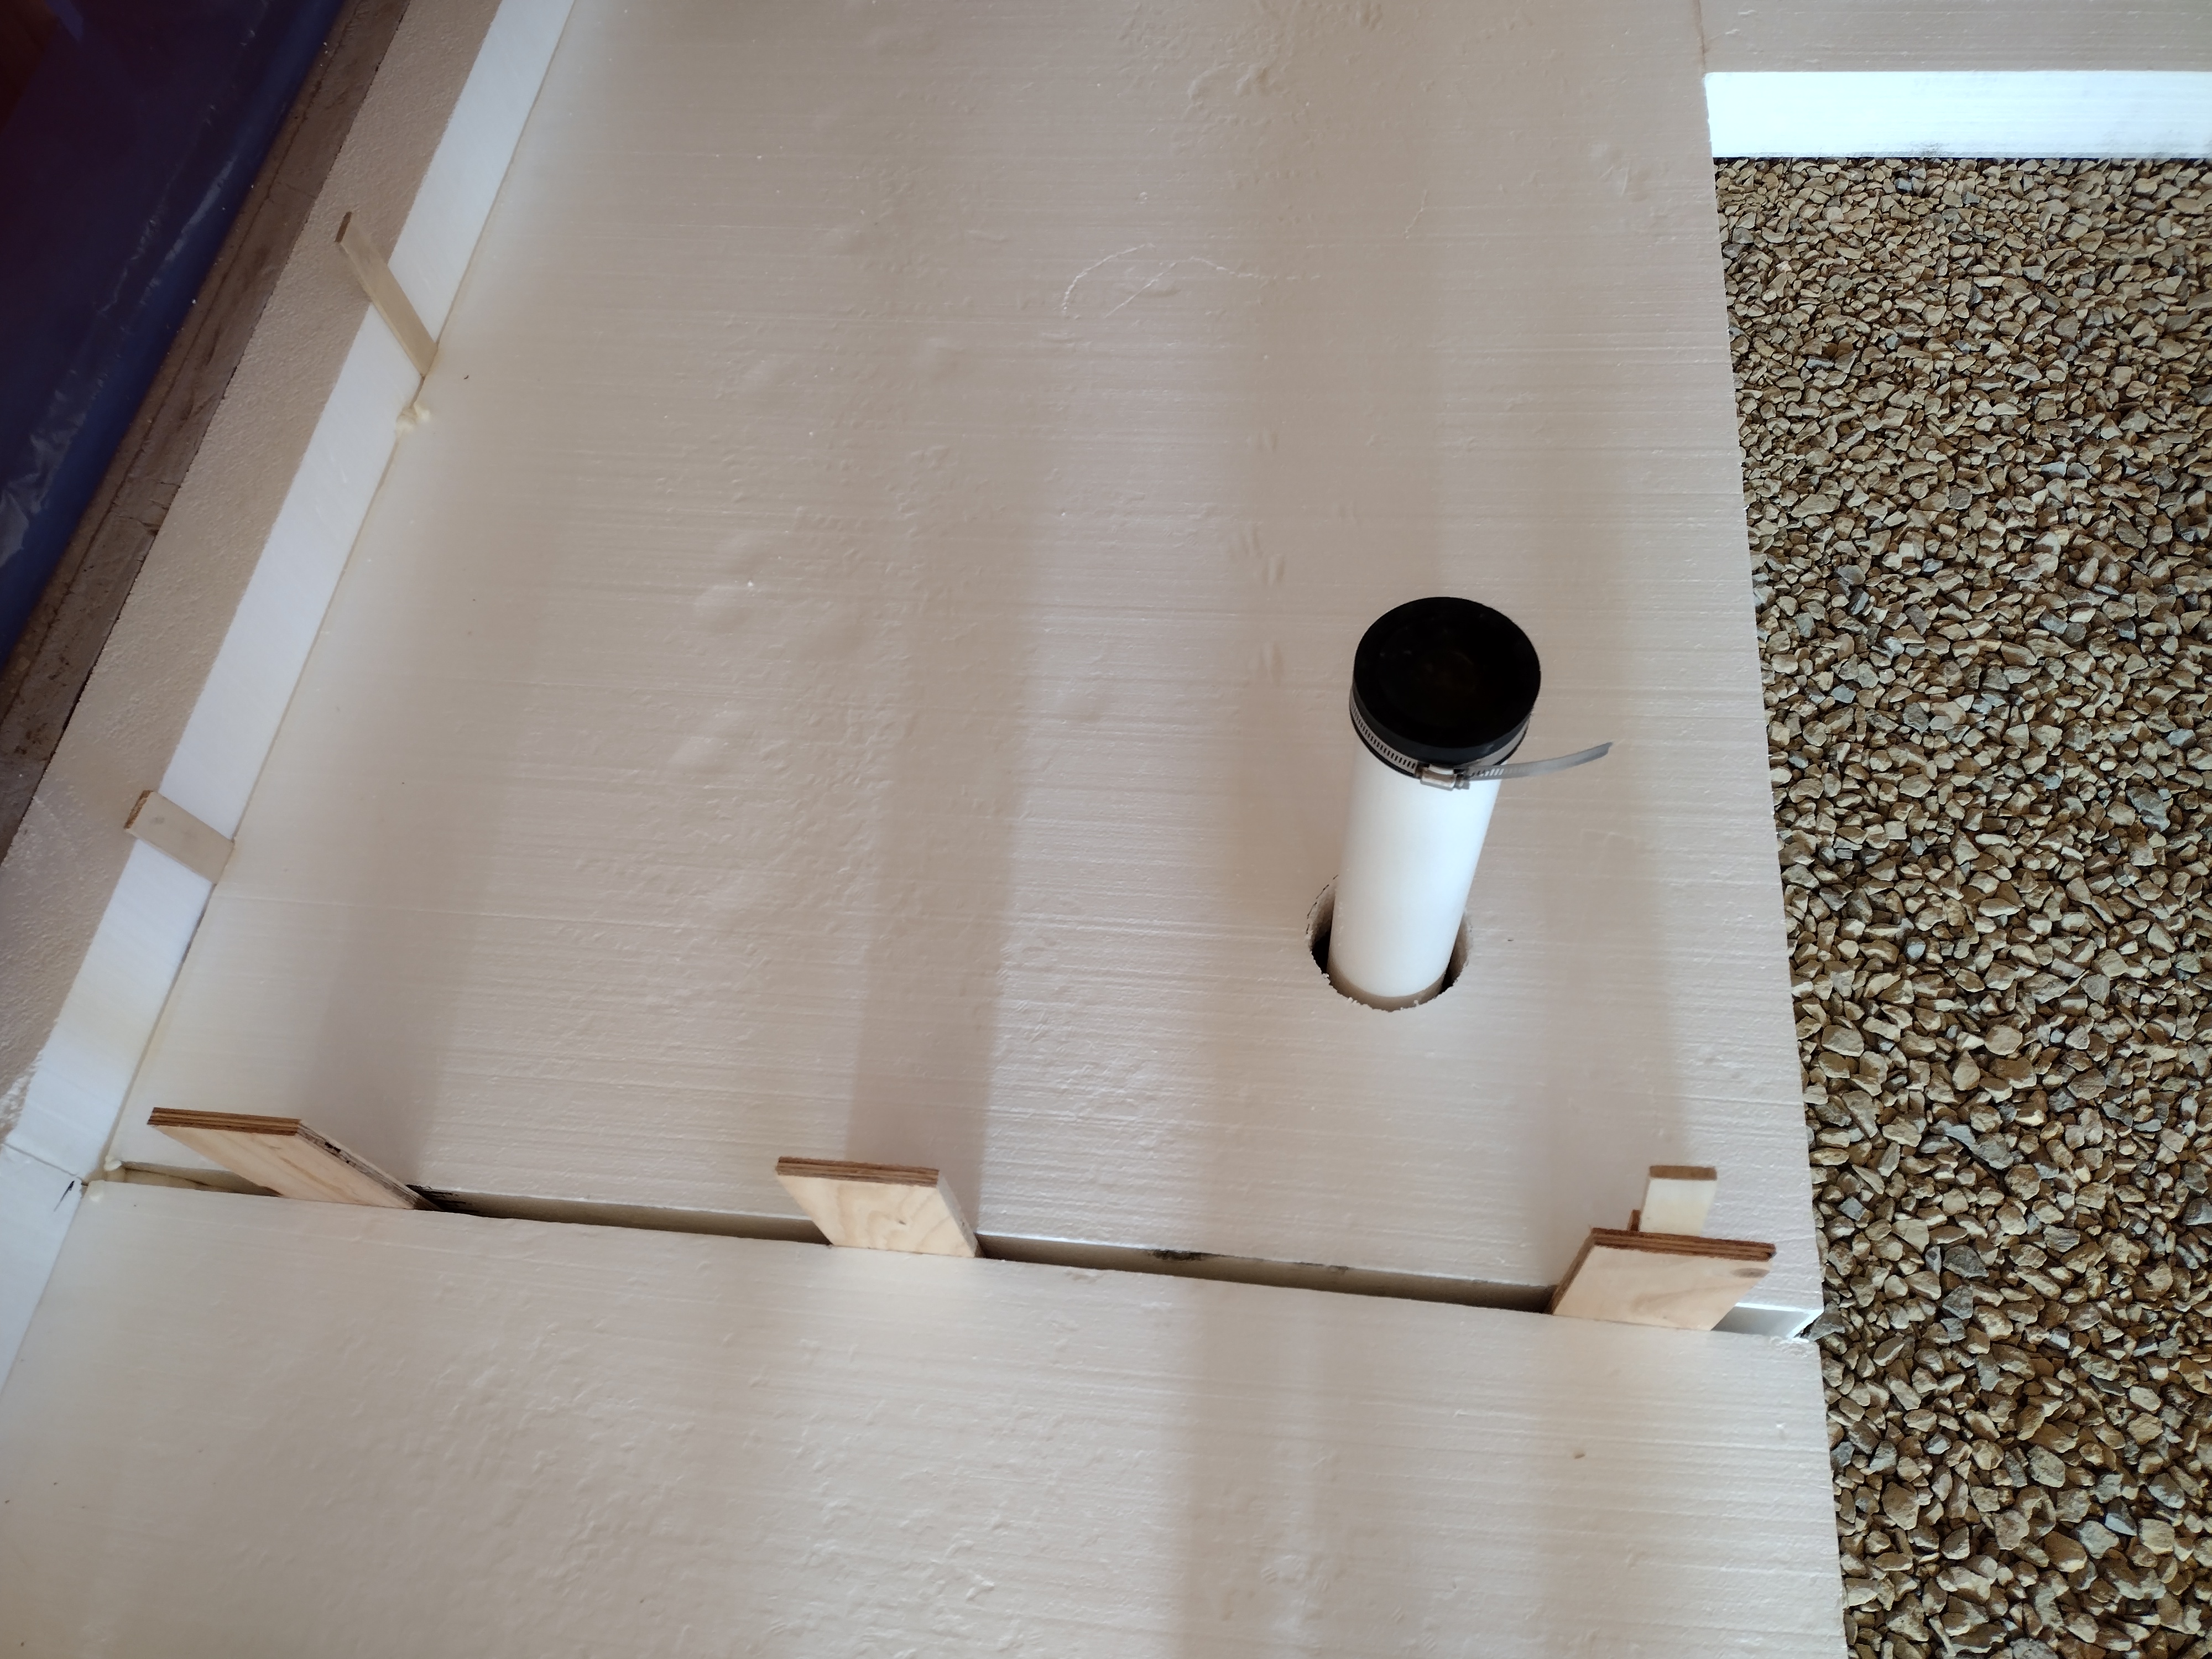
At the framing stage (before siding and drywall), I installed a white 4 inch PVC pipe to serve as a sleeve for the refrigerant lines. The picture on the left shows the sleeve just after the lines and line set cover were installed but before the matching hood was snapped into place. The picture on the right shows the sleeve taped to the vapor retarder, prior to insulationand drywall.
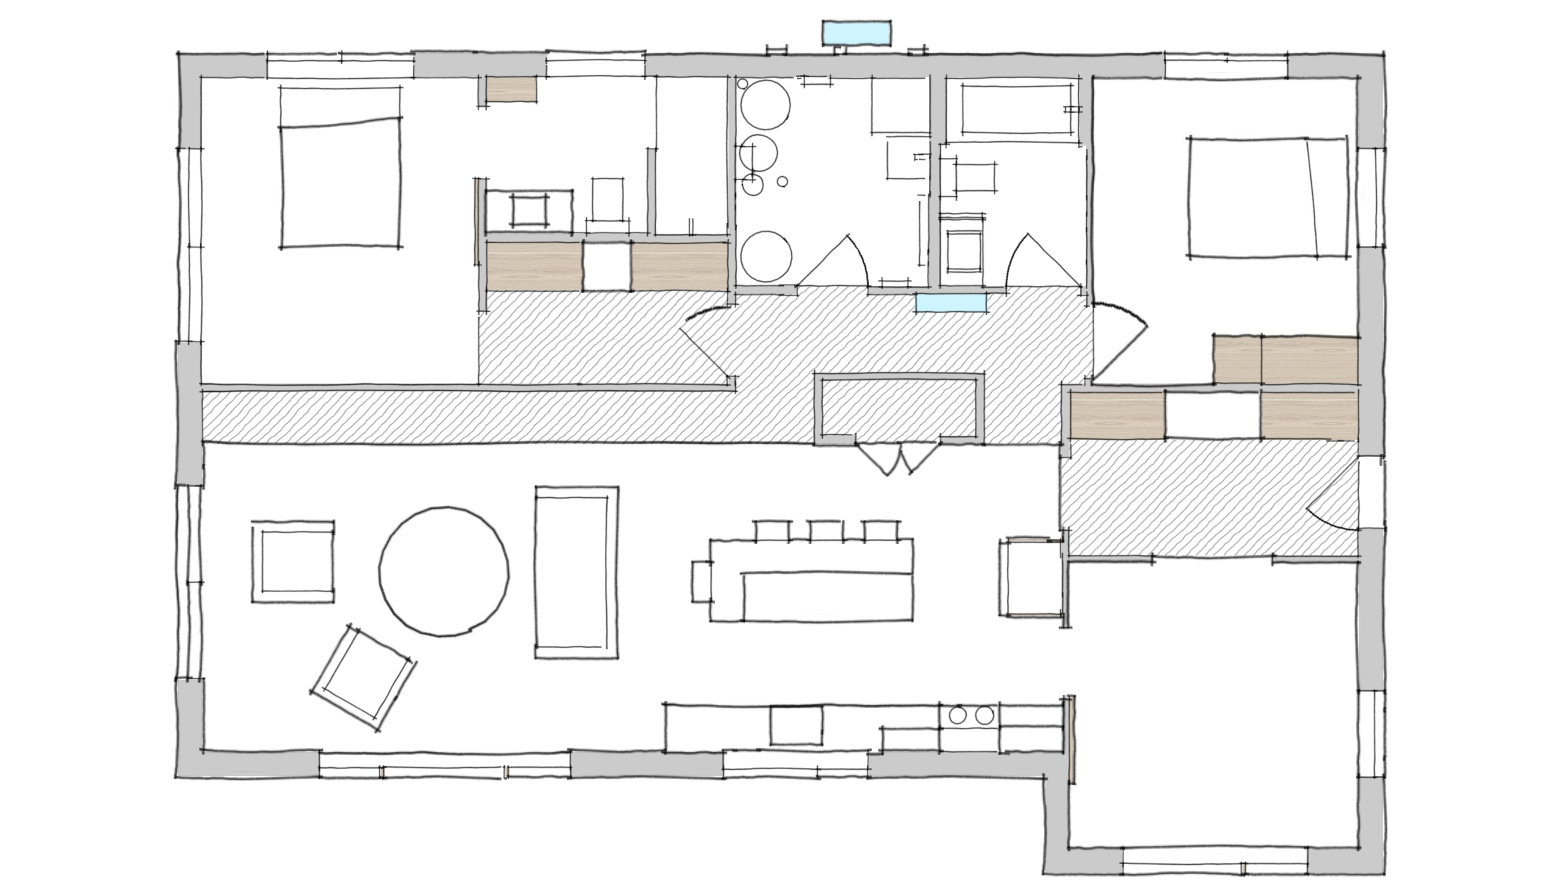
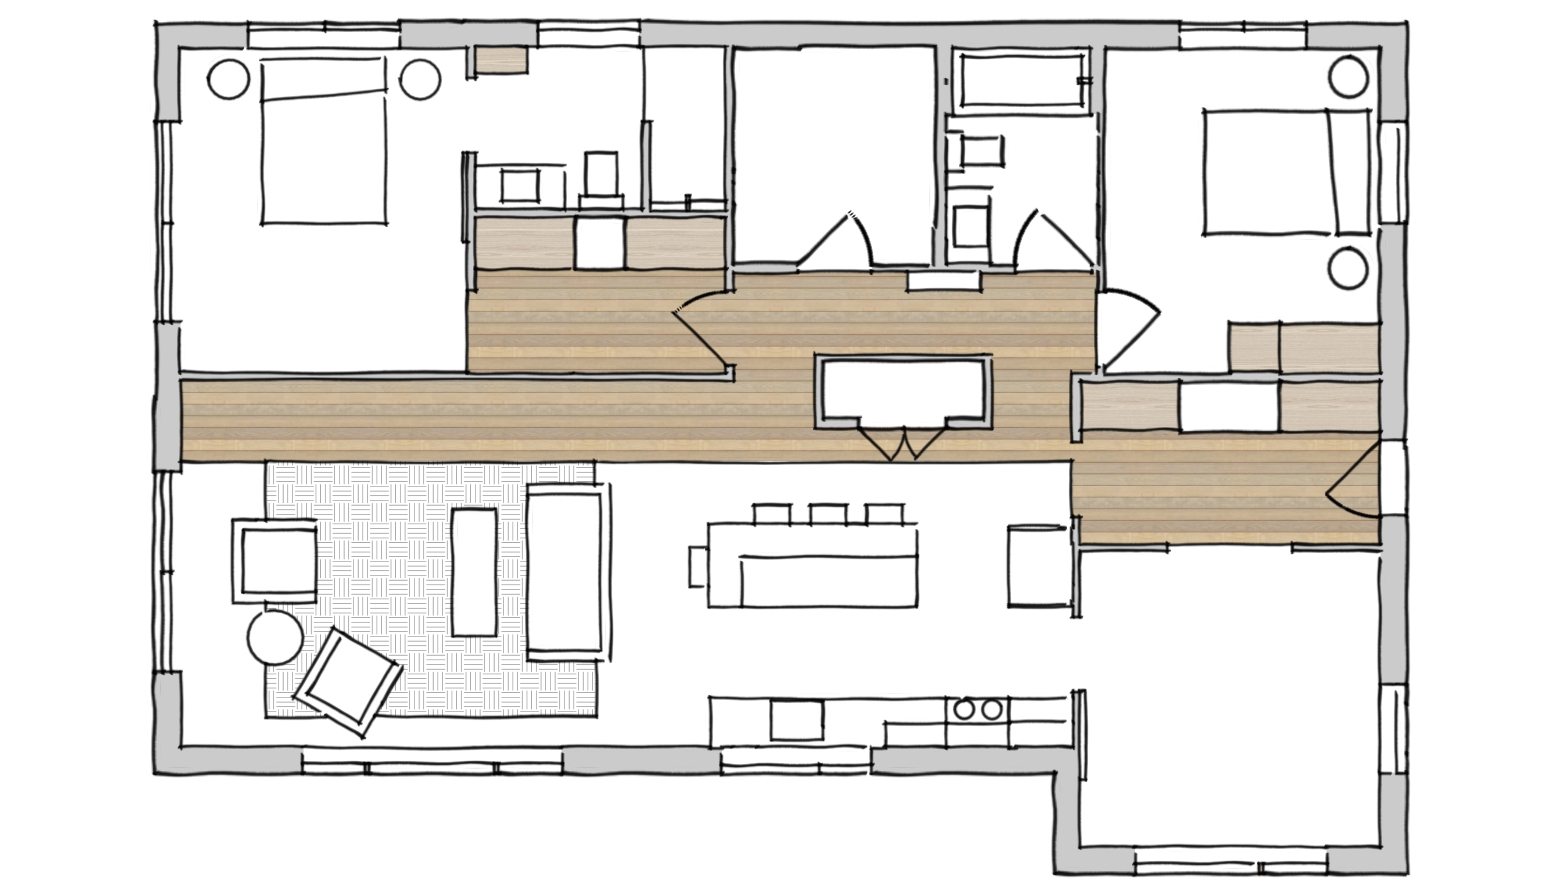
Here’s the floor plan showing the mini split heat pump highlighted in blue. The outdoor unit is located on the north wall of the mechanical room and the indoor unit is in the hallway. With bedroom and bathroom doors open and ceiling fans whirring, the heated or cooled air should circulate fairly evenly.
The home has 9 feet ceilings except in the hallway, entryway, pantry closet, and along the light shelf in the living room where it drops to 8 feet (hatched area on plan). This soffit hides the ductwork necessary to delivery fresh air to the living spaces and exhaust stale air from the bathrooms and kitchen.
On the left you can see the skeletal frame of the soffit and how the 12 inch drop creates space for ductwork. On the right, a white fresh air register above the cedar strip light tray.
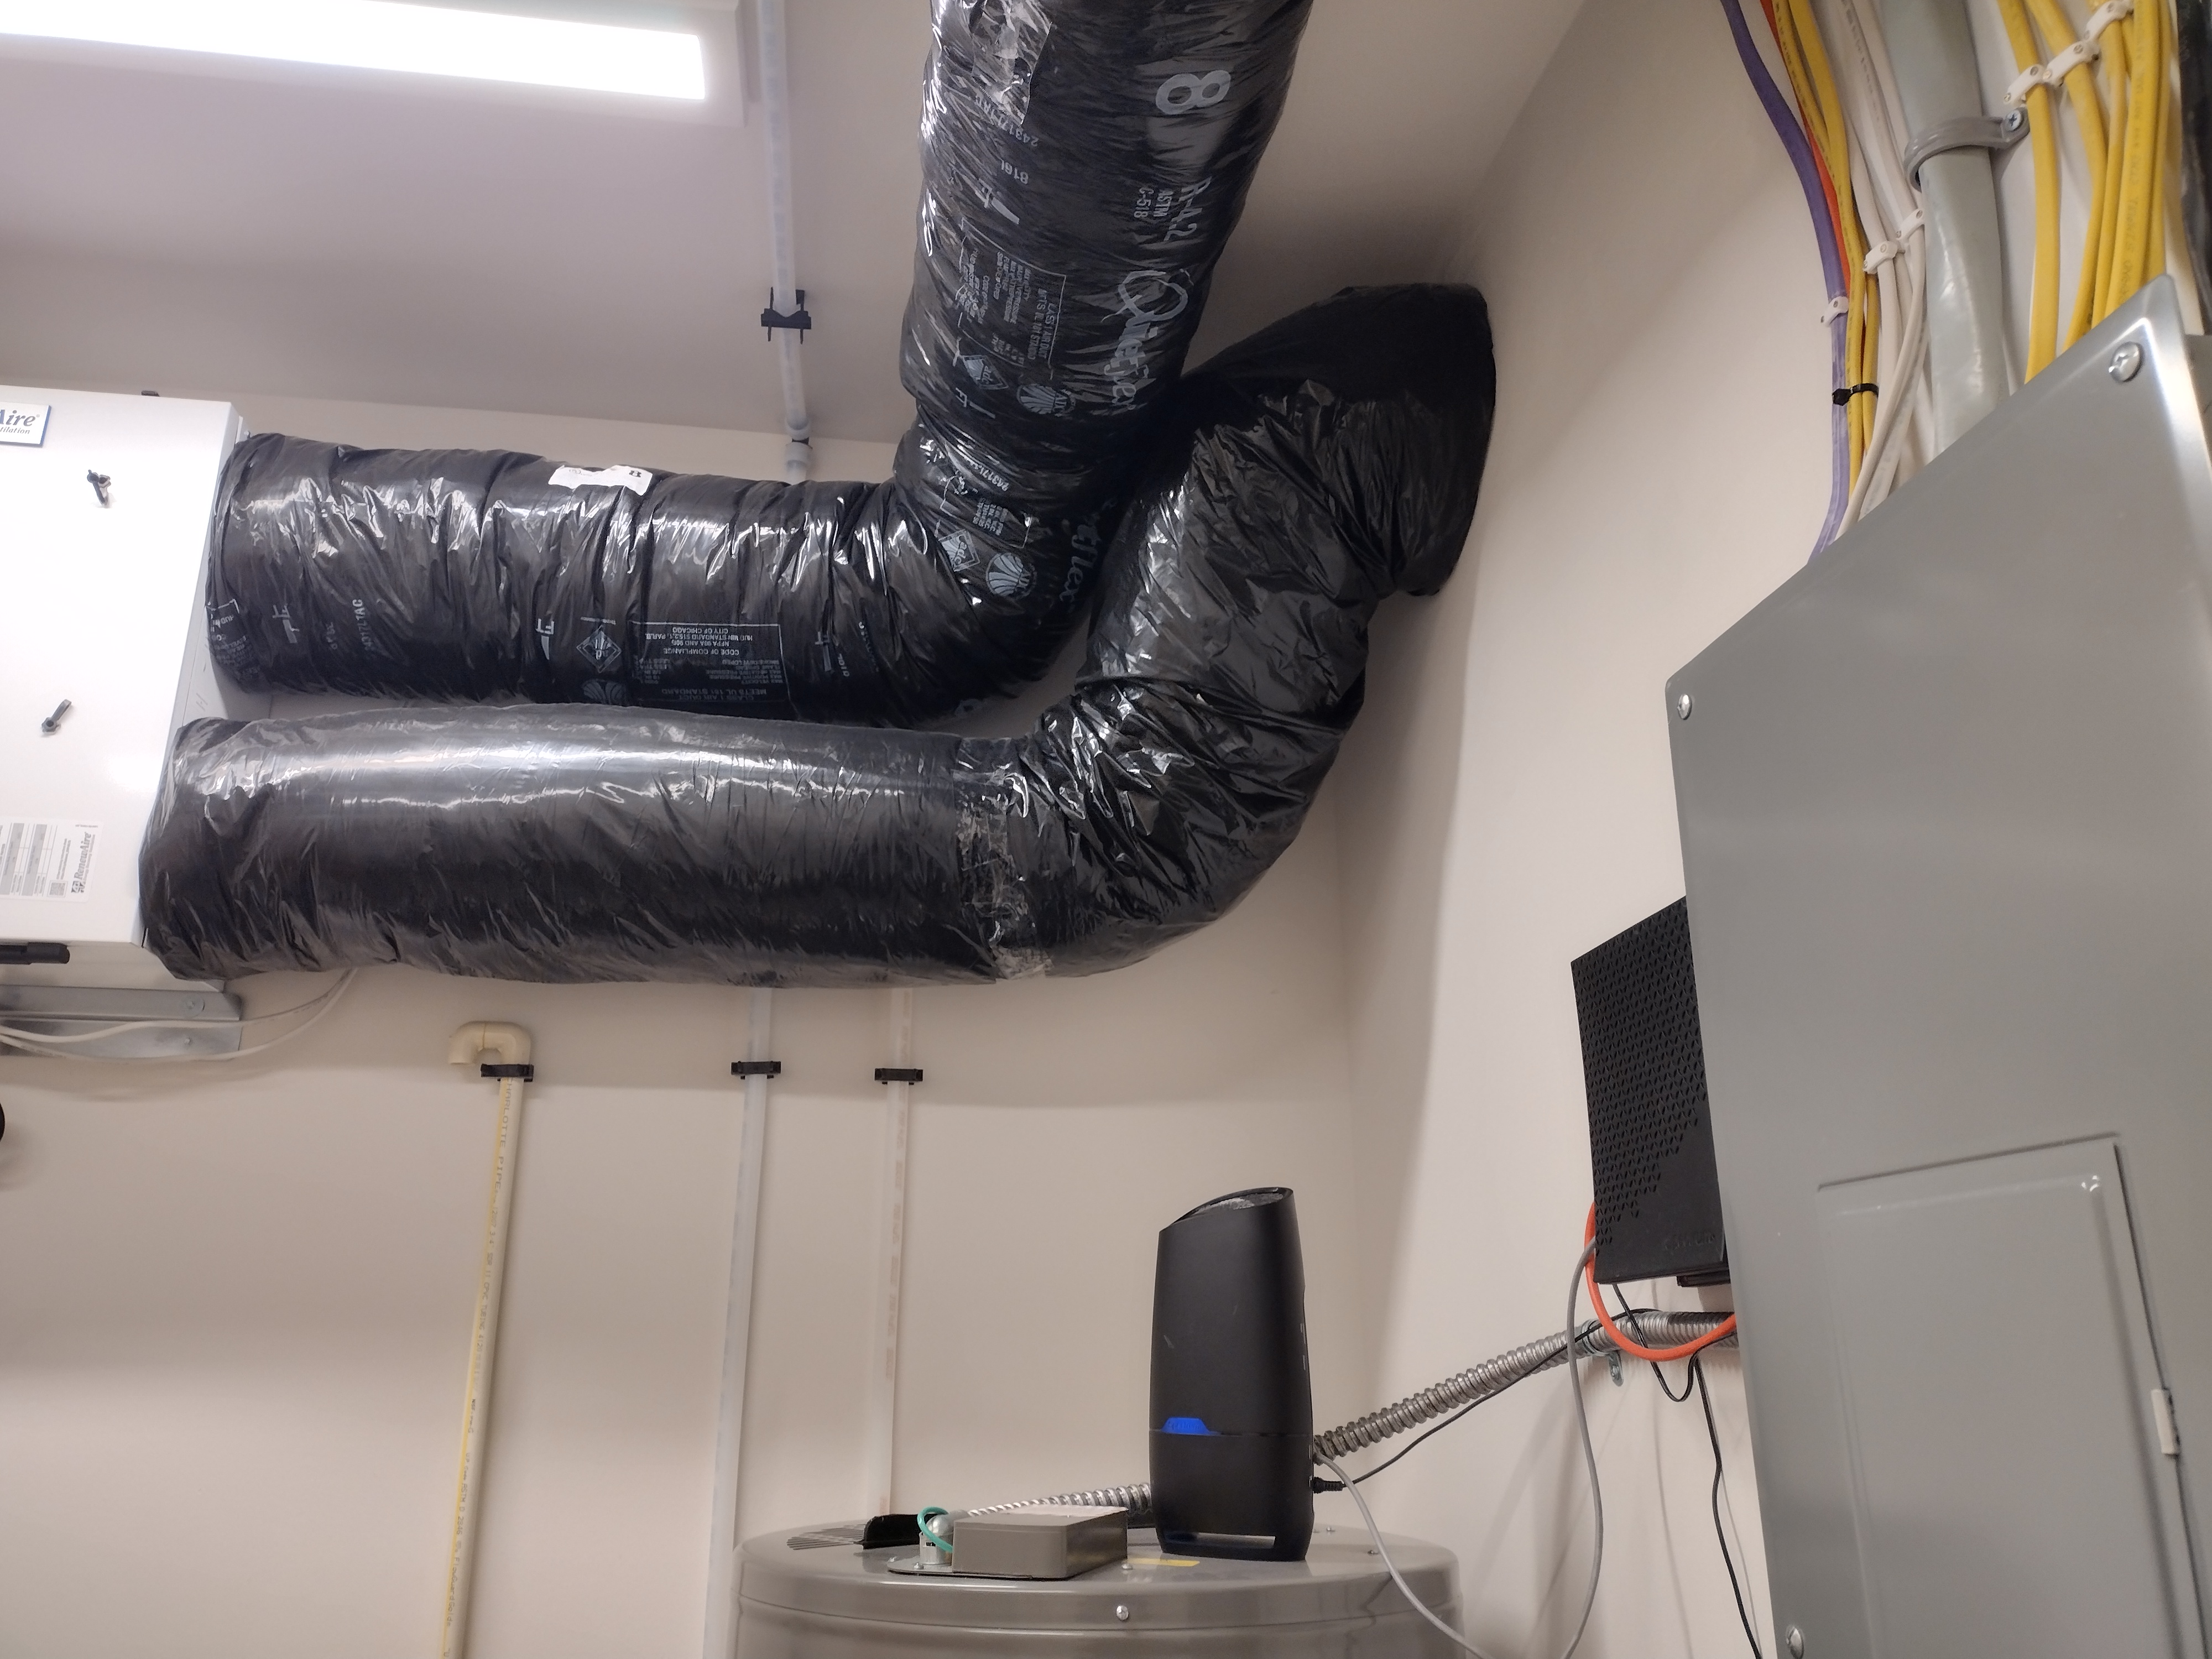
Concealed in the soffit and exposed in the mechanical room are 4 inch, 6 inch, and 8 inch rigid galvanized steel ducts that enter and exit an Energy Recovery Ventilator or ERV. I chose the RenewAire EV Premium S unit, manufactured in nearby Waunakee, Wisconsin. This unit is energy efficient to operate, relatively quiet, and can move air 30 to 130 cubic feet per minute or CFM—-an ideal range for a home this size.
The supply ducts on the left side of the unit go to the living room, dining room, and bedrooms. The exhaust ducts, also on the left side of the unit, pull stale air from the kitchen and bathrooms. One duct on the right side of the unit brings in fresh air from the north side of the house while the second duct pushes the stale air outside, about 6 feet away from the supply. Because these two ducts are in direct contact with potentially cold outside air, they are insulated to prevent condensation.
In winter, cold dry outside air is pre-heated, filtered, and humidified by the exhausting stale air from the house. The air streams bypass each other—without mixing—inside the unit. In summer, warm humid outside air is pre-cooled, filtered, and de-humidified by the exhausting stale air.
An ERV is an essential piece of equipment for an air-tight home, and should be operated continuously whenever windows are shut and the air-conditioning or heating system is running. With virtually no random leaks like an ill-fitting door sweep or an un-caulked electrical outlet, an air-tight home can’t get enough fresh air to dilute the indoor air pollutants that inevitably build up.
I began monitoring the air quality of my own home several years ago with a consumer-grade device called Awair, and it was a real eye-opener. Here’s the unit on my kitchen window sill, showing a score of 87 out of 100. Good, not great.
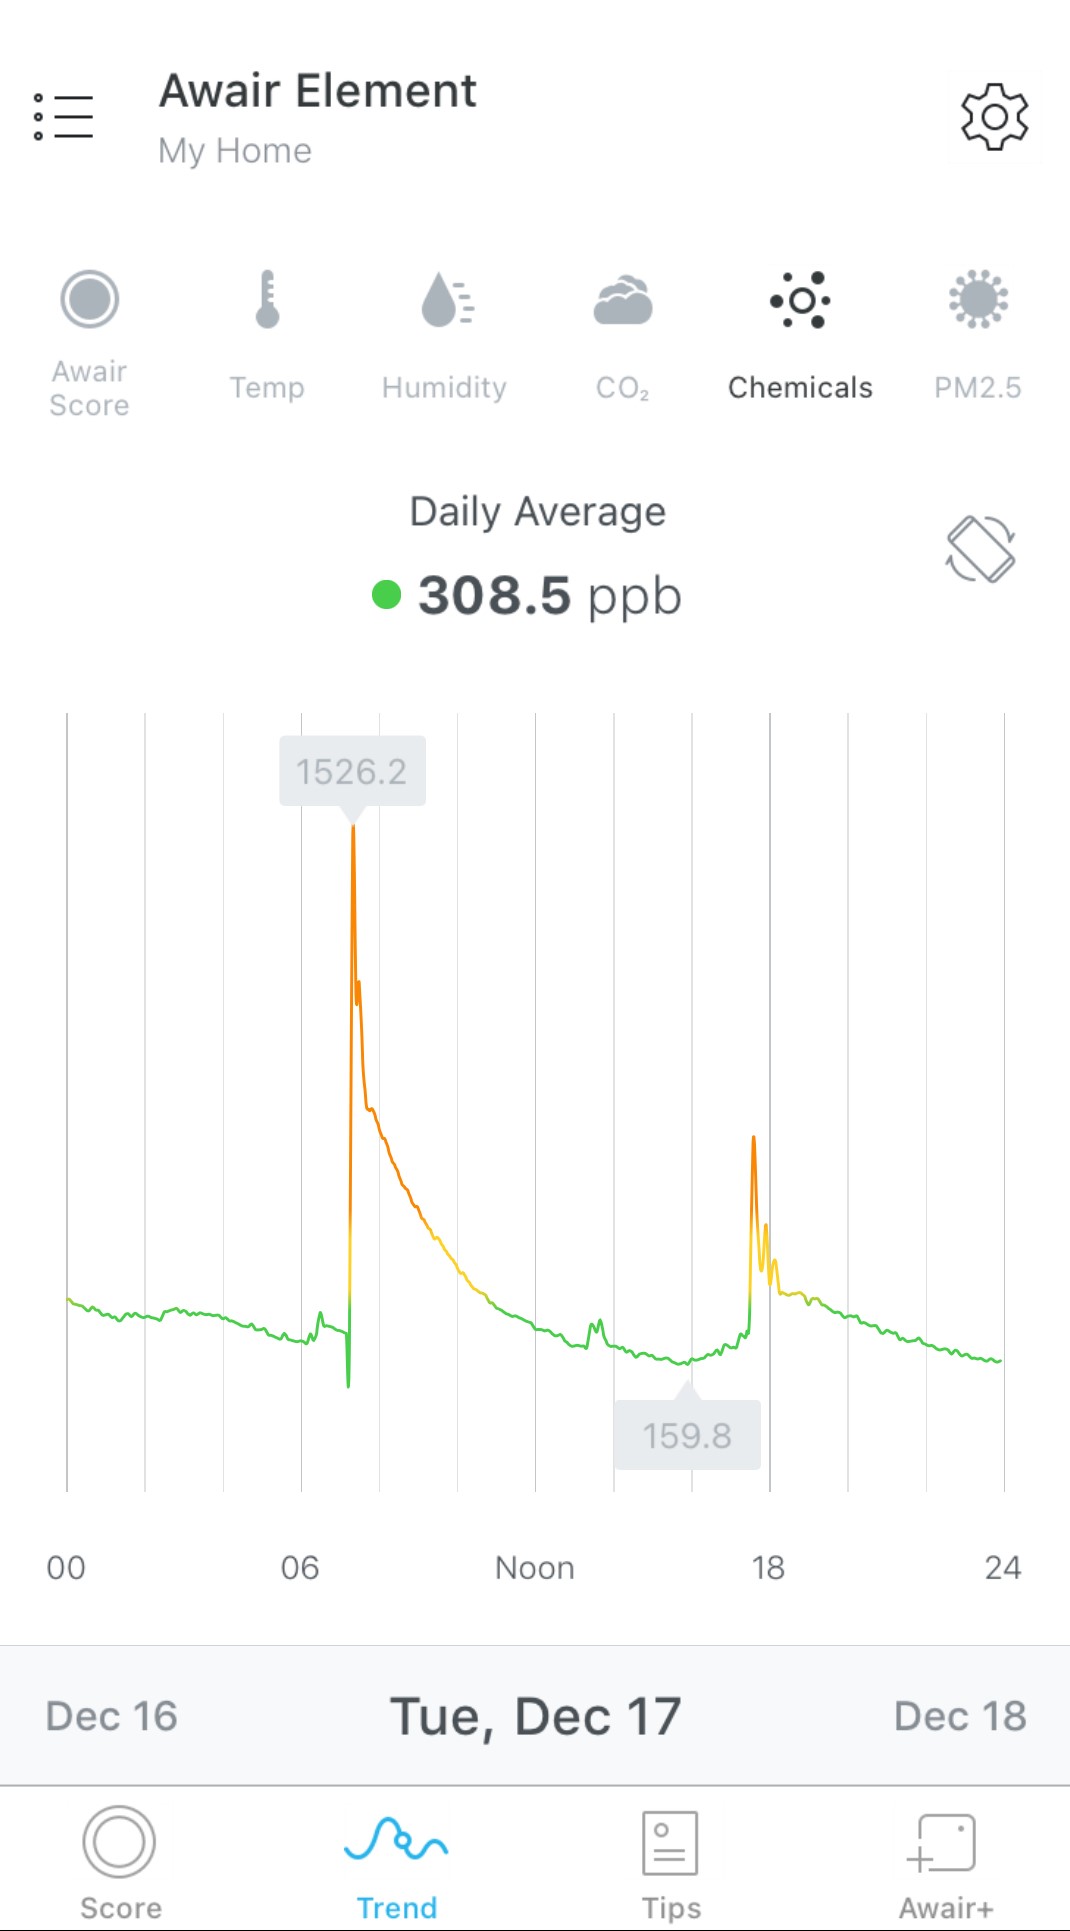
I found out that when more than two people visit, I better crank up the ERV to keep Carbon Dioxide or CO2 levels from spiking. CO2 is the silent but harmful byproduct of human breathing that can cause drowsiness and lethargy. Sunscreen, perfume, and cleaning products alert me to concerning levels of Chemicals and seemingly harmless slightly-burned toast calls my attention to Particulate Matter or PM 2.5’s—-all known to cause respiratory irritation and compromise the health of those with asthma or allergies.
This is what happens when you burn toast(red is bad, green is good).
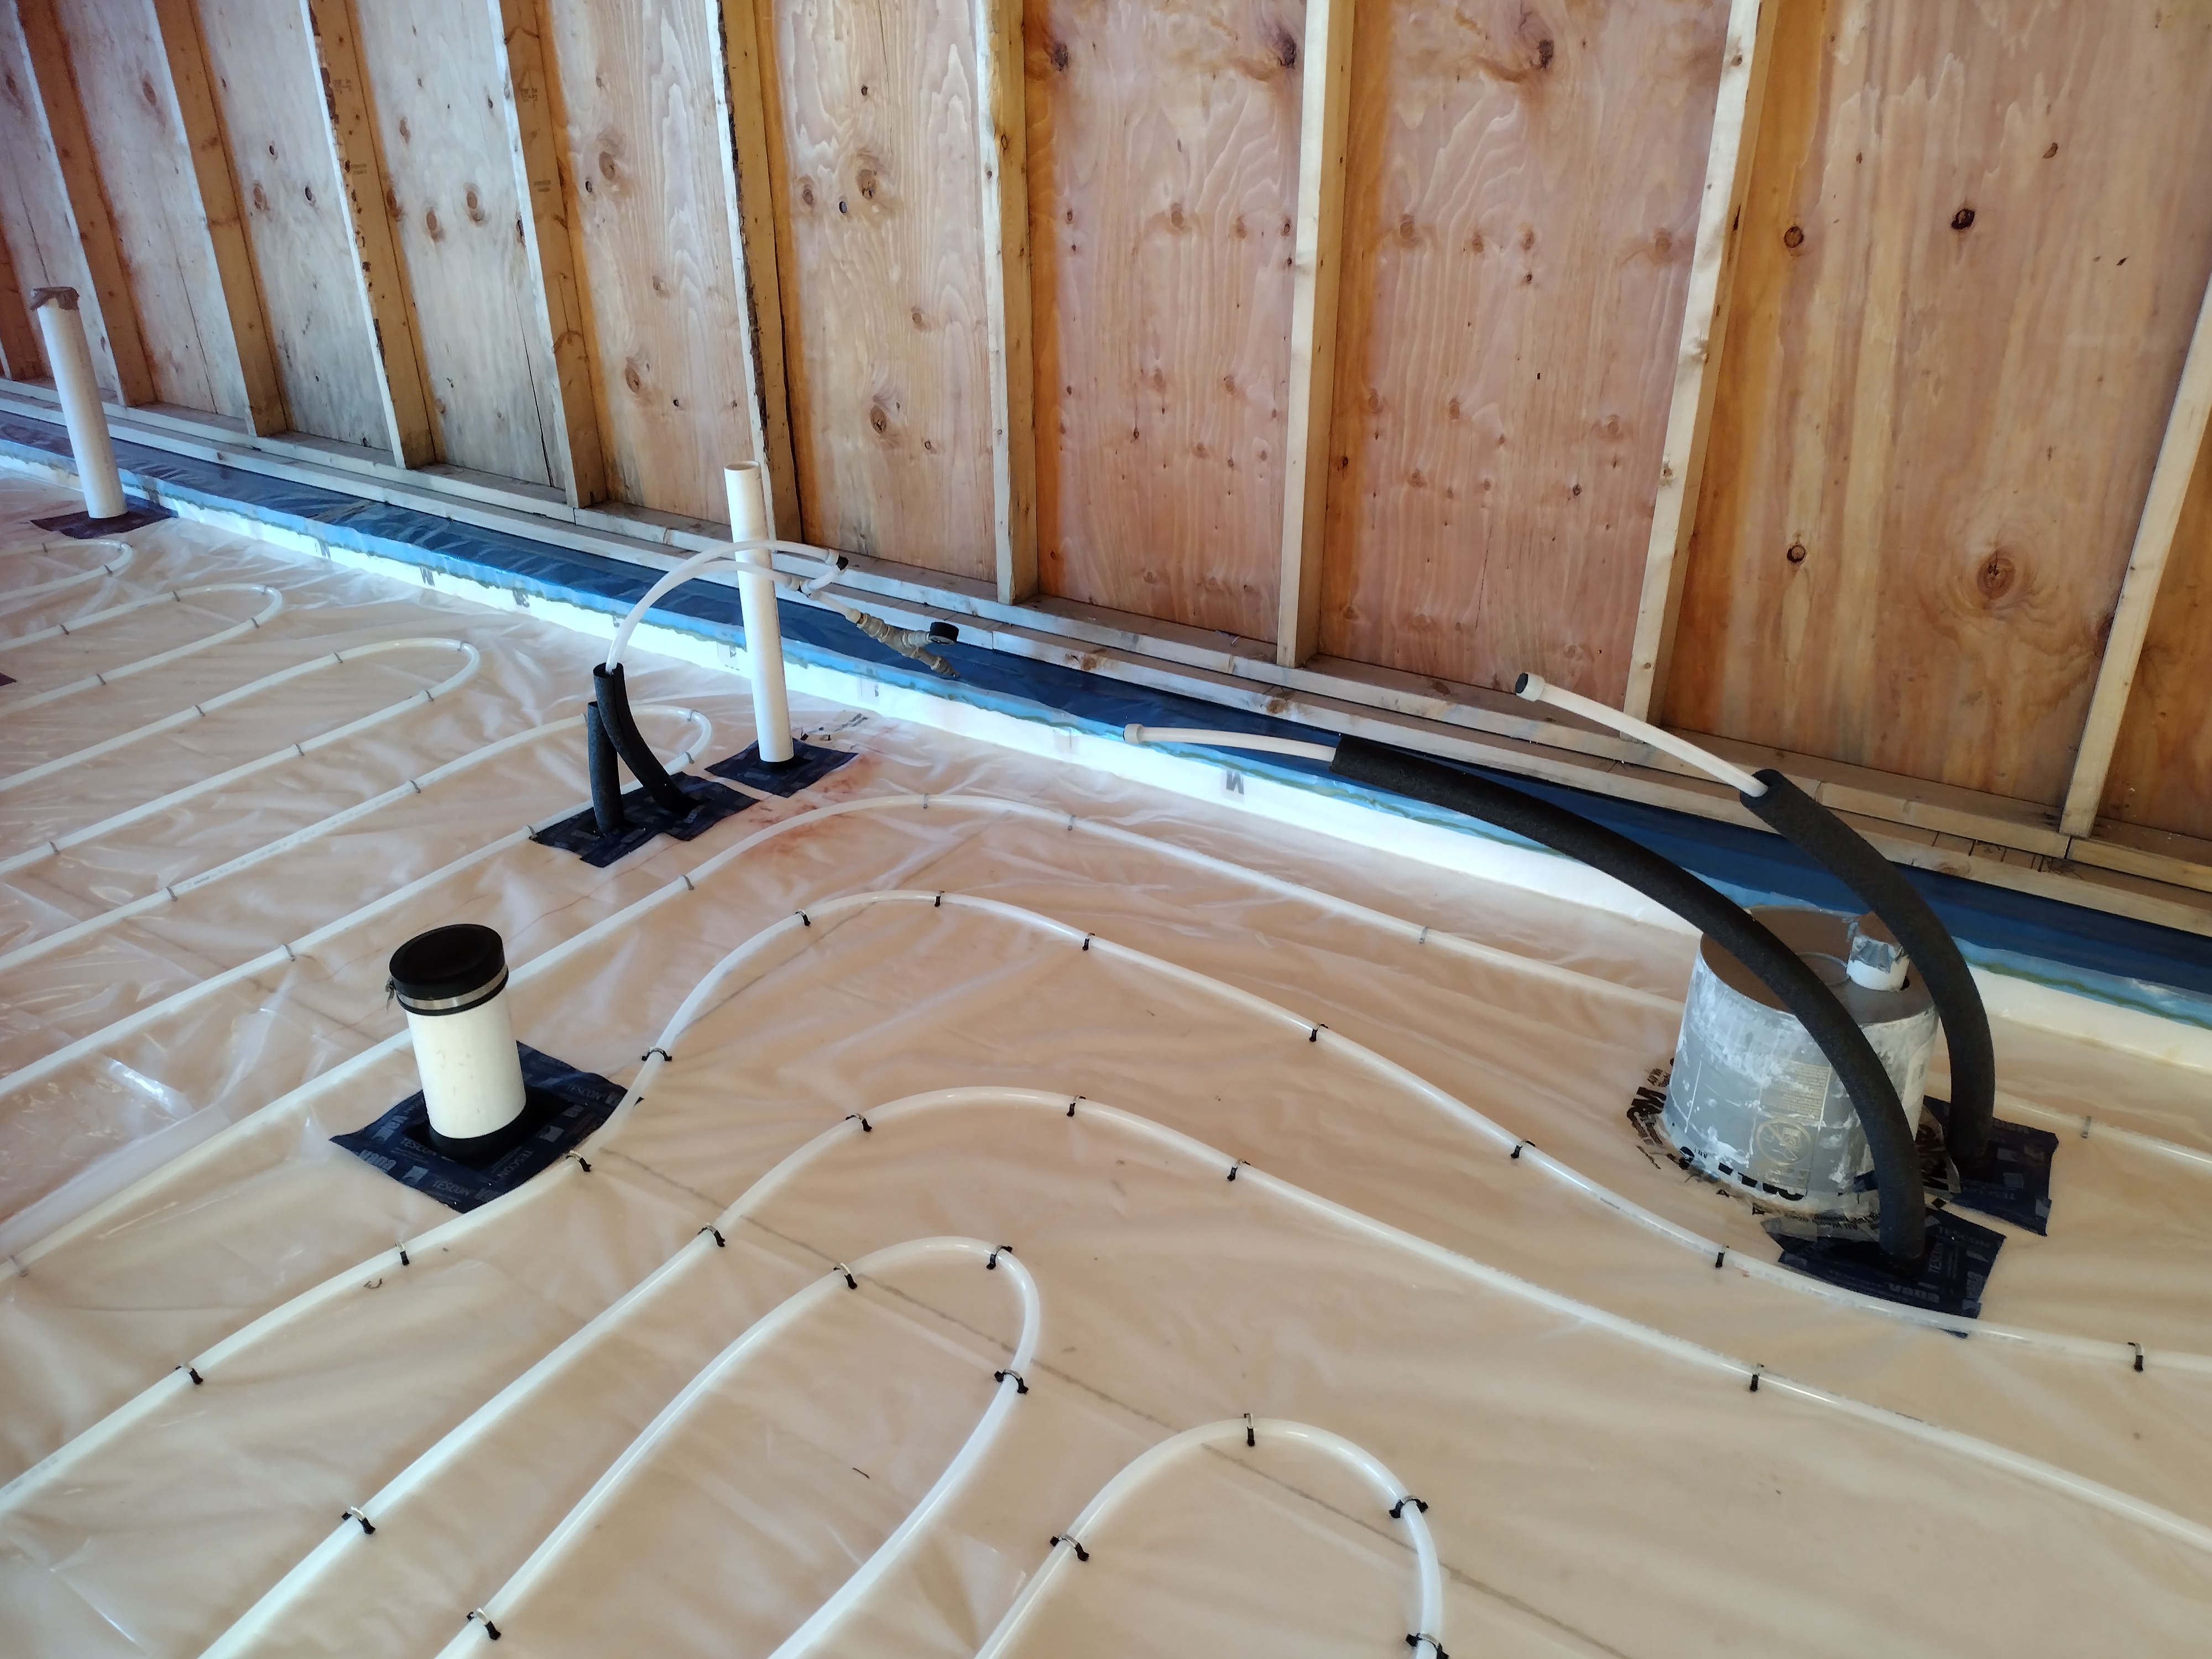
Partly for backup heat but mostly for comfort, we installed PEX tubing prior to pouring the slab.
The radiant heating system cost $13,000—a luxury upgrade that I deemed necessary after living in my own home for the last 5 years. While my air temperature may be fine, the slab is cold. There’s no way I can say my house is “cozy” in the dead of winter.
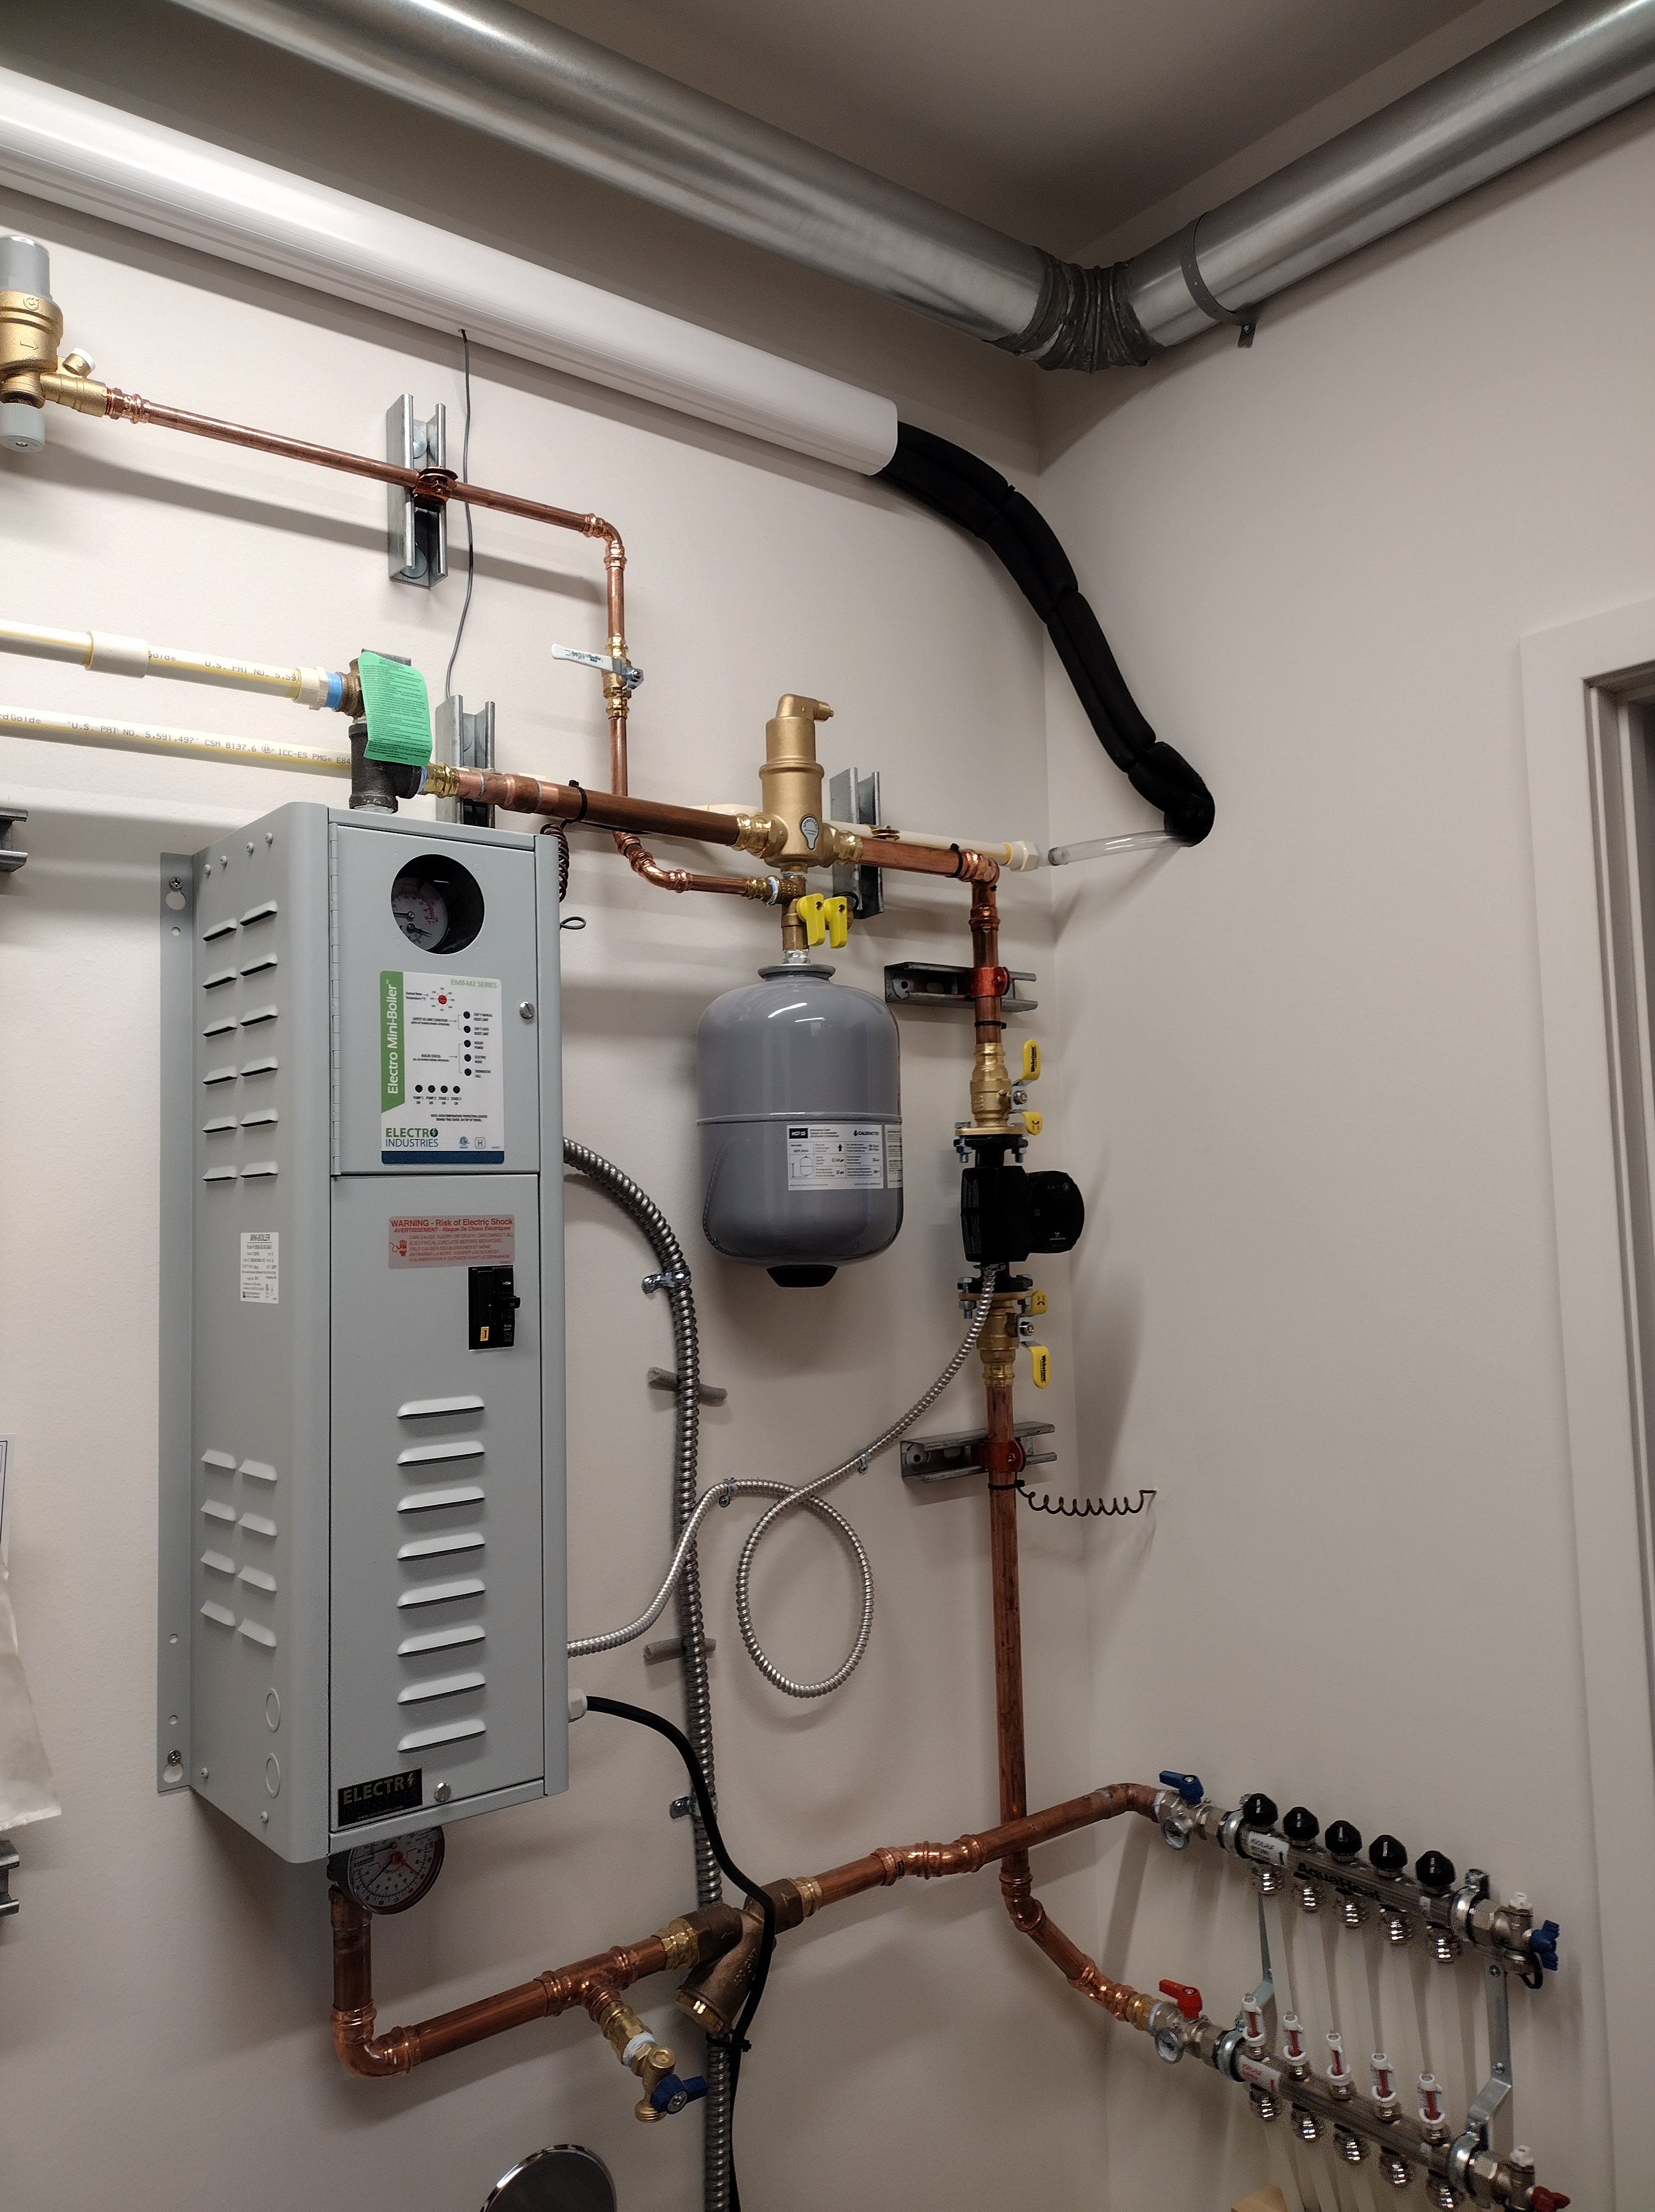
My contractor installed Electro Industries 5 kW Mini-Boiler, the electric resistance heating unit seen here along with an expansion tank, various valves, and the copper lines that connect to the PEX tubing. This set up can more than meet the Calculated Peak Load of the house, according to my REM Rate model.
I’m eager to learn how the house will function this coming winter, the first for the homeowners. The radiant slab is expected to take several days to warm up, and will probably perform best (and be most economical) when the thermostat is set several degrees below the desired air temperature. Sunny days will raise the air temperature—perhaps beyond comfort—and especially cold and windy days (even with all the extra insulation and air-sealing) will cause a drop. But that’s where the mini-split comes to the rescue—quickly ramping up with cool or warm air to even out the difference.
The Mitsubishi mini-split is by far more energy efficient than Electro’s mini-boiler. That’s because of something called the Coefficient of Performance or COP. The mini-boiler is like a toaster: it converts electrical energy directly into heat for a COP of 1. The mini-split is a heat pump that moves heat energy from one air source to another: it consumes electrical energy to run its compressor and fans but delivers several time more units of heat energy for a COP that ranges from 1.89 (at minus 13 degrees) to 4.54 (at 47 degrees).
If the home is heated solely with the radiant slab, the yearly cost is predicted to be $908
If the home is heated solely with the mini-split, the yearly cost is predicted to be $447
A happy outcome may be for the radiant slab to satisfy 1/3 of the heating demand while the mini-split makes up the rest, for a yearly cost of $591
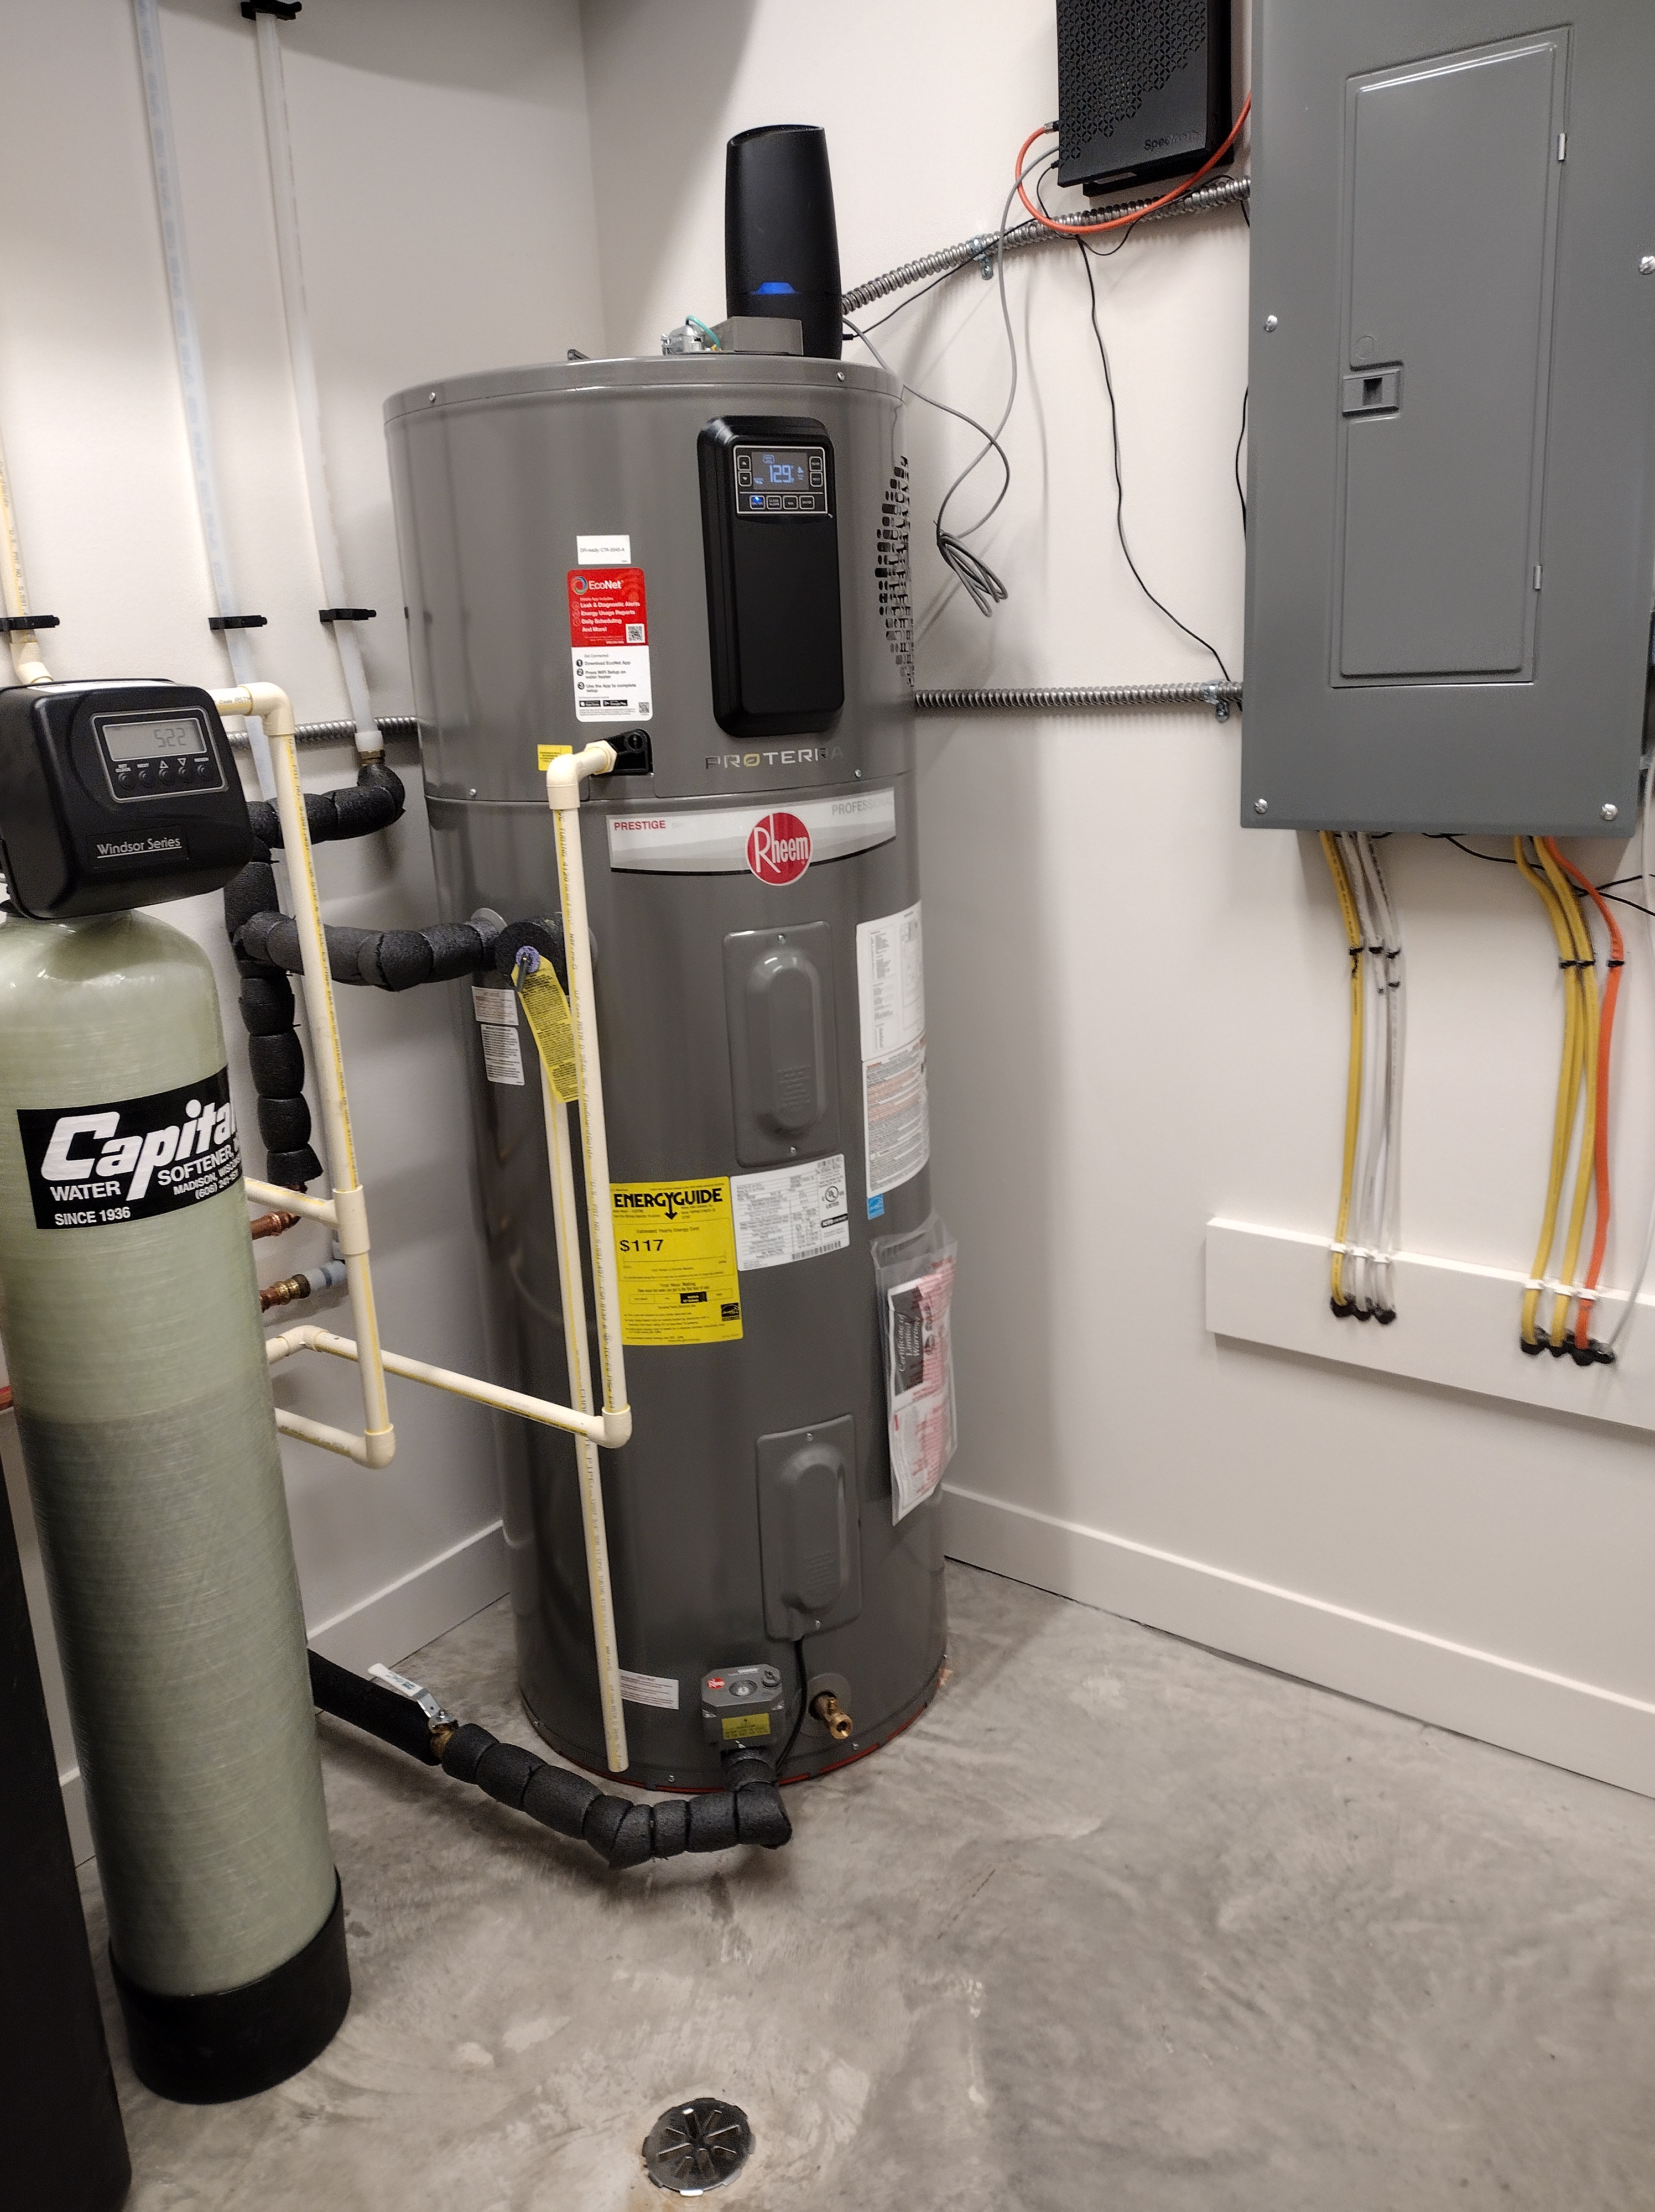
For domestic hot water, I chose Rheem’s Prestige ProTerra Hybrid Electric Heat Pump. The heat pump technology greatly reduces yearly electricity costs. We also installed a 0.4 gallons-per-minute Point-of-Use tankless water heater from Eemax under the kitchen sink, for instant hot water sufficient for washing hands or a few dishes. To the left of the Rheem hot water heater is a standard water softener system.
Water heating is predicted to cost $72 per year.
A conventional electric resistance hot water heater would cost the homeowner $312 per year.
When I first began learning about net-zero energy homes and how to design them, I focused on the building envelope. As an experienced designer of conventional homes, I was well versed in foundations, framing, insulation, windows, and finishes. What I didn’t know about (and didn’t really want to know about?) was mechanical systems. I was an aesthete.
Little did I realize that mastering the building envelope is the easy part: the hard part is matching the low heating and cooling loads of my homes to appropriately sized equipment that is both affordable and locally available. Please let me know if you have any questions about what I’ve selected or any feedback that may help me help my future homeowners.
For reliably helpful articles about building science and other green building topics, my go-to is Green Building Advisor. There’s a paywall but also a lot of free articles. It’s worth checking out.
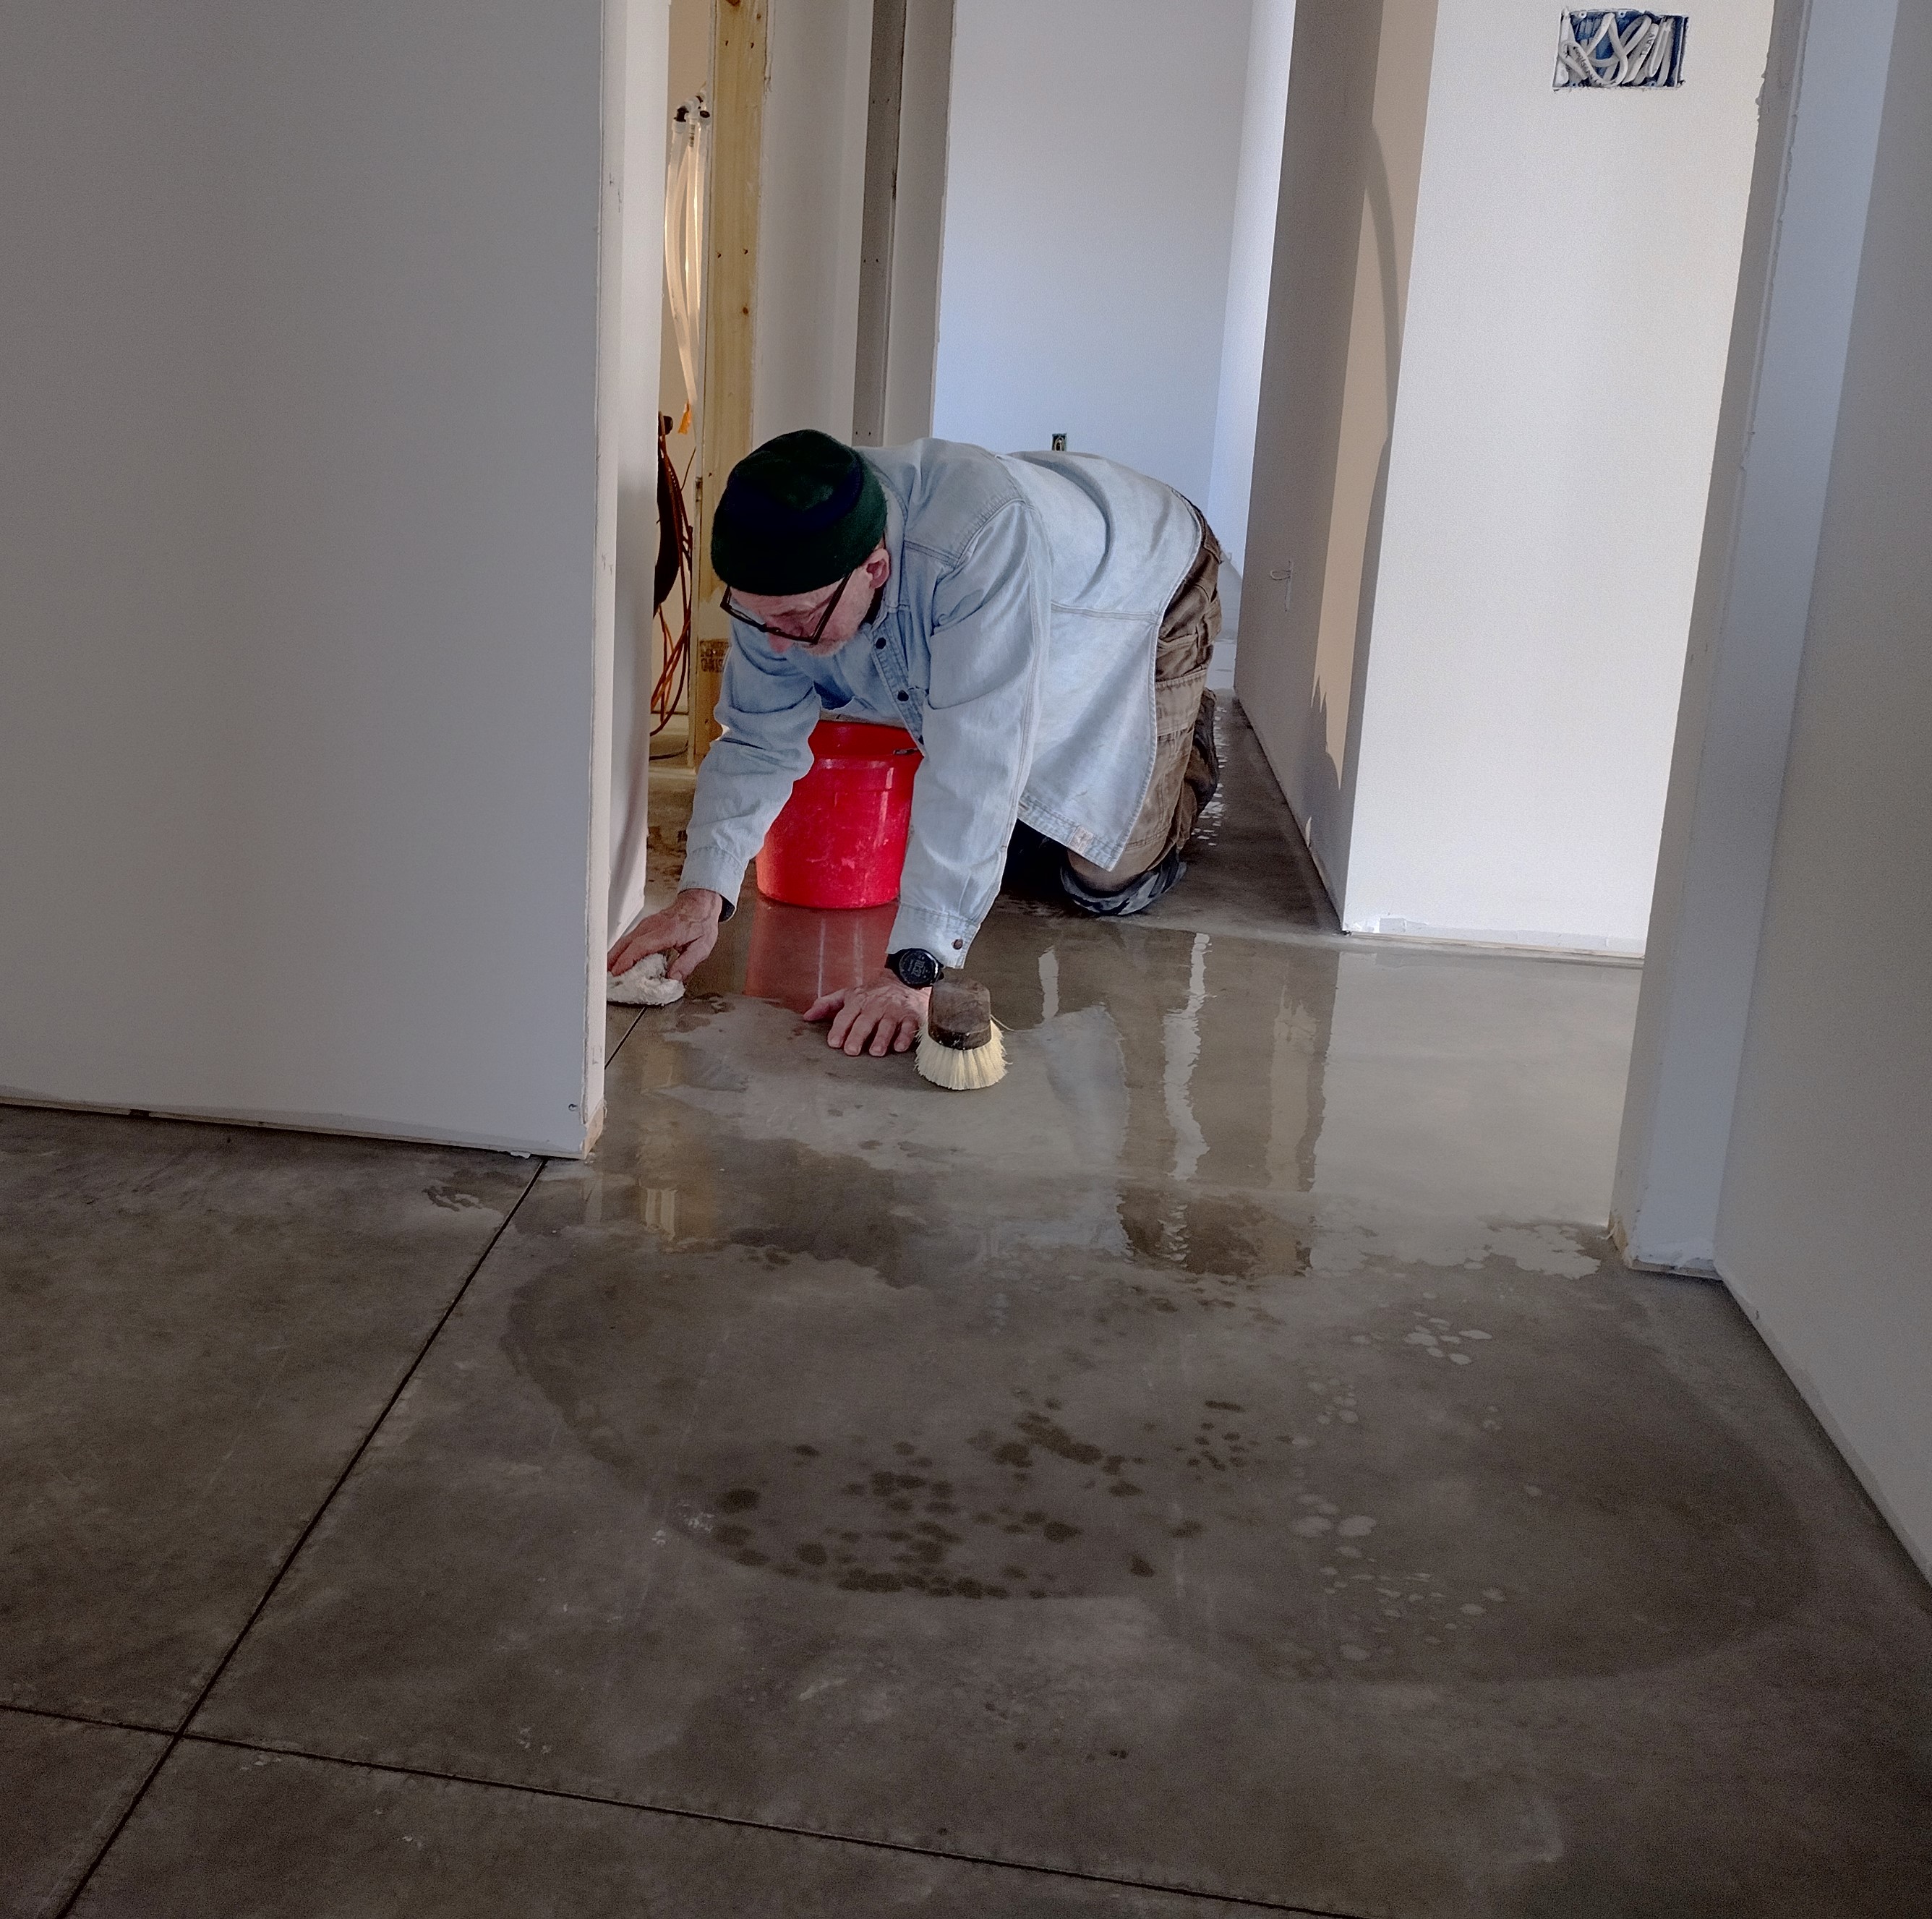
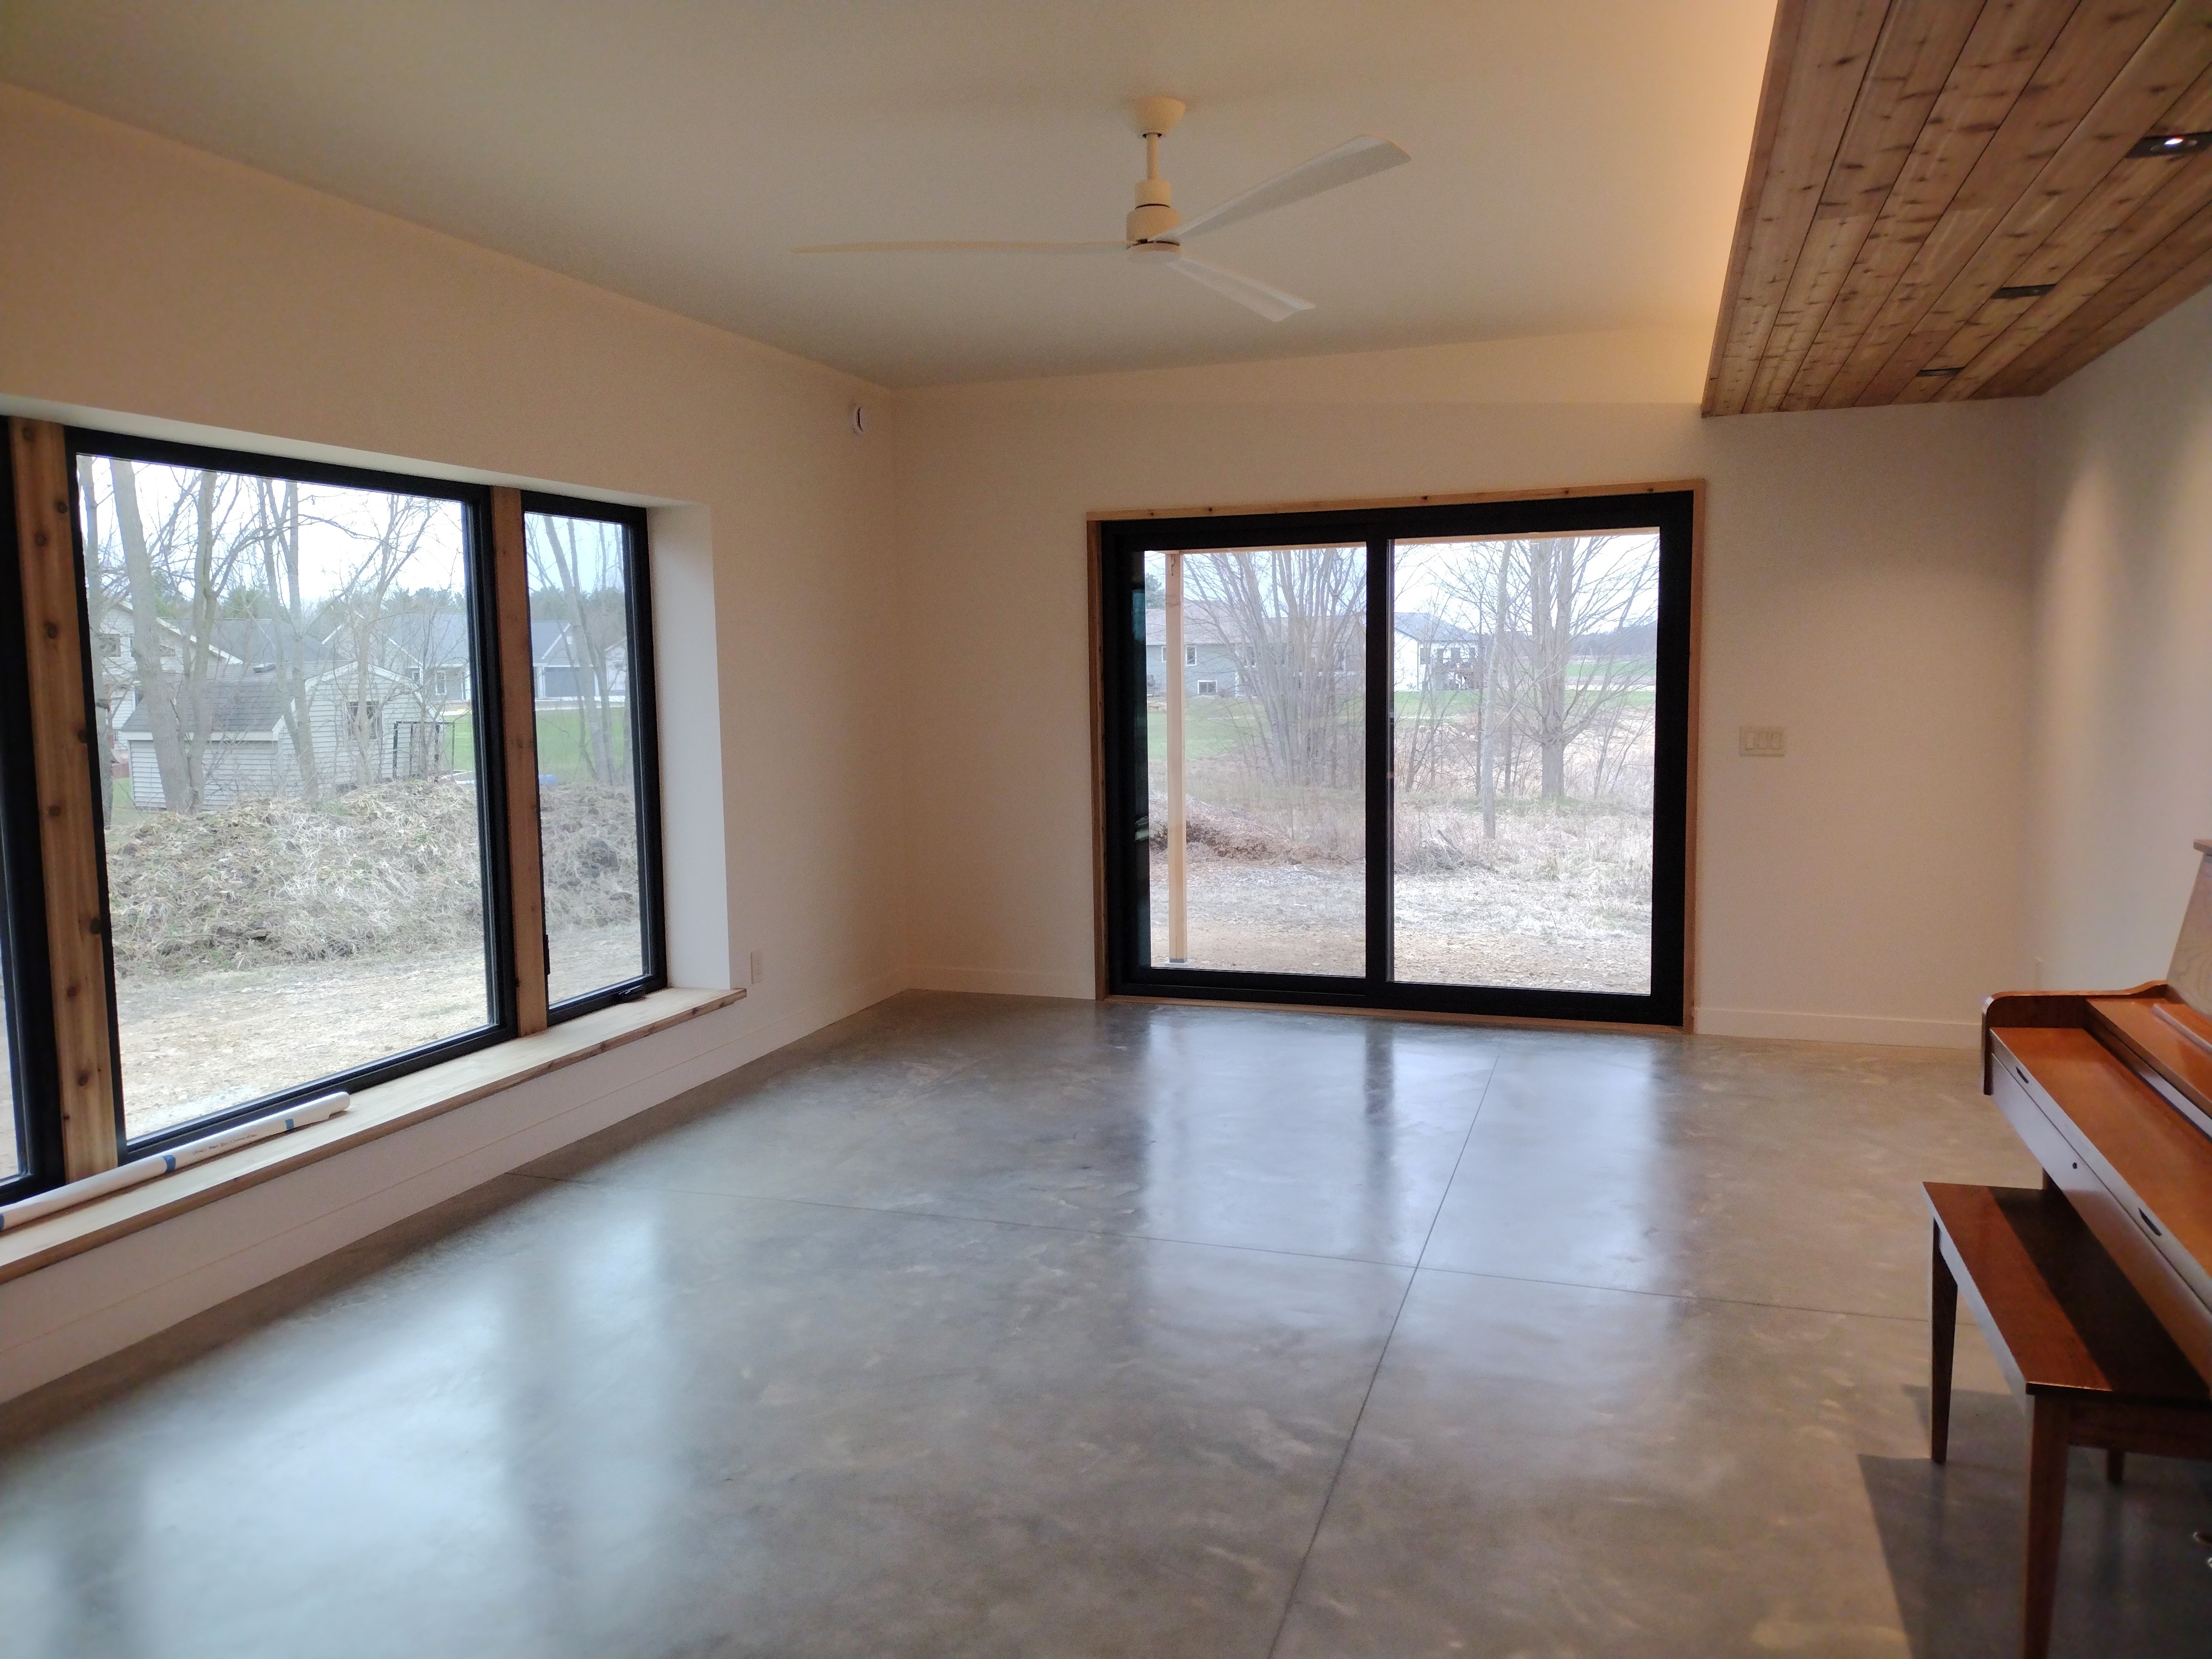
February 8-April 2, 2025: With the walls and ceilings gleaming white with fresh paint, we turned our attention to the dusty and dull floor while mentally lining up all the pretty, useful things like cabinets and doors and wood trim that will smooth out the remaining rough edges and make it possible for life to feel calm and orderly.
We sanded out the few bad spots in the slab with a hand tool called a masonry brick. It was surprisingly easy and effective. Then our trusty “weekend warrior” crew set to scrubbing. On our hands and knees. With brushes. Twice.
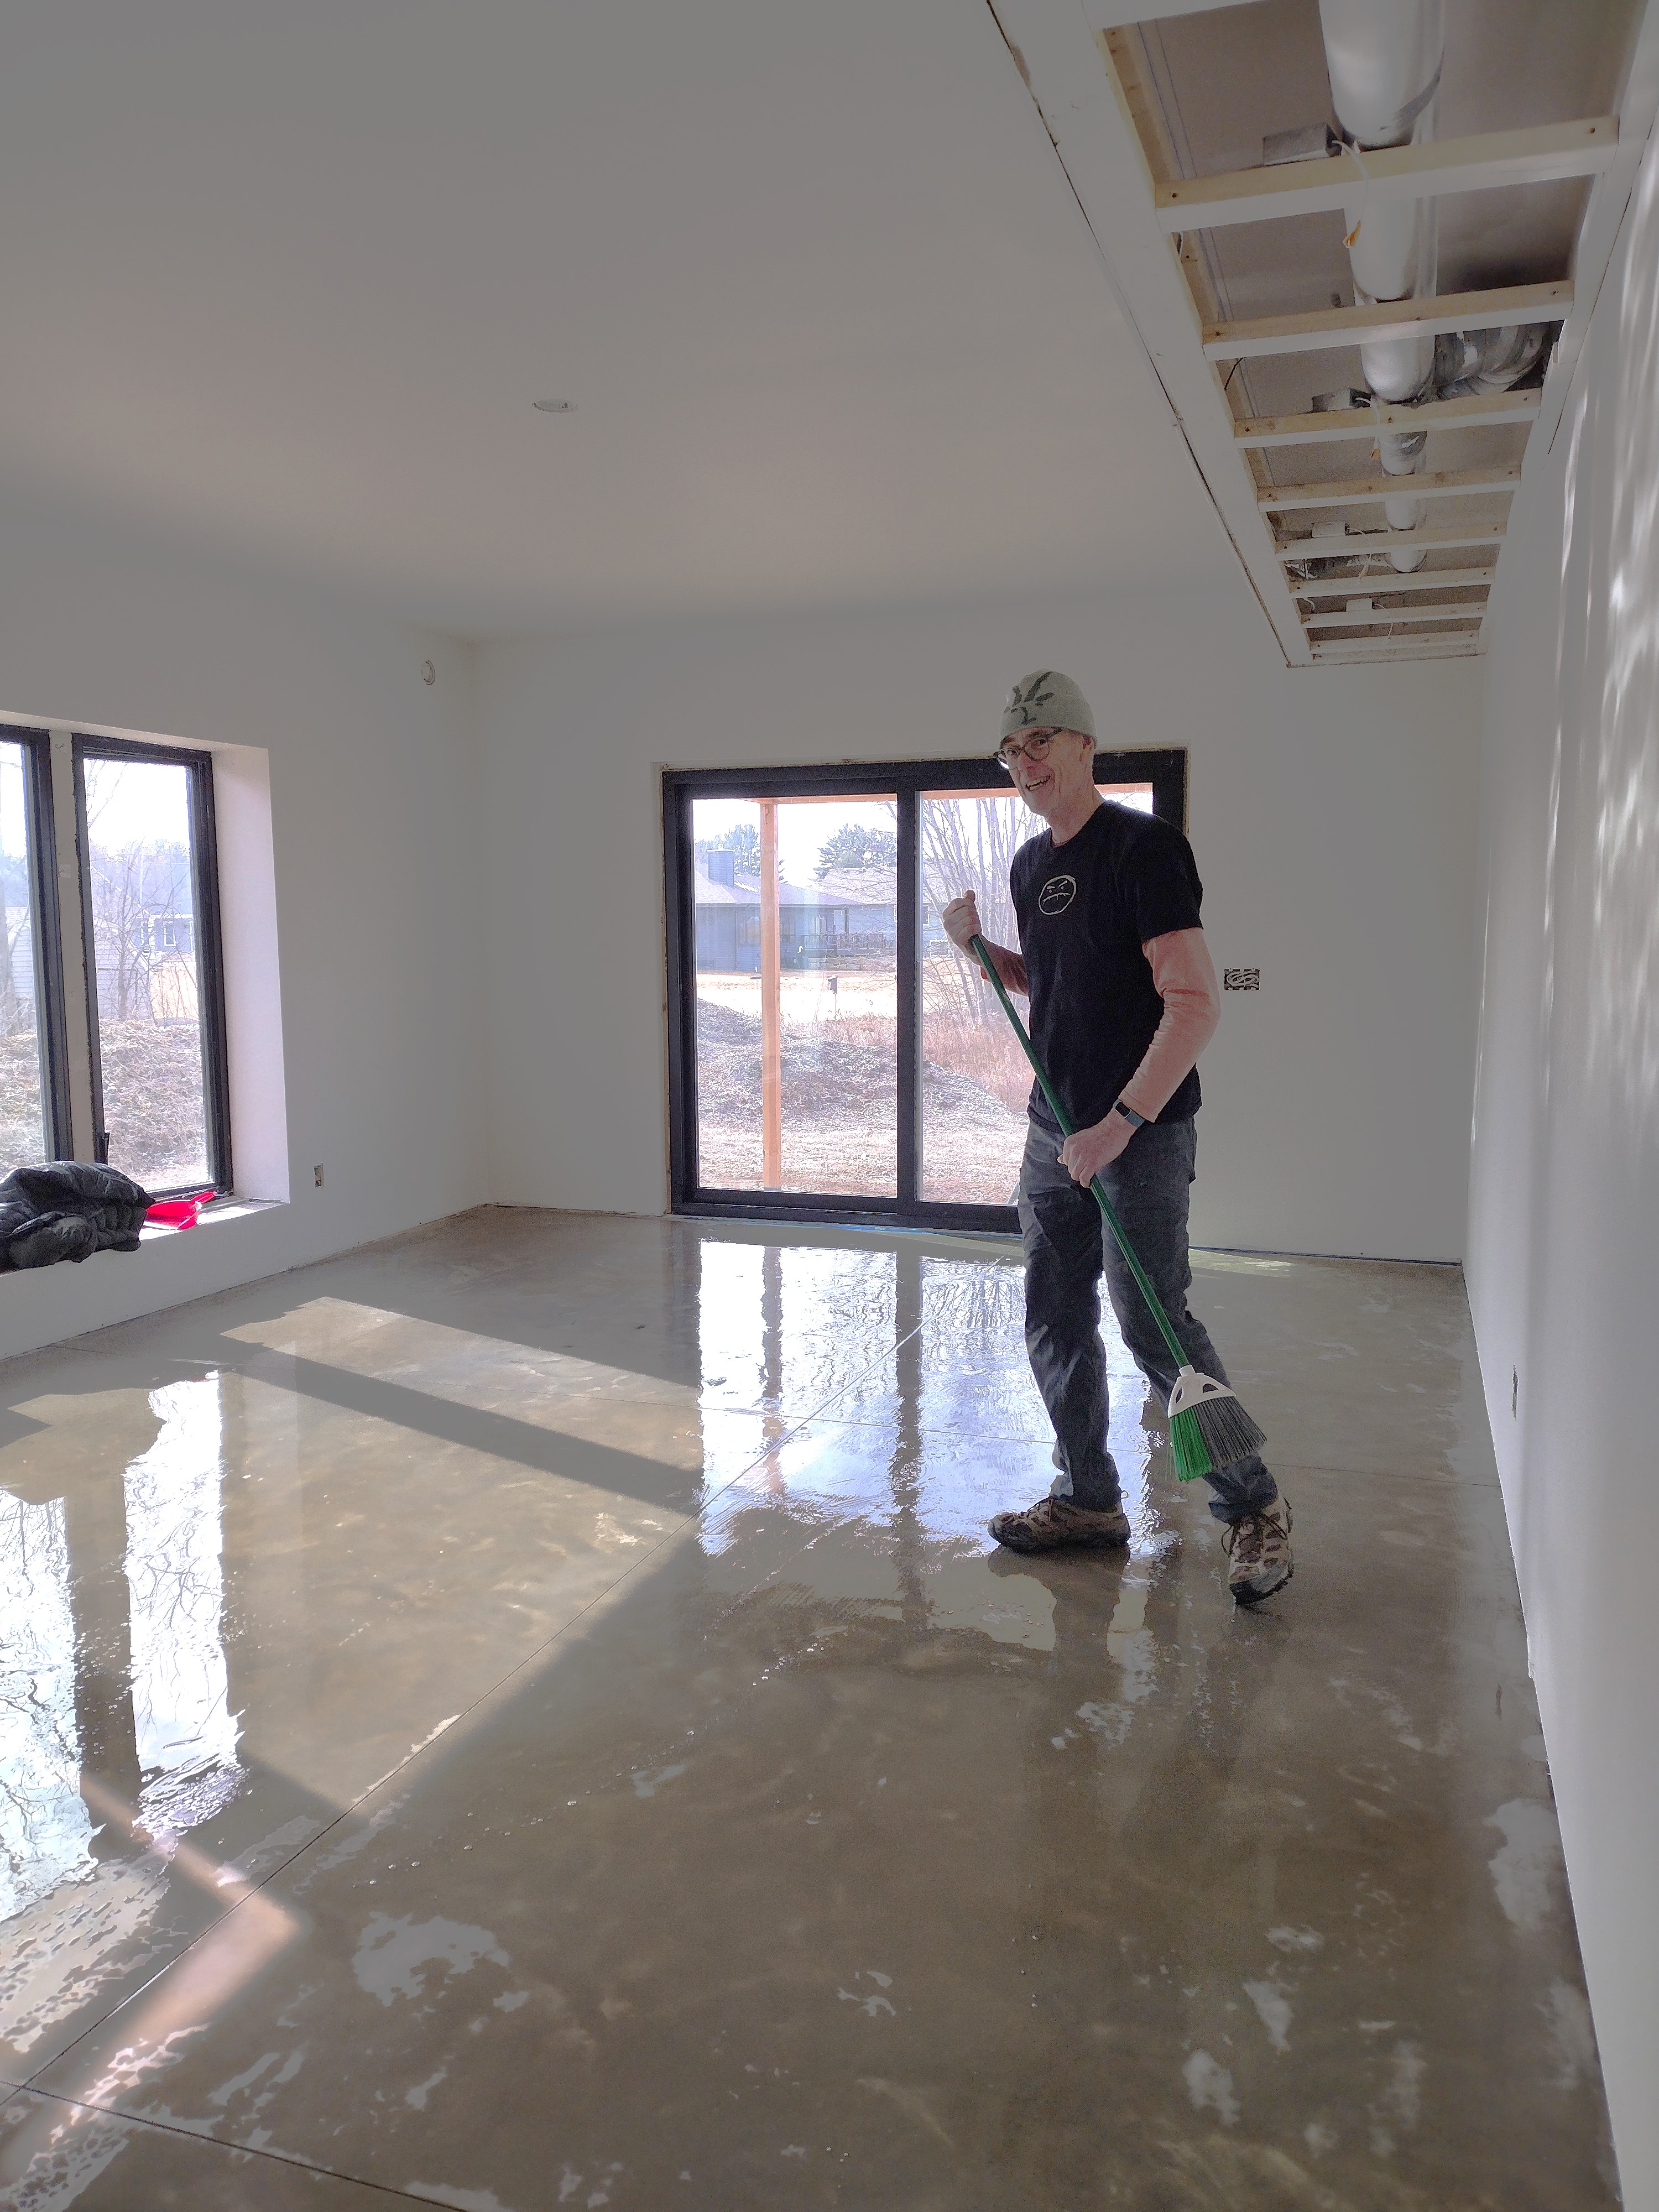
We flooded the slab, wet-vacuuming and swiffering until the water came up clean.
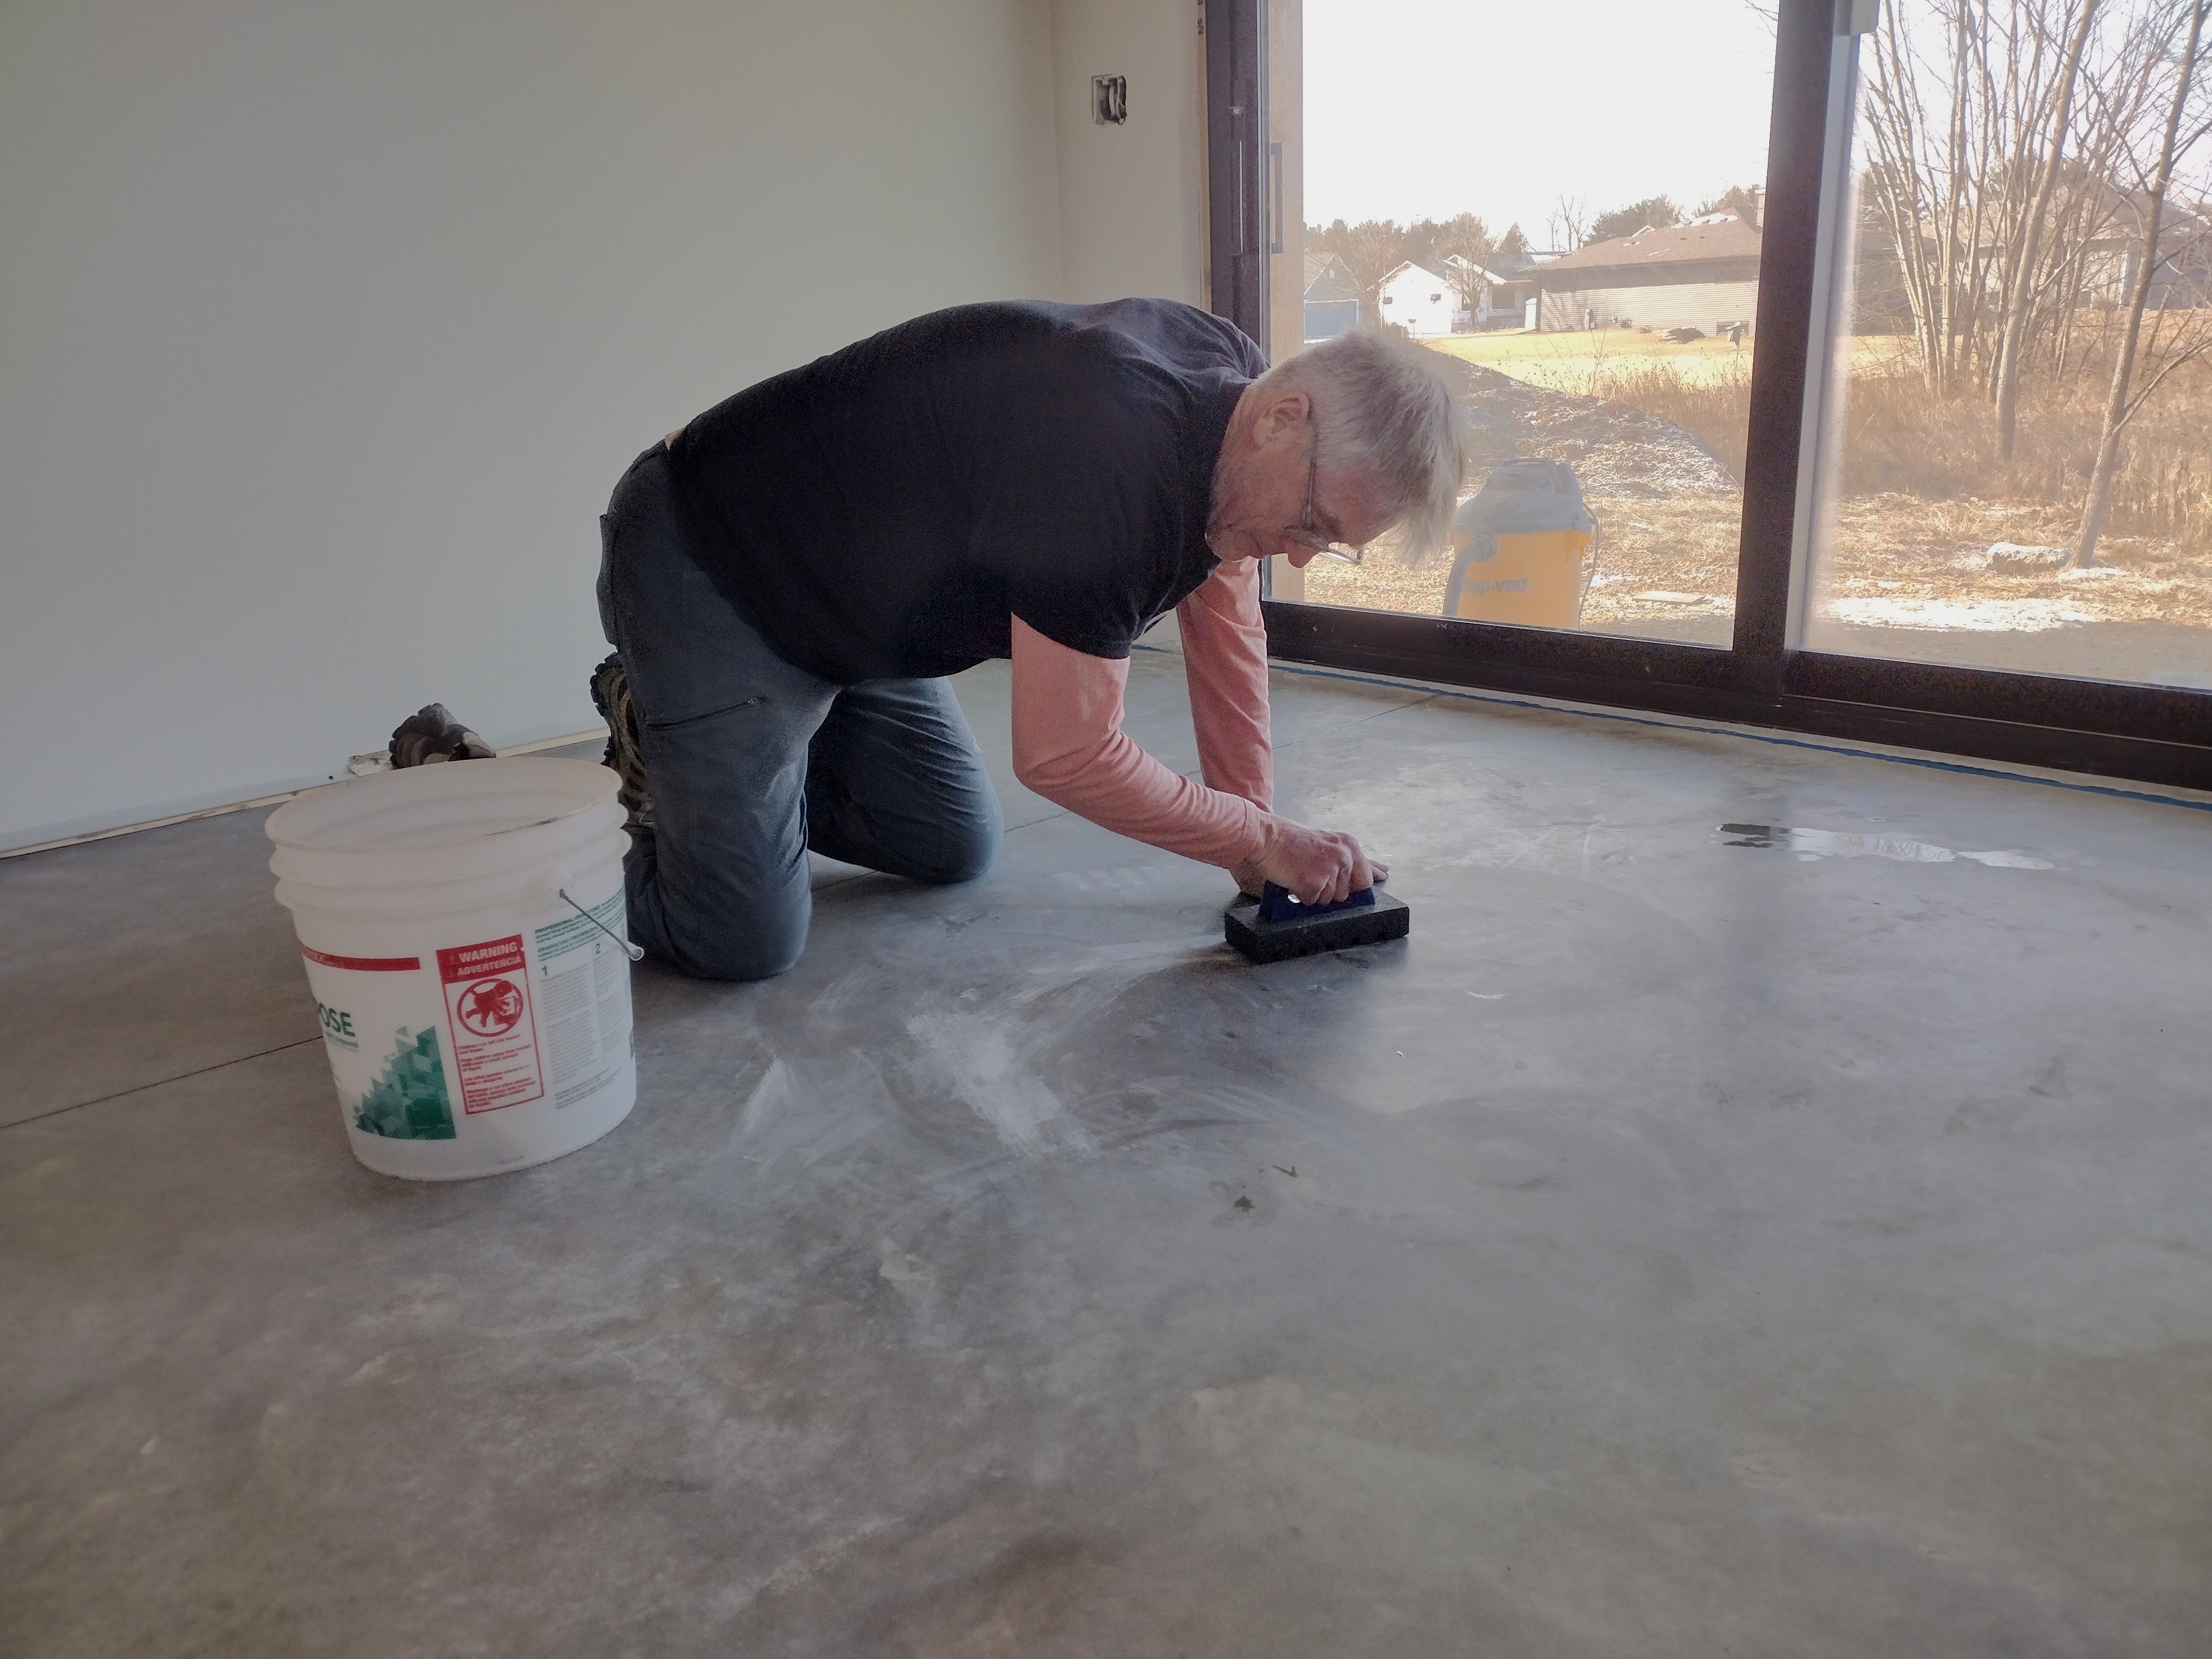
Next, we mixed up batches of diluted muriatic acid and swept it out, watching it sizzle and foam. It’s a fun and essential step that micro-etches the top layer of concrete so that it readily accepts a coat of sealer.We did this twice, then rinsed four times.
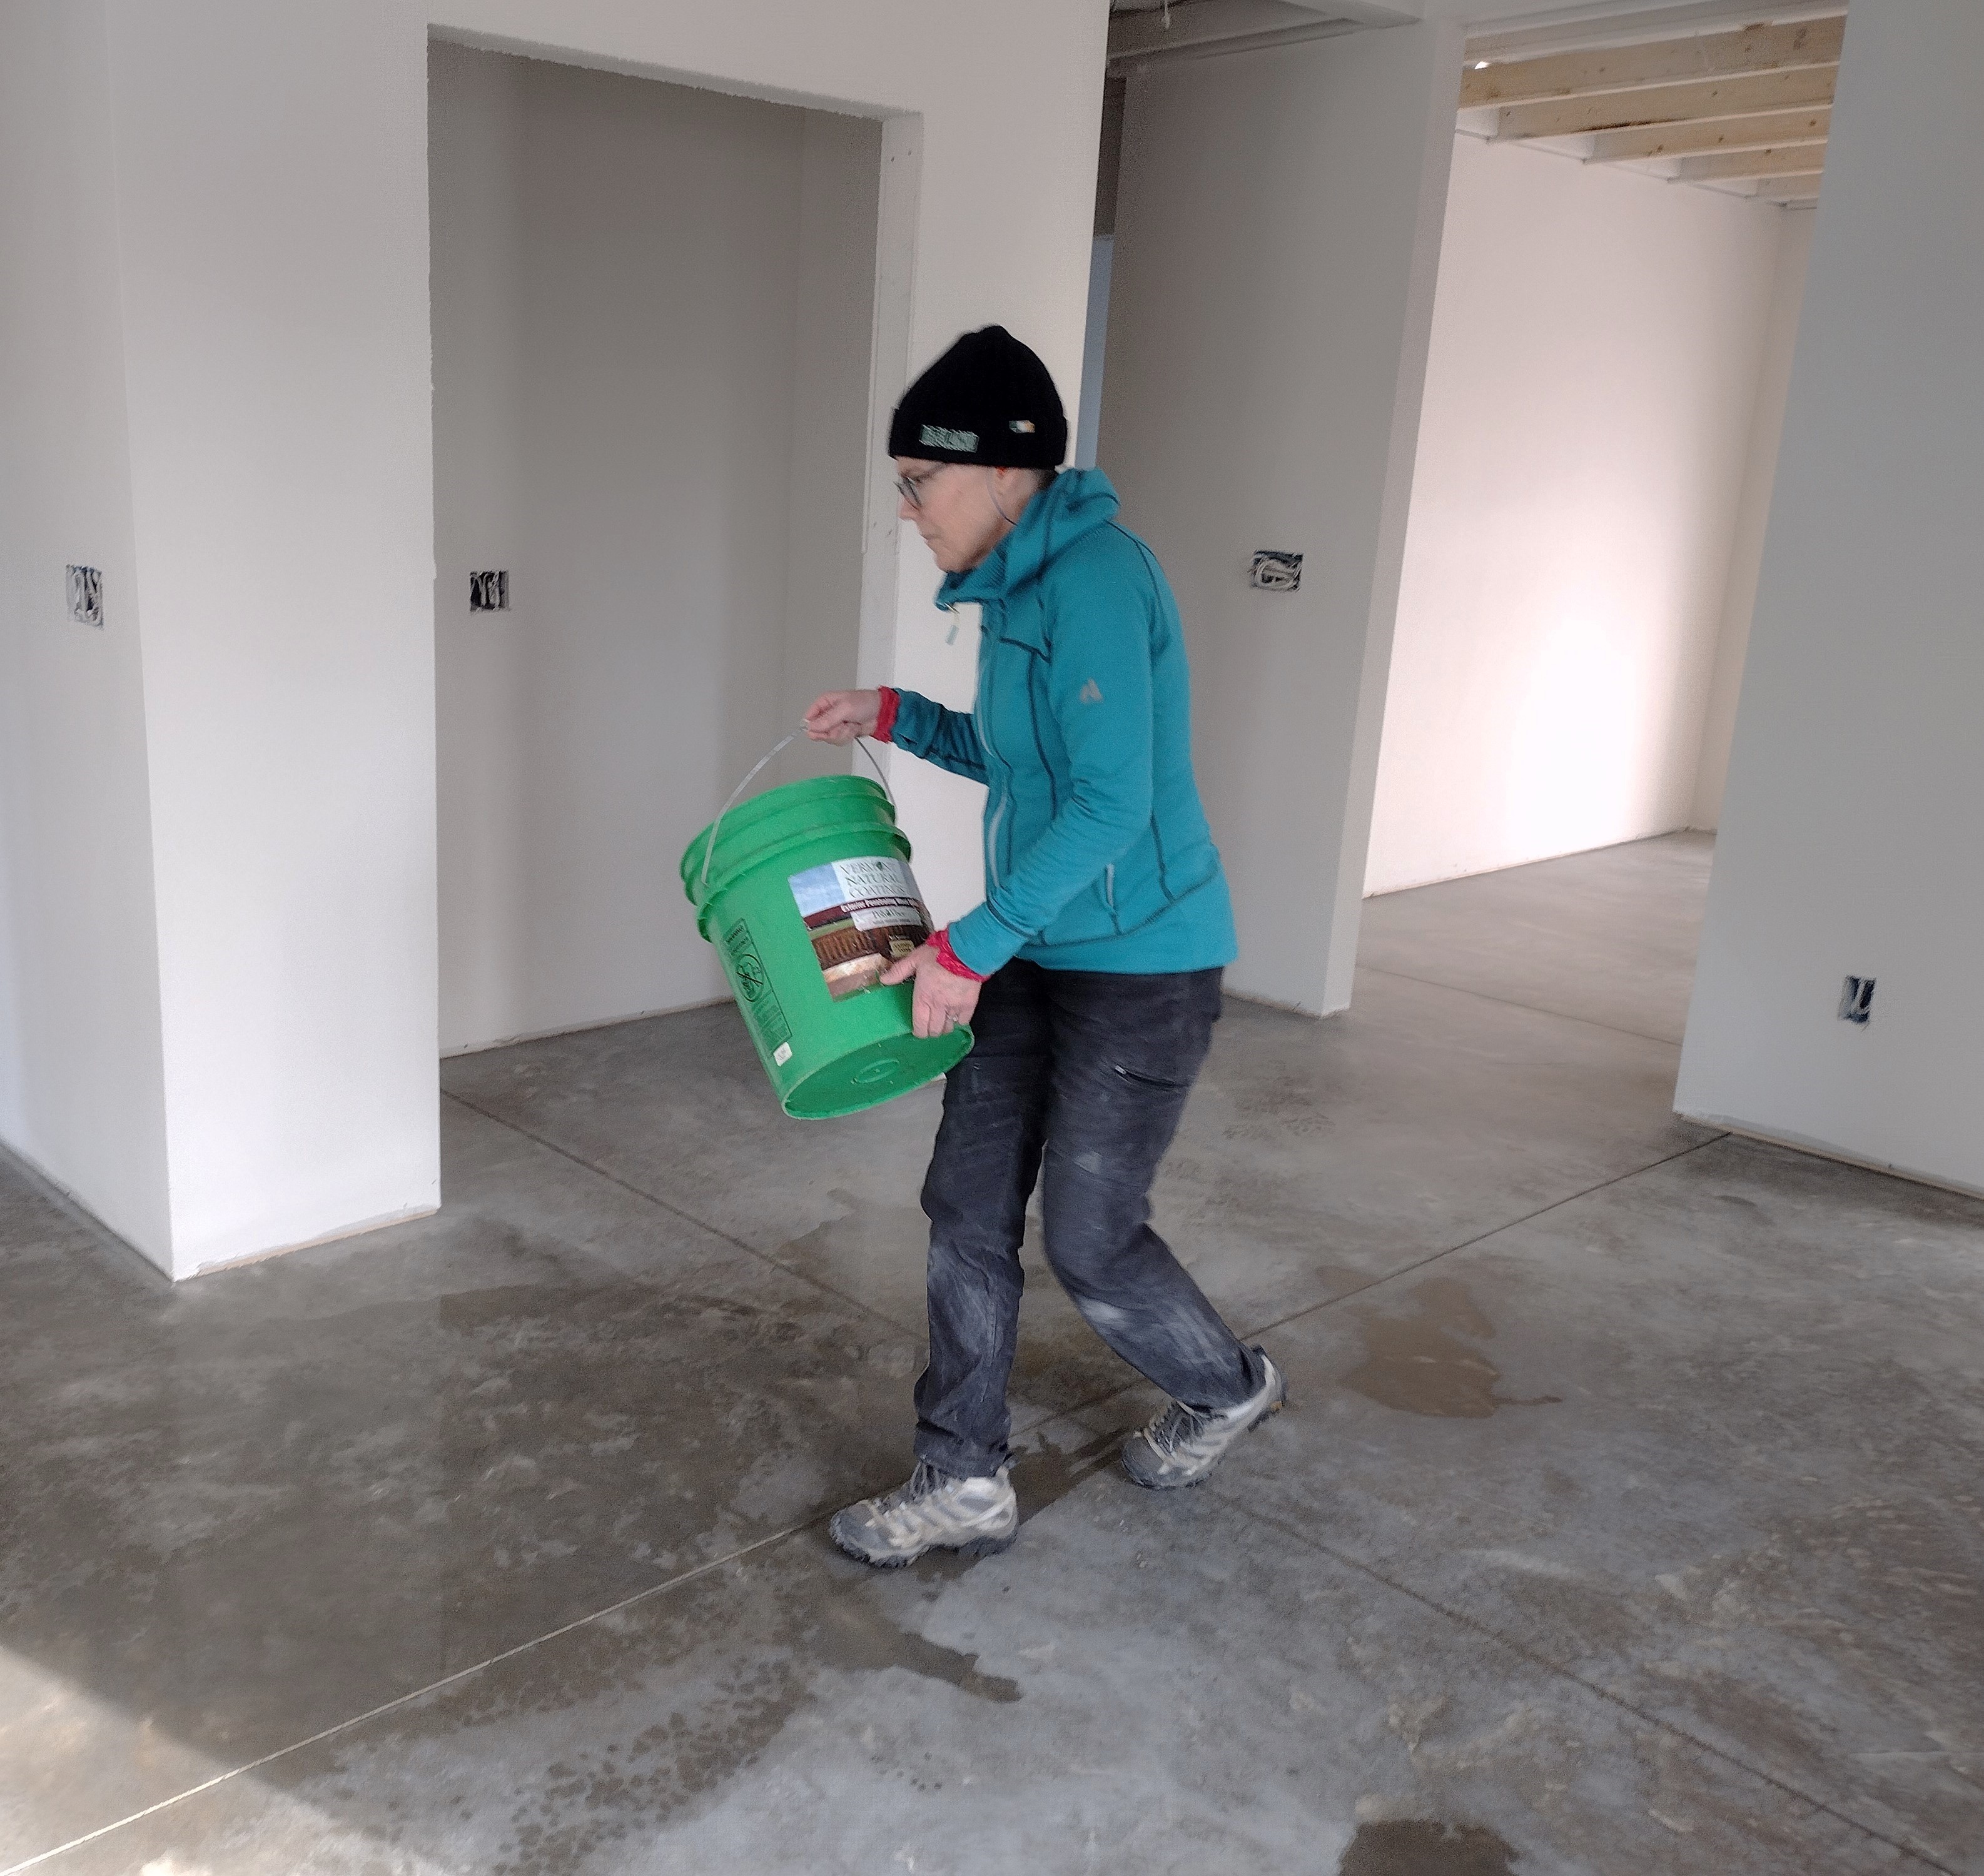
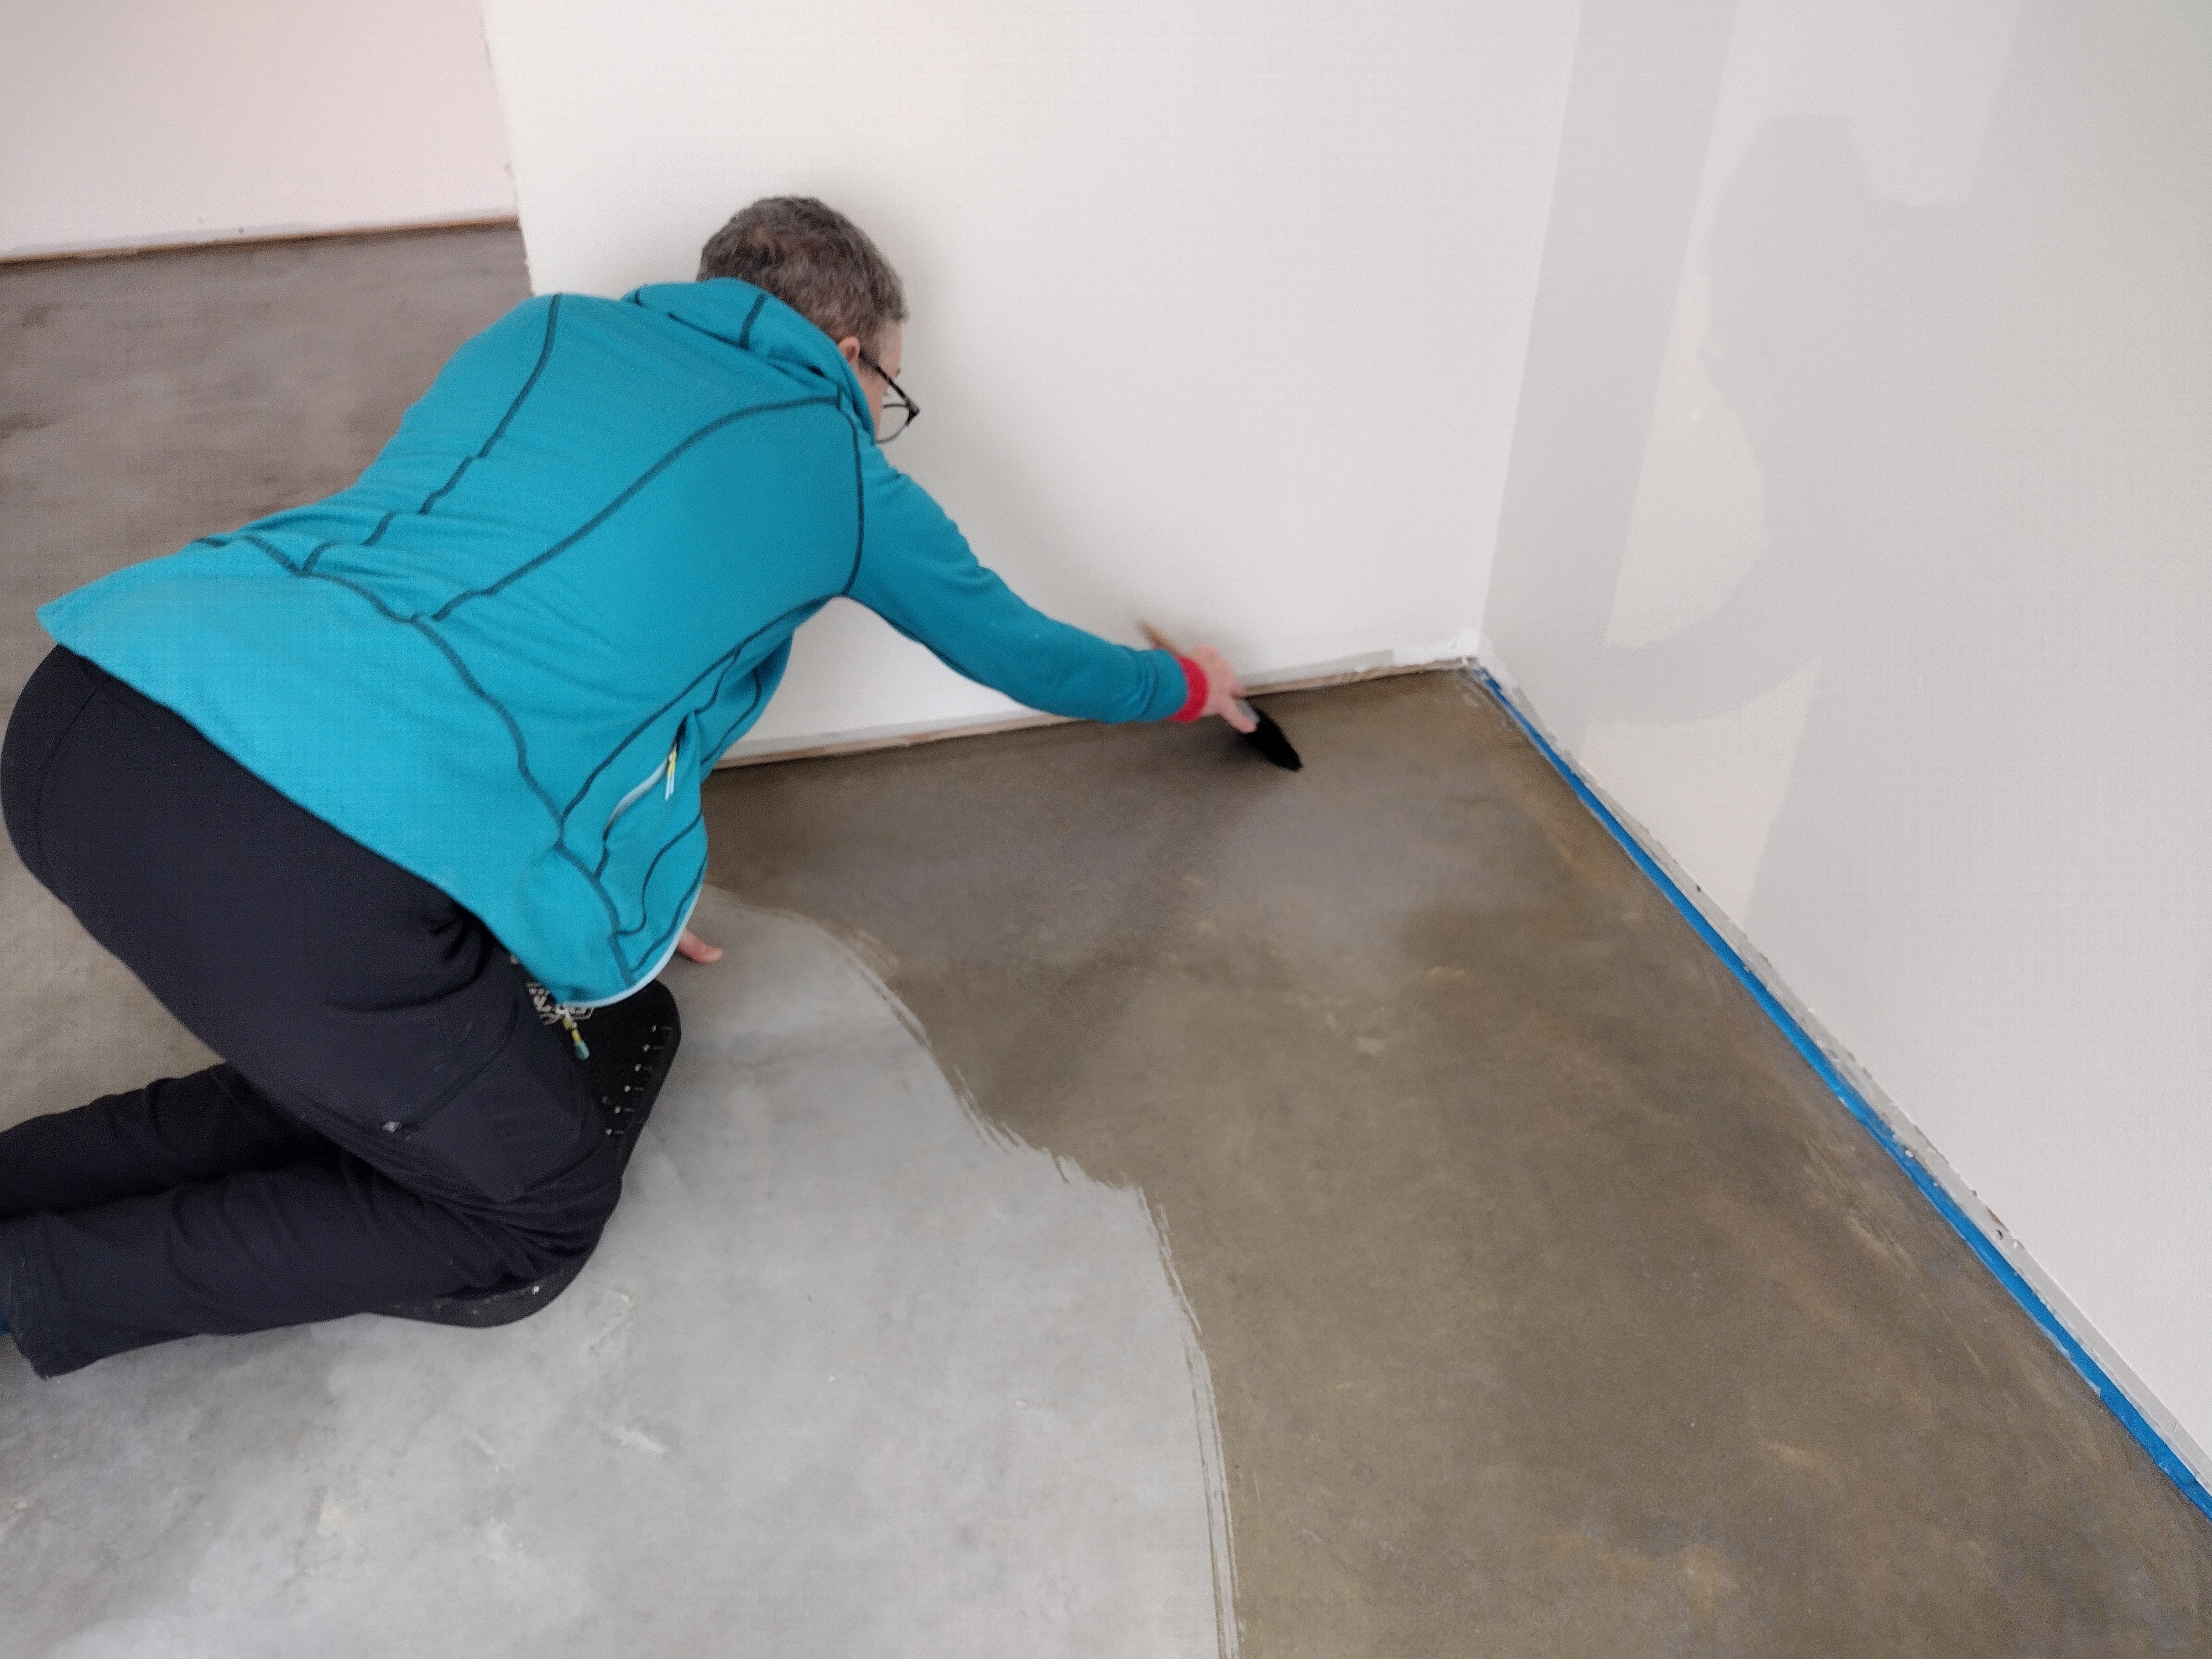
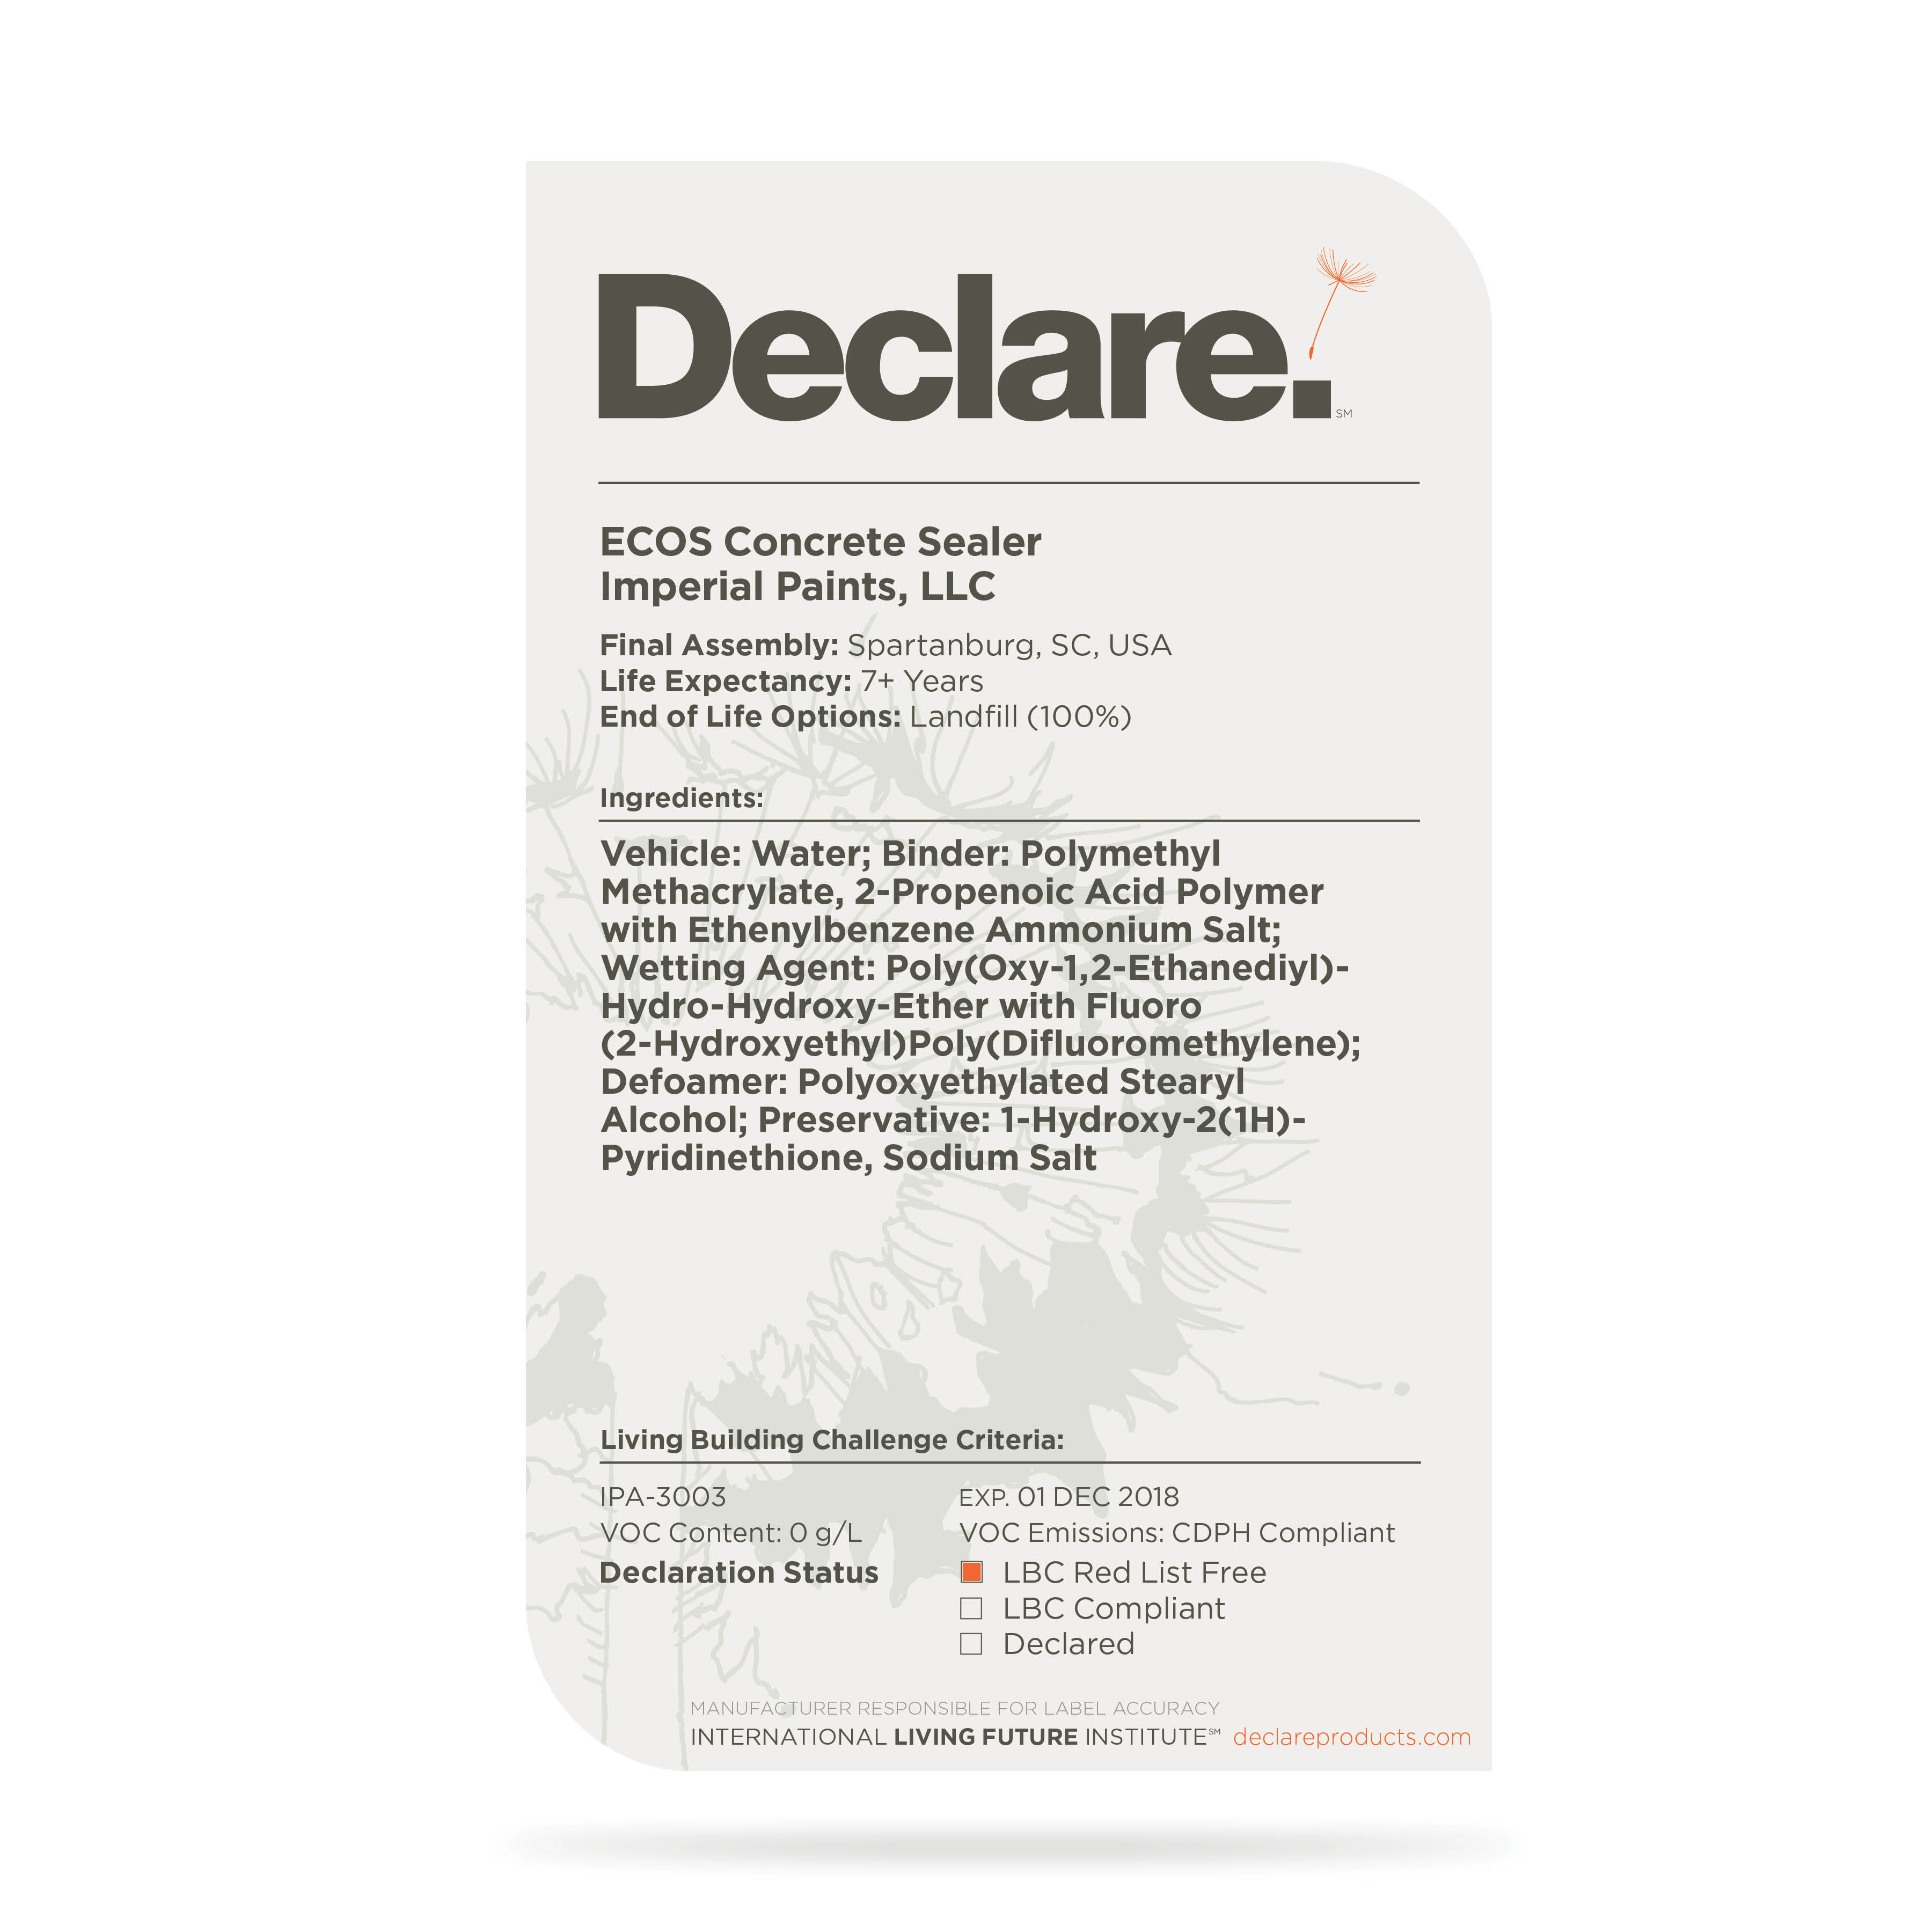
When the slab was good and dry, we brushed out two coats of Ecos Paint Clear Concrete Sealer. This product is non-toxic and low in VOC’s, with a label from the International Living Future Institute’s DECLARE list of healthy building products. My home has the same finish, and it has held up beautifully—-still shiny and bright after 5 years.
The sealer carries the “Red List Free” rating, the highest score in the database. It is free of the chemicals that can harm human, animal, and environmental health.
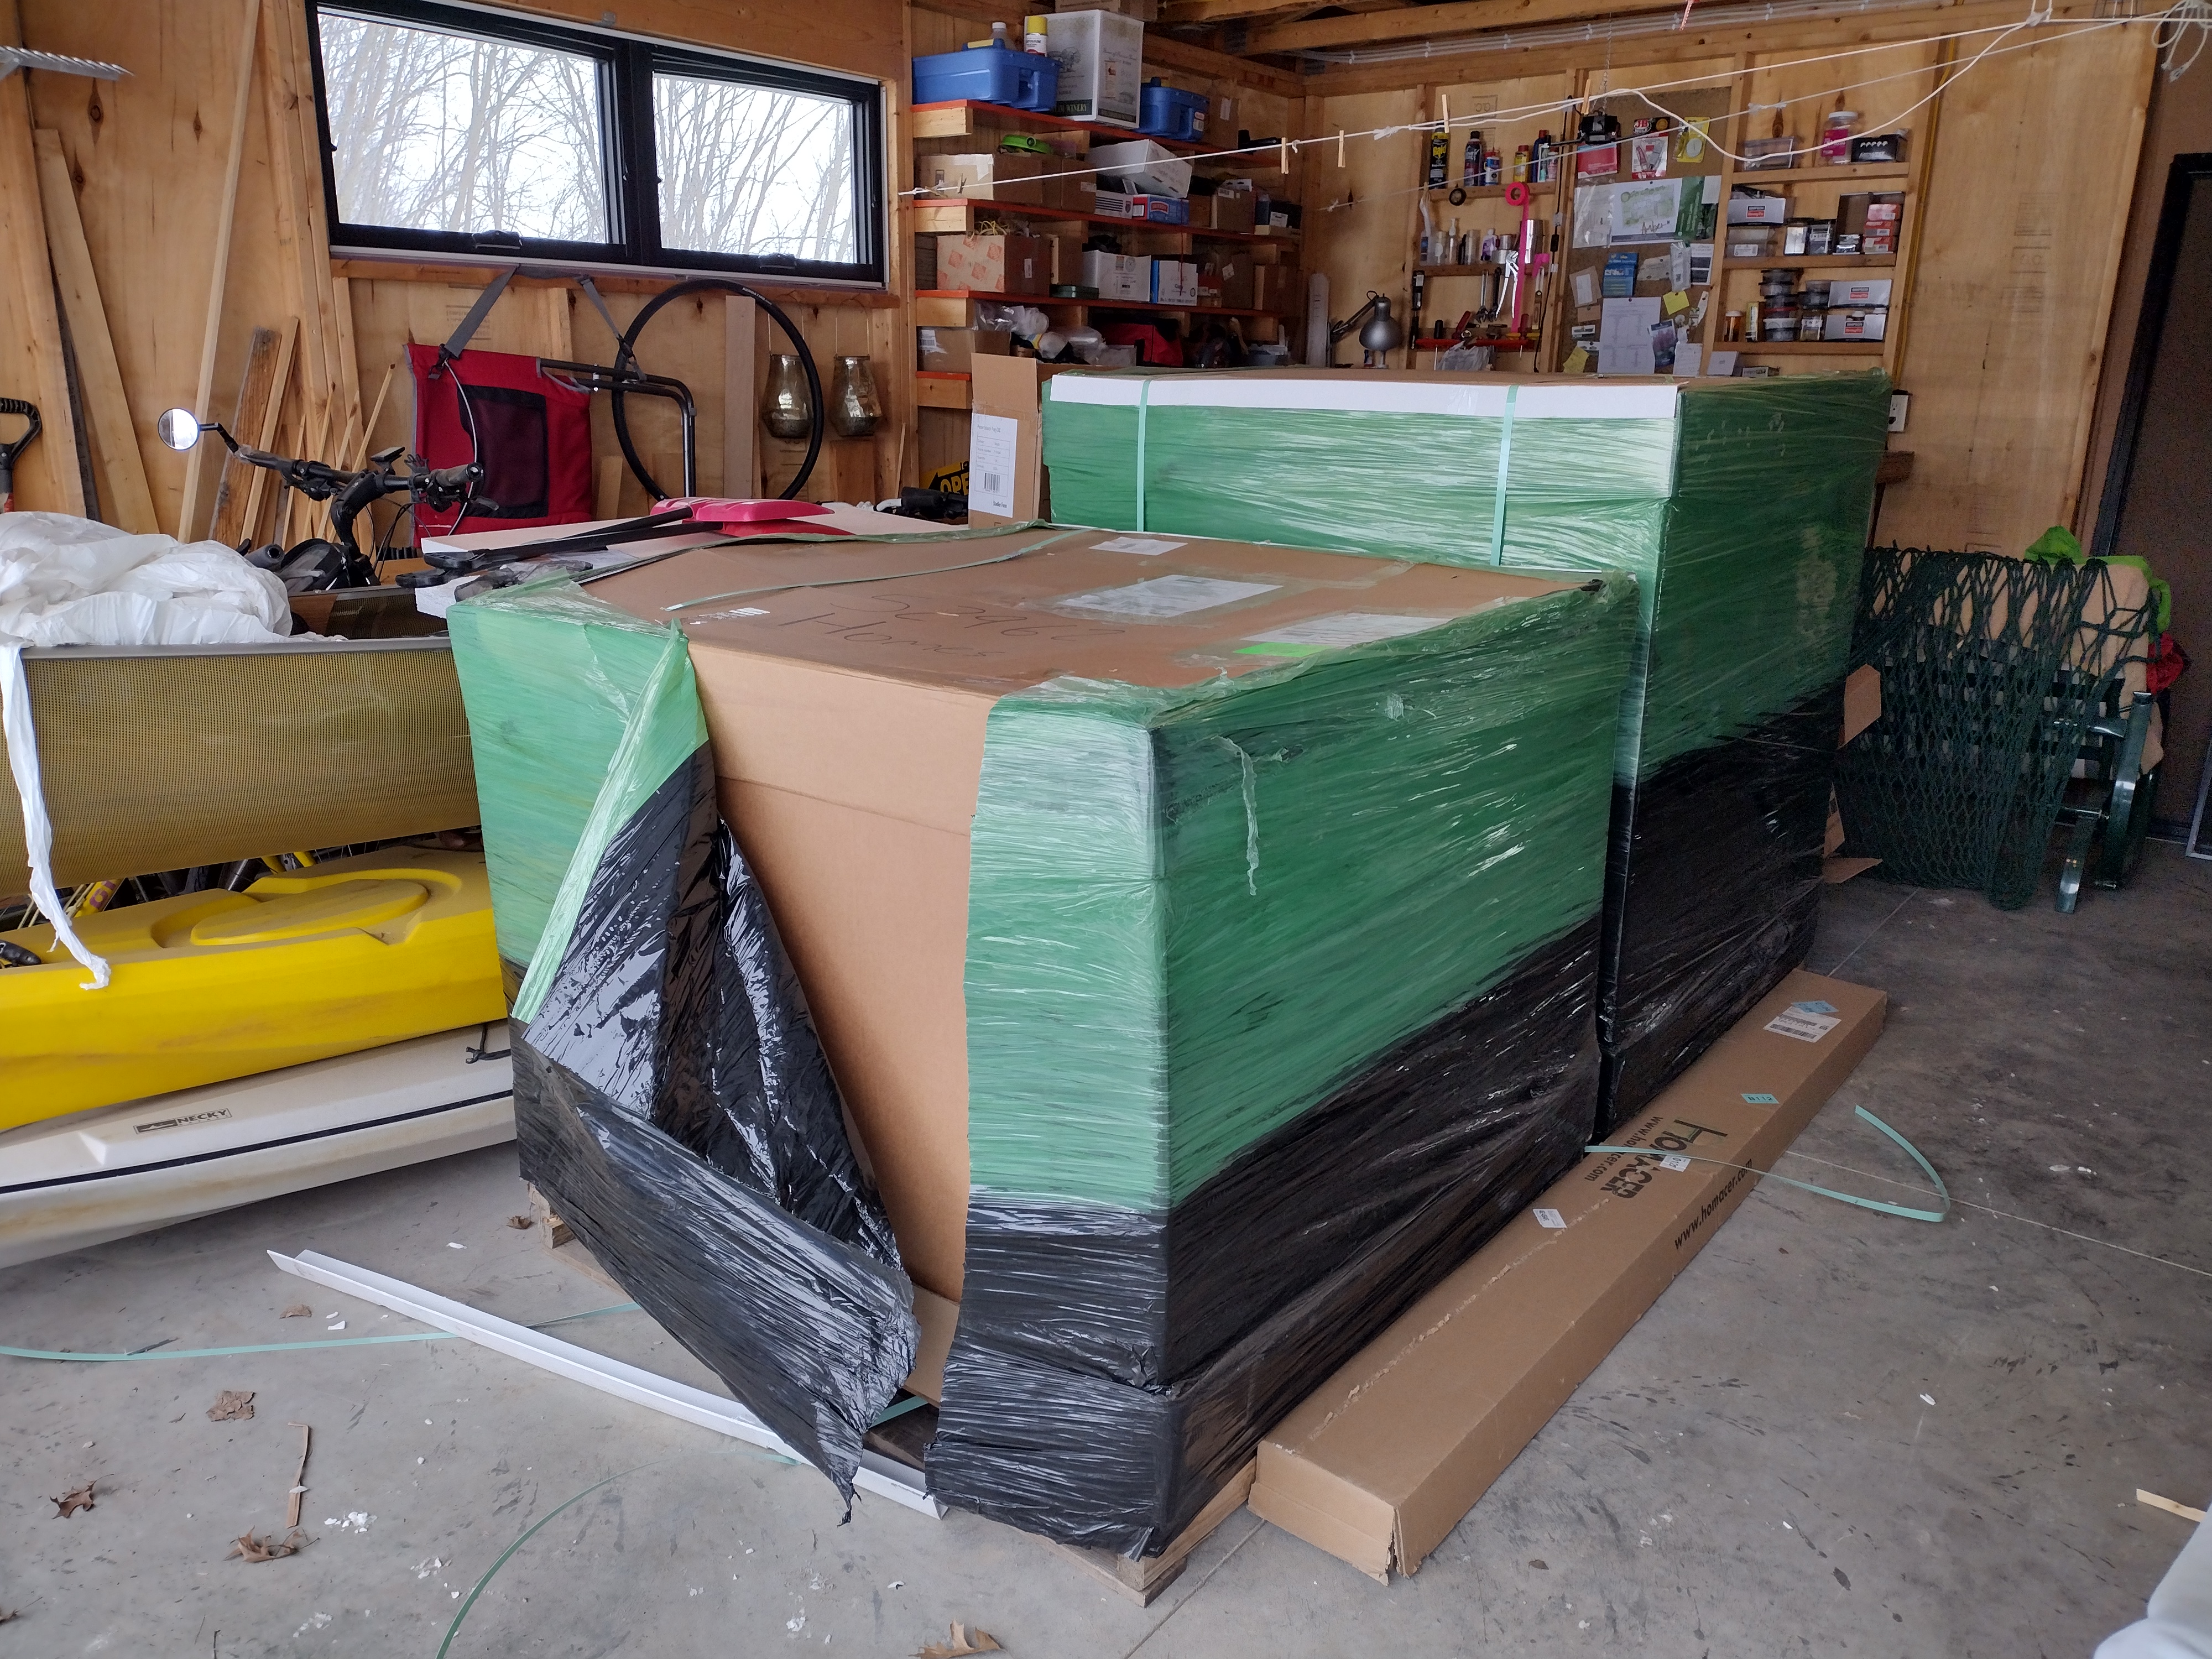
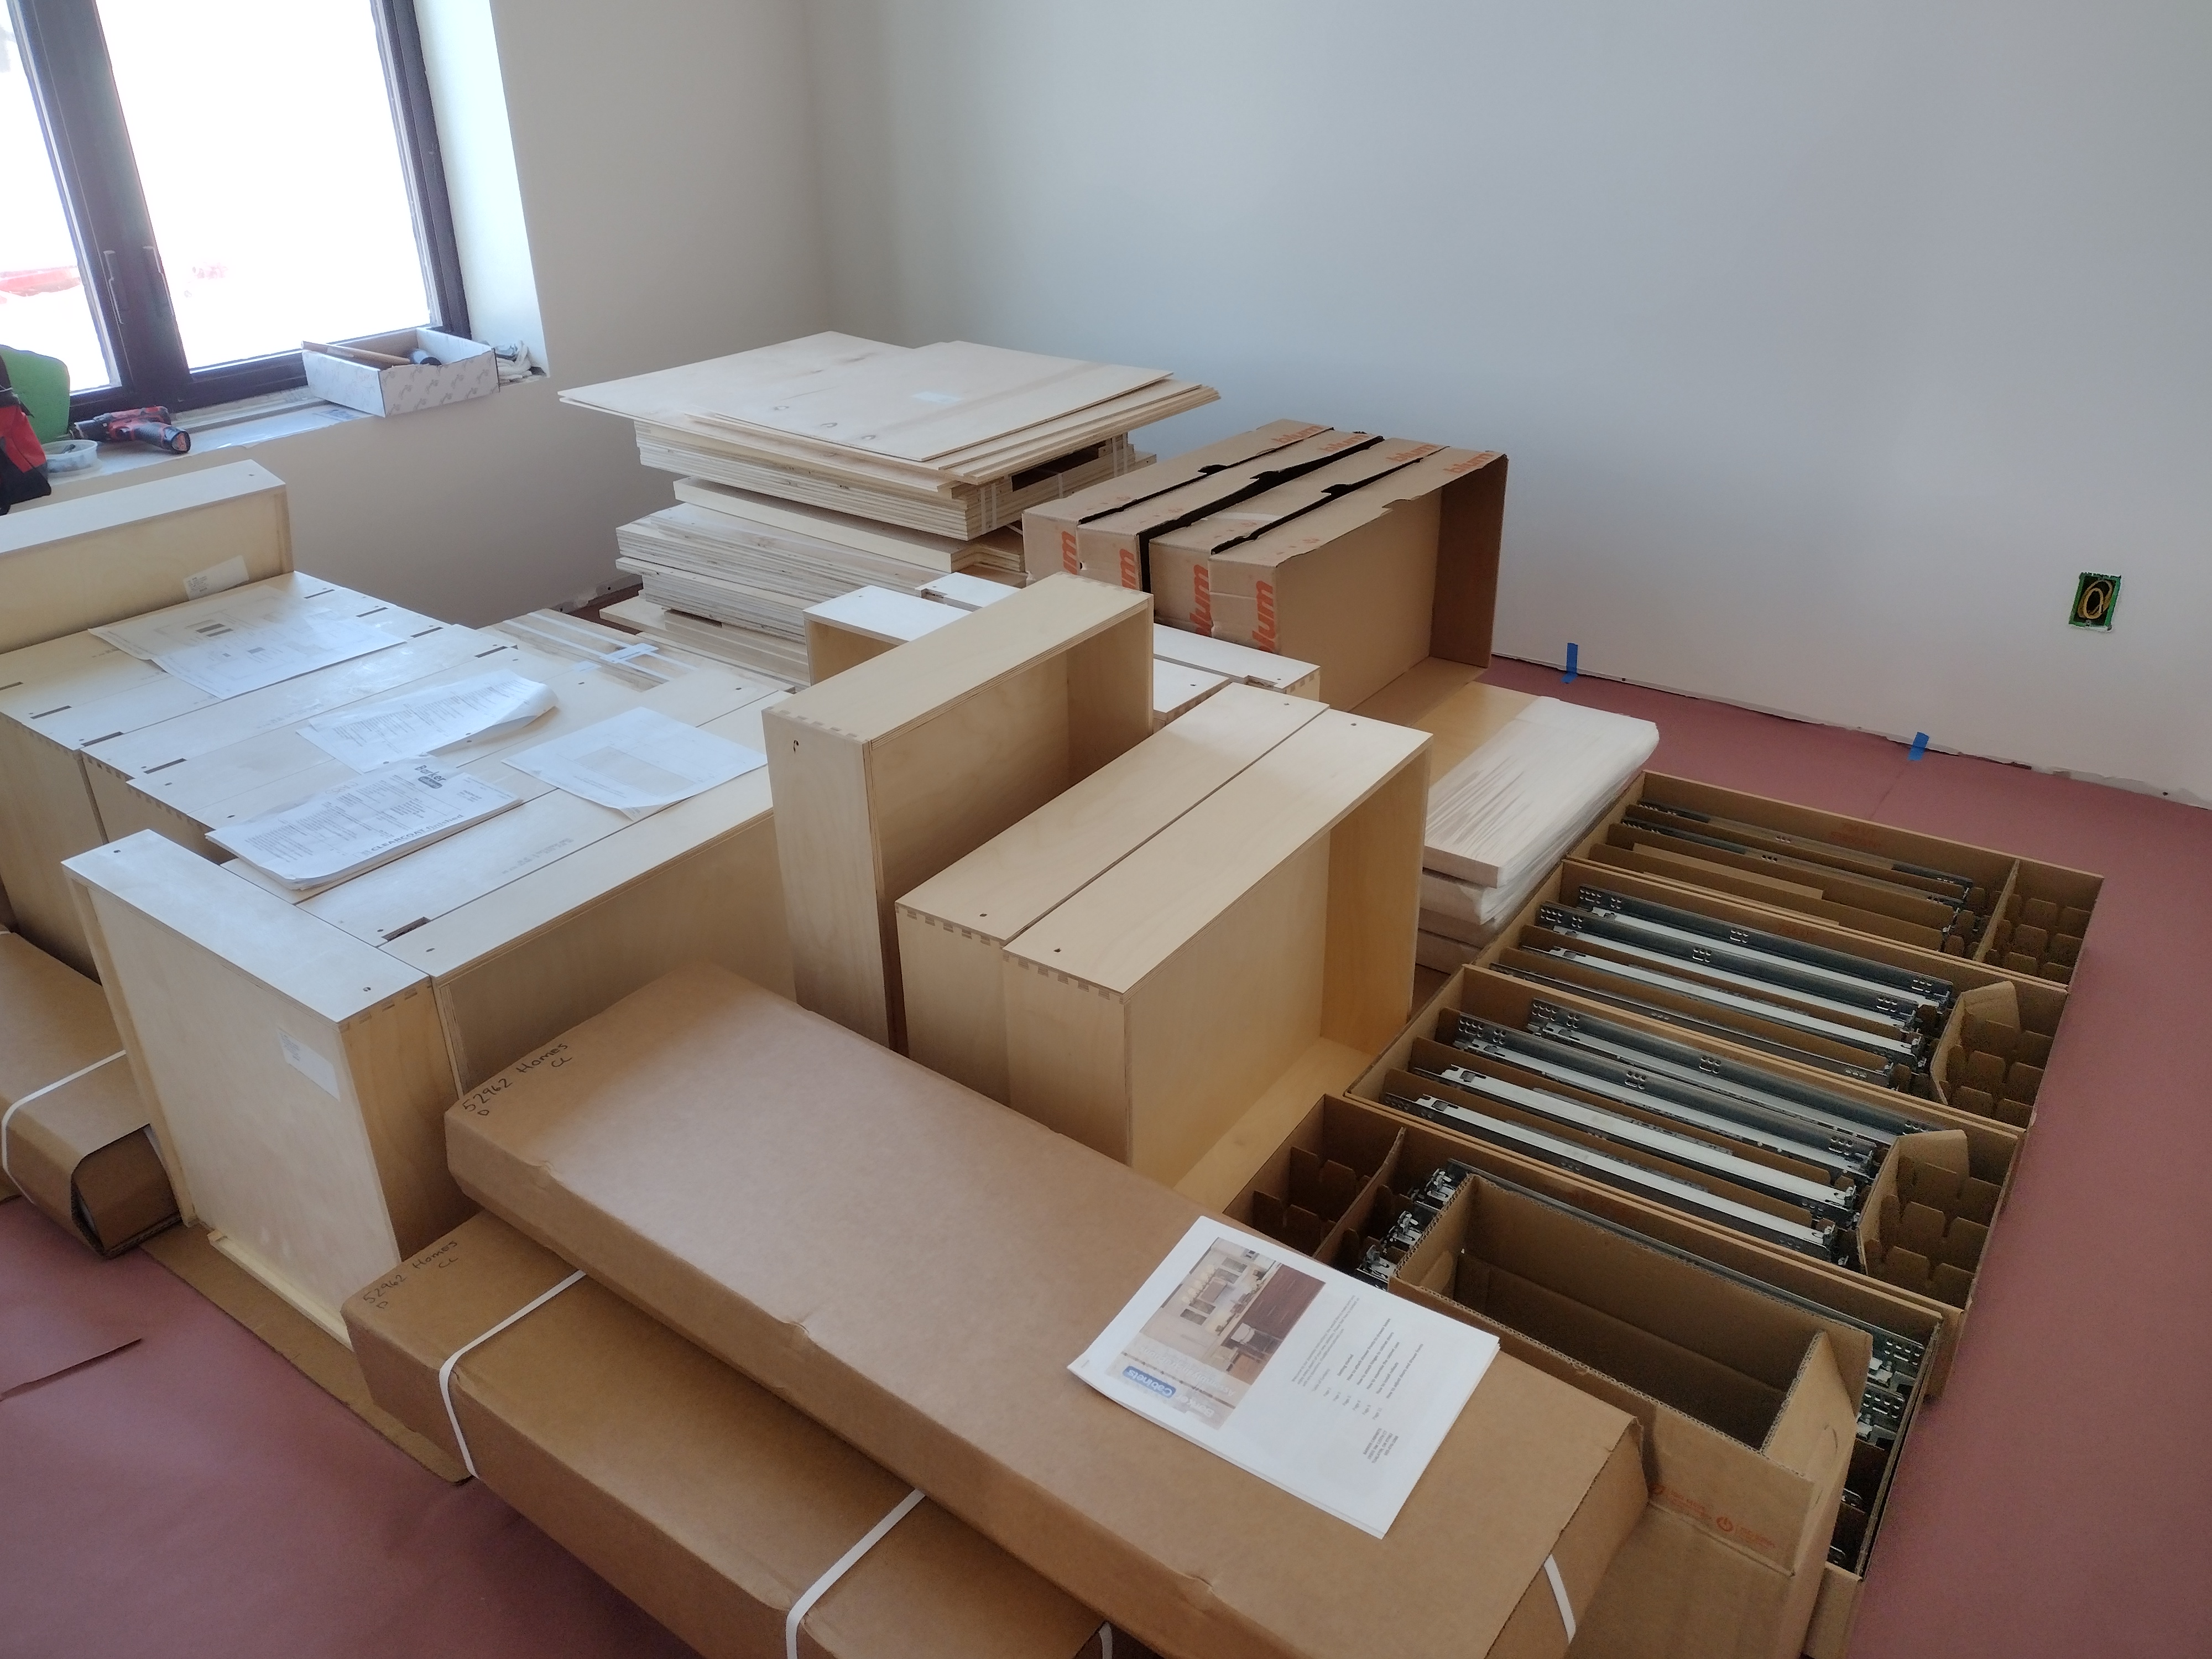
As if it were finally Christmas, we tore into the boxes and packages of goodies stashed in the garage.For kitchen and bath cabinets, I chose Barker Cabinets for their reasonable price, high quality parts, and green cred:
Made in America (Oregon)
Formaldehyde-free 3/4″ 9-ply birch plywood cabinet boxes from U.S. producer Columbia Forest Products
Solid wood door frames and drawer fronts
MDF Medium Density Fiberboard Carb Phase 2 low formaldehyde inset panels
Low VOC clear coat varnish
RTA Ready-to-Assemble to reduce shipping costs
DIY friendly to reduce labor costs
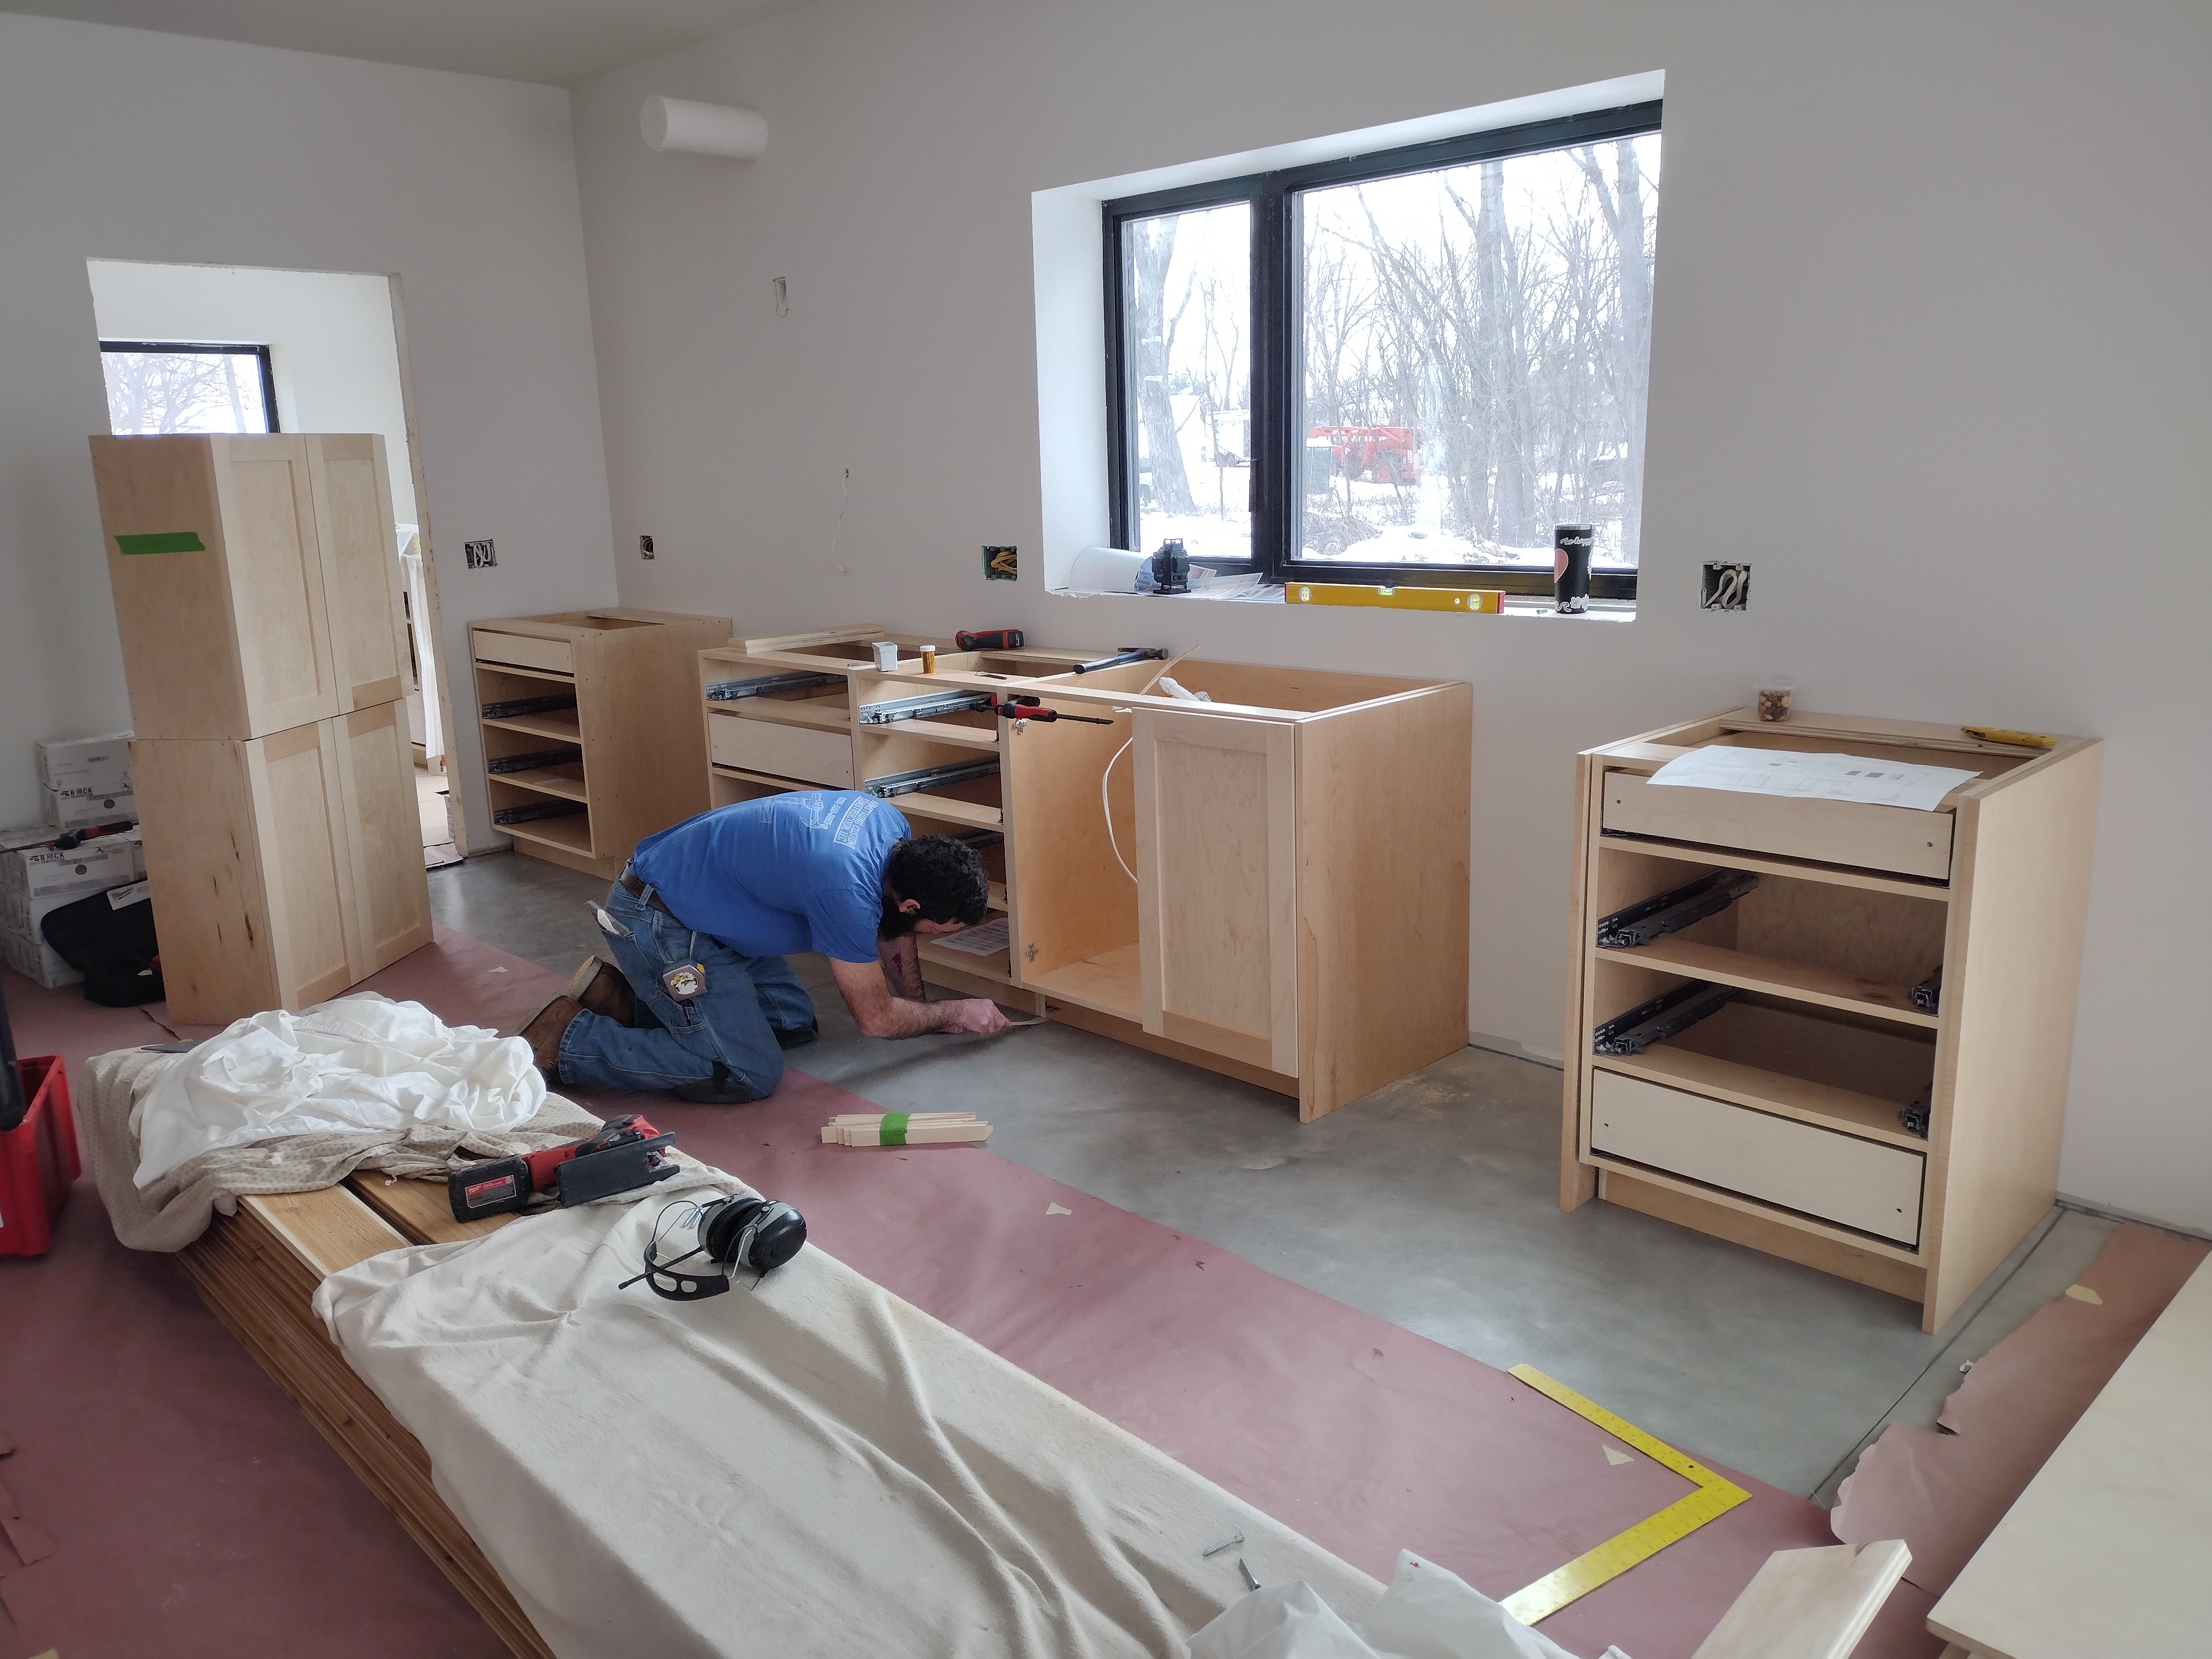
Our weekend warriors assembled the cabinet boxes and installed the undermount drawer slides and other hardware. Our finish carpenter, Cale Armstrong, set the cabinets level, plumb, and square. The hand can feel the quality, promising years of ease and satisfying service.
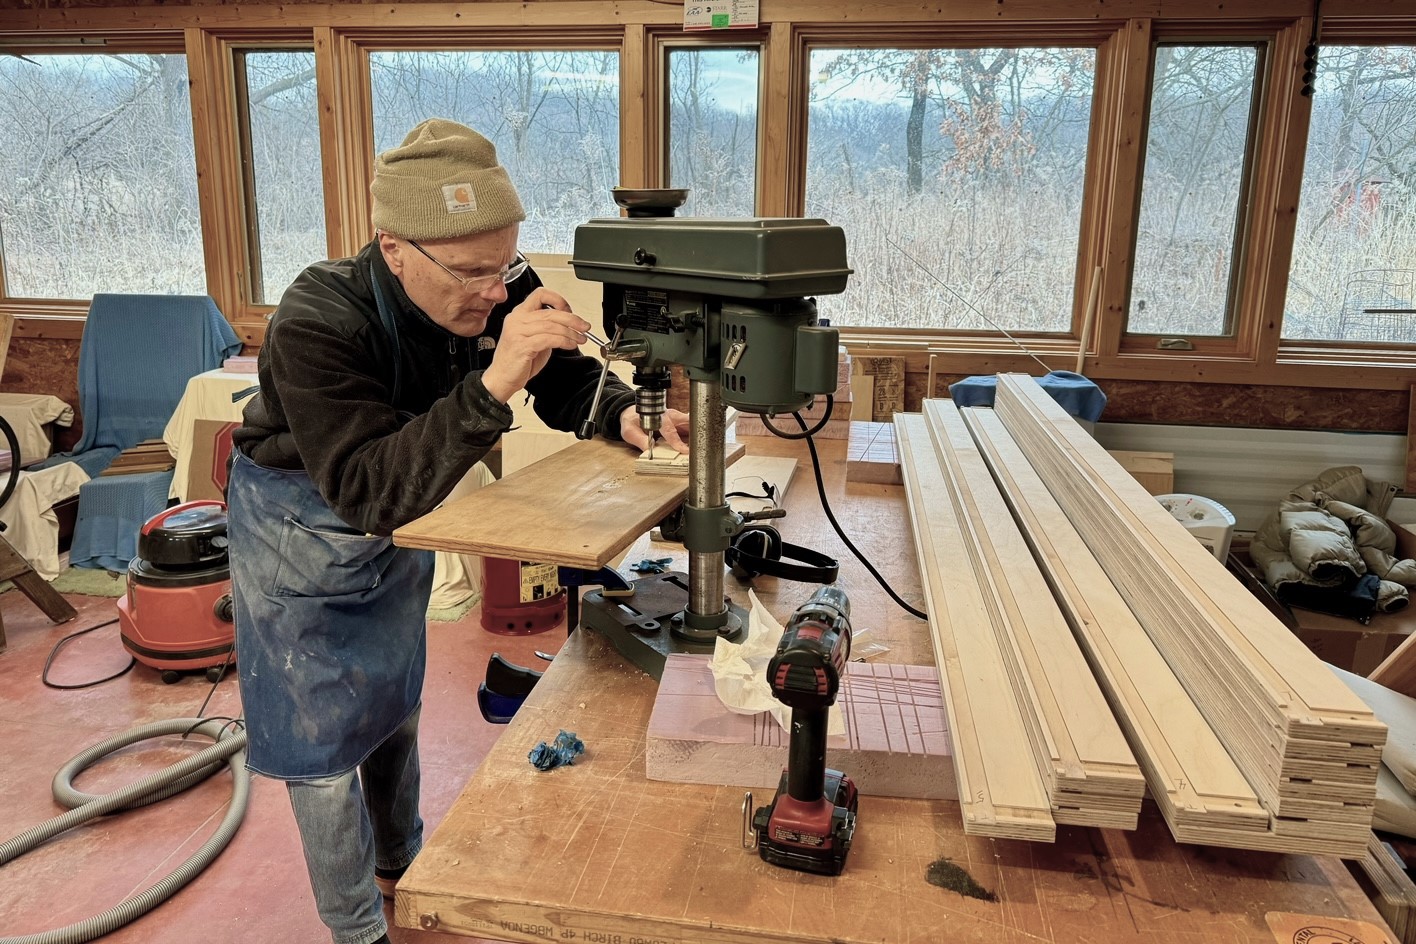
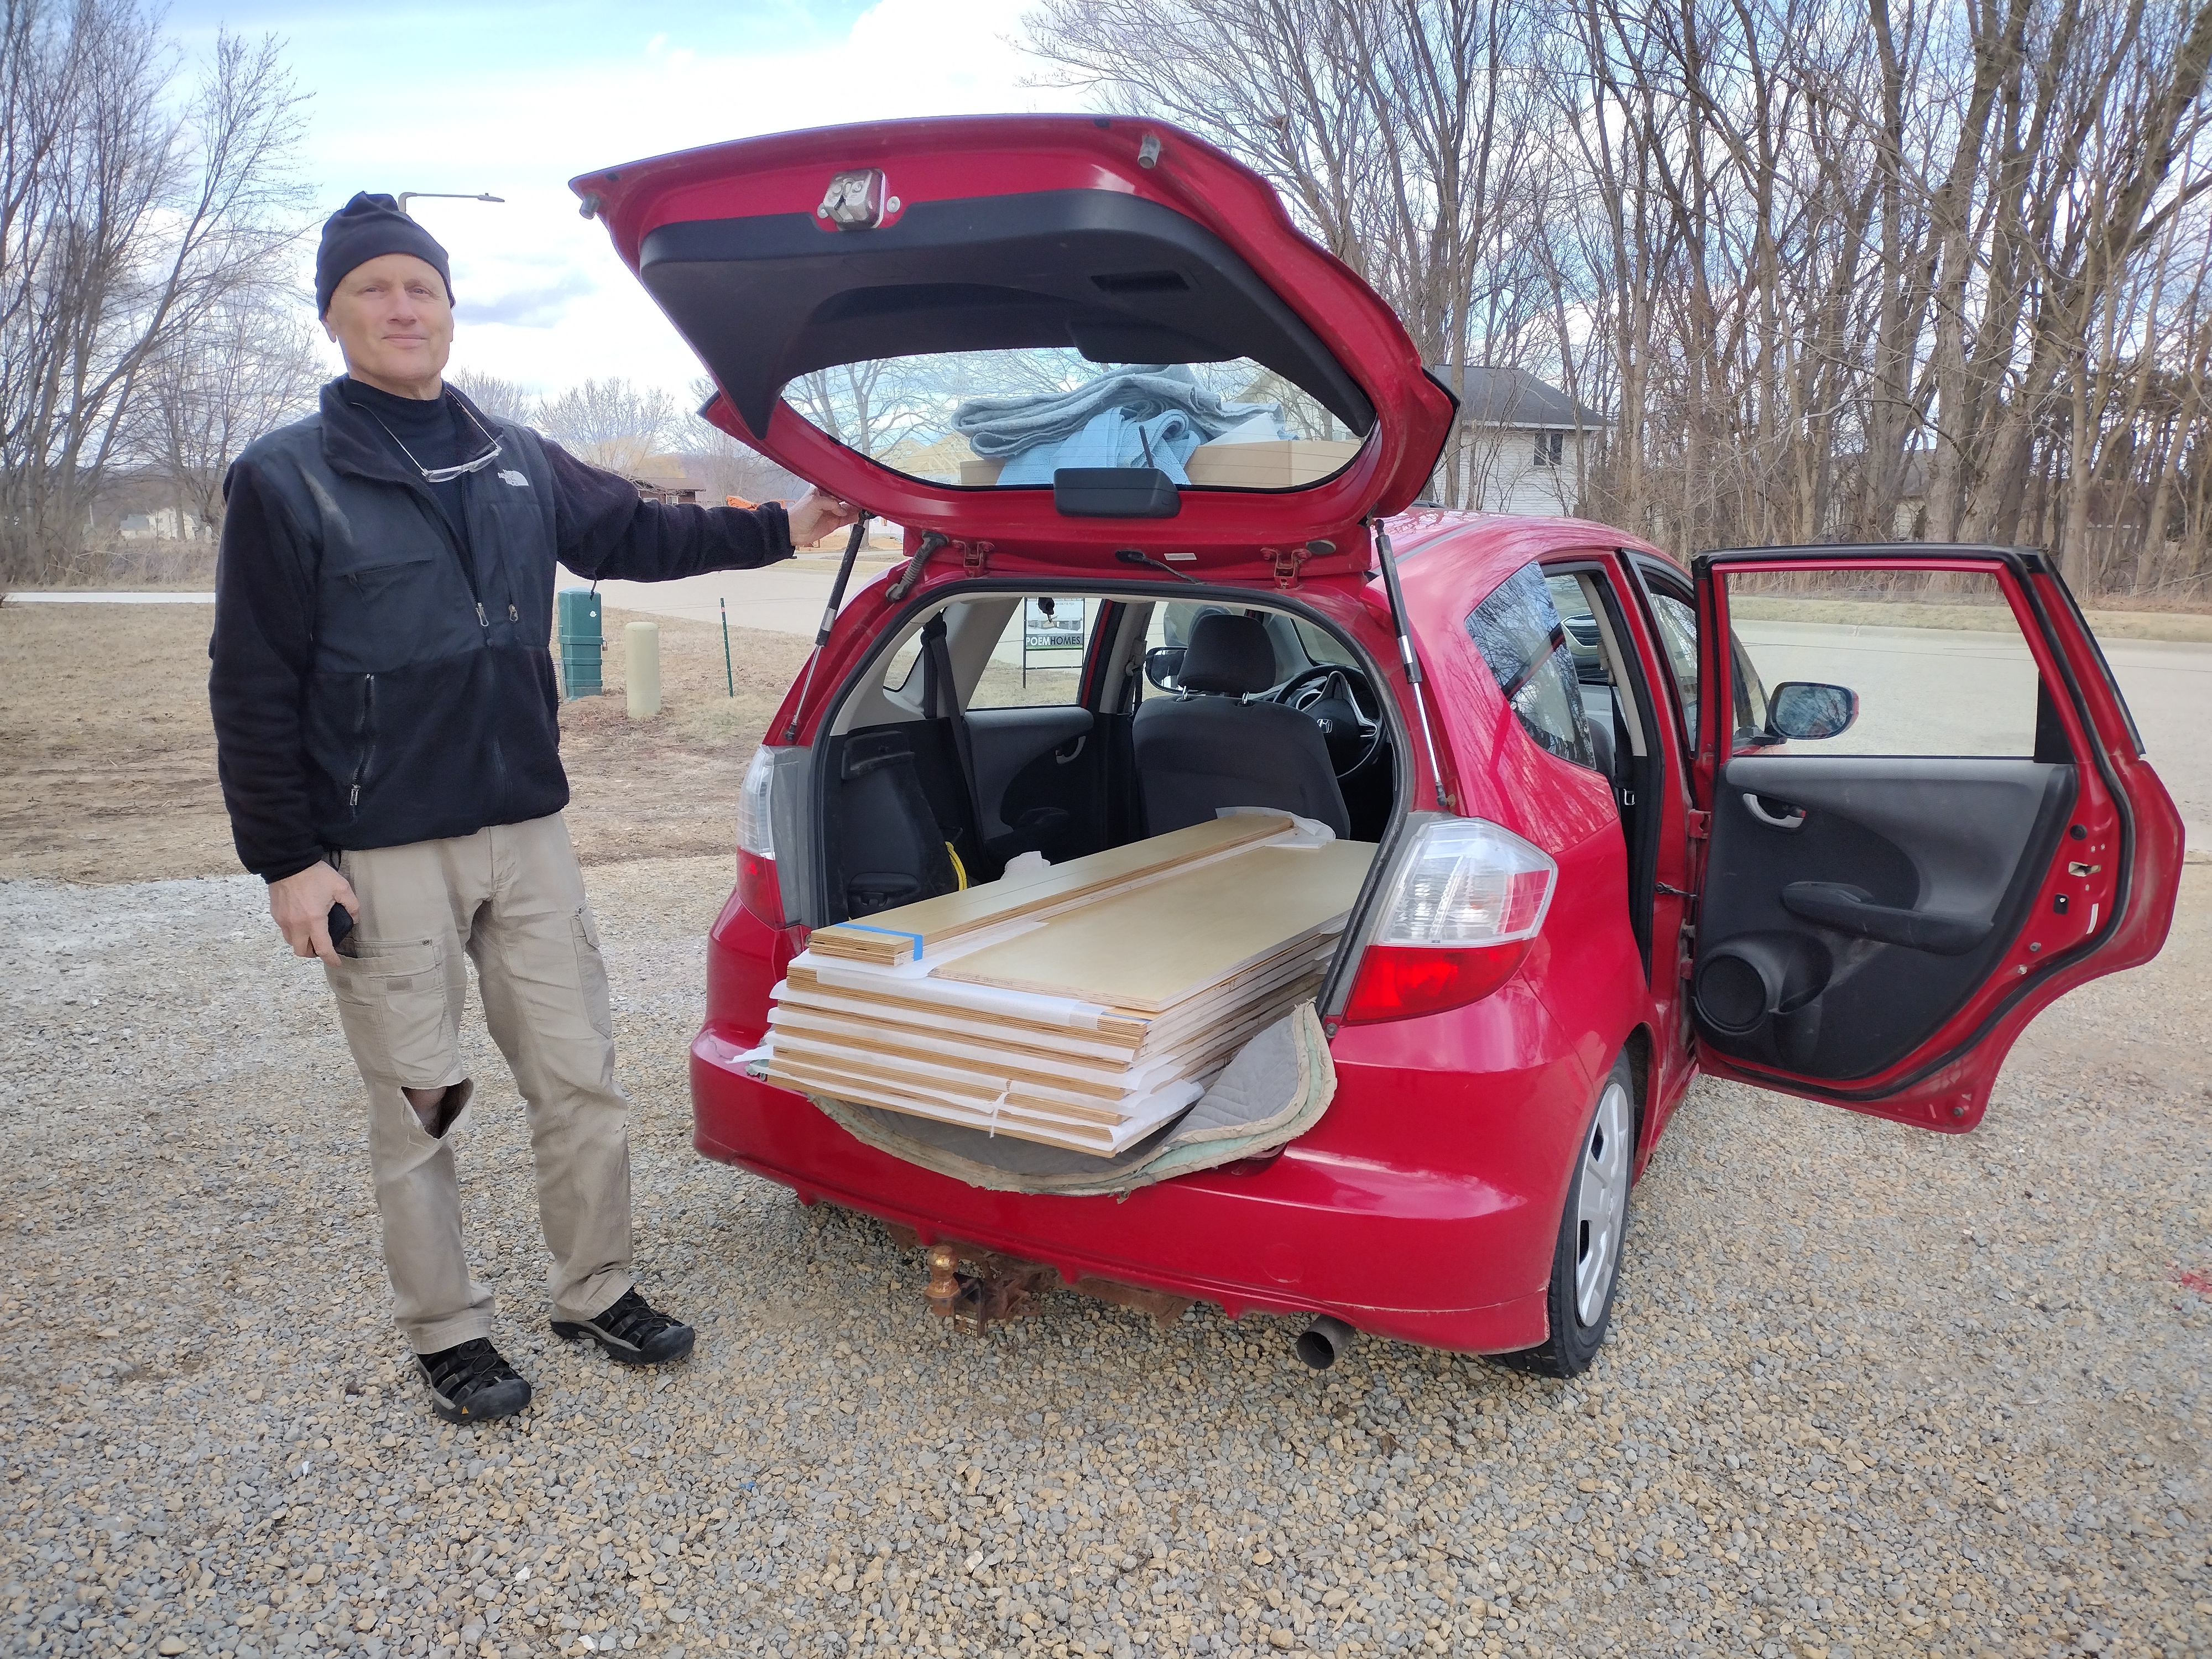
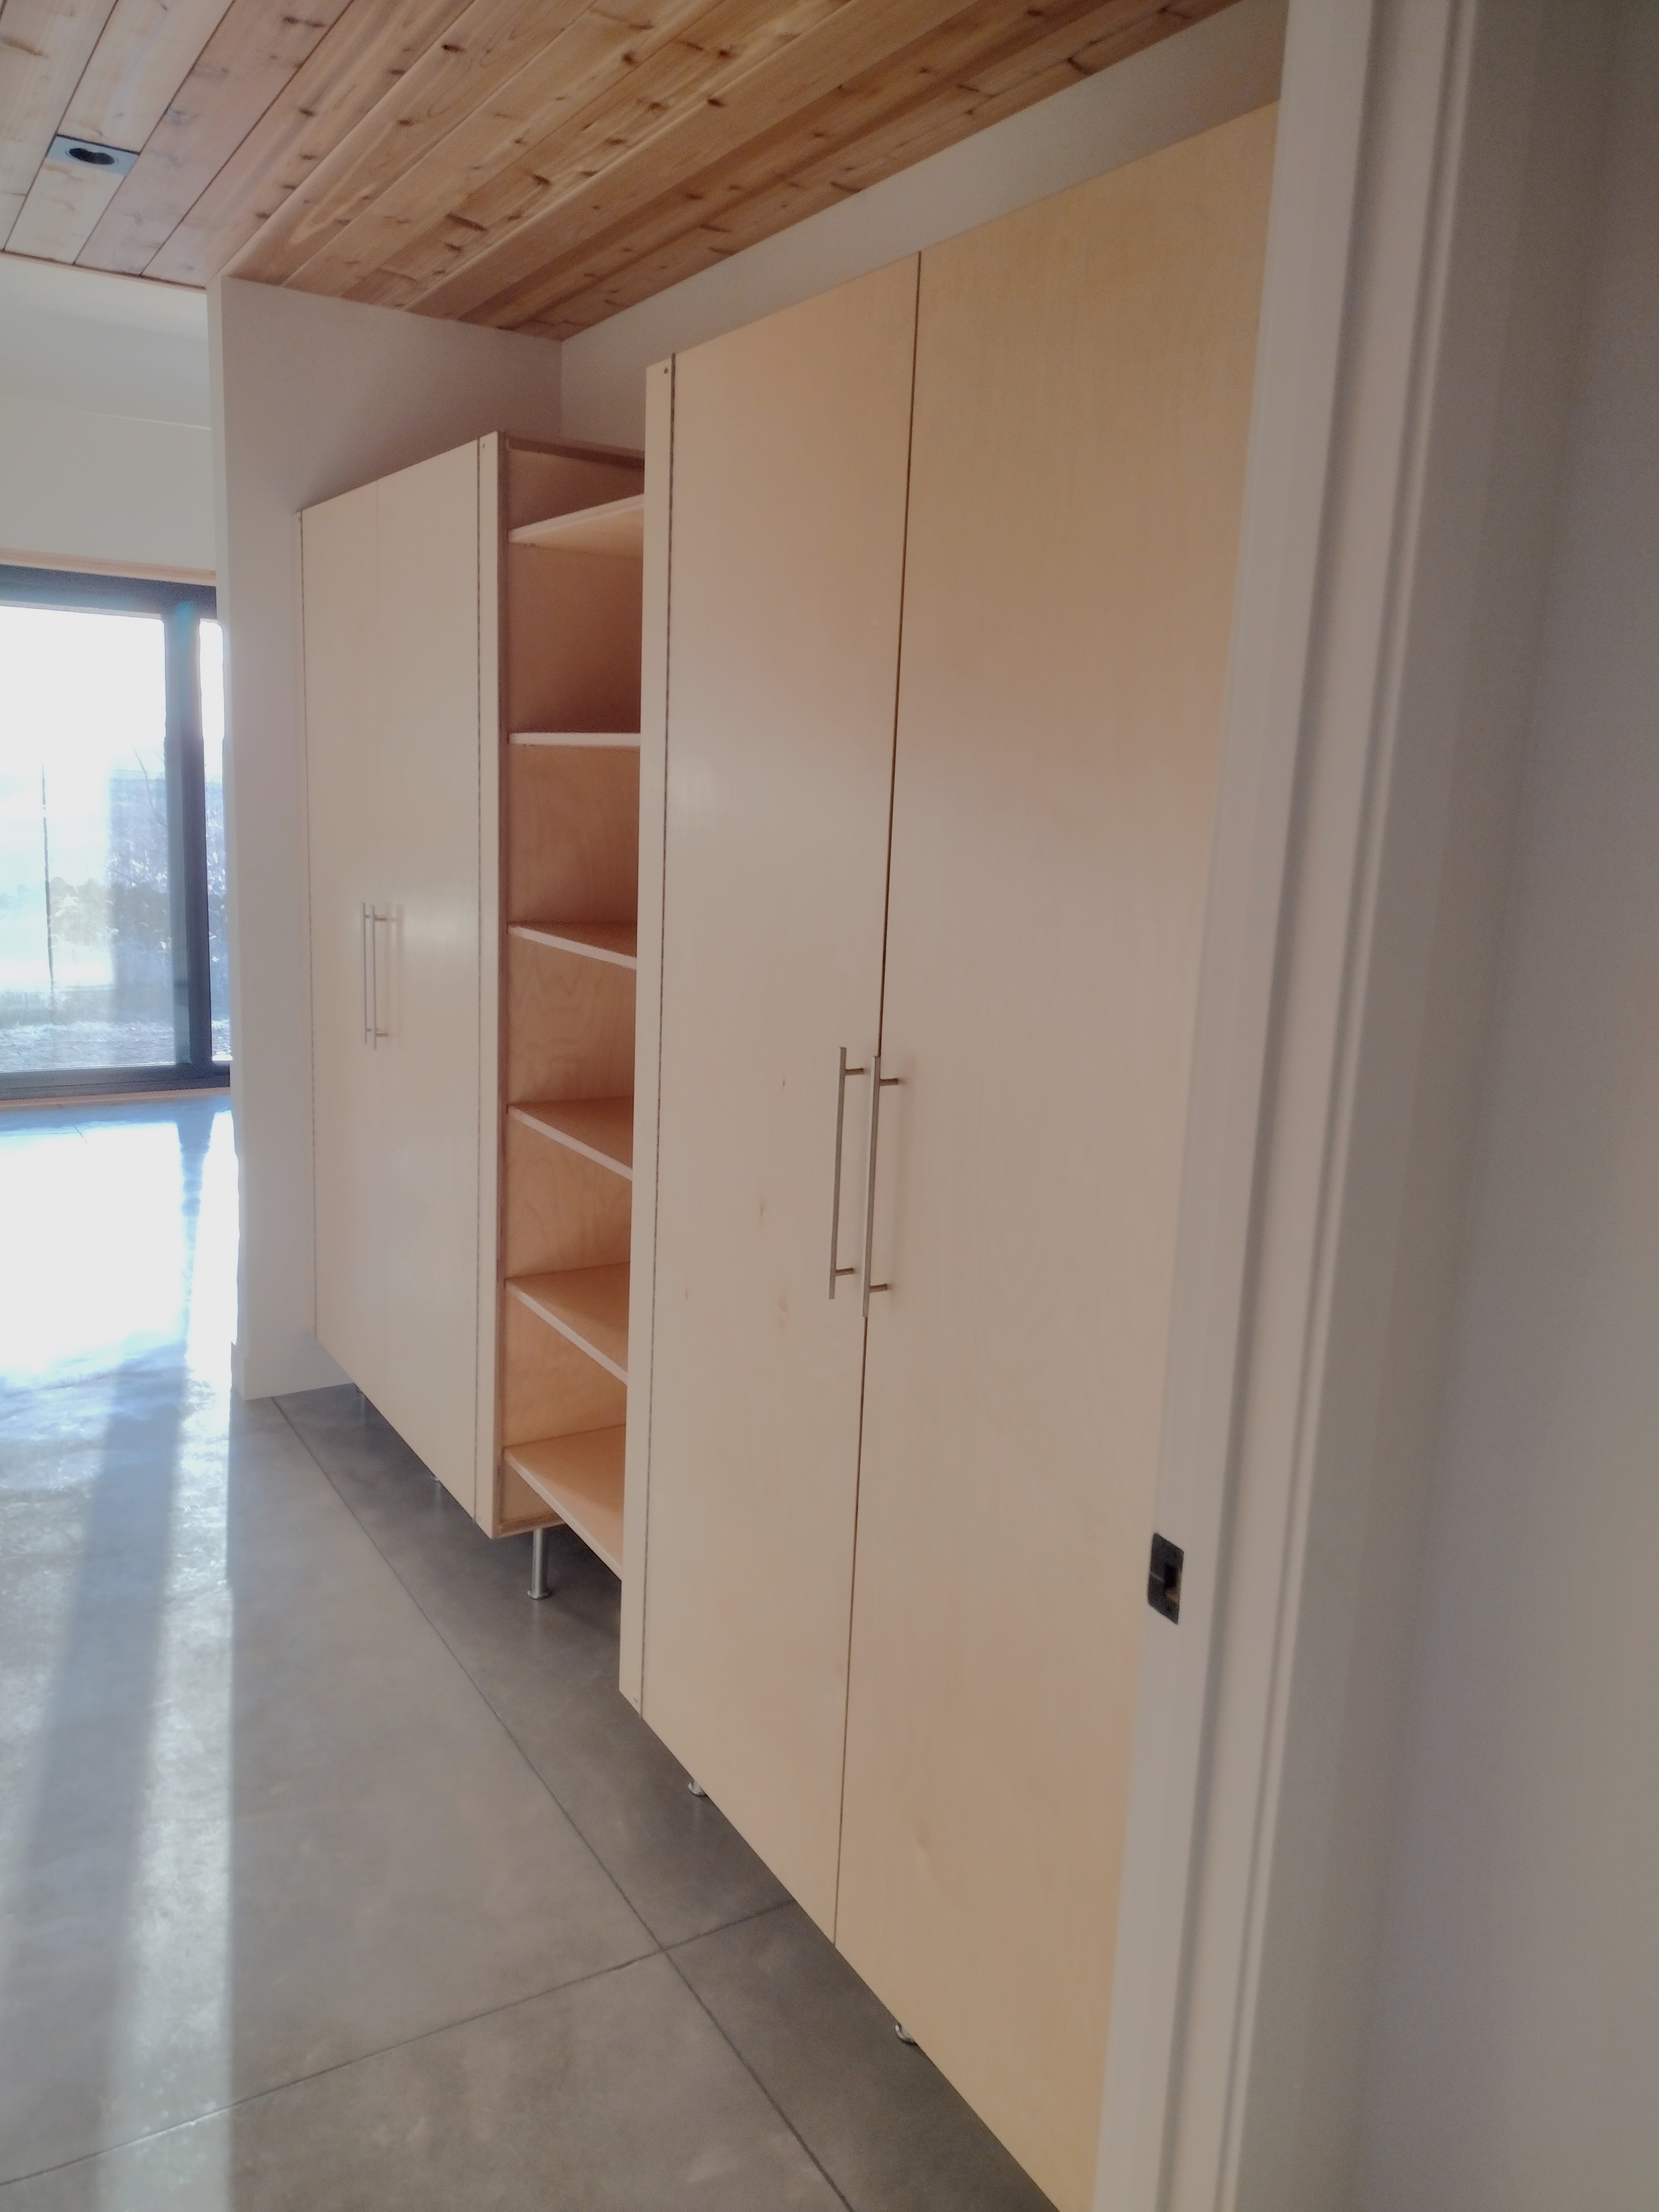
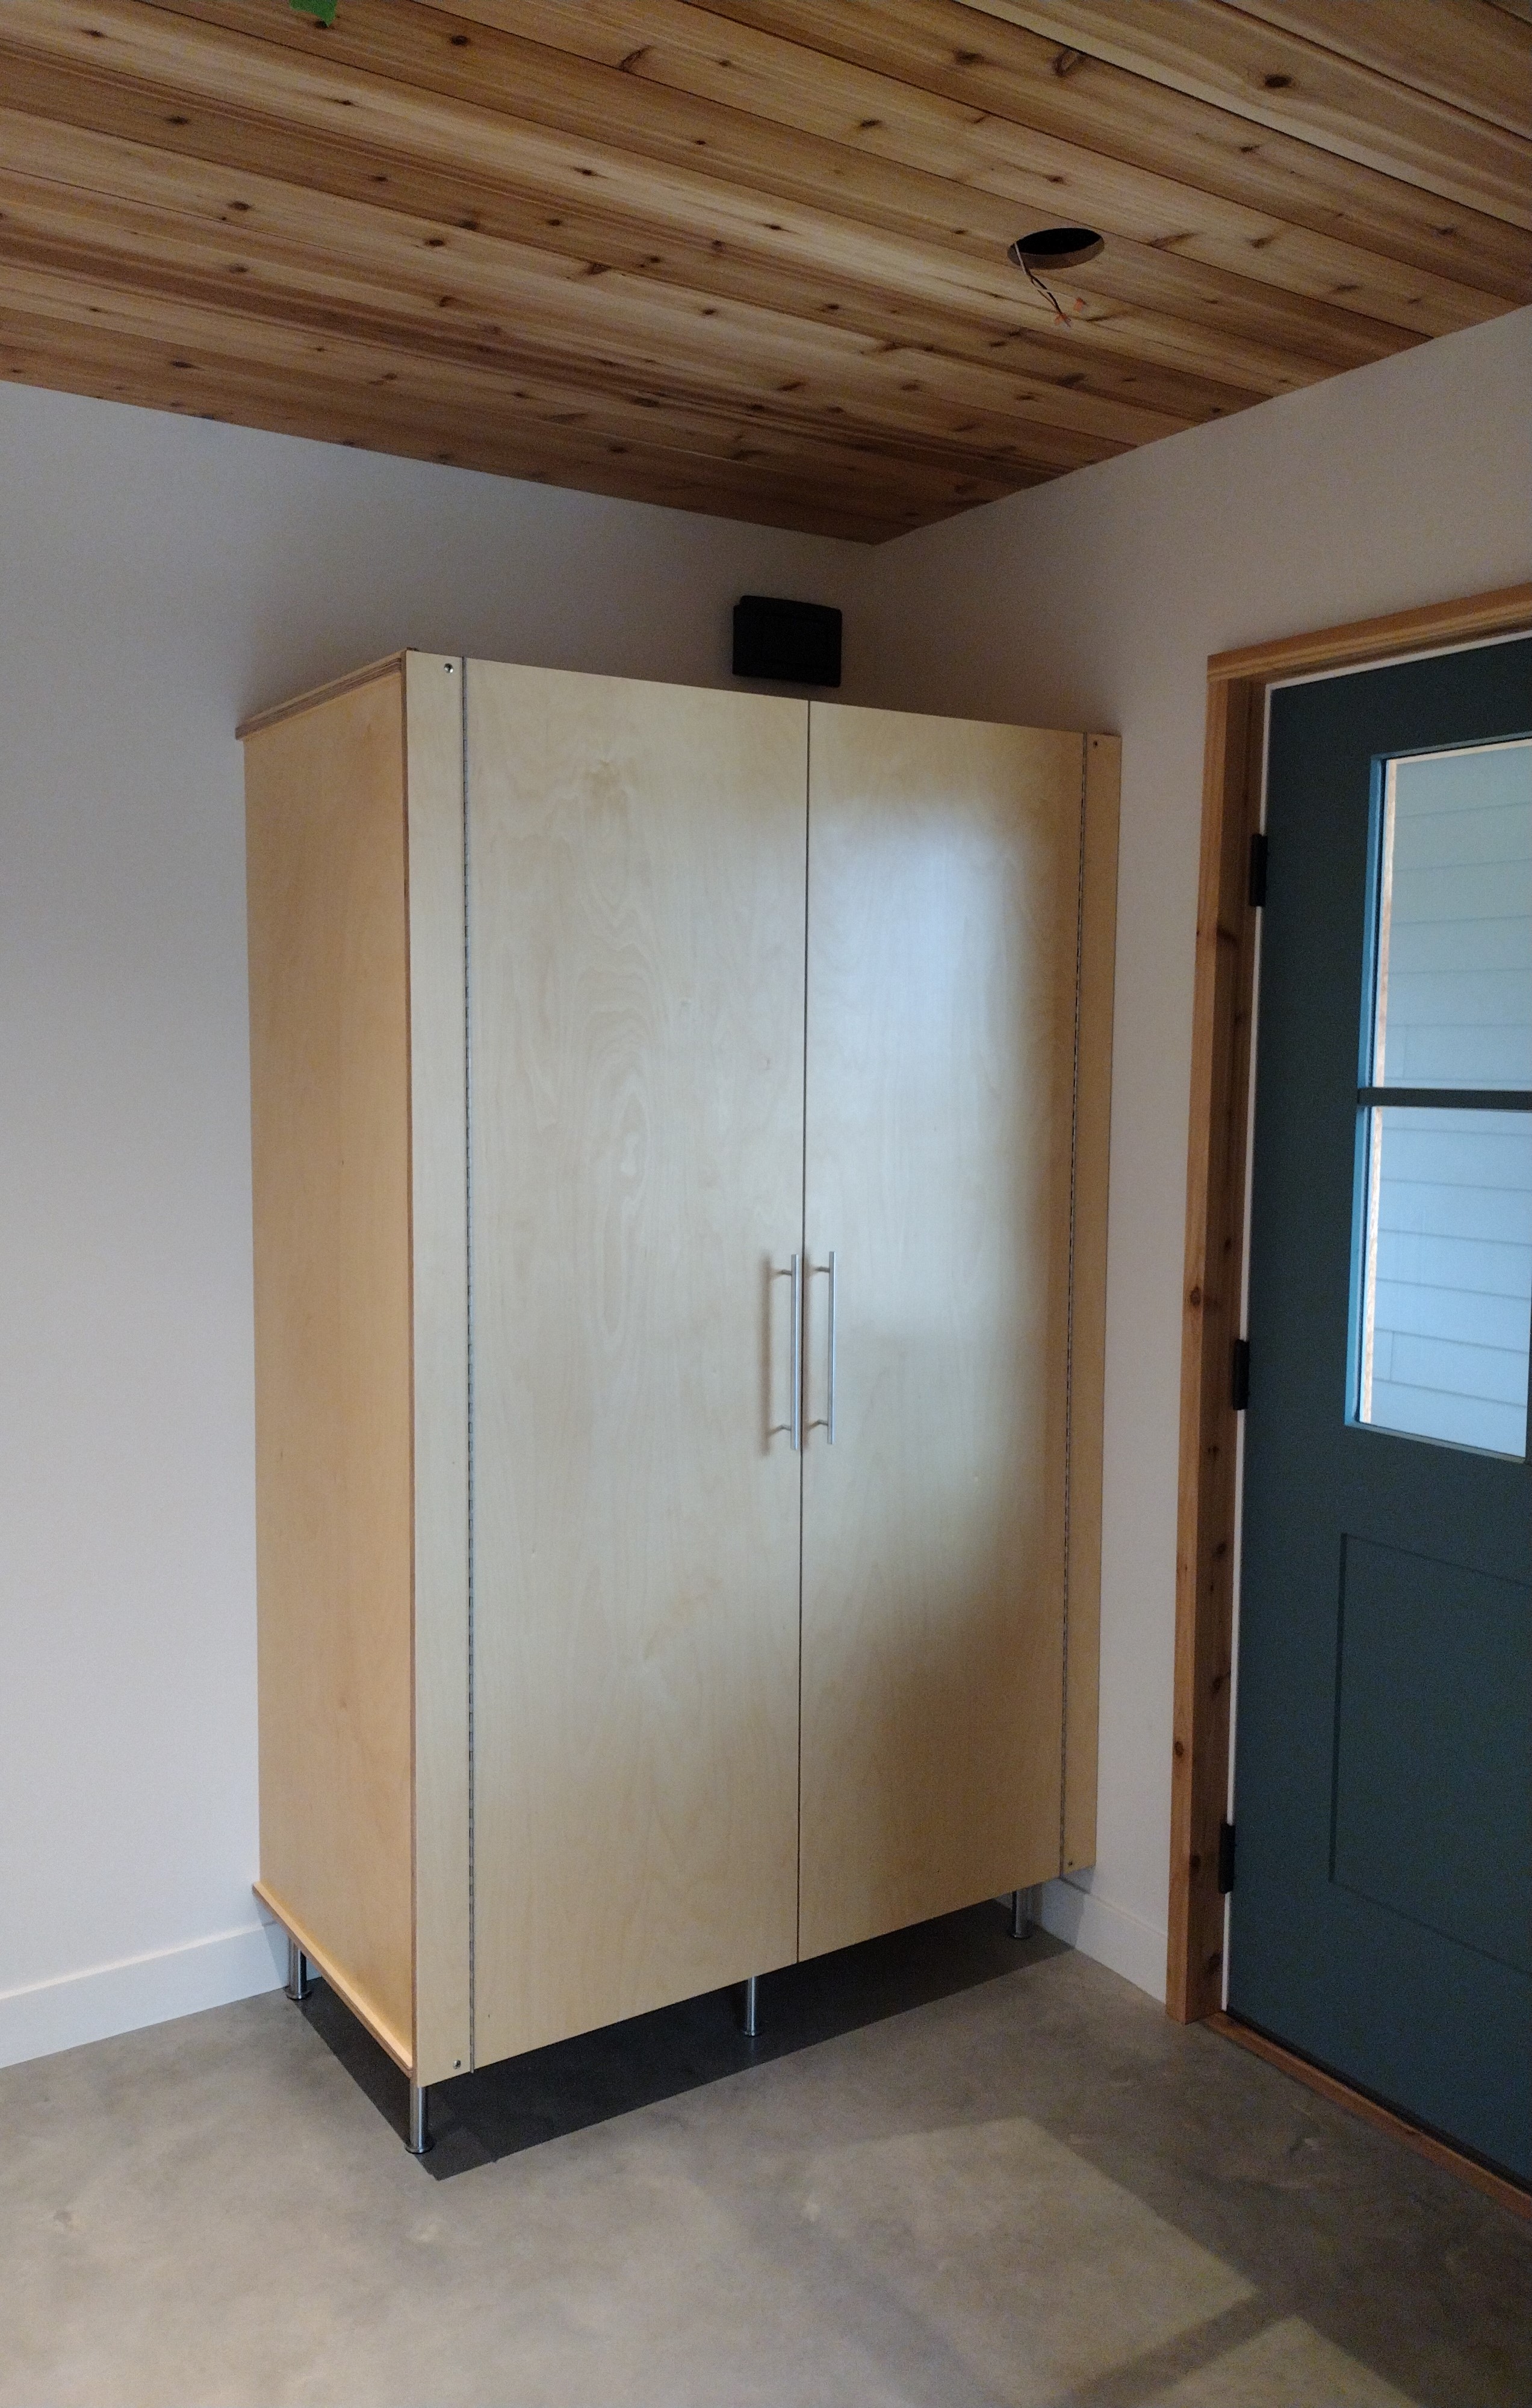
Meanwhile, our friend Eric Wallner was busy in his woodland shop, ripping, routing, drilling, and sanding the parts and pieces that make up his signature Frank Lloyd Wright inspired wardrobes.
Precisely dimensioned for economy and scale. Made from 4×8 sheets of 3/4″ thick 11-ply premium birch plywood. Nary a strip of waste. Pleasing proportions and subtly proportioned details. Piano hinges and smooth stainless steel hardware. A buttery finish that invites touch.
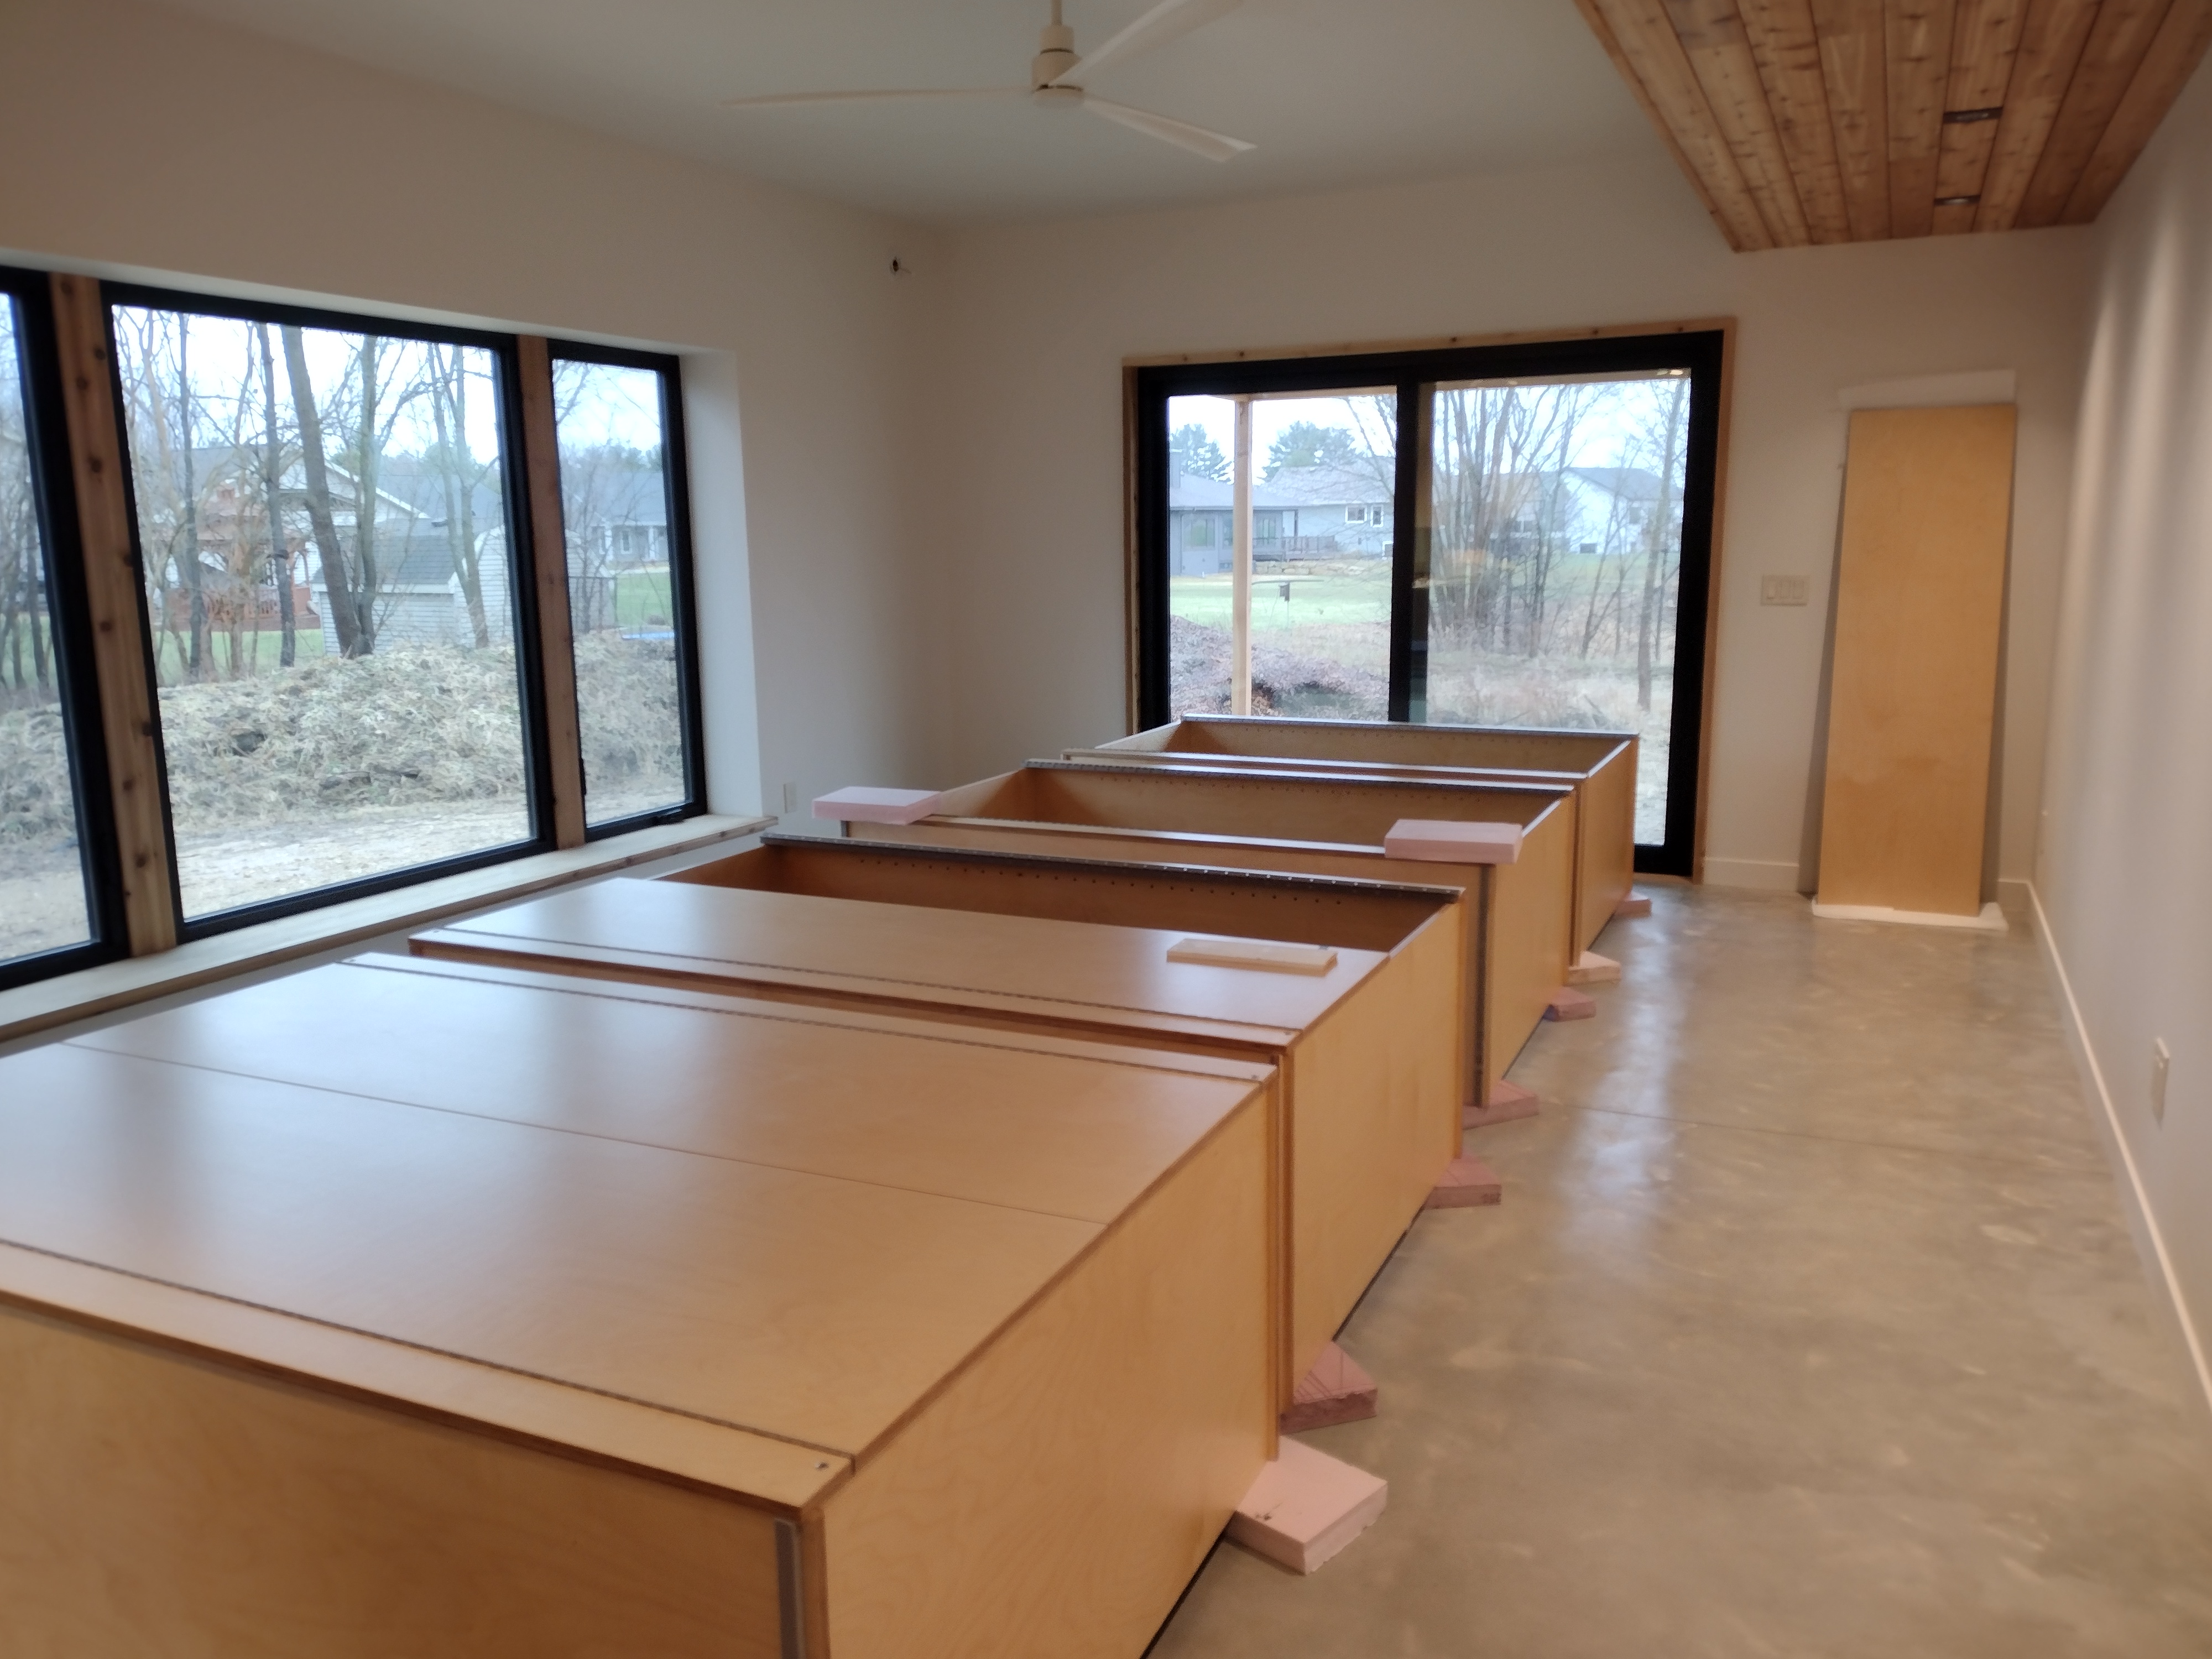
The entry has two 48″ wide units for coats, with a 48″ wide bench between for taking shoes off and on. The west bedroom has two 48″ wide units, with open shelving between for folded clothes. The bathroom for this bedroom has a 24″ wide unit, just 12″ deep, for supplies and towels. The east bedroom has a 48″ wide unit paired with a 24″ unit. They are 72″ tall, on 6″ stainless steel legs.
Open above, and lightly touching the floor, these cabinets replace conventional boxy closets, lending a more spacious and artful feeling to the rooms they so elegantly serve.
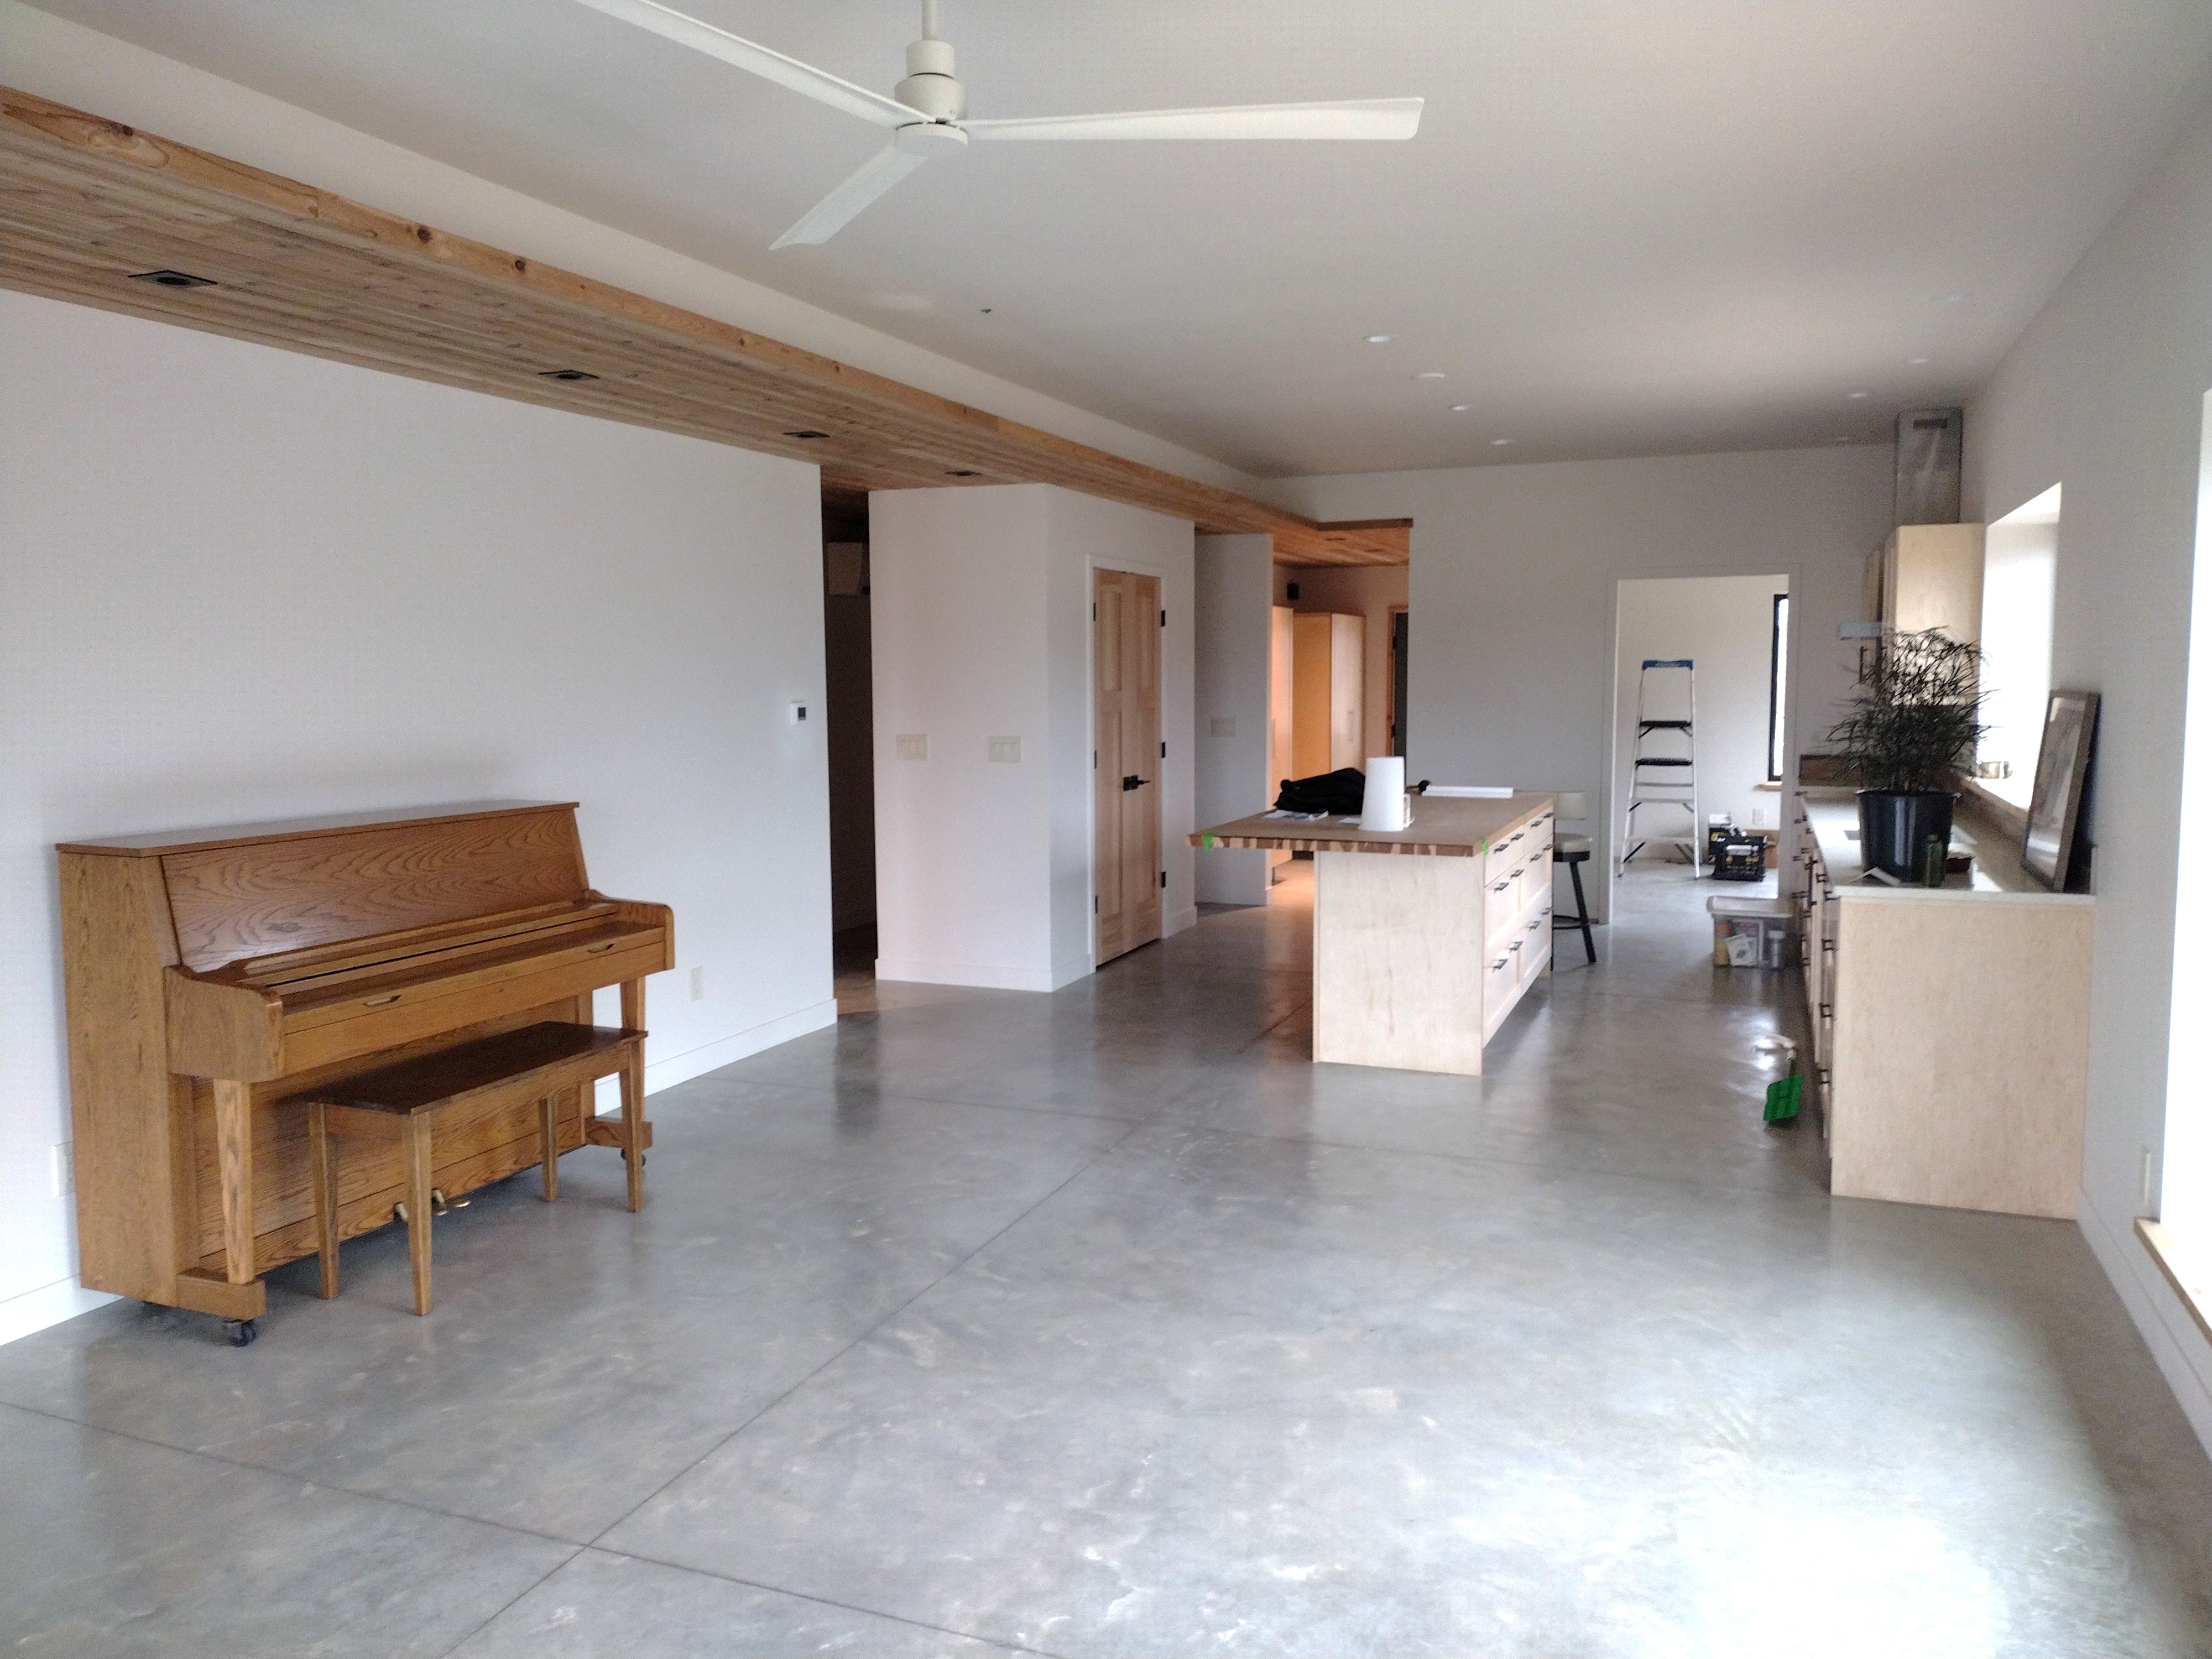
A cedar strip wood ceiling finishes the dropped soffit we built to house ductwork. For how and why see my previous blog post Interior Framing.
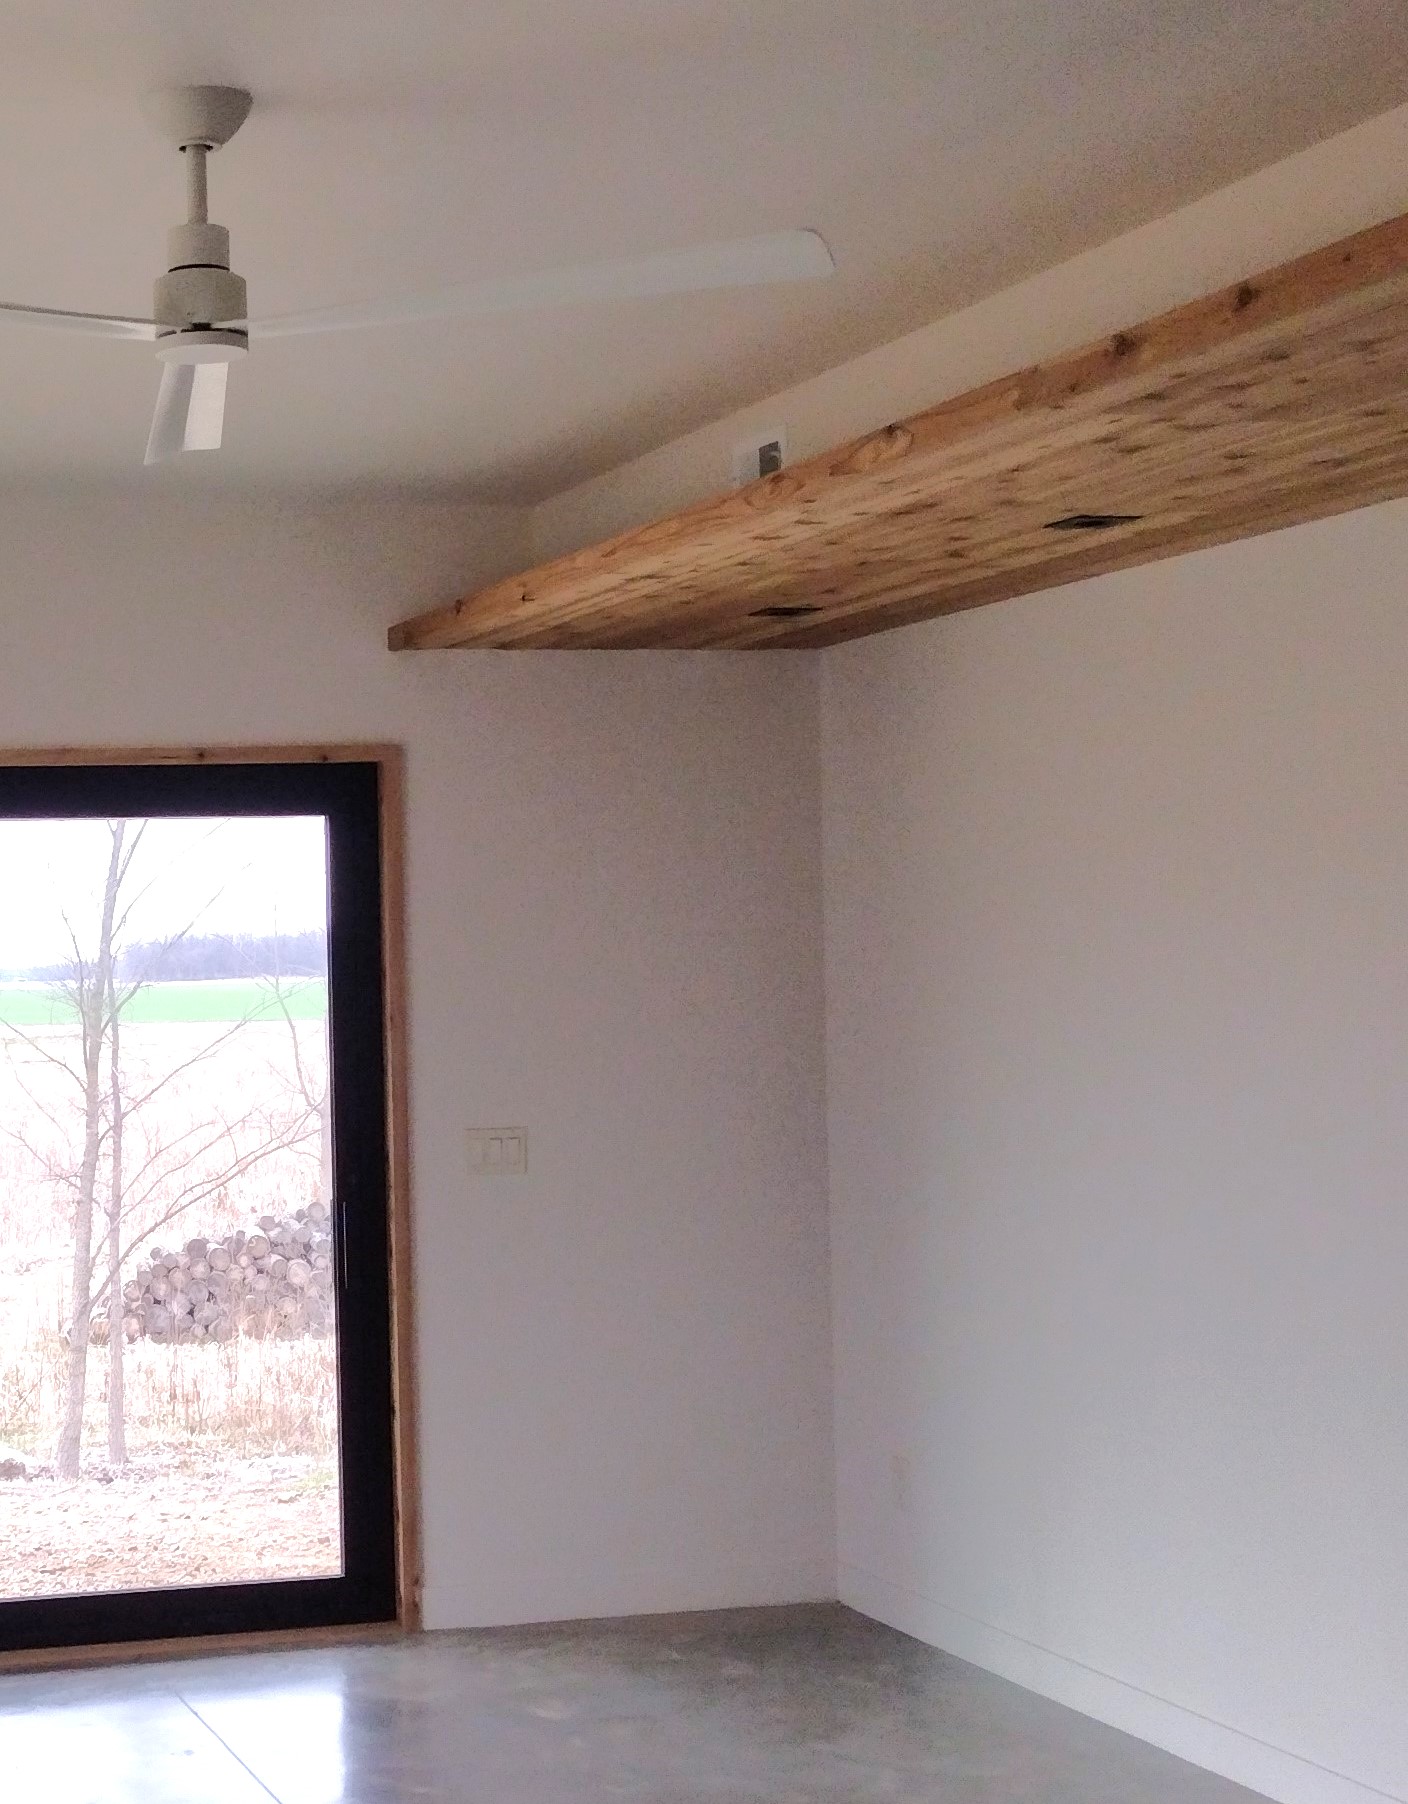
The cedar strips cantilever 12 inches beyond the soffit (stiffened with plywood backing) to create a light shelf in the Frank Lloyd Wright tradition. Hidden, a dimmable LED tape light bounces light off the drywall ceiling to create a pleasant glow. Recessed downlights punch through the soffit, casting halos of light on the wall.
Recessed downlights are black squares in the cedar ceiling. They are white circles in the drywall ceiling. Super-quiet and completely non-descript white fans in the living room, dining room, and each bedroom keep the air moving.
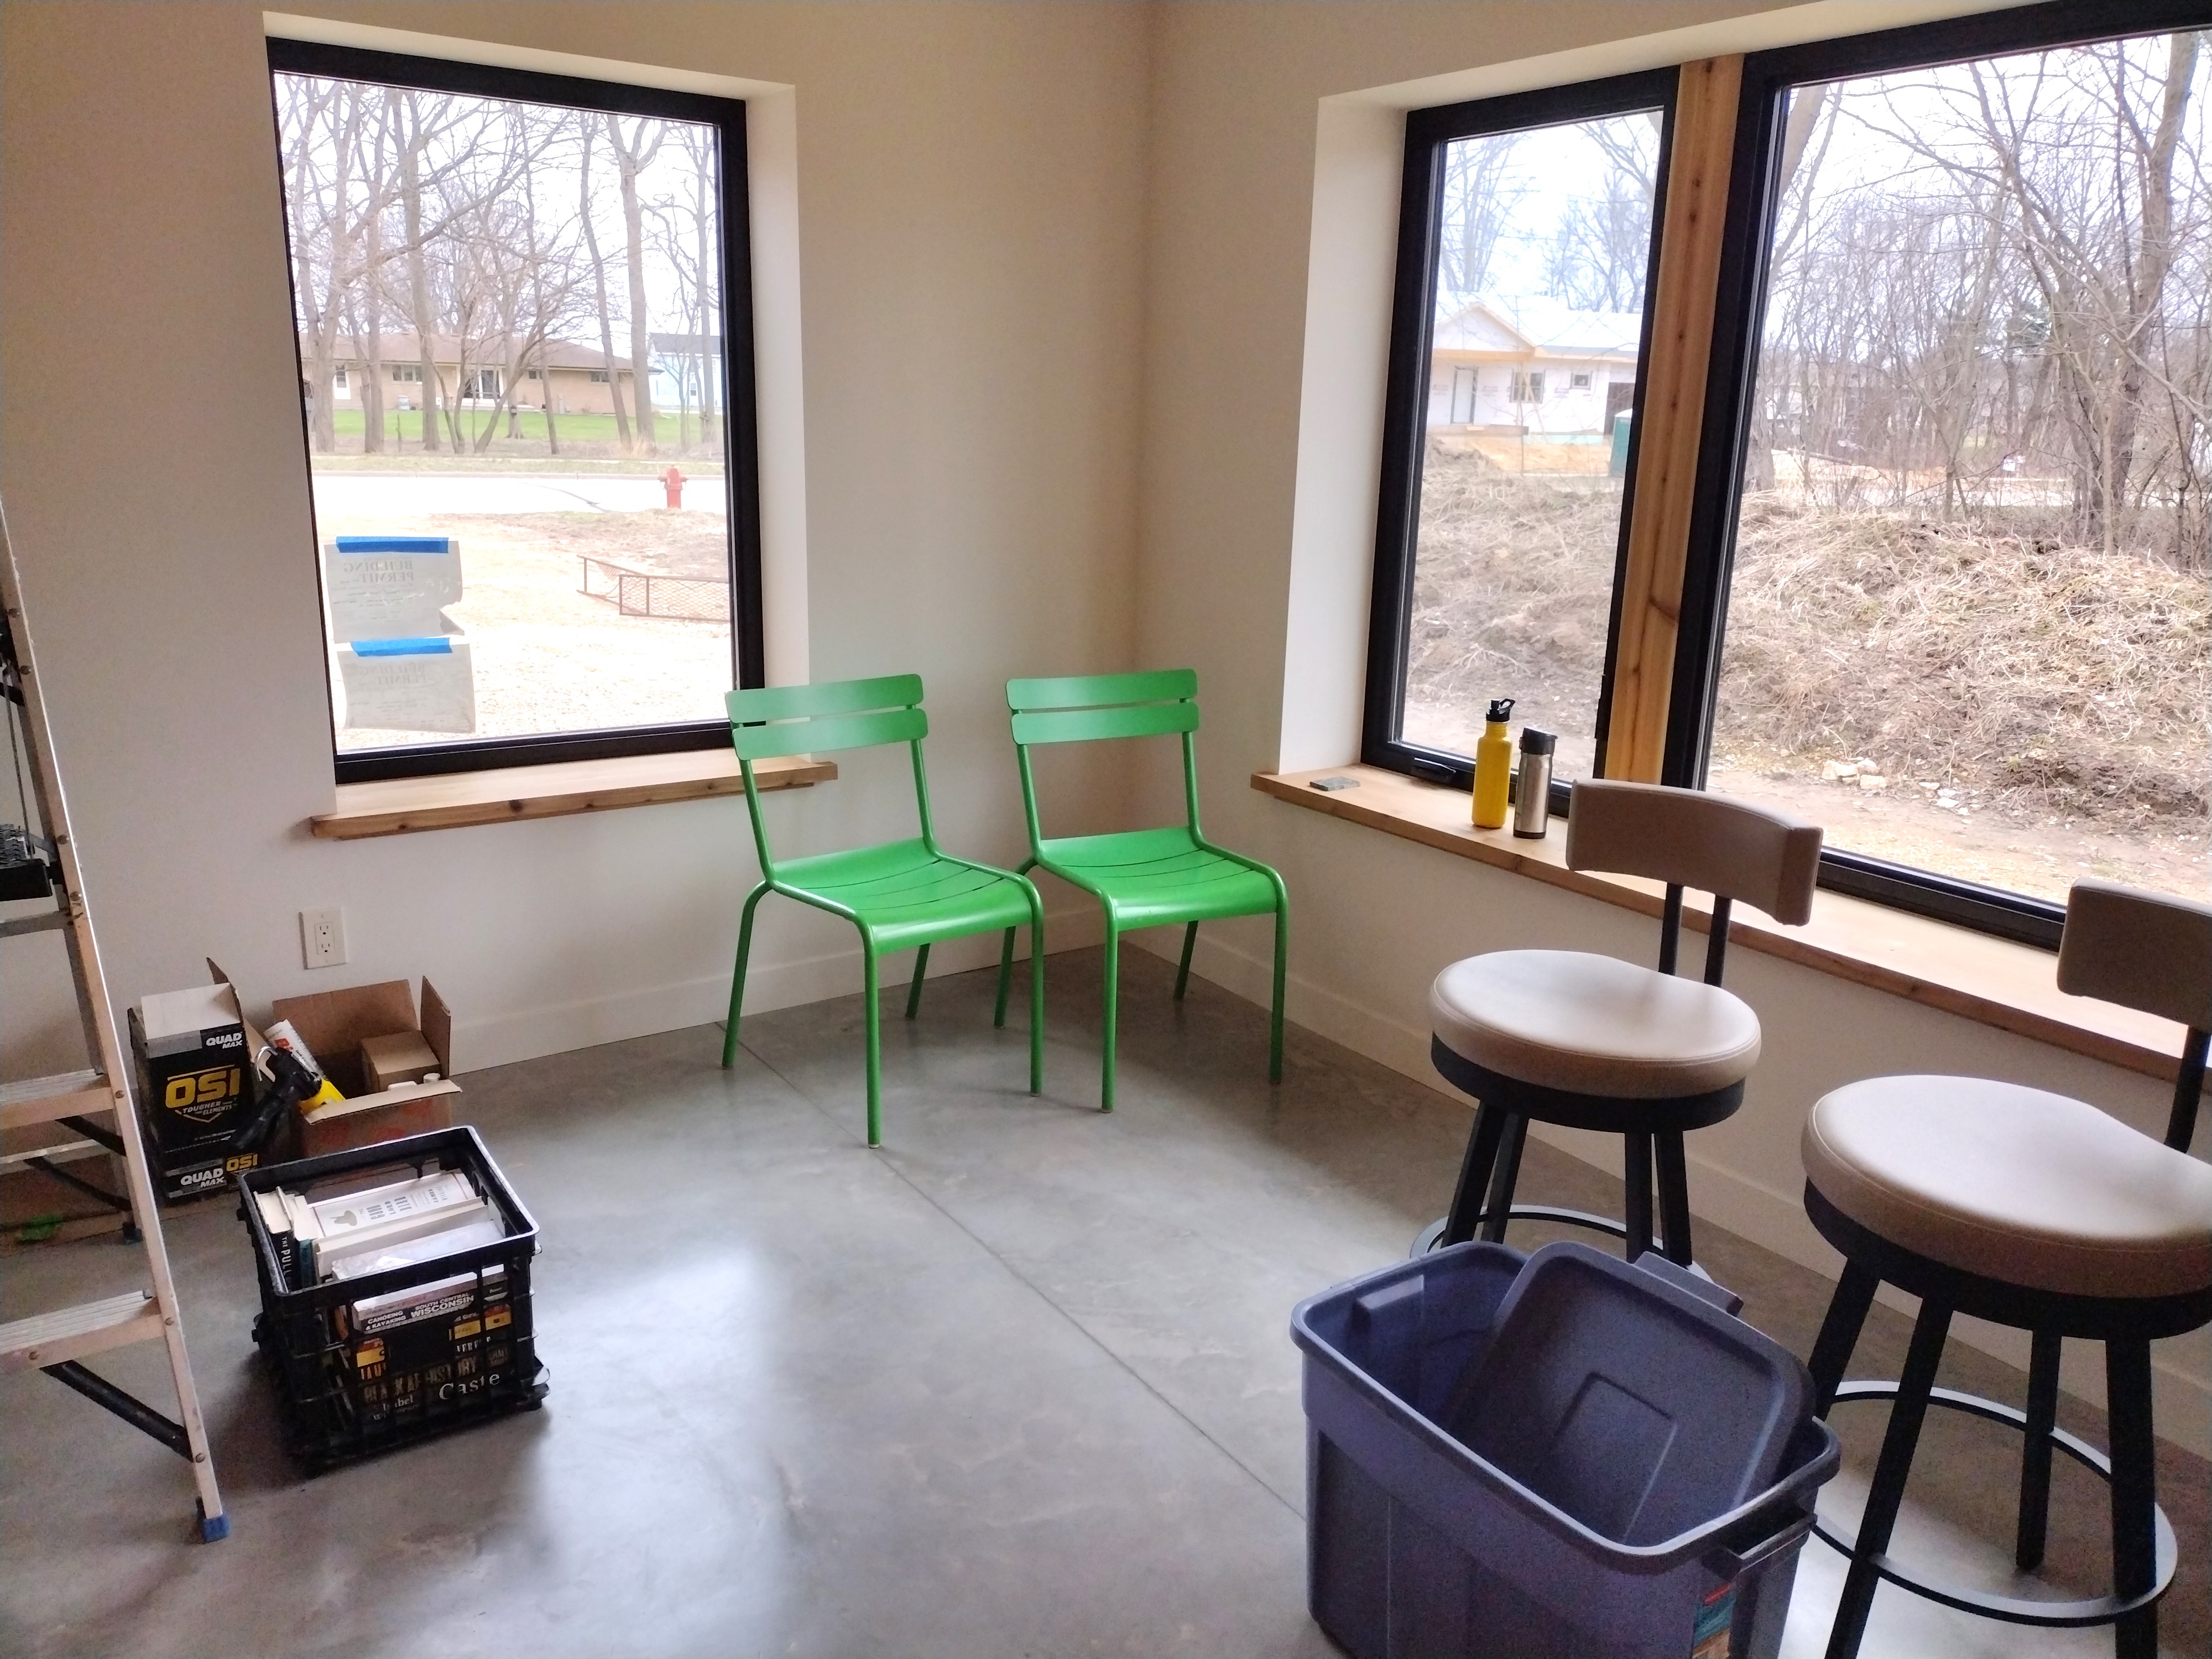
For window sills, we chose 2 inch thick cedar boards notched and fitted to drywall jambs.
For door jambs, we chose 2 inch thick cedar on edge, to match the cedar trim on the exterior.A few more details came later, including the entry way bench, refrigerator surround, and tilework.
April 2, 2025 marked the day the keys were officially turned over to the homeowners, JC and Laura Love. What a rewarding time is was to put into place all the architectural elements that make up this home’s basic character. Now, the Love’s will add their artwork, furniture pieces, and other tools for living that will make it truly their own!
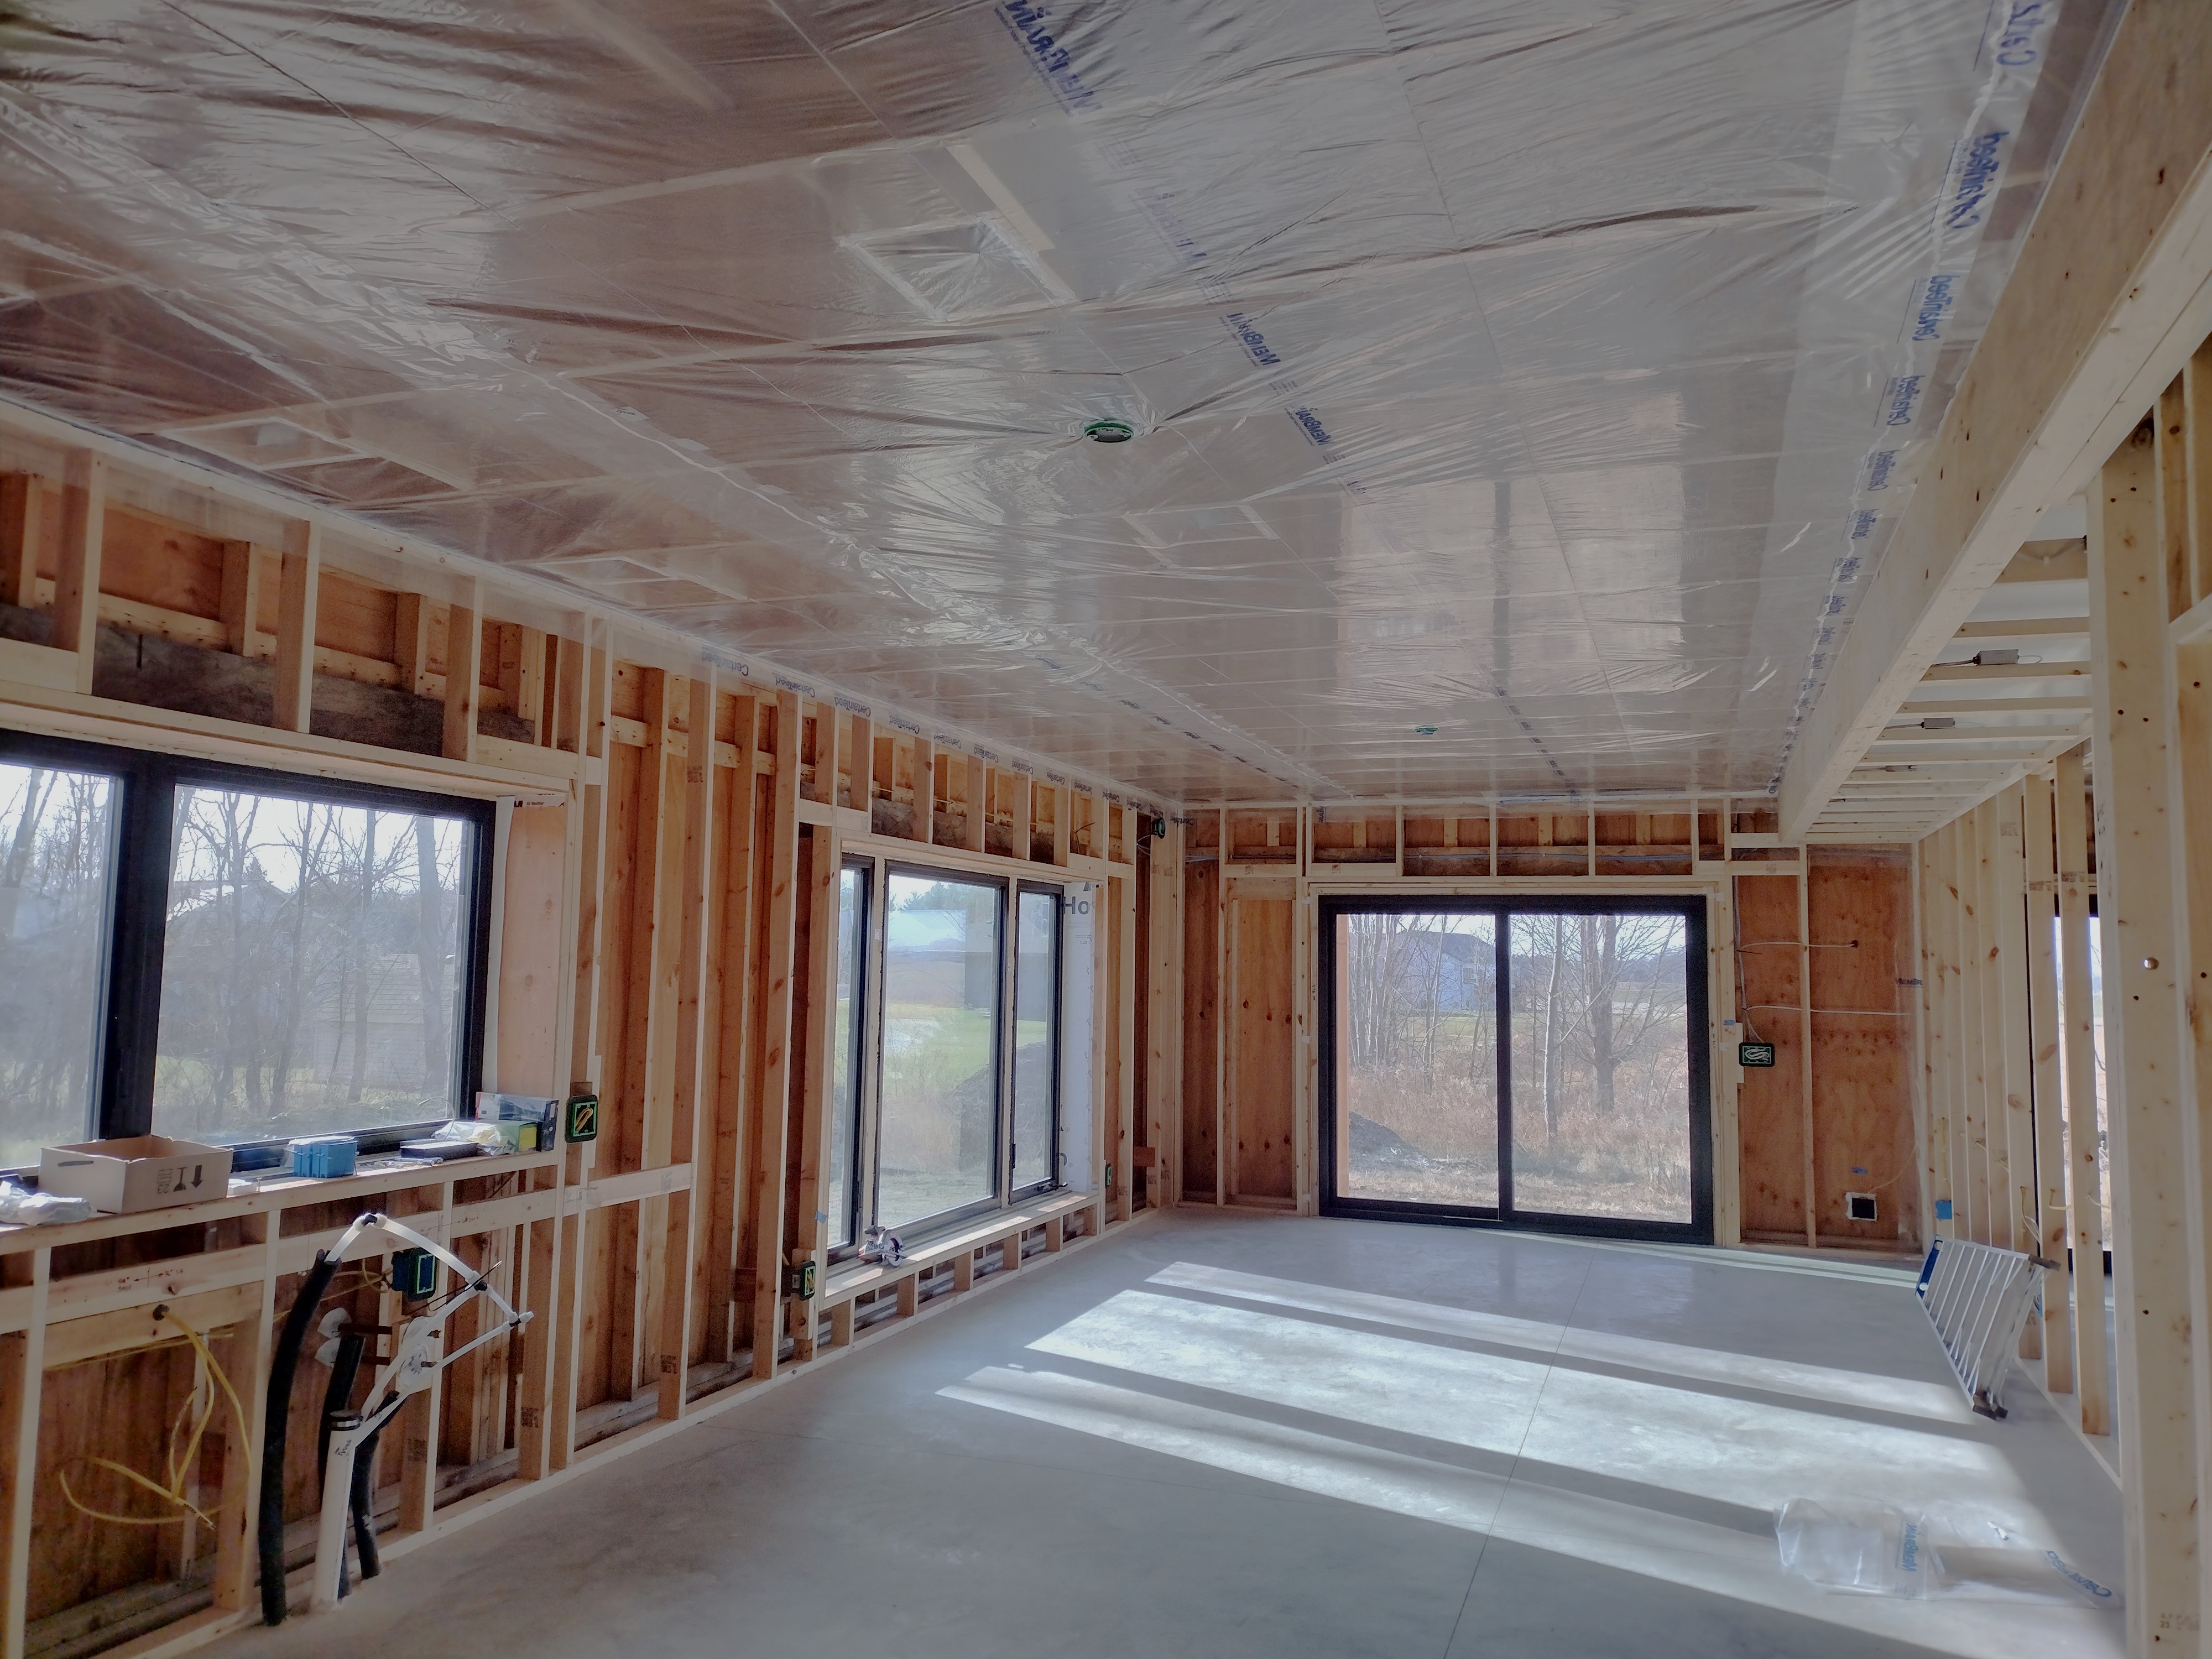
December 12, 2024-February 7, 2025: With full confidence that we’d done everything we could to seal up the mechanical penetrations and building material seams, our “weekend warrior” crew began wrapping the walls with vapor retarder; of course caulking and taping as we went. For a better understanding of how important this work is, see the previous blog post “Testing Our Work”.
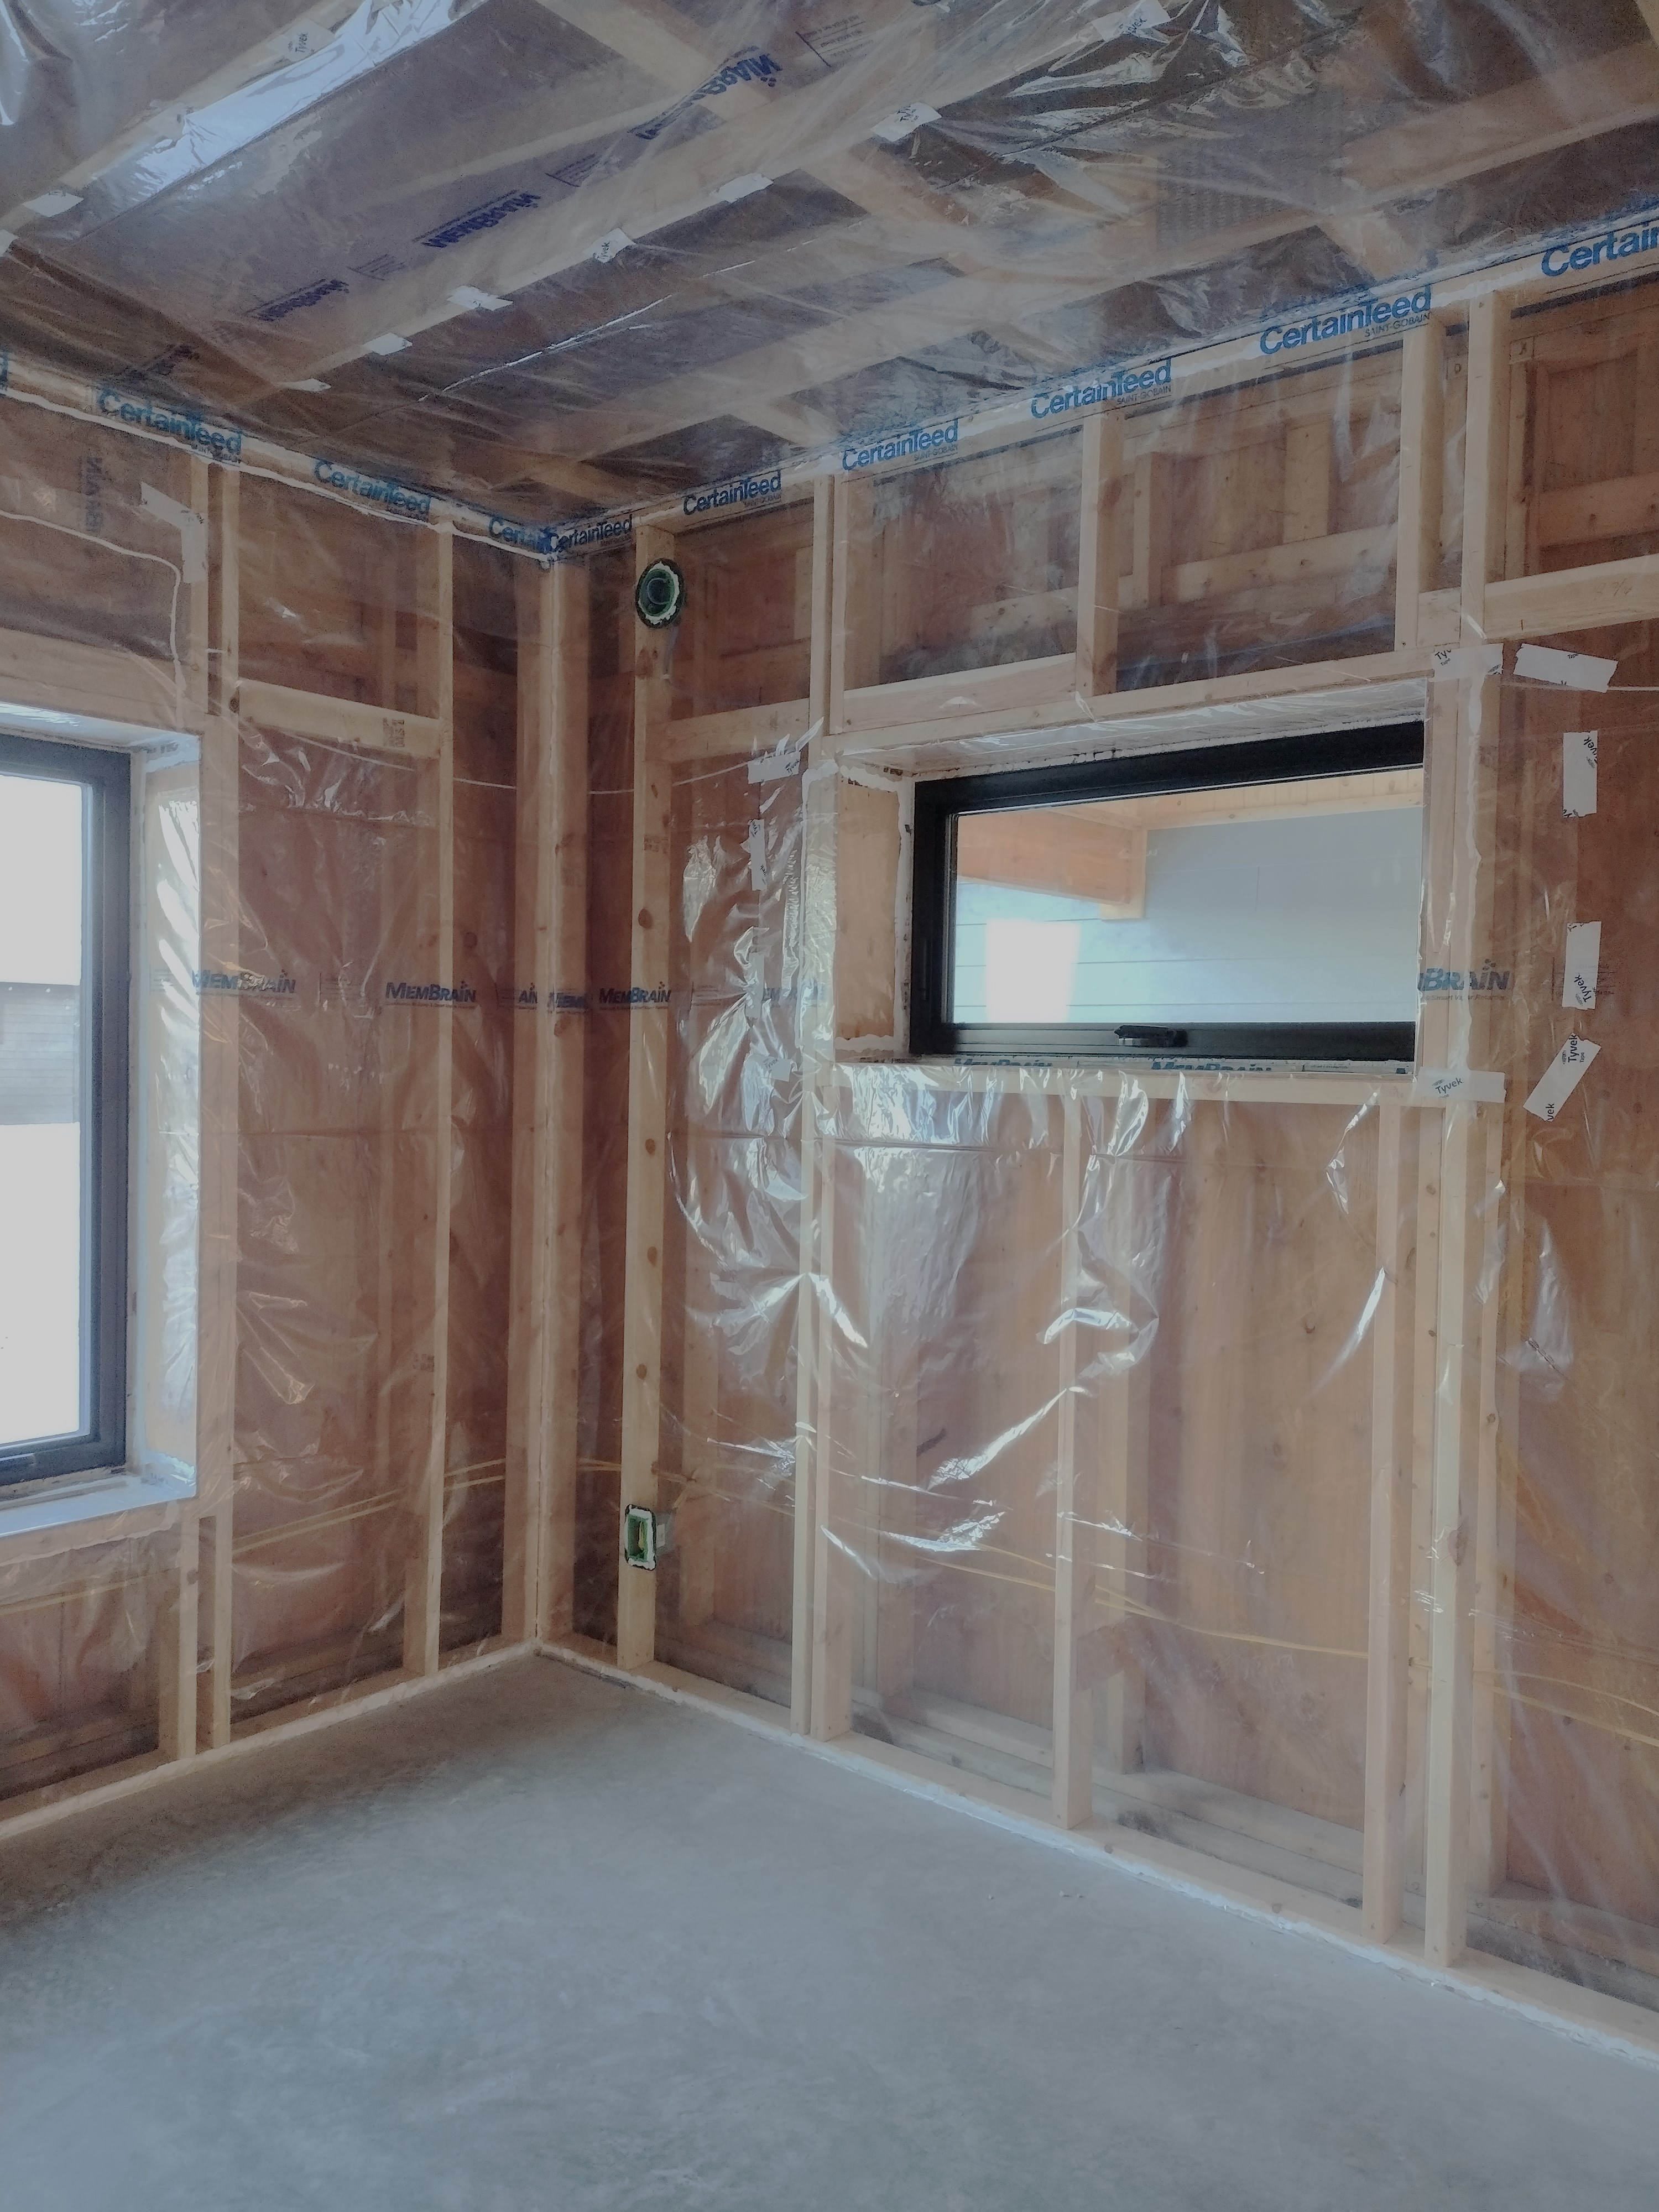
Here you can see Certainteed’s MemBrain vapor-variable retarder neatly stretched across the studs and caulked at the bottom and top plates. It wraps into the window openings and is cut and caulked to the perimeter of the electrical outlets, switches, and fixtures.
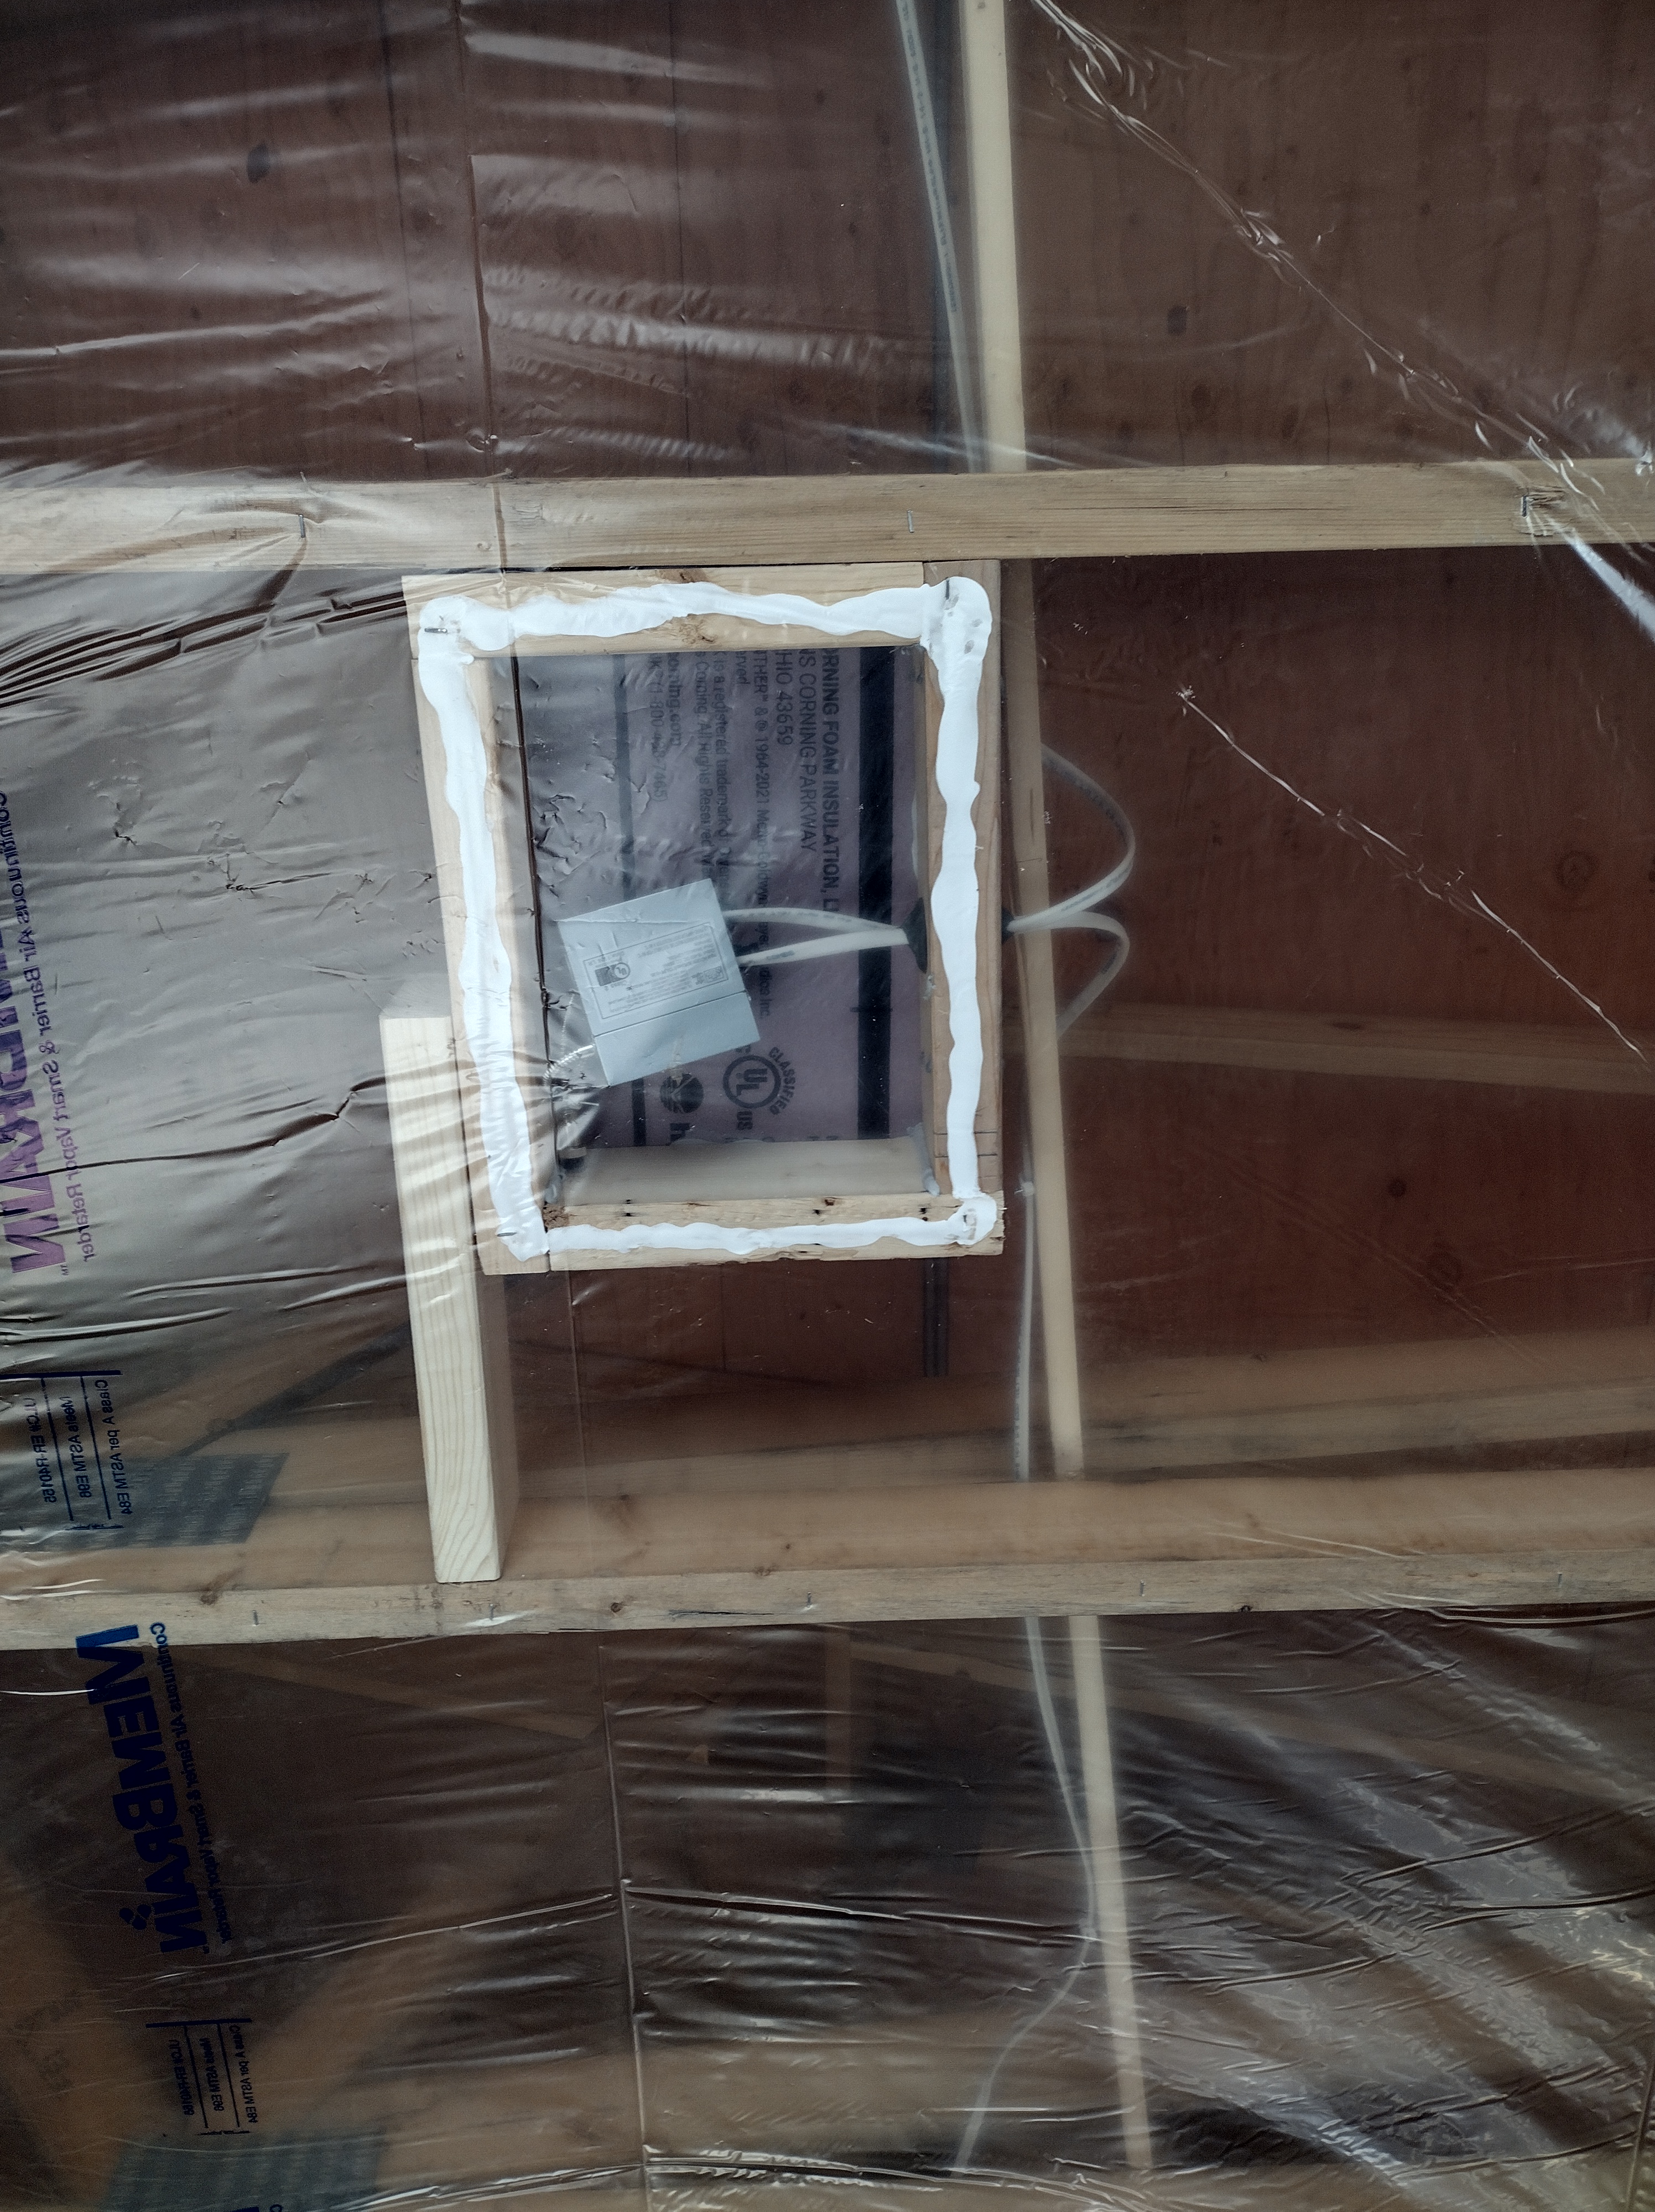
Basically, we went nuts and air-sealed everything, like this box for a future ceiling fixture that’s thermally isolated from the attic insulation and caulked to the vapor retarder. Our work will pay dividends for the lifetime of the home: in lower heating and cooling bills AND in healthy indoor air free of outside pollutants, mold, mildew, and pests.
Air-sealing saves our homeowner $528 per year in heating and cooling costs compared to a new home built to Wisconsin’s minimum standard.
I can’t seem to get enough of running energy models of my designs and iterating alternate scenarios. For this project, I turned to REM/Design software to compare Wisconsin’s Uniform Dwelling Code minimum standards to our high performance goals. The Code is uneven: many standards provide good guidance based in building science and other standards are wildly off base. To meet the air-tightness standard would be to build a shockingly leaky home at 7 ACH (air changes per hour). Most new homes today using conventional building methods and materials easily achieve 3 ACH with a blower door test. For this reason, the $528 savings cited above is unfair. Let’s change that:
Air-sealing saves our homeowner $206 per year in heating and cooling costs compared to a typical new home built in Wisconsin.
A few days later, the drywallers delivered their material. The people at First Choice Drywall were great every step of the way.The work sequence I asked for was unusual, but not difficult. It did require an extra trip.
Our insulation company likes to blow cellulose into the walls AFTER the drywall is installed. They need at least a 6 inch gap at the top of the walls and below the windows for their hose. Here you can see how the drywallers set it up: for our 9 foot walls, they delivered 54 inch wide drywall; a 12 inch strip was scored and snapped off and set aside. The remaining 48 inch sheet was installed on the bottom, factory edge up. On top, they installed a full 54 inch wide sheet. The 12 inch strip was prepped for any electrical holes and then tacked to the wall it belonged to. It will be installed later, factory edge down. Ditto for the below-the-window strips.
Normally, the drywallers sheet over the windows, then cut the openings out afterward with a router. Because our vapor retarder wrapped around the window jambs and was crucial to our airtight protocol, we couldn’t risk the router tearing it. Instead, the drywallers stopped at the edge of the window openings. They prepped 12 inch strips for the windows jambs and set them aside for later installation.
I have a lot of faith in the people at Accurate Airtight Exteriors.We’re on the same page when it comes to the importance of air-sealing and quality insulation work. Our “weekend warrior” crew had already taken care of all the air-sealing, including constructing an air-tight attic hatchway, but we certainly needed them for their expertise and the proper equipment to install cellulose insulation.
For the double stud walls, the crew punched their hose through a small slit (reinforced with tape) made through the vapor retarder. They added more staples as needed to keep the insulation contained in the stud bays. A good installer can tell by sound and feel when they’ve achieved the proper density. They also rely on a gauge on their equipment, and they keep count of how many bags of cellulose they’ve used. By dense-packing, all voids around pesky wires and other obstacles are filled and settling at the top of the wall is eliminated. Please see my previous blog posts Dense Pack: Take 1 and Dense Pack: Take 2 for a better understanding of the advantages of cellulose.These walls are insulated to R-45.
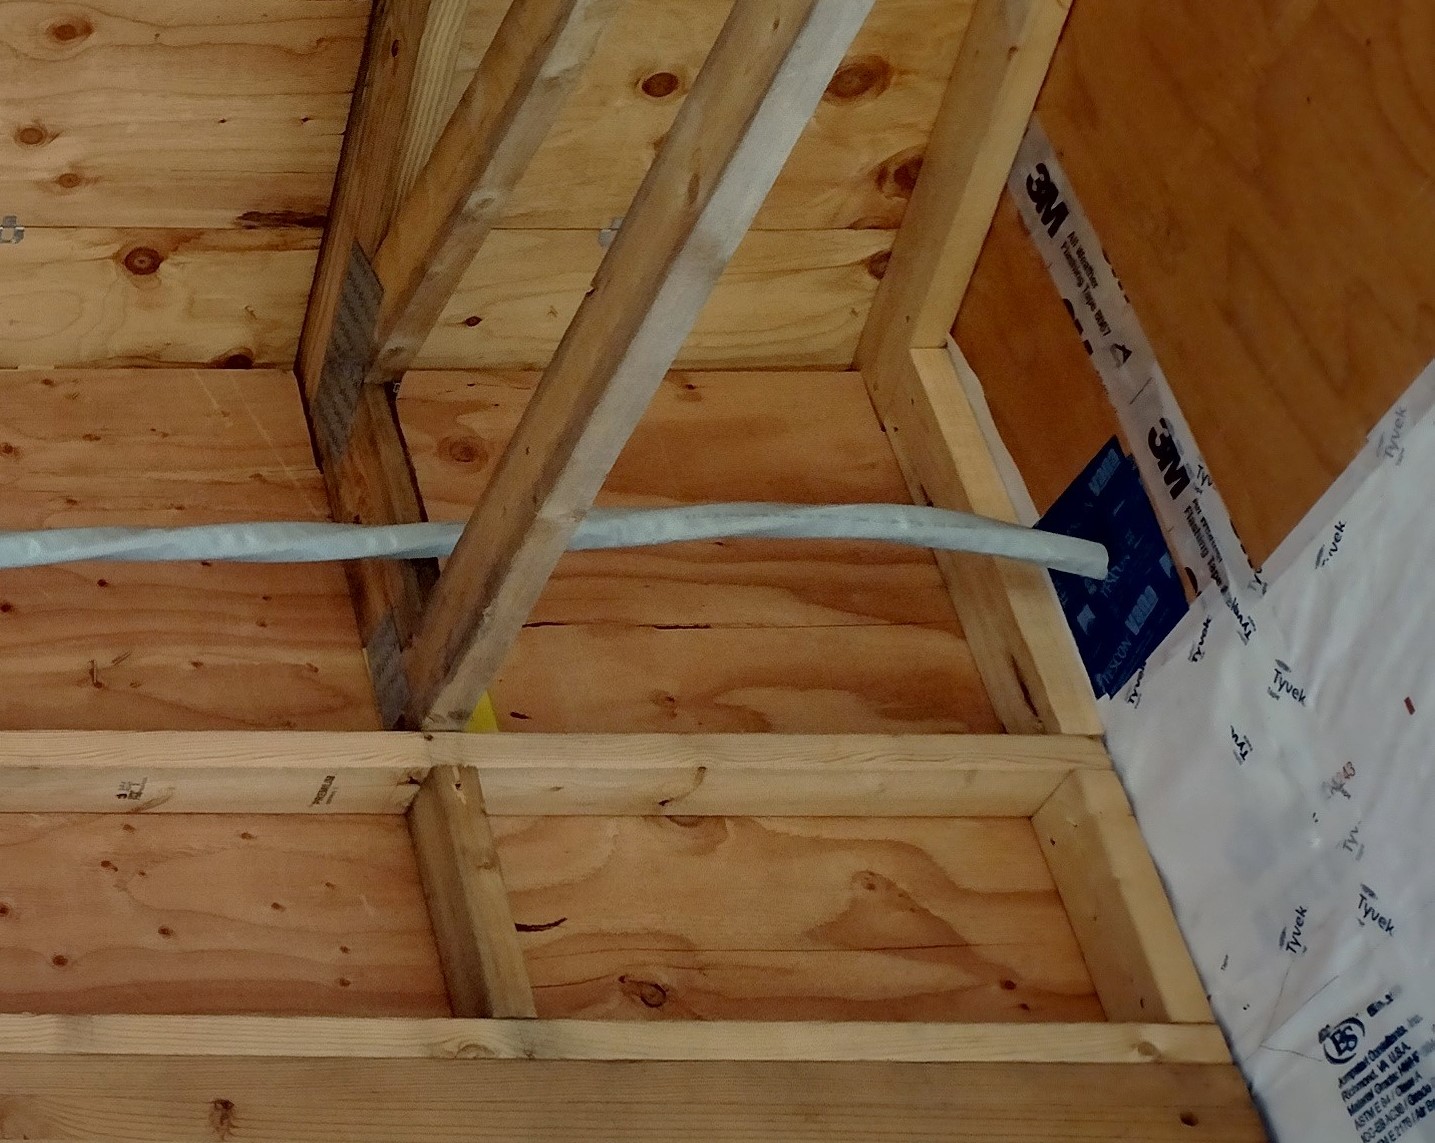
Blowing attics is a typical job for the crew, and access to this one is better than most (the headroom isn’t too bad). The trusses were ordered with a 20 inch high “heel”, and the exterior sheathing extended to act as a “dam” so that a full 18 inches of loose-fill cellulose could be blown uniformly across the entire ceiling. Note that this design eliminates the need for insulation baffles. The cellulose will eventually settle to approximately 16 inches, for an insulating value of R-60.The 2 inch air gap allows for a free flow of outside air from the soffit to the roof’s ridge vent.
In this close up picture, you can see where the exterior wall sheathing was installed 2 inches short of the roof sheathing, leaving a gap for ventilation. A flat ceilinged, ventilated attic is easy to build and is considered to be the least expensive—and most problem-free—type of framed roof assembly. With proper air-sealing and full R-value extending uniformly across the entire area (especially over the perimeter walls), both condensation issues and ice dams are eliminated.
Upgrading the walls and ceiling insulation above Code minimum cost an extra $6200. My REMRate energy model predicts $303/year in energy savings.
The simple payback, not accounting for inflation or the future cost of energy is: 6200 / 303 = 20 years
The simple ROI (return on investment), not accounting for inflation or the future cost of energy is: 303 / 6200 = 4.9 %
A typical new home, meeting Wisconsin’s Code for insulation levels, has 2×6 walls with R-20 fiberglass batt insulation, R-38 blown fiberglass in the ceiling, and builder-grade U-0.35 dual pane vinyl windows.
Poem Home’s upgraded insulation and triple pane windows saves our homeowner $661 per year in heating and cooling costs compared to a new home built to Wisconsin’s minimum standard.
Altogether, by upgrading the R-value of the slab, windows, ceiling, and walls AND by being fanatical about air-sealing, we save our homeowner $1189 each year for the lifetime of the home.
above-code slab insulation saves $78/year
above-code triple pane windows save $280/year
above-code ceiling insulation saves $77/year
above-code wall insulation saves $226/year
above-code air-sealing saves $528/year
When I talk with people about the type of homes I build, they often ask me what type of insulation I use. Many express surprise when they learn I don’t like spray foam. For years, spray foam has been held up as the cure-all for leaky homes and it’s true: there’s a place for it in some building assemblies. I rely on individual cans of spray foam for cracks and crevices that are otherwise hard to air-seal or insulate. But for a new home with conventional framing cavities, it’s a budget-buster and terrible for the environment.
According to Builders for Climate Action BEAM carbon estimator and the EPA’s greenhouse gas calculator, using spray foam in my walls and ceiling would place a significant burden on our planet’s dwindling resources and air qualitycompared to the more affordable and commonly used fiberglass, or the somewhat more expensive and labor-specialty but “carbon negative” cellulose:
Closed Cell Spray Polyurethane HFC gas (now being phased out) = 33,959 kg Carbon Dioxide equiv = driving 86,478 miles
Closed Cell Spray Polyurethane HFO gas (now more widely available) = 10,735 kg Carbon Dioxide equiv = driving 27,337 miles
Fiberglass = 2079 kg Carbon Dioxide equiv = driving 5294 miles
Cellulose = (2742) kg Carbon Dioxide equiv = not driving6983 miles
A few days after the insulation was completed, the drywallers came back and installed the 12 inch strips at the top of the walls, under the windows, and at the window jambs. Next, the finish crew arrived and had everything taped and mudded in just a few days. A third crew sprayed texture and paint. What a good feeling it was to pull up the mess and move on!
This phase of work generated some waste, but nothing we couldn’t handle in small batches. The drywall company assured me that every bit of scrap would be picked up and recycled. Not knowing what their protocol was for drywall mud boxes, I took it upon myself to flatten and cart away the cardboard for recycling. The plastic bags the mud came in went into general trash. Ditto for the sodden red rosin paper laid down to protect the slab. Very little cellulose fell to the floor—and what little—was simply tossed out the door.
September 25-December 11, 2024: As the mechanical contractors installed their wires, ducts, and pipes our “weekend warrior” crew swooped in behind them to do what we do best: AIR-SEALING. The task of meticulously caulking, taping, and spray foaming any and all type of joints between building materials is what differentiates our job site from the average one.
We’re dedicated to this work. It’s essential for three reasons: to assure the long-term durability of the structure, materials, equipment, and finishes; to help keep the indoor air dust-free, mold-free and dry; and to save on the operational costs of heating, cooling, and filtering the air.
A tangible test of our efforts came with a visit from Joe Paprocki from Trinity Environmental. Joe spent several hours with us inspecting our work and conducting an initial, pre-insulation “blower door test”.
Here’s Joe setting up the blower door equipment. The red tarp is secured to the front door frame to create a tight seal. The fan is powered up gradually until the pull of air out simulates a 20 mph wind bearing down on all sides of the house.
As the house depressurized, the ceiling vapor retarder ballooned and we heard a few pops as several staples lost their hold.
We double-checked that the windows were latched tight and had another look around at the mechanical penetrations we’d spent so many hours sealing to the best of our ability. We knew that replacement or “makeup” air was being forced to come from somewhere. At such pressures, even the smallest pinhole or crack becomes noticeable. The draft can be felt by hand, or seen with the aid of a smoke stick. As it turned out, the only leak Joe could find was from the plastic eggcrate-style shims the crew had used to level the window sills. He recommended we smear caulk across their face to seal their tiny, tiny gaps.
1.45 ACH @50Pa or 0.07 cfm/sf
After checking his gauges and running some numbers, Joe looked up and announced his number. I’d been crossing my fingers for anything under 2. For context, a new home built in Wisconsin can be as leaky as 7.0 ACH (air changes per hour)— literally the number of times per hour the volume of air in the home is replaced with outside air sneaking in through holes in the building shell.
Joe tests all manner of homes in his capacity as a rater for Wisconsin’s Focus on Energy New Homes Program (a utility-funded agency charged with helping builders and home owners achieve certification in energy-efficiency). The program requires a final post-occupancy blower door test equivalent to approximately 4.4 ACH (depending on the size of the home). Our score is the lowest or nearly so in the program’s history, and will no doubt drop to half that or less when the house is fully insulated and drywalled and we have him back for the final test.
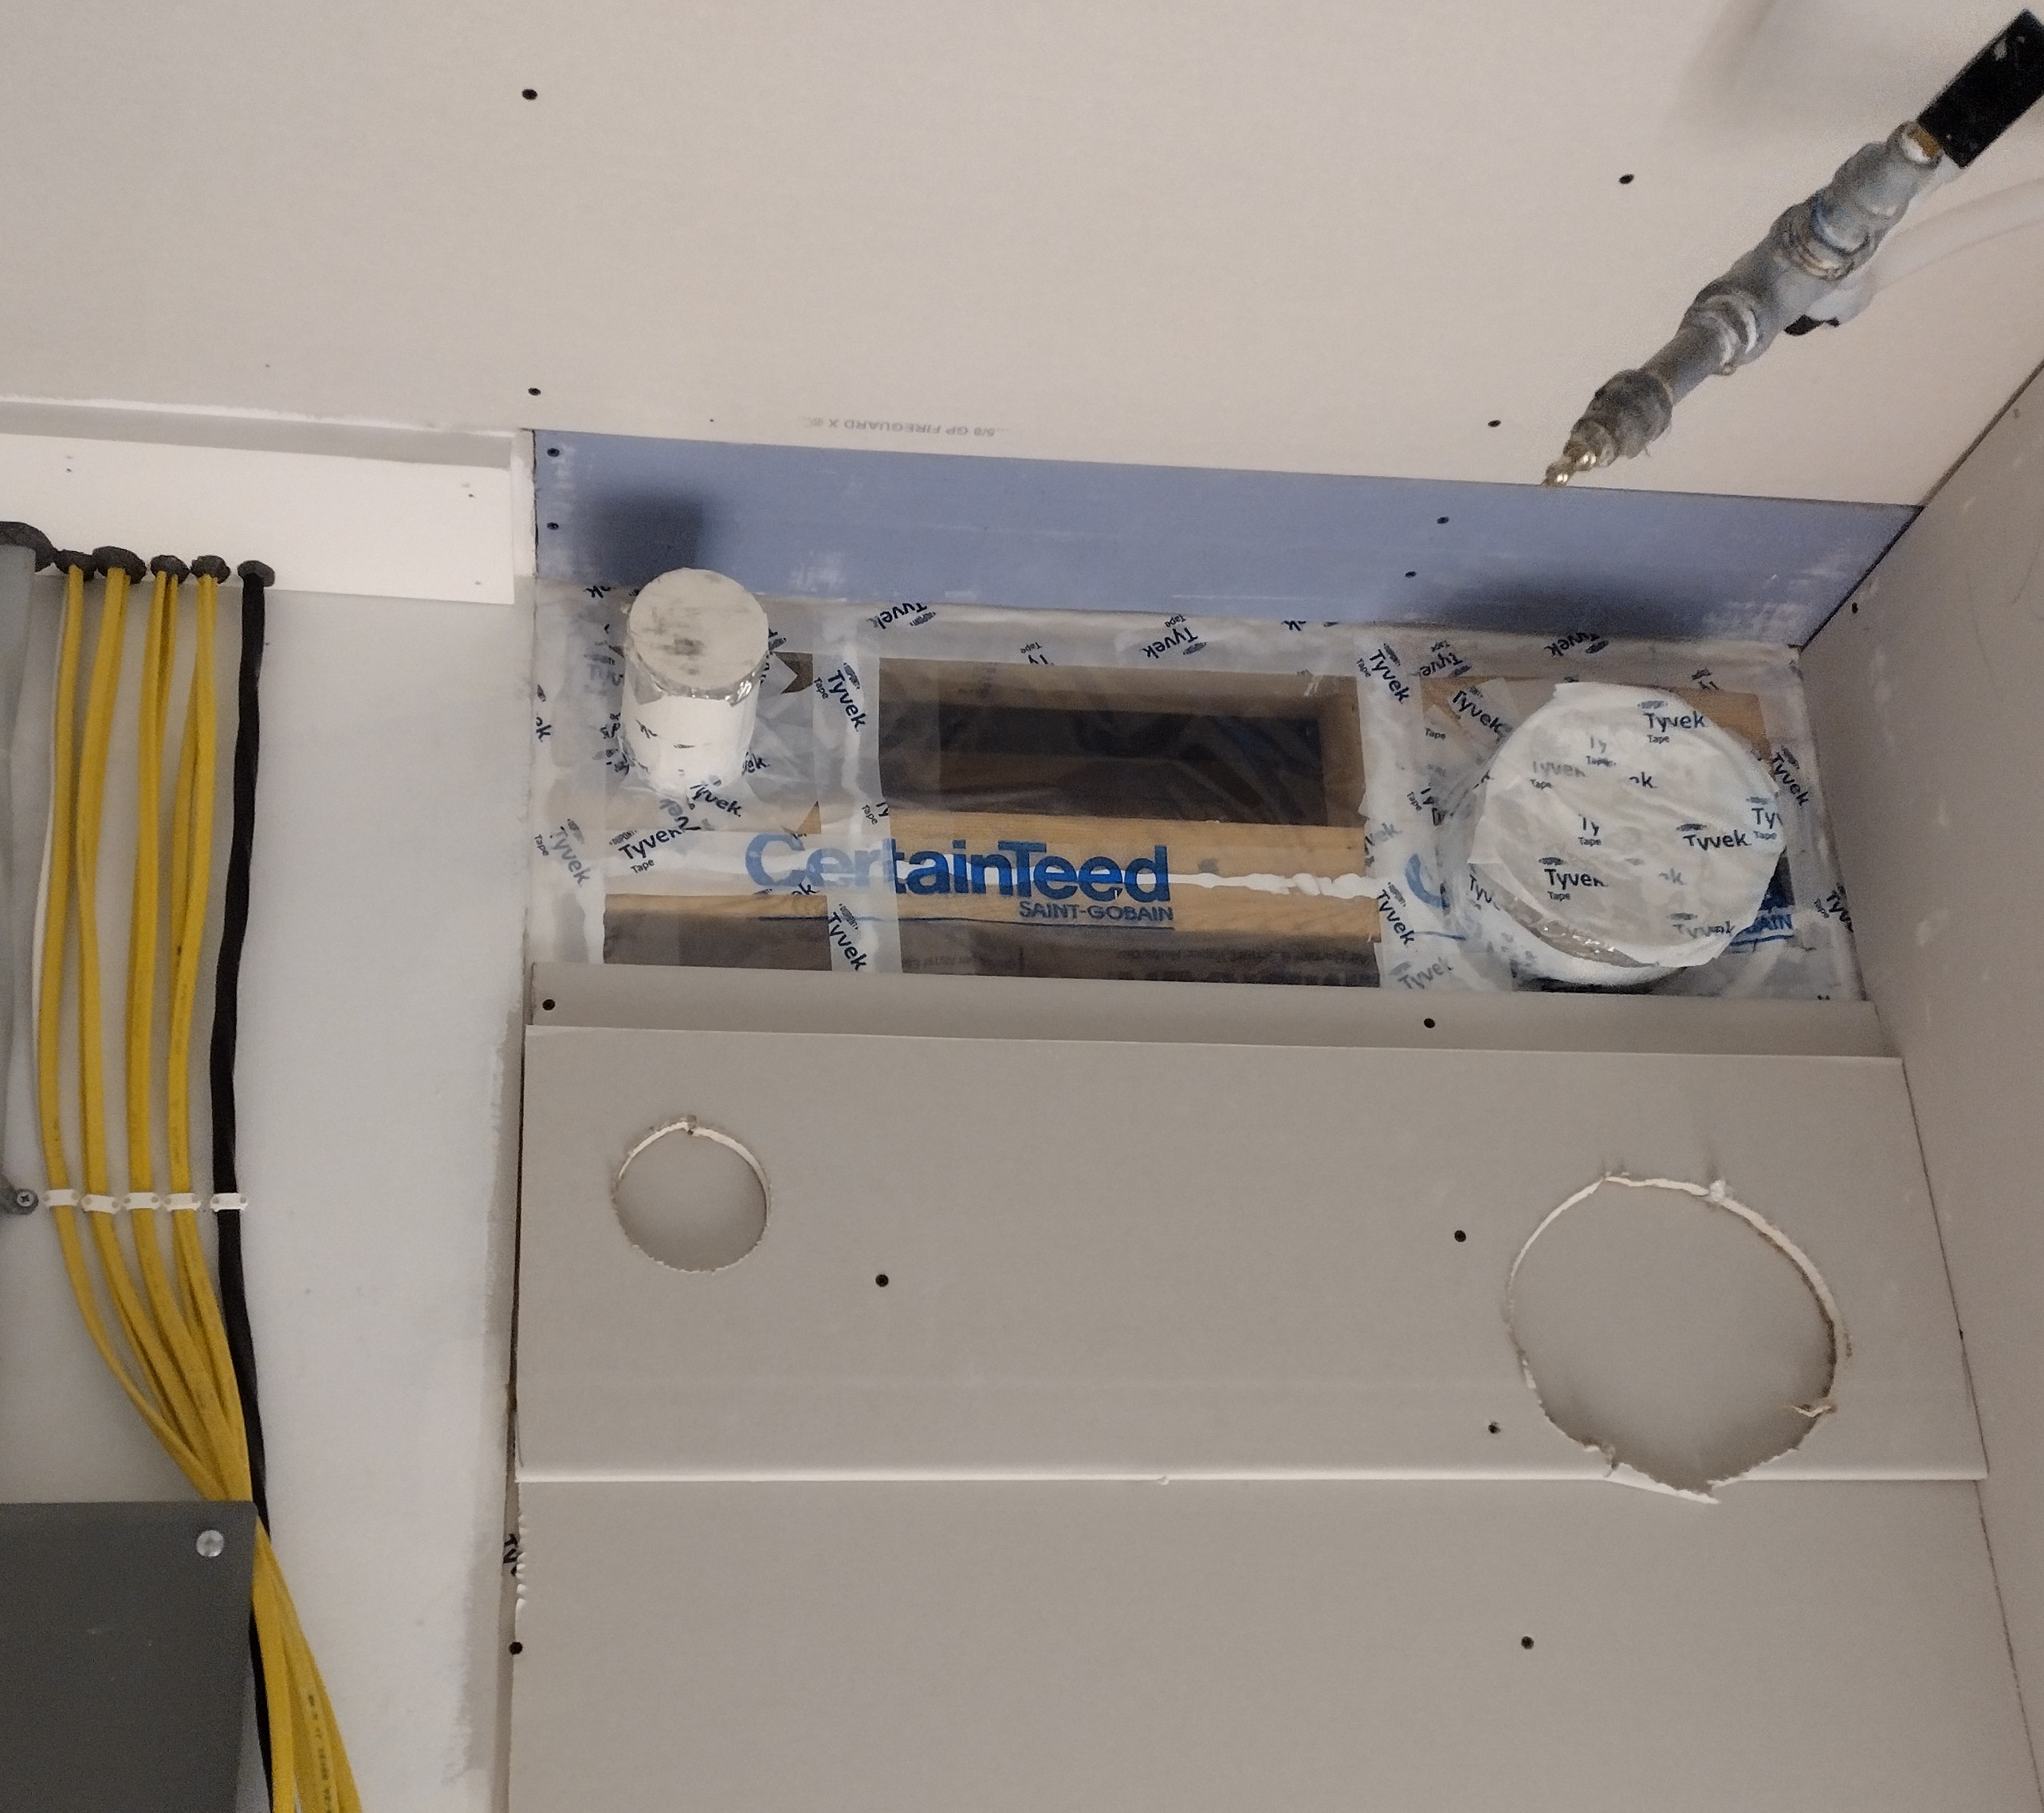
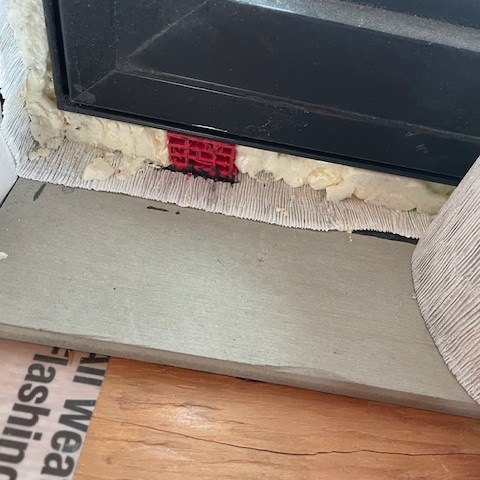
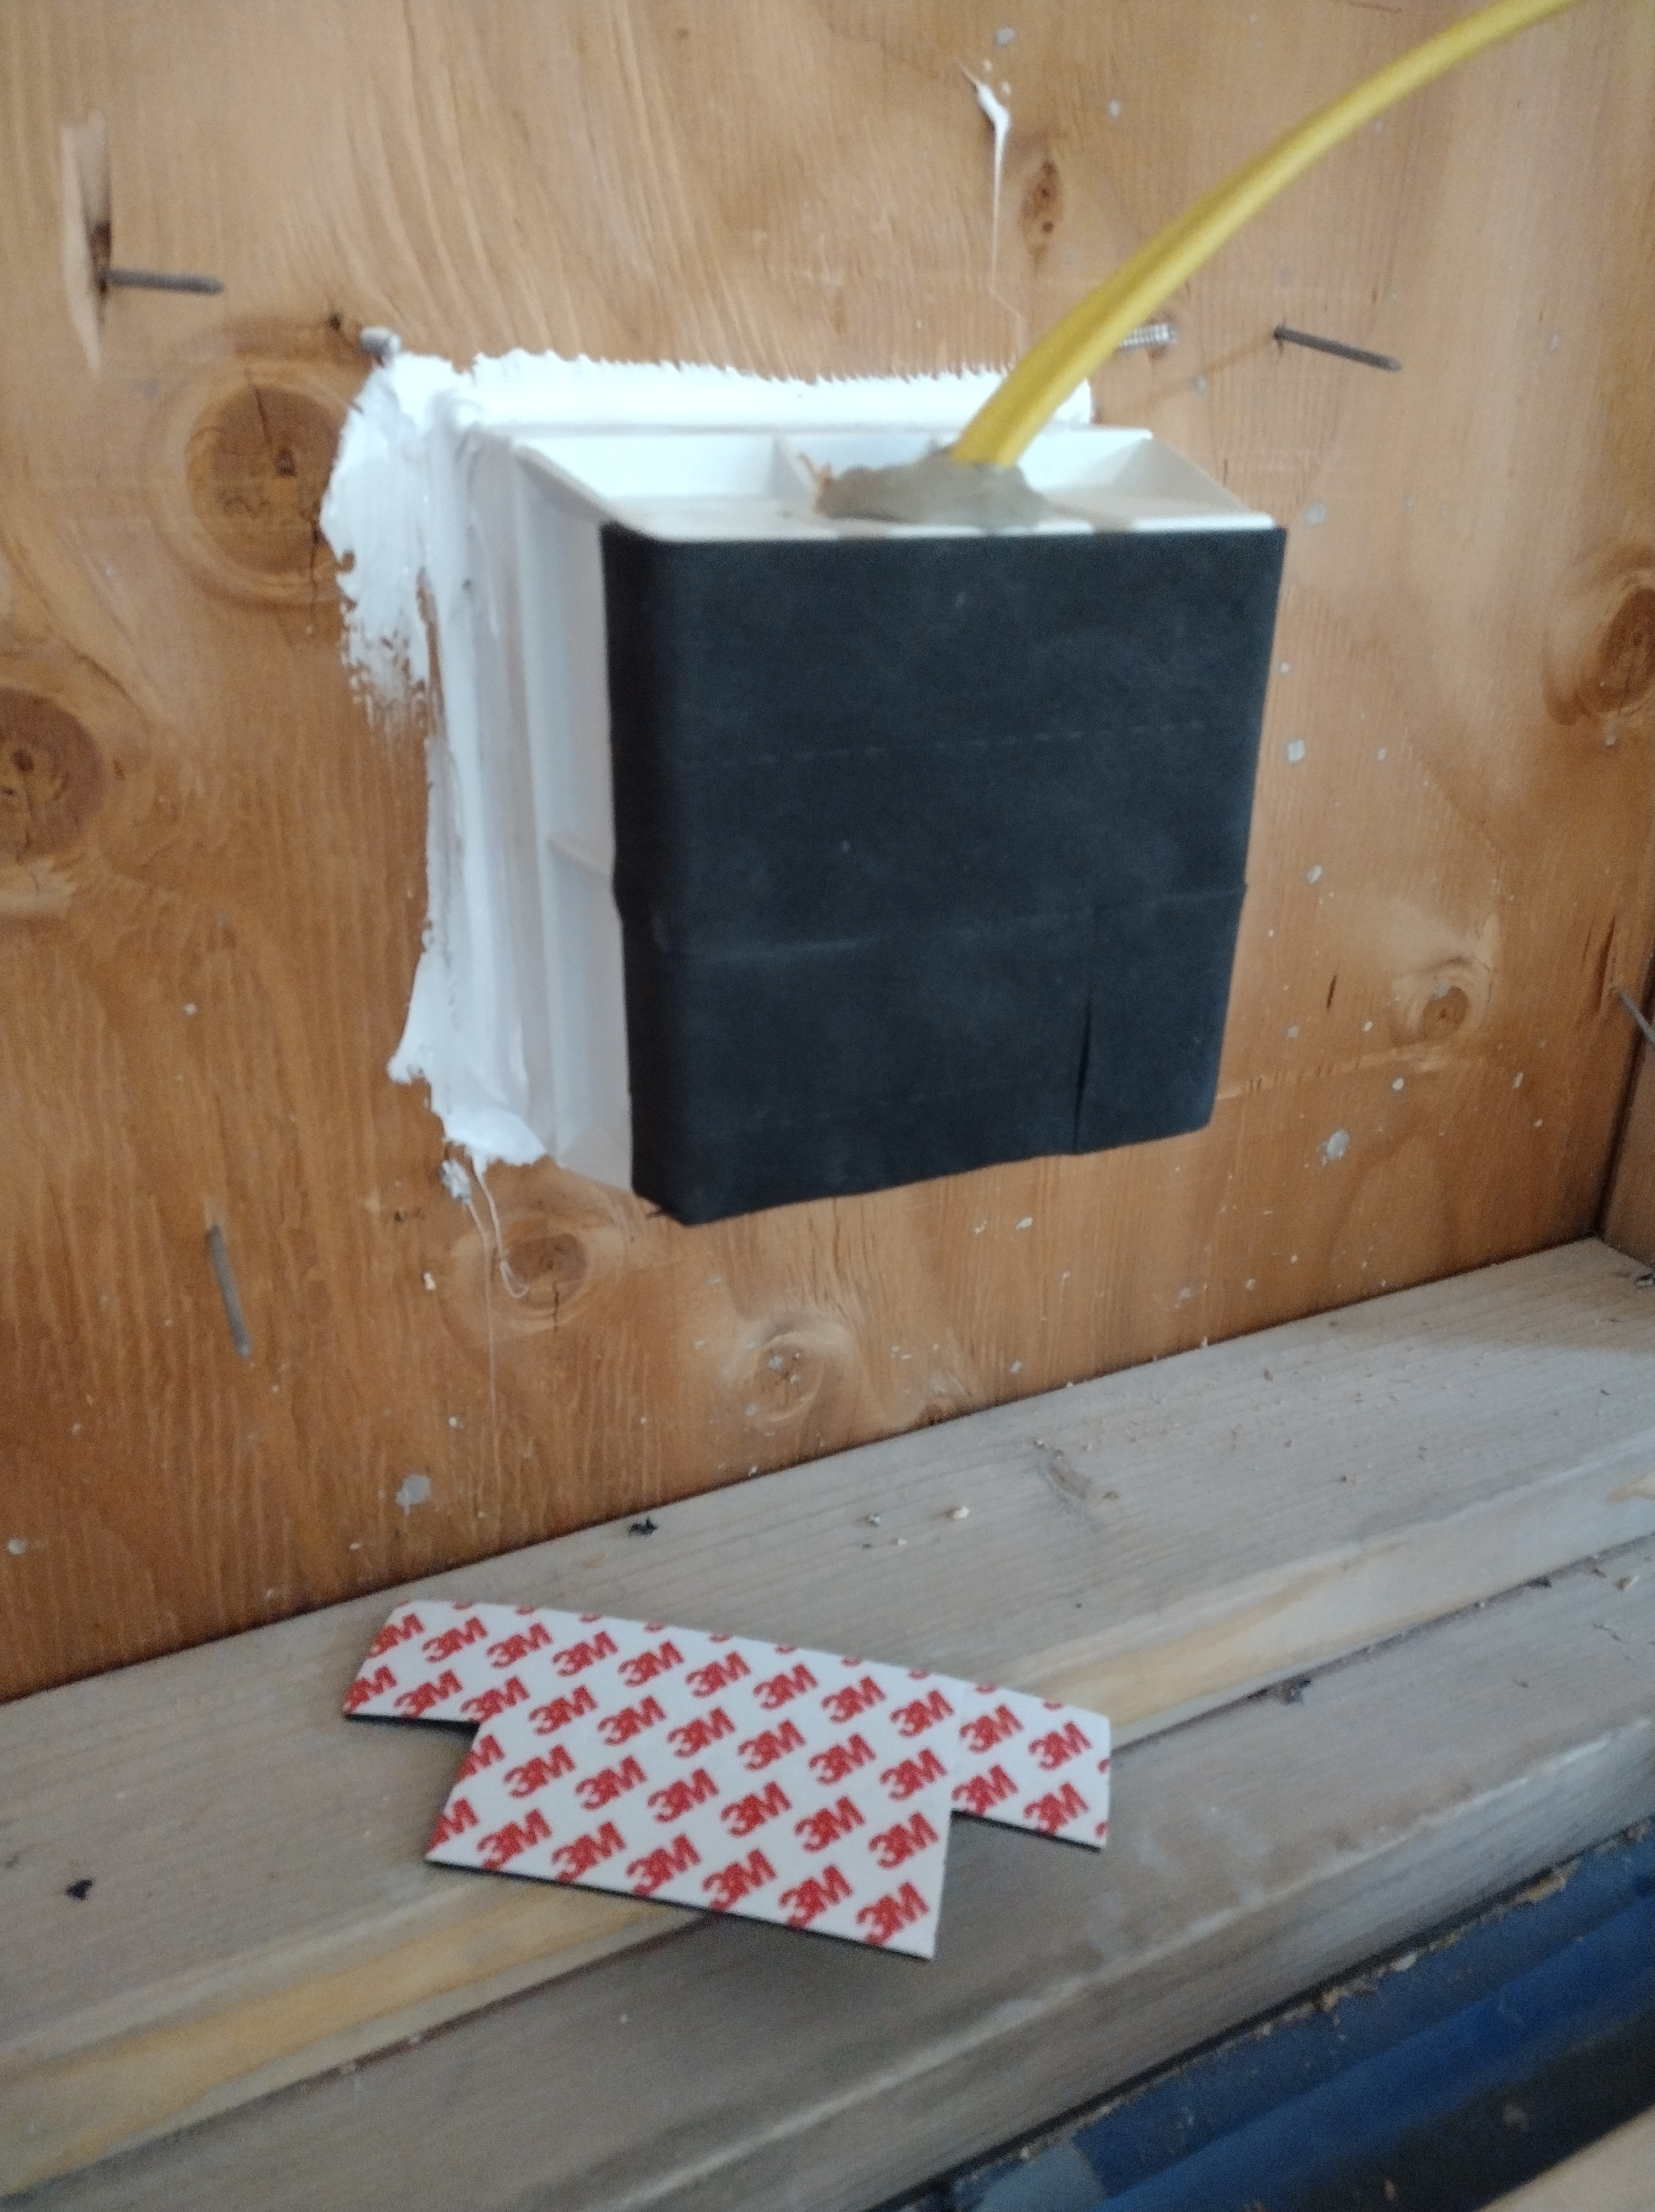
How did we do it? We simply paid attention to each and every mechanical penetration and material seam and chose high quality sealing materials. The picture on the left shows the electrical wires in the attic poking through the partition wall’s top plate to run to the guest room’s recessed lighting. See how we made these boxes in my previous post Interior Framing.The wires are sealed on both sides of the framing with electrician’s putty, a highly moldable product that remains flexible over time. On the right, an exterior-facing electrical outlet for the back porch, sealed with ChemLInk’s Durasill silicon caulk and 3M’s peel-and-stick black foam pads. The wire is puttied to the box.
The electrician supplied these green flanged electrical outlet and switch boxes, which he installed at the exterior walls. The flange gave us solid backing for attaching the vapor retarder (sealed with a bead of caulk around the perimeter), and the black foam gasket further aids in creating a tight seal to the drywall.Plumbing pipes, including this hot/cold hose bib, were sealedwith DuPont FlexWrap EZ.
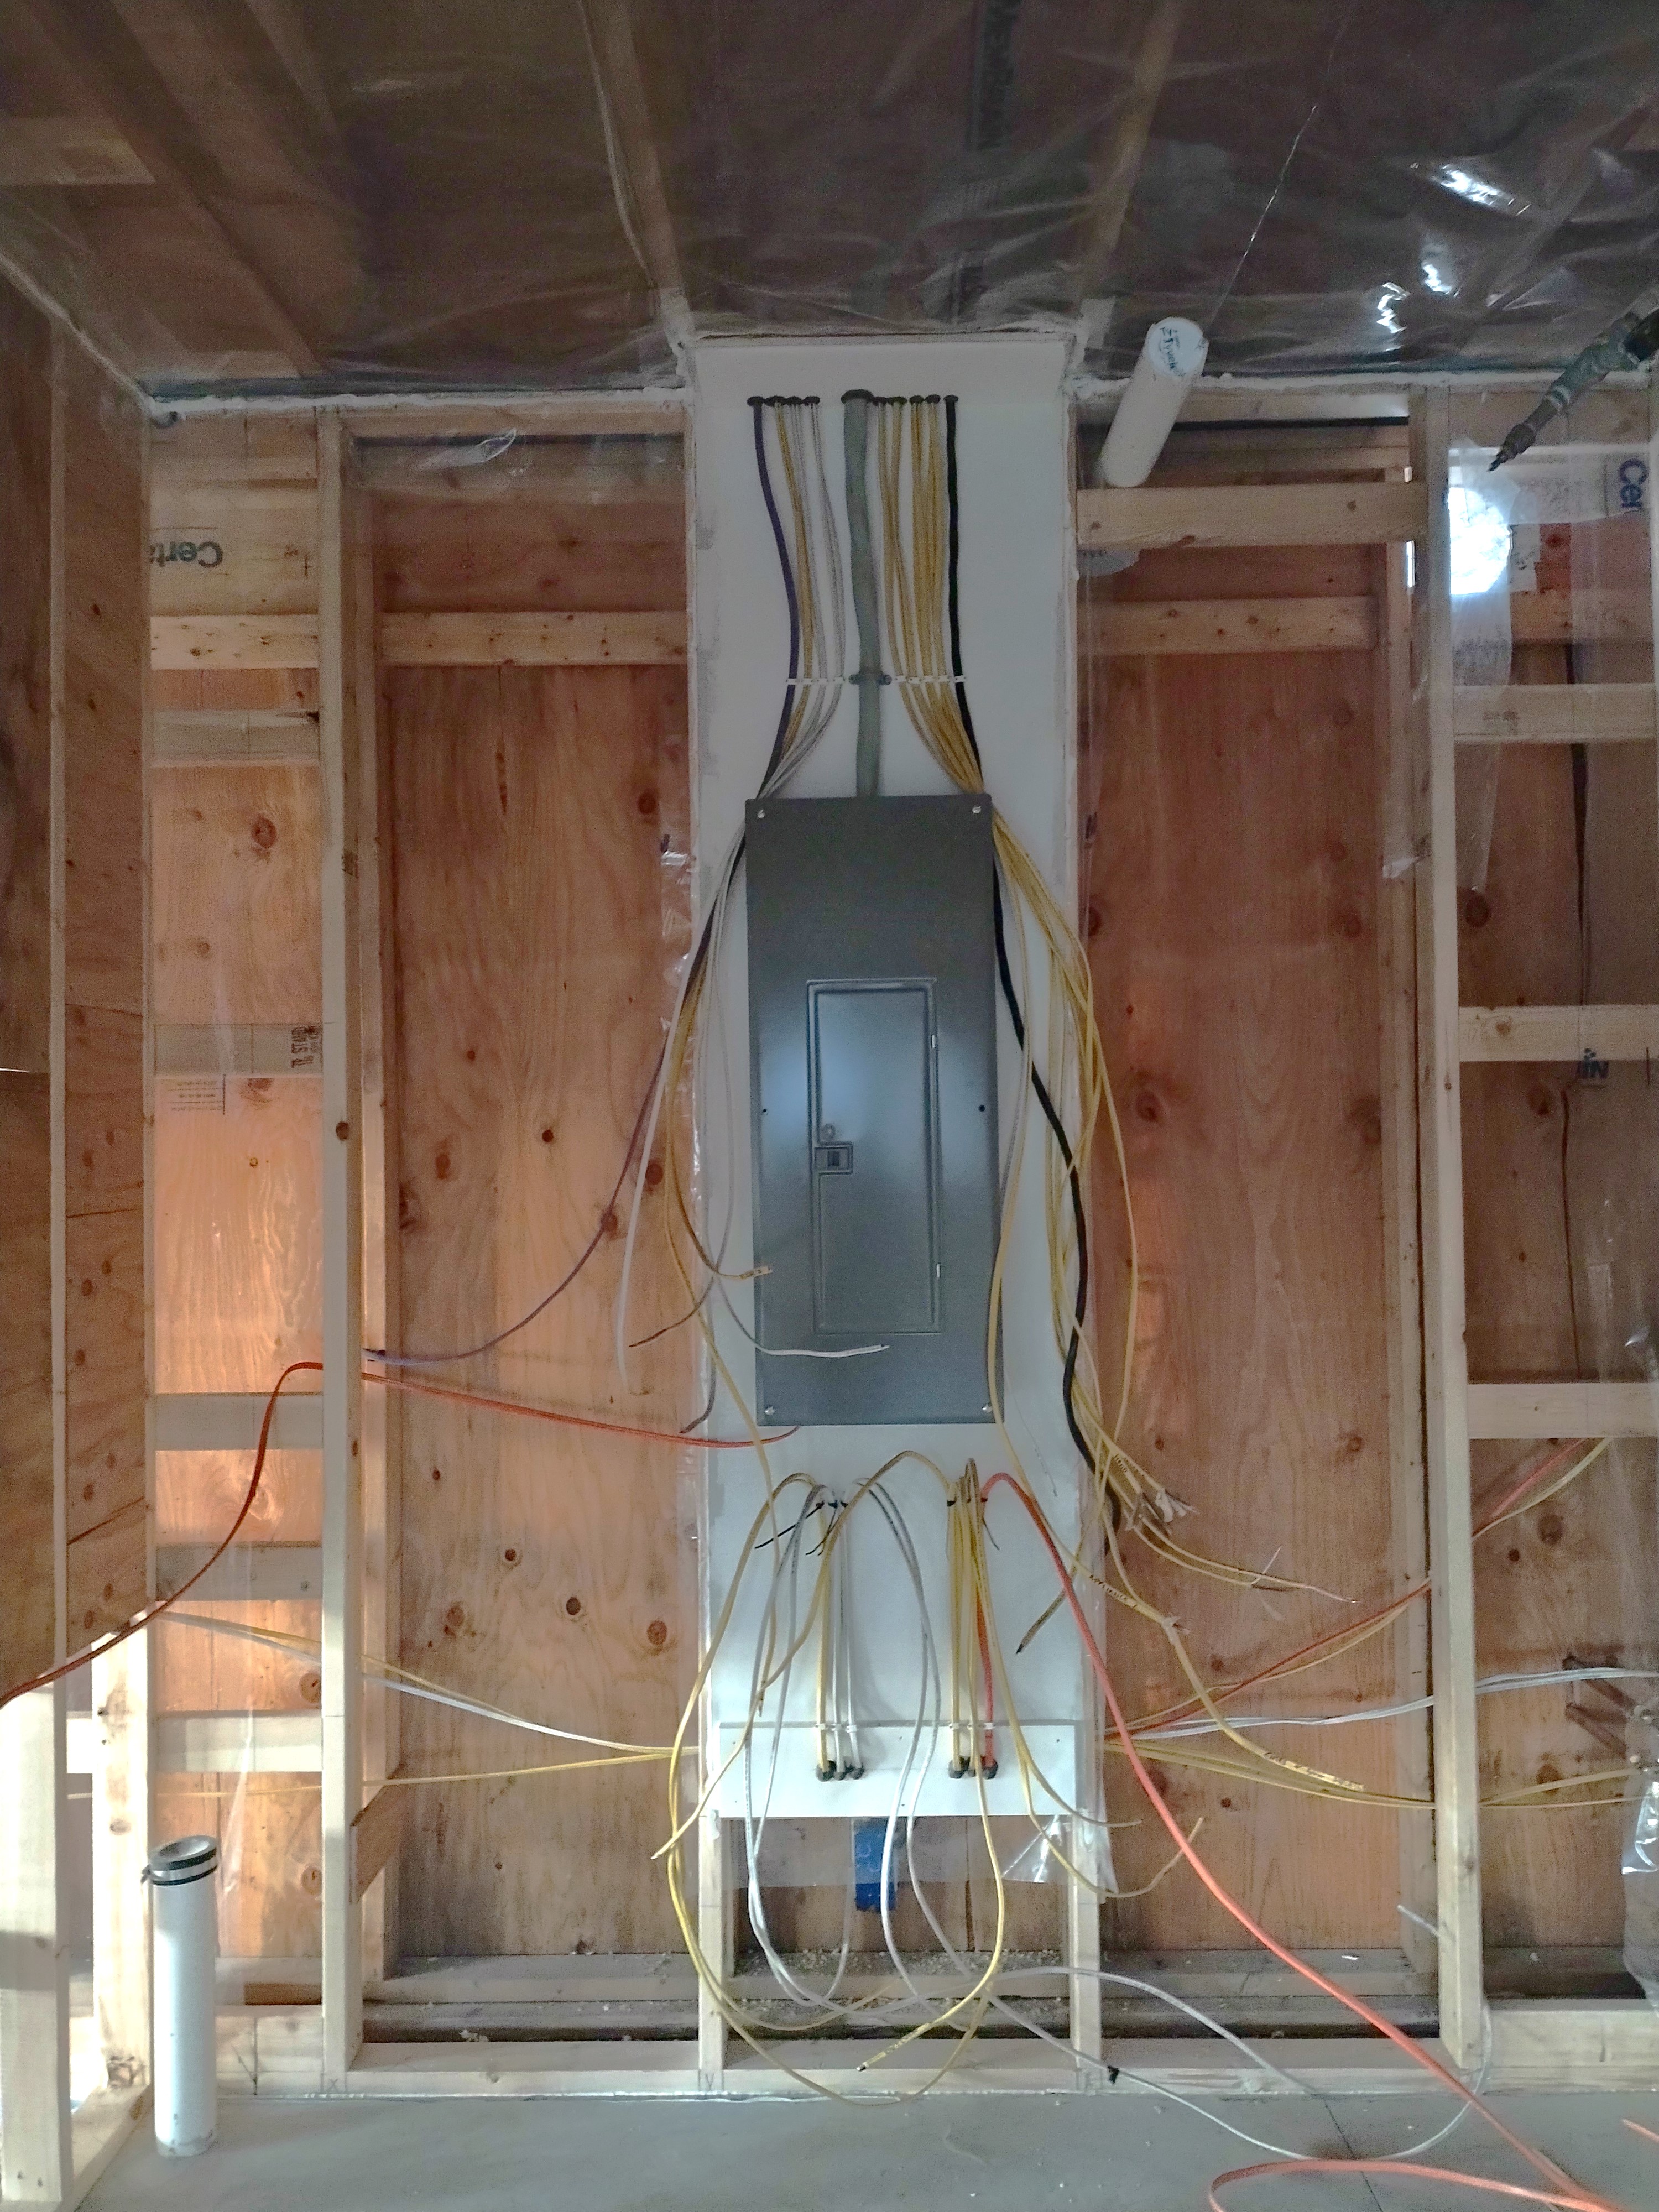
Instead of burying the electrical panel in the wall, where it would displace insulation and present extra air-sealing challenges, I ran a sheet of vapor retarder and drywall over the middle stud bay in the mechanical room. So that we could make a neat and effective seal at each wire penetration, I added a PVC 1×6 board at the bottom edge and at the ceiling. Each wire was puttied on each side of its hole. Wherever possible (there were some exceptions), our goal was “one hole, one wire” for the most effective air-sealing.
For larger wires, like this service wire that connects the garage electrical panel with the main one in the mechanical room, I used ProClima’s Roflex gaskets. These tight-fitting EPDM sleeves come in a number of hole sizes and are quick to install and attach with Tescon tape. Their main advantage here is that they remain flexible—-the wire can be tugged on from either side as adjustments are made.
As a final step before the blower door test, we ran Certainteed’s MemBrain, a vapor-variable retarder across the ceilings, air-sealing the edges and seams with ChemLink’s Durasil adhesive or Tyvek tape. In this picture, you can see several recessed light boxes and two ceiling fan outlets sealed to the vapor retarder.
The vapor retarder we used isn’t your typical lumberyard “visqueen” or 6 mil polyethylene. Instead, it’s a thin, 2 mil engineered plastic called “polymide film” that can expand its pores to adjust the flow of vapor diffusion depending on which side of the wall or ceiling is facing higher relative humidity. For more understanding of how important vapor retarders are for the longevity of the home and for the health of its people, please see the article “Smart Vapor Retarders” in Green Building Advisor.
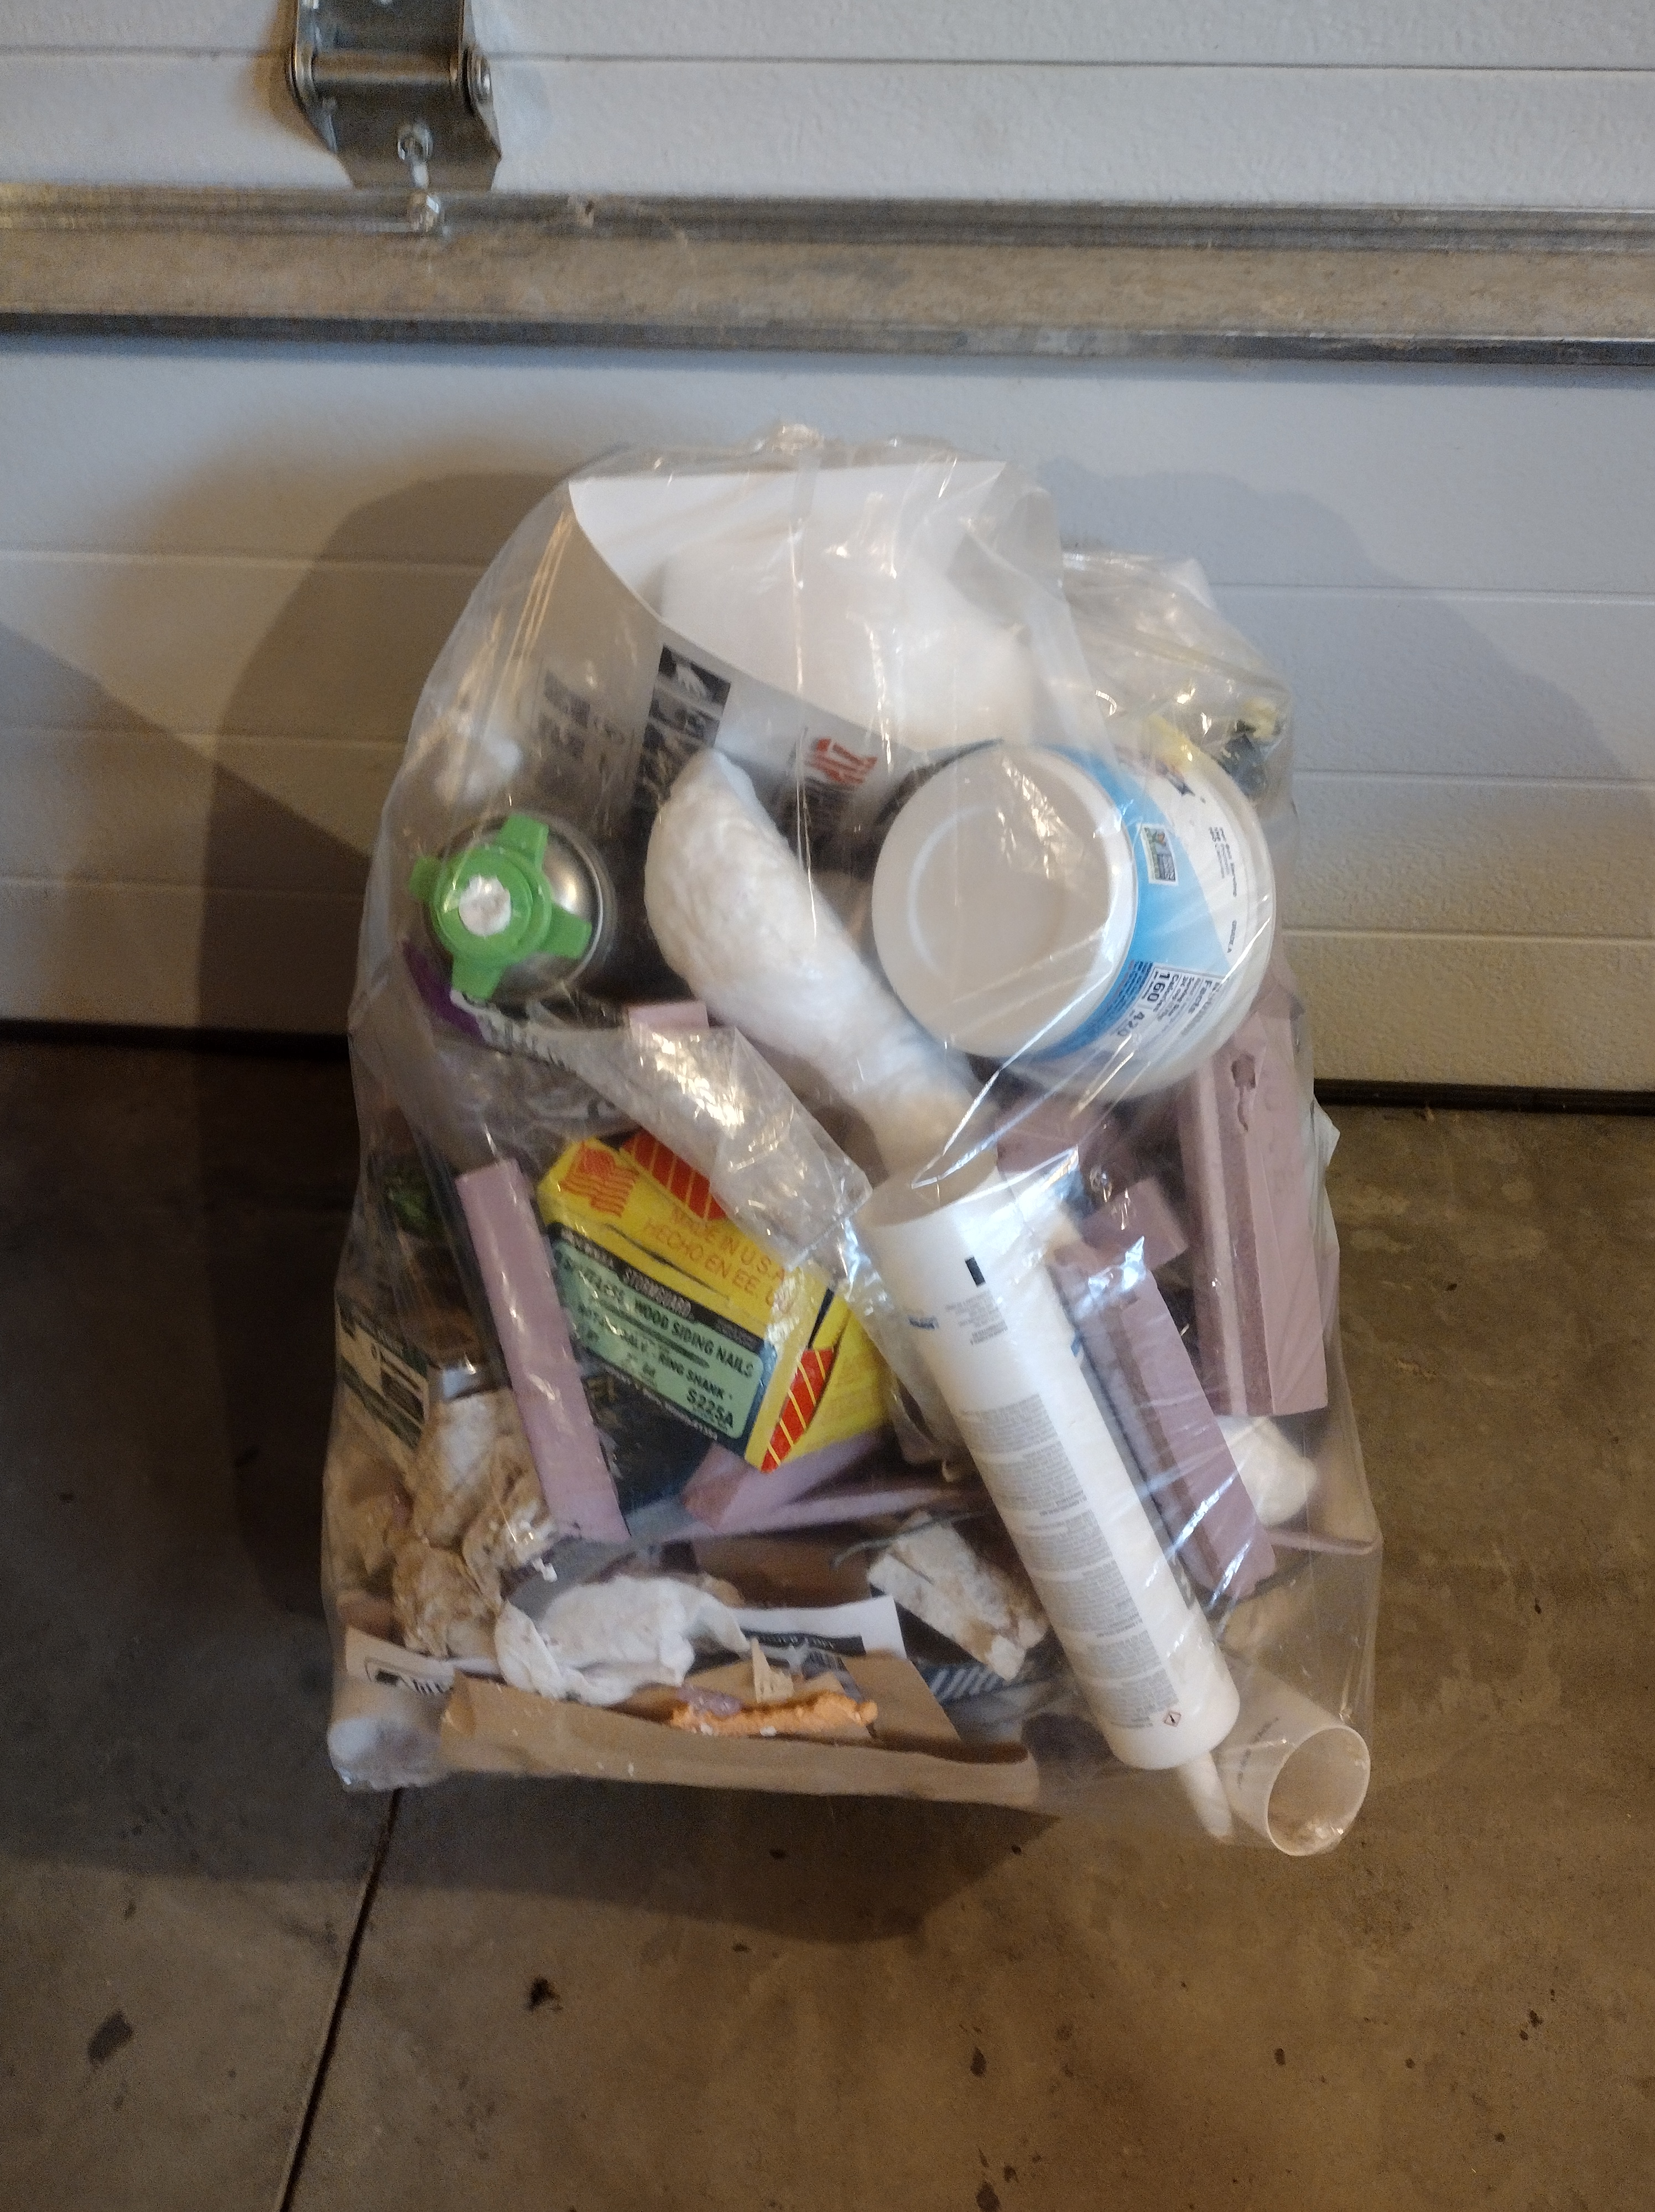
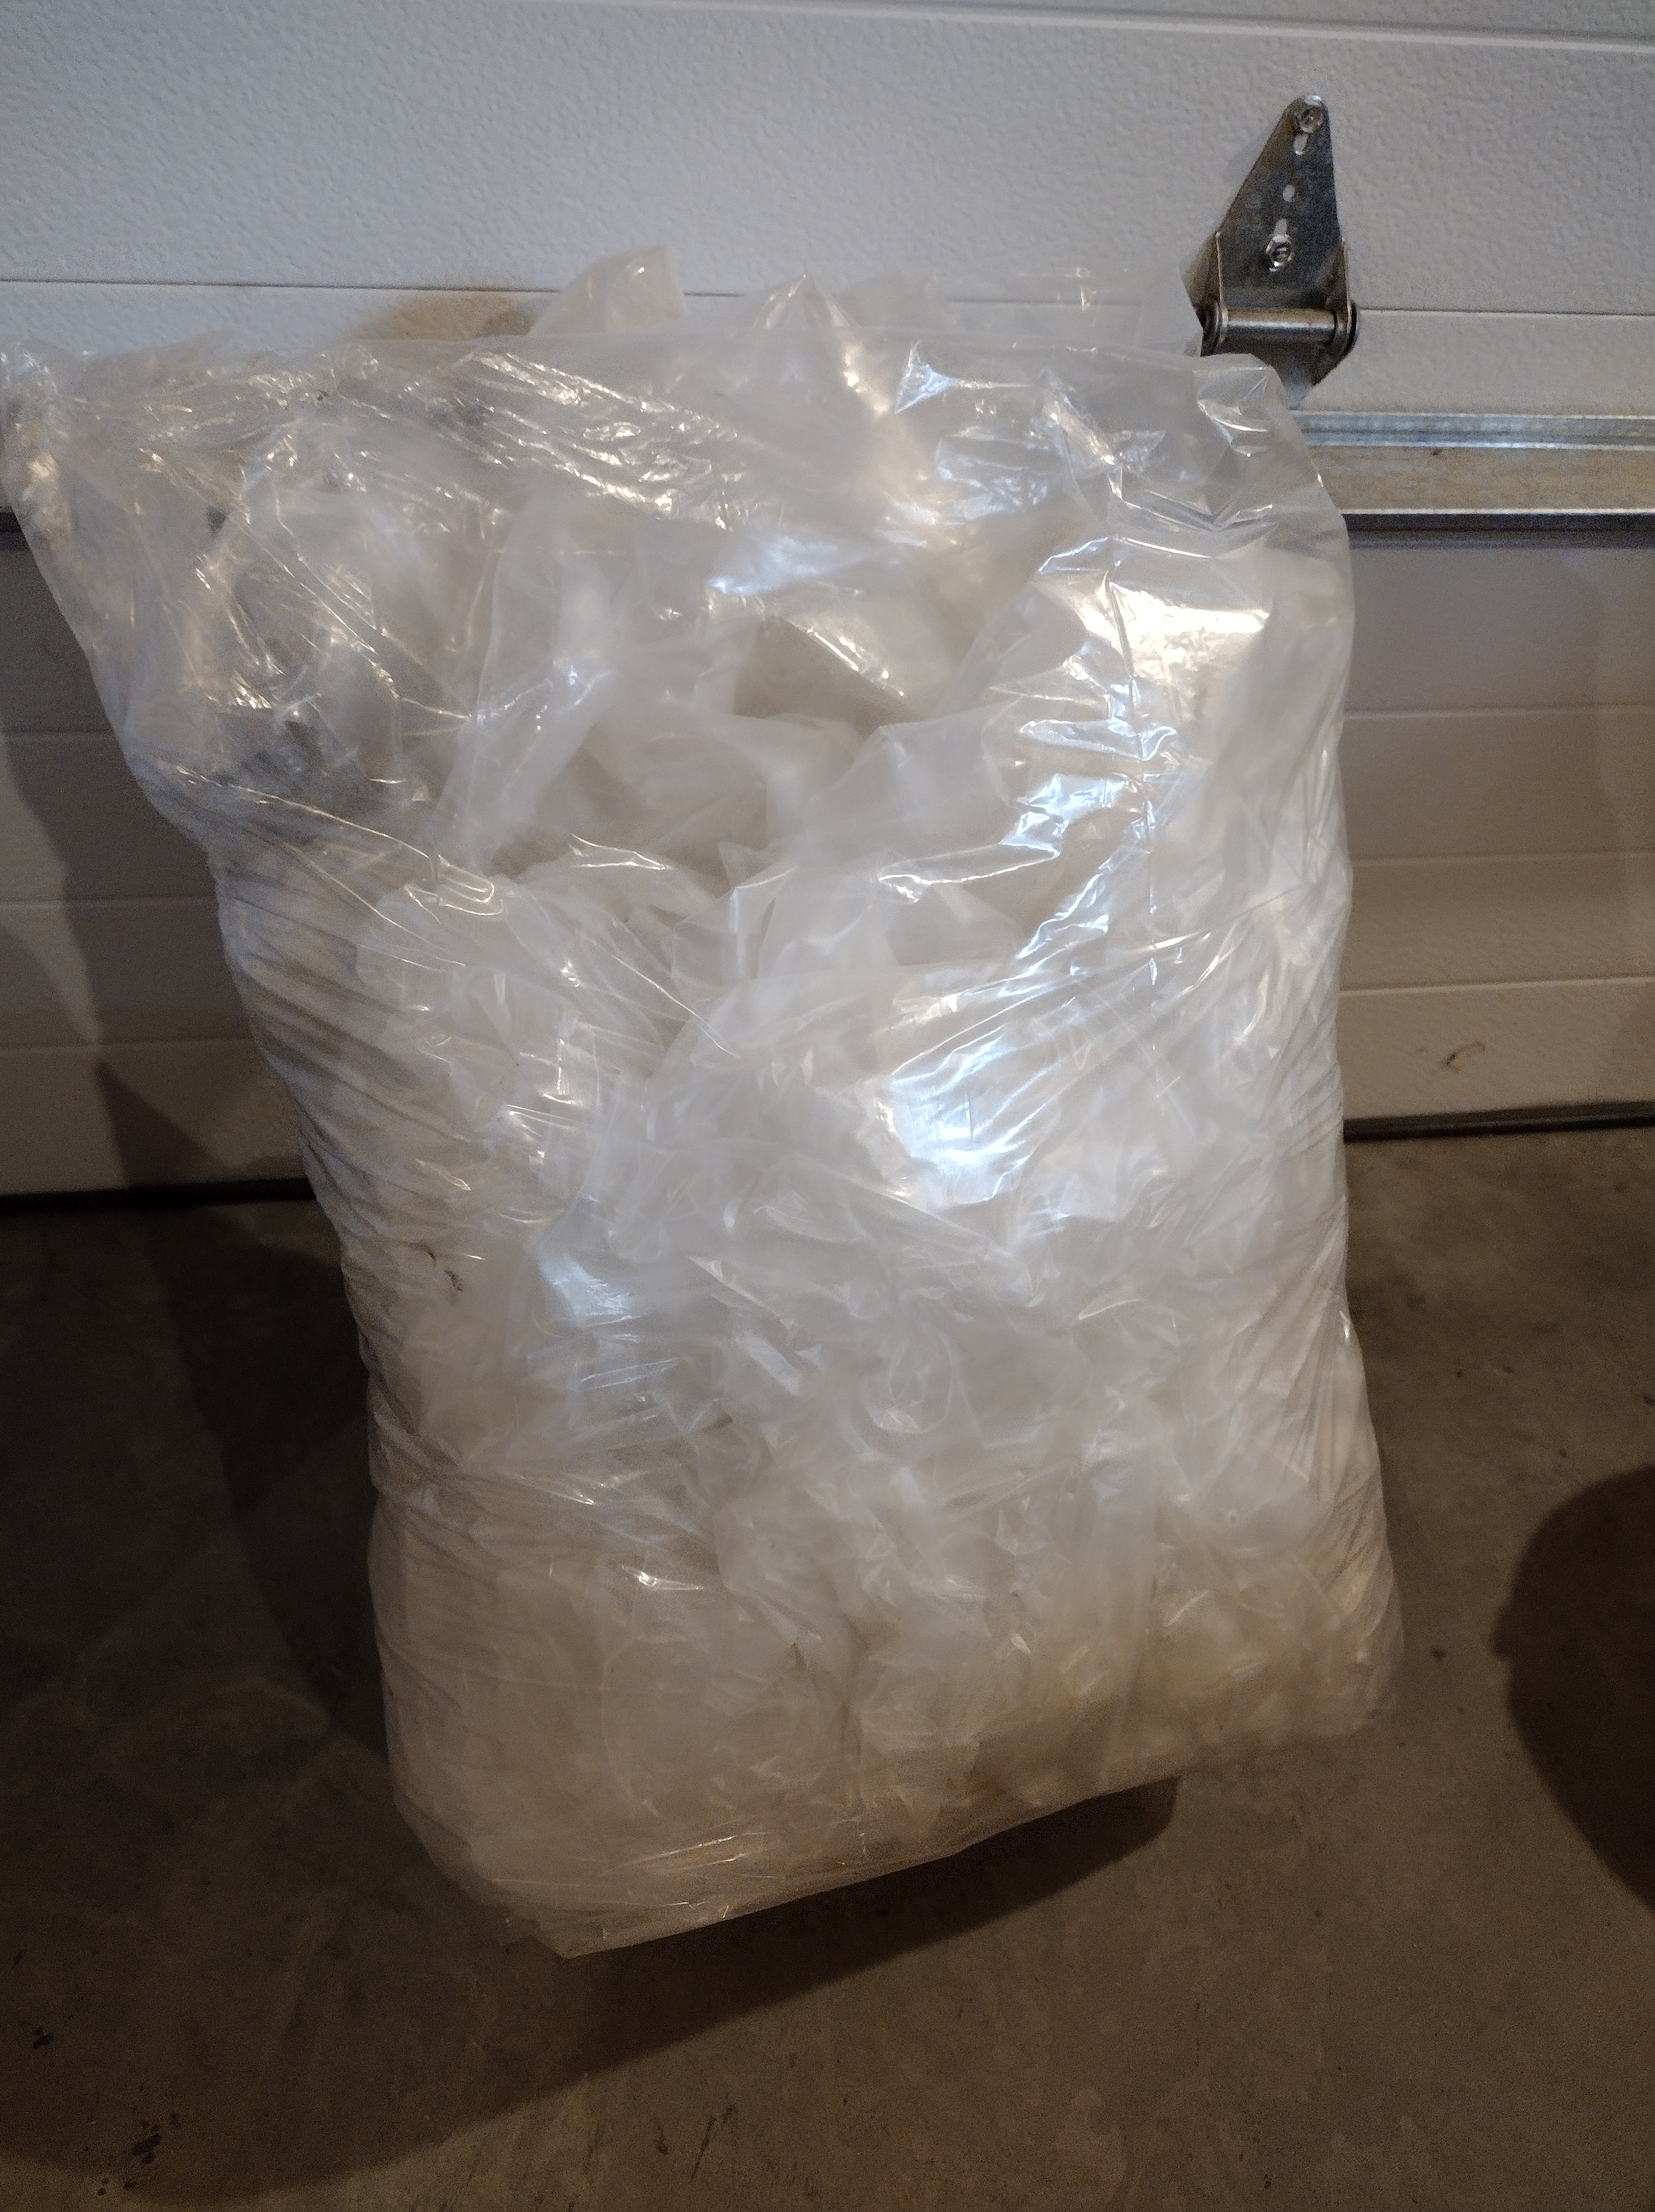
For this phase of work, we had several bags of miscellaneous trash (caulk tubes, dirty rags, bits of Styrofoam), and a bag or two of vapor retarder scraps. Our recycling facility accepts “clear” and clean plastic sheeting, and readily took the Certainteed MemBrain, even with some writing inked on it.
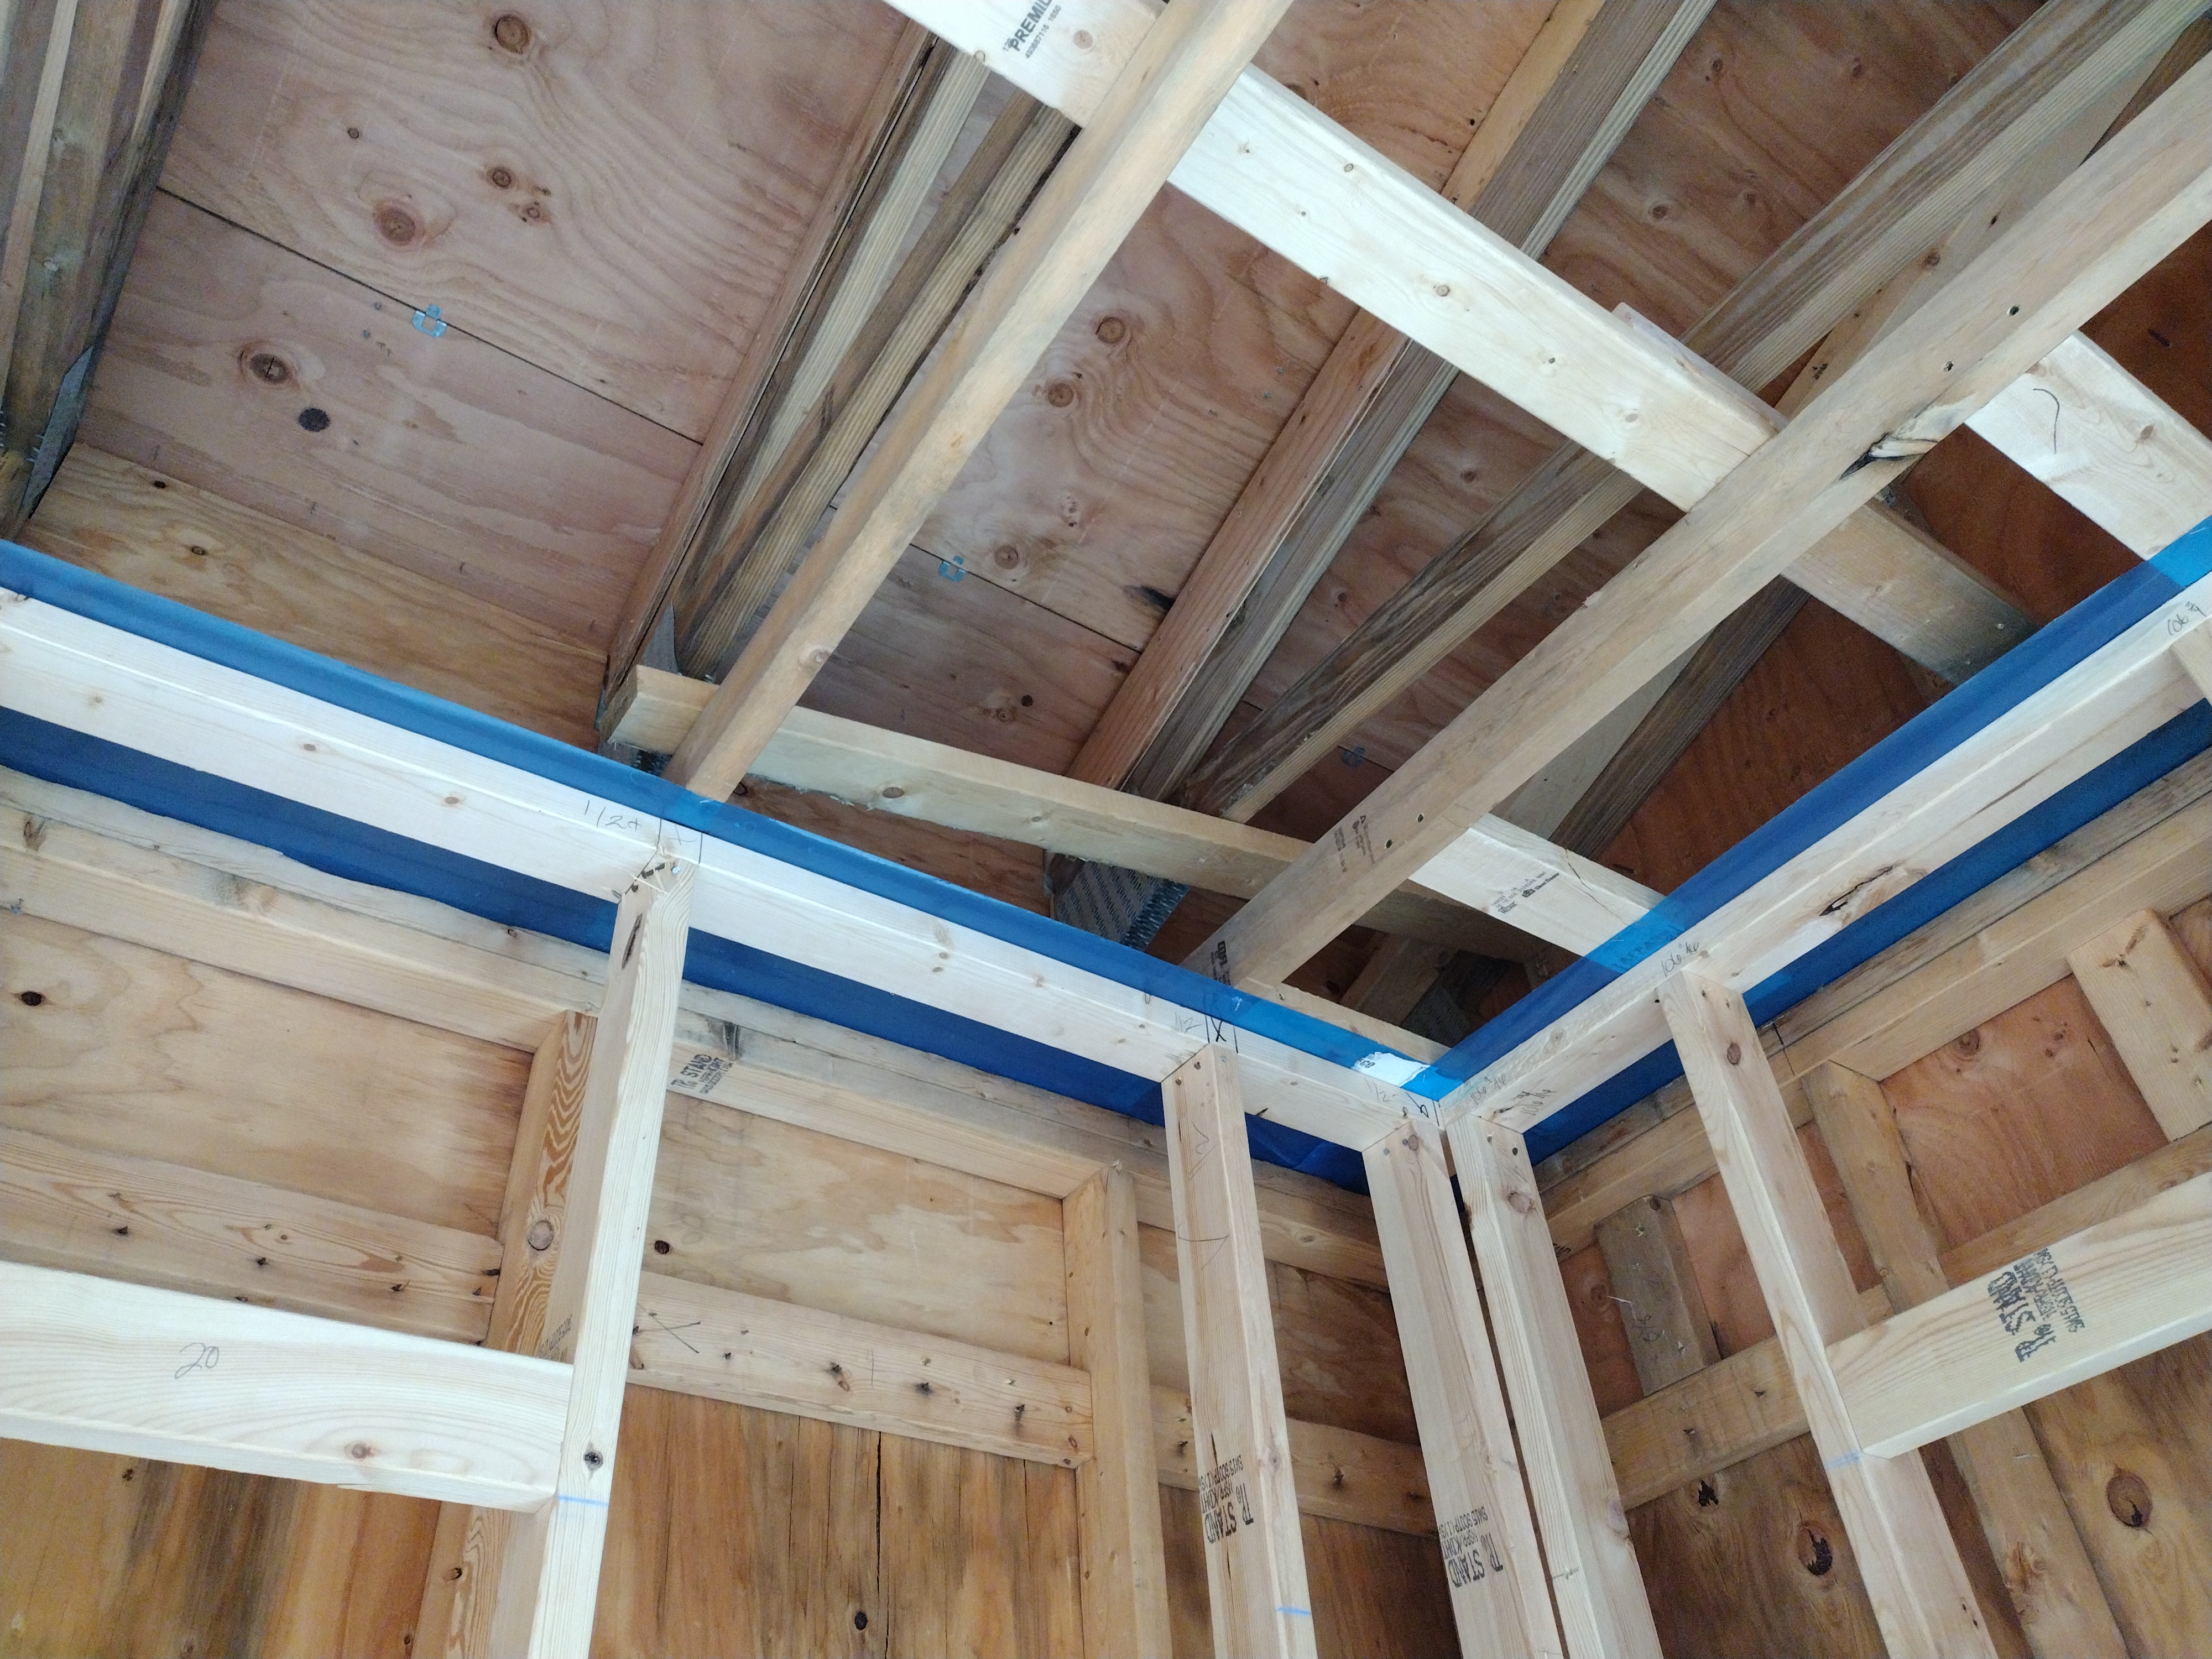
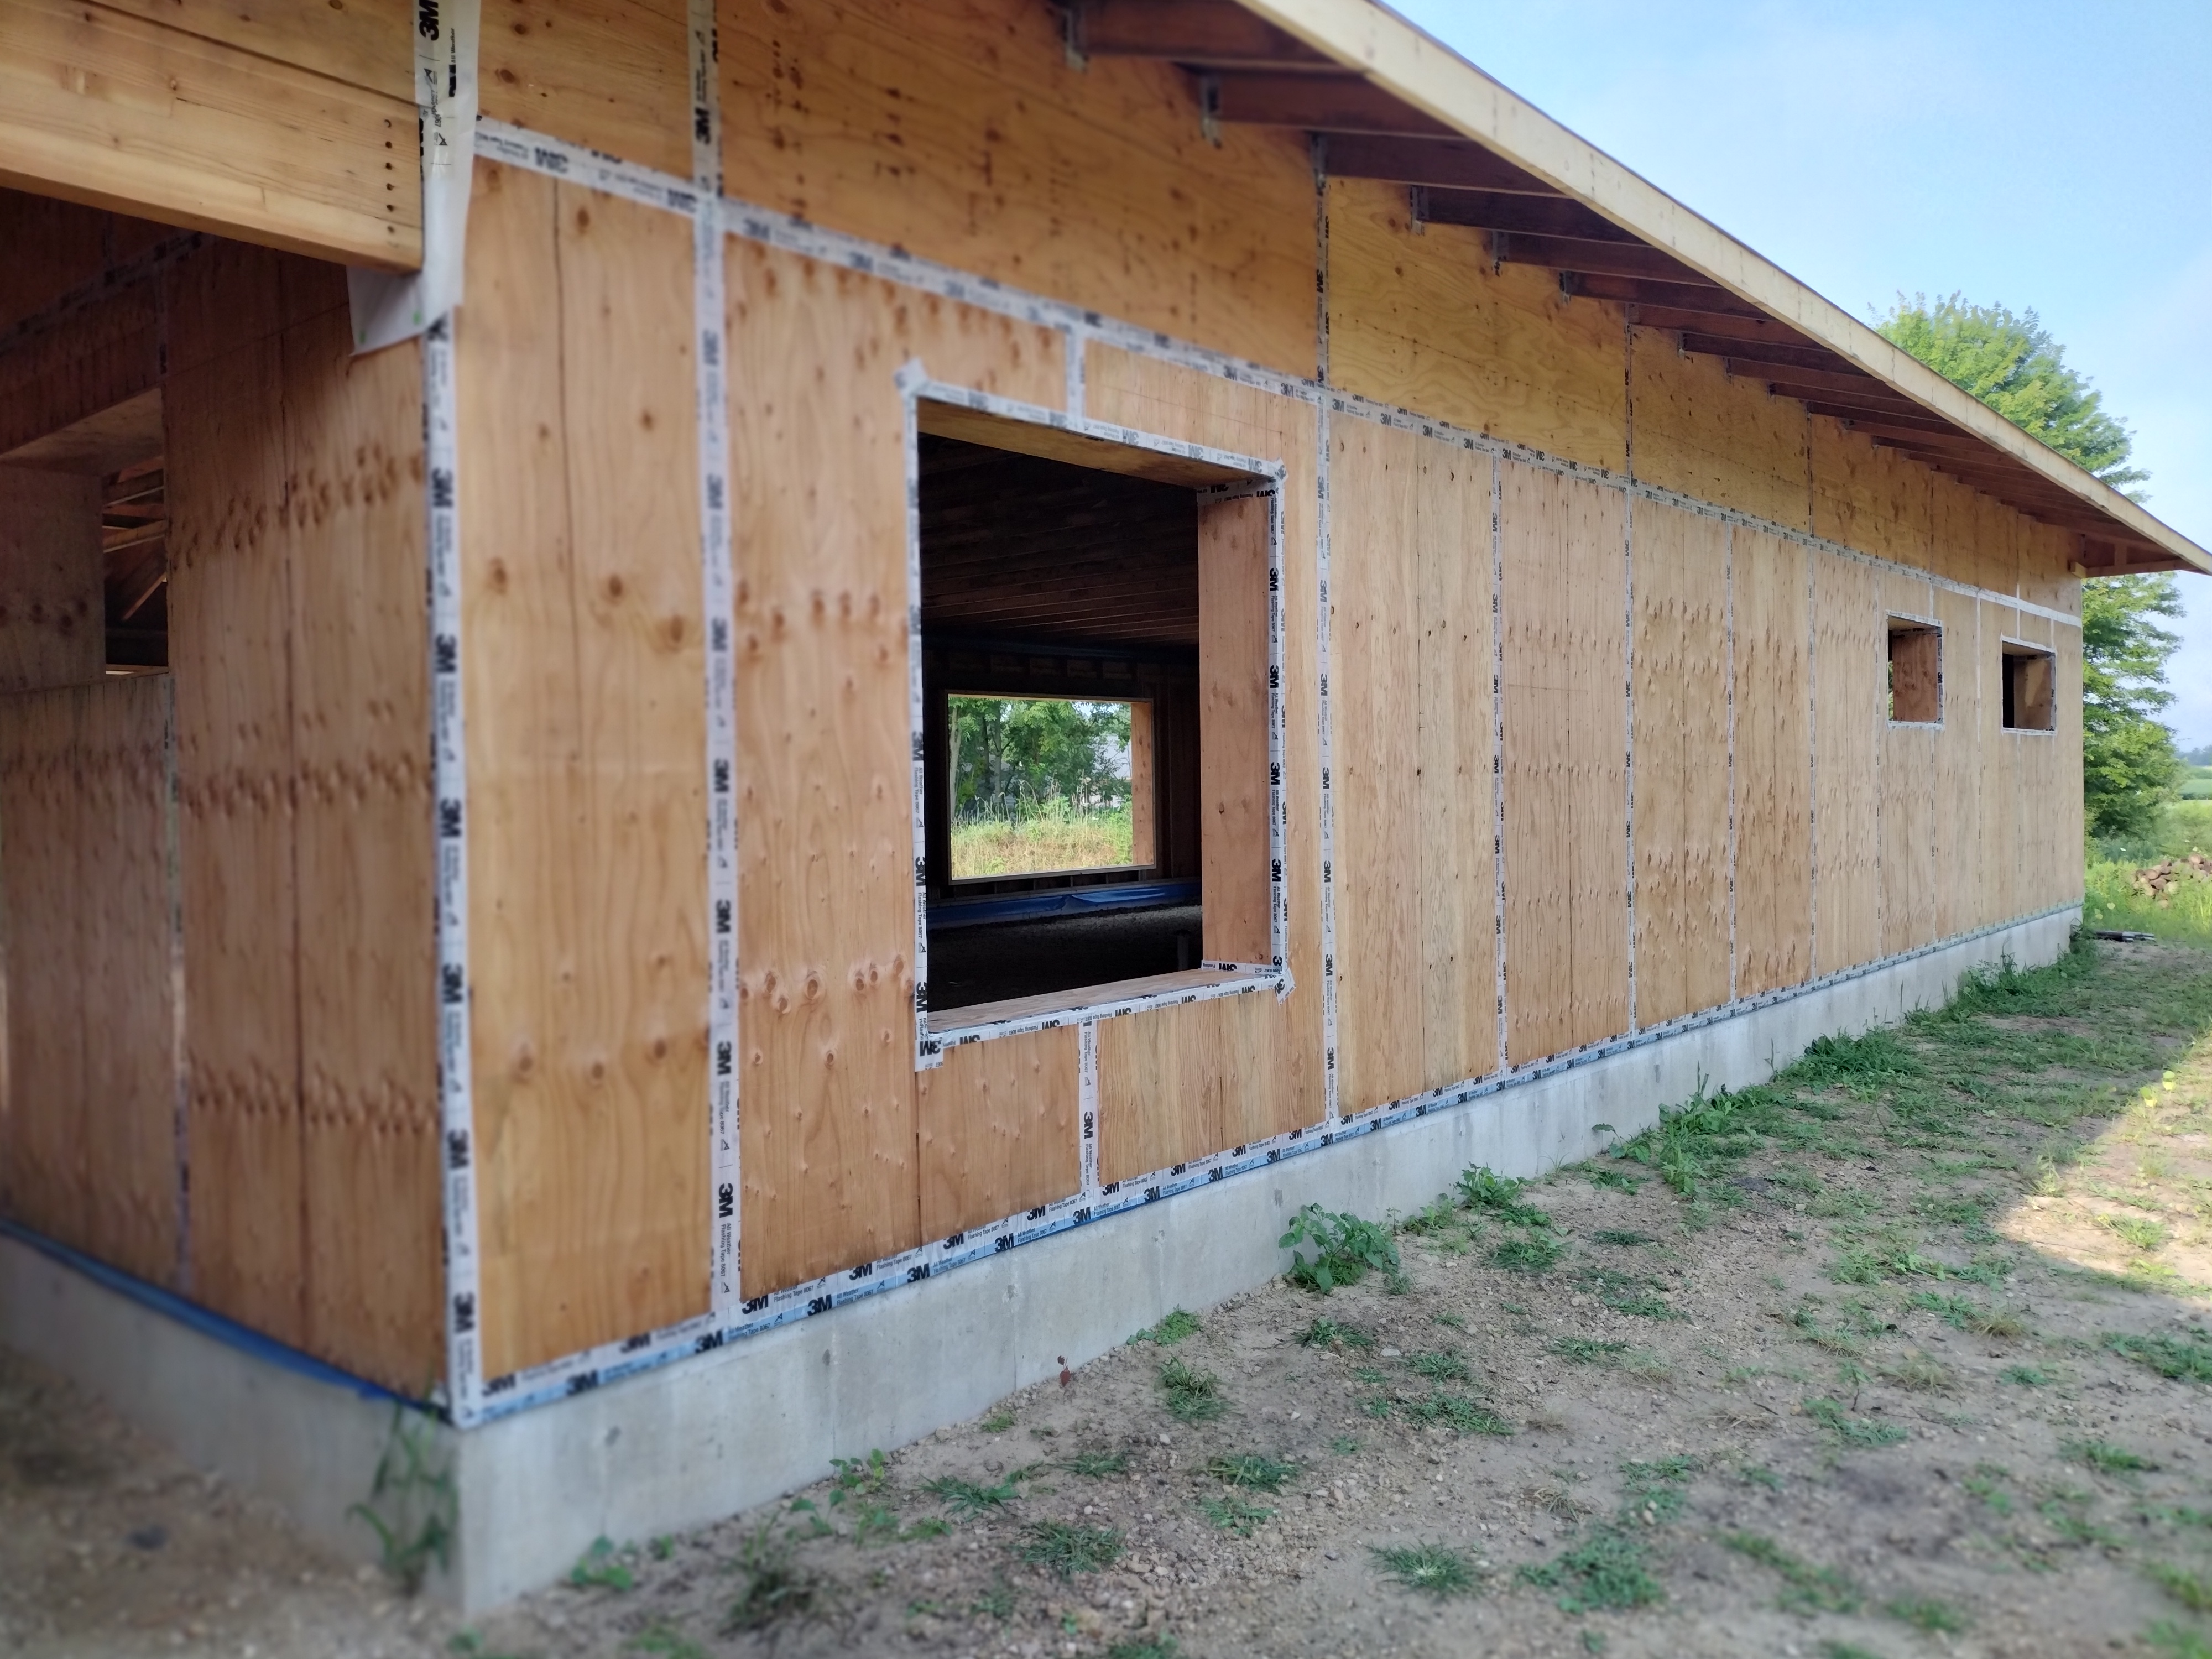
September 4-November 22, 2024: While roofing and siding work continued on the exterior, our crew jumped back indoors to build out the perimeter and partition walls so that the mechanical trades could run their lines. The rooms took shape quickly. The soffit and blocking took more time.
For the perimeter walls, the framing crew first tacked the strip of blue vapor barrier, previously draped over the outside stud (see picture right and my previous blog post Exterior Framing), to the underside of the trusses. They then installed a single top plate, instead of the conventional double, to save time and gain just a bit more space for insulation. As a result, 9-foot pre-cut studs would be too short so instead the crew cut down 10-footers, for more-or-less a wash in lumber and labor costs.
Before framing up the partition walls, the crew tacked strips of Certainteed MemBrain vapor-variable retarder to go behind the end studs and above the top plate, shown here in pink.
The MemBrain vapor retarder (in reality, clear plastic) can be seen stretched over ladder blocking where these partition walls attach. The copper piping for a hot/cold hose bib in the right hand photo will later be stabilized in place with a block of 2×6. Solid backing is preferred wherever MemBrain seams land and wherever the MemBrain needs to be taped or caulked to a mechanical penetration.
In this picture, the hot/cold hose bib on the opposite side of the house has been secured to a 2×6 block and sealed with DuPont FlexWrap EZ. Blocking is also in place where the kitchen base cabinets will attach to the wall. There’s a piece of plywood visible adjacent to the plumbing pipes—-these gussets are attached to every other stud pair and serve to tie the exterior wall to the interior perimeter wall. Note the bottom plate is air-sealed to the slab with caulk.
The middle part of the house will have a dropped ceiling, like a soffit, to house ductwork. It will also serve as an architectural feature, defining the circulation areas with a warm and attractive wood ceiling.
An important feature of any energy efficient house is to locate ductwork within the air + thermal envelope—-not buried in the attic’s insulation or worse, laying on top of the attic insulation. The crew extended the vapor retarder across the dropped ceiling areas and installed drywall, which I later mudded and taped.
The crew framed the soffits with 2×4’s, and placed 2×4 or 2×6 blocking wherever needed for the sliding barn doors, kitchen and bath cabinets, wardrobe cabinets, window curtain rods, bathroom grab bars, soap + shampoo niches, and electrical + mechanical penetrations.The electrician began wiring.The gray boxes in the soffit are the drivers for the can lights.
Our “weekend warrior” crew nailed up scraps of plywood on leftover 2×2’s in the mechanical room, for solid backing wherever we anticipated equipment will be hung.
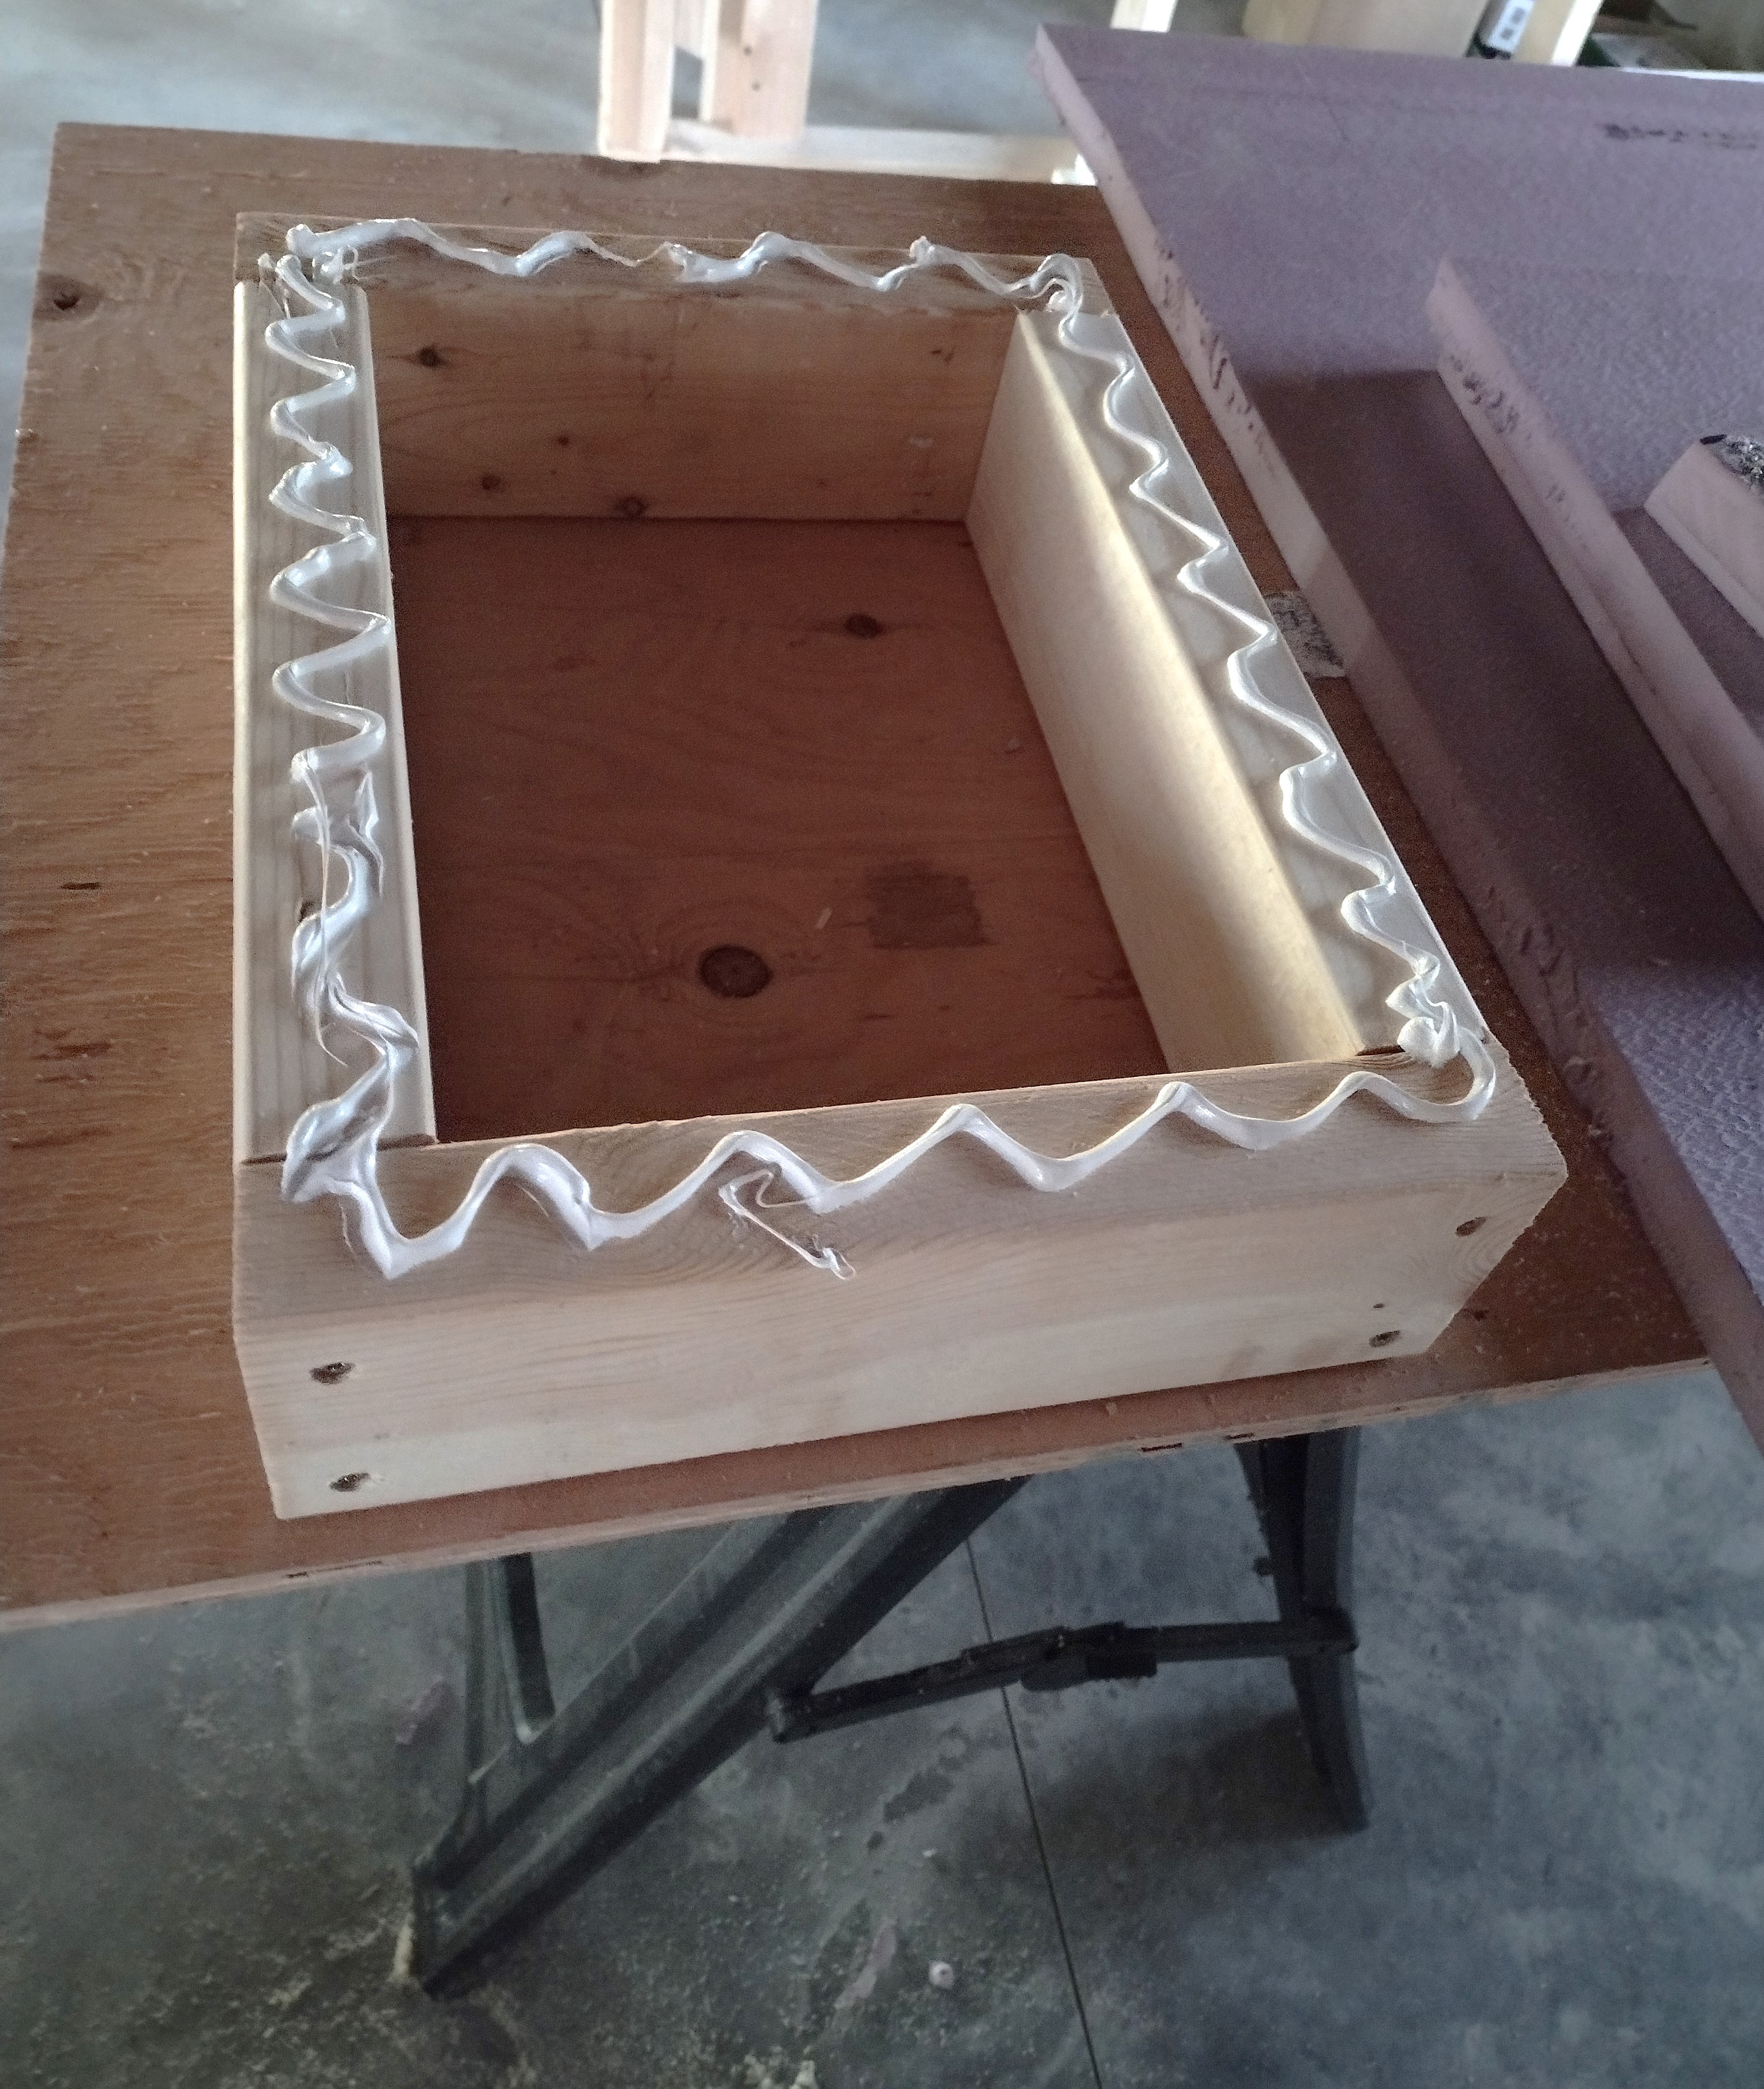
We also busied ourselves making can light boxes out of leftover 2×4’s and Styrofoam. These we installed between the trusses where the finished (drywall) ceiling will be at 9 feet. The boxes are generously sized to fit the LED fixture, its driver (the gray box), and the electricians hand for making the connection after the drywall is hung and a circular hole cut.
The inside 2×4 joints were caulked and the Styrofoam was sealed to the face with adhesive caulk.These boxes will displace 3-1/2″ of insulation, for a penalty of (3.5) x (3.75) = R12. The attic will be insulated with blown-in cellulose for a settled depth of 16″, which is rated at R-60.
We fashioned an attic hatchway out of scraps of plywood and patched-together sheets of Styrofoam. This foam “plug” can be pushed up and placed out of the way on the adjacent truss framing in the rare instance that access to the attic is needed in the future.It’s air-sealed with weather-stripping.
It was also important to get the wall behind the tub air-sealed before the plumber set the tub. I installed a section of MemBrain, a sheet of drywall, and a waterproof membrane from Schluter, caulked at the perimeter to the framing. Later, a second layer of drywall + Schluter will be installed over this back wall, to overlay the tub’s lip.
With much relief, we got all the parts and pieces in place for the finish carpenters and the mechanical contractors, while along the way doing a bang-up job of air-sealing! This phase of work generated very little waste. Every scrap of wood was saved or sent to recycling, as were the drywall cut-offs. Bits of clear plastic were saved to be recycled later when the entire scope of the vapor retarder work is completed. Foam waste isn’t recyclable in our area; it was sent to the landfill.
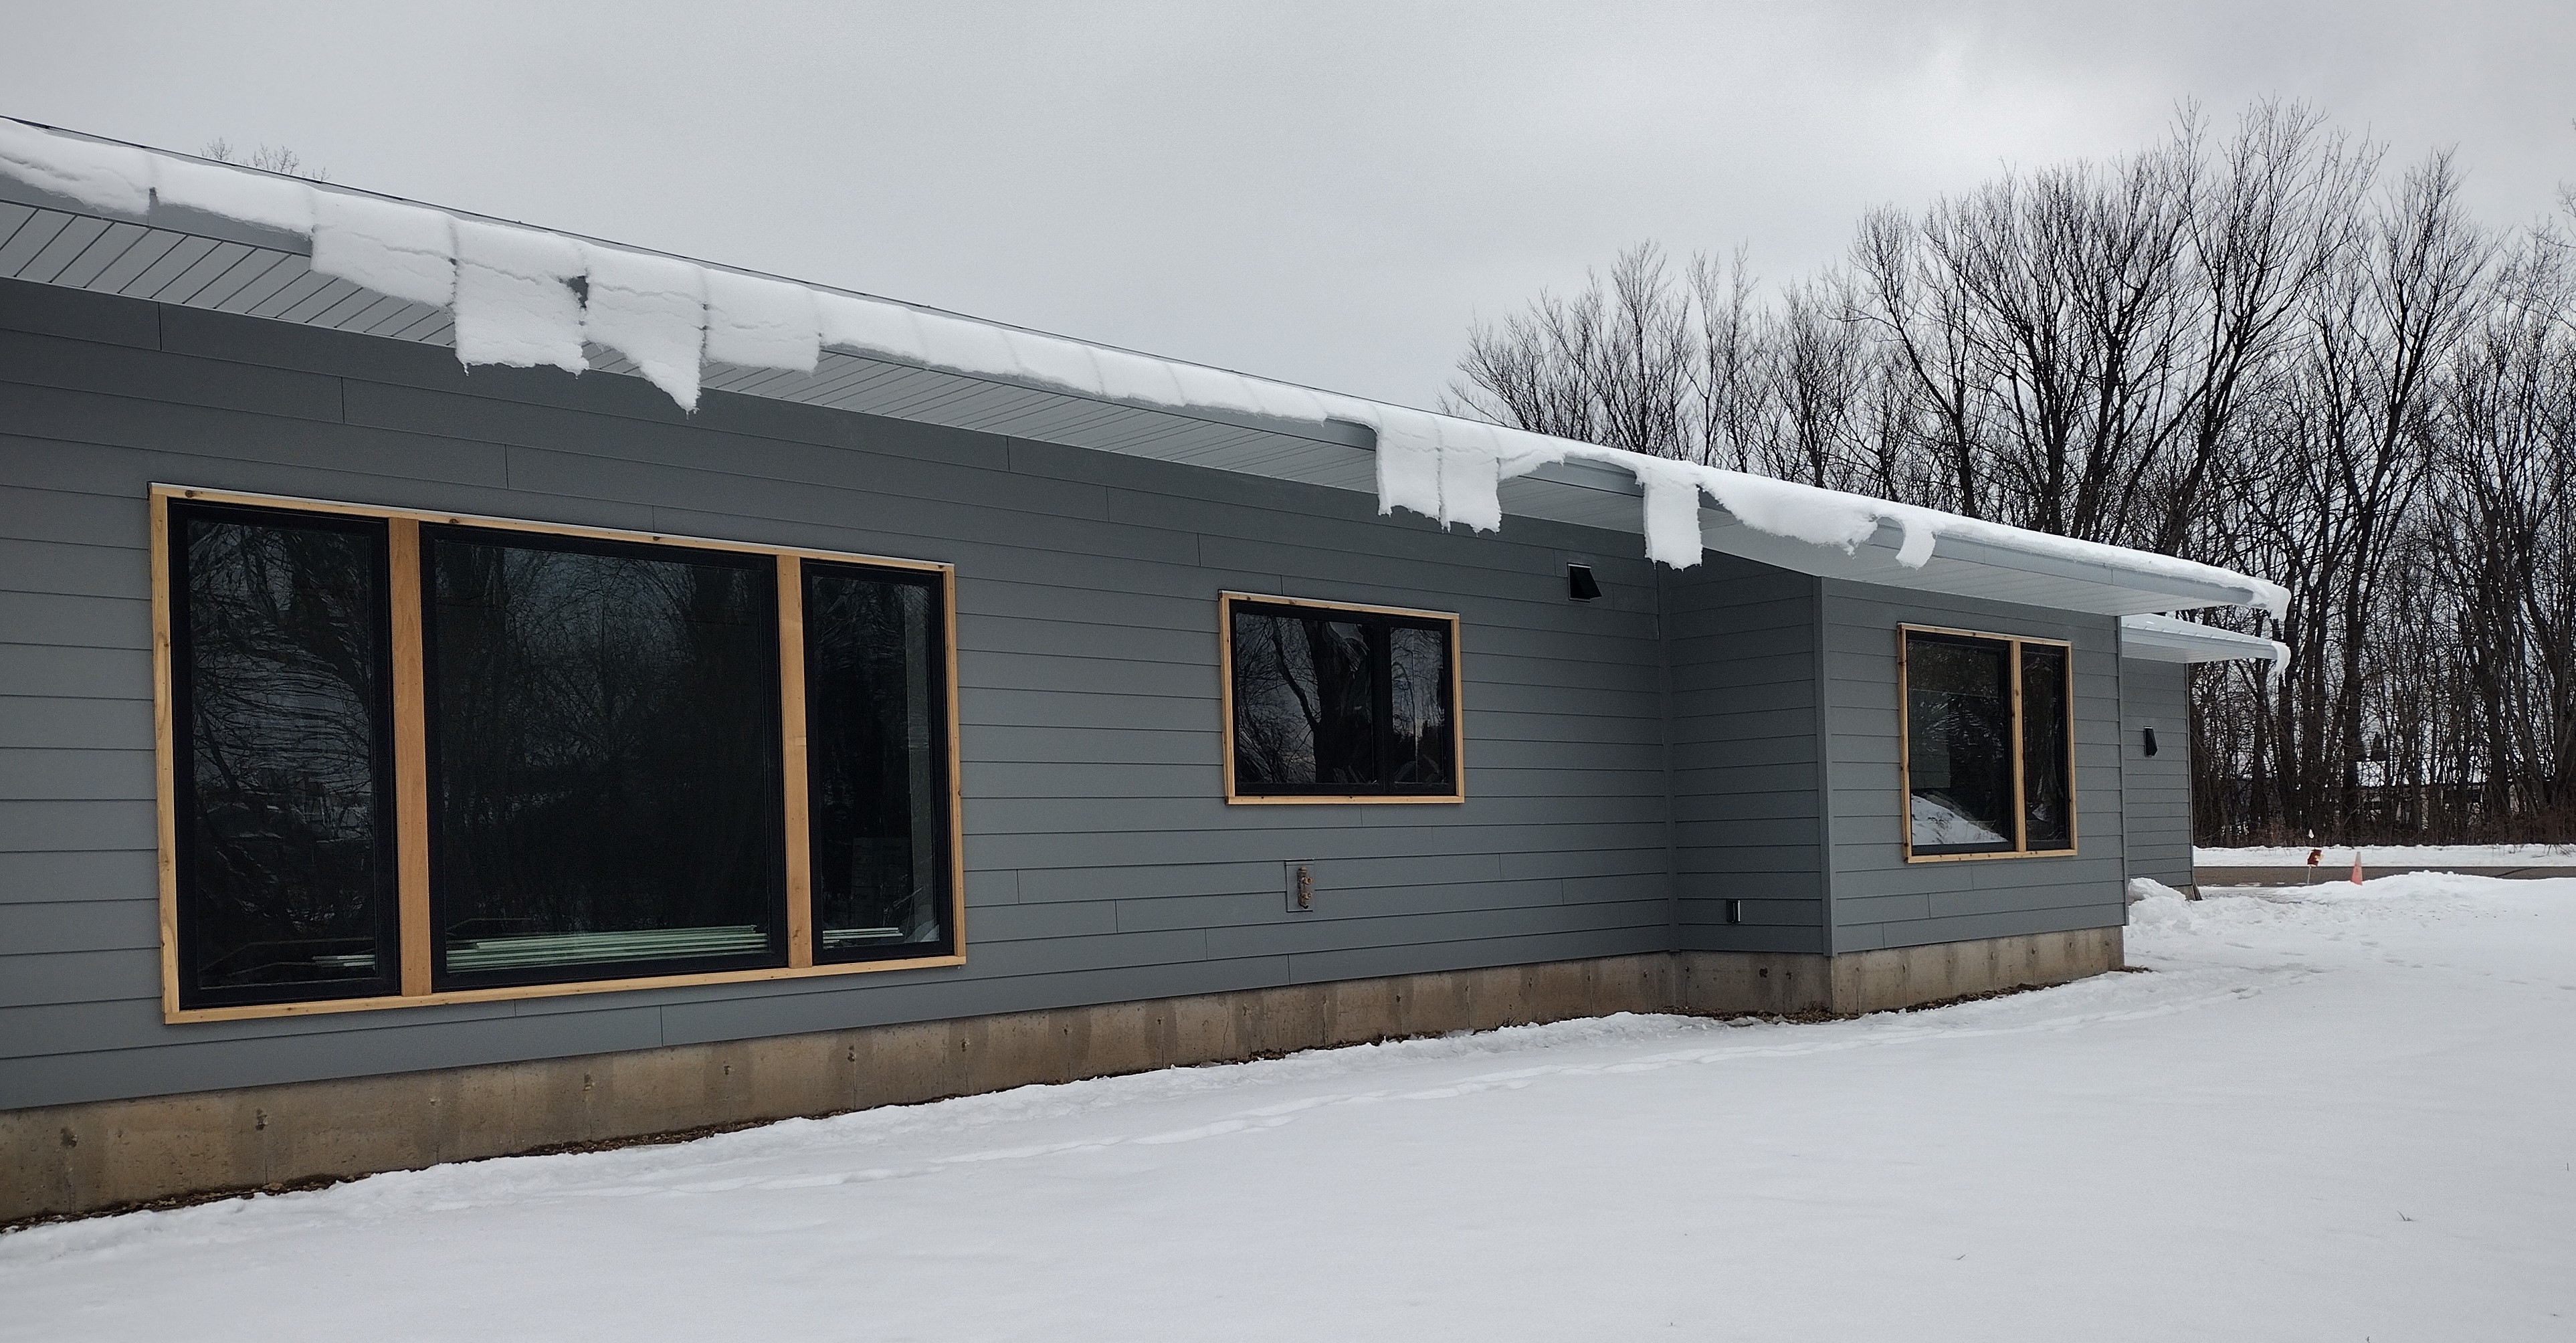
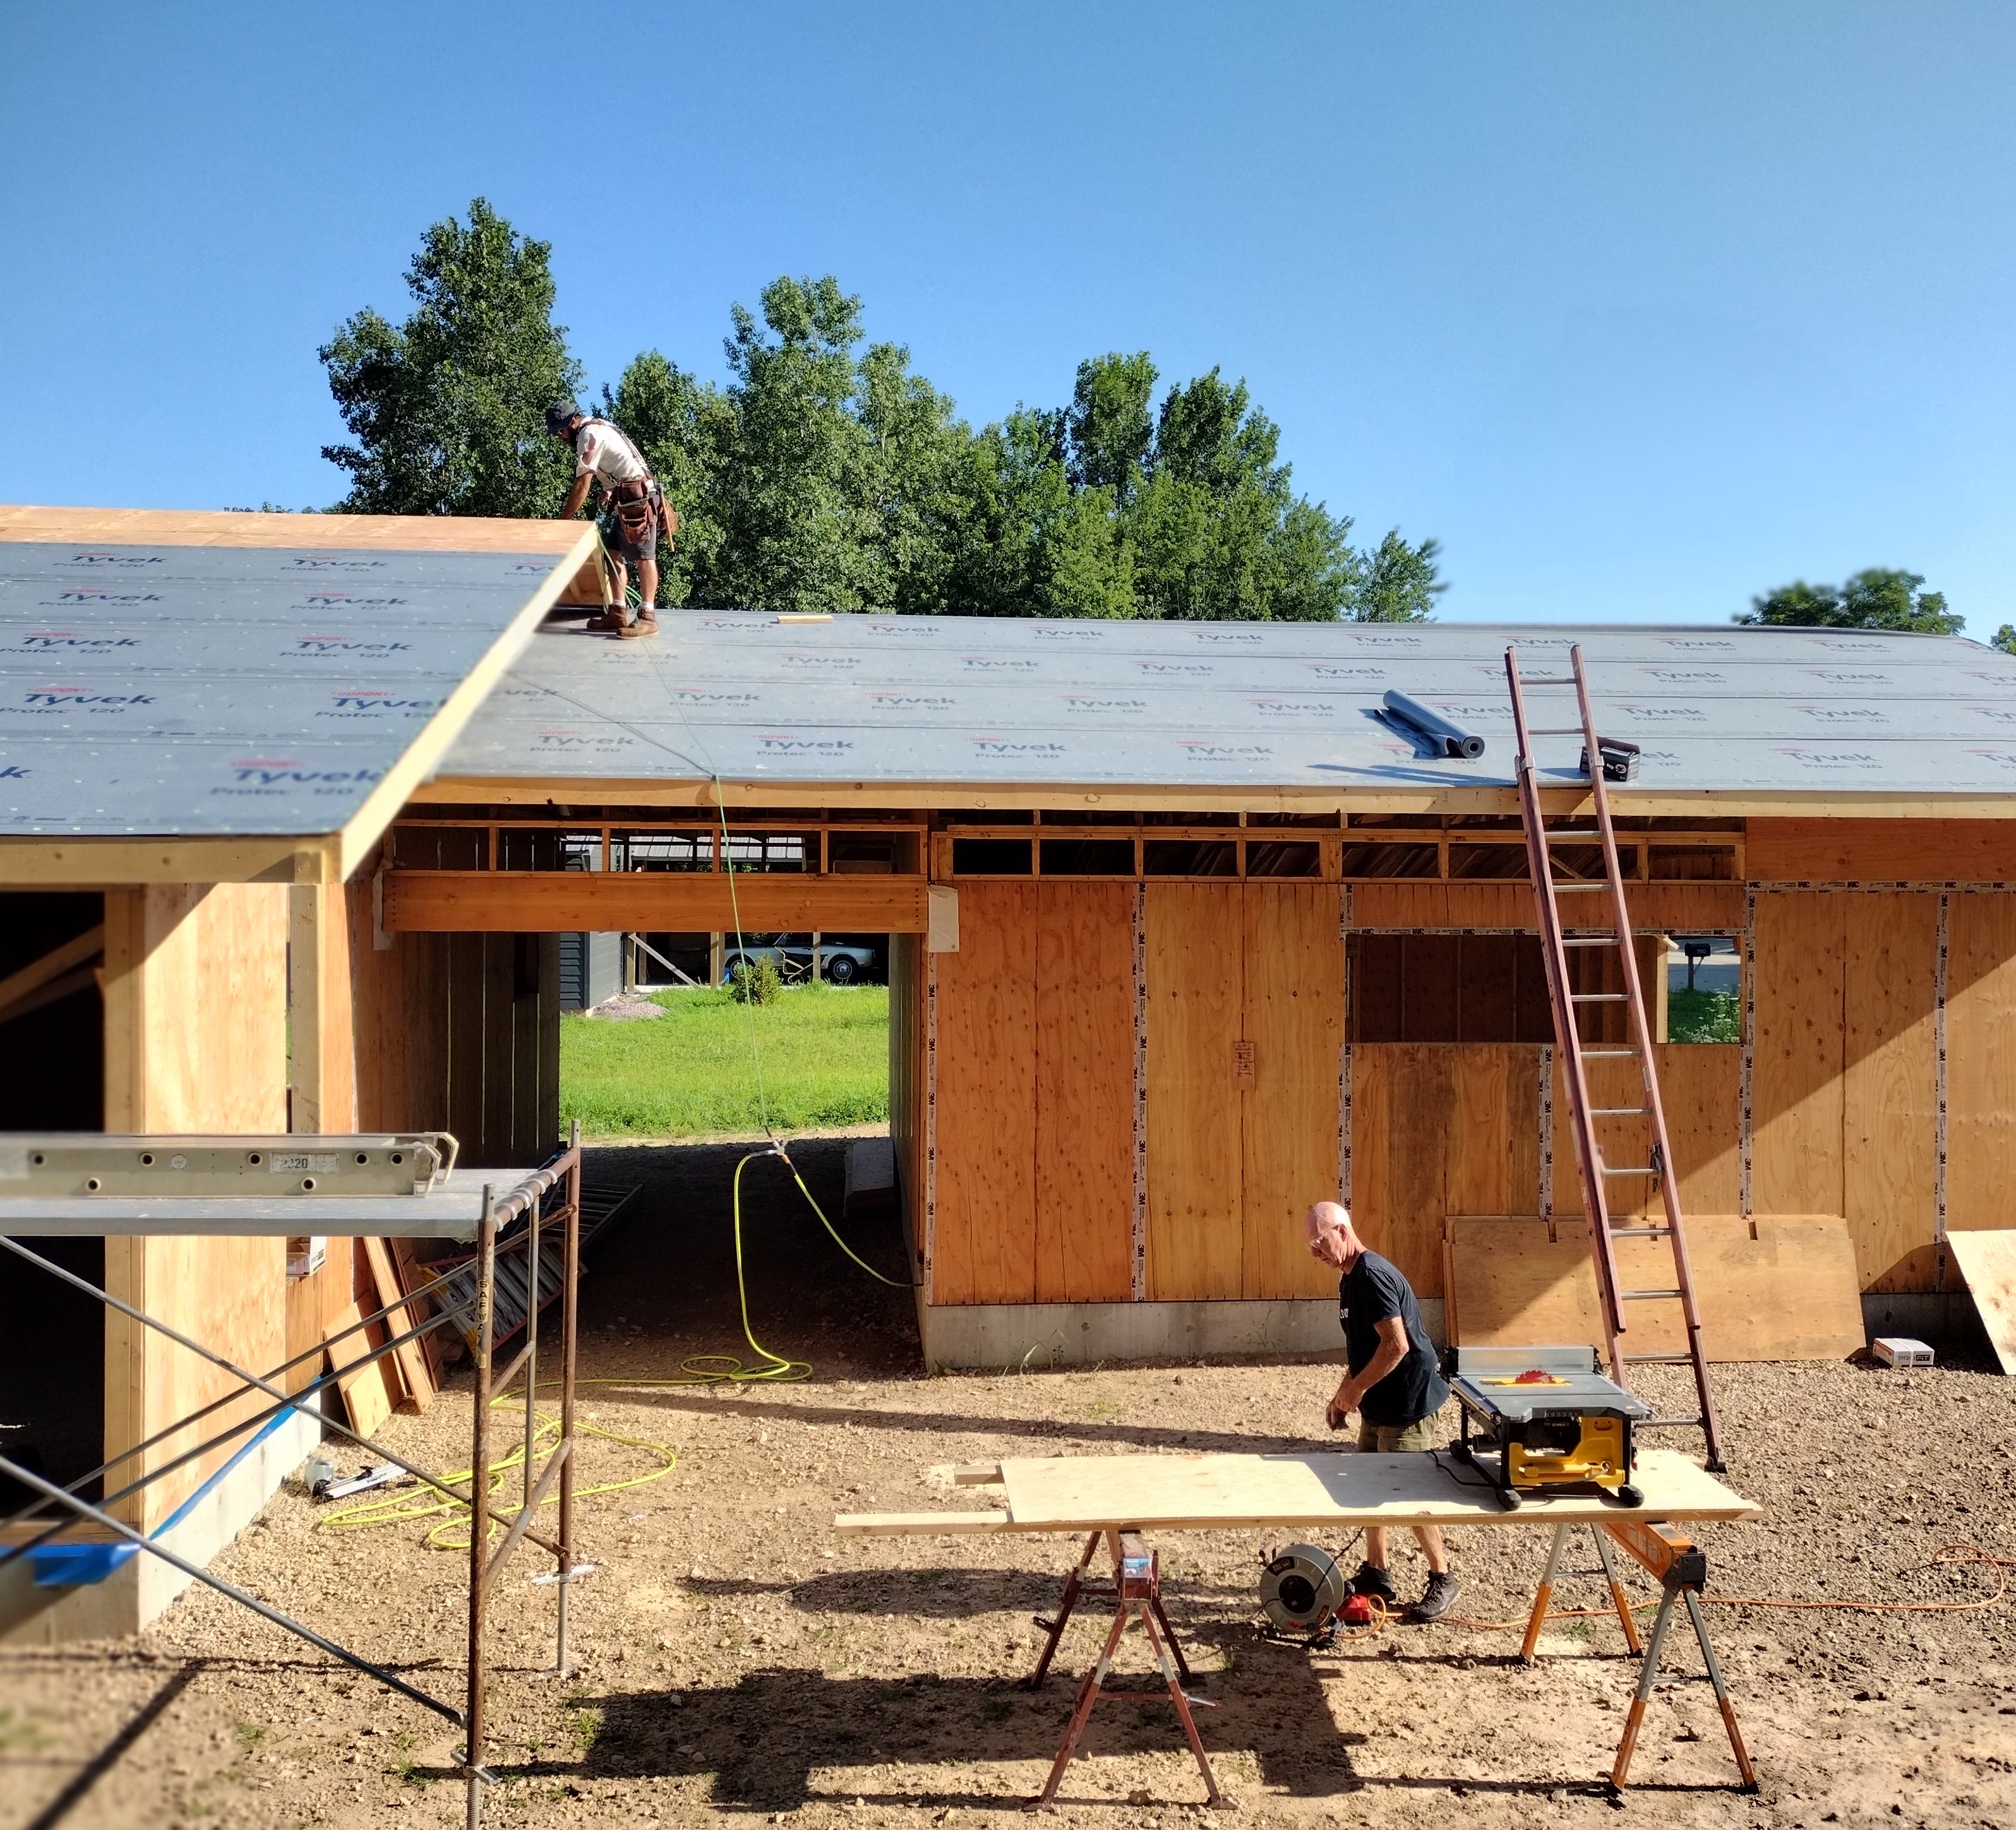
August 21-December18: The work of installing high quality, durable, and attractive roofing, siding, soffits, and trims extended over several months as weather and time permitted. Choosing materials that met these criteria, while also weighing the environmental impacts and the impact on my budget came with some compromises.
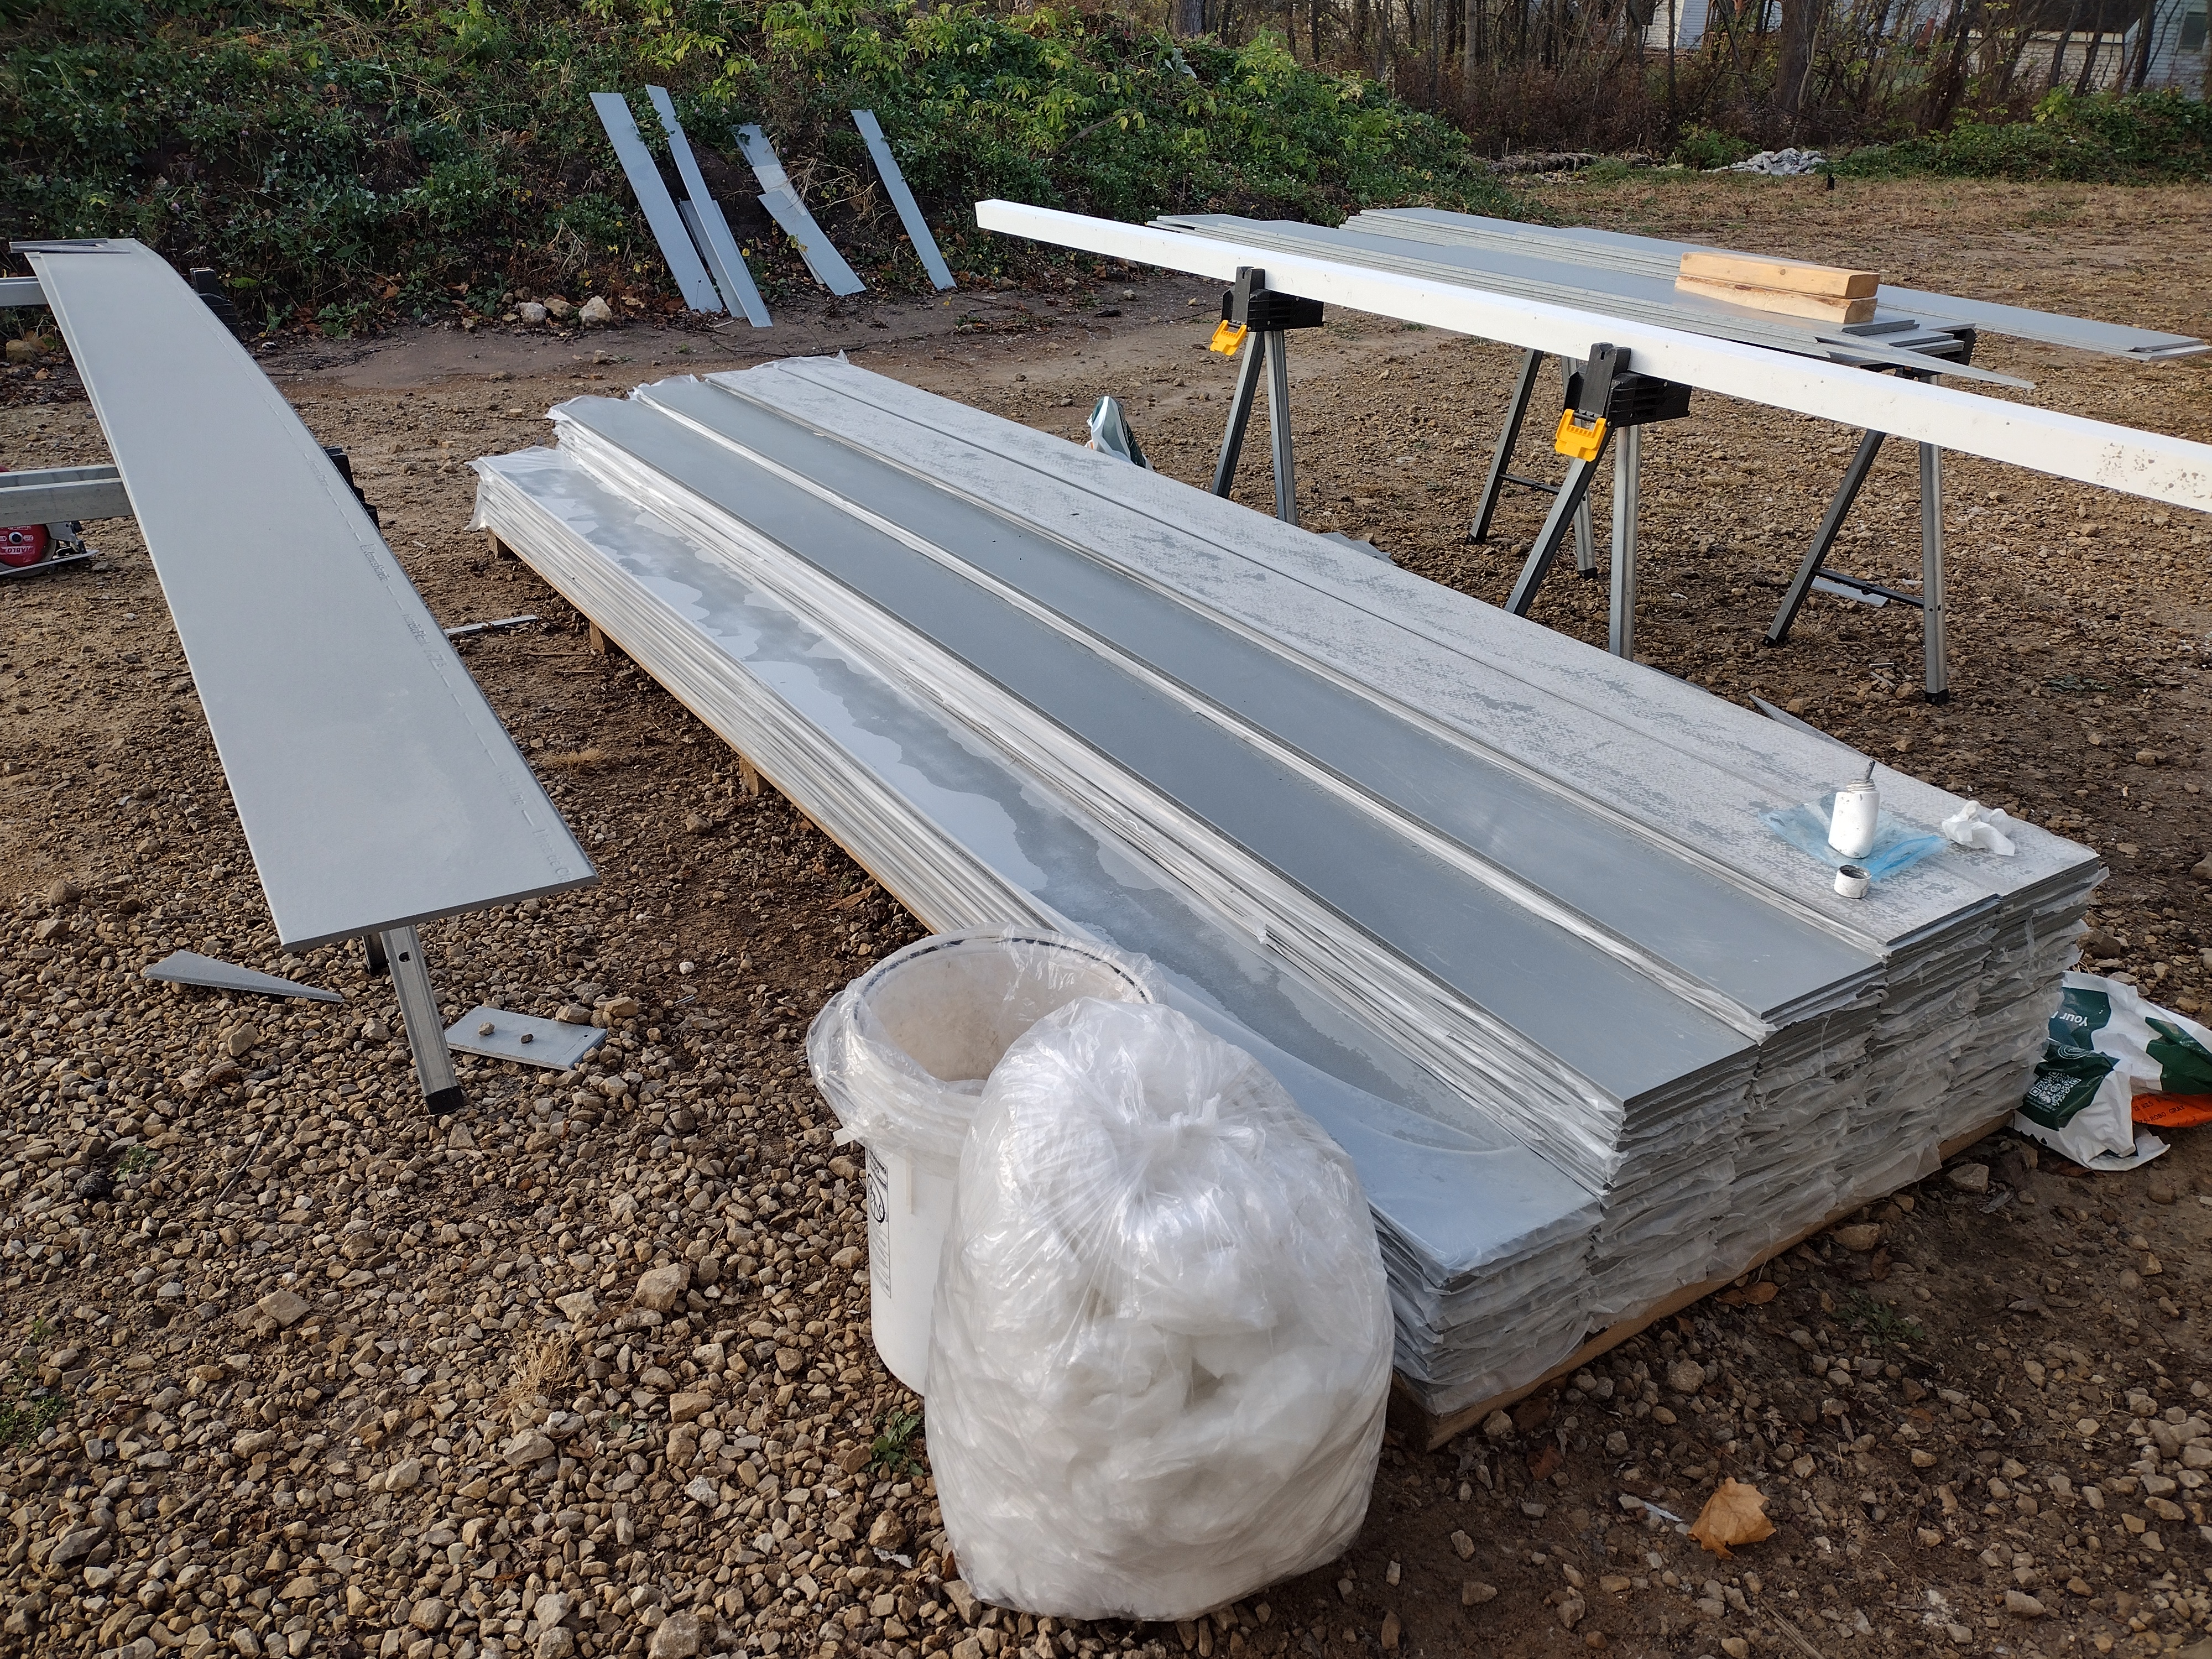
There was no debate in my mind about what type of roofing to choose: it had to be standing seam steel. This concealed fastener “snap” panel system promises to be maintenance-free and rust-free for 50 or 60 years and beyond. It pairs beautifully with PV solar panels, which will be attached to a rack system that merely clips on to the standing seams—no penetrations through the roofing will be needed. The roofing will outlast the PV solar panels. This roof is cost competitive over the long term in part because my design has no valleys, hips, dormers, or other complex shapes, the 4:12 roof pitch is walkable, and ground access is easy.Steel roofs are fireproof and very hail-resistant. While steel imposes three times the manufacturing burden on the environment compared to asphalt shingles, its longevity and the likelihood that it will be recycled at the end of its useful life may be considered an offset. See BEAM carbon calculator. We were careful to save every cut-off and scrap and send it to recycling.
The panels were fabricated on site from rolls of stock material. I chose the “pencil rib” profile over a flat pan, for added stiffness and to conceal any “oil-canning”. I chose a galvalume finish for its authentic good looks and for its environmental qualities. Instead of a painted finish using something called a “PVDF” coating, which contains PFAS and other “forever chemicals”, galvalume is bare steel coated with an alloy of zinc and aluminum. However, it does have a clear acrylic coating of unknown impact, and the 20 year warranty on the finish is less than for PVDF. For more information see Habitable Future. As a bonus, galvalume is highly reflective and will help keep the home (and adjacent outdoor living spaces) cooler in the summer. Lots of thanks to Pete Faust and his crew for their hard work and attention to detail.
Pete also supplied custom galvanized steel fascia covers in a simple “L” shape that slips under the roof’s drip edge. Here, Dave and Cale are using exposed screws on the narrow face to secure it and cover the raw edge of the aluminum soffit. The soffit material is Rollex Stealth, a unique design with concealed vent holes. Instead of the customary “punched tin” look of the typical soffit, this product simulates tongue-and-groove boards and its folded design makes it uber-sturdy. Together, these two materials look sharp and are more than several notches above in long-term durability.The steel and aluminum scraps were saved and sent to recycling.
The crew built frames for the windows out of 2x rough sawn cedar, and capped them with another Pete fabrication—a robust head flashing that was slipped under the Tyvek housewrap and taped securely. The cedar frames present a small but impactful touch of natural material to the exterior, and will require the homeowner to apply a couple coats of clear penetrating sealer every few years to maintain UV and moisture resistance. We used Vermont Natural Coating’s PolyWhey, a safe, effective, and easy-to-apply product that replaces typical toxic ingredients with whey proteins, a byproduct of the state’s cheesemaking industry.
For trims and mechanical blocks, I chose Skytrim, a cellular PVC board supplied by my local lumberyard. This product is bomb-proof (it’s pure plastic) and when applied smooth side out, looks clean and modern. The large white rectangle seen on the right is where the electrical meter and other utility boxes will go. The crew cut a slope on the top edge and capped it with a galvanized steel flashing.
For the (hot + cold) hose bib mounts, I chose Sturdi-Mount, a one-and-done product that comes with an integral nailing flange and sloped cap (no extra flashing required). I’d purchased a variety of these mounts, hoping to use them for electrical boxes and lighting fixtures but the sizes and shapes available turned out to be too clunky for my use. Instead, the carpenters custom cut blocks of Skytrim.
For siding, I chose James Hardie’s planks with a 7″ exposure, and Tamlyn’s plank flashing to backthe seams.Together with caulked seams, this “armor” is the first line of defense against water intrusion. The siding and trims are installed on Tyvek’s HomeWrap, a waterproof and vapor-open material that meets Code’s requirement for a “water-resistive barrier”, and is the second line of defense against water intrusion.
There are many material up-grades to conventional Tyvek including bumpy or textured wraps that create a drainage and drying space behind the siding.Another upgrade is to “strap” the wall with 1×2 or similar battens for a robust 3/4″ gap for maximum drying. These various materials and methods are often called “rainscreens”, and are used where extra insurance against water or vapor damage is needed, or to extend the life of the siding (especially effective for wood with a painted finish). For more discussion, see Moisture Protection for Walls in Journal of Light Construction.
Because the walls of this house are only one story, and are well protected by 36 inch overhangs and rakes, I feel confident using conventional Tyvek. Additionally, the plank siding inherently creates triangular “drying” gaps behind each row. Our meticulous attention to air- and water-tightness on the exterior, and air- and vapor-tightness on the interior serve to keep the walls dry and free of mold, mildew, rot, and insect intrusion.
I began to regret the choice of Skytrim, not for its durability or ease-of-use, but because of the environmental impact of the product (see Habitable Future), and the hassle of painting it in the field. Here, the “weekend warrior” crew is applying blue masking tape in preparation for painting the gable end frieze boards.Only a few manufacturers formulate paint for use on PVC, and so I was not able to use a product from Ecos Paints, my preferred vendor. And if that wasn’t enough to sink the heart of this “eco-friendly” builder (me), my plan to send the cut offs to recycling turned out to be wishful thinking. I’m still hanging on to the larger scraps in hopes of using them elsewhere and am still looking around and making calls to recyclers.
The smooth, cool gray plank cement board siding is a nice contrast to the warm tones of the rough sawn cedar window trim. This James Hardie product should last for decades: the finish comes with a 15 year warranty. It’s considered fire-resistant (it’s non-combustible), hail-resistant, and non-toxic once in place (our crew worked outside to avoid inhaling the silica dust it releases when cut). Except for the factory applied painted finish and certain undisclosed “additives”, it’s made from raw and natural materials (Portland cement, cellulose, sand, water).
However, to manufacture and transport it comes with a high environmental cost (see Habitable Future). Moreover, Builders for Climate Action’s BEAM carbon footprint calculator finds that cement board siding has 4.5 times the carbon footprint of vinyl siding. It’s helpful to know that James Hardie has goals to reduce their carbon footprint, including energy and water consumption and waste reduction.
The siding came protected with a thin plastic sheet between each plank, which was sent to recycling. The cut-offs were sent to the landfill.
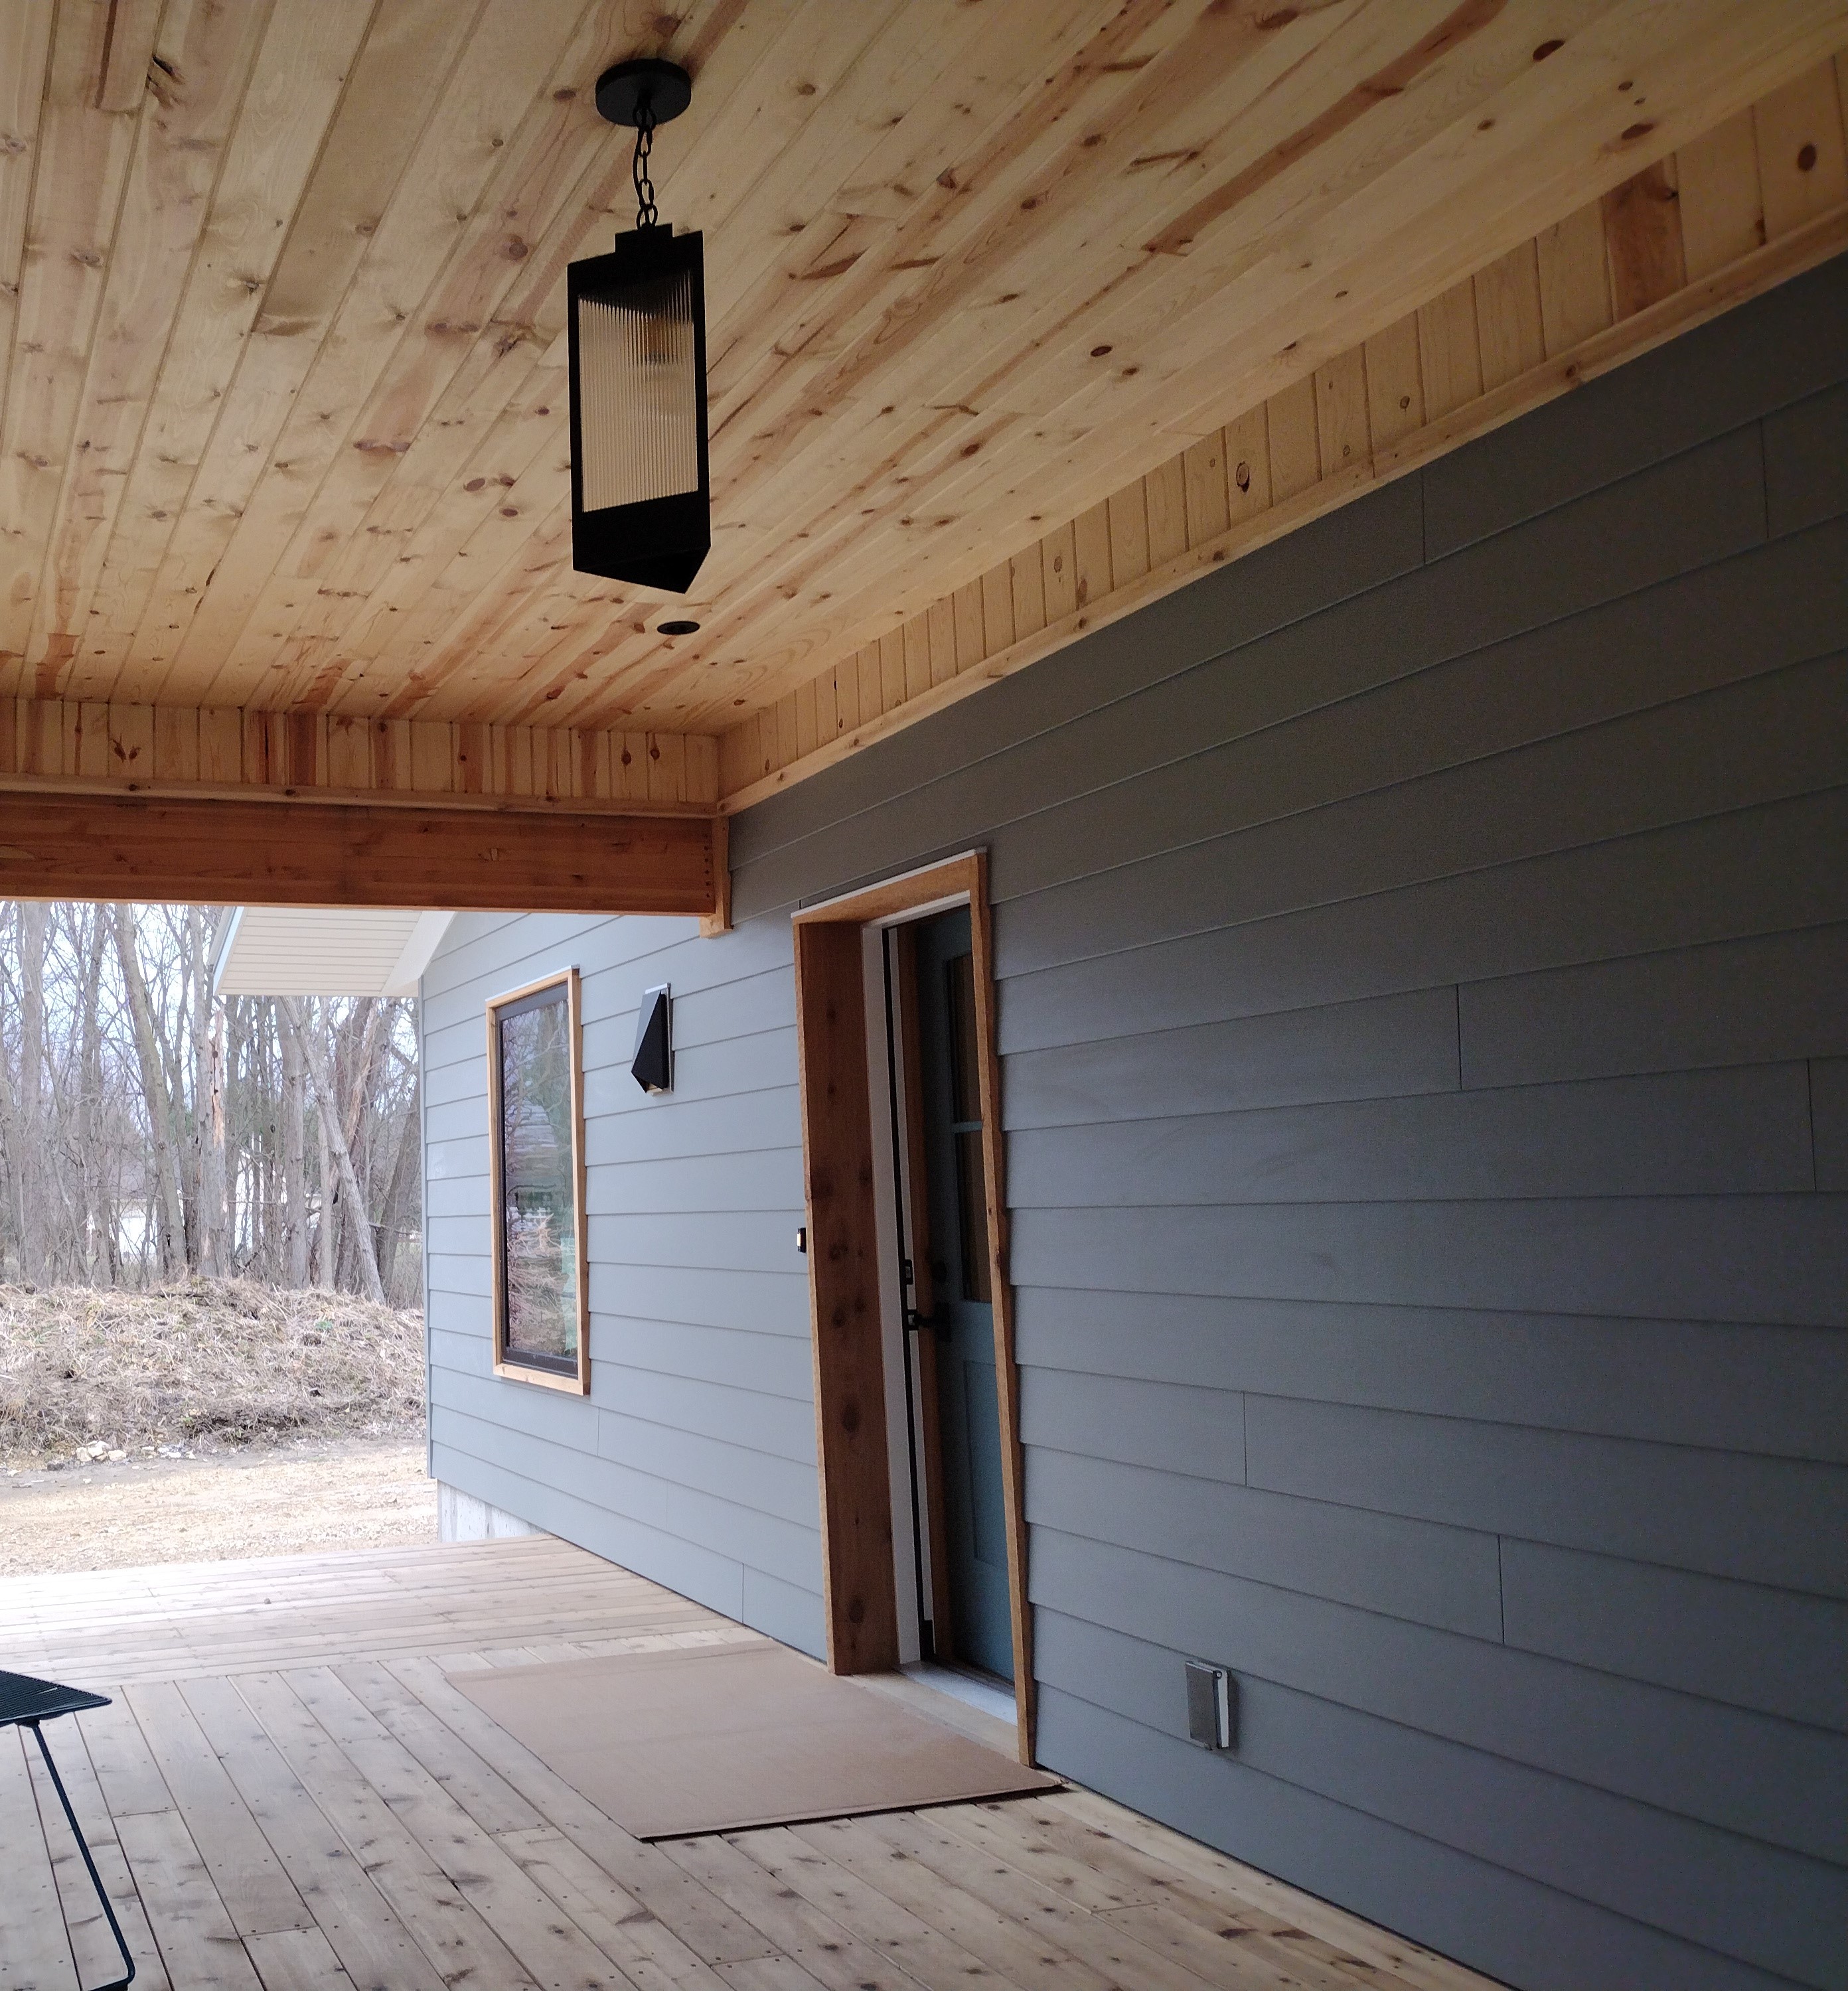
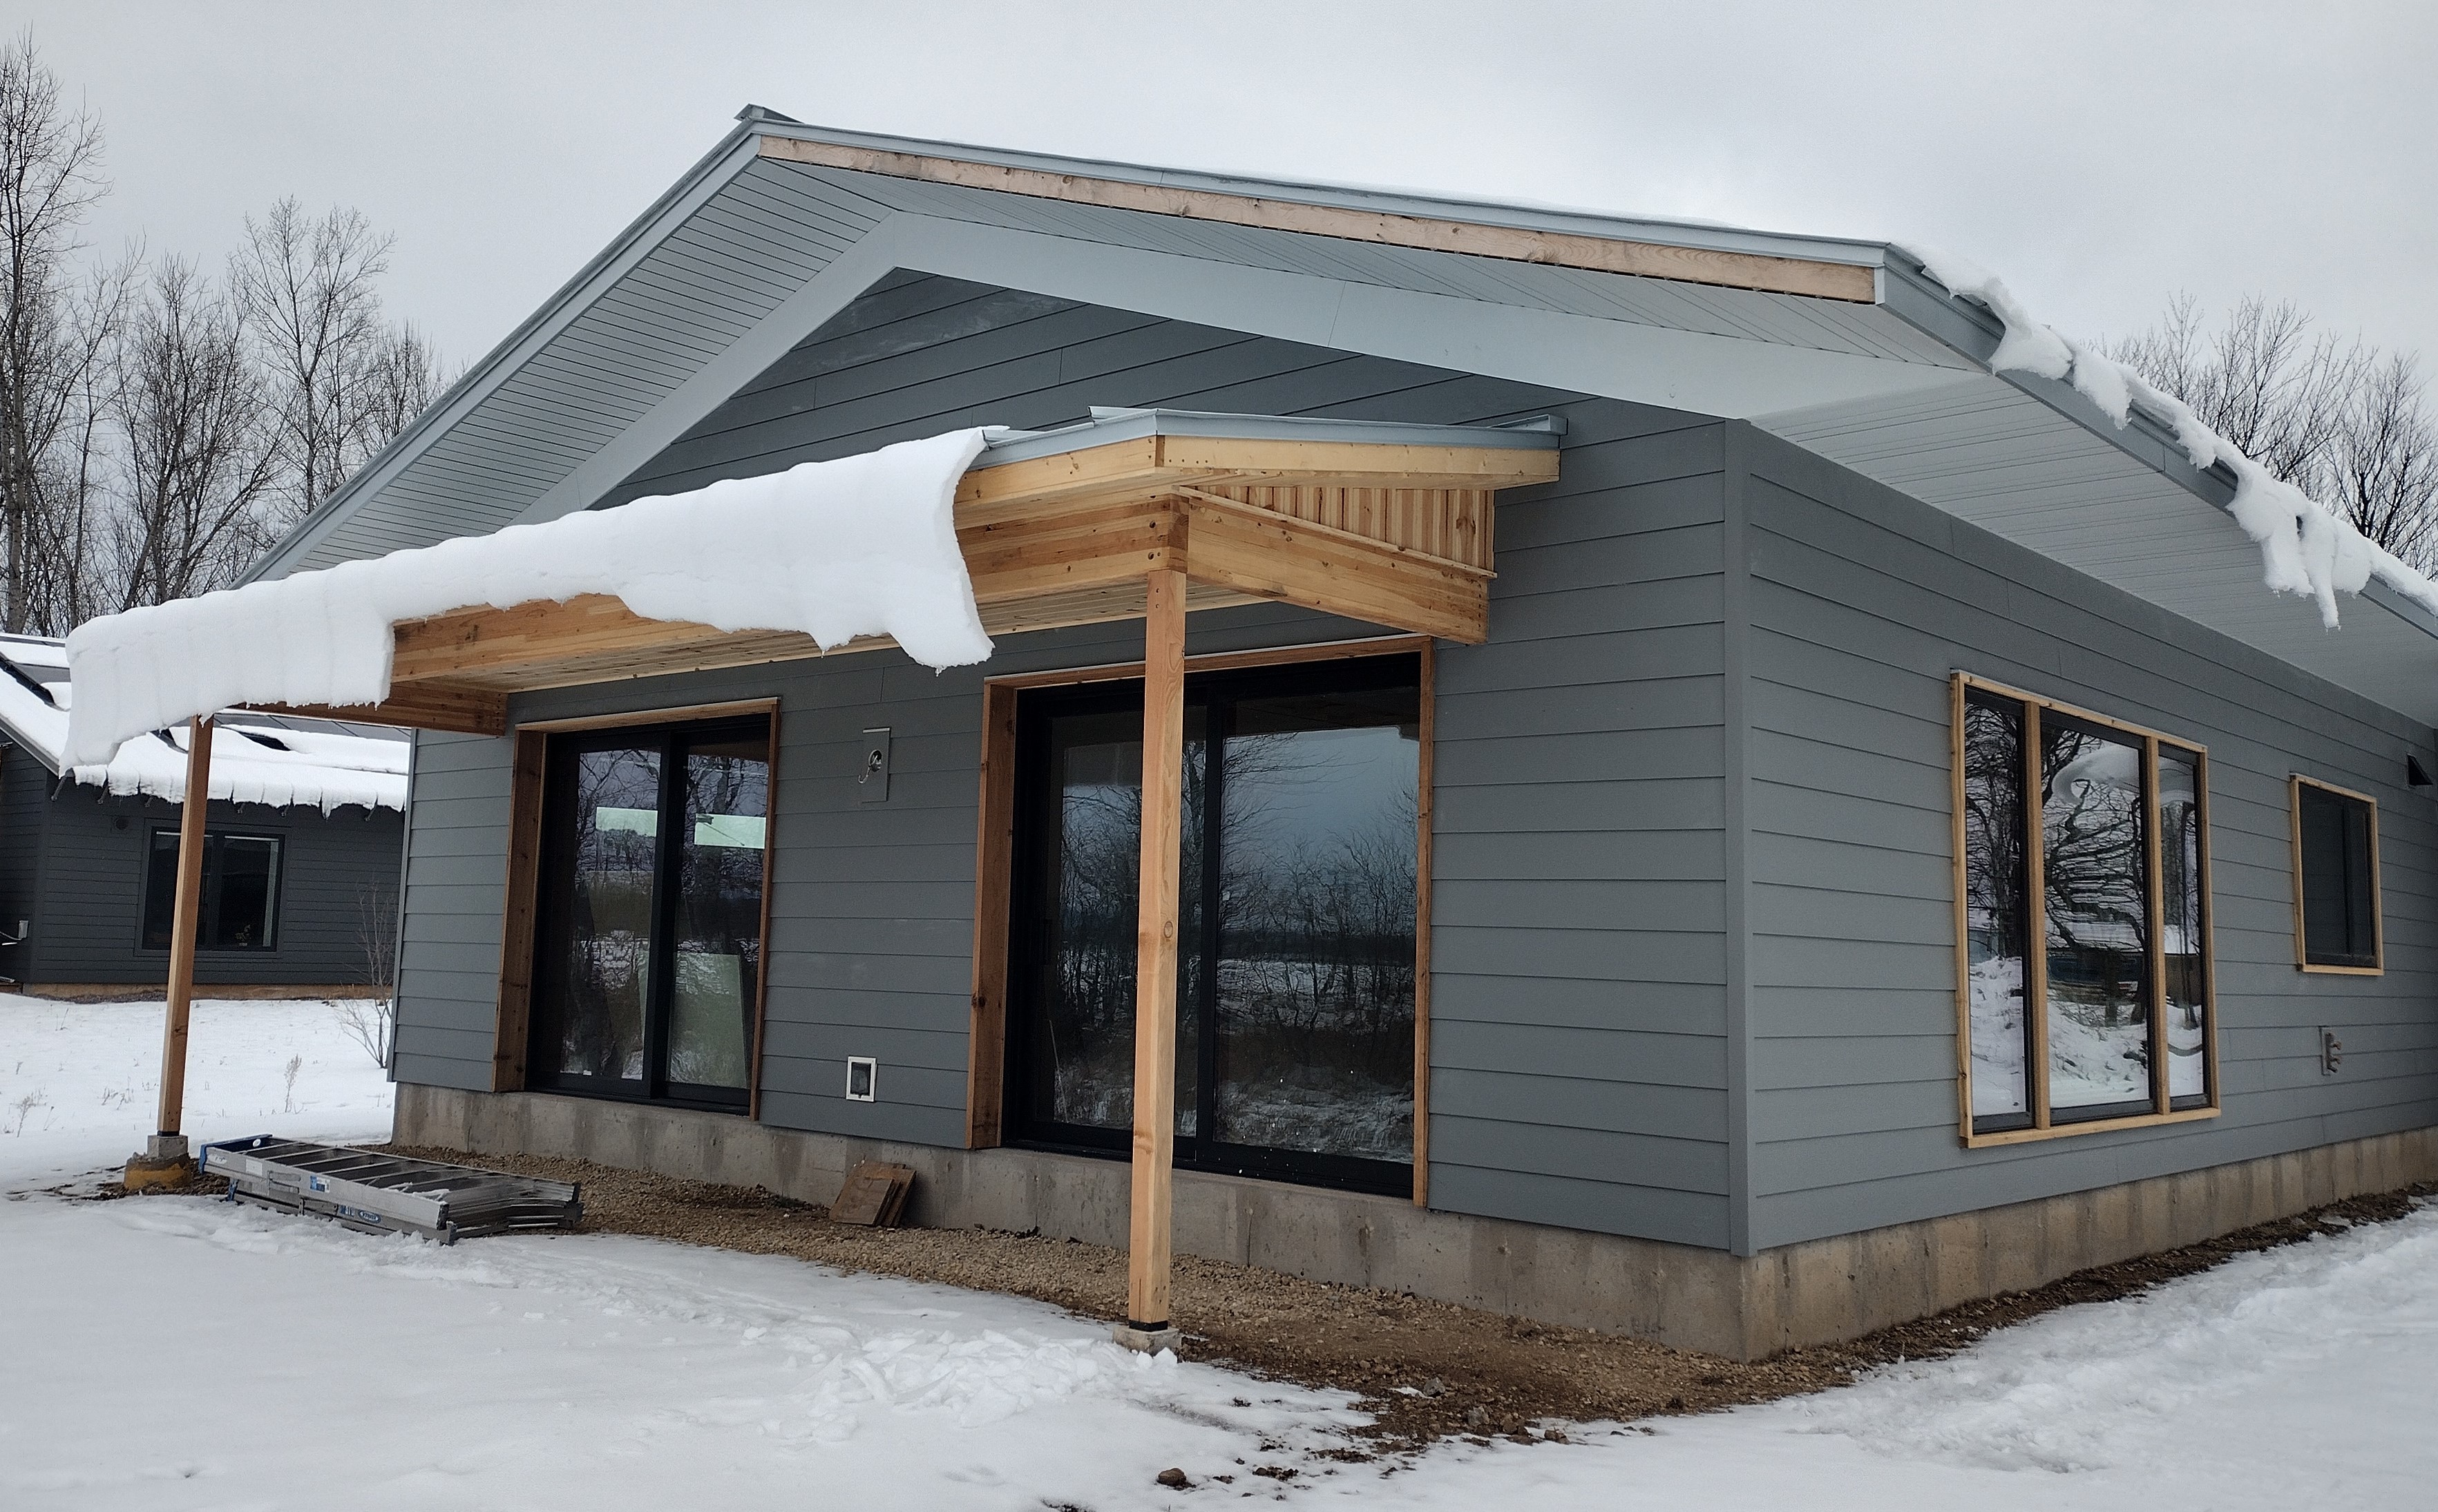
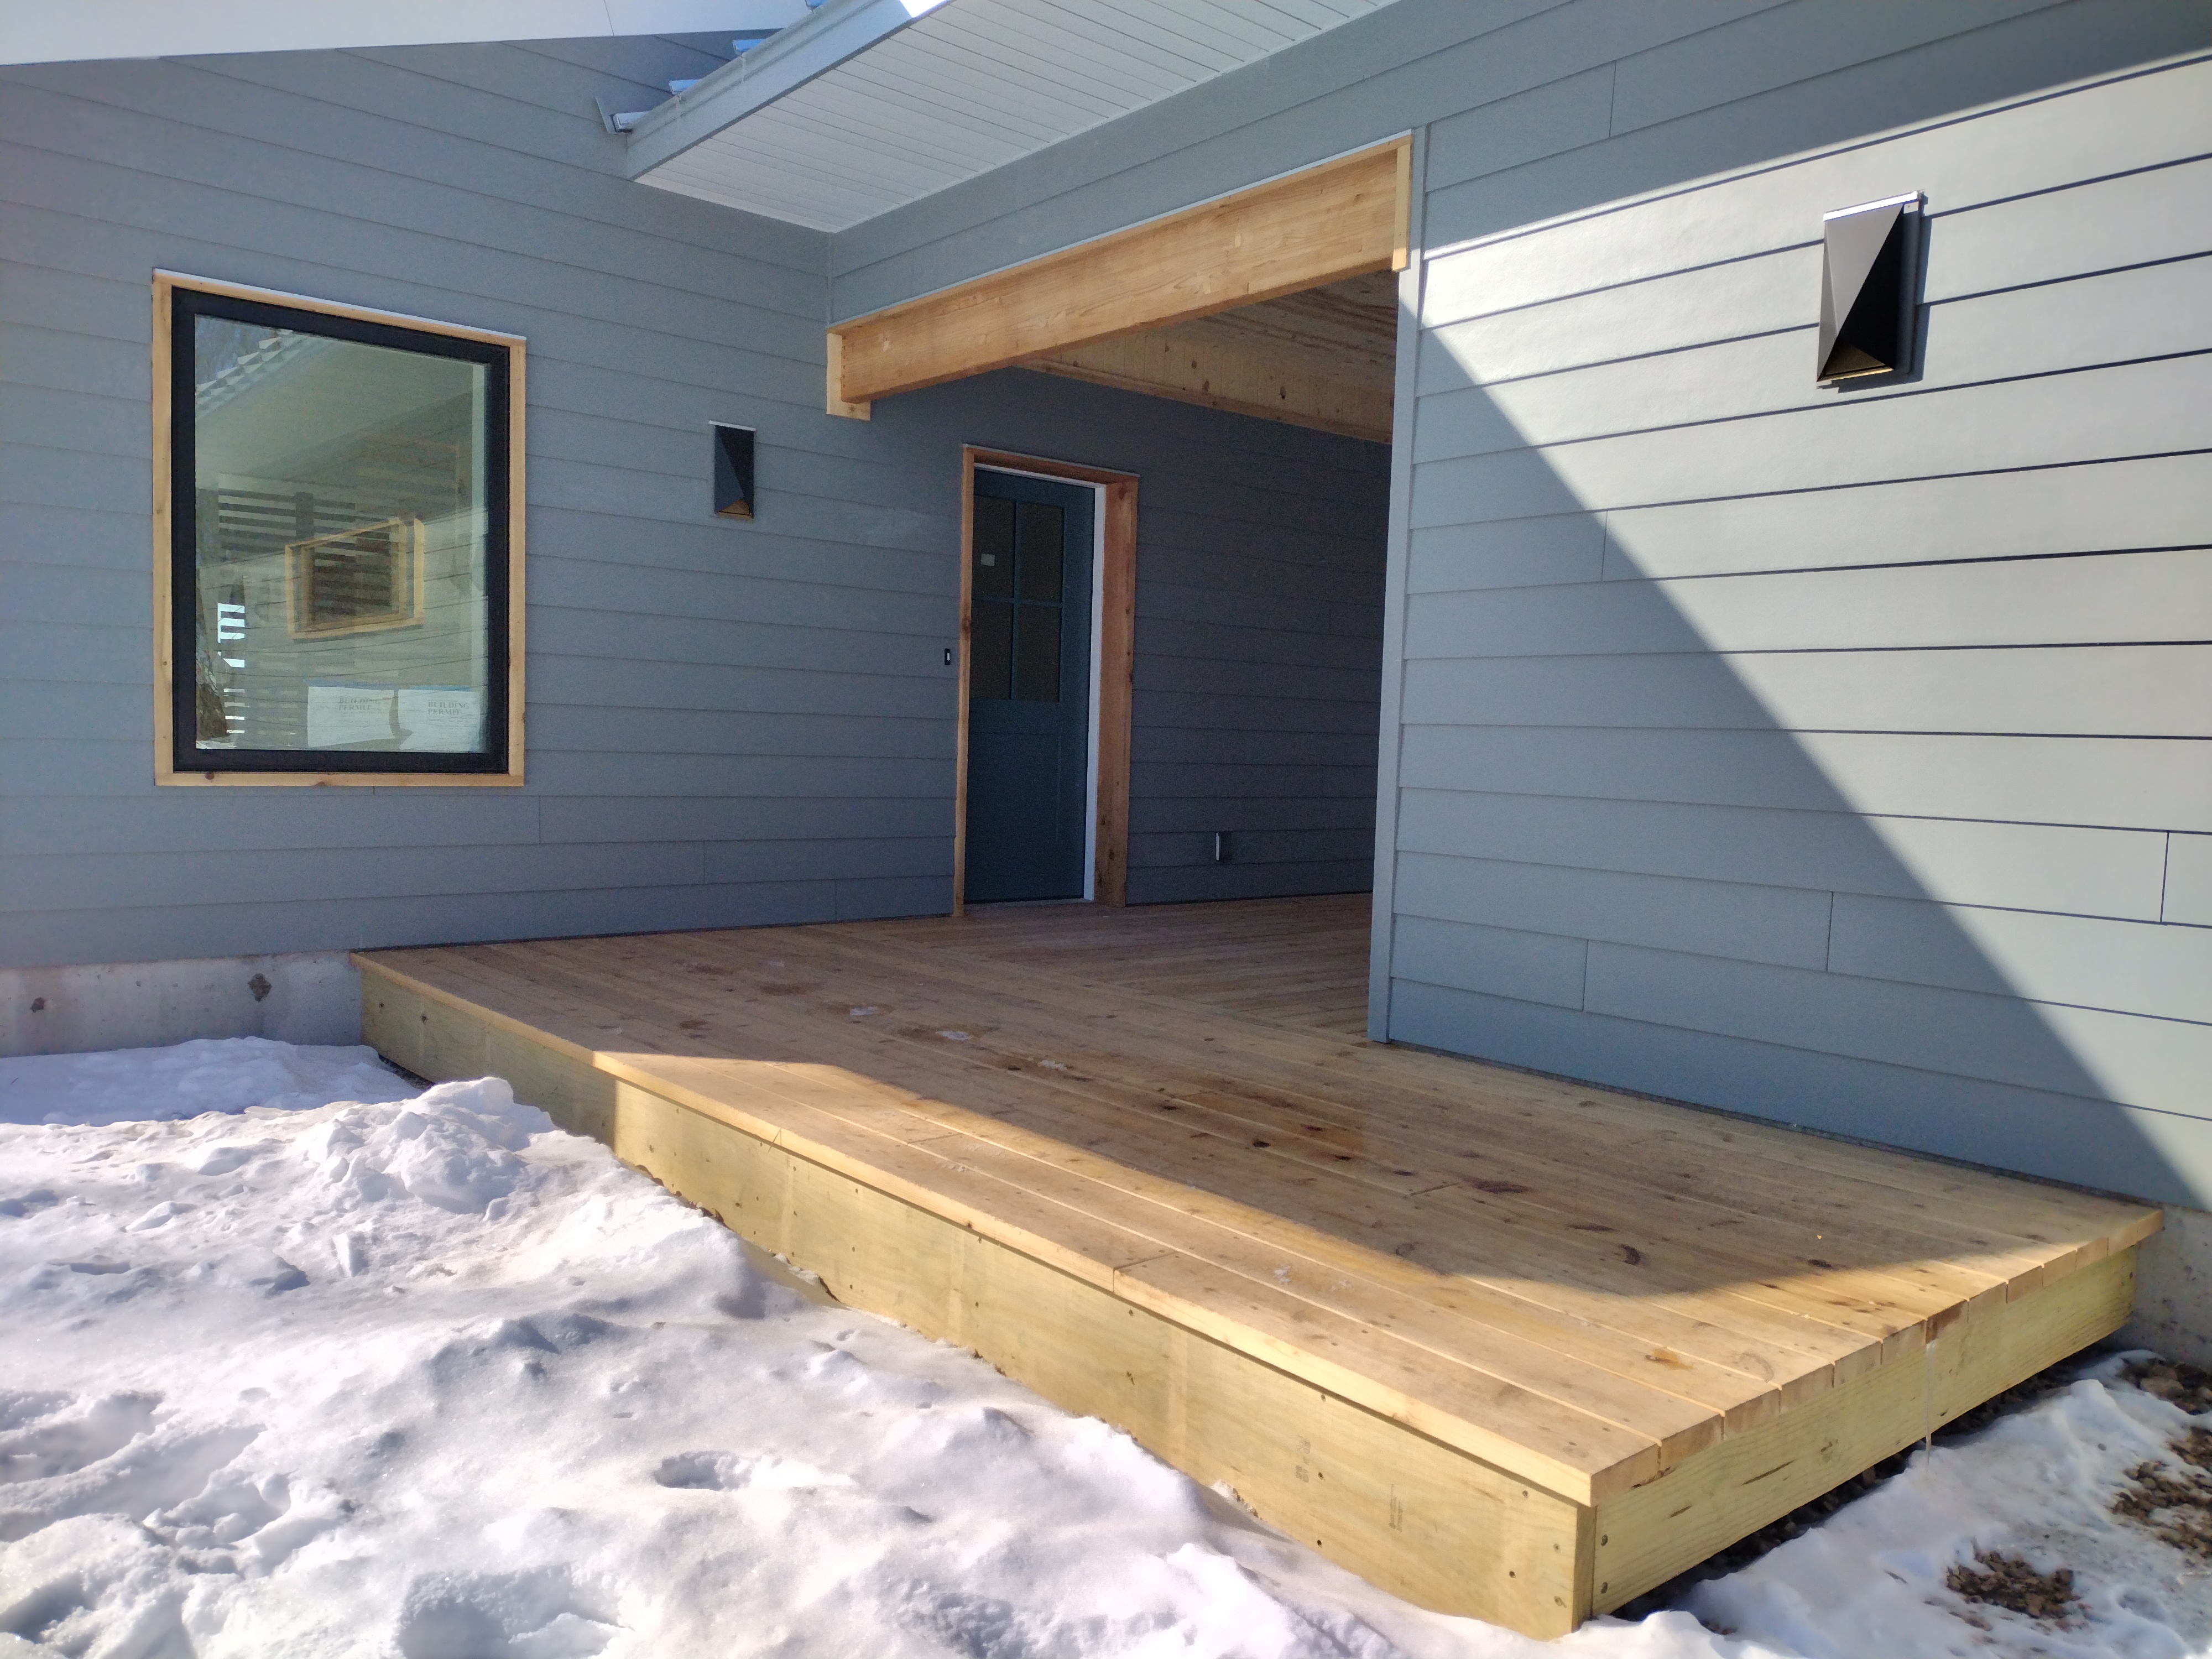
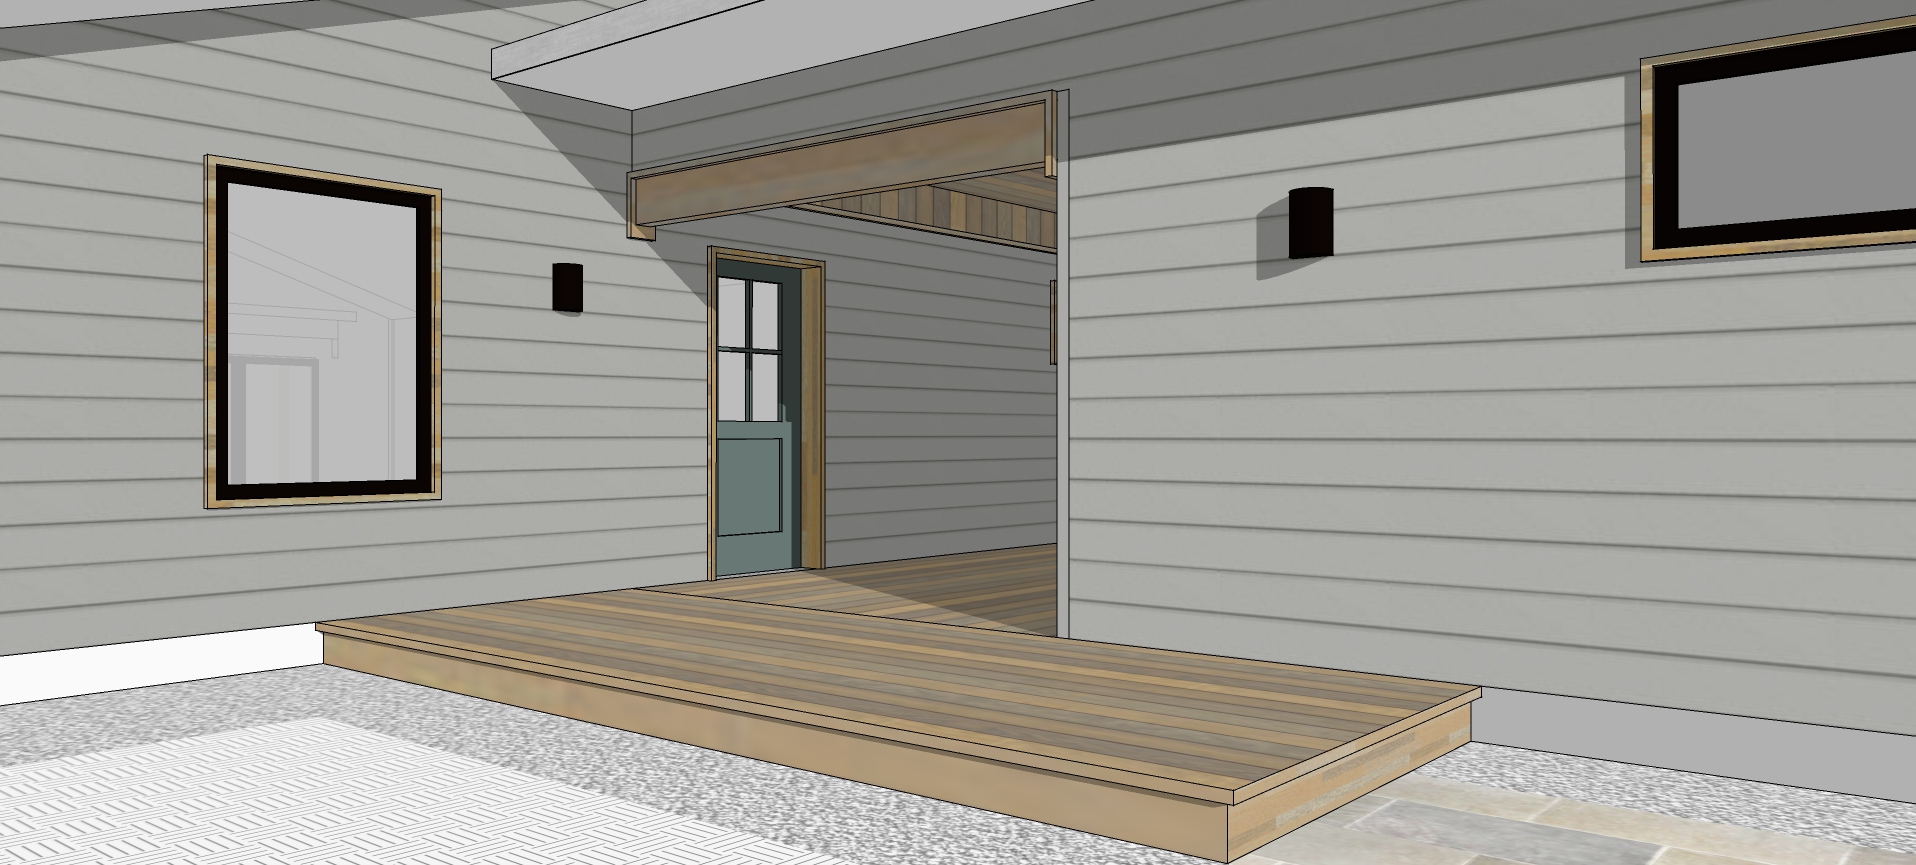
It’s rewarding to see my design from a year ago finally built (drawing on right). The breezeway turned out beautifully, and features 2×6 cedar decking and a pine shiplap ceiling.The front door is of fiberglass construction from Therma-Tru, with a factory painted finish in the same hue as the siding, but darker.
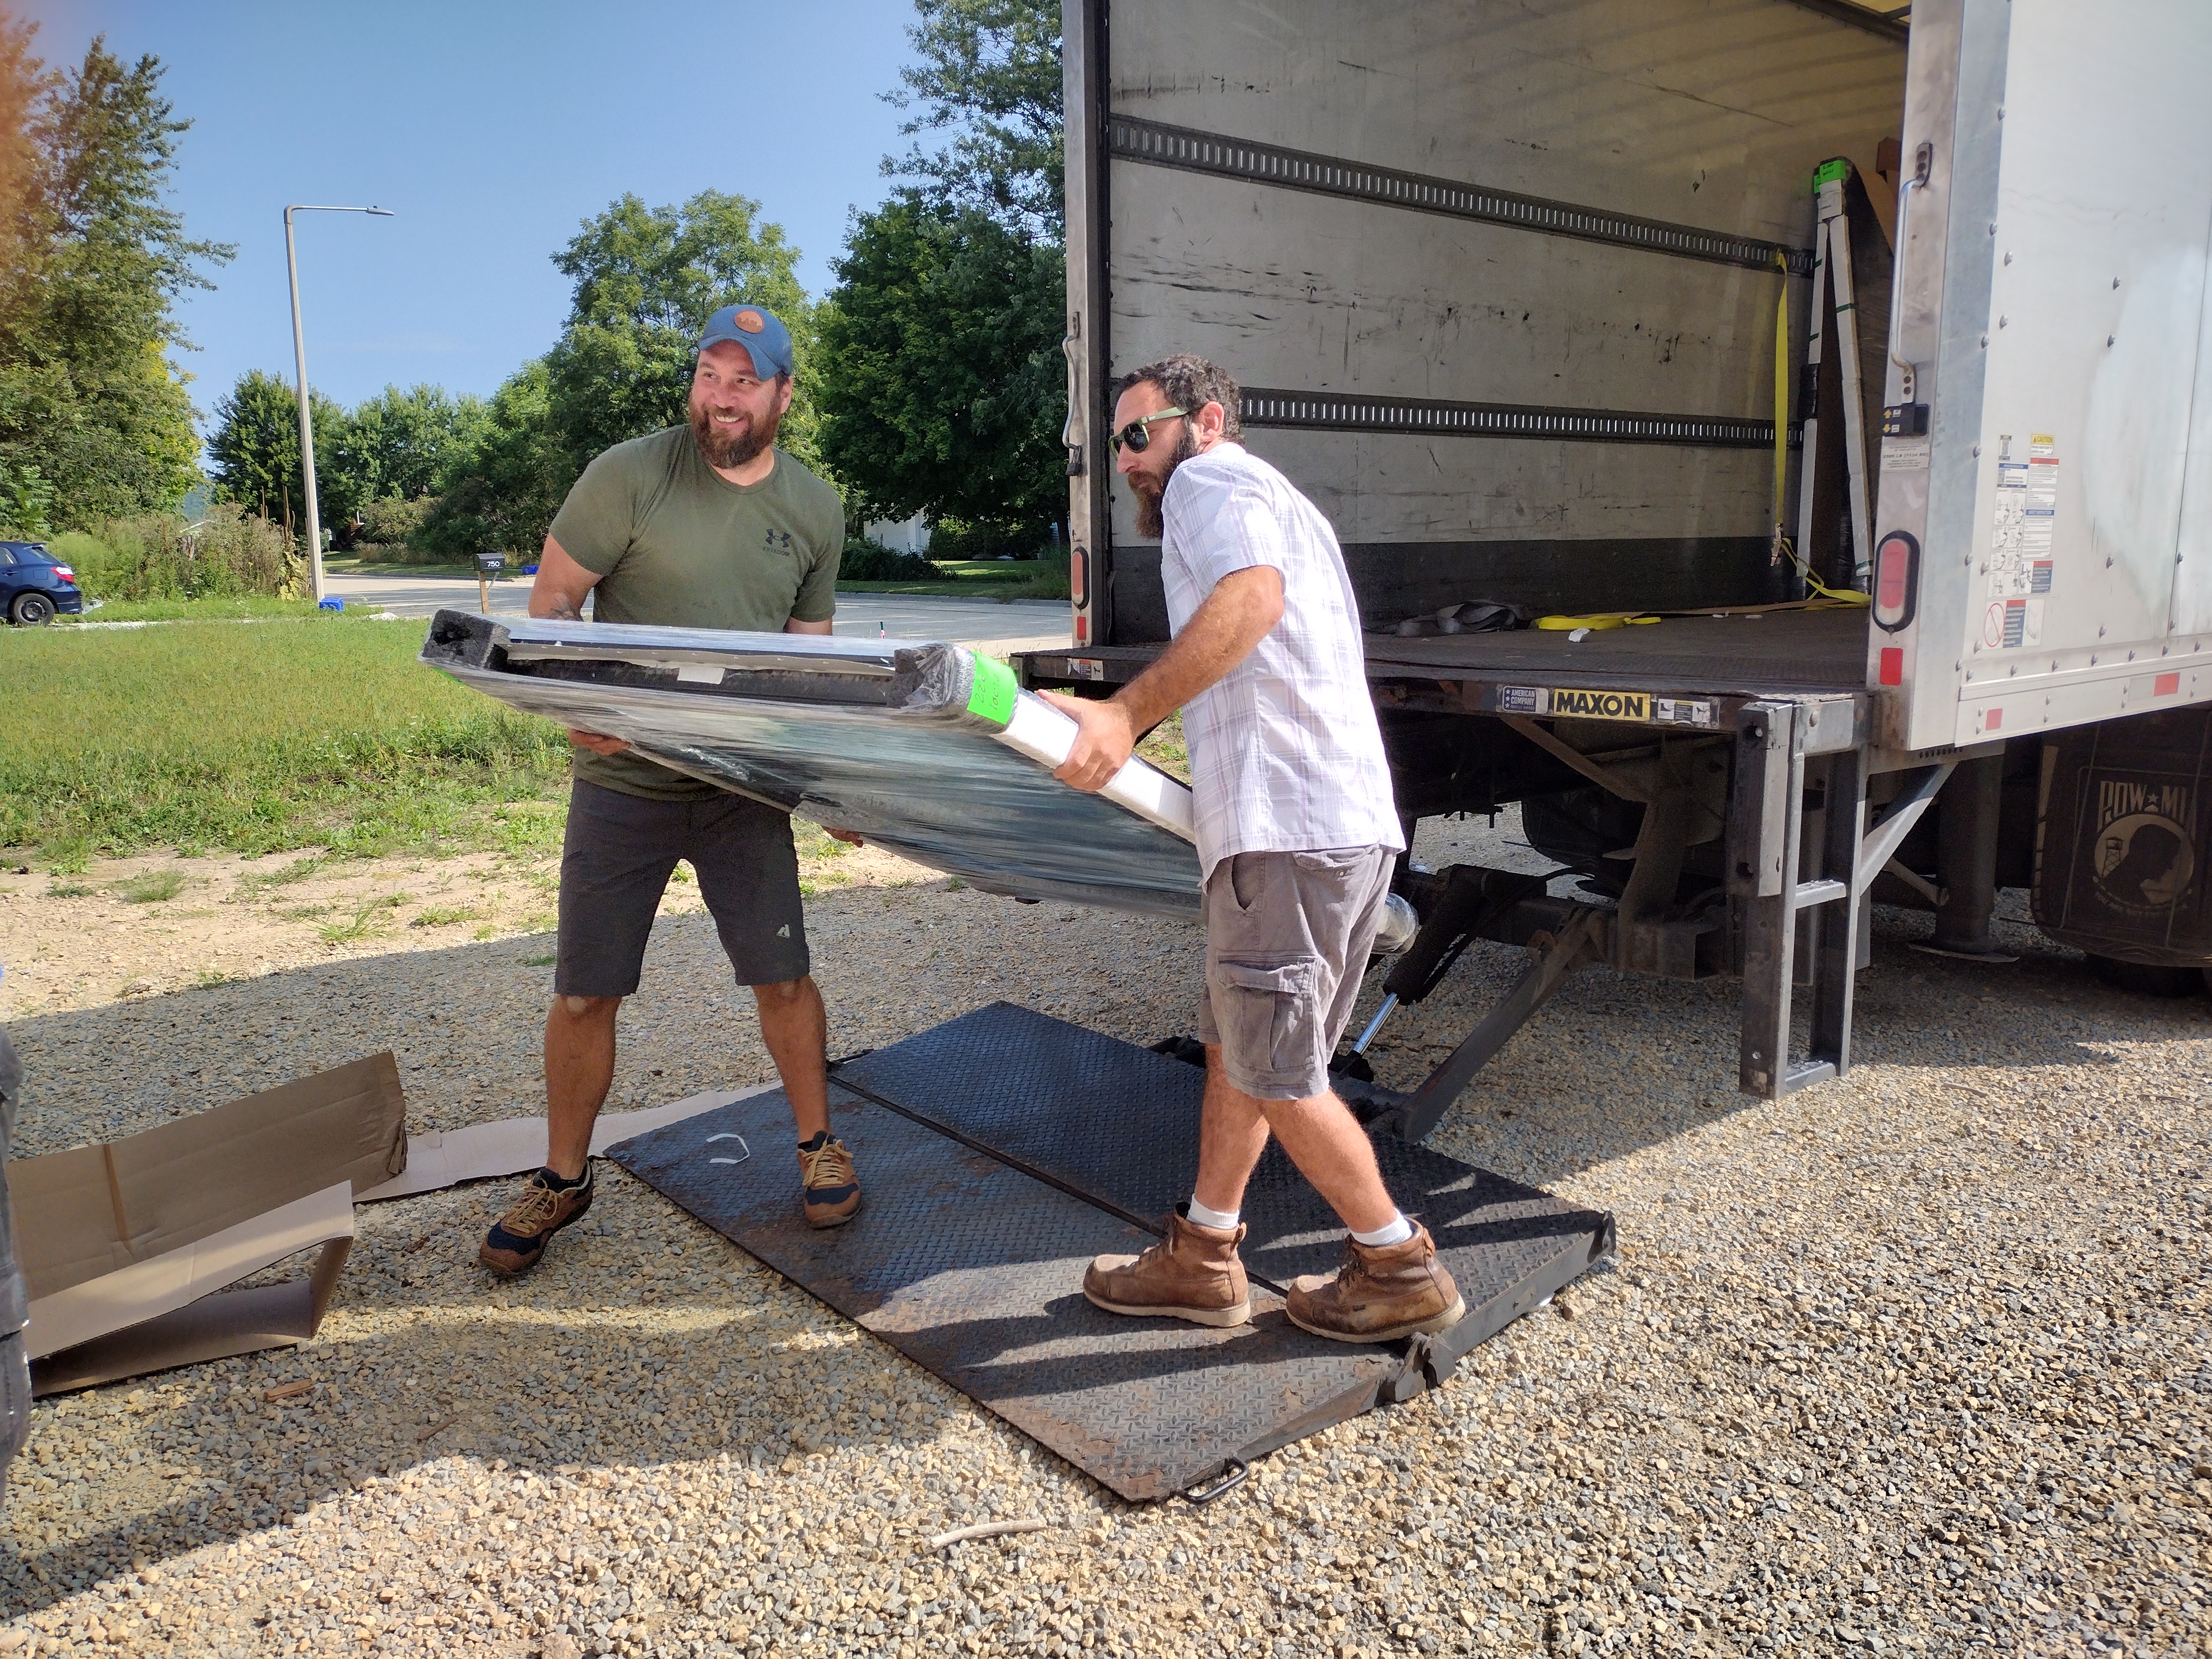
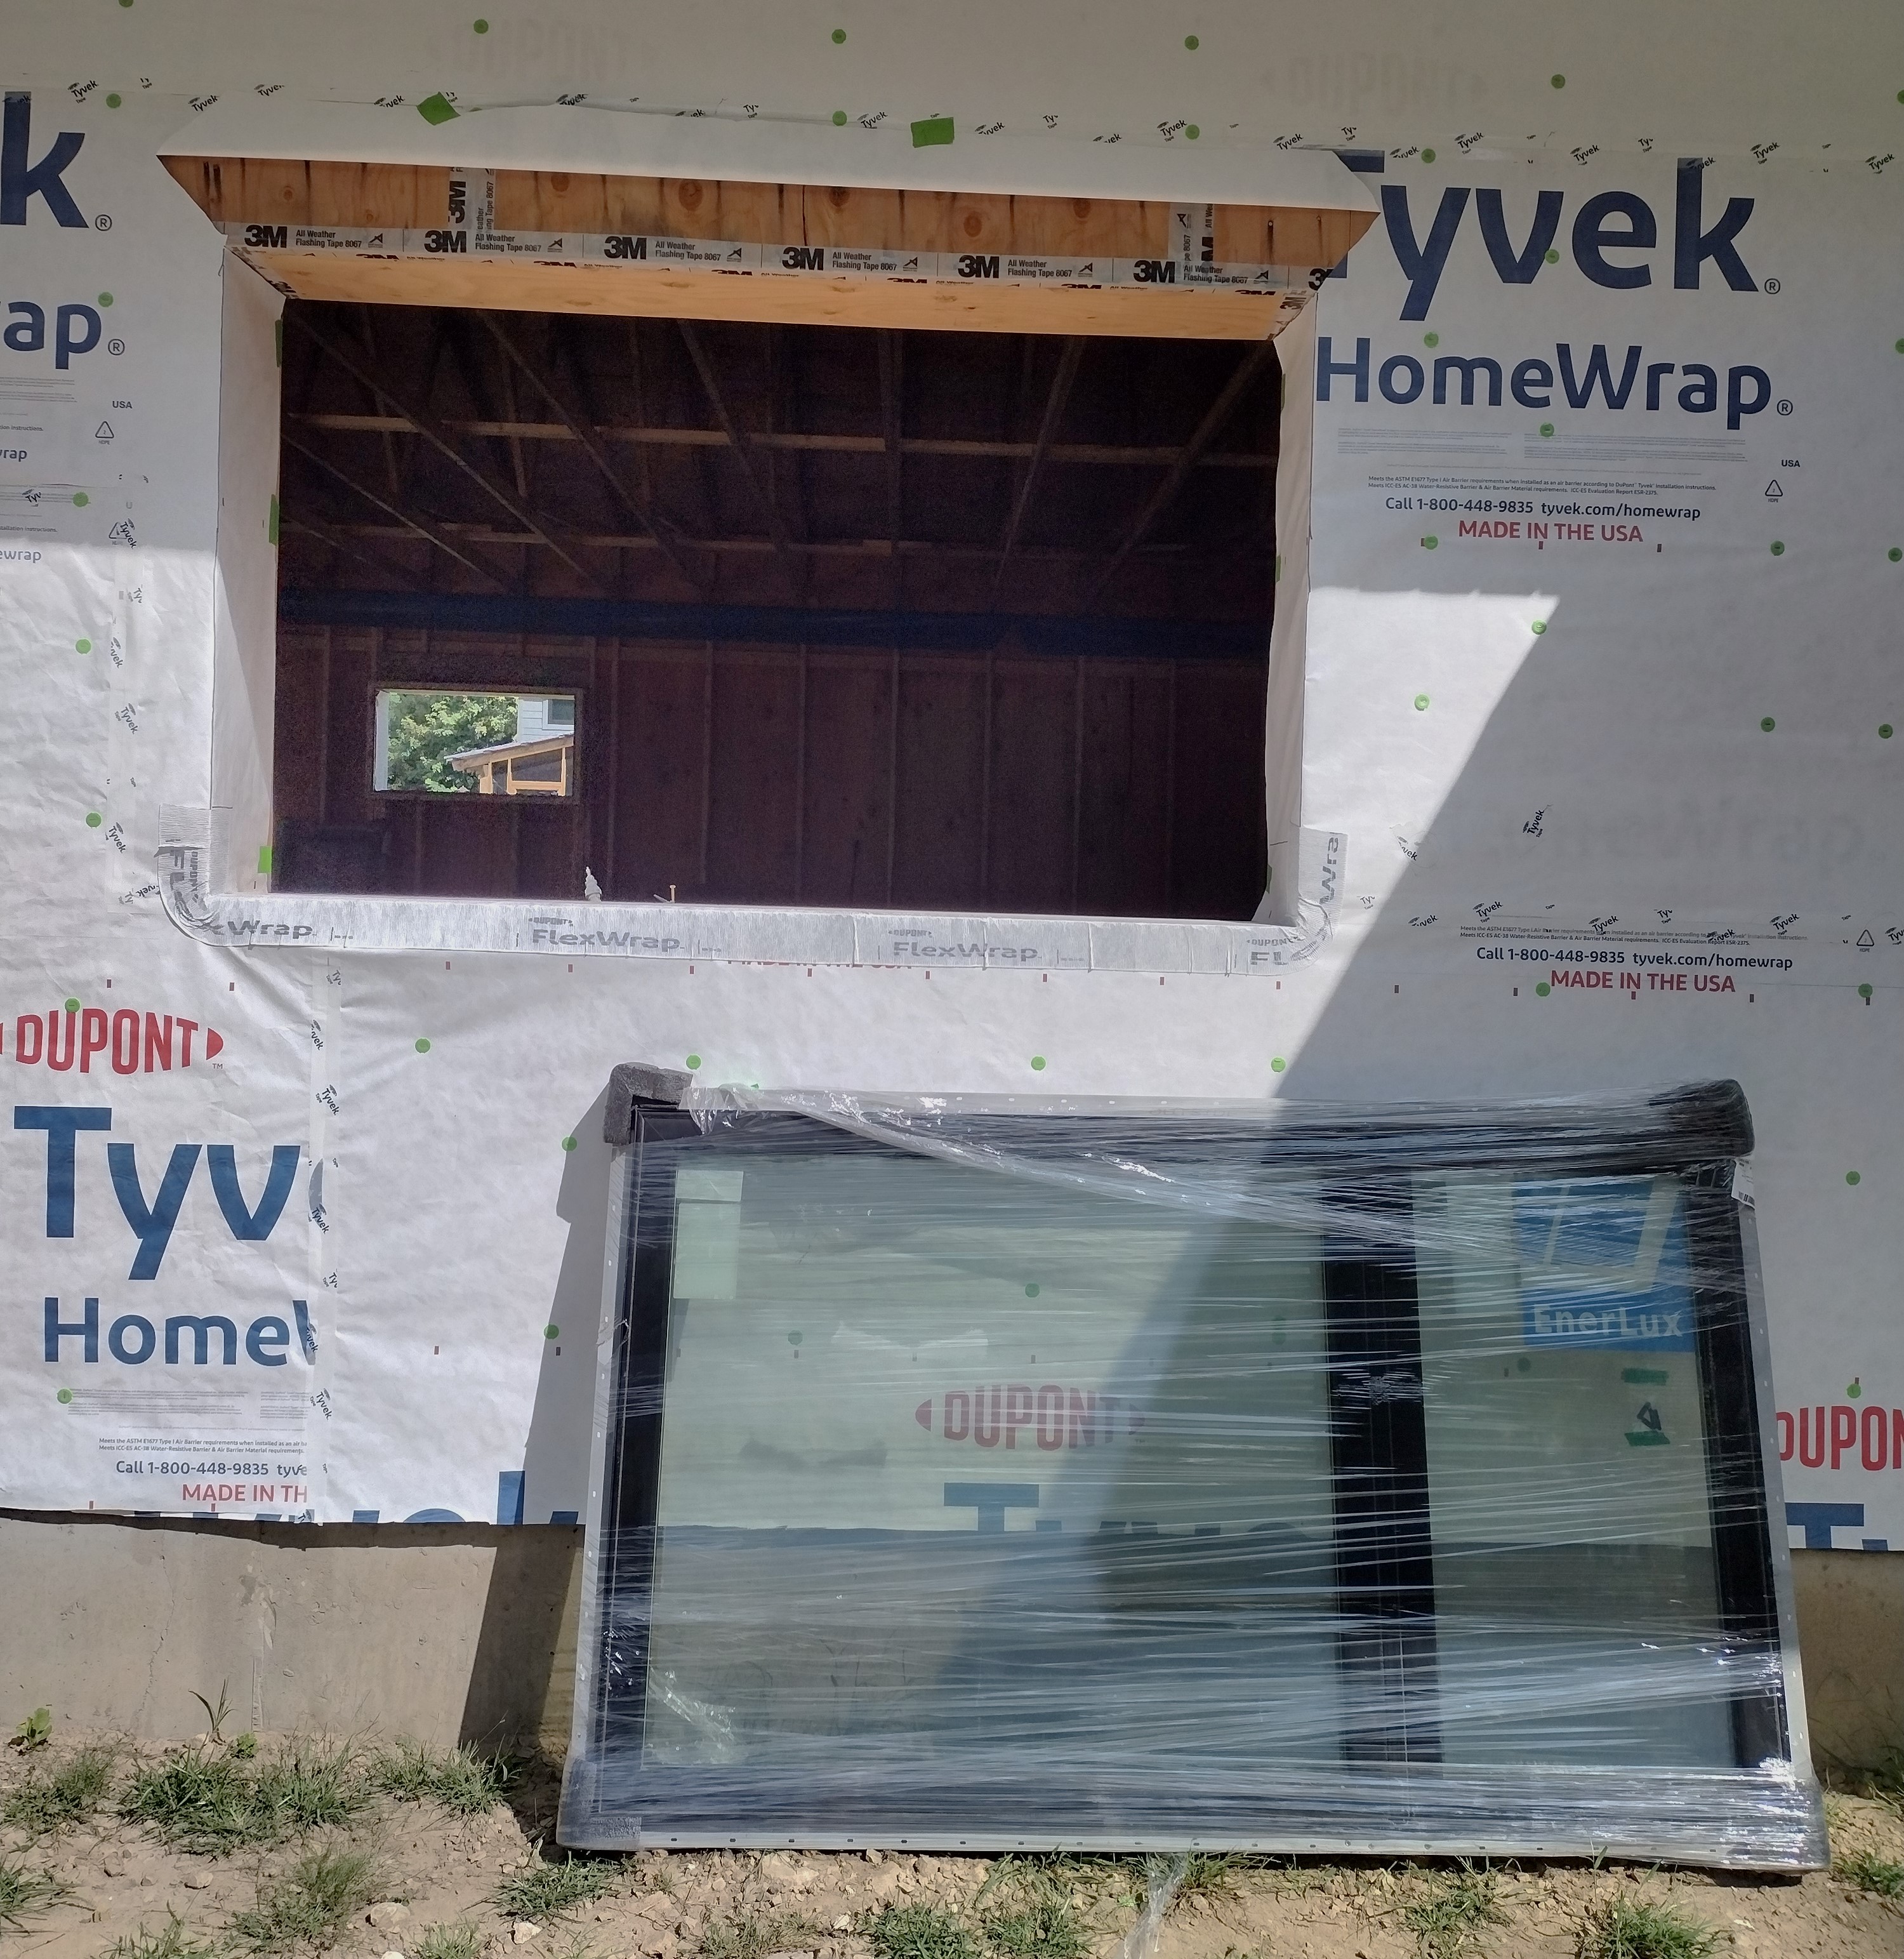
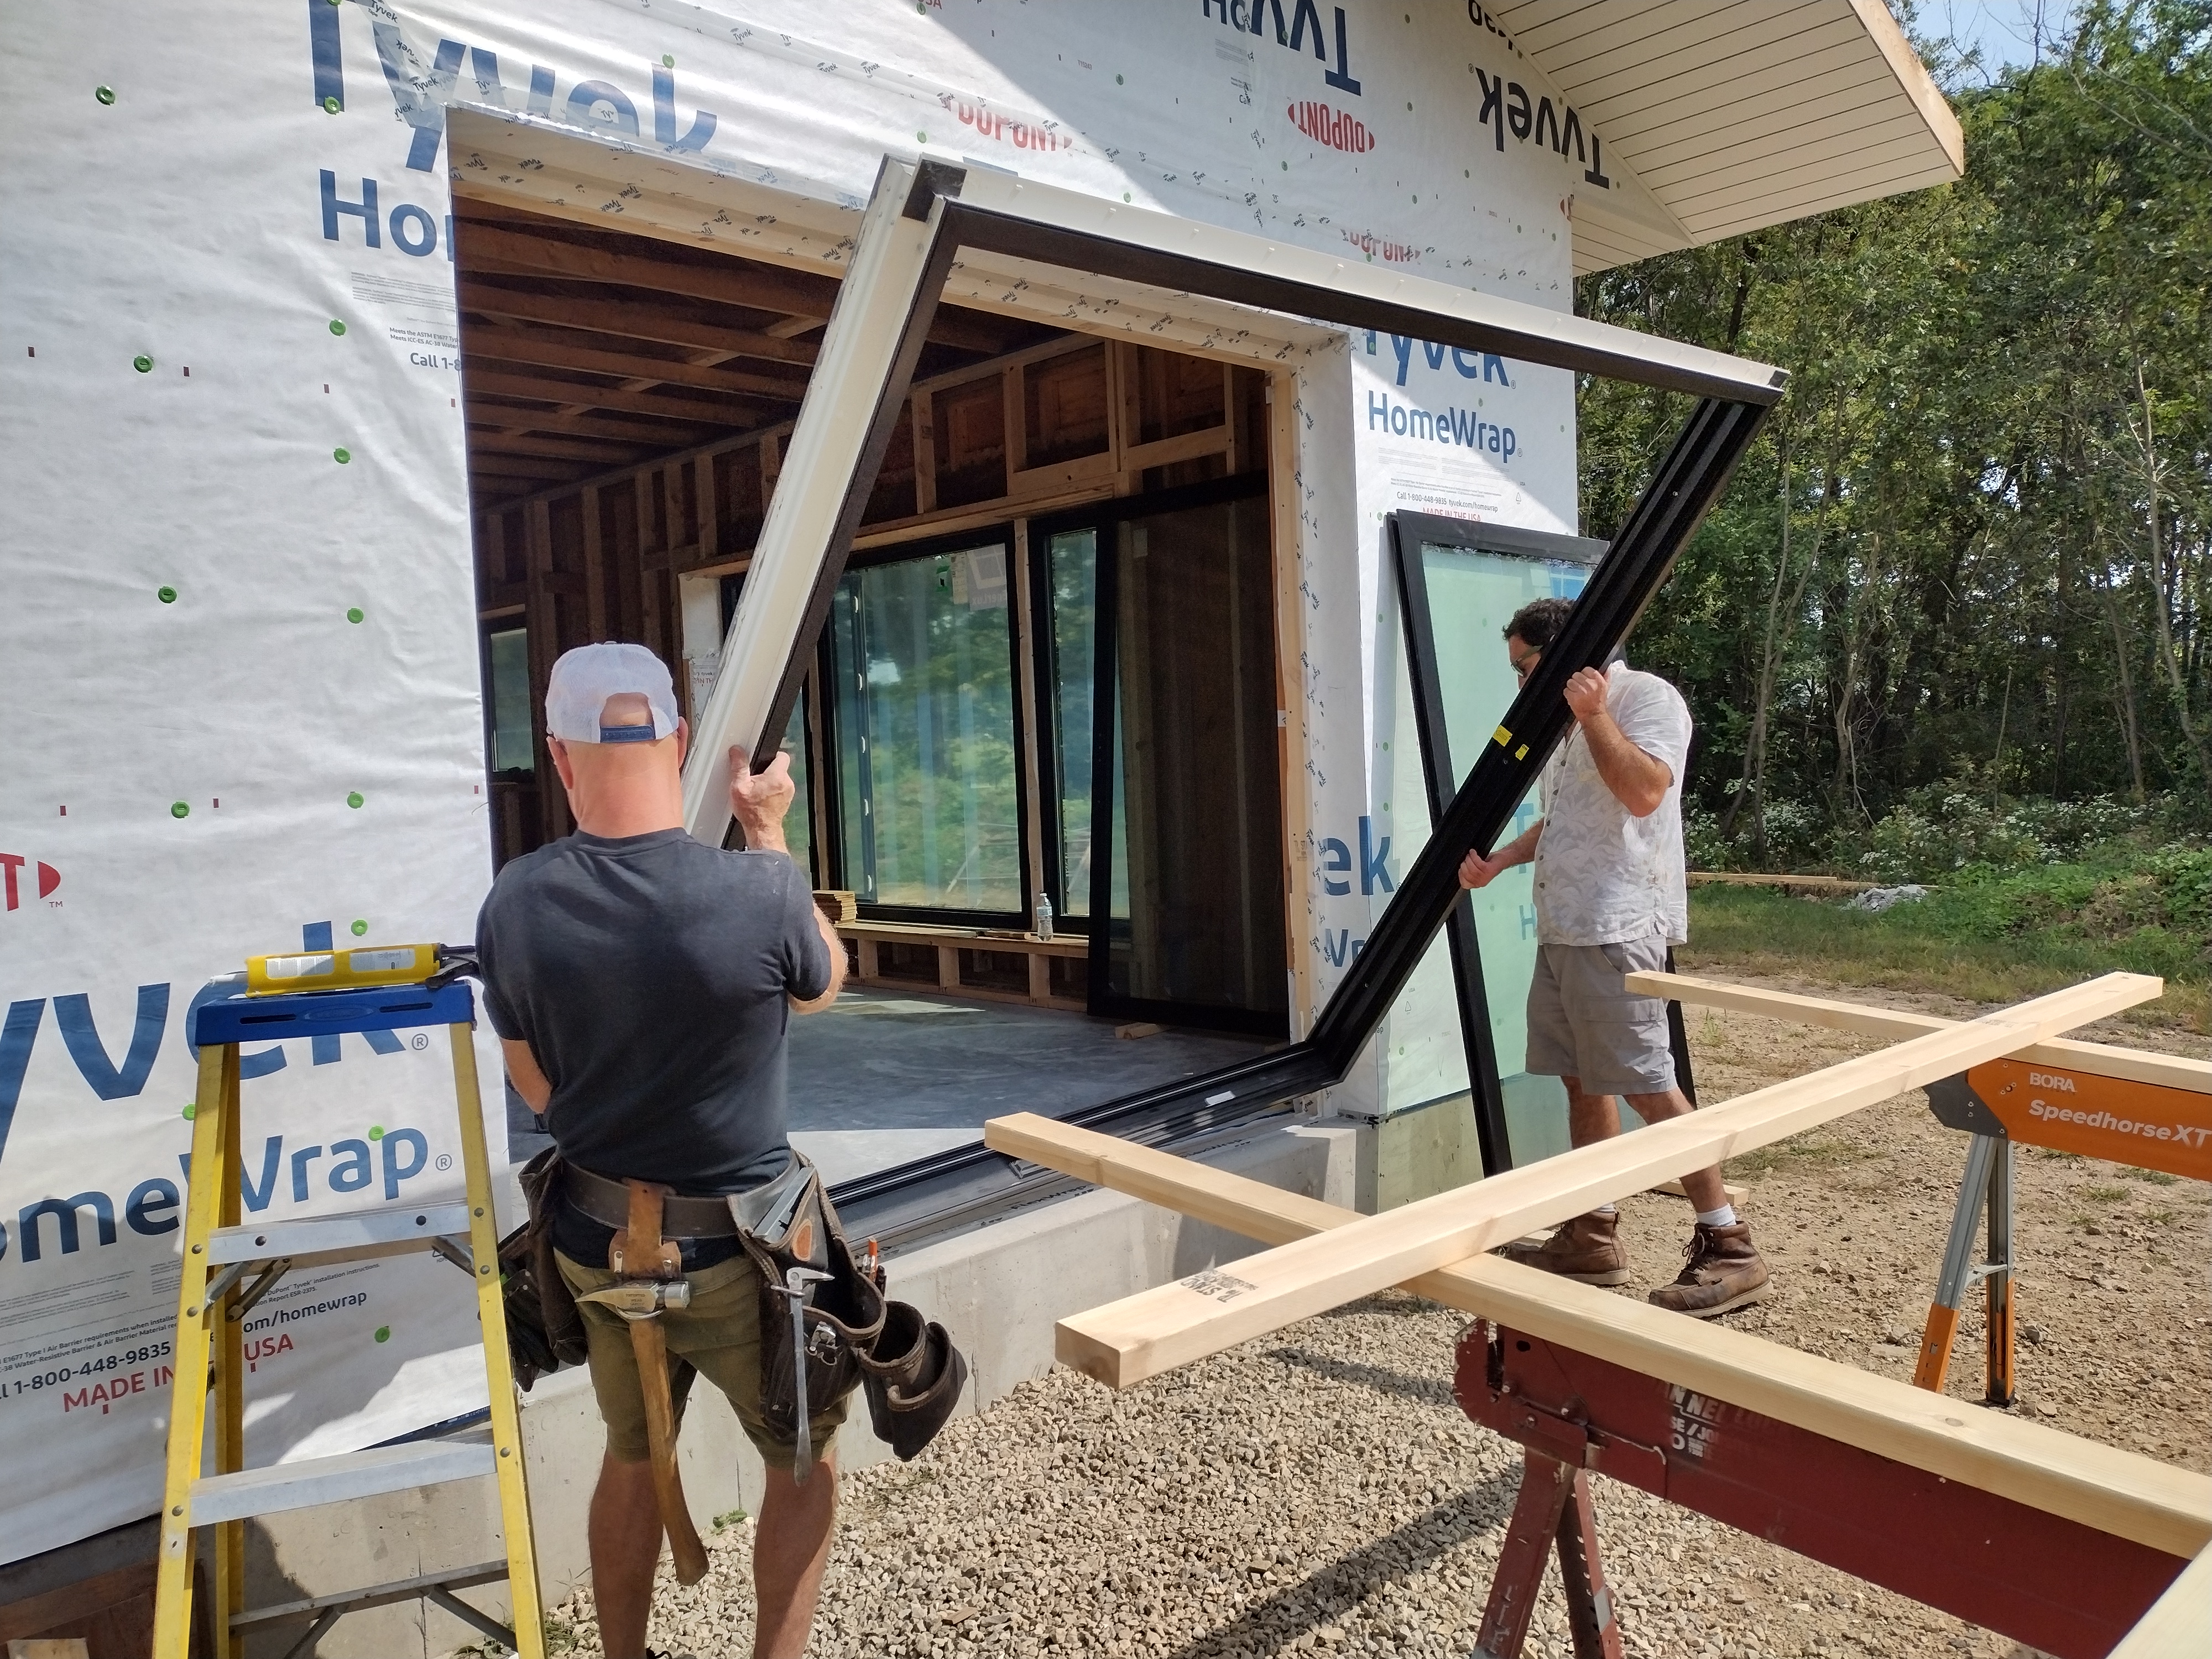
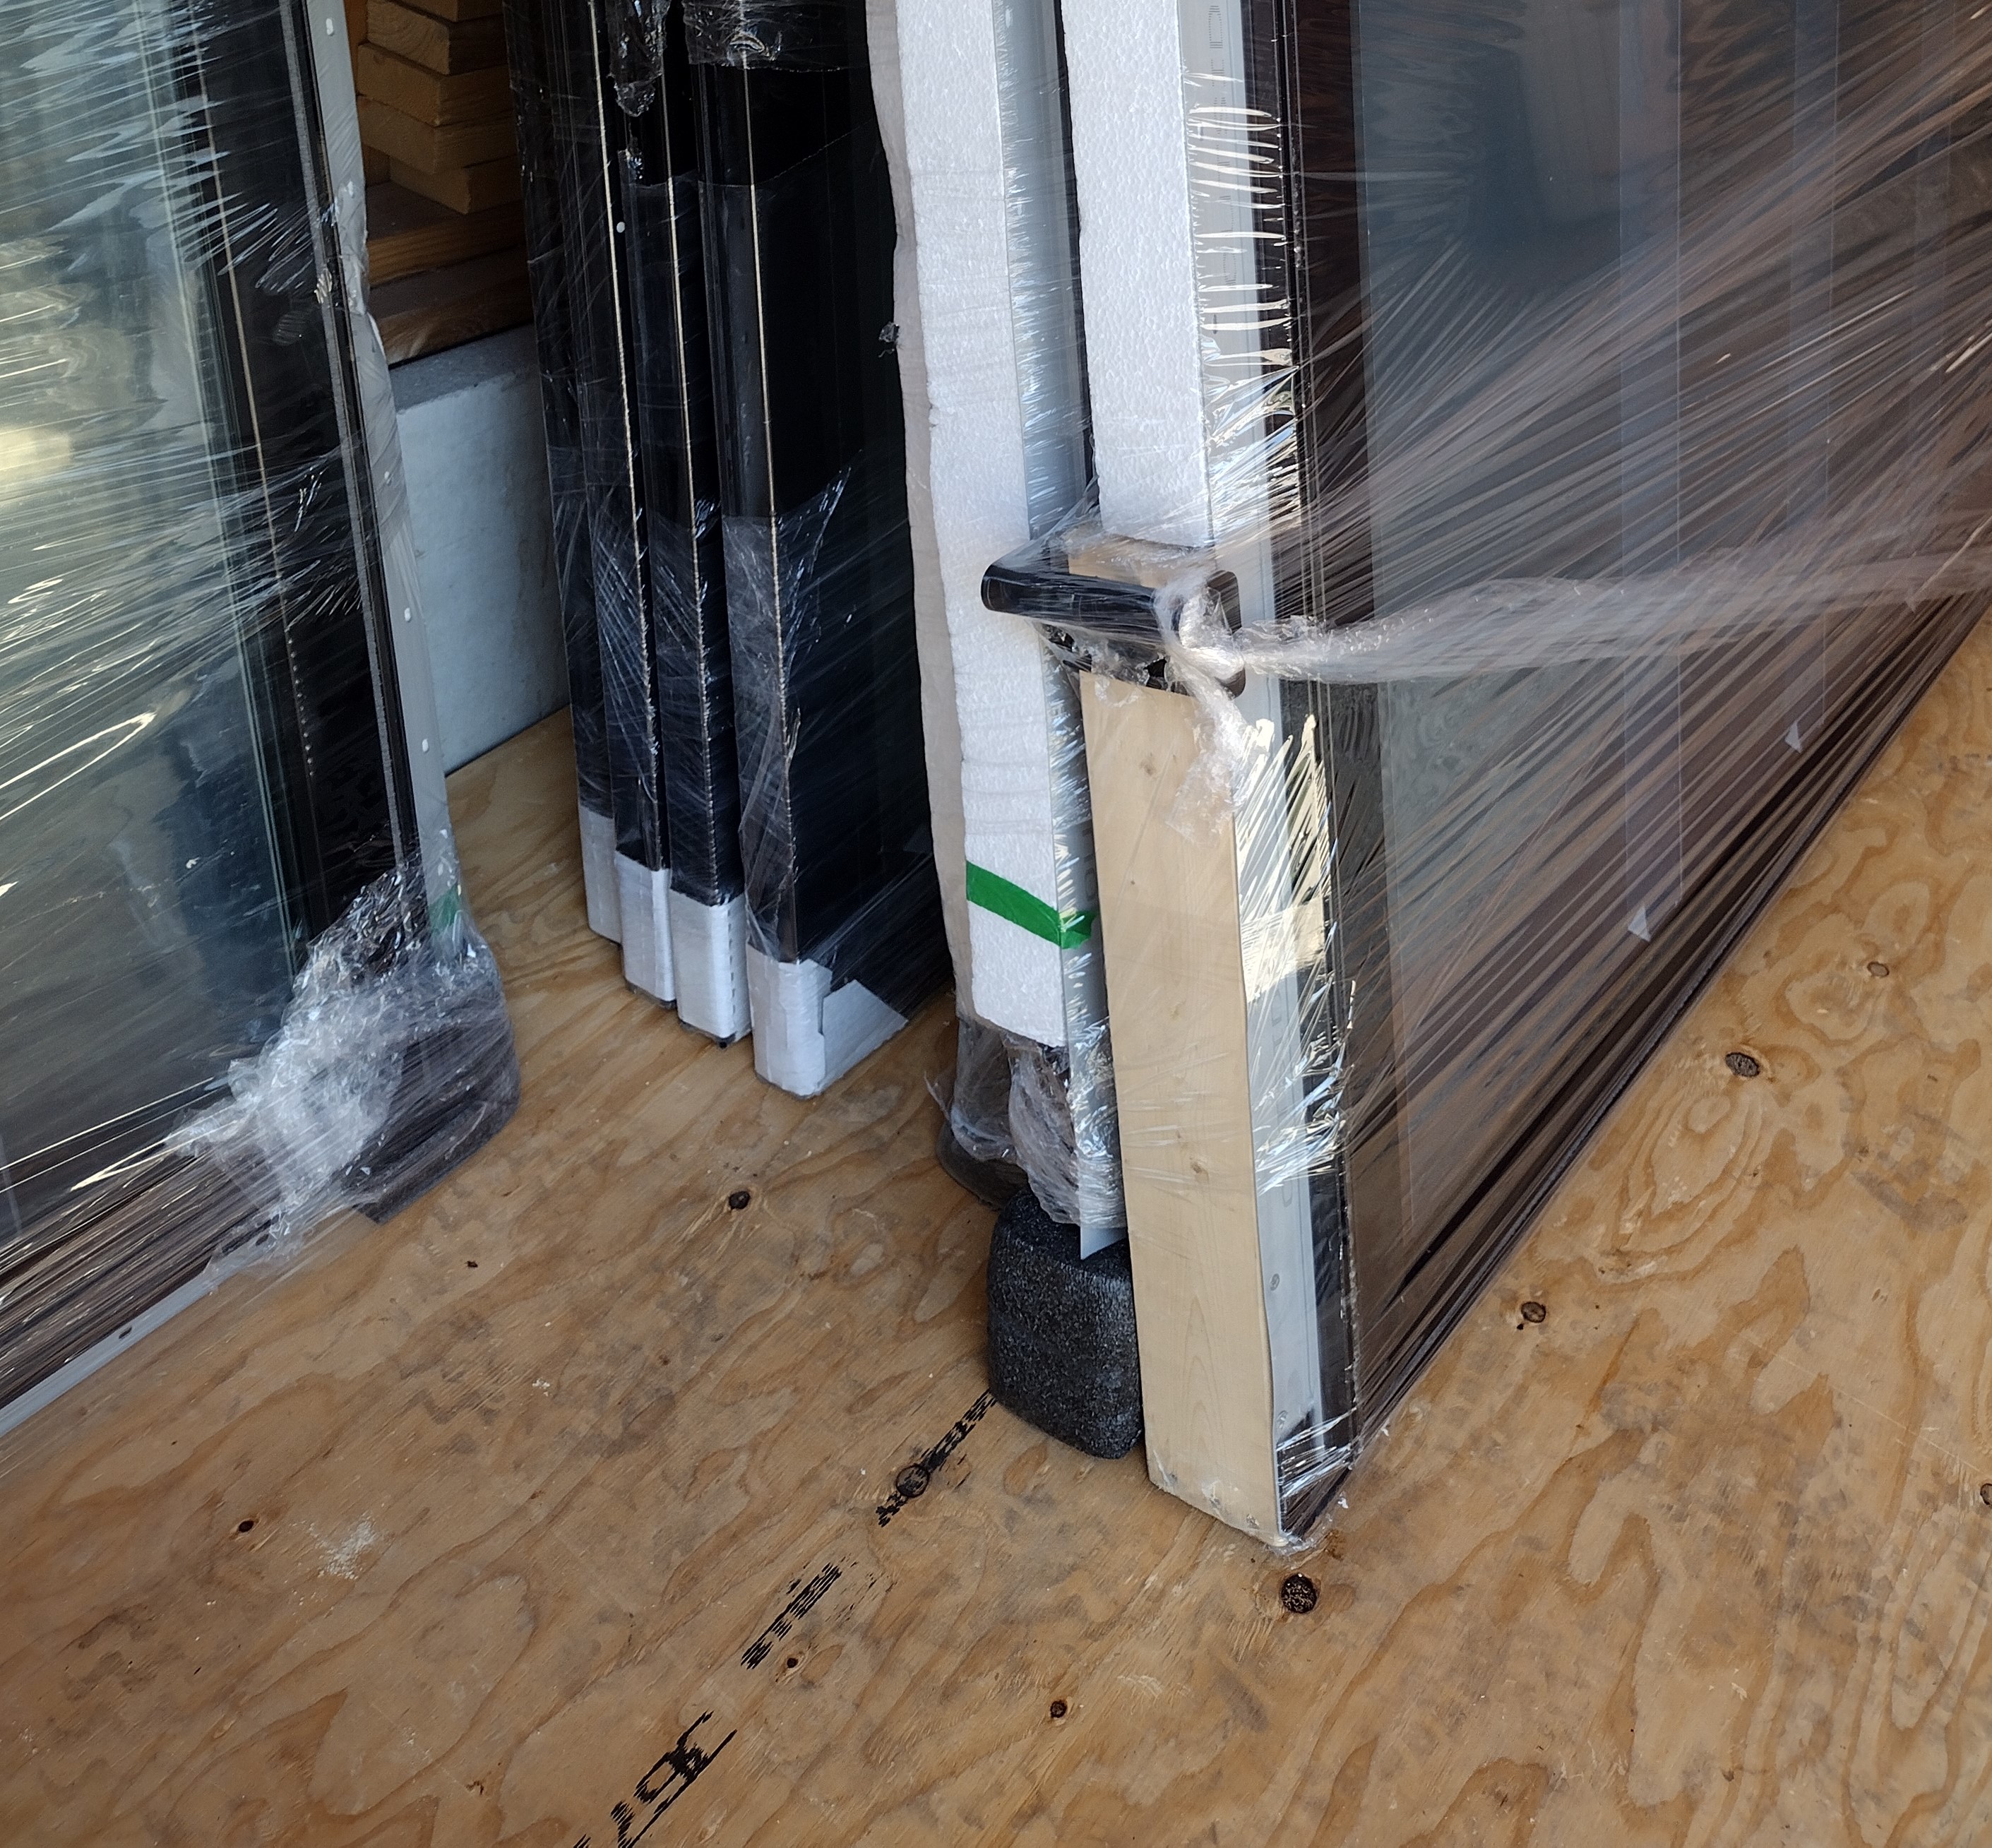
August 23 – September 6: Taking delivery of a house full of new windows and doors comes with an air of celebration. It means the hard work of getting the walls and roof up is done and the worry of securing housewrap and tarps over the awaiting holes is over. From inside, we’ll finally be able to appreciate the views, framed by the window sash, that will be enjoyed for years to come.
Mike Larson and Cale Armstrong take delivery.
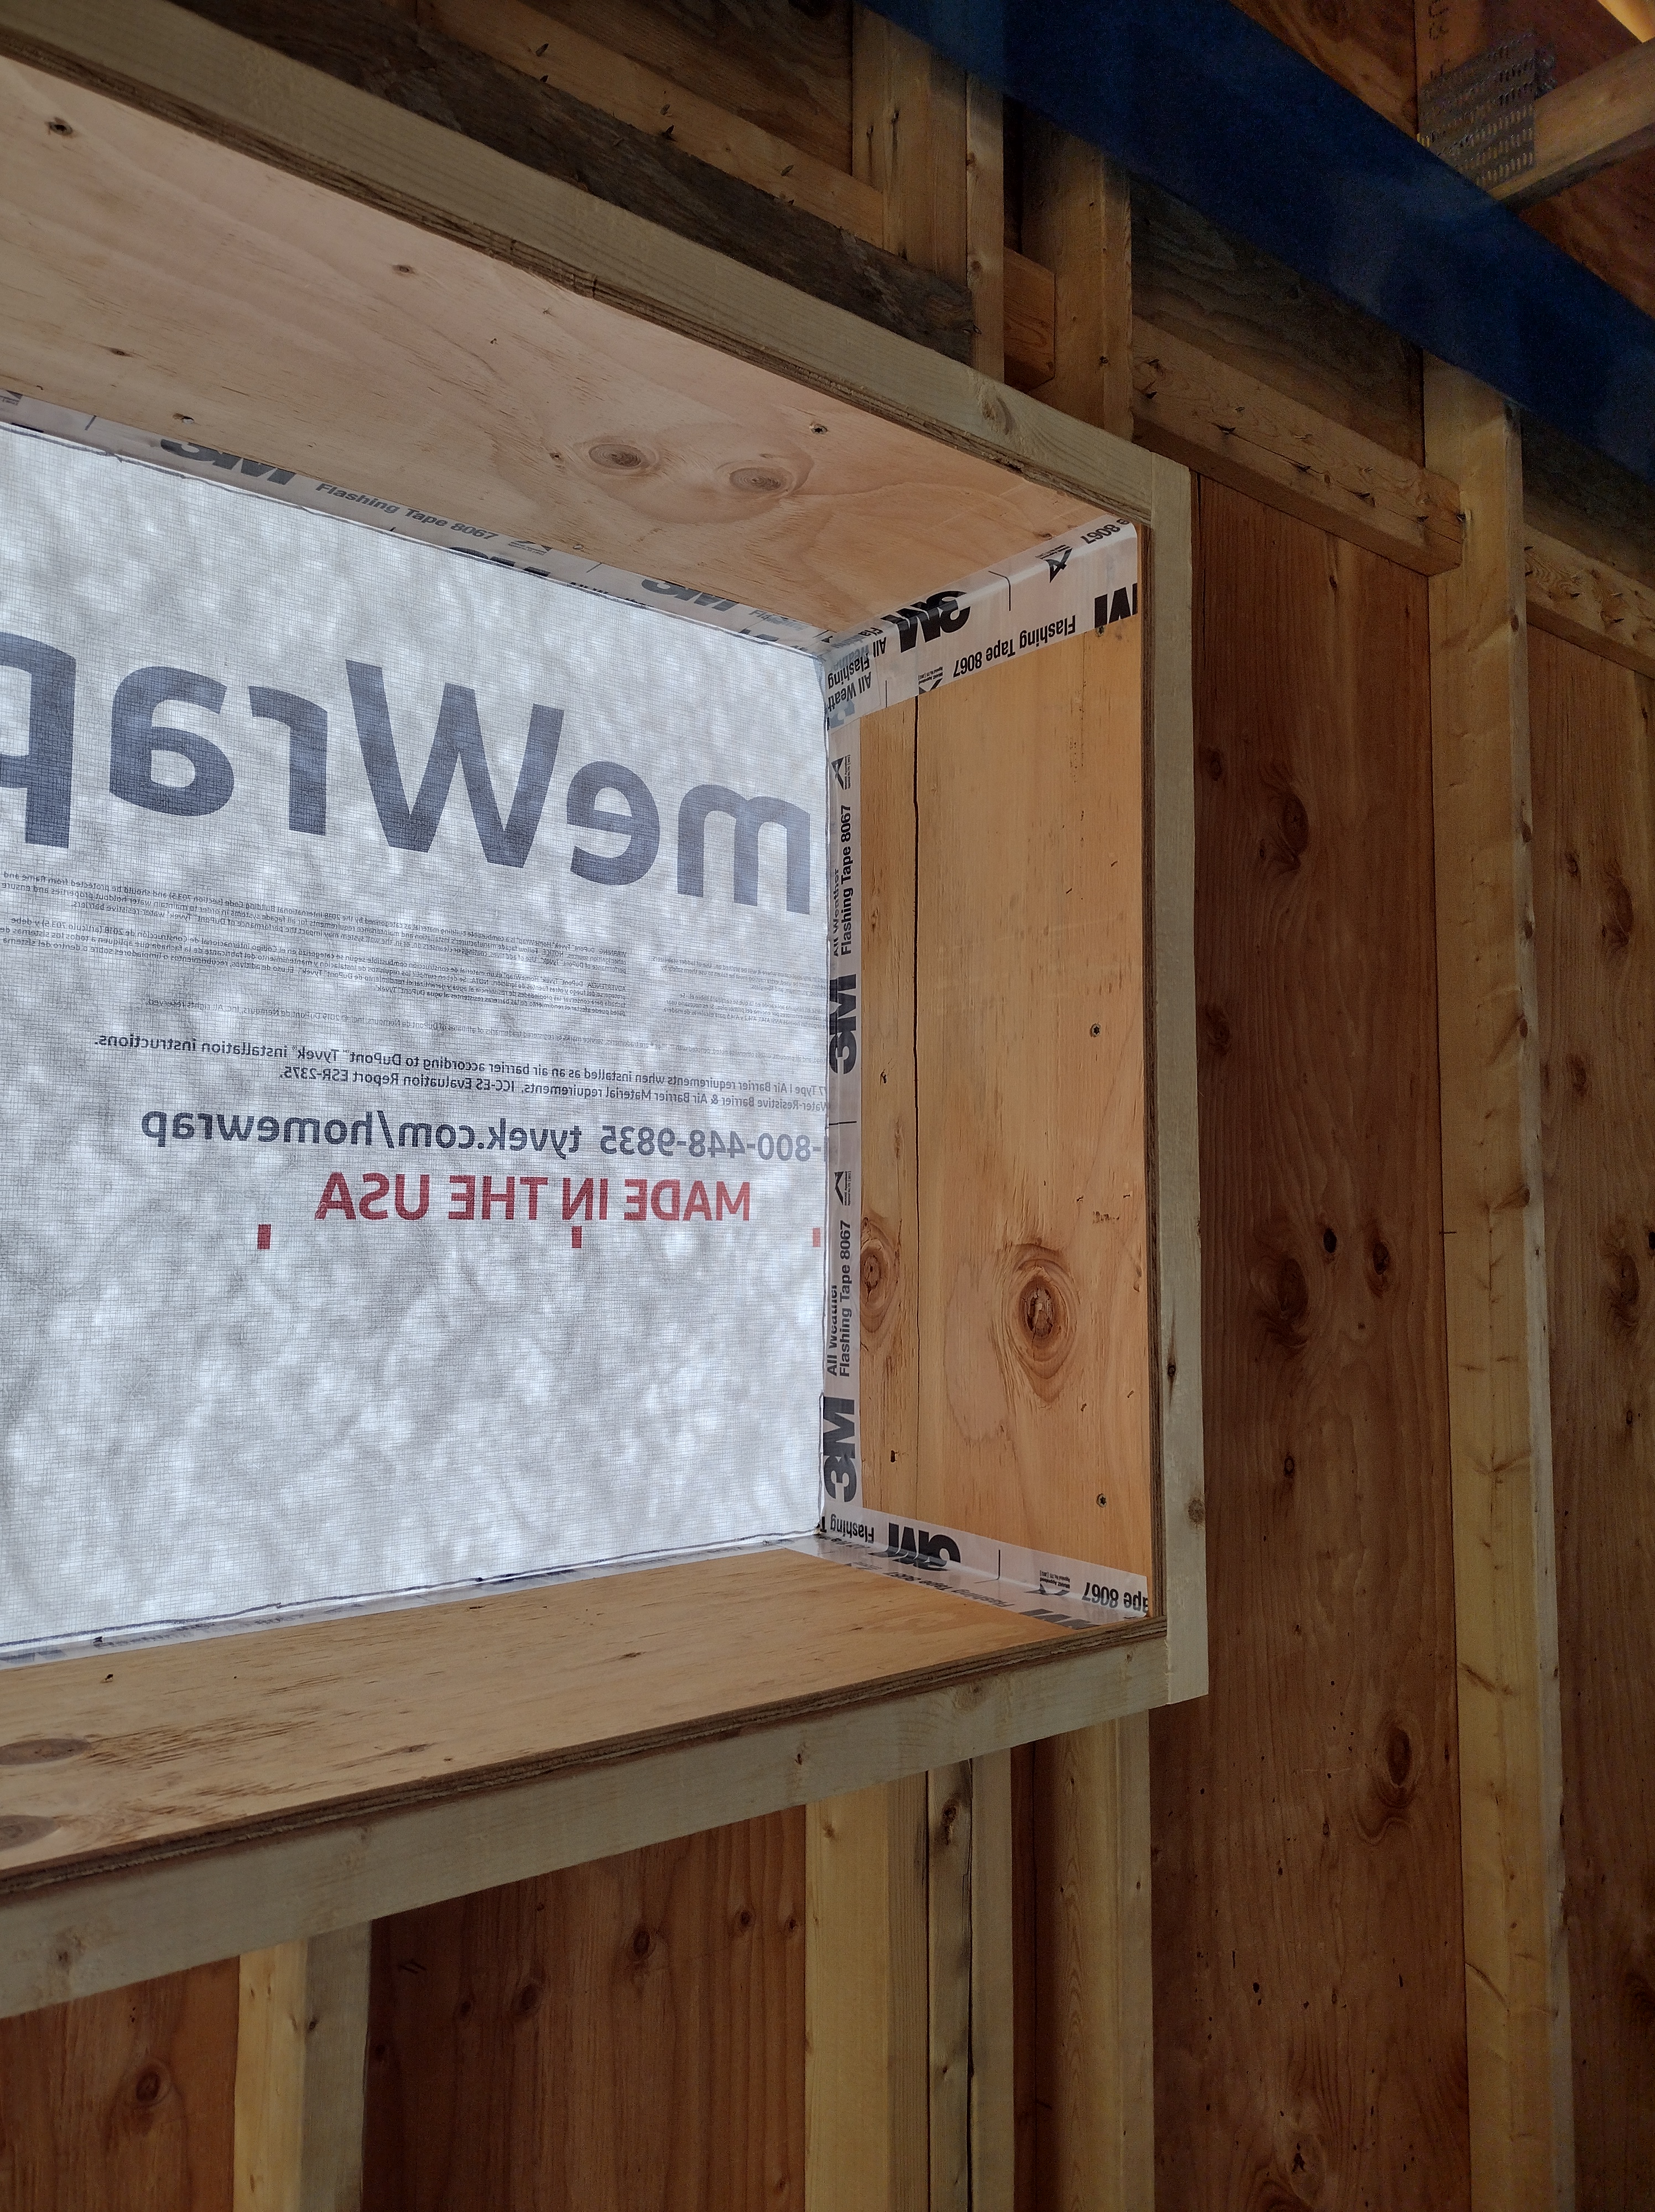
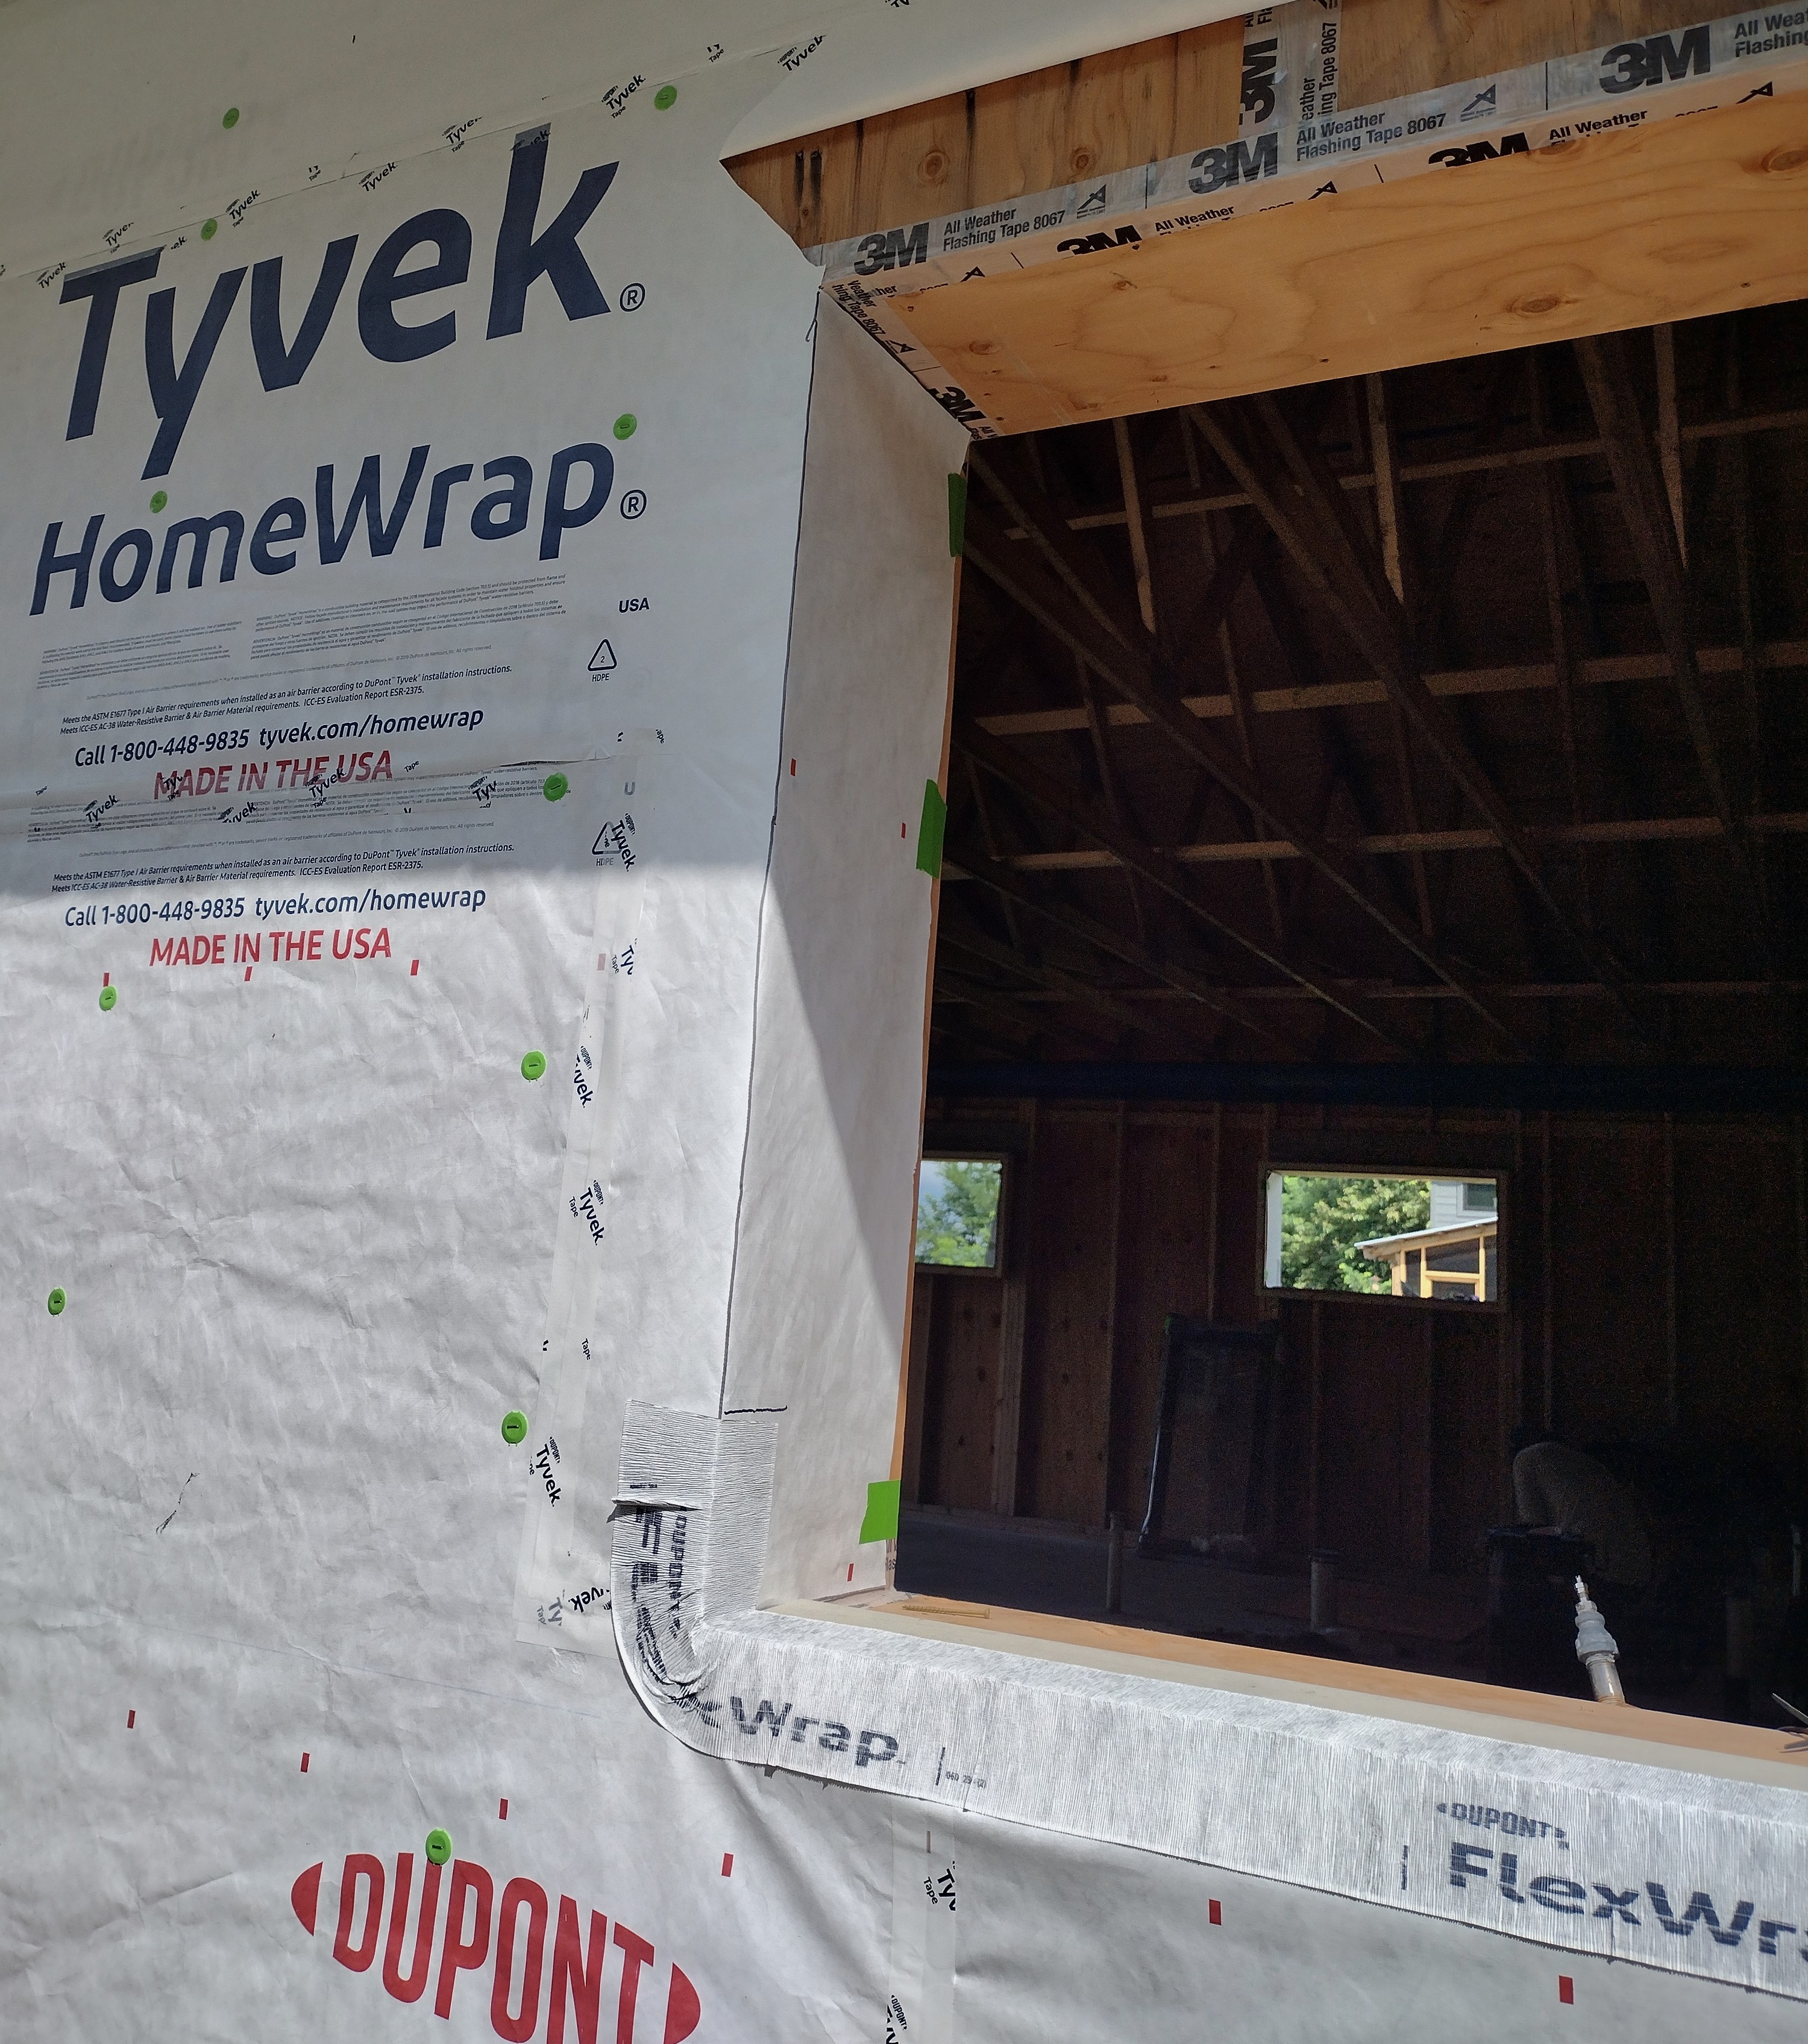
The carpentry crew got to work on the window “bucks” : a frame lined with 12″ wide rips of plywood. The “weekend warrior” crew taped the plywood seams, nailed down a sloped sill (leftover synthetic clapboard from a previous project), and wrapped DuPont’s FlexWrap over the sill and 12 inches up the jambs.
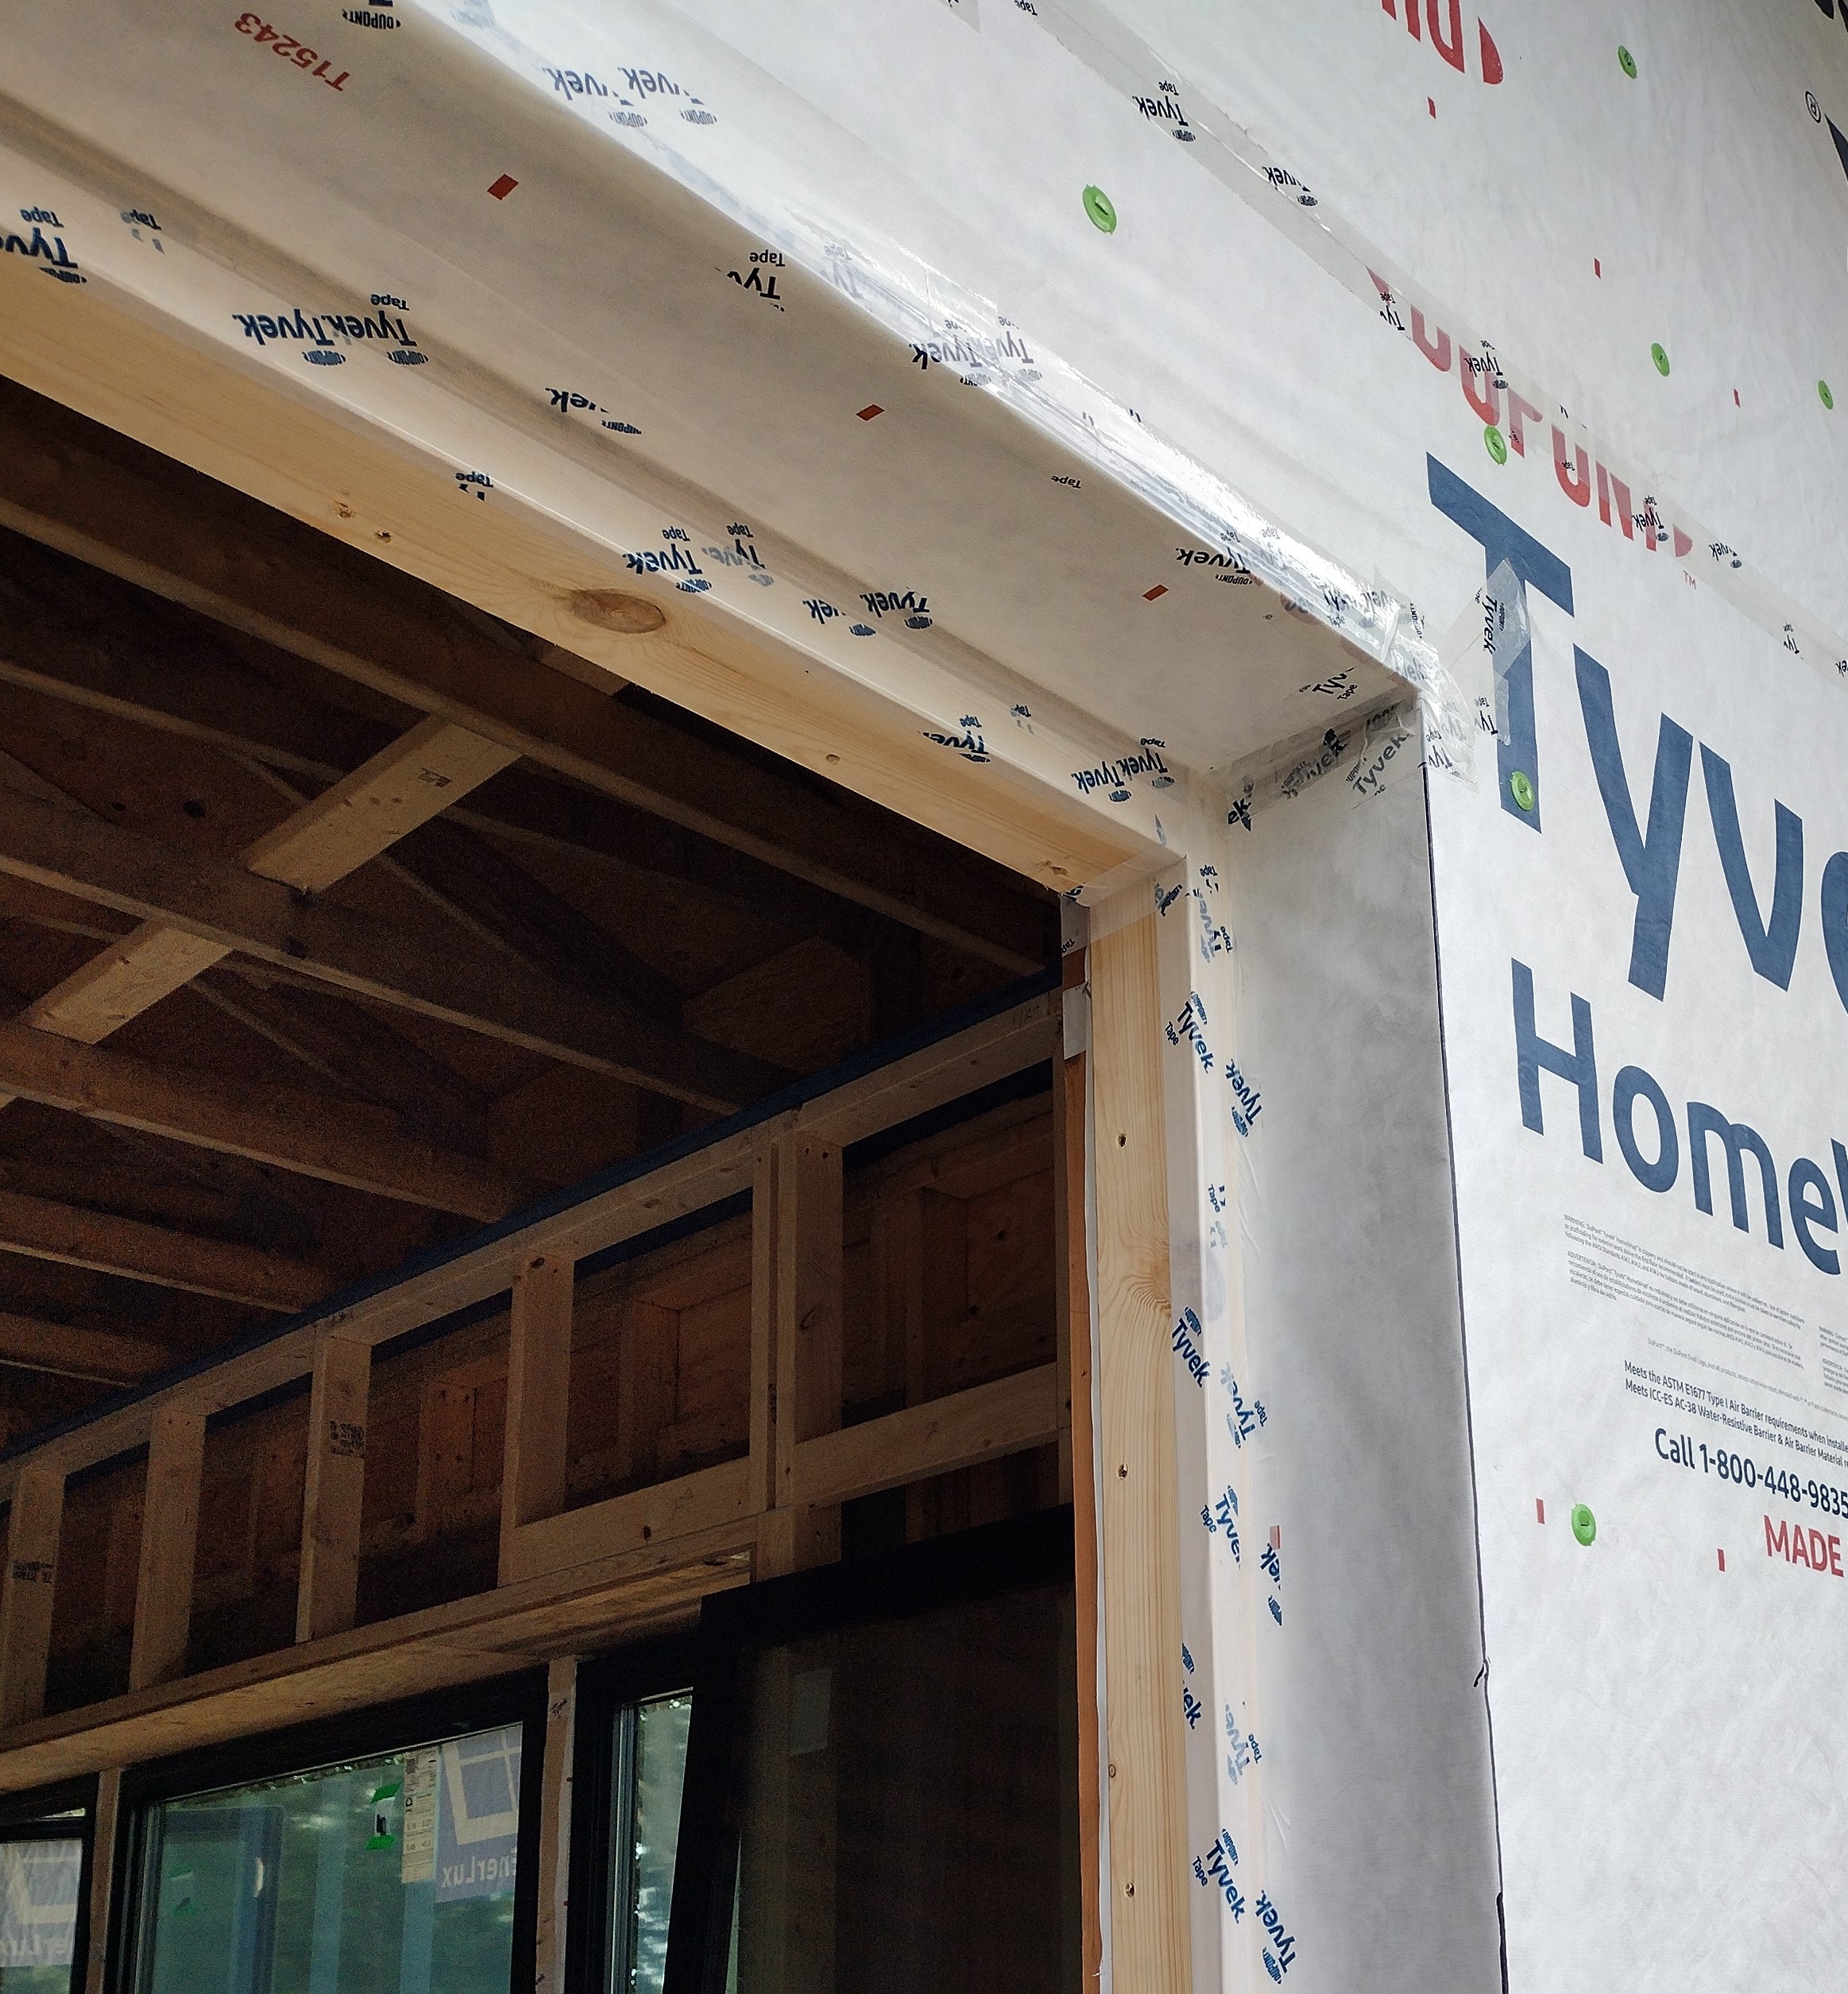
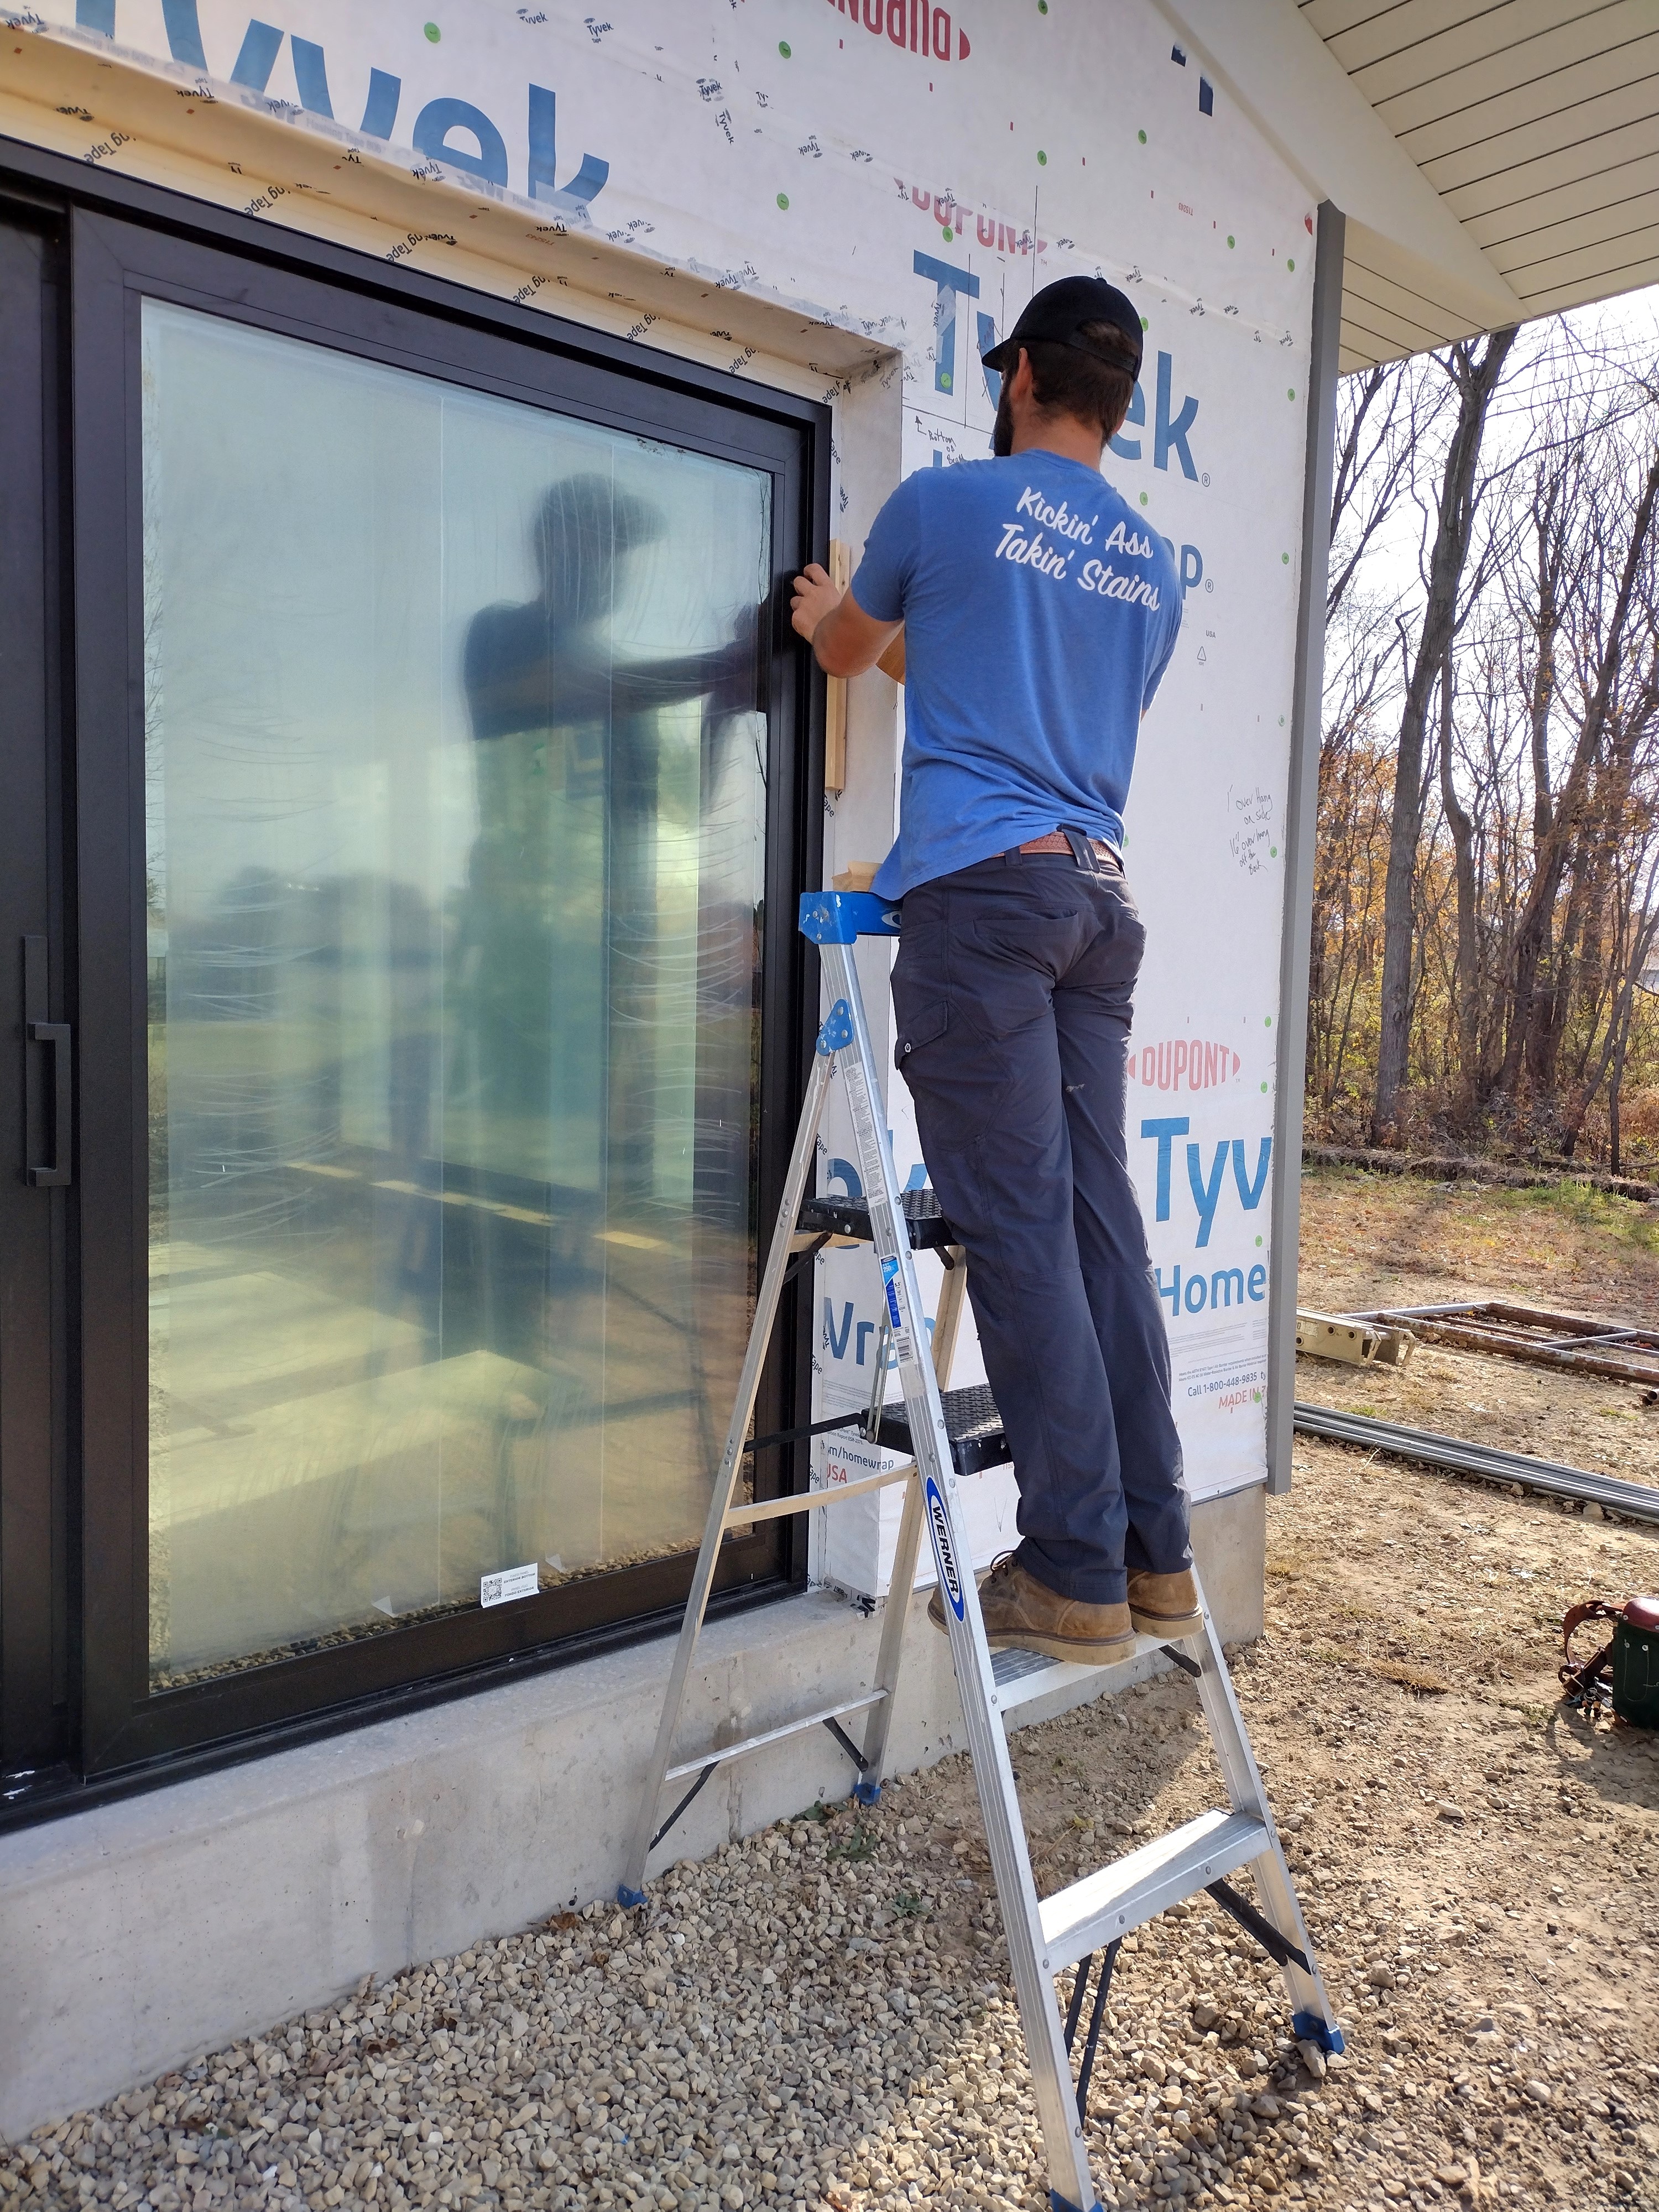
With the Tyvek temporarily turned up at the top, and the FlexWrap providing a waterproof barrier at the sill, the carpenters popped in the windows “level, plumb, and square”.
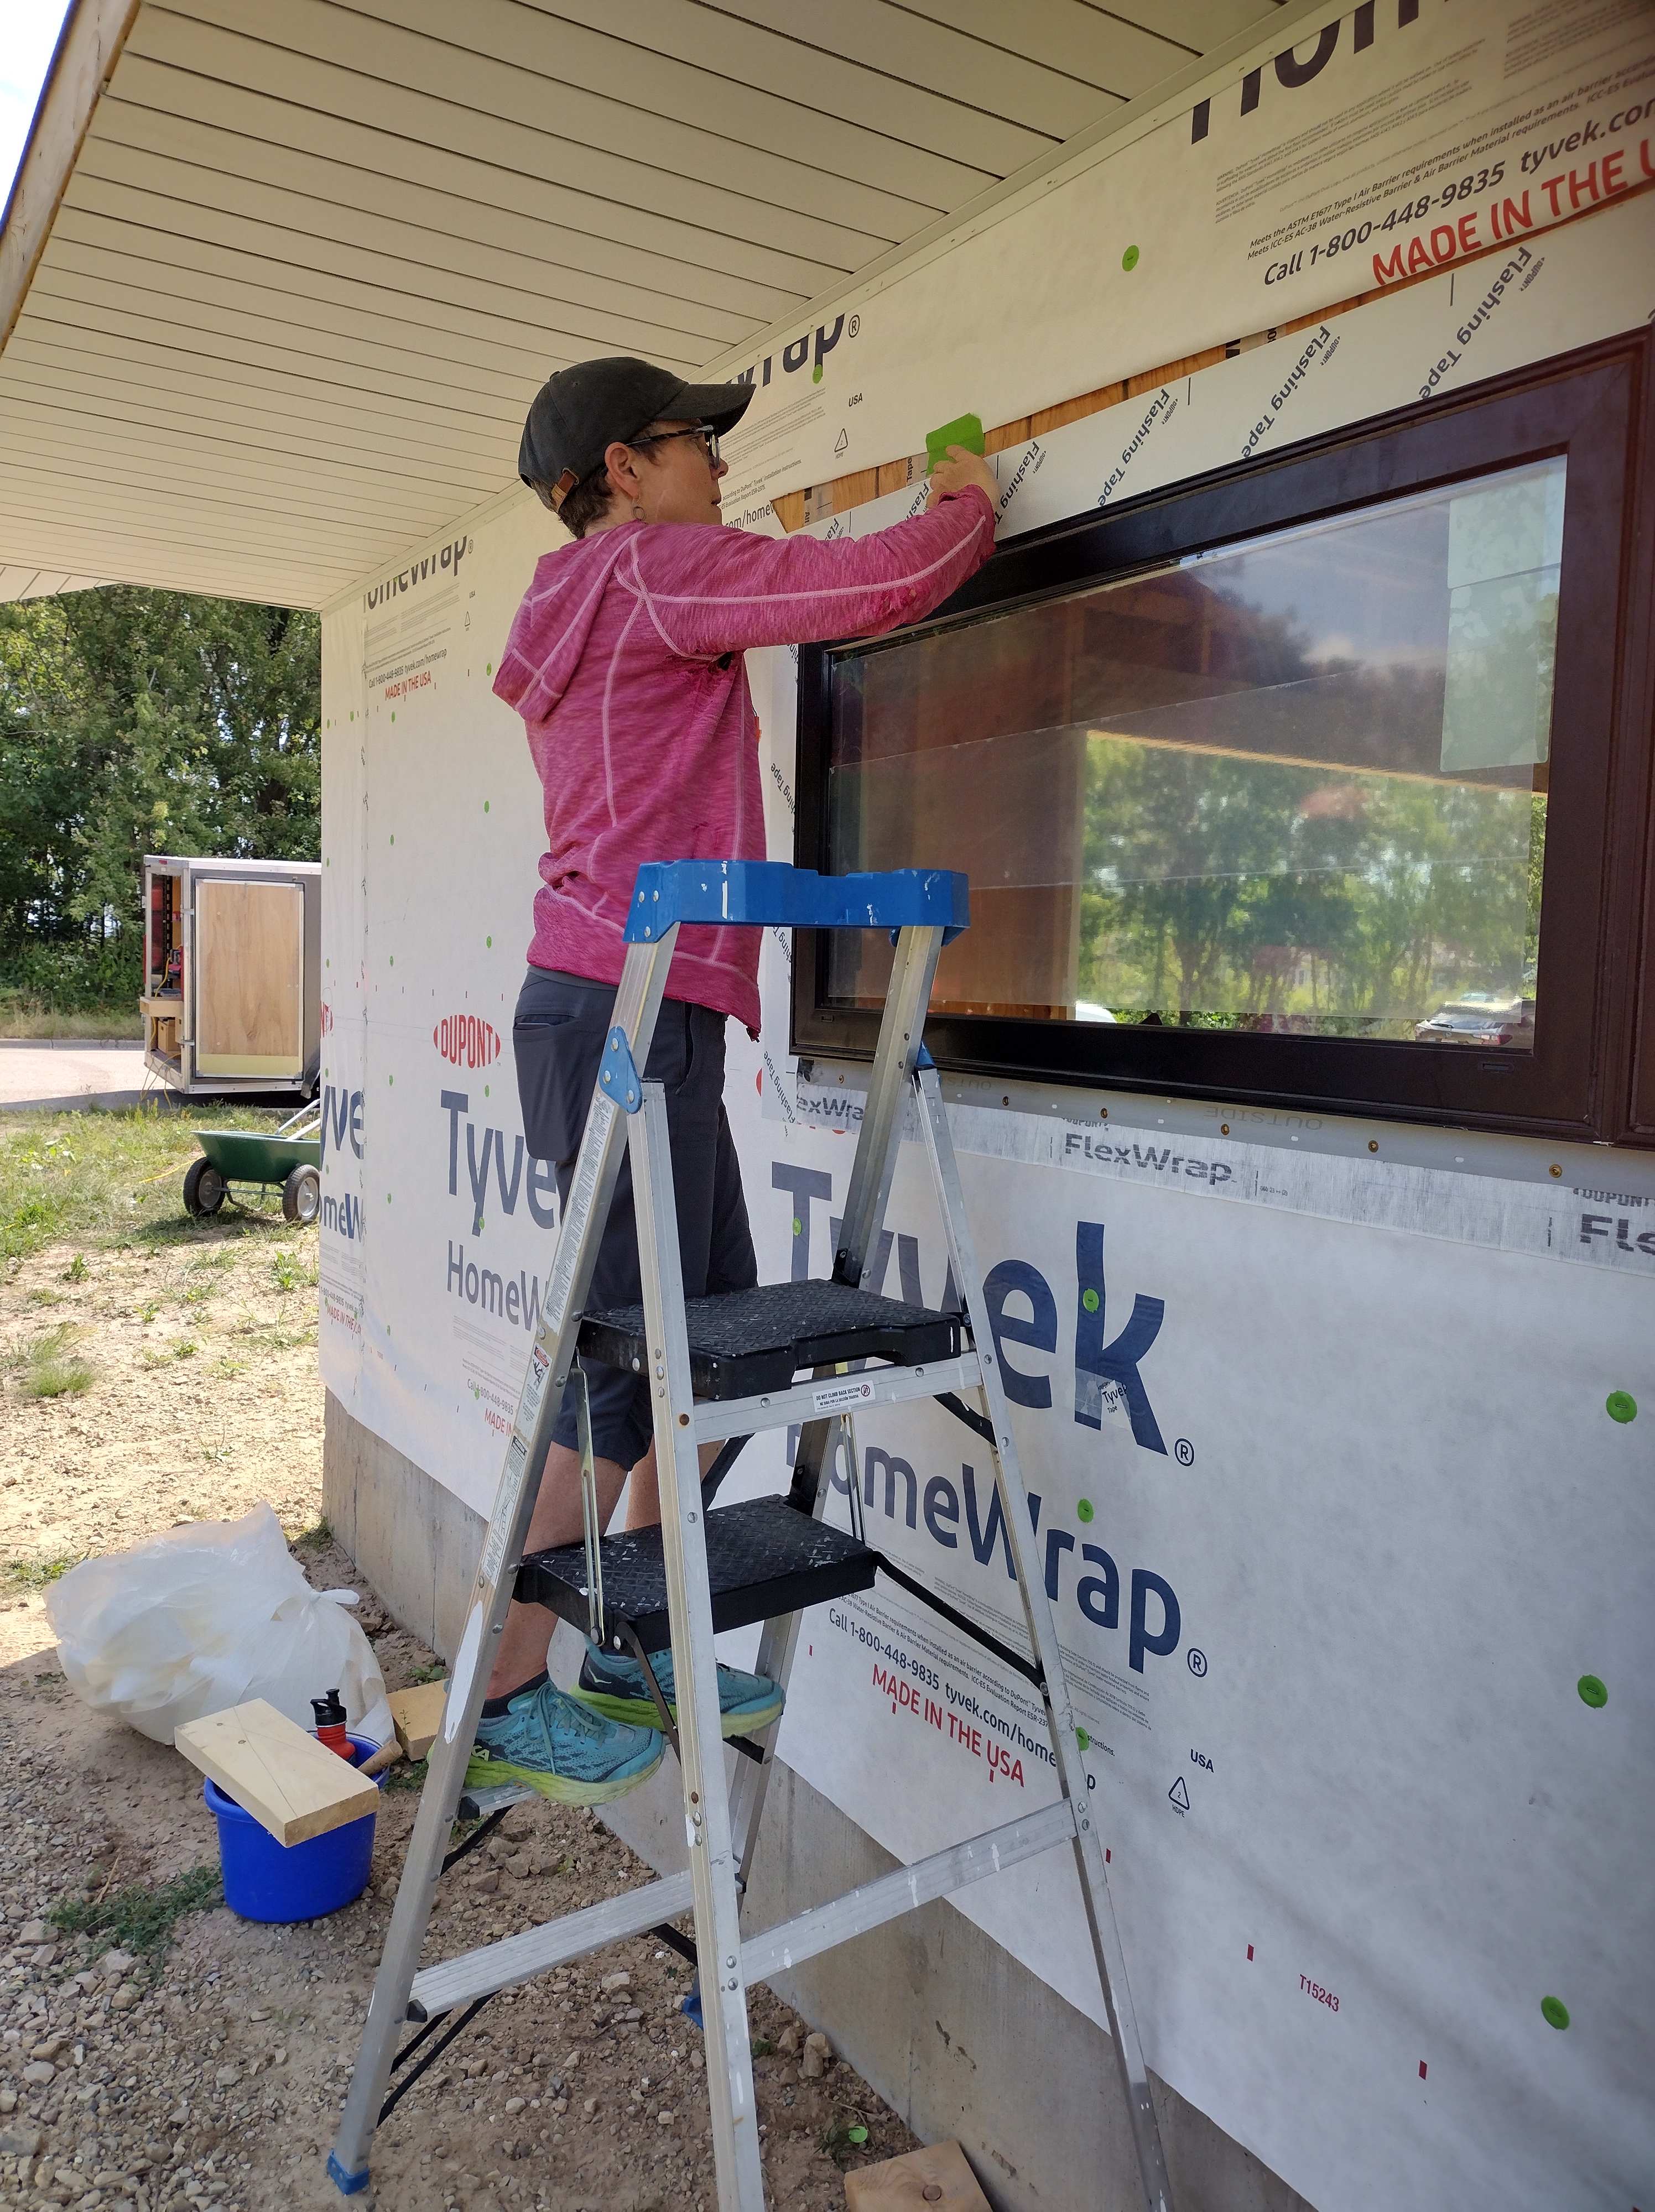
Next, we covered the window’s nailing flanges with DuPont’s Flashing Tape at the top and sides (the bottom flange was left free of tape to allow water to drain, should any rain sneak through the window), then folded the previously upturned Tyvek flap back down, securing it with Tyvek tape.
For this project, I chose EnerLux Windows in Nebraska. They are a small, custom order company and cost-competitive with major brands like Marvin Windows. The windows and patio doors are manufactured from low-carbon-footprint, durable-in-the-long-run fiberglass (not vinyl or wood), and are sturdy enough to hold 3 panes of glass.
Upgrading from dual-pane to triple-pane glass cost $6287. My REMRate energy model predicts $280/year in energy savings.
The simple payback, not accounting for inflation or the future cost of energy is: 6287 / 280 = 22.5 years
The simple ROI (return on investment), not accounting for inflation or the future cost of energy is: 280 / 6287 = 4.4 %
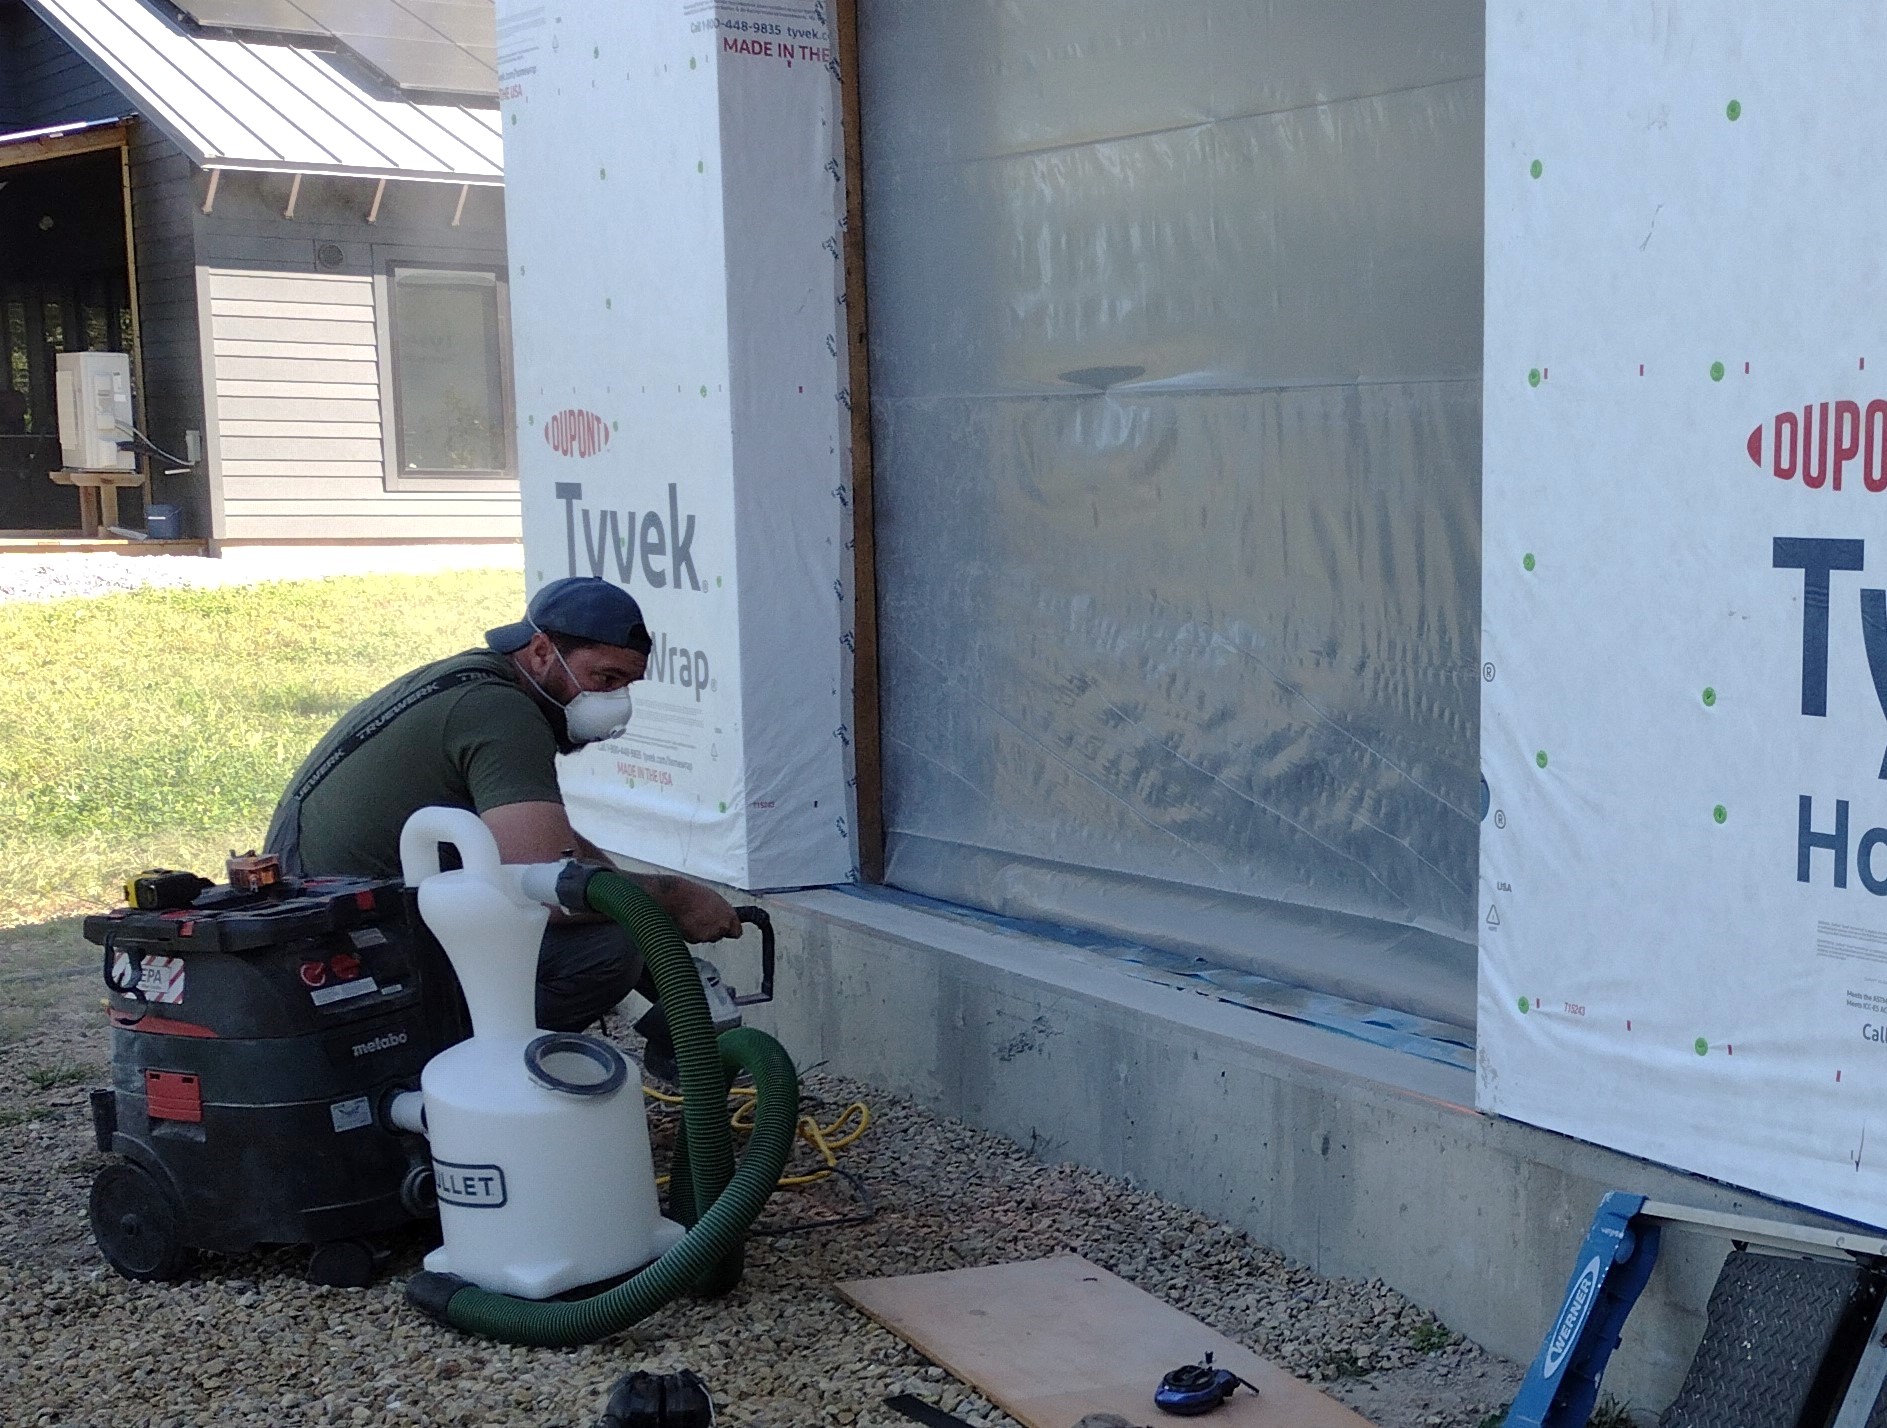
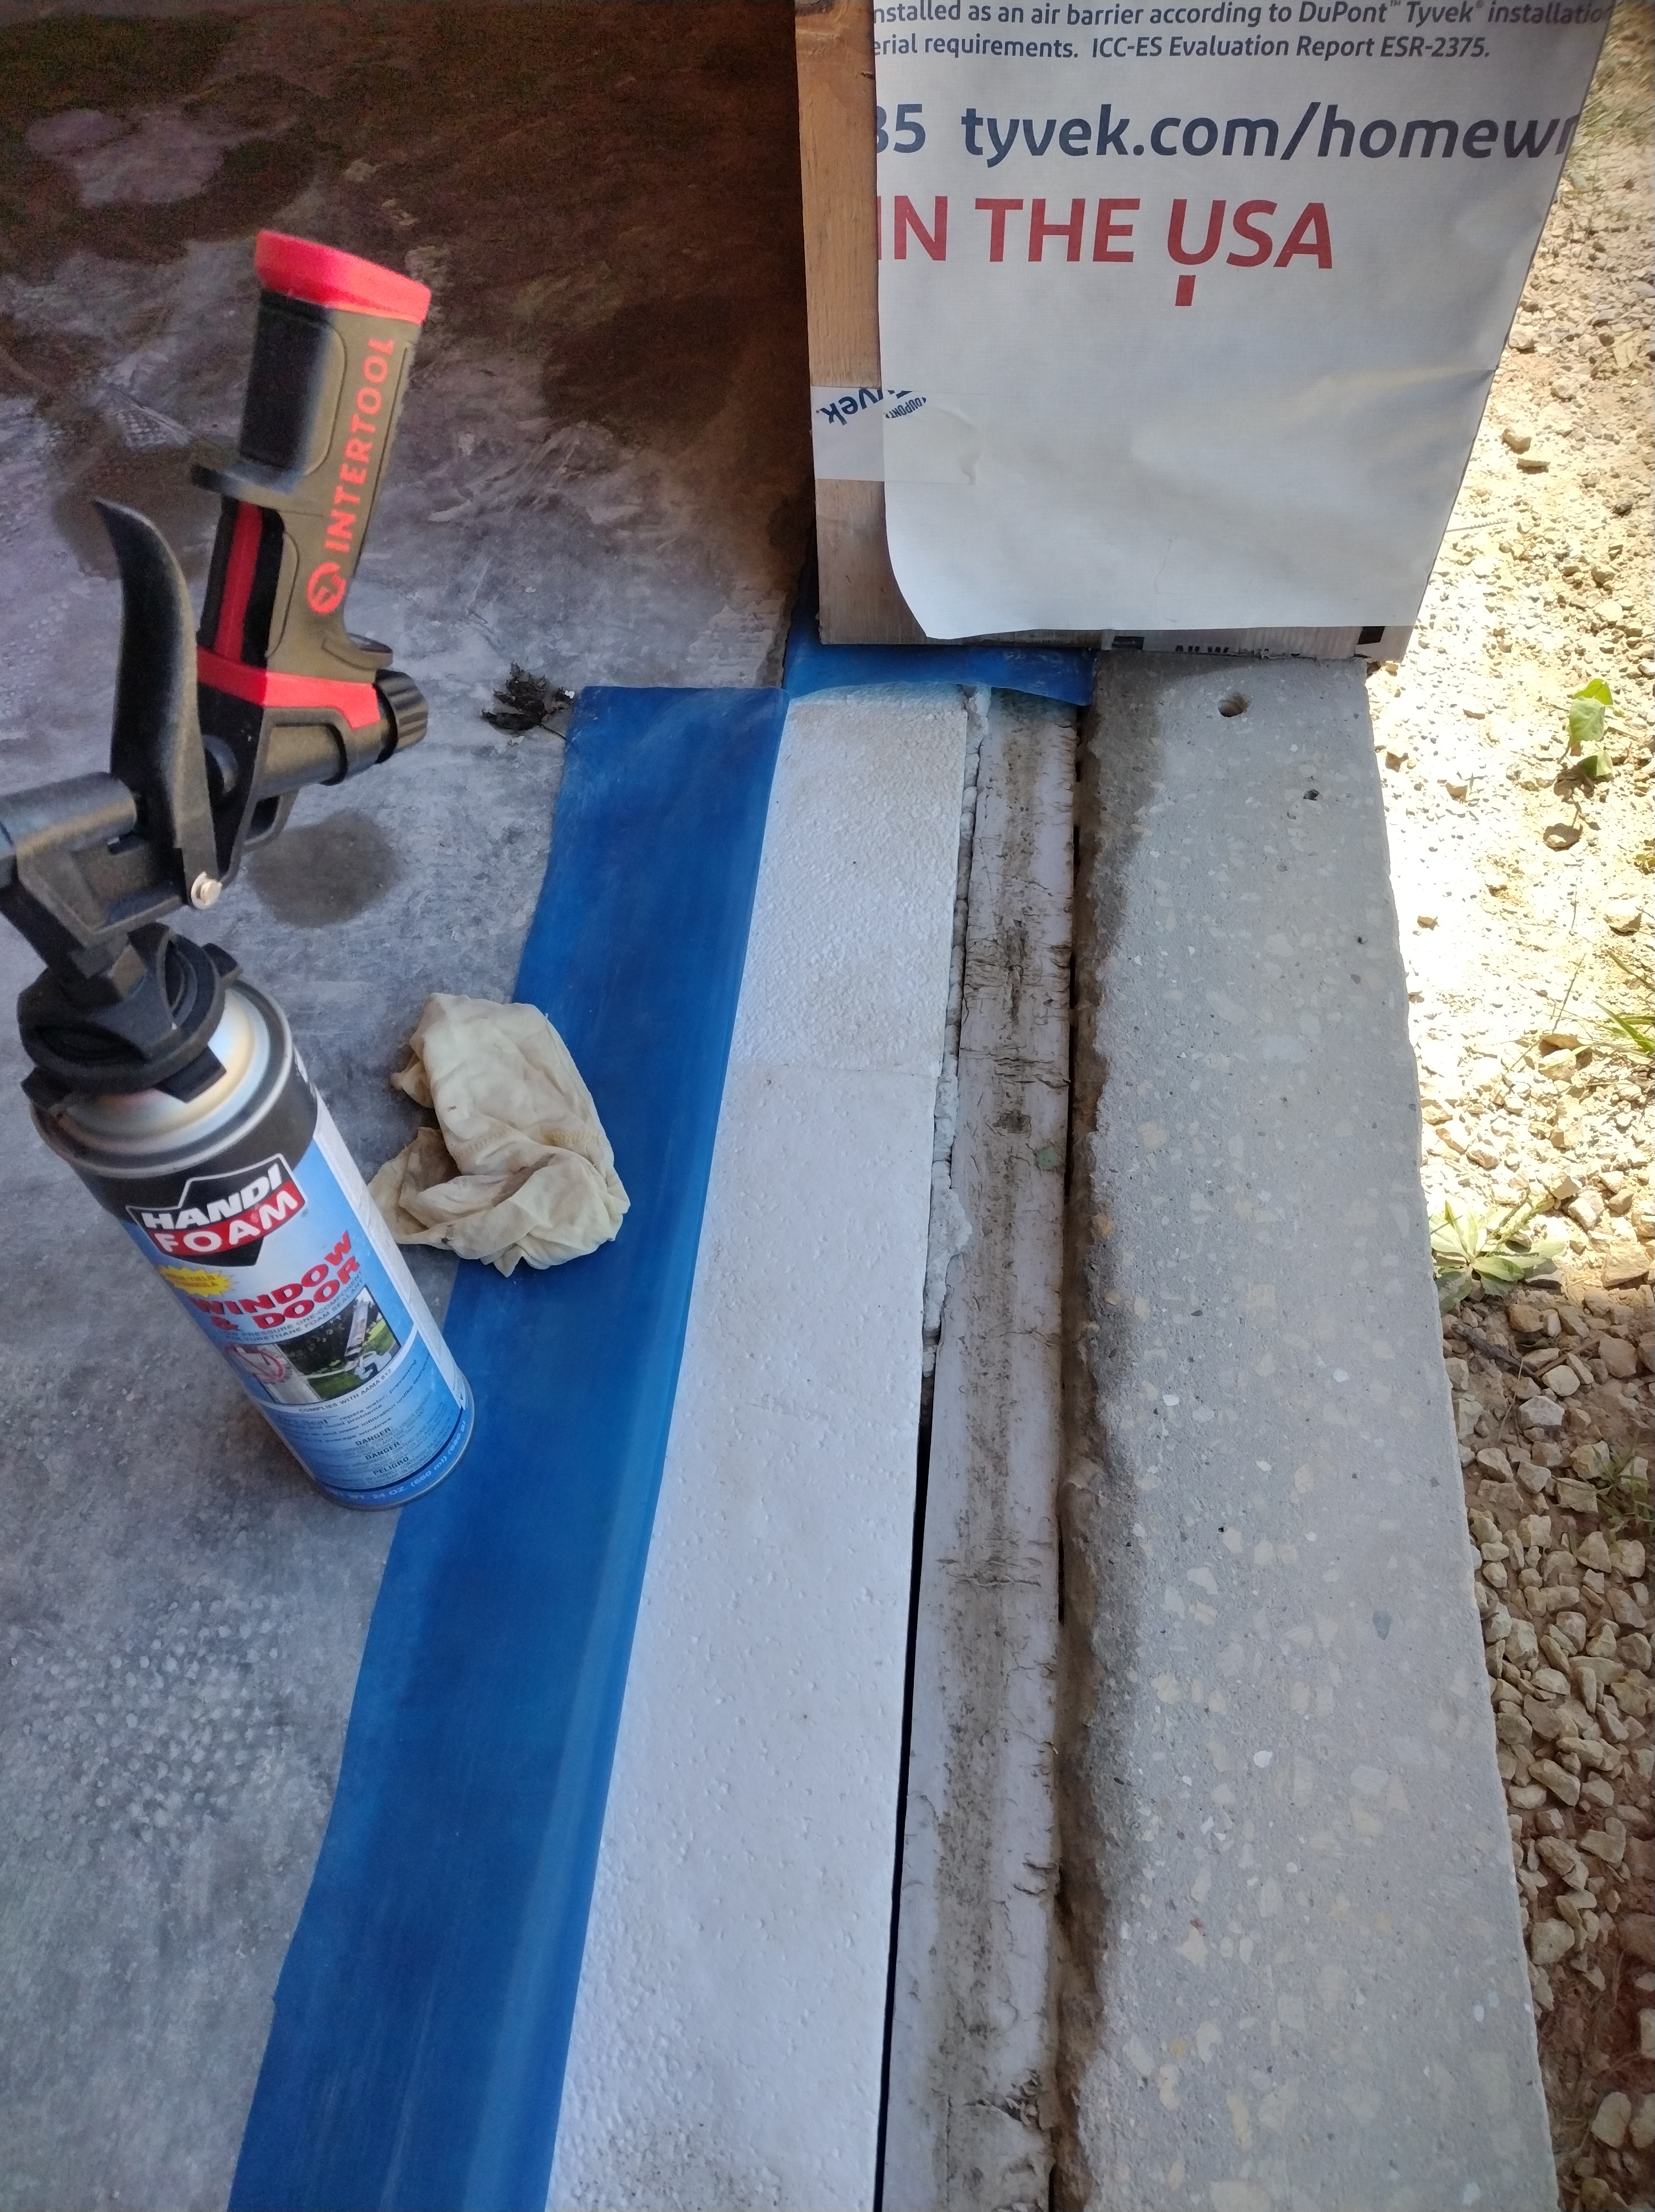
The EnerLux patio doors were installed in a similar manner to the windows, but with a few extra steps beforehand. Mike used a grinder to smooth and slope the concrete frostwall at each patio door opening.
Next, I made sure the slab-edge foam was tight to the foundation wall and spray foamed any gaps. I glued the under-slab vapor barrier (blue) to the EPS foam (white). The carpenters glued down a length of beveled cedar siding to create a rot-resistant sill with positive drainage to the exterior. For an extra barrier to the entry of air and water, I taped the joints with 3M’s 8967 waterproof tape.
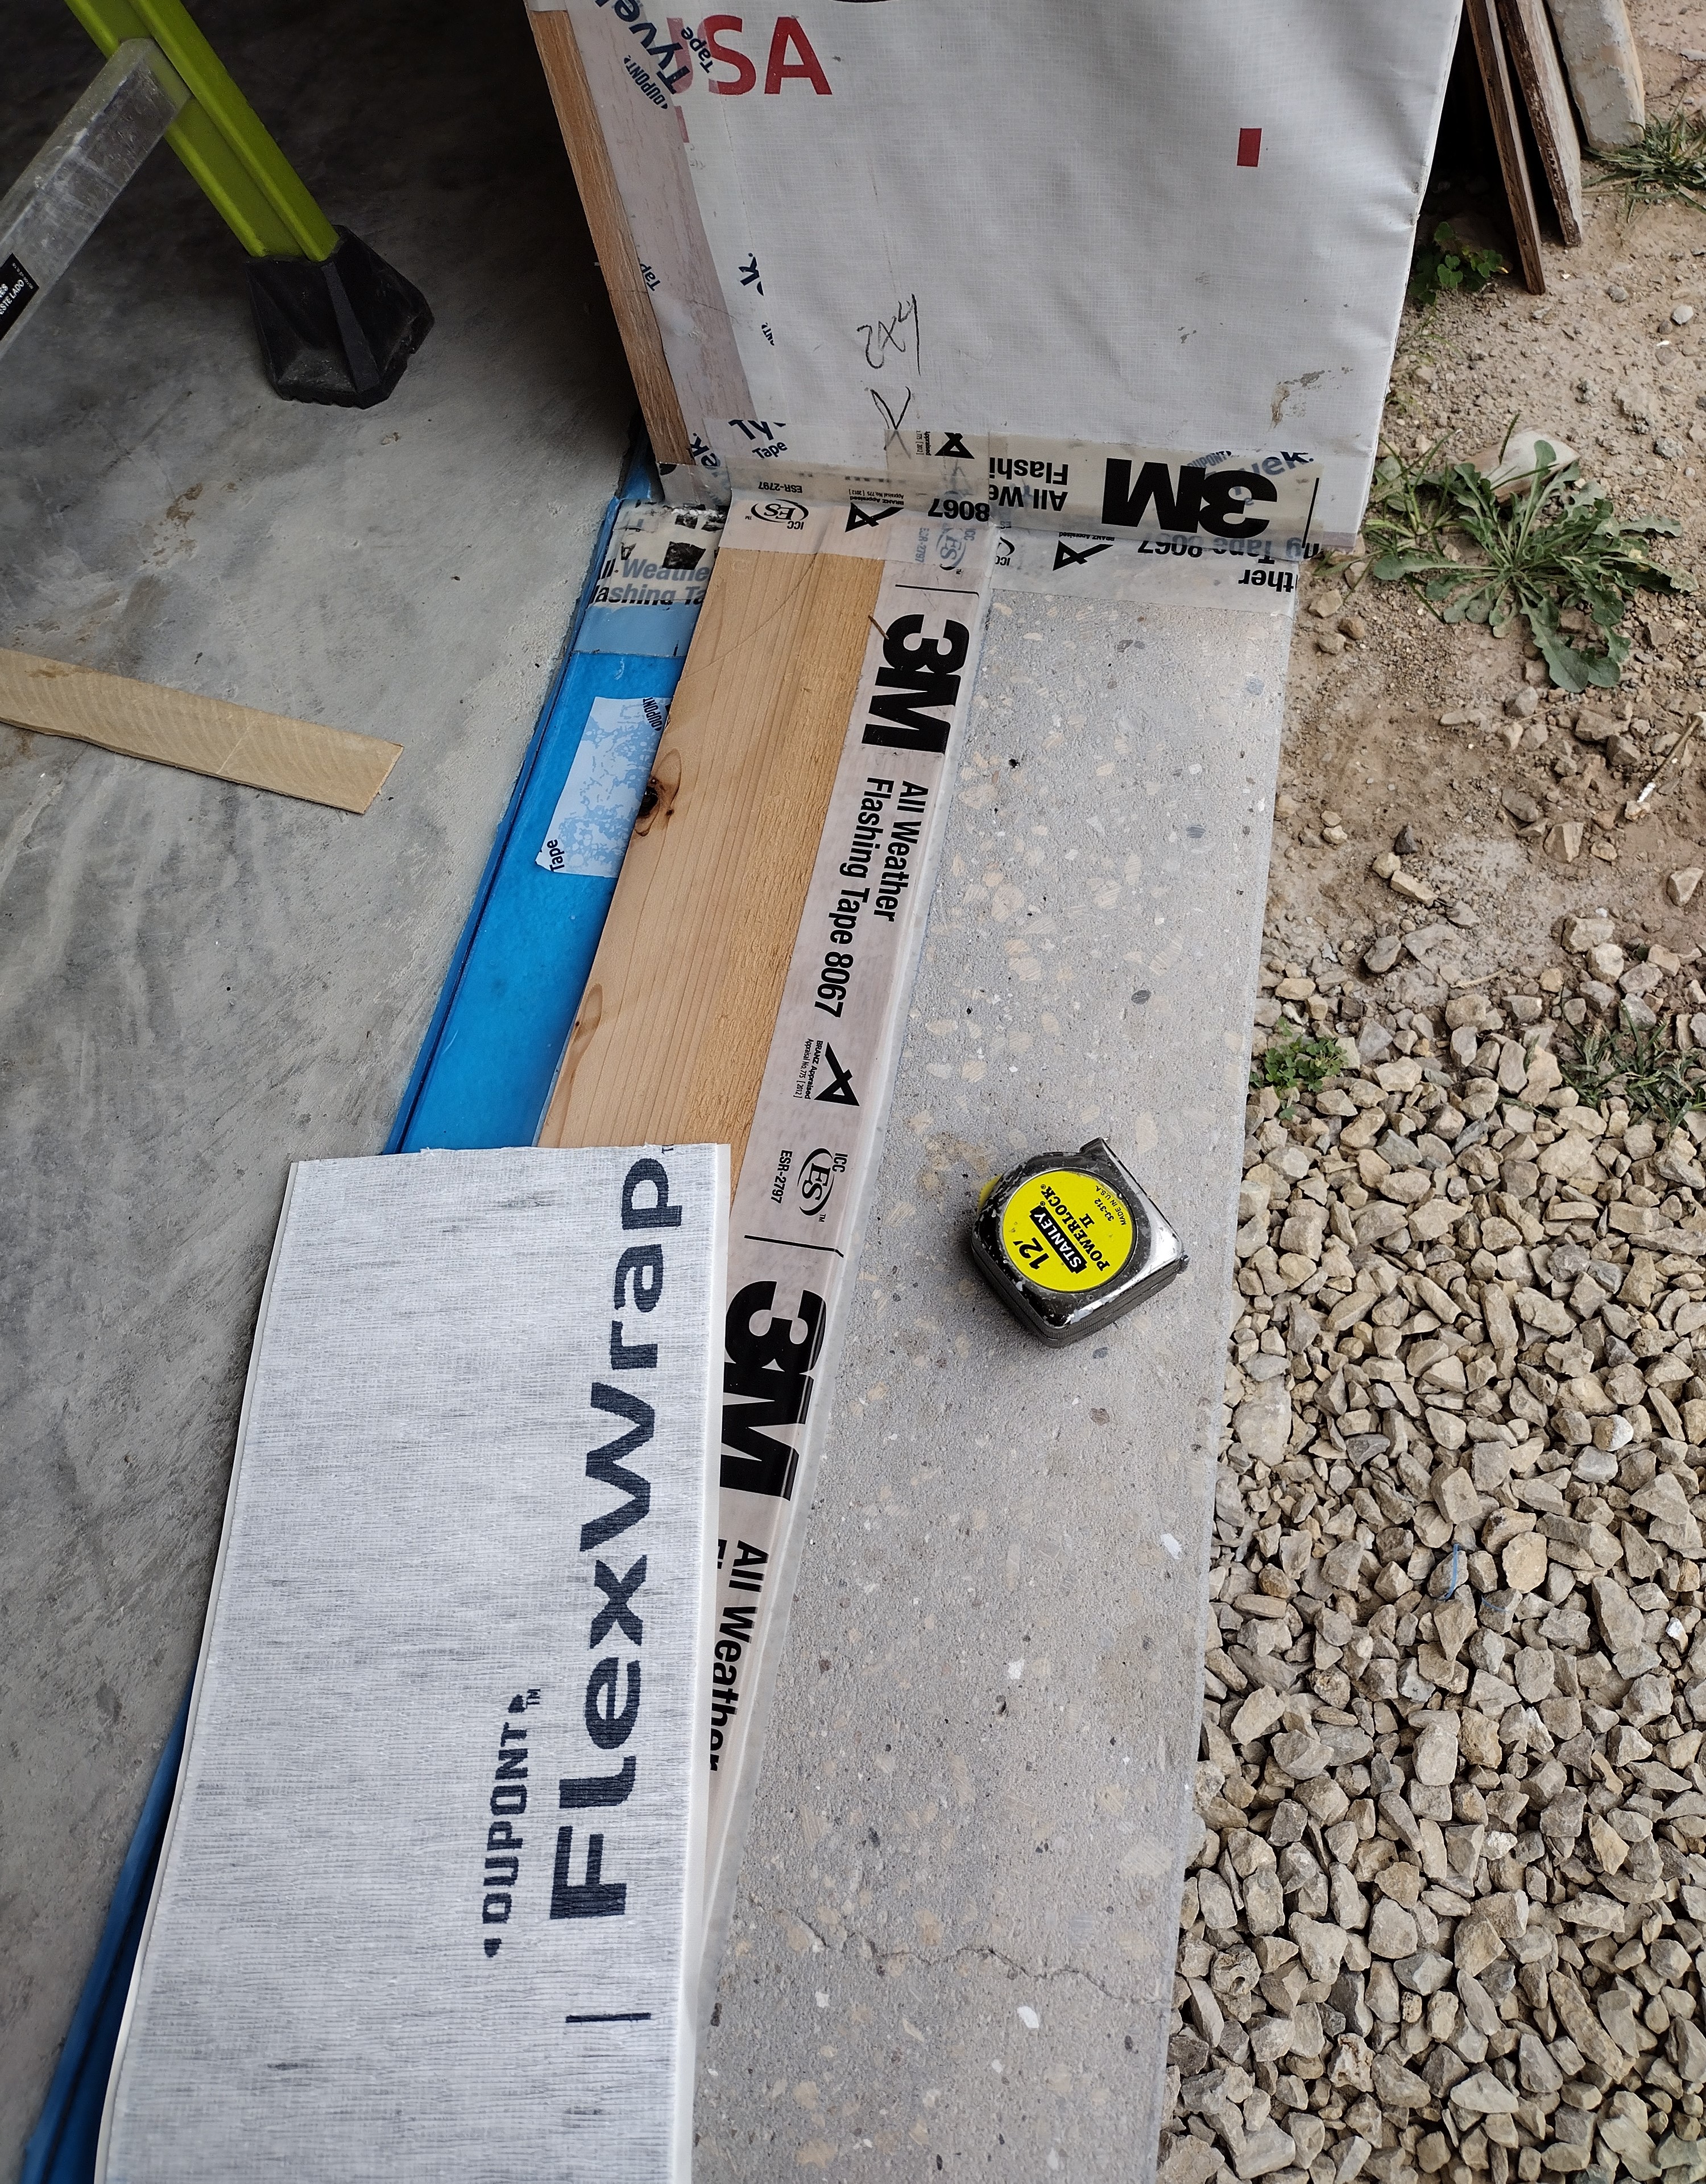
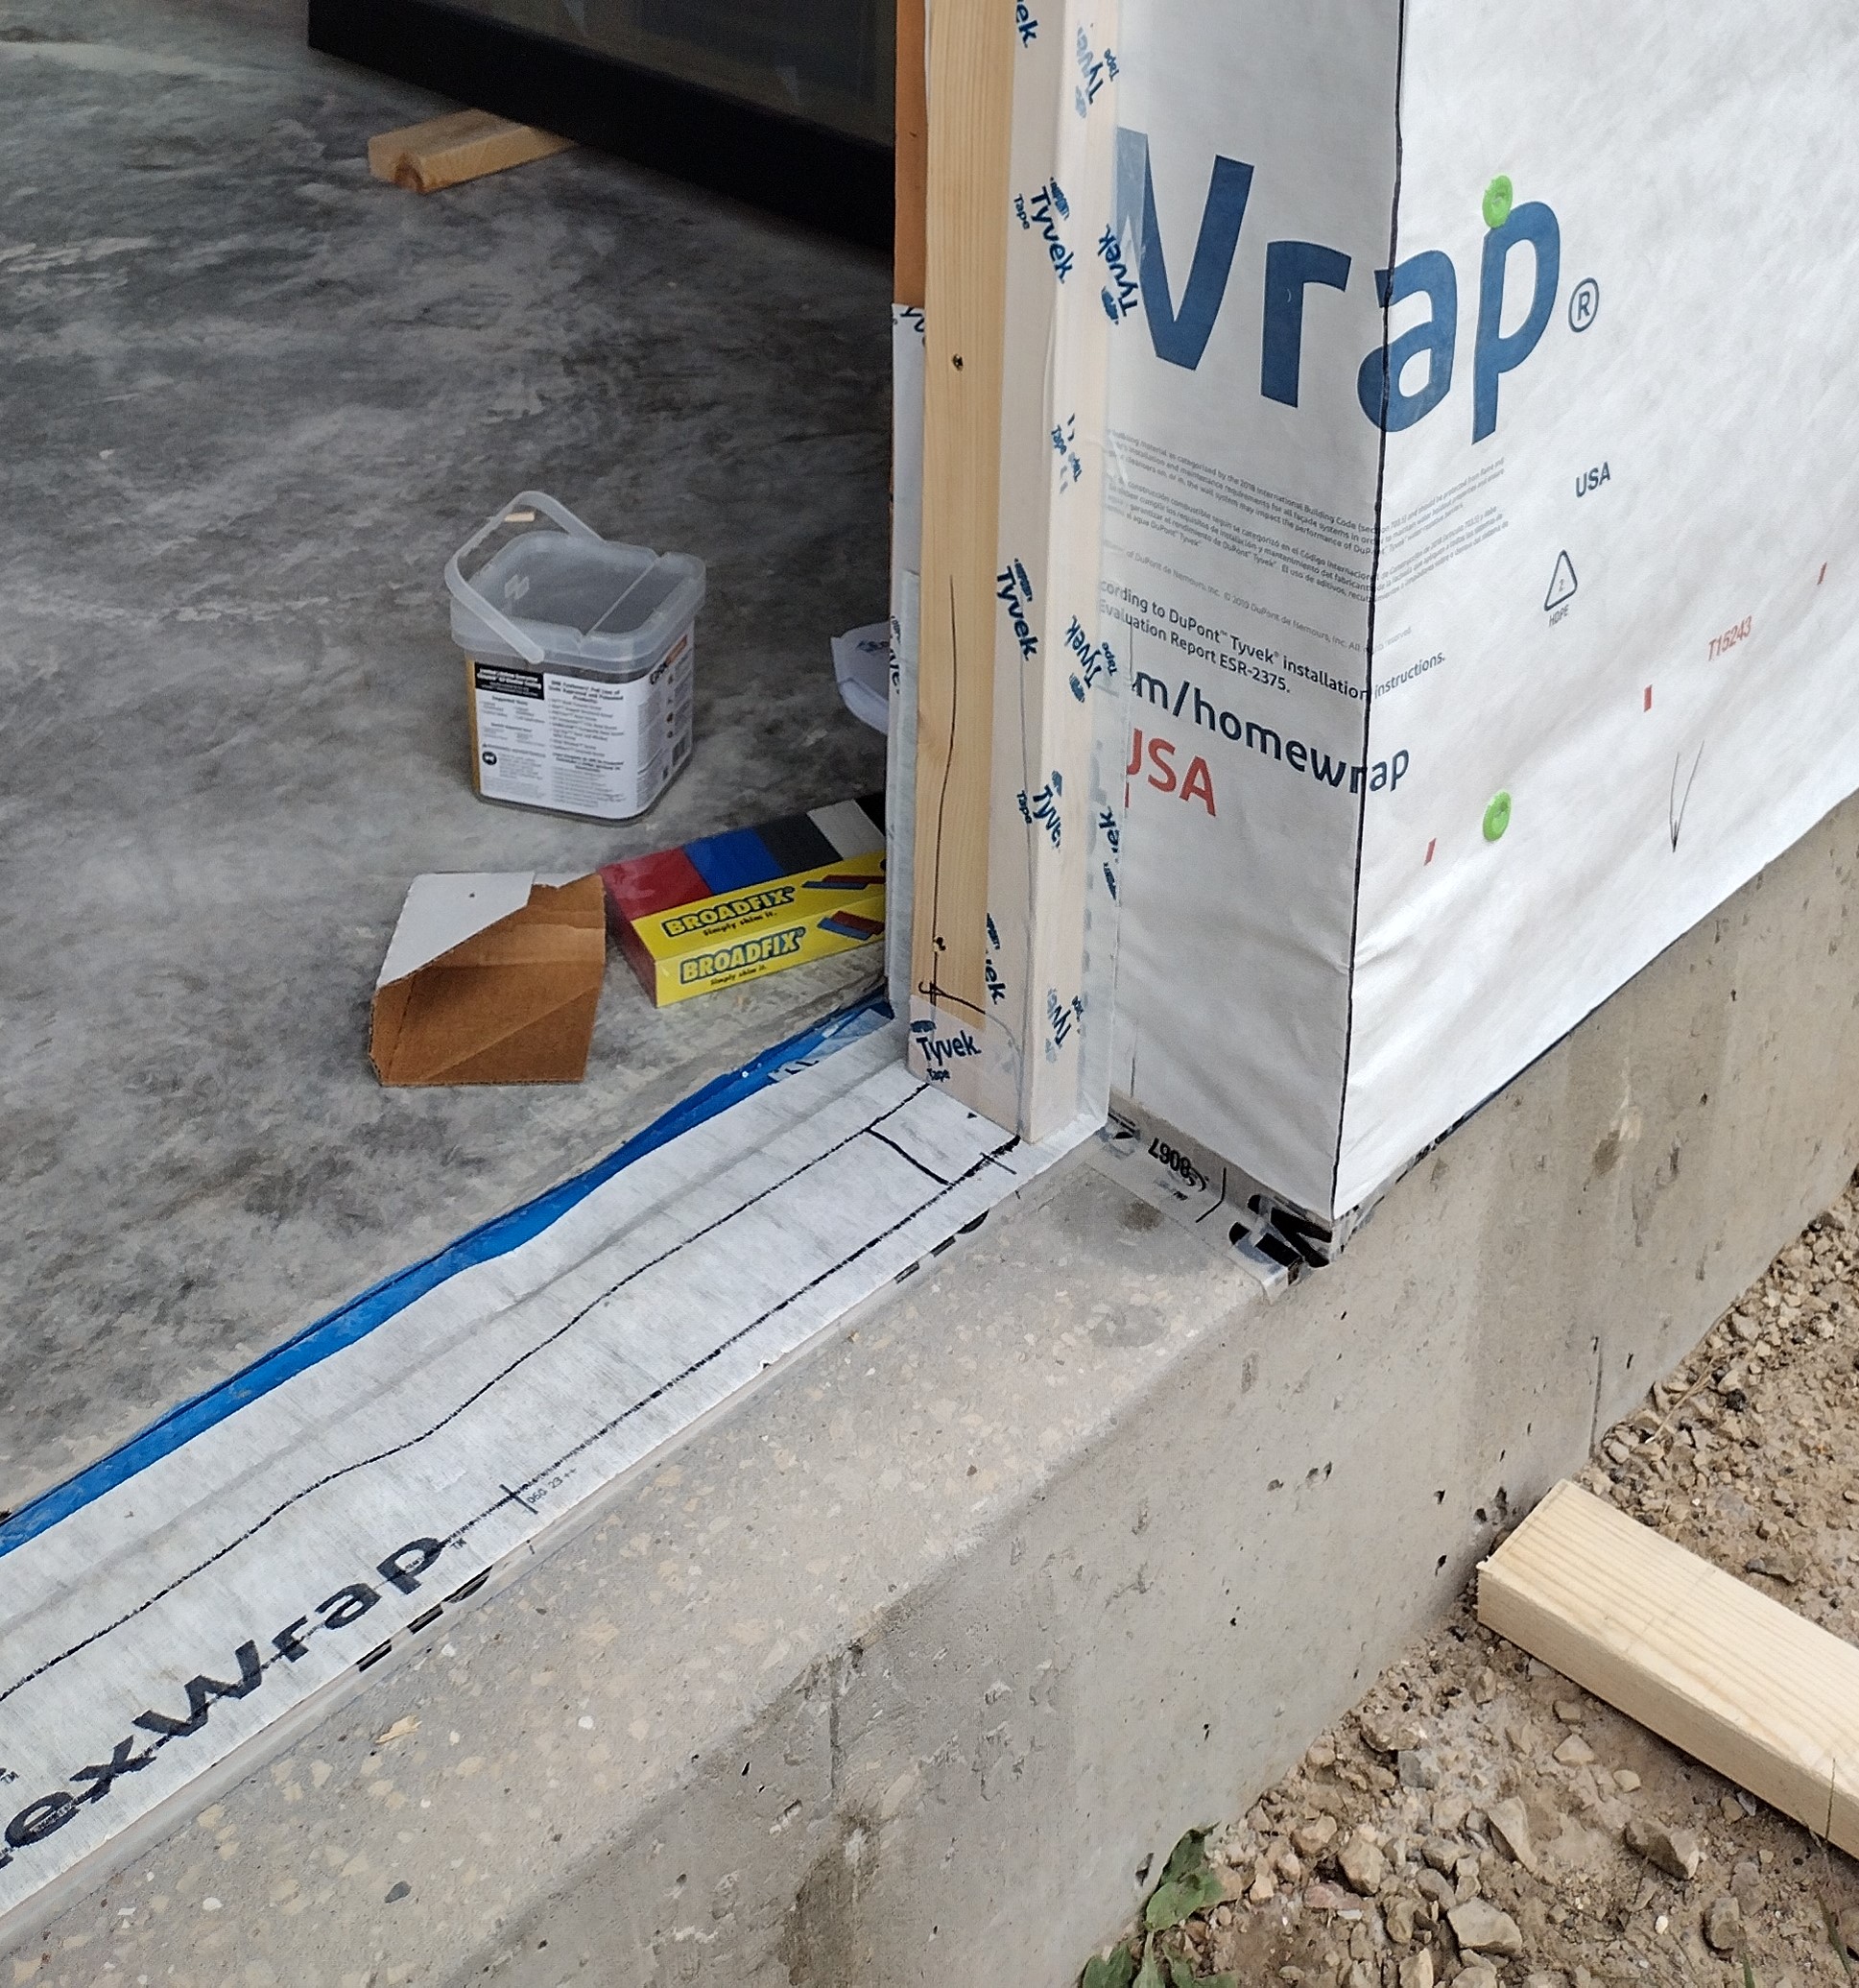
FlexWrap is a waterproof, flexible, and formable peel-and-stick membrane that’s easy to work with. A generous upturn at the jambs provides extra insurance at the corners, where most window and door installations fail. Next, 2x side and top jambs were ripped and nailed in place to align with the outer 4 inches of slab-edge foam. Tyvek tape seals the connection between wood and housewrap.
Dave Skenky and Cale Armstrong installed the patio door frames. Later, they slid the glass panels into place.
Blake Welu trimmed out the patio doors with 2×8 rough sawn cedar boards on edge. An extra piece was needed to bridge the slightly too-large rough opening, but it became a subtle detail that looks just right.
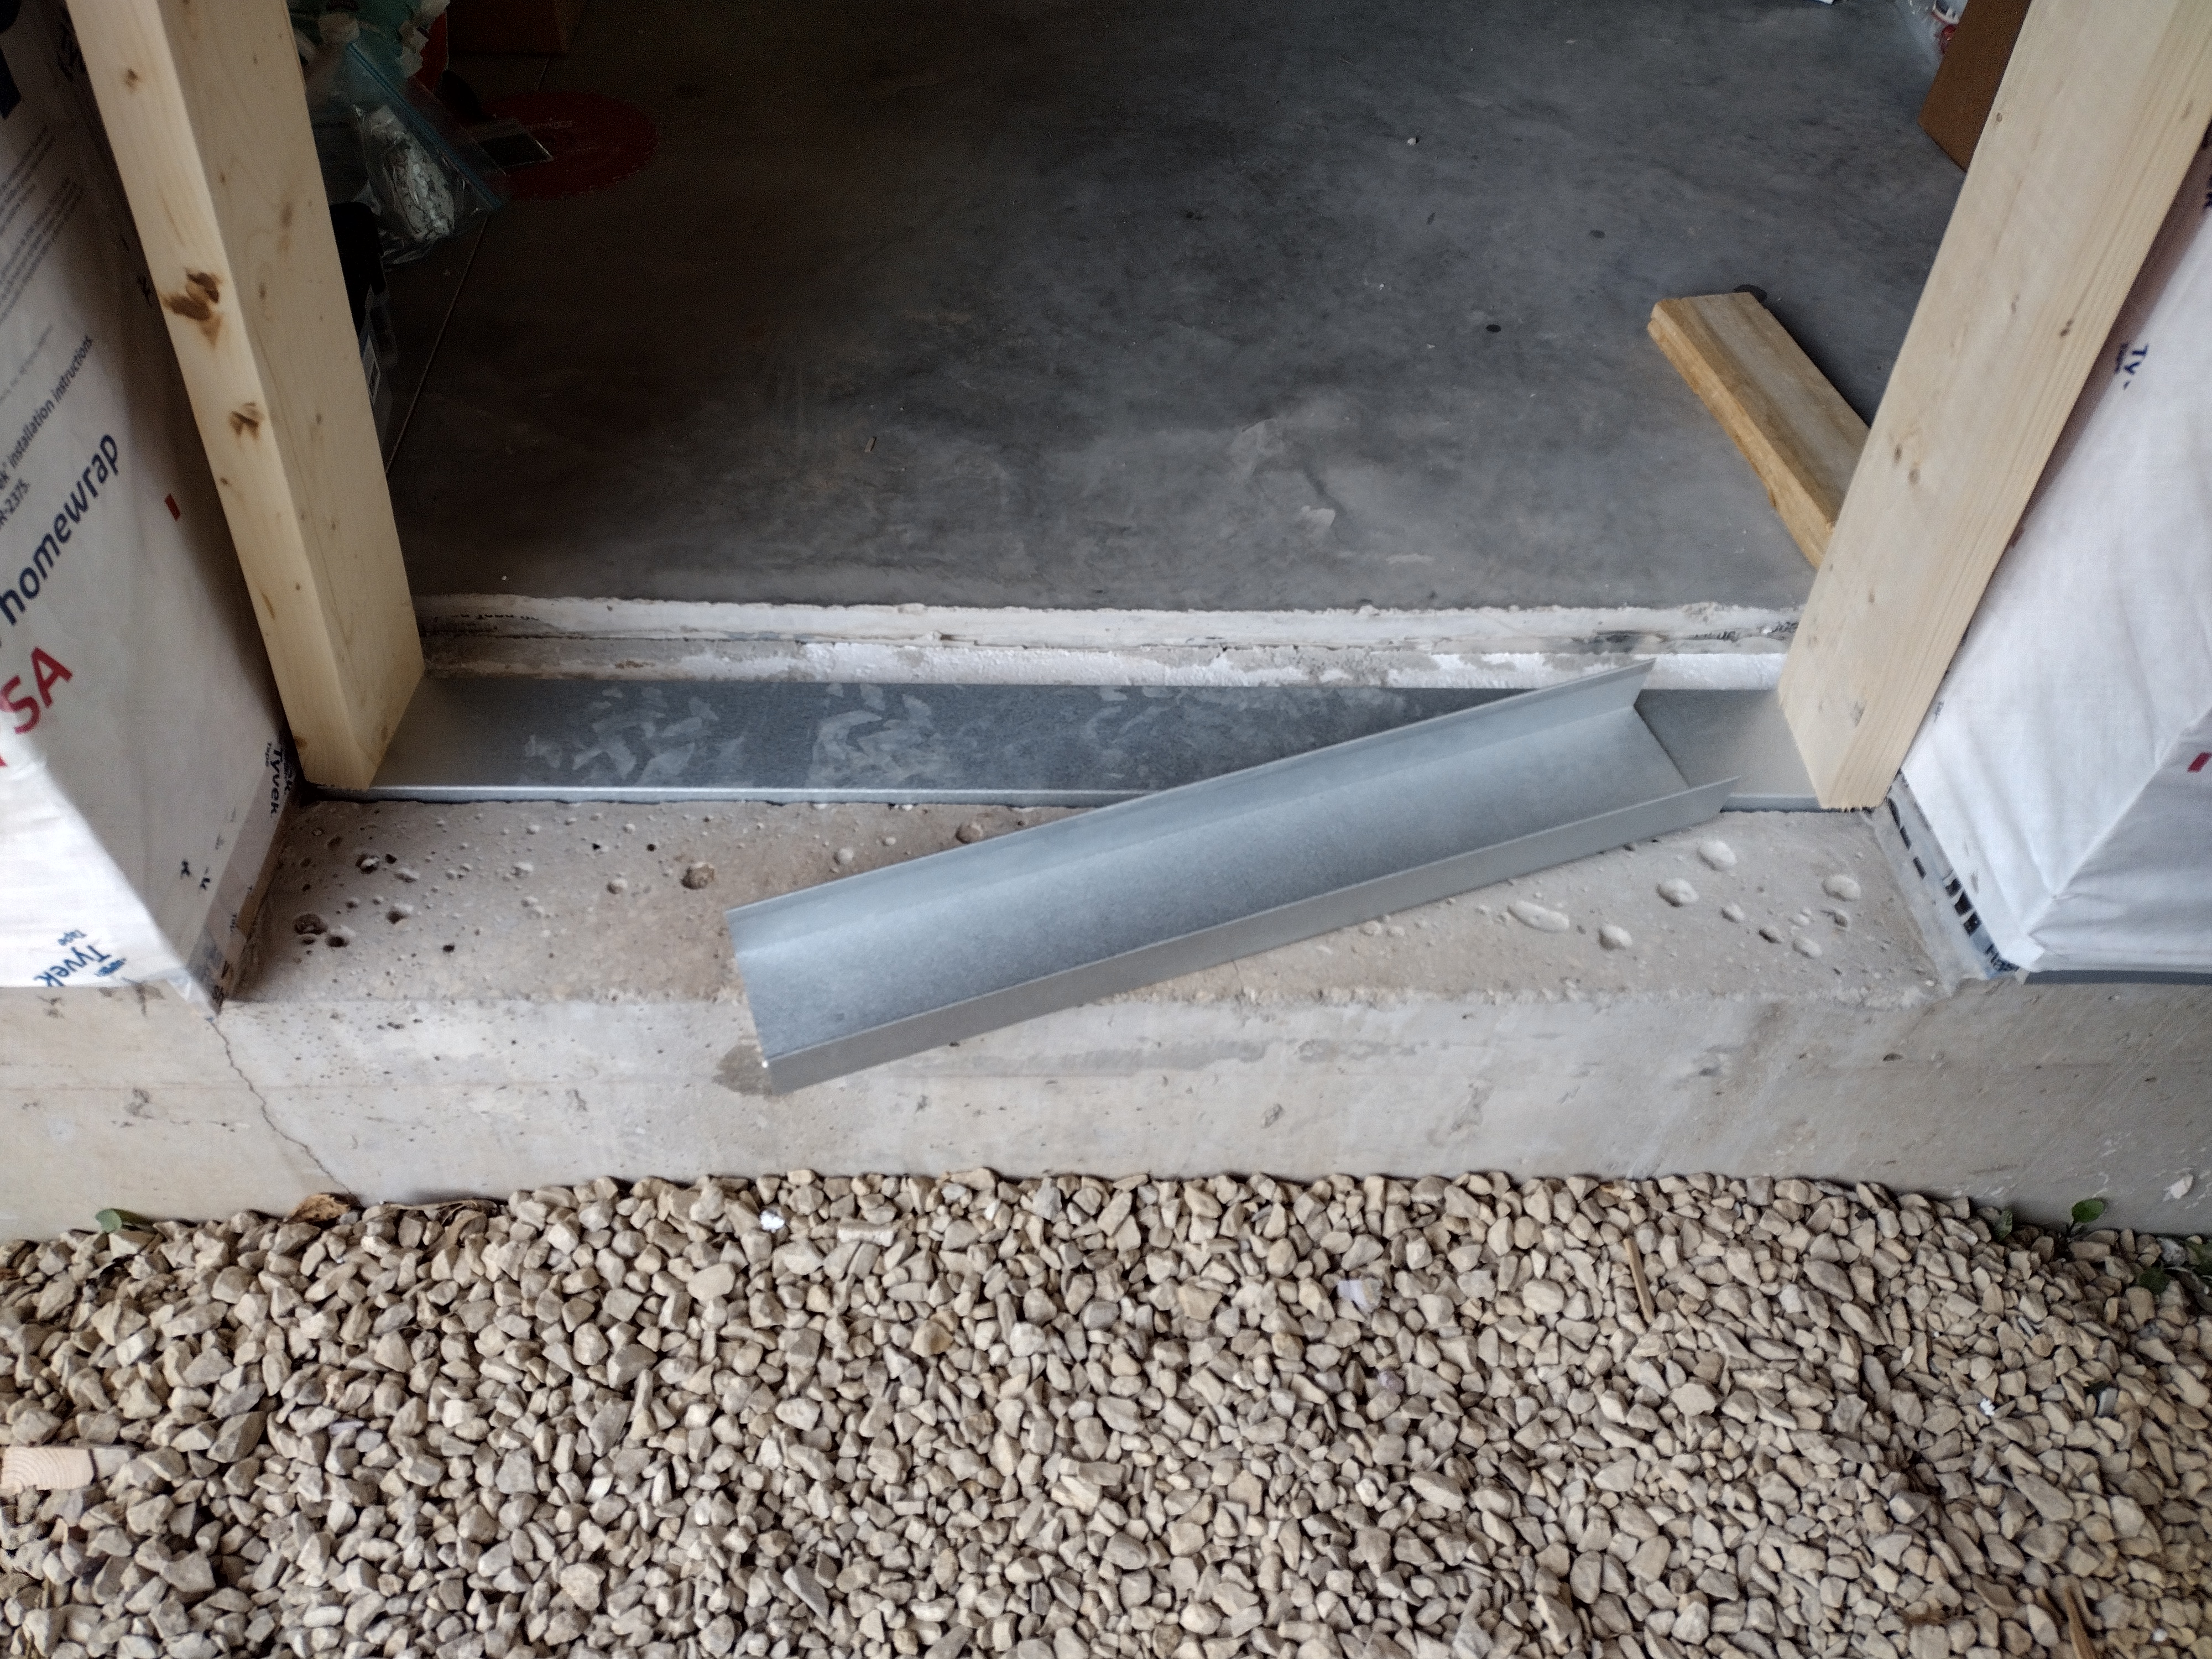
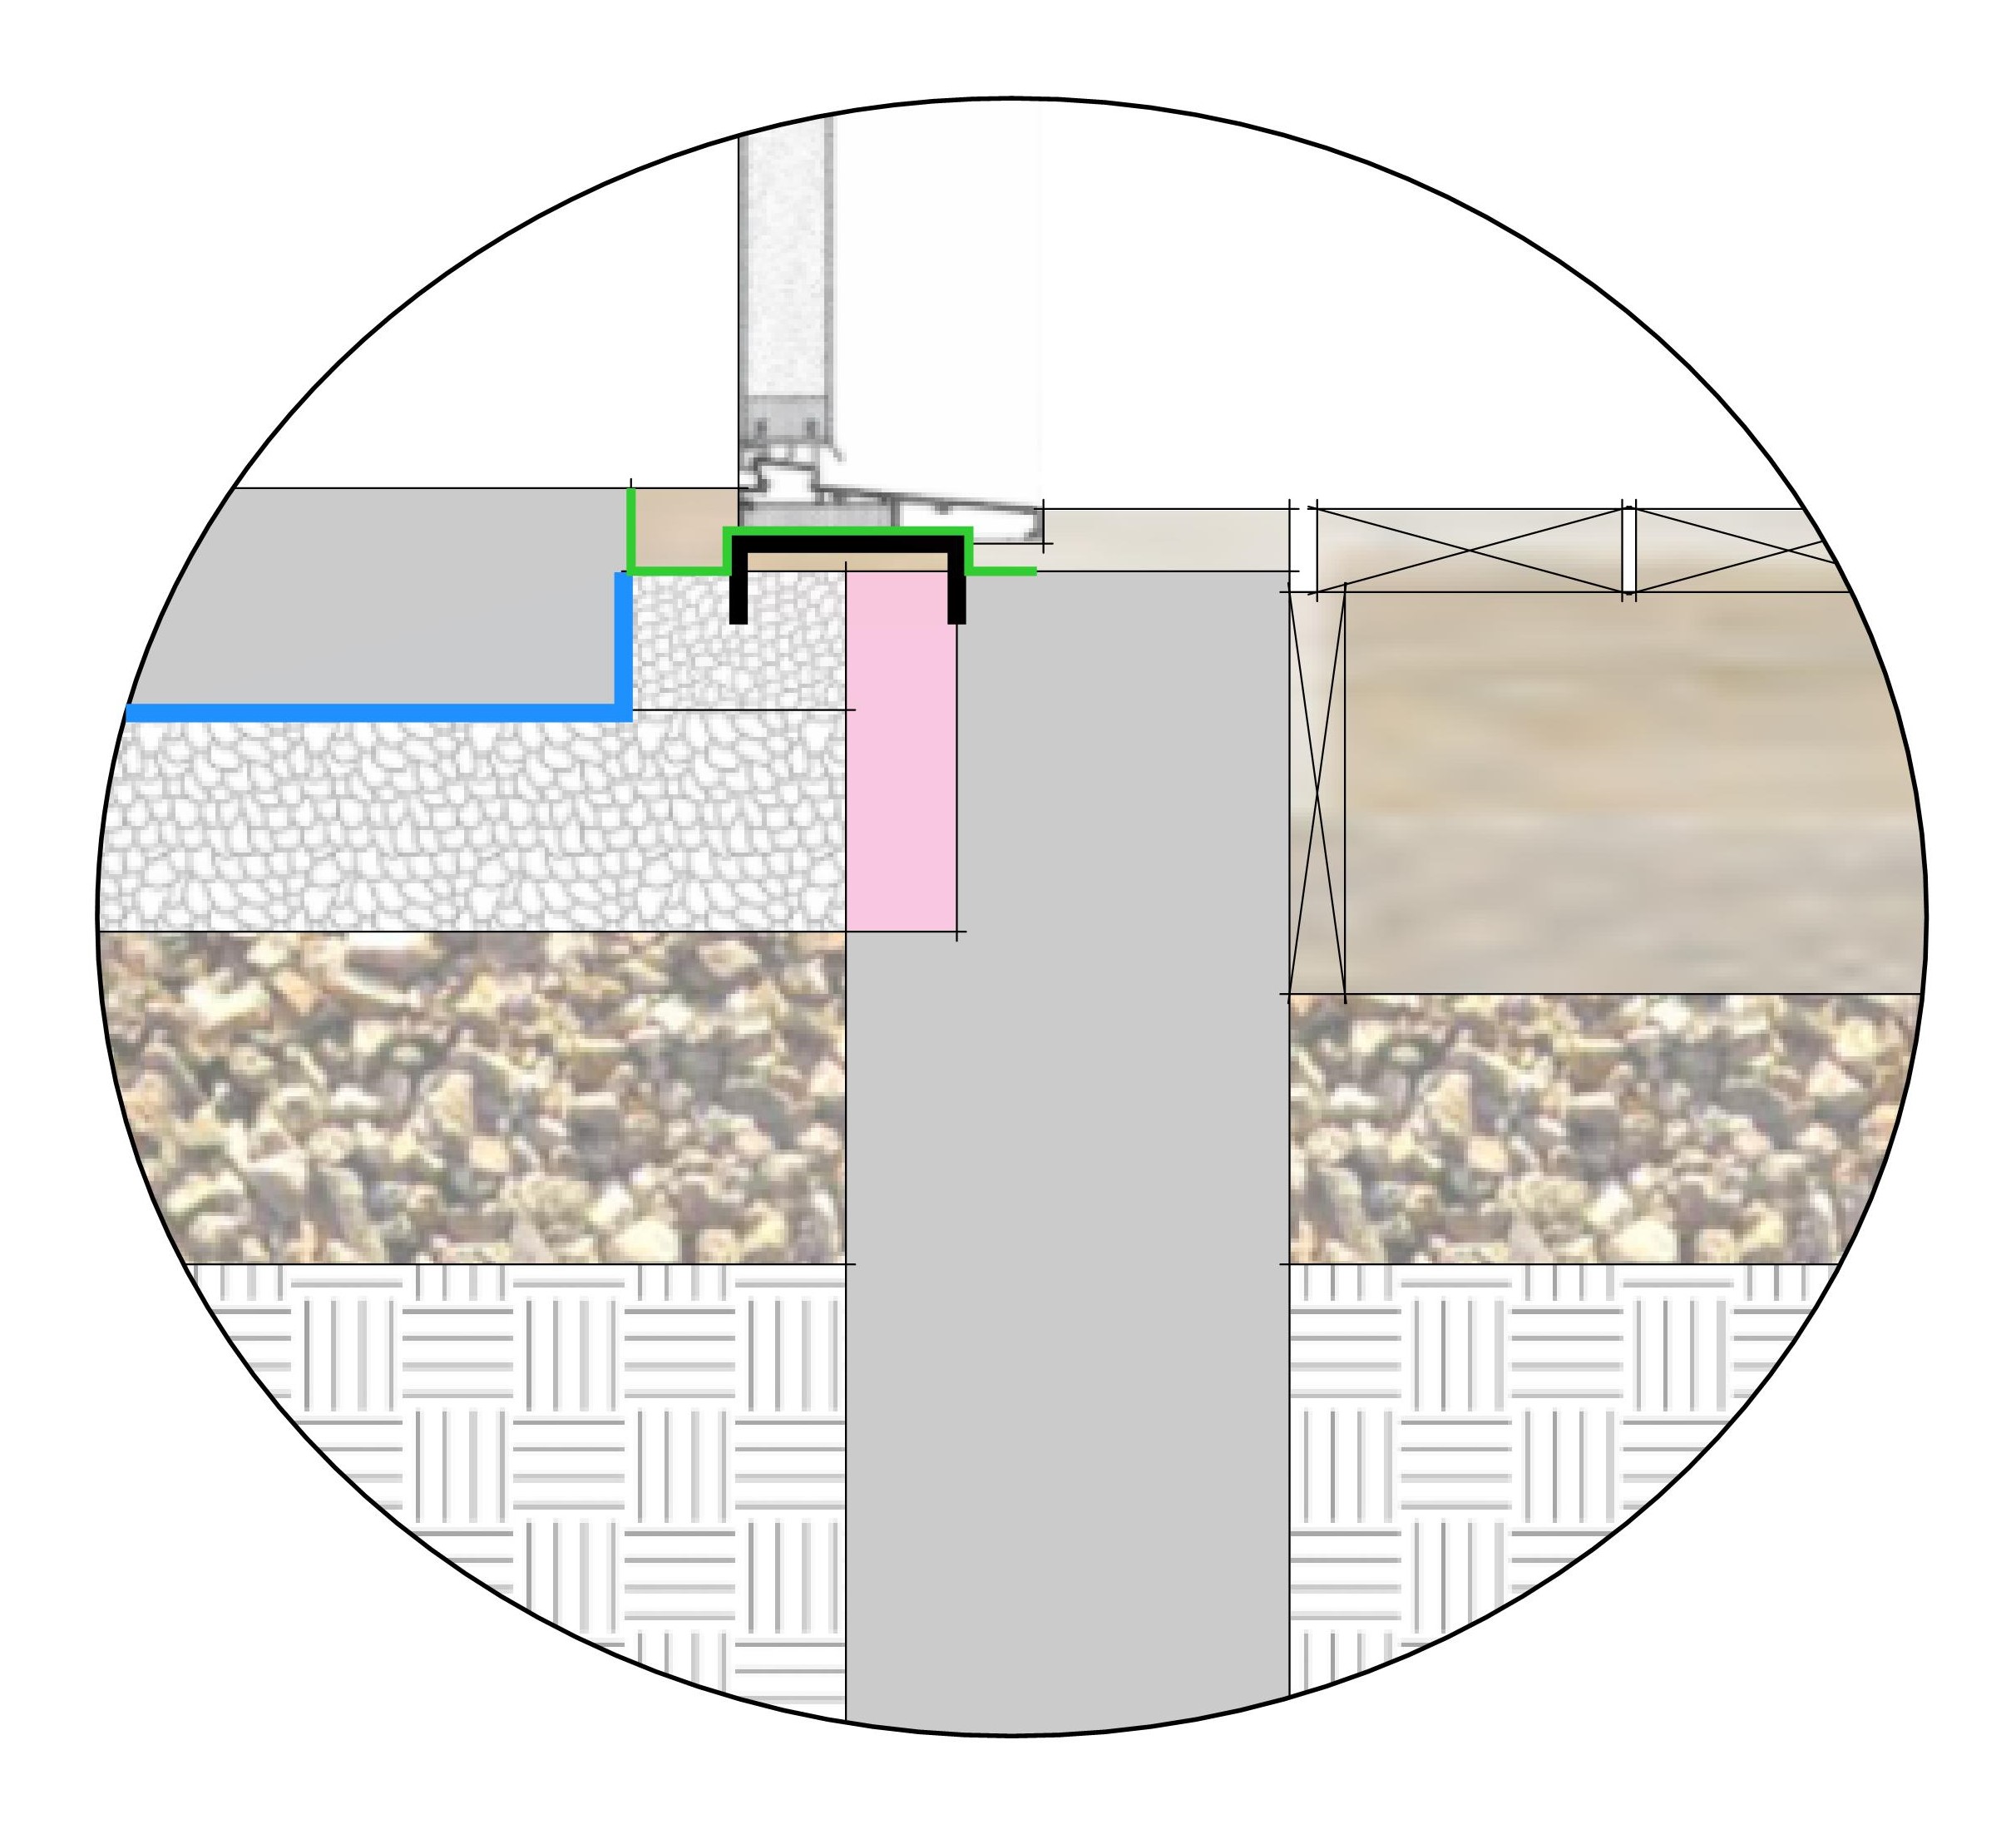
The front door presented its own unique challenge. It was important to me that we have an accessible entryway. Typical residential doors come with a bulky sill that can usually be overcome with sloped extensions or by building up interior floor layers, but with our slab floor we’re more locked in. For my last project, I chose an aluminum ADA sill which provides a low threshold but no effective thermal break: it frosts up during cold snaps. For this project, I had the concrete contractor block out the doorway with a 2×6, so that the top of the frostwall would land 1-1/2″ below the slab.
The carpenters secured a piece of plywood and a section of galvanized steel channel over the foam to provide a solid base for the door sill, adjusting it to the exact height needed to flush out with the slab. I caulked and taped and FlexWrapped as before.
Here is a section drawing showing the front door sill assembly. The green line is the 3M tape paired with FlexWrap to create a waterproof layer over the galvanized steel channel and plywood strip. A deck board will be notched to slip under the door’s aluminum sill to provide support.
This phase of work generated very little trash. The paper backing from the various tapes used is recyclable as miscellaneous paper. The clear plastic shrink wrap is also recyclable. There wasn’t much cardboard used in the packaging, but each bit was separated out and recycled. Many of the window and door corners came protected with black foam corners, and the heavier units came with black handles. These were coveted by Mike who could use them in his shop when shipping out his cabinetry work.
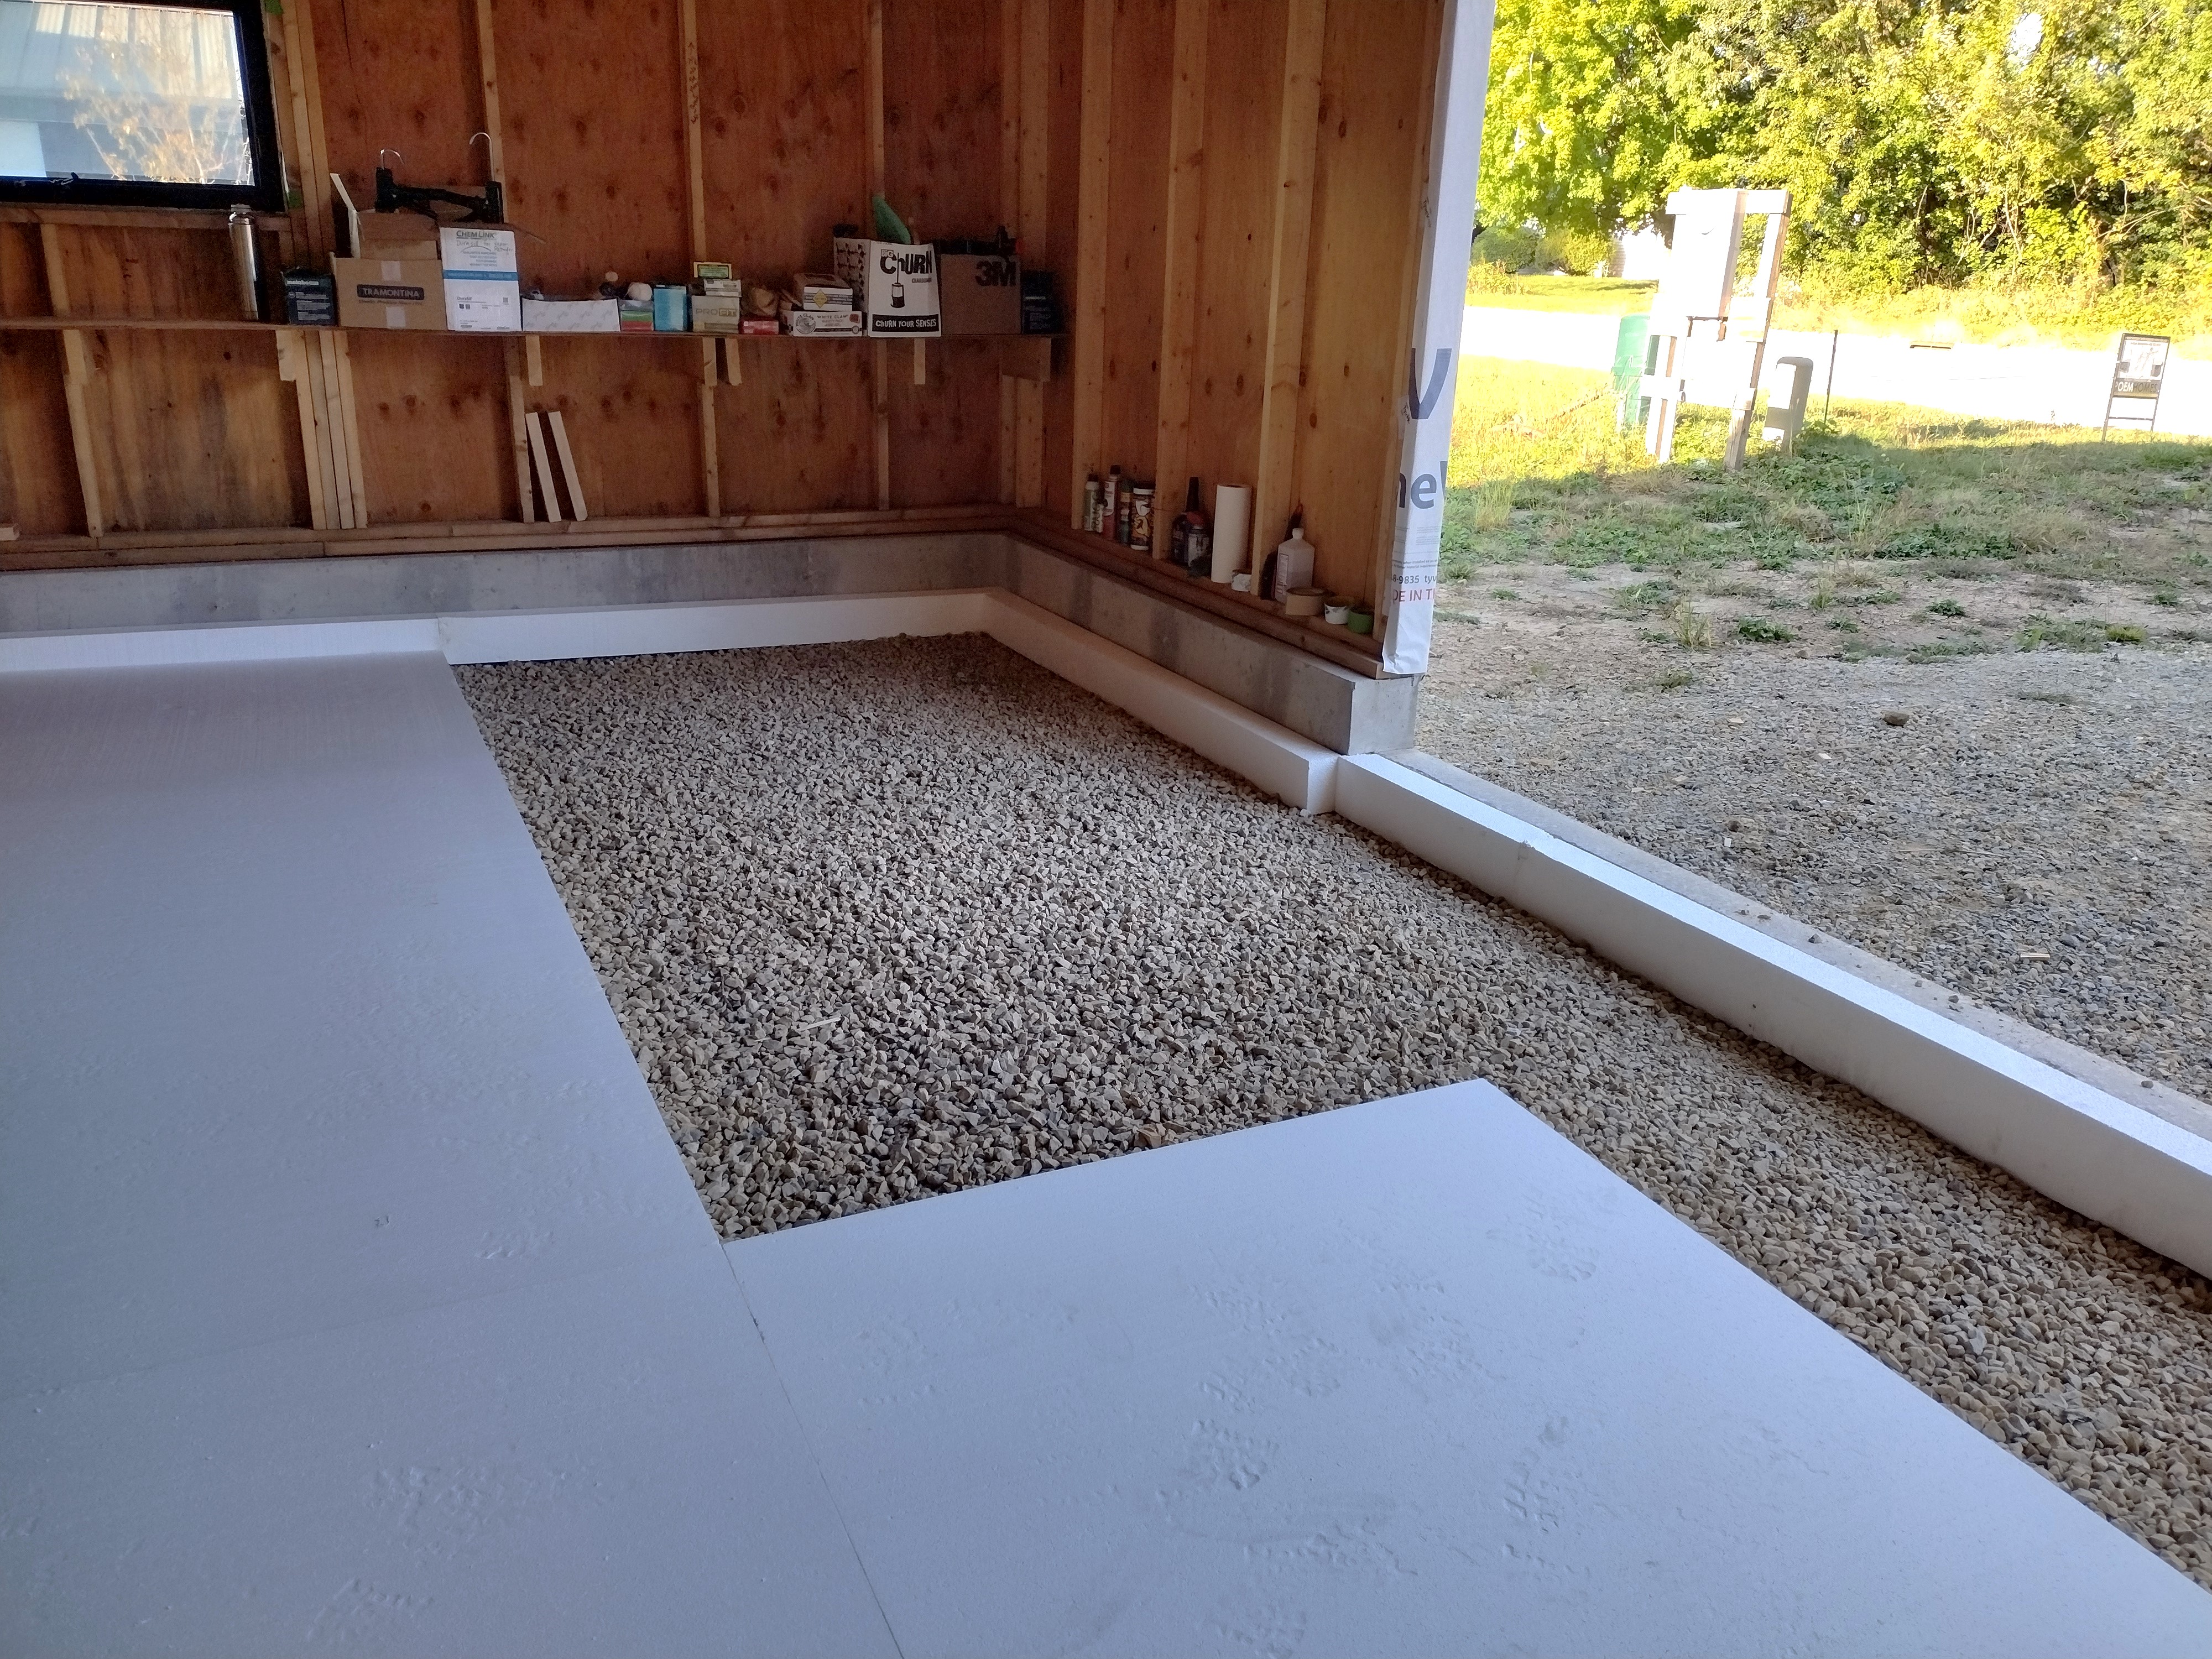
August 1 – August 30: As soon as the exterior of the house was buttoned up against the weather, our “weekend warrior” crew set to work prepping for the house and garage slab pours. We had a lot of steps ahead of us to create an air-sealed, vapor-sealed, and thermally-sealed assembly prior to the Big Day.
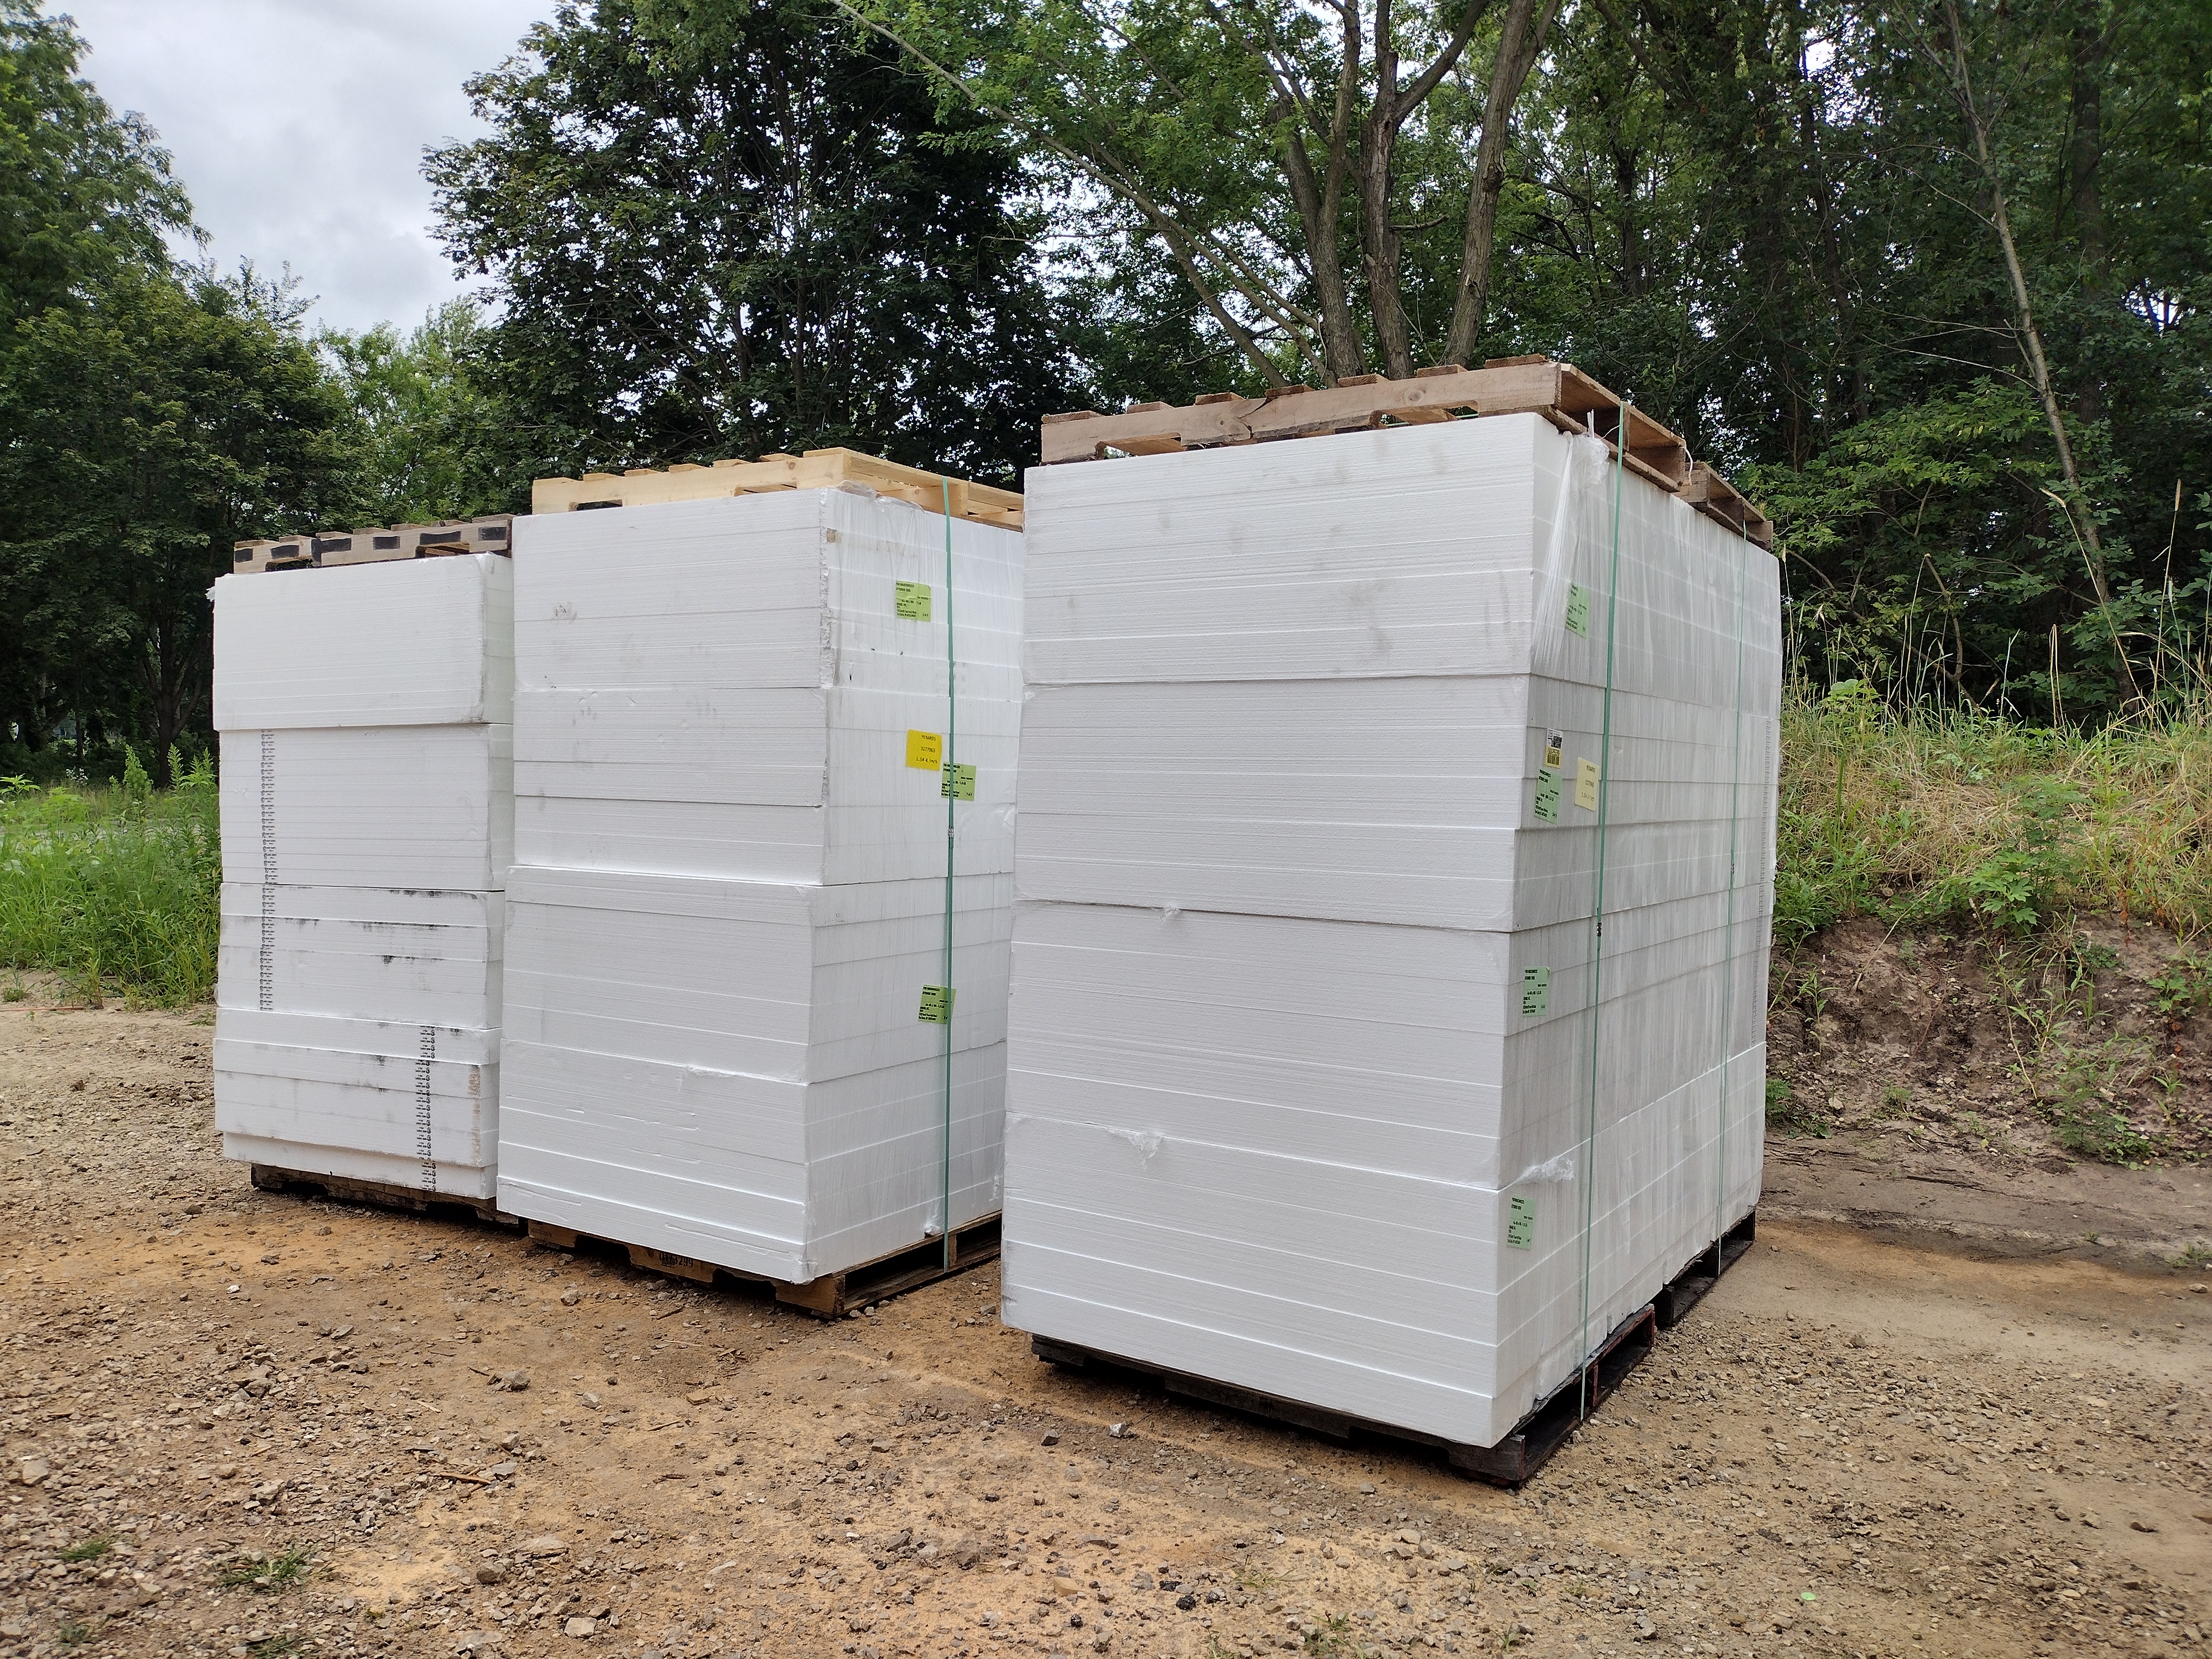
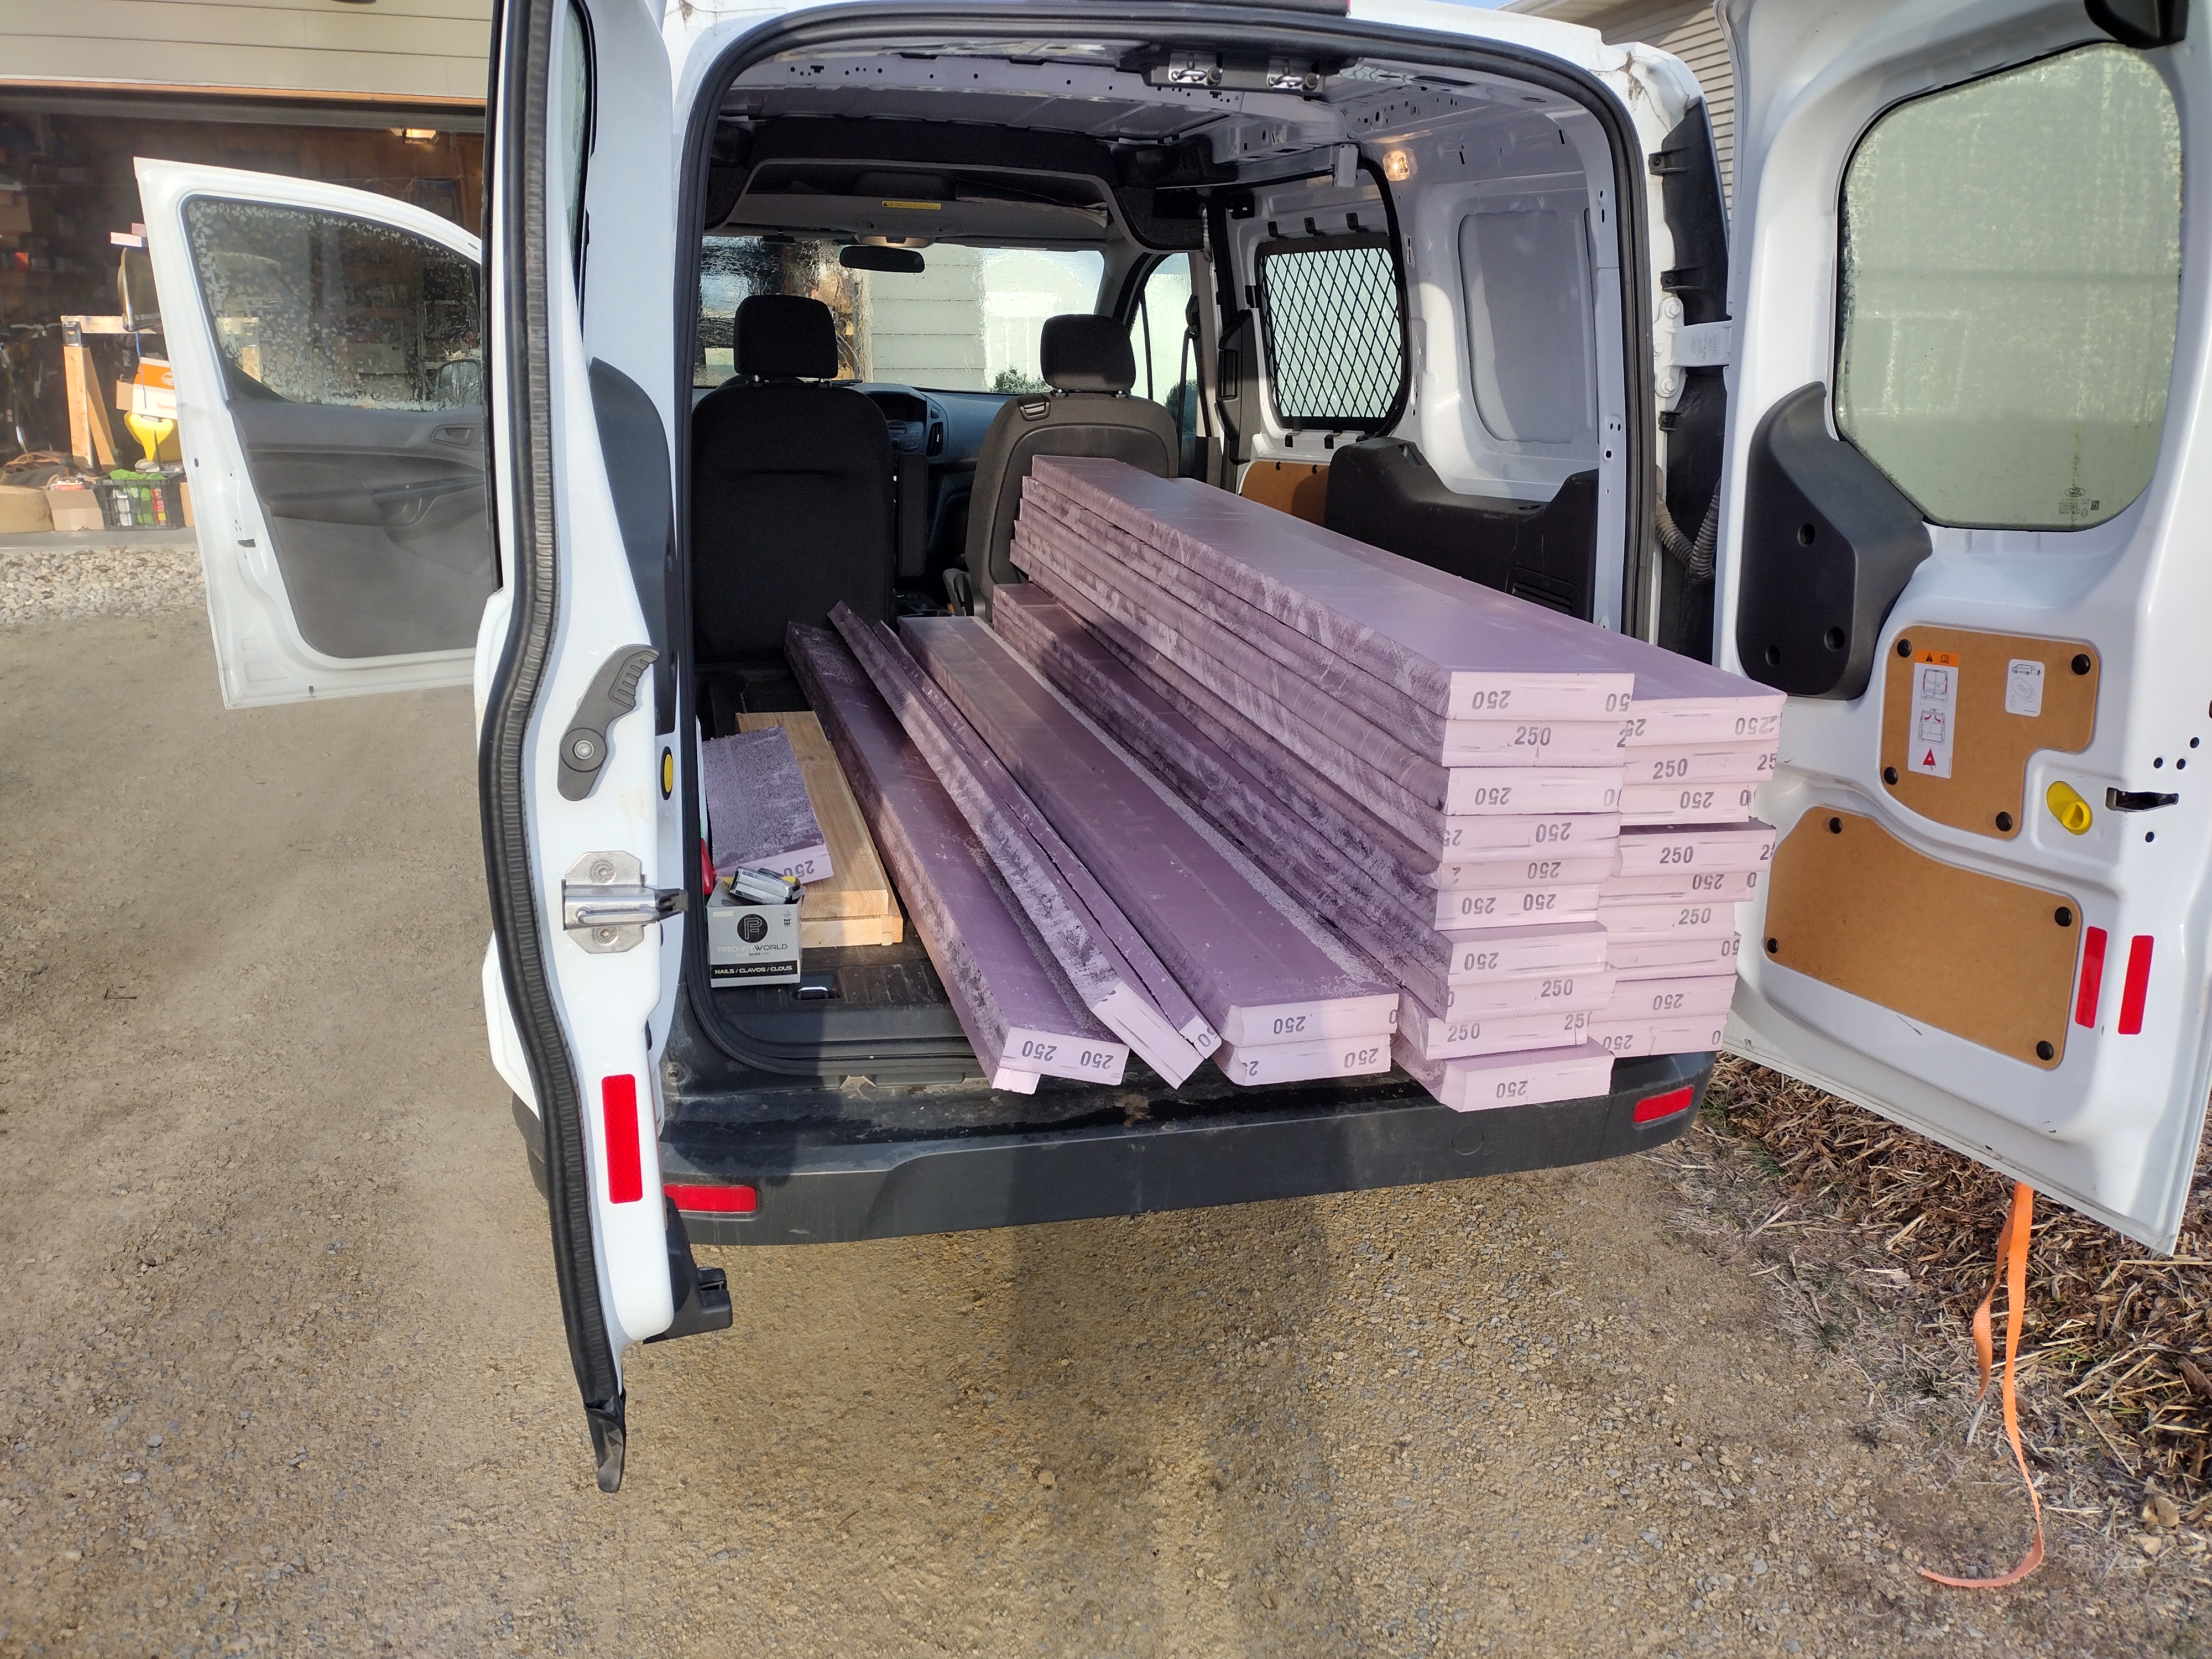
For slab insulation, I special ordered several pallets of InsulFoam Type II EPS (expanded polystyrene) sheet foam, in 4″ thickness for the house and 2″ thickness for the garage. Lumber yards and regional suppliers in the Madison area stock XPS (extruded polystyrene), but EPS is an anomaly. For convenience, I’d used XPS on my previous build but this time around, I wanted to do better.
I’m watching my diet: my carbon footprint diet that is. The manufacture of foam, whether in spray or sheet form, places a high toll on the environment. Fortunately, that’s changing. The XPS I used in 2020 has 6 times the carbon footprint of the formula now on the market. Even so, EPS comes out better. According to Builders for Climate Action BEAM carbon estimator and the EPA’s greenhouse gas calculator, using EPS instead of XPS would cut the environmental impact in half:
Owens Corning Foamular NGX 250 = 4008 kilograms of Carbon Dioxide equivalent = driving 10,207 miles
OR
InsulFoam Type II EPS = 1821 kilograms of Carbon Dioxide equivalent = driving 4,367 miles
To be sure we didn’t end up with any waste, I prepared a Cut Sheet in SketchUp for the crew to follow (house plan shown). The idea was to rip edge strips out of 3.5 sheets (yellow), use the remainder and cut 3 more sheets for 4 foot x 4 foot starters (hatch), and then lay the full sheets in brick pattern to reduce thermal bridging. If nothing went wrong, I’d need 47 sheets. I ordered 49.
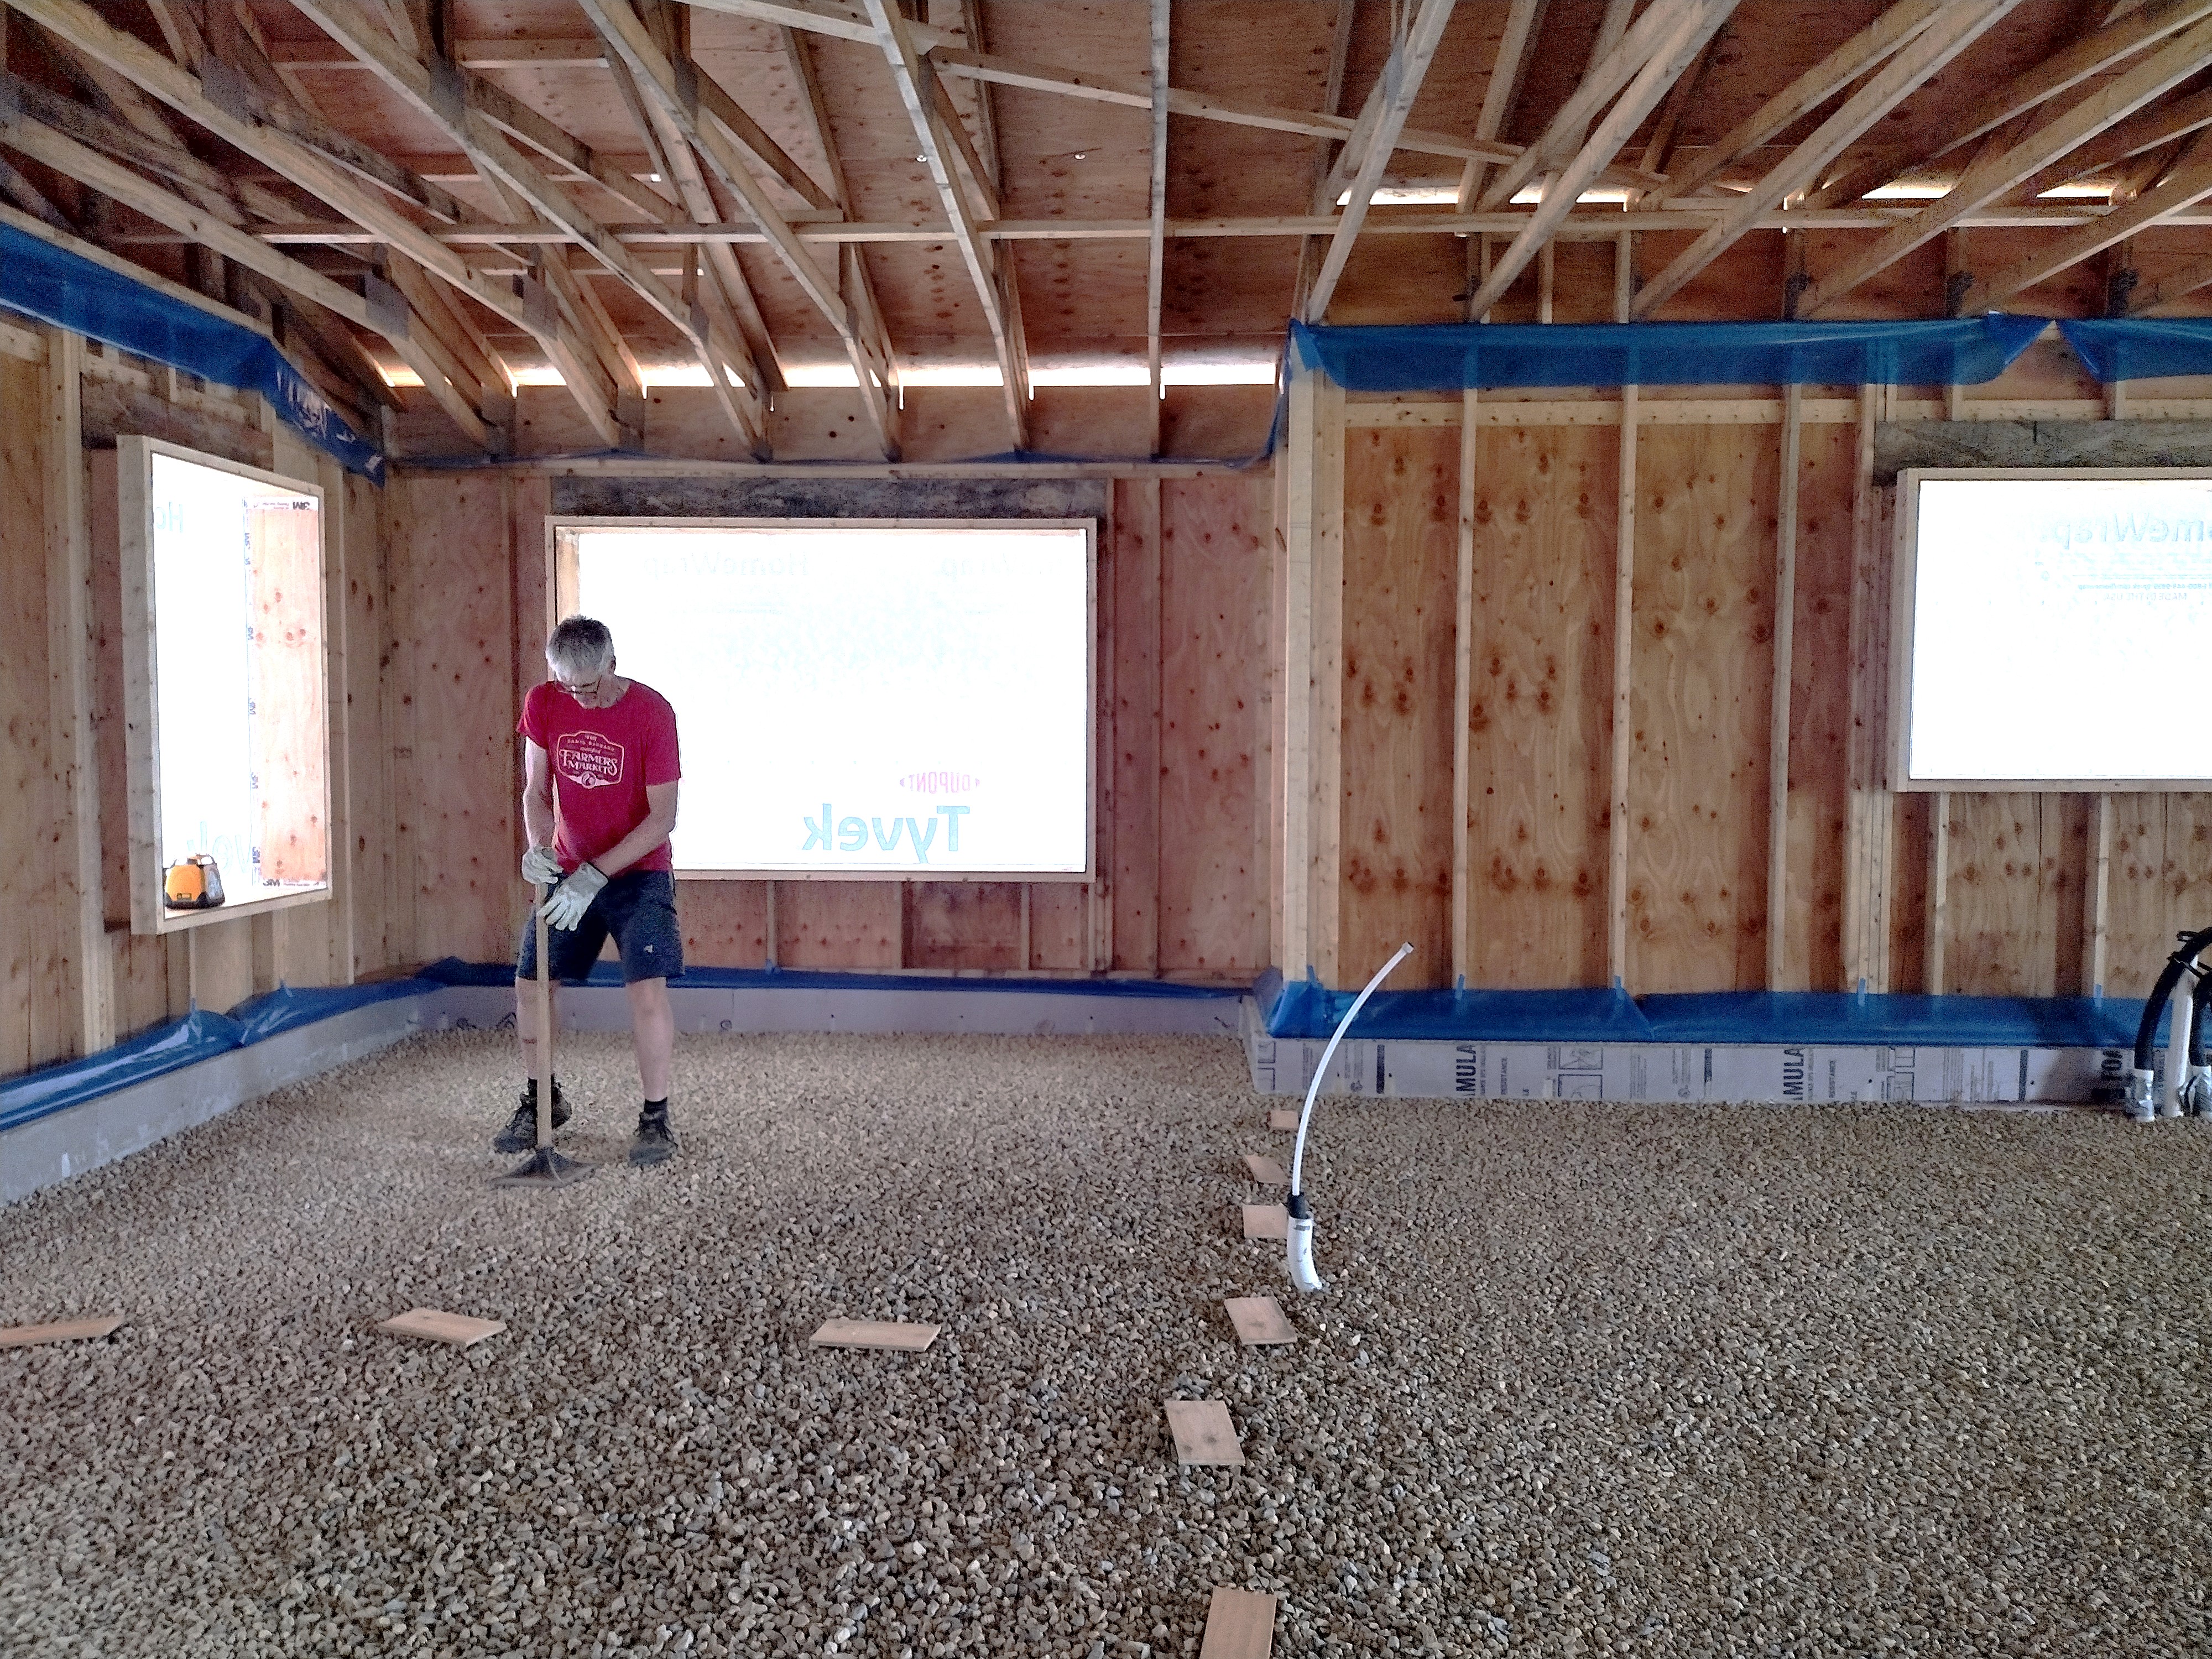
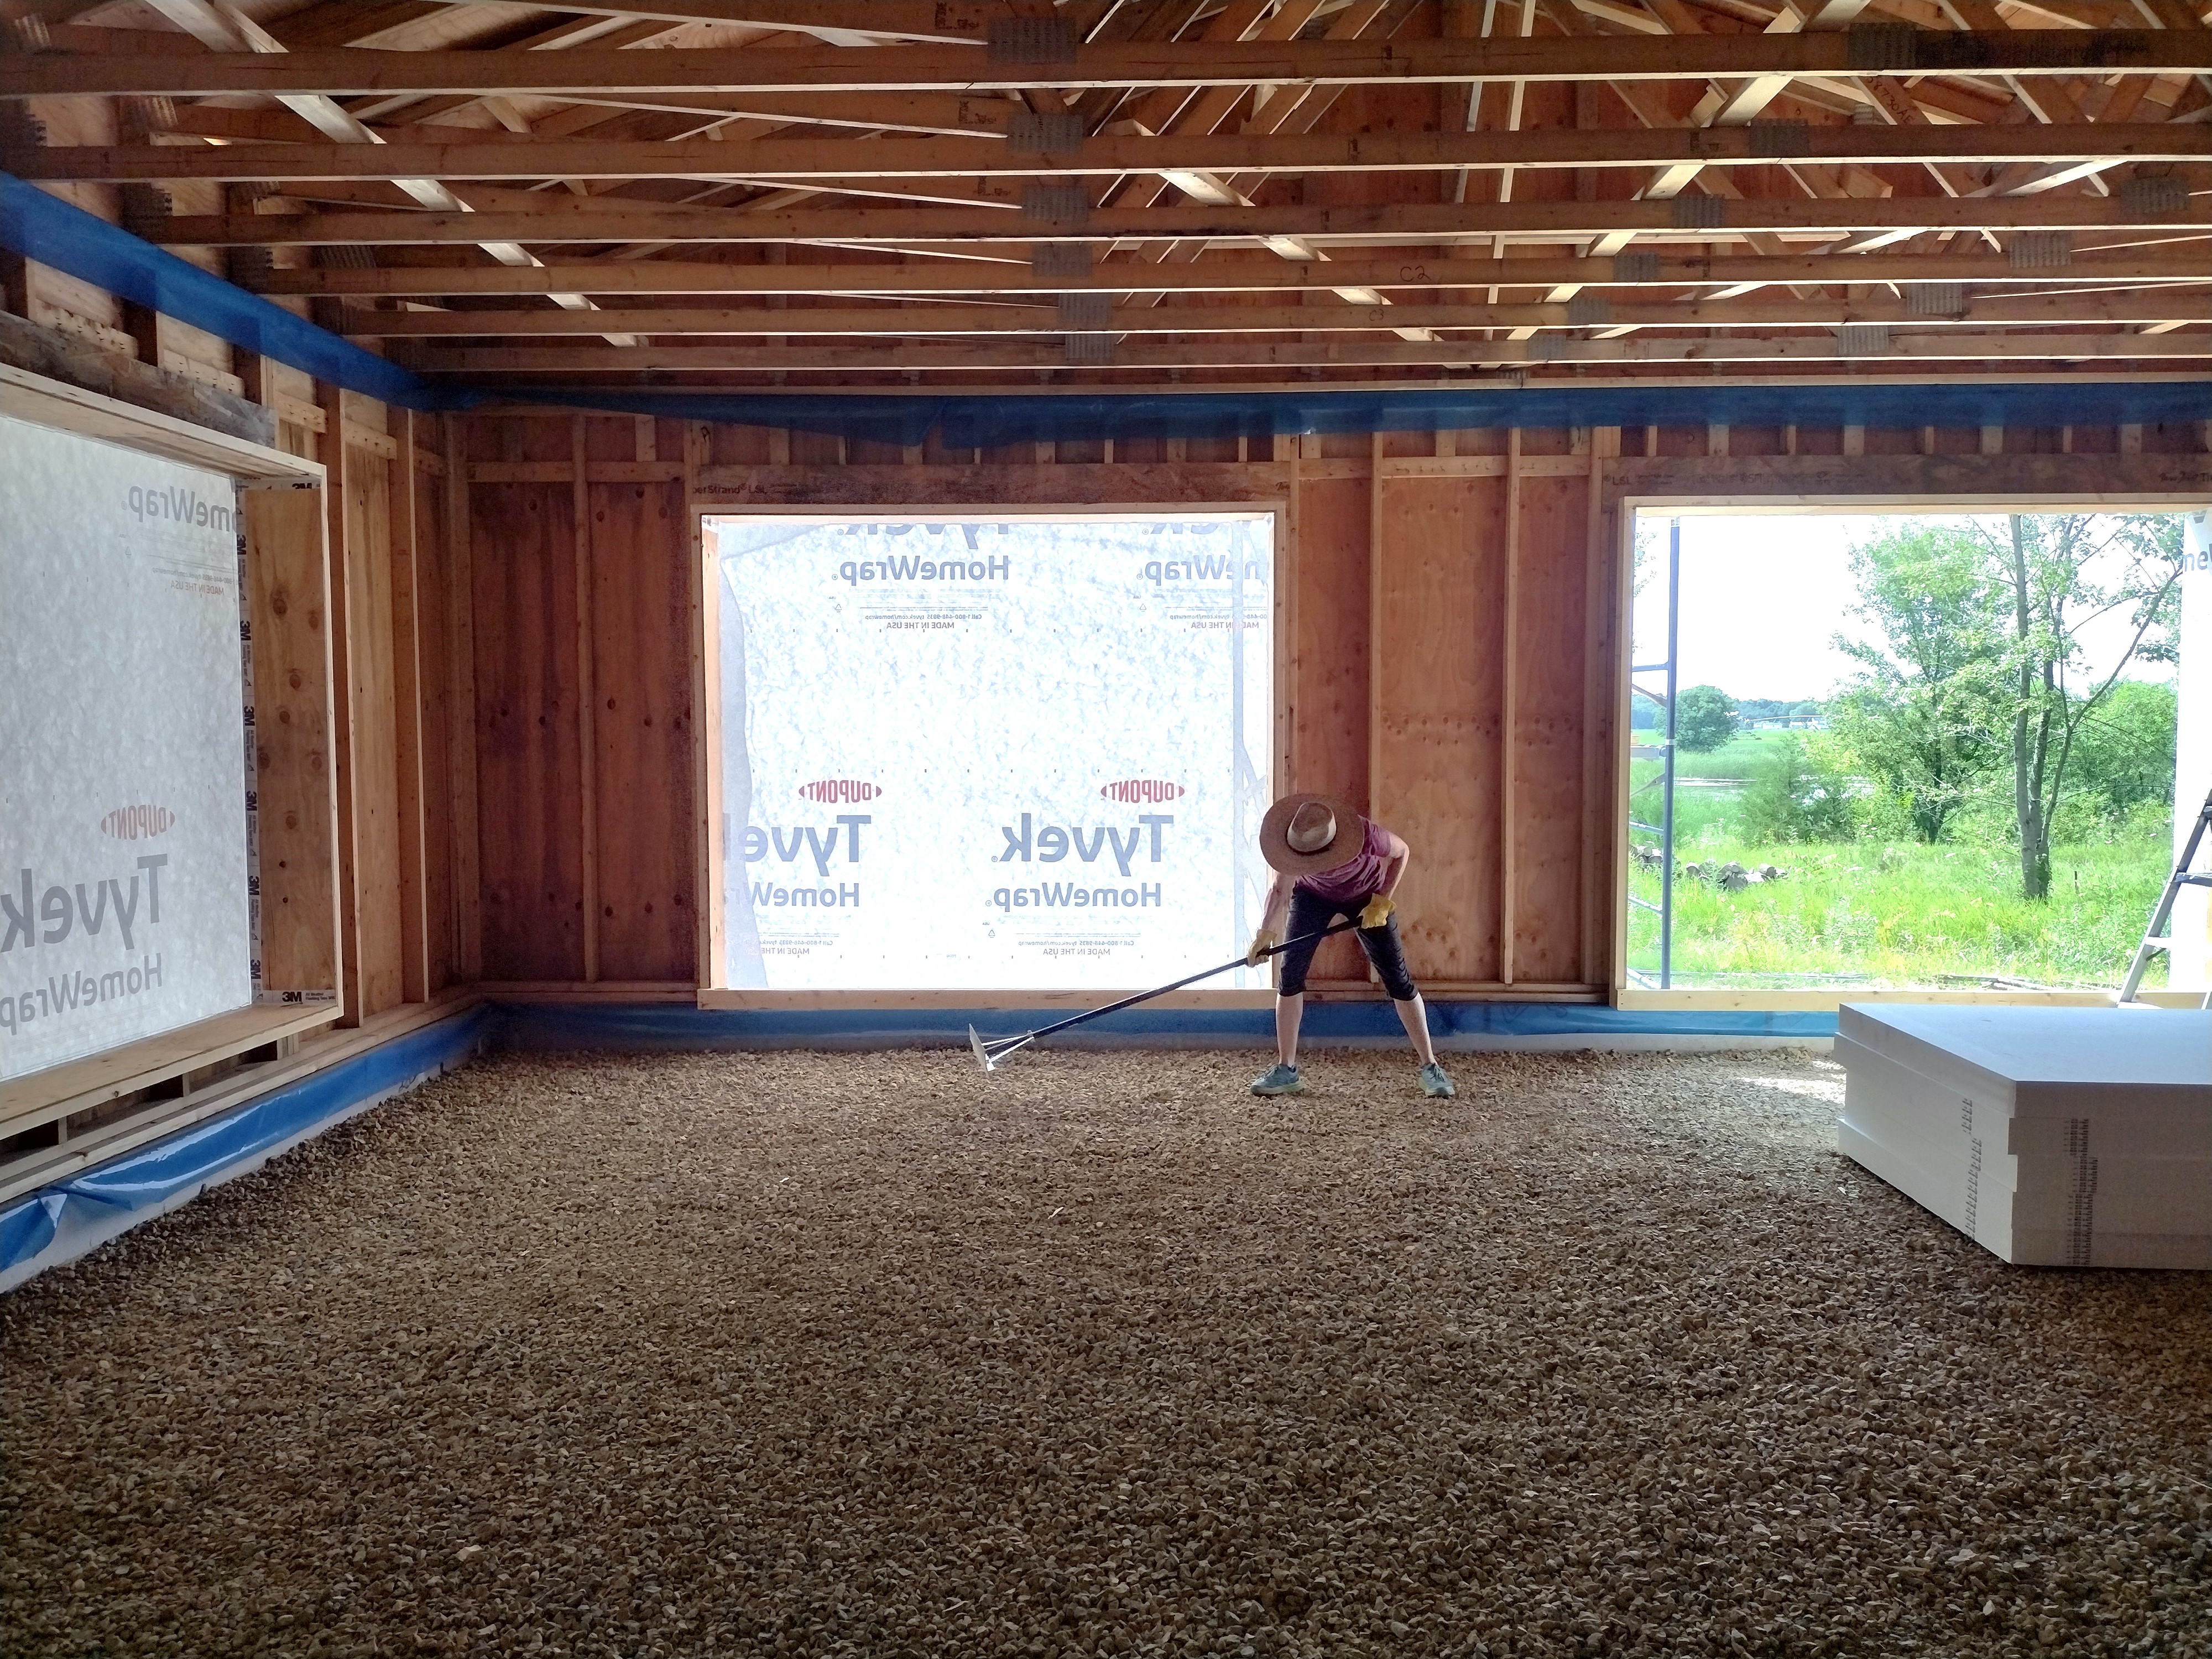
Our crew’s first task was to rake level and smooth out the gravel laid down by the excavator for a radon bed (see previous blog post Up and Out of the Ground). We used a laser level for overall “good”, then our eyes to finesse. Tamping was an essential (and hard) step but necessary to get the sheets to lay flat. I was tempted to order in a load of pea gravel after spreading and raking out a trial batch of it on top of the rough stone. The foam sheets did rest easier, but the extra step and expense was nixed in favor of soldiering on. Later, when laying the 2″ thick sheets for the garage, I found that tamping wasn’t as critical, as the thinner sheets could more easily “ride” the rough stones and occasional dips.
We started with the perimeter strips, then executed our Cut Sheet pattern. To get a nice, clean cut through 4″ thick material, I turned to carpenter Cale Armstrong who happened to own a 16″ saw. He accurately and quickly ripped the strips. For the half sheets, we used a standard 8″ saw, flipping the material over and lining up to our first pass. For holes, hole saw bits chucked into our drill. For other cuts, simple hand saws and rasps. All these cuts produced foam dust that was hard to corrale for disposal.
We had some tricky cuts.
We used wood shims to get everything tight and then spray foamed the gaps using canned spray foam from HandiFoam, a Green Guard Gold certified product low in chemical emissions.
Here you can see the 6 inch thick foam perimeter: 2 inches of pink XPS installed as a reverse brick ledge in the foundation forms (see Footings + Foundations) plus the 4″ EPS strip for a total R-value of 28. This detail is possible because it will be completely covered by the 12″ wide double stud wallwe will be building.The 4 inch under-slab foam has an R-value of 19.
Wisconsin is currently enforcing the Uniform Dwelling Code, which is based on the IRC 2009 Code (International Residential Code). Needless to say, we are far behind other states in updating our Code for both energy efficiency and in aligning with current building science, which proves that higher insulation levels and tighter building enclosures ensure more durable, trouble-free homes with healthier indoor air for their owners.
Poem Homes strives for insulation levels that are double Code Minimum. Upgrading the slab-edge from Code Minimum R-15 to R-28 and the under-slab from Code Minimum R-10 to R-19 saves $78/year in heating costs, according to my REM/Rate energy model.
The extra cost of this foam is $1543, so the simple payback, not accounting for inflation or the future cost of energy is: 1543 / 78 = 20years
The simple ROI (return on investment), not accounting for inflation or the future cost of energy is: 78 / 1543 = 5.0 %
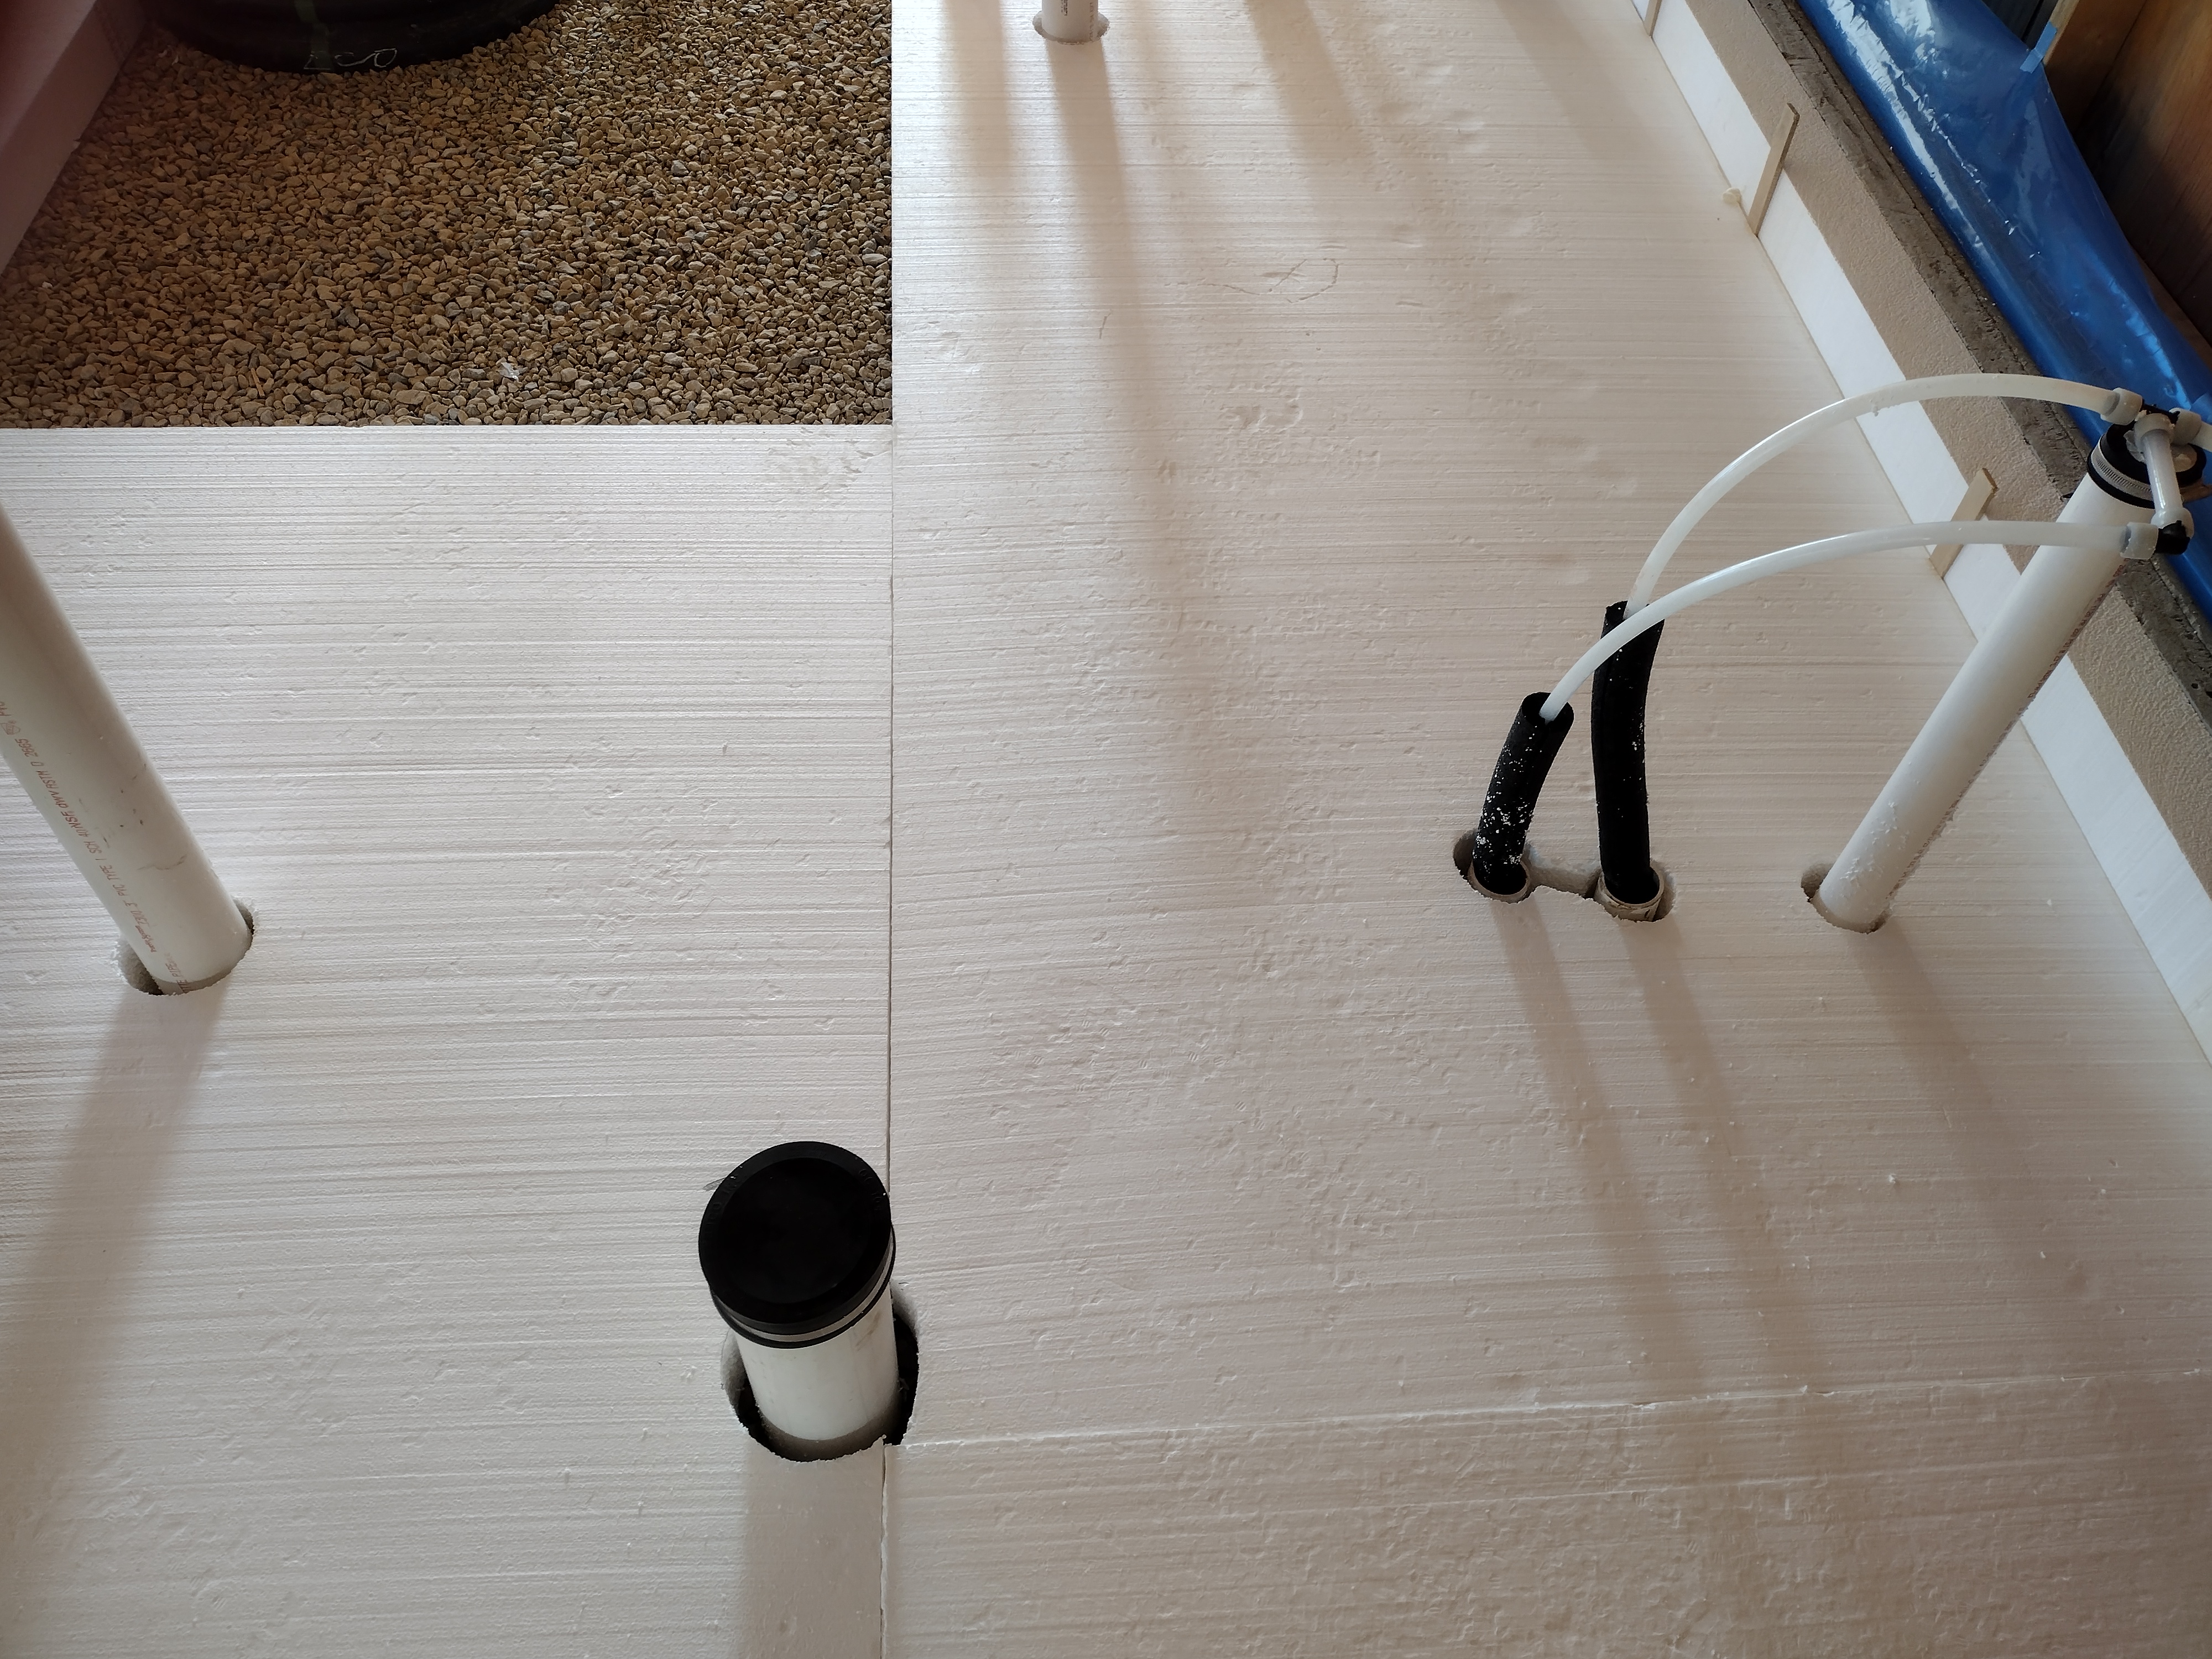
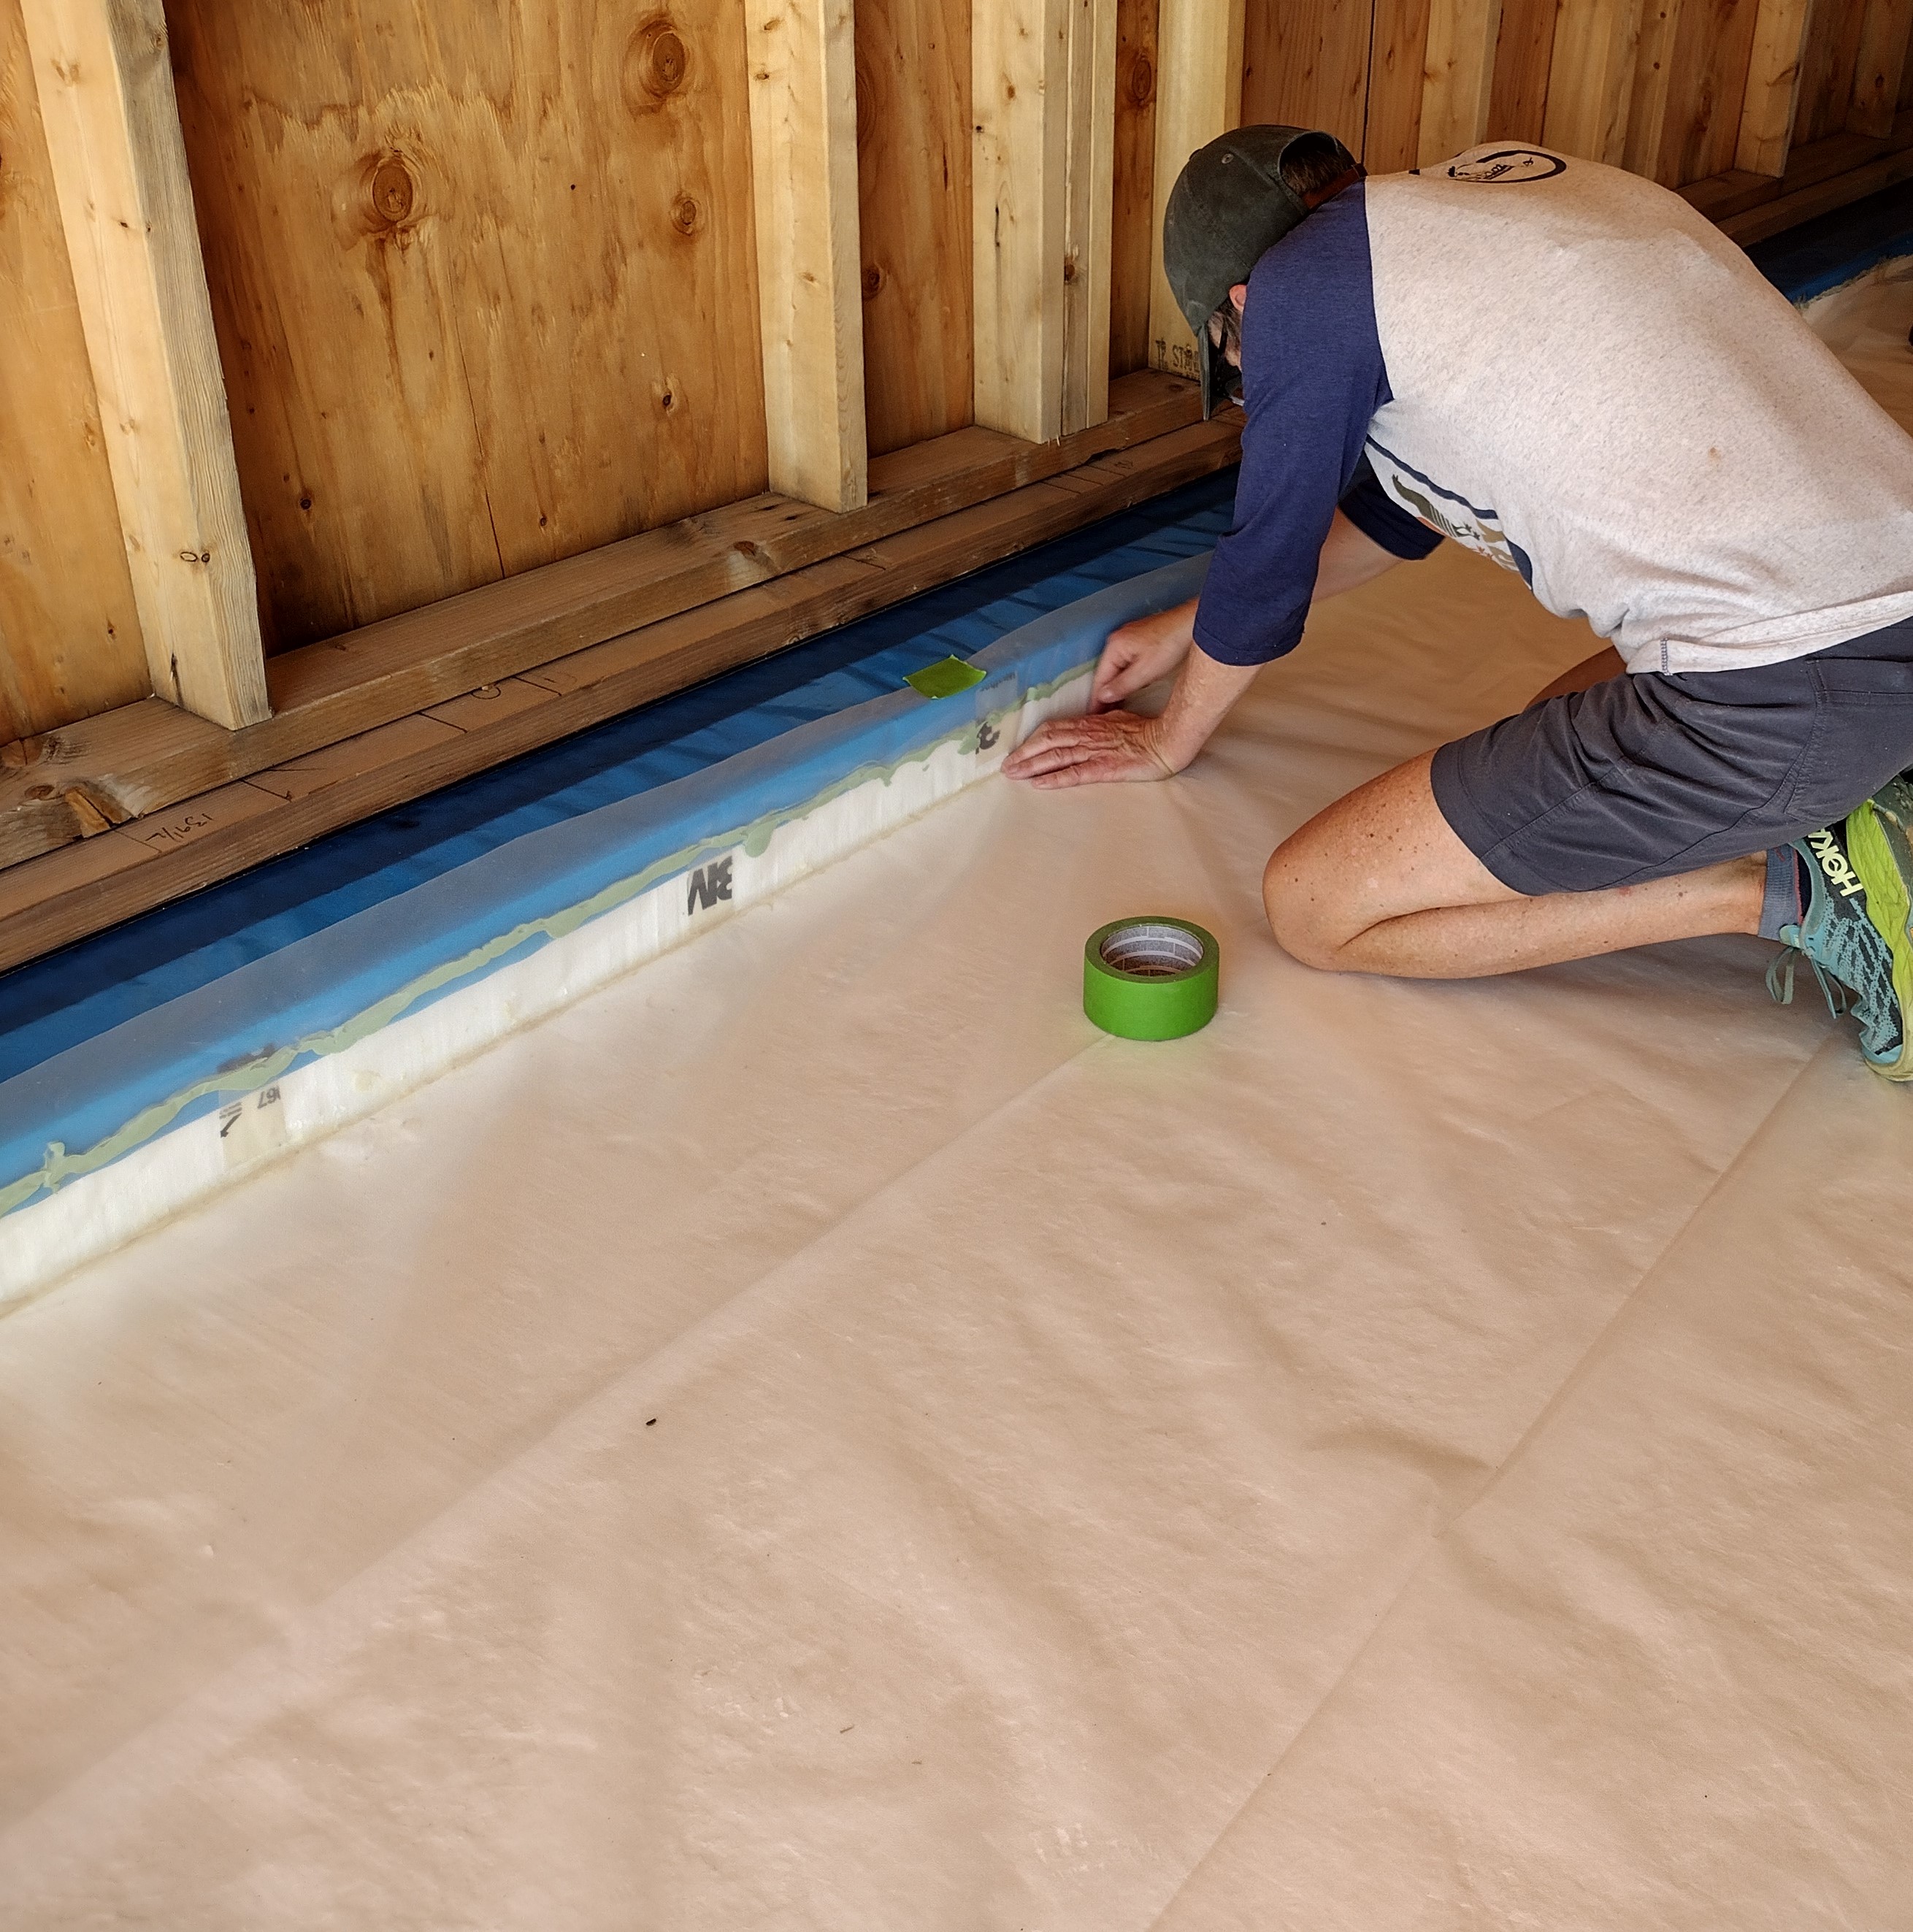
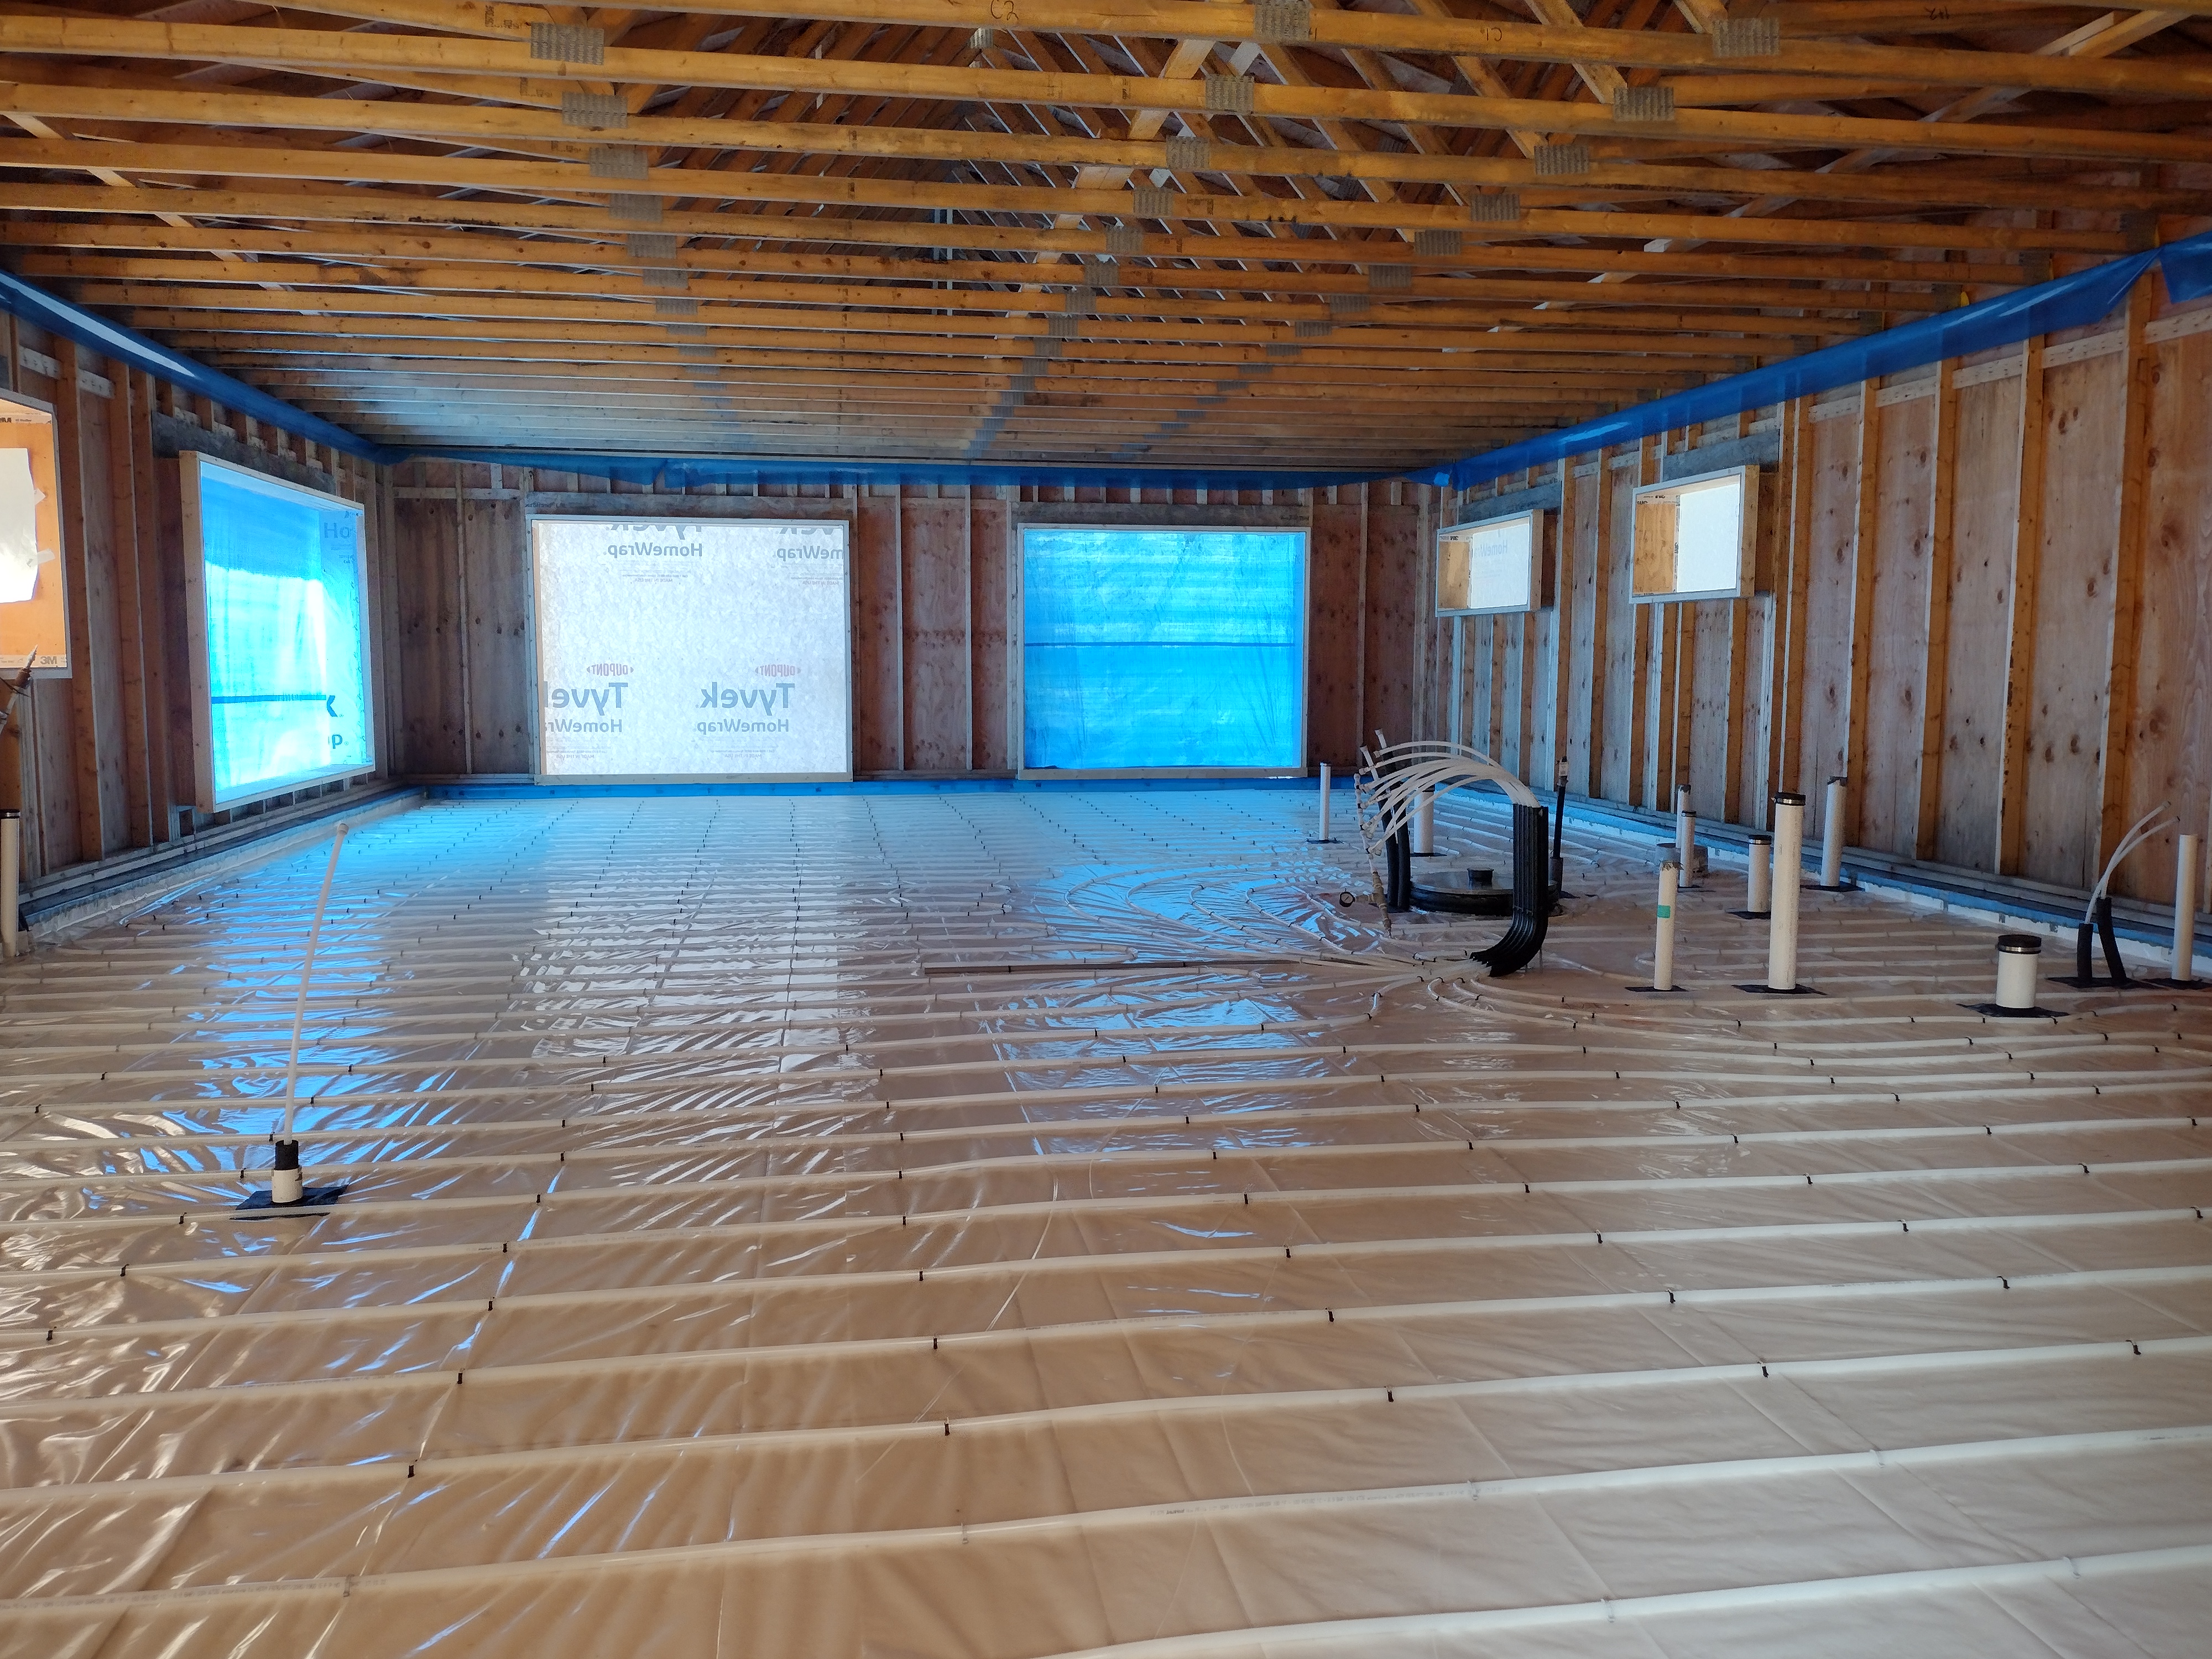
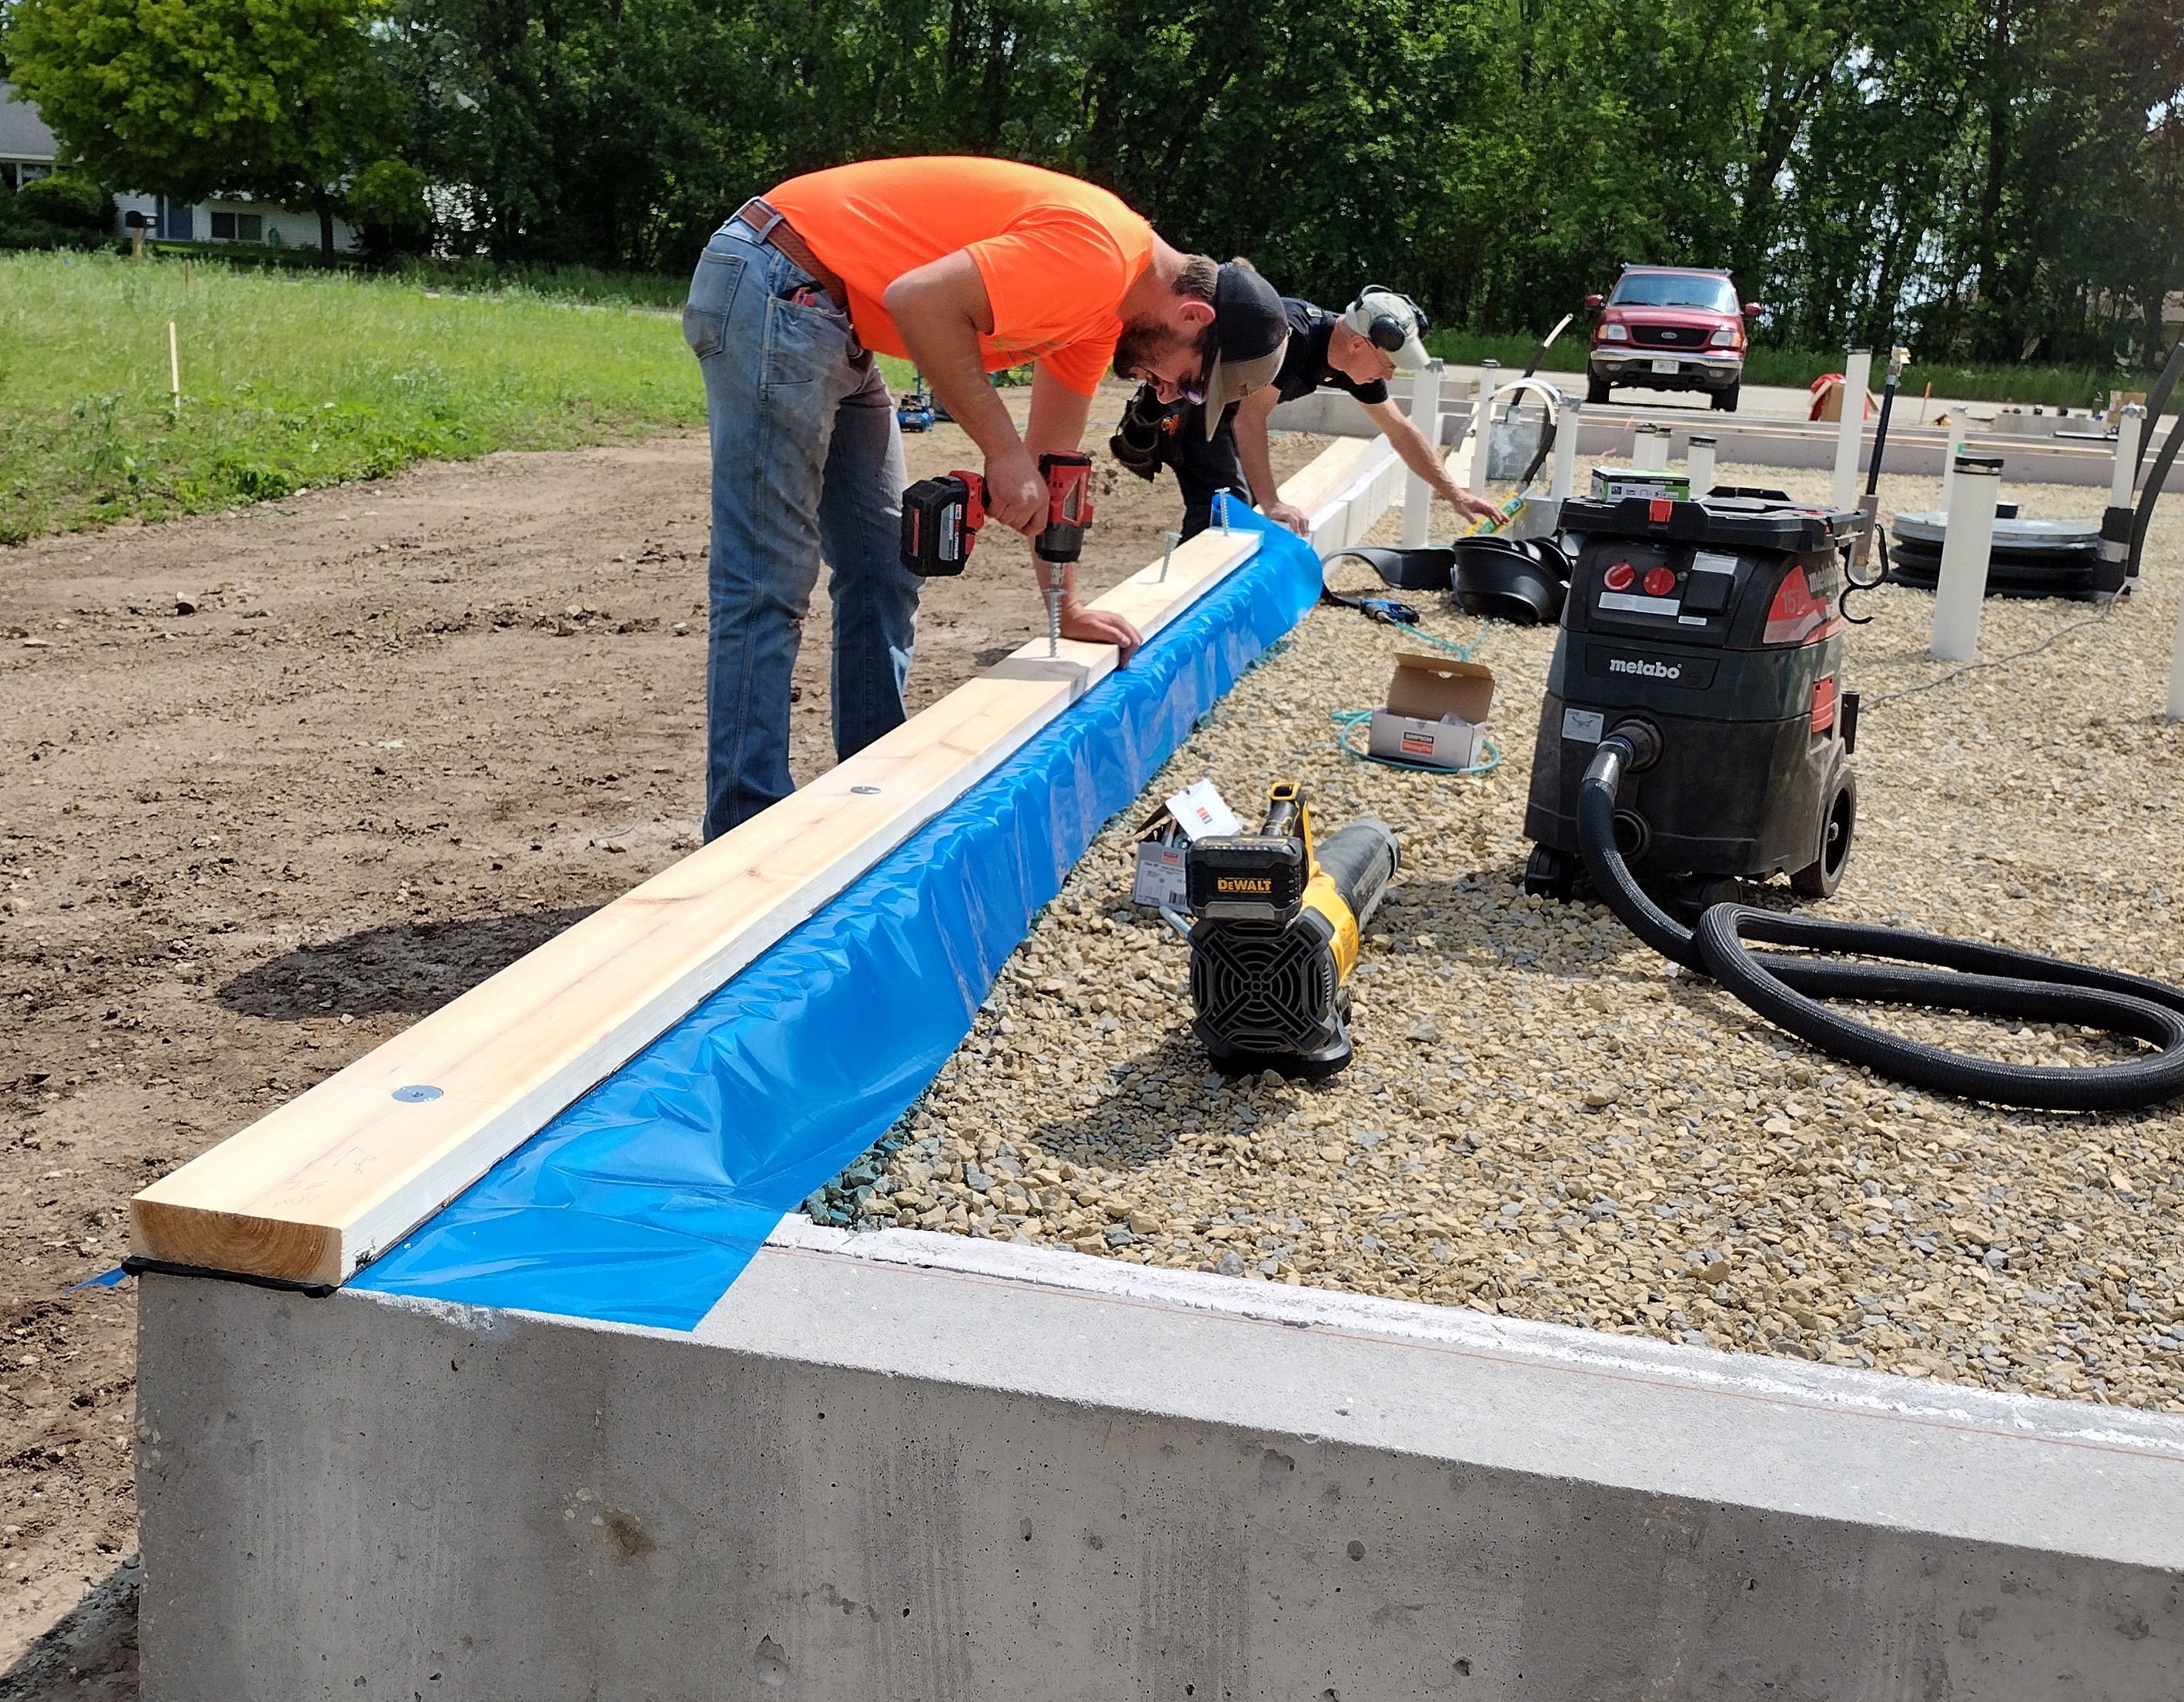
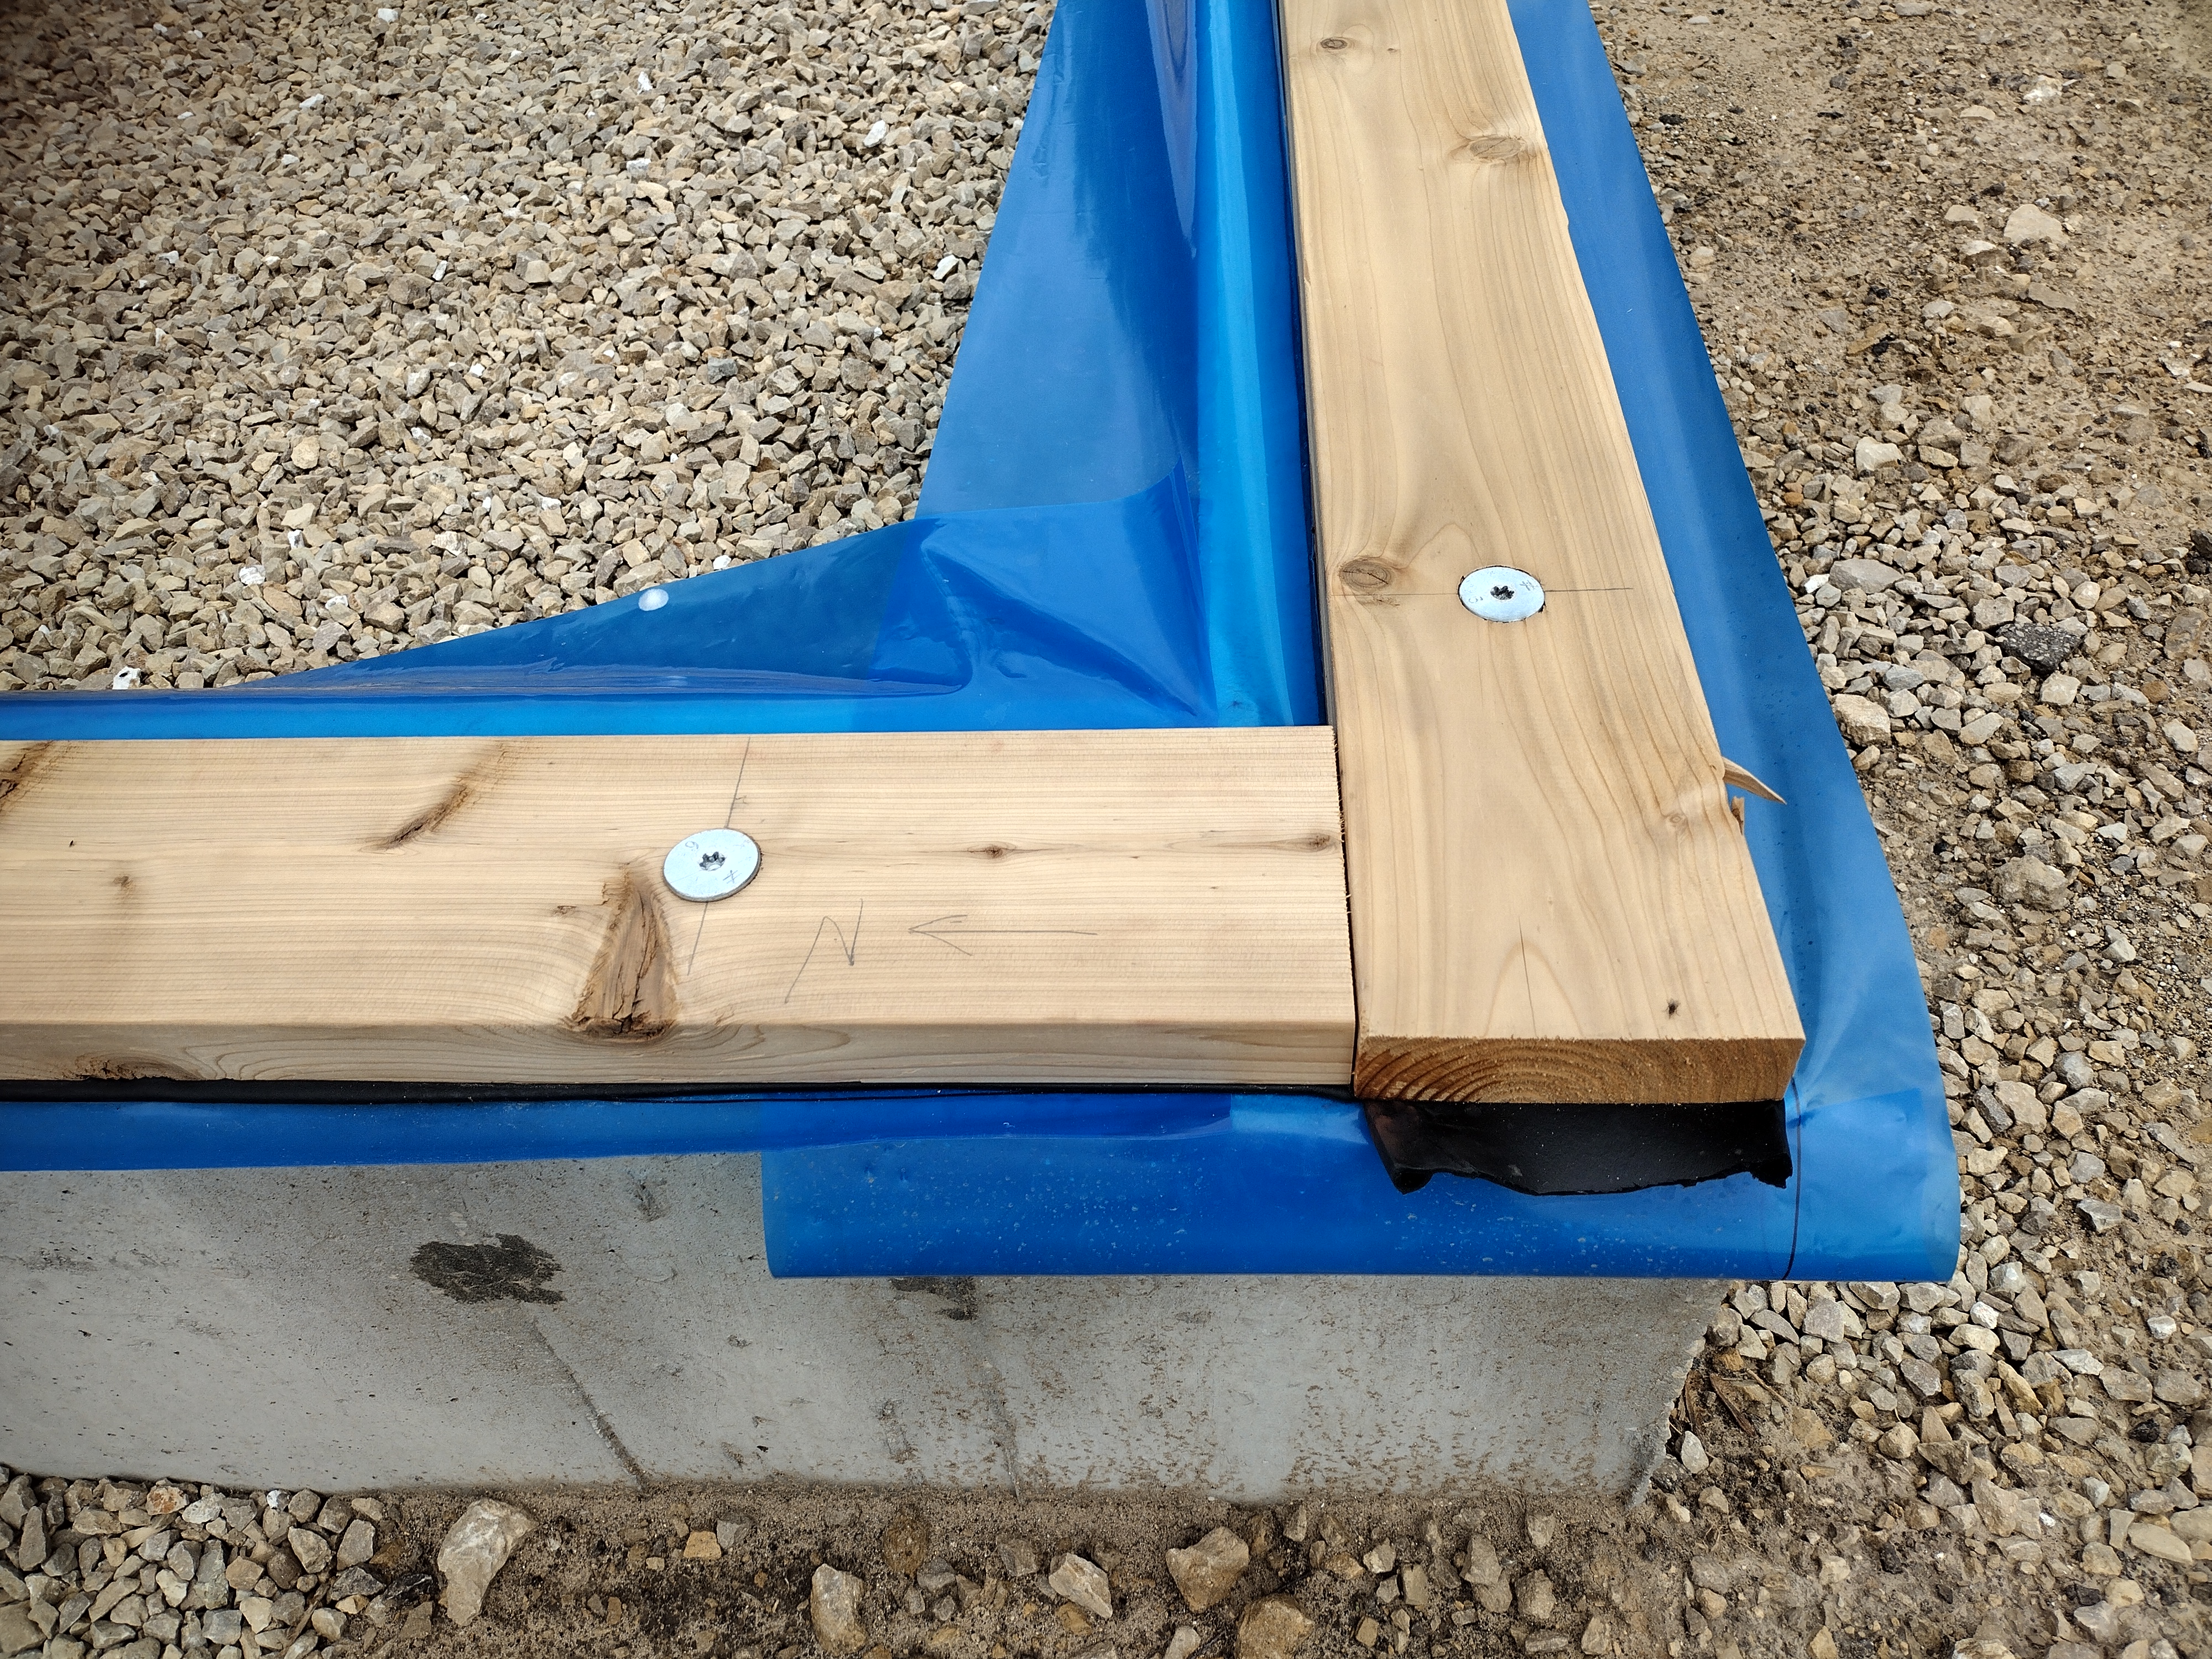
Our next step was to roll out 6 mil polyethylene vapor barrier and caulk or tape it to the previously installed strip of blue vapor barrier (see Sill Plates). Together with the taped plywood wall sheathing, this creates the home’s exterior air barrier (see Exterior Air + Water Barriers).
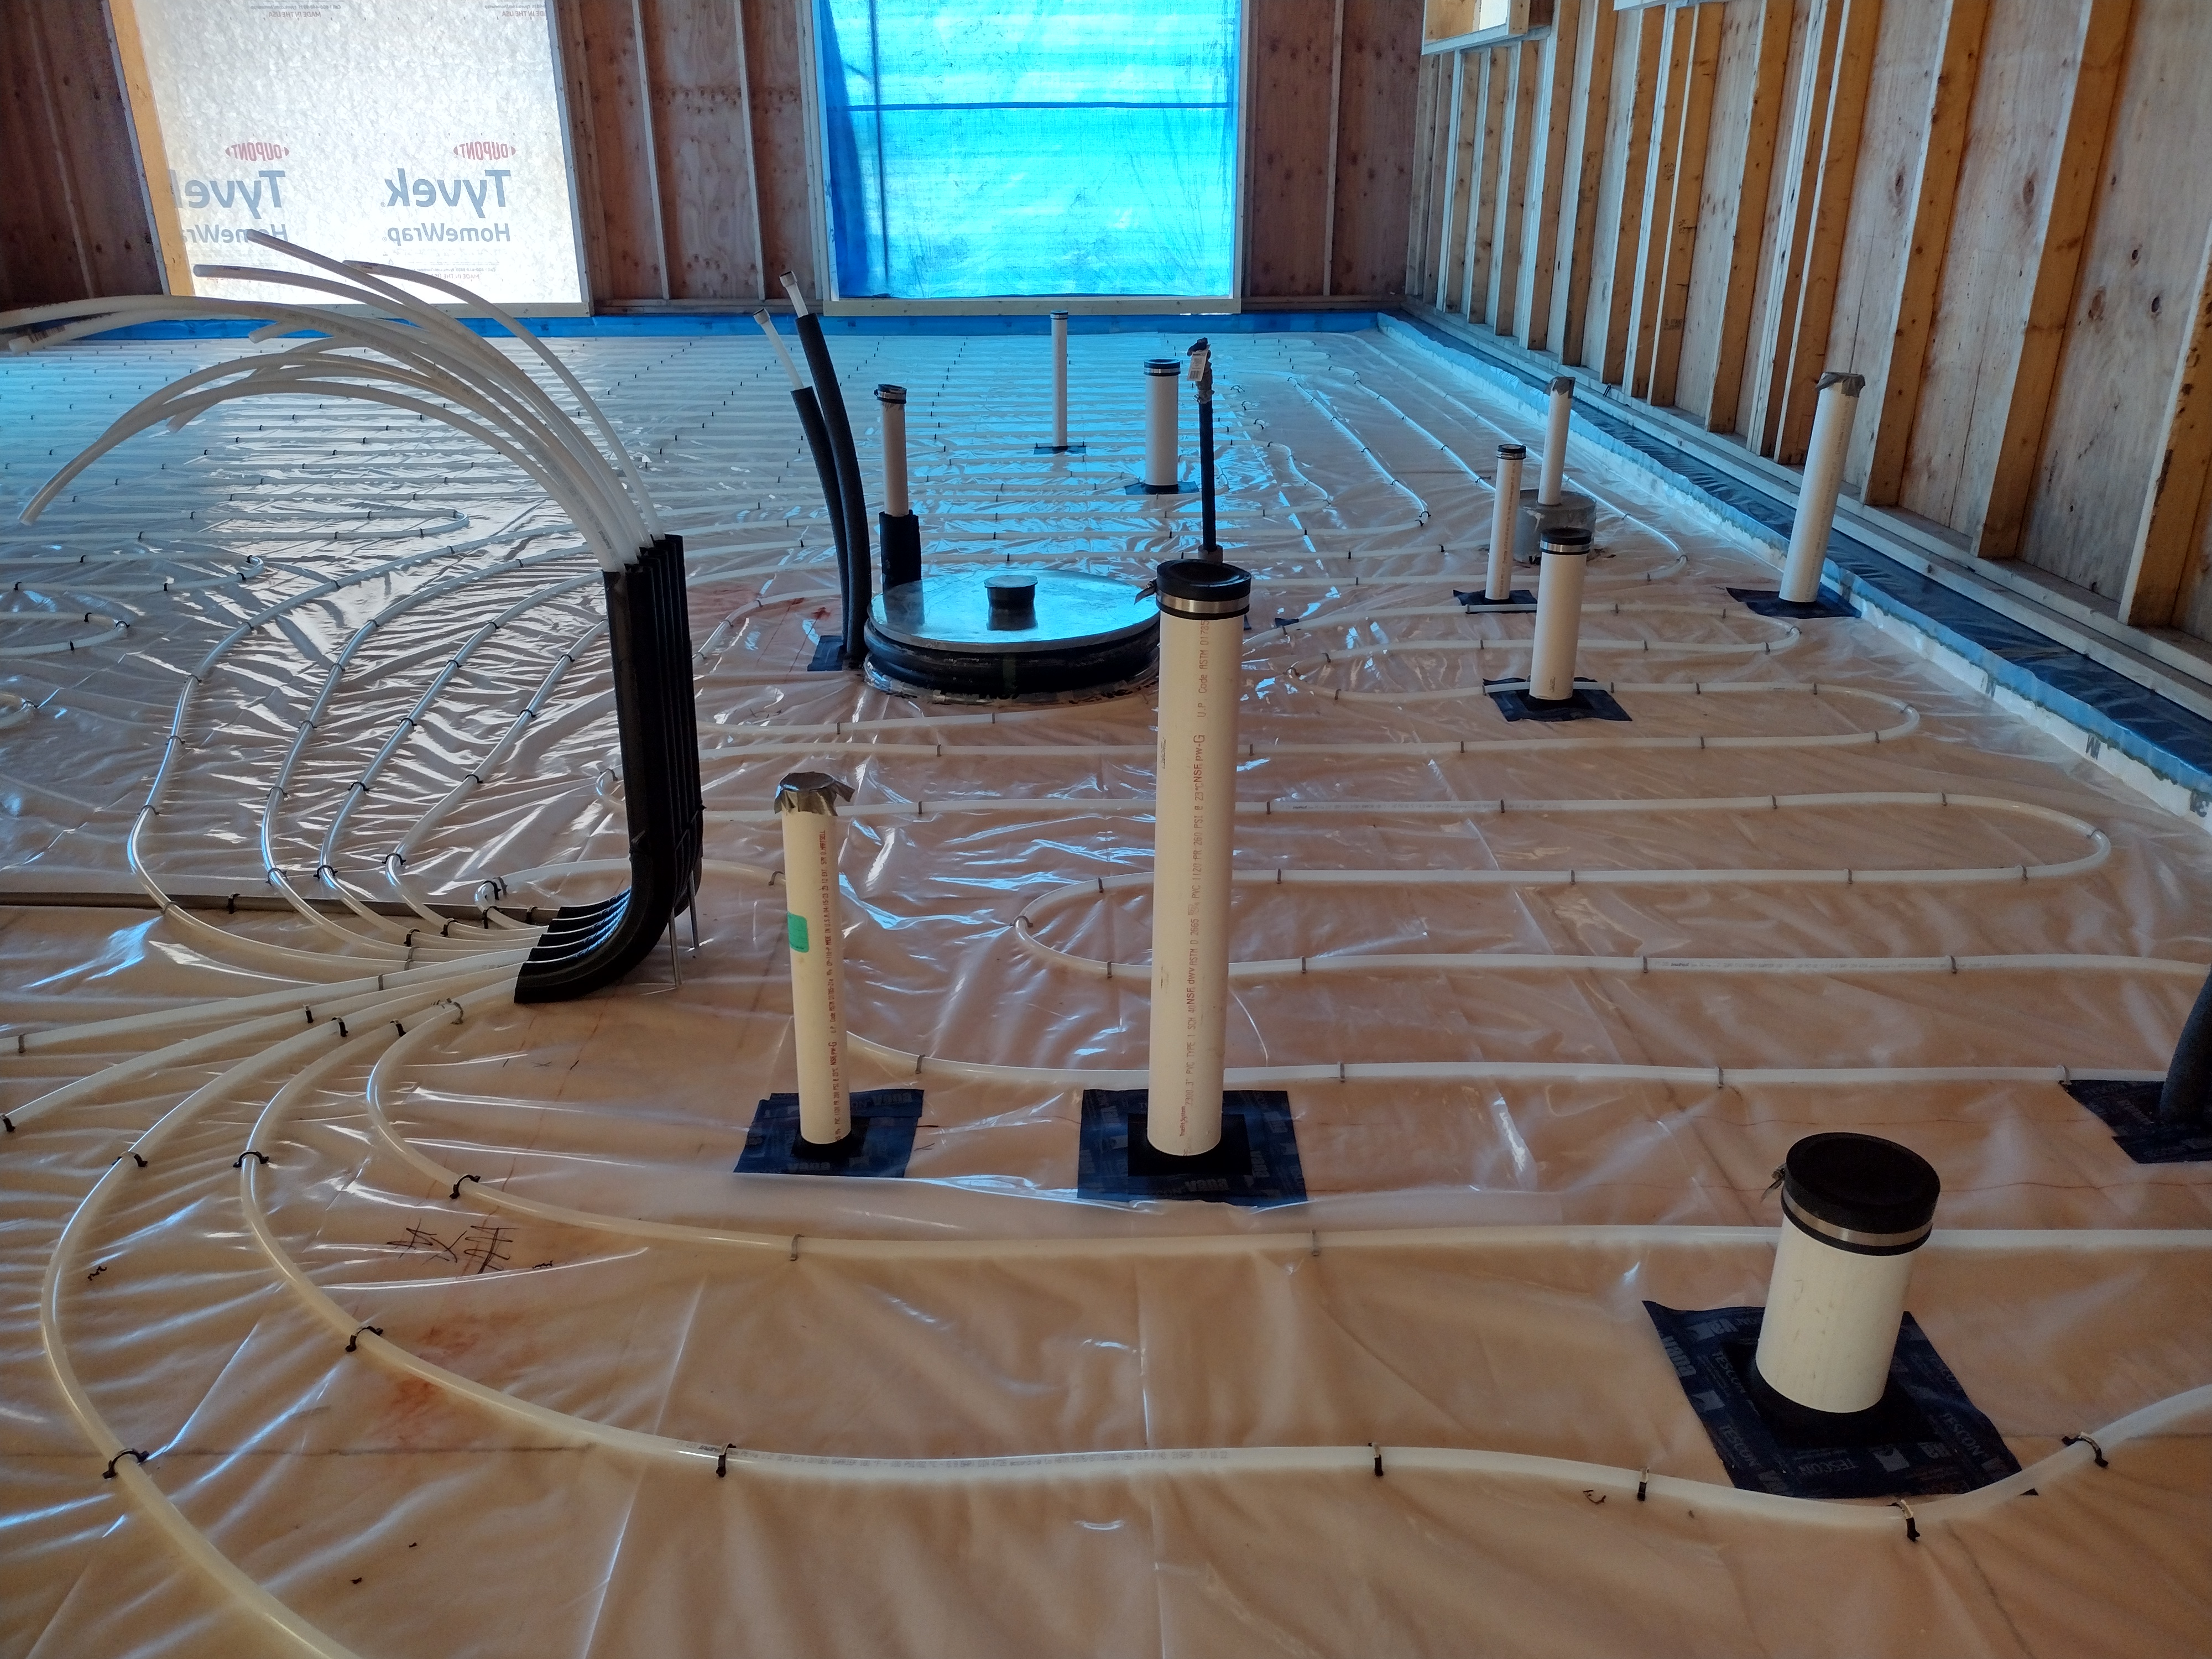
We lapped the polyethylene seams and air-sealed all the mechanical penetrations to it with snug fitting gaskets or tape. In this way, the poly acts as an air barrier (in conjunction with the slab) against radon gas. It also acts as an effective vapor barrier, even accounting for the numerous stab holes from the PEX staples. For a lively discussion on this topic see “Poly Under Concrete Slab” on the Green Building Advisor website.
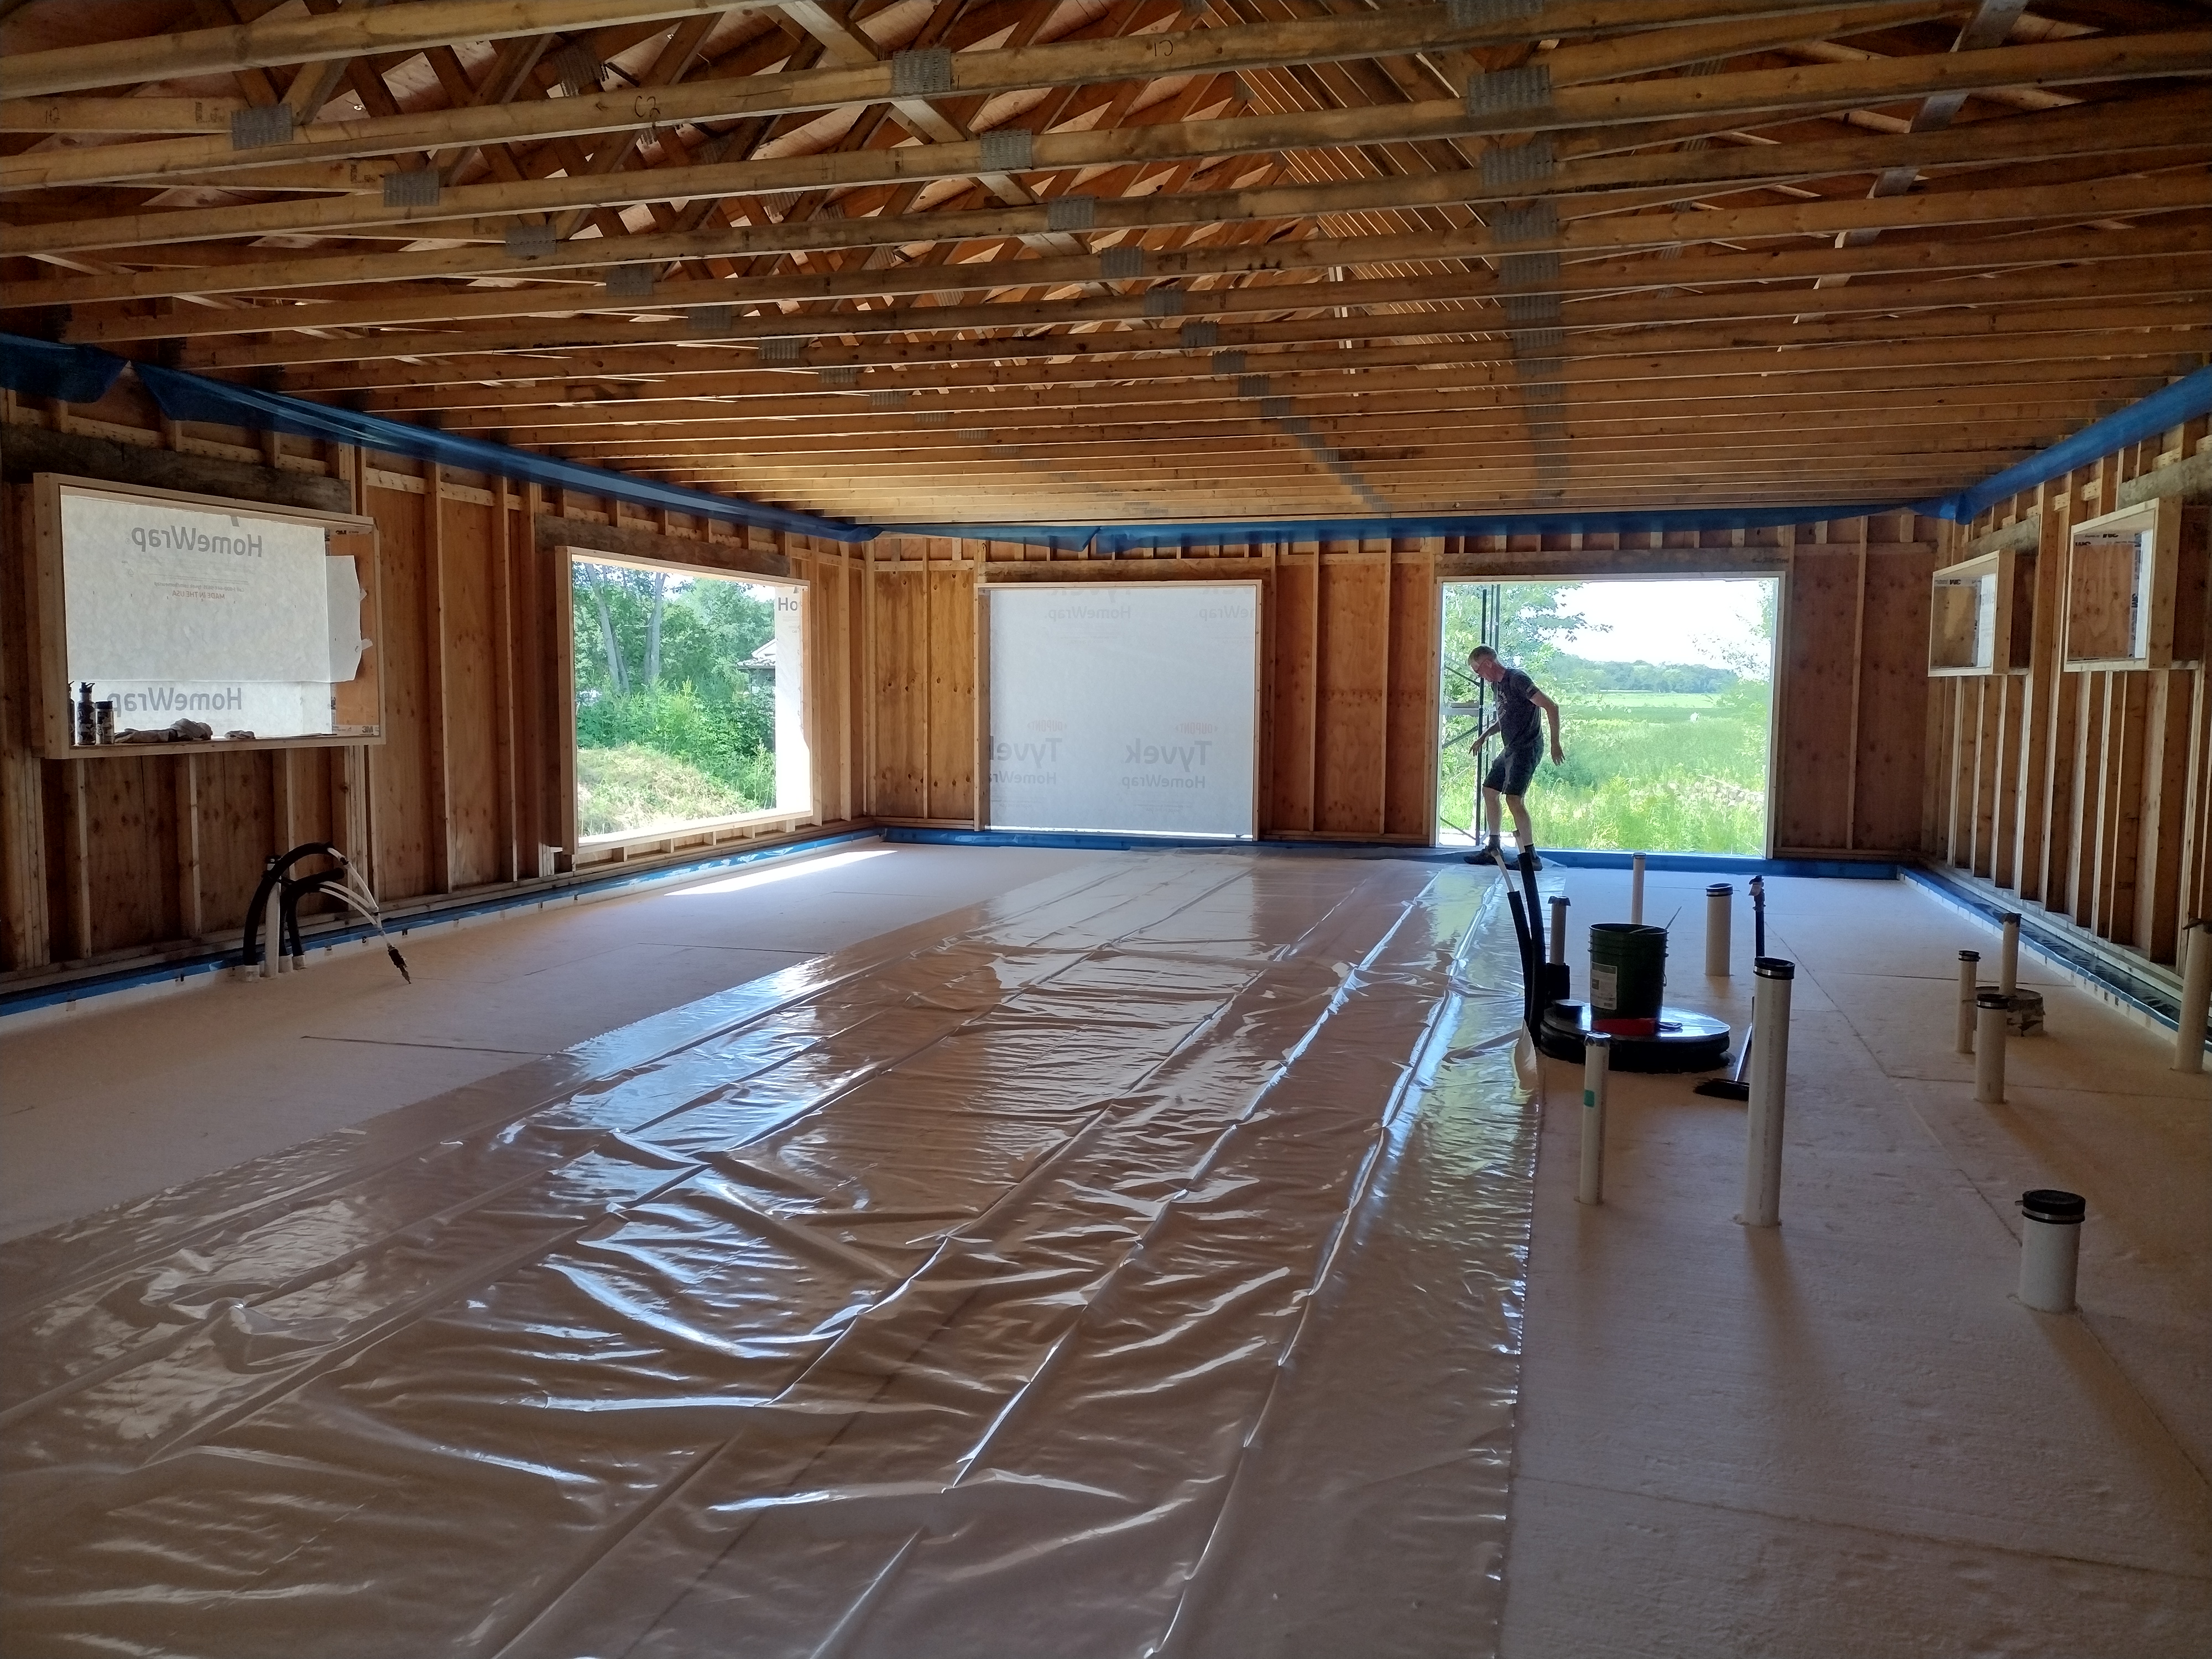
Our local HVAC company, Collins + Hying in nearby Dodgeville, did a neat job of installing the PEX tubing for the hydronic heating system.
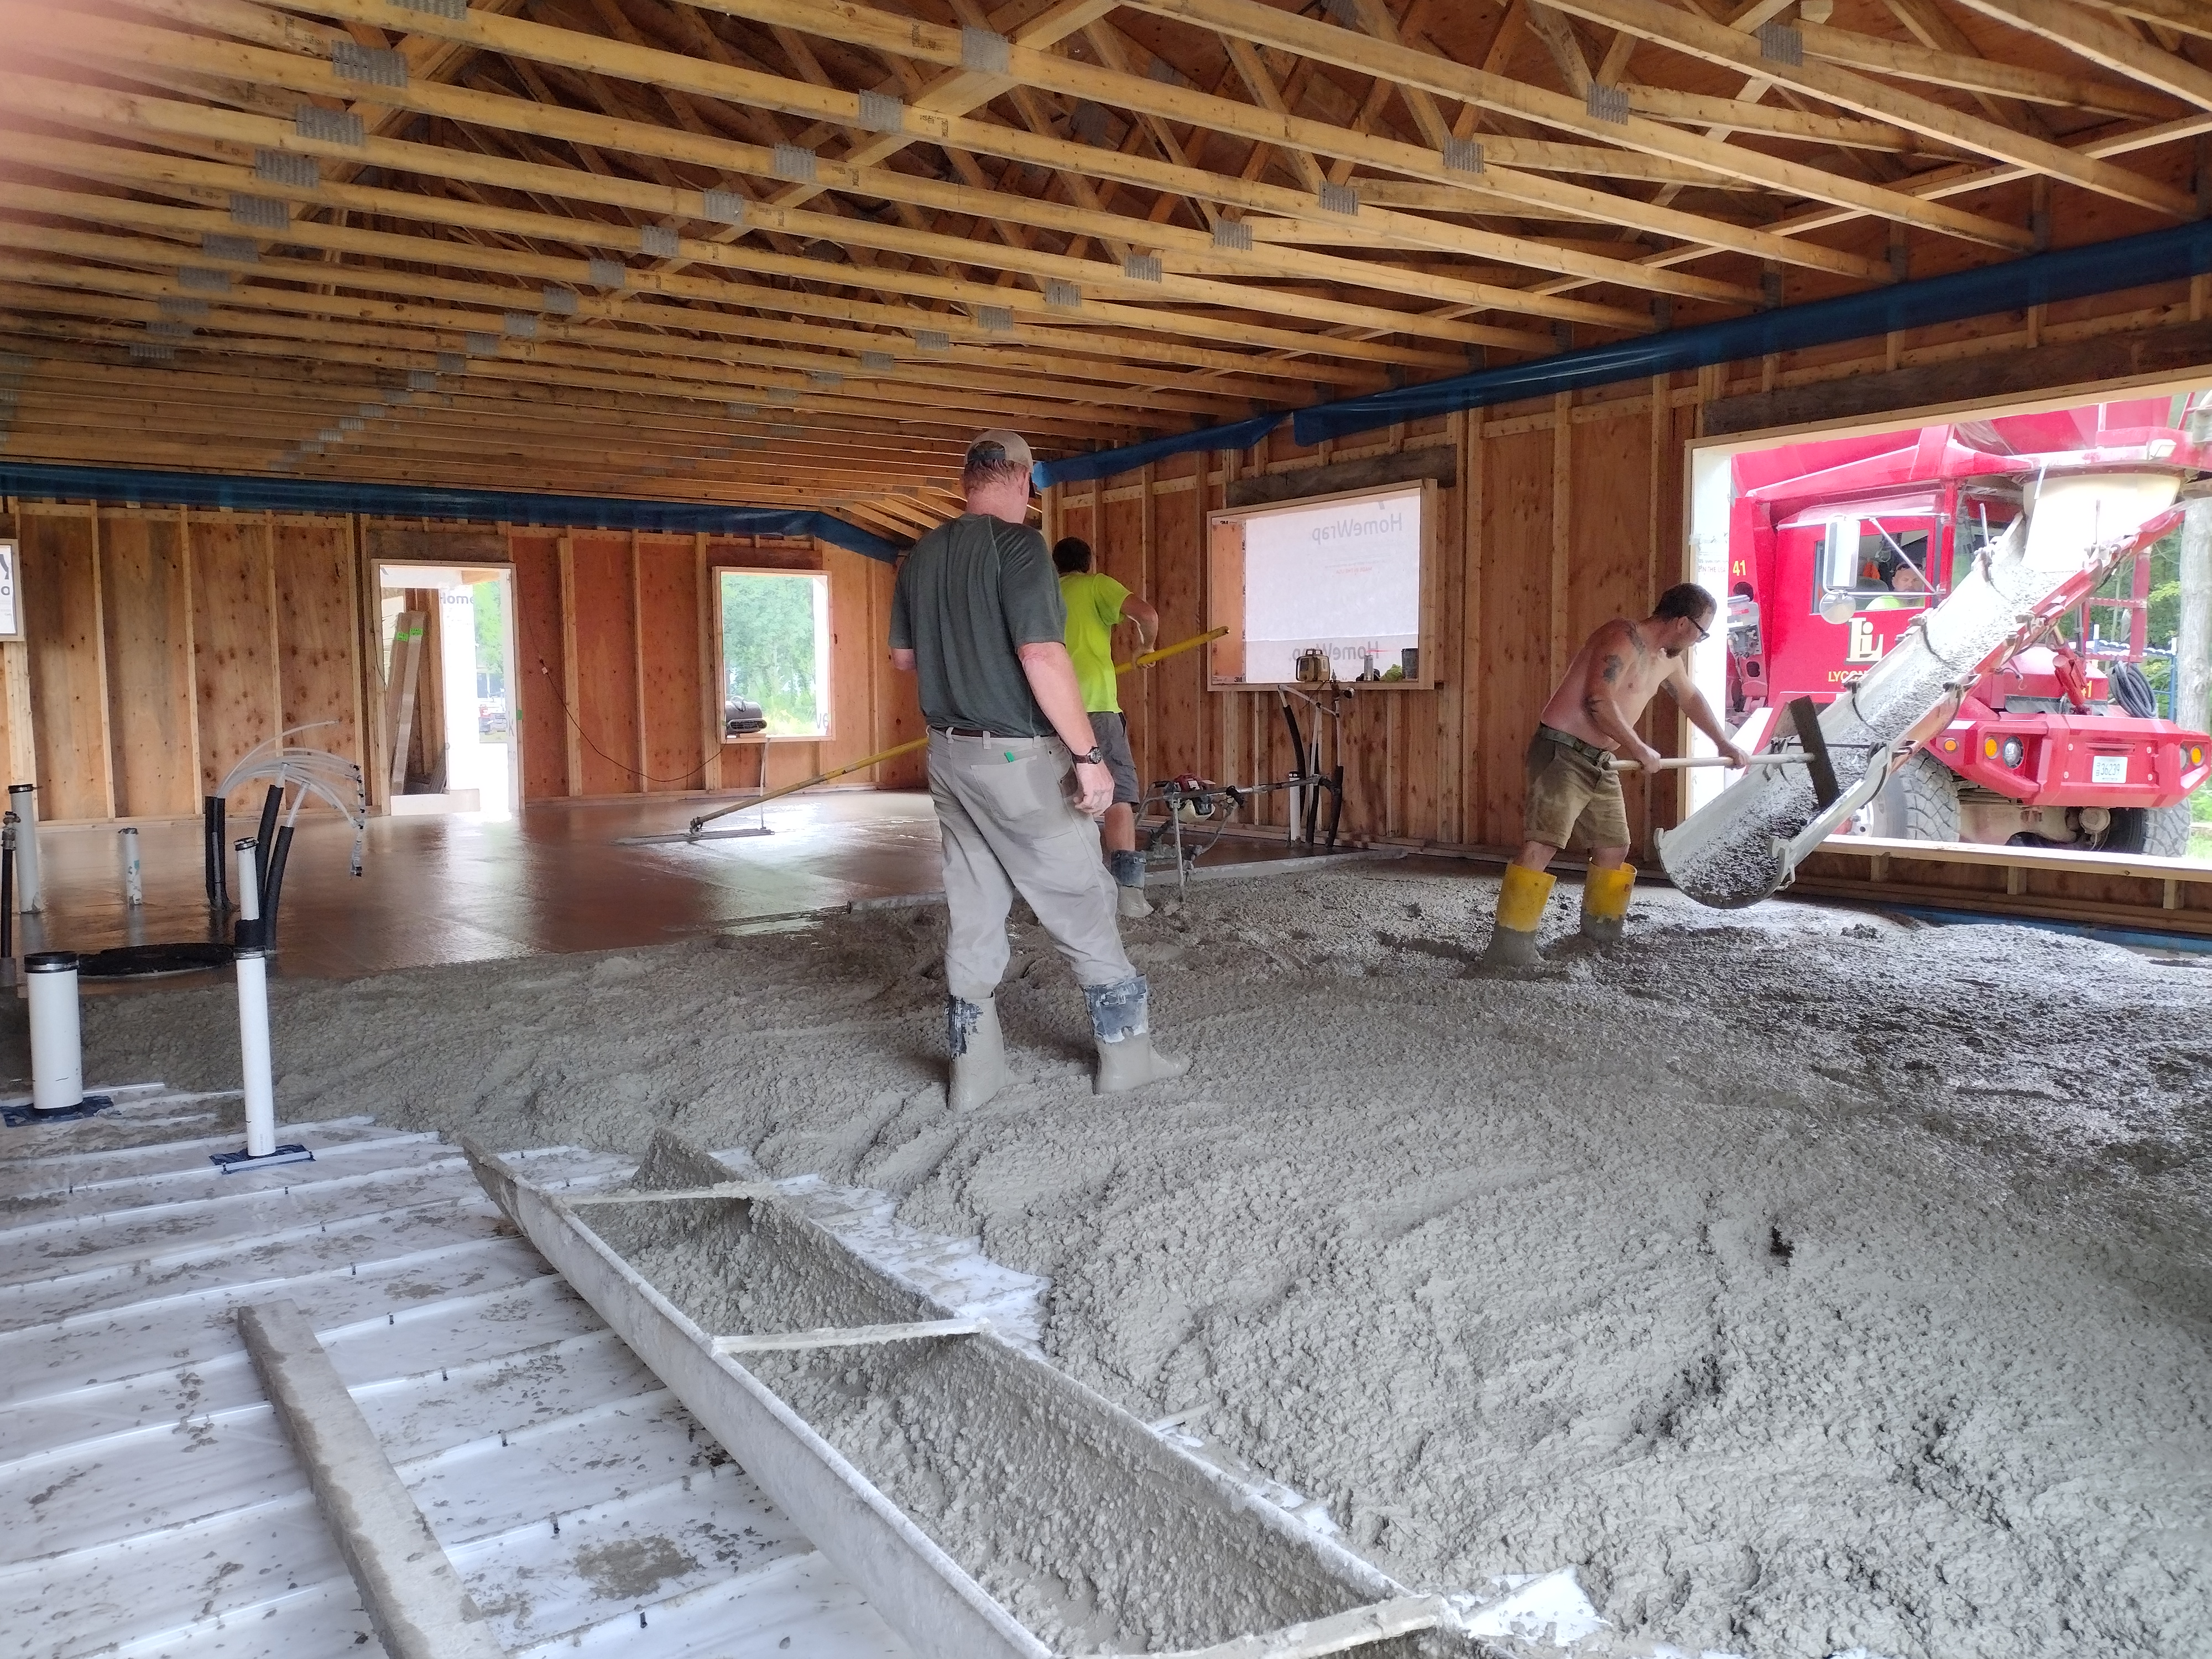
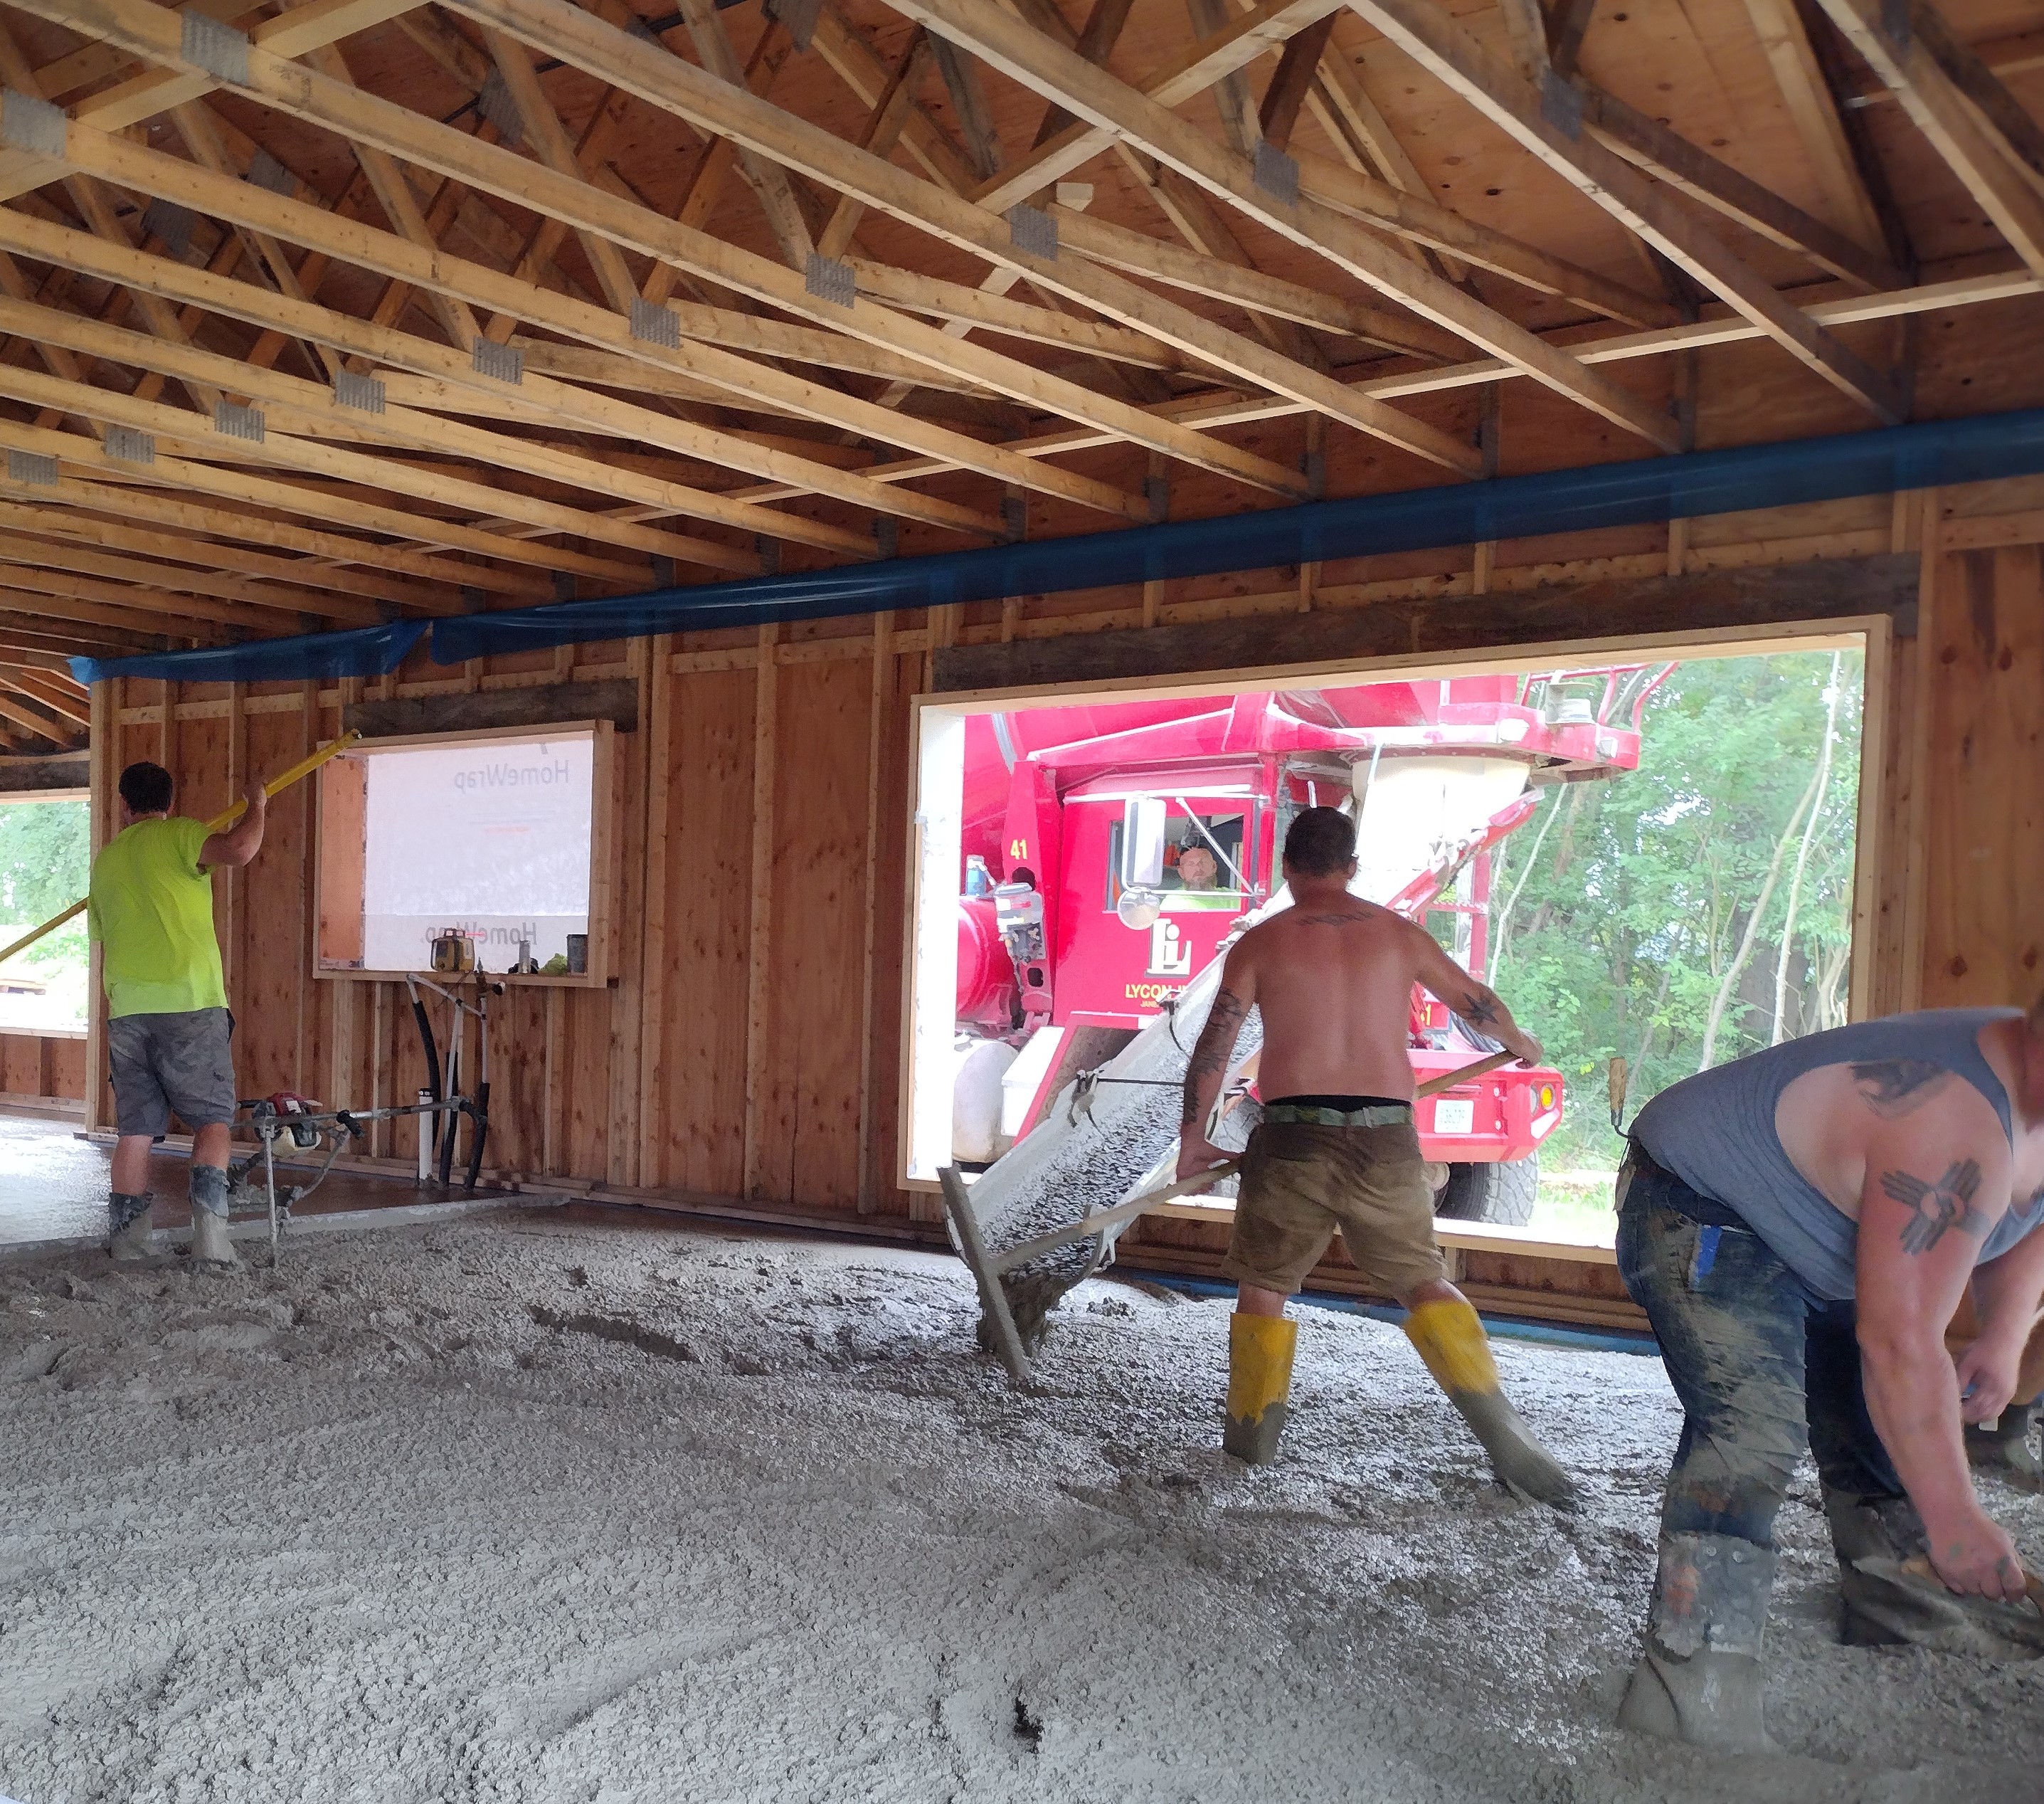
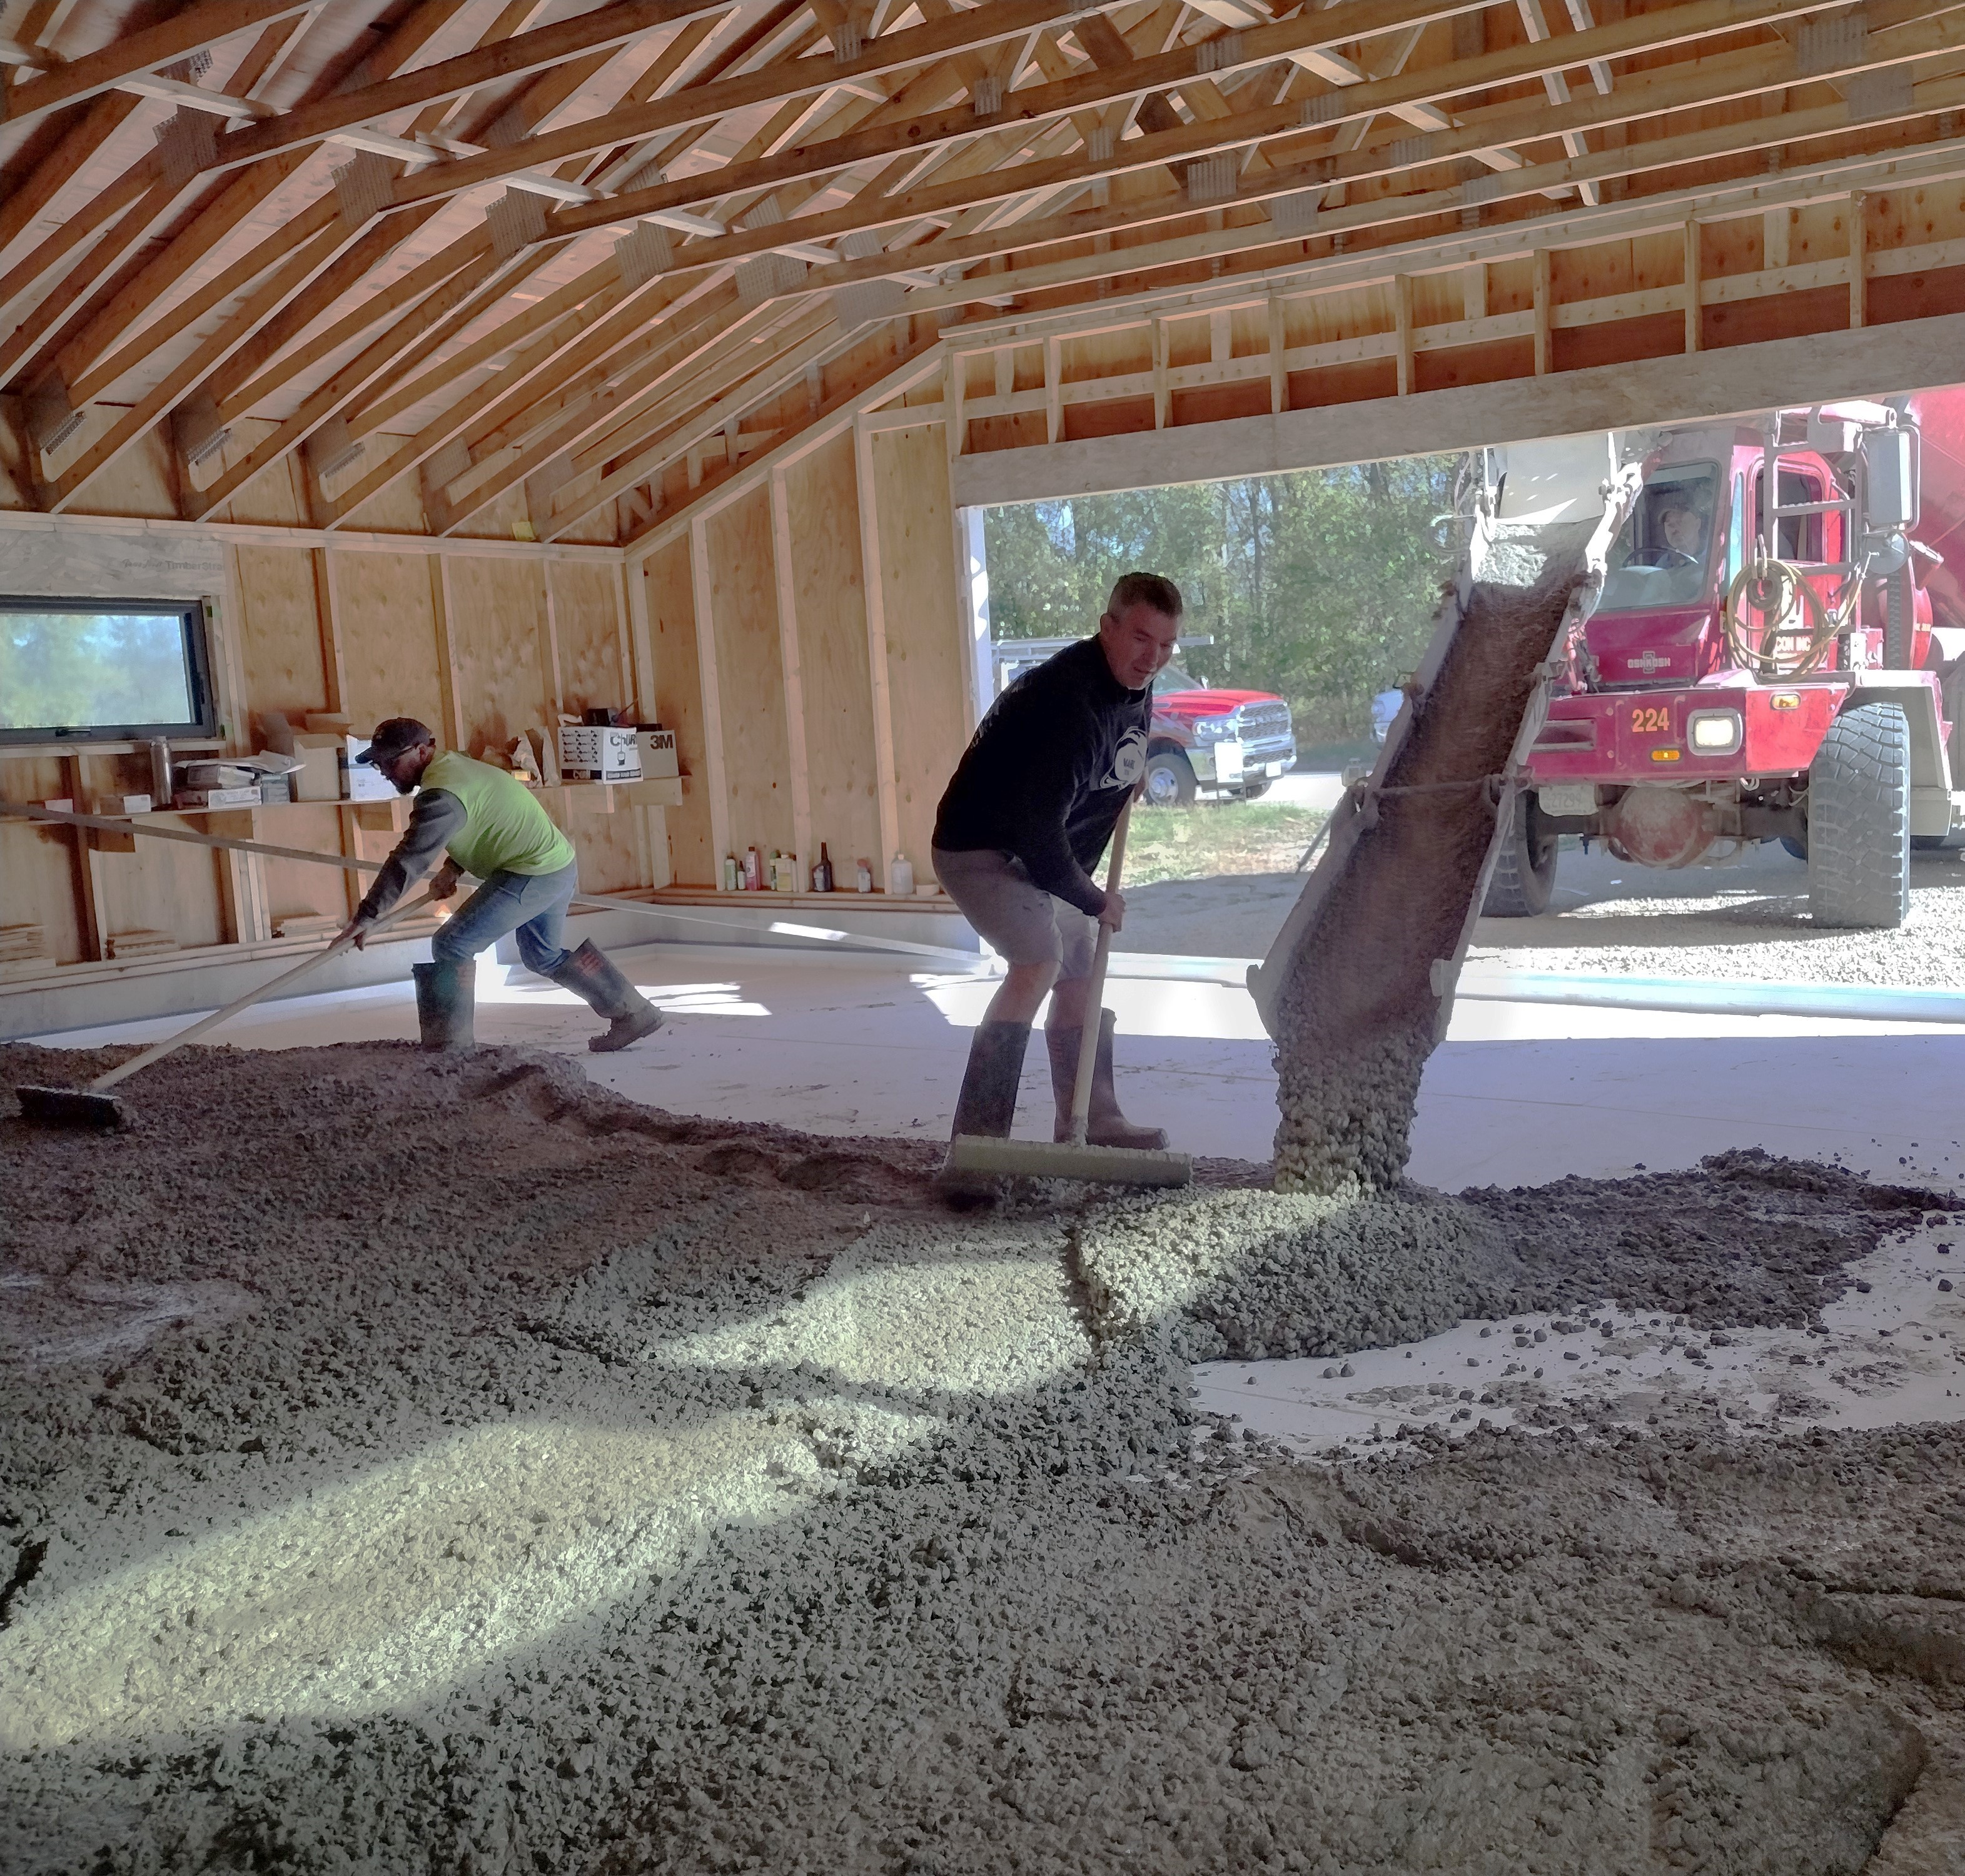
The big day! Here is the crew from Rockcrete in Ridgeway pouring our slab. While in the planning stages for this project, I was determined to get the walls and roof up and covered before we attempted the slab prep and pour. There are so many advantages: no need for tarping against the rain, no work stoppages due to inclement weather, no worries about the concrete curing too fast in the hot sun, and no sunburns!
The next day, Rockcrete was back to saw 1 inch deep control joints, about every 10 feet. Then it fell to me to babysit the slab for the next 5 days. Instead of opting for the customary chemical curing compound that’s applied to the fresh concrete to slow evaporation and maintain hydration, I flooded the surface 3 to 5 times a day. This is known as “water-curing” and is seldom done anymore except by “weekend warriors” like me and my crew.
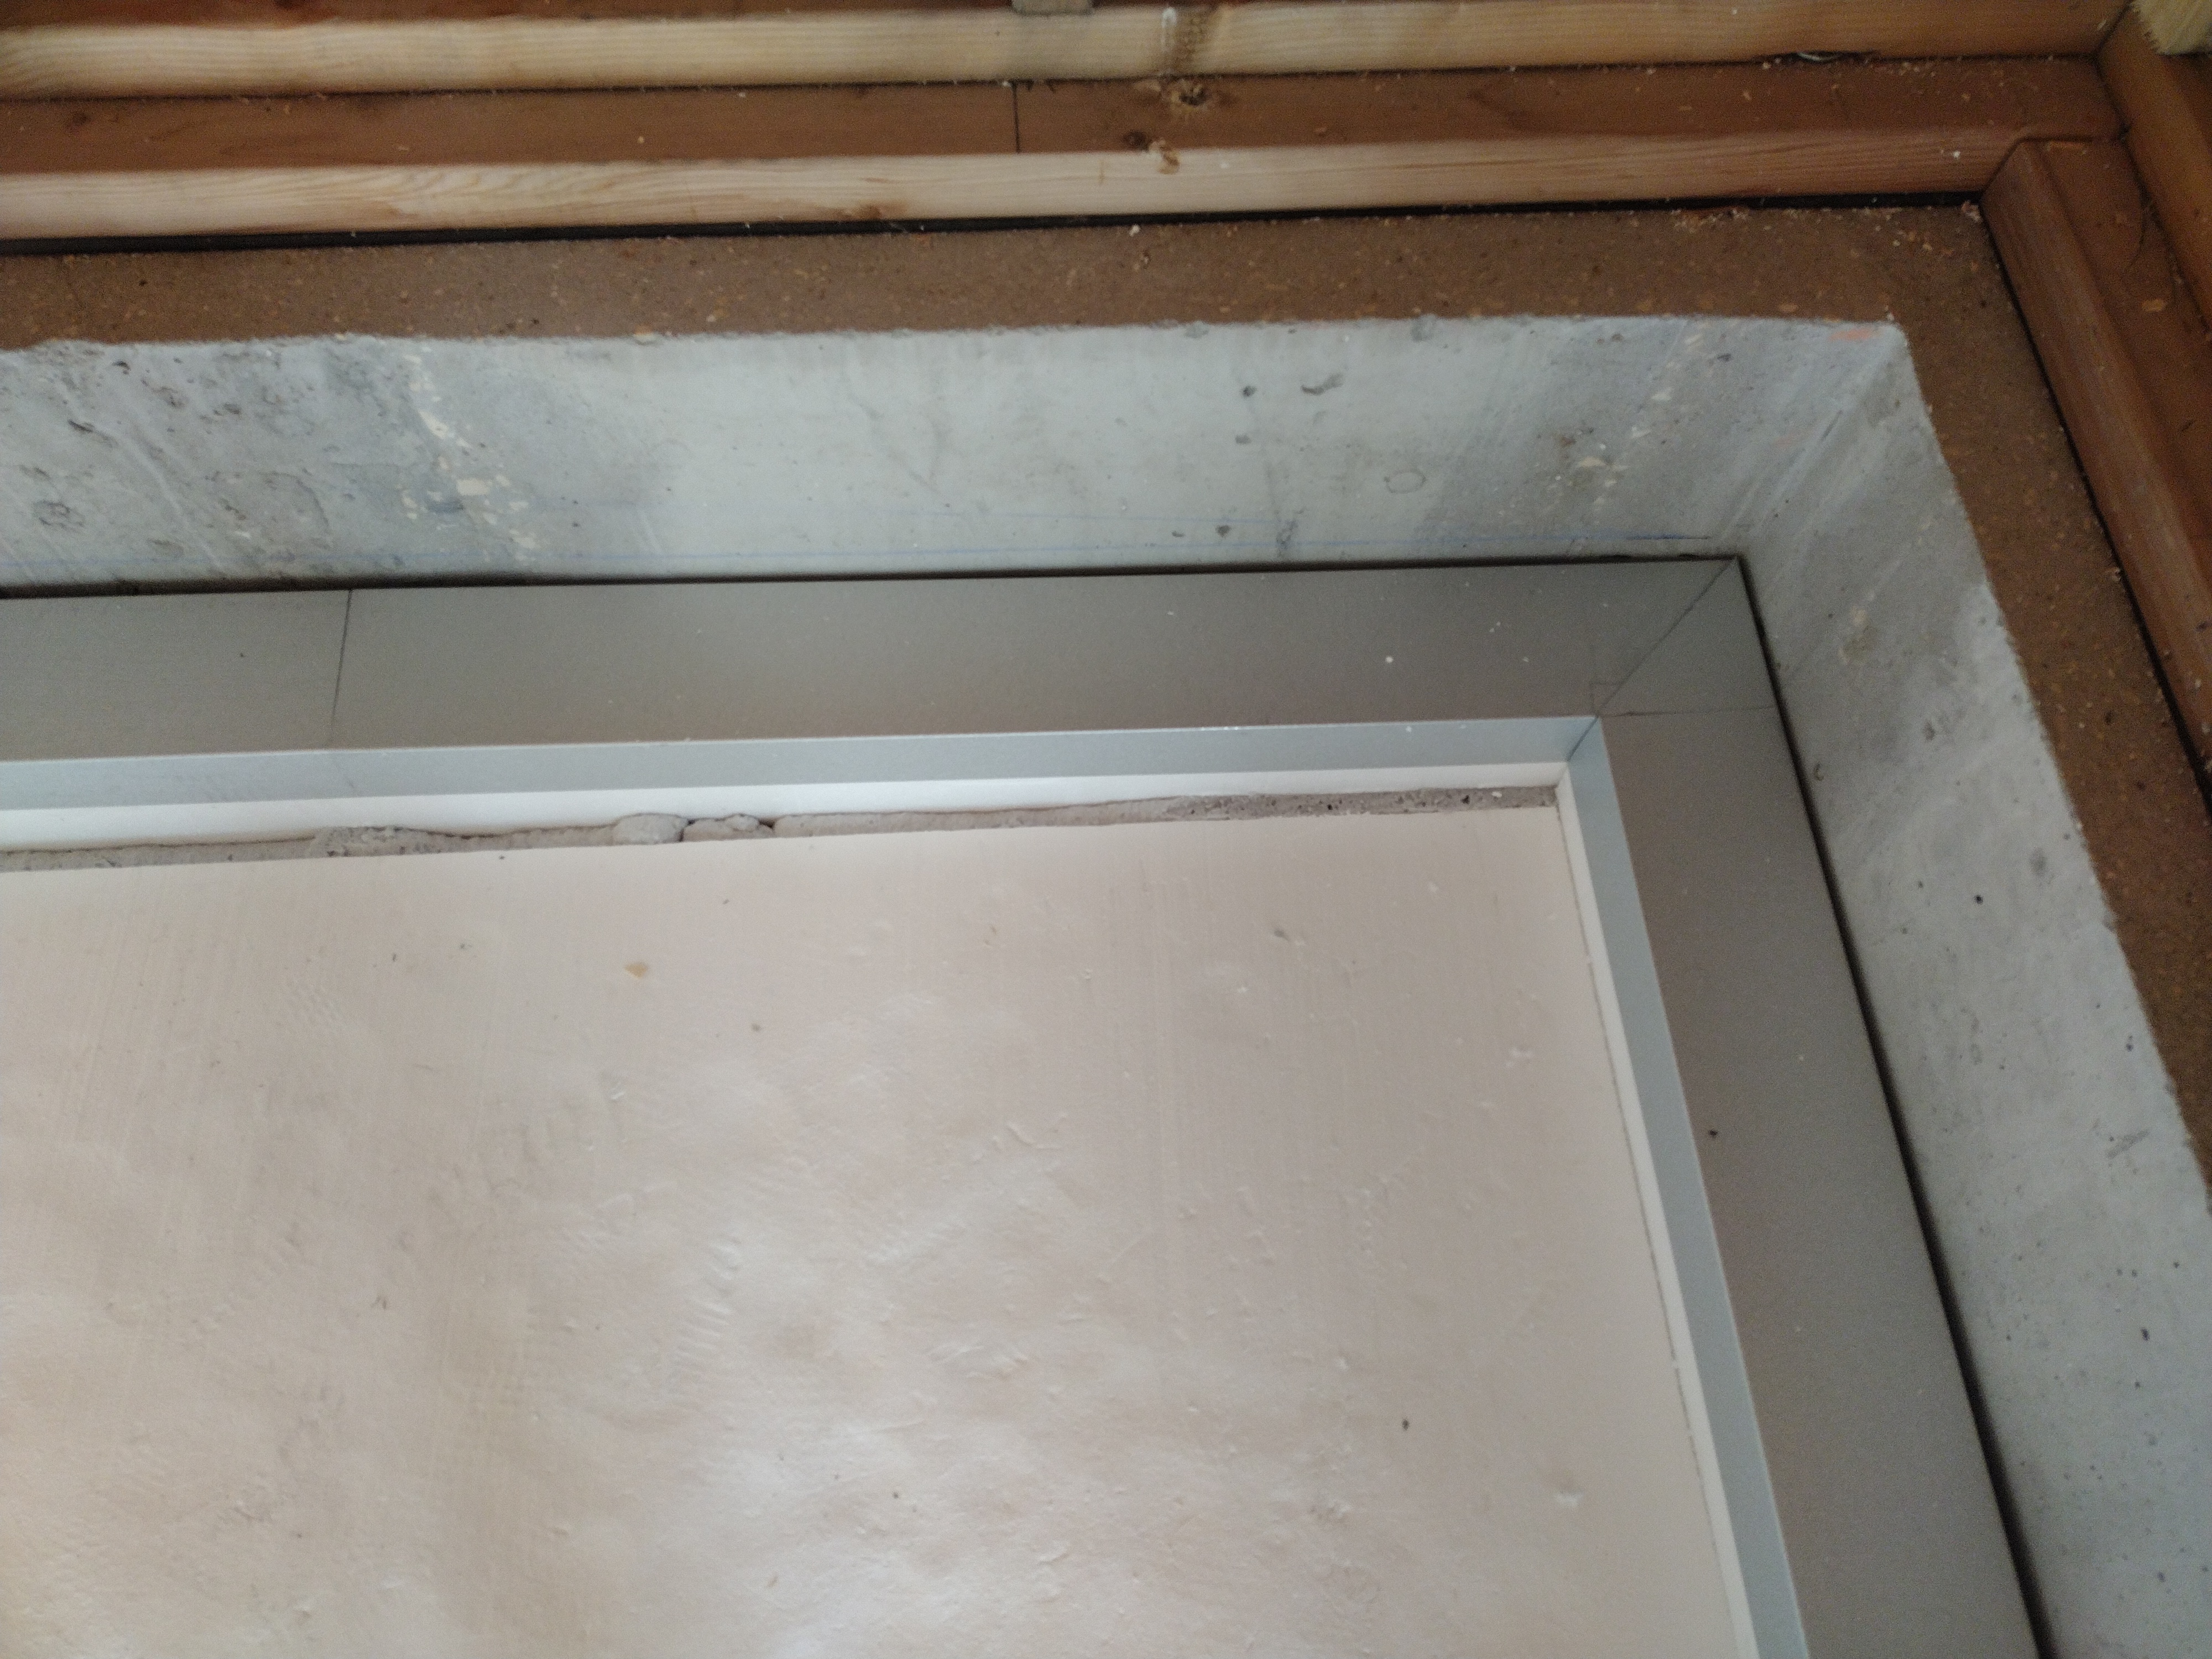
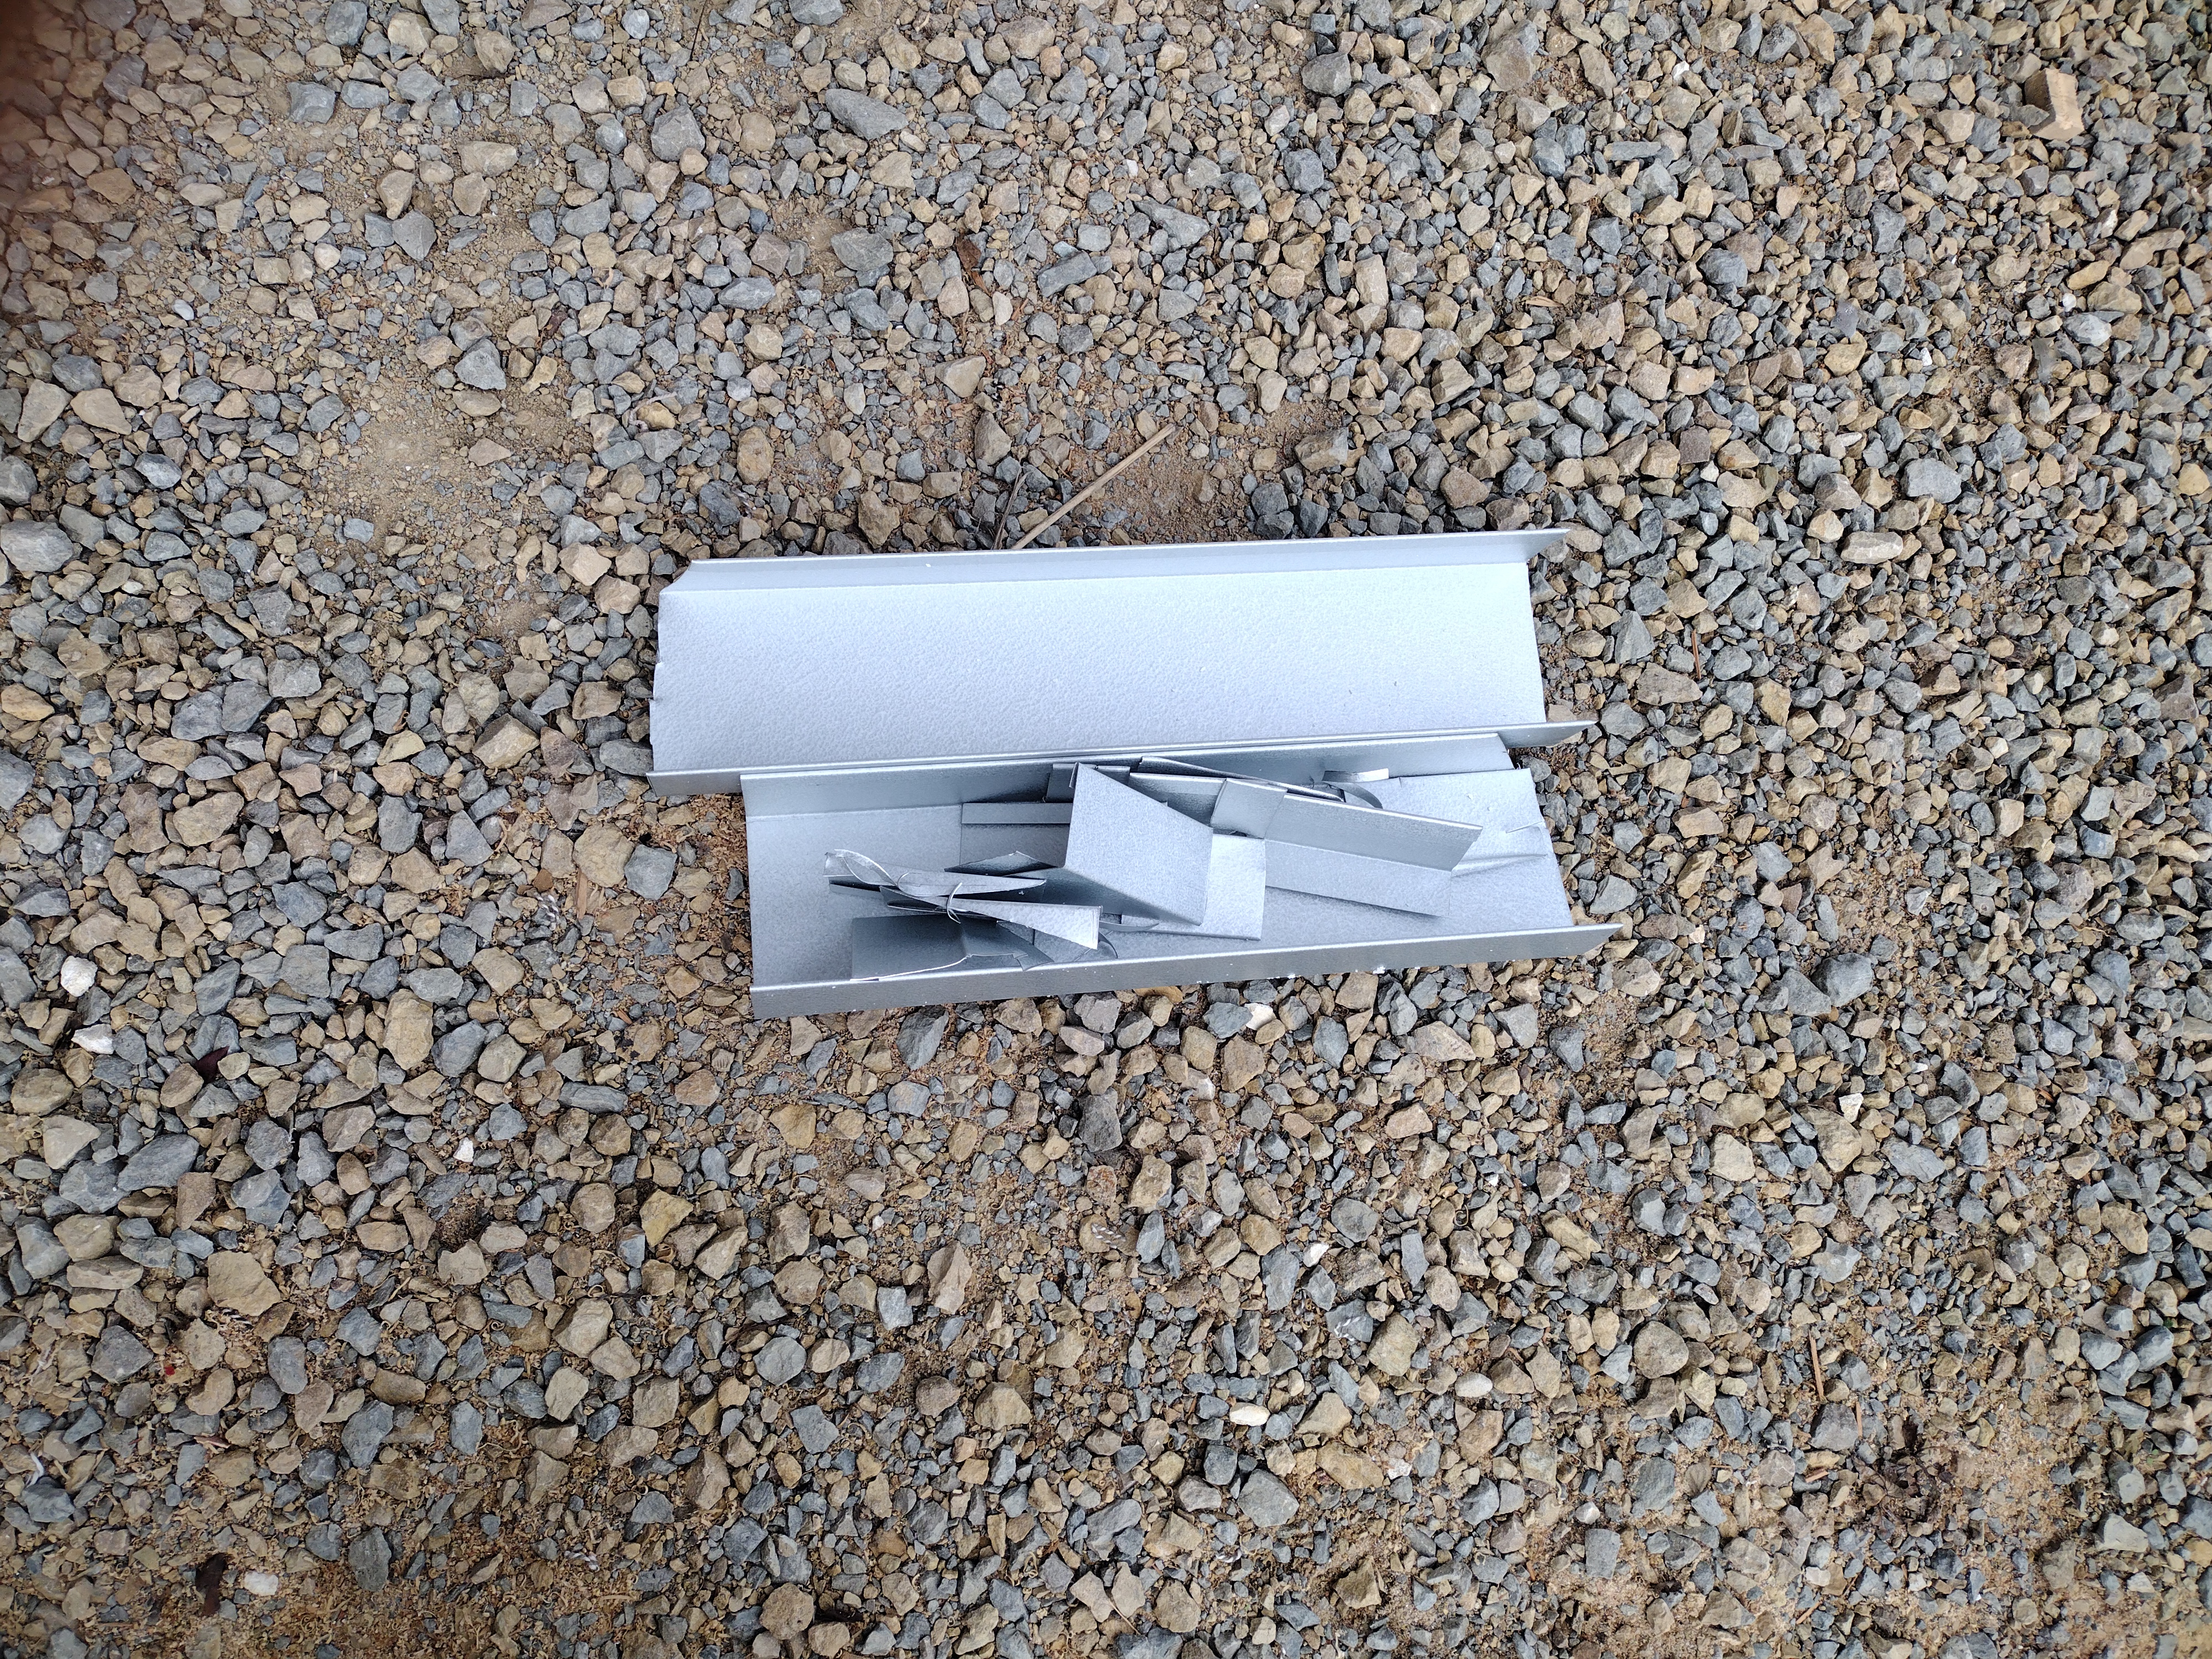
By October, I could pull away from other tasks and lay down the garage foam. I used the leftovers from the house foam for a 4 inch thick edge, which jogs to align with the overhead door, then laid down the 2 inch thick under-slab foam. Galvanized steel channels protect the top of the exposed edge. An insulated slab like this is unlikely to “sweat” in the spring, and will keep tools and supplies drier. A dedicated vapor barrier isn’t necessary here: the 2 inch foam is sufficient to slow upward vapor migration. Should a future owner decide to insulate the garage, they’ll be off to a good start.
My roofer, Pete Faust, made up the channels for me, showed me how to cut the miters, and let me borrow his tin snips. My corners weren’t as good as the one he made, but passable.
This phase of work generated a small amount of scrap and trash. The leftover foam was cut and glued up to make an attic hatch plug. The galvanized steel cutoffs were sent to recycling. Shrink wrap from the sheet foam packaging, when clear (not white) was also accepted at the recycling facility. Plastic strap ties and empty spray foam cans were sent to landfill. The wood pallets were placed at the curb with a “free” sign and were picked up by a passer-by.
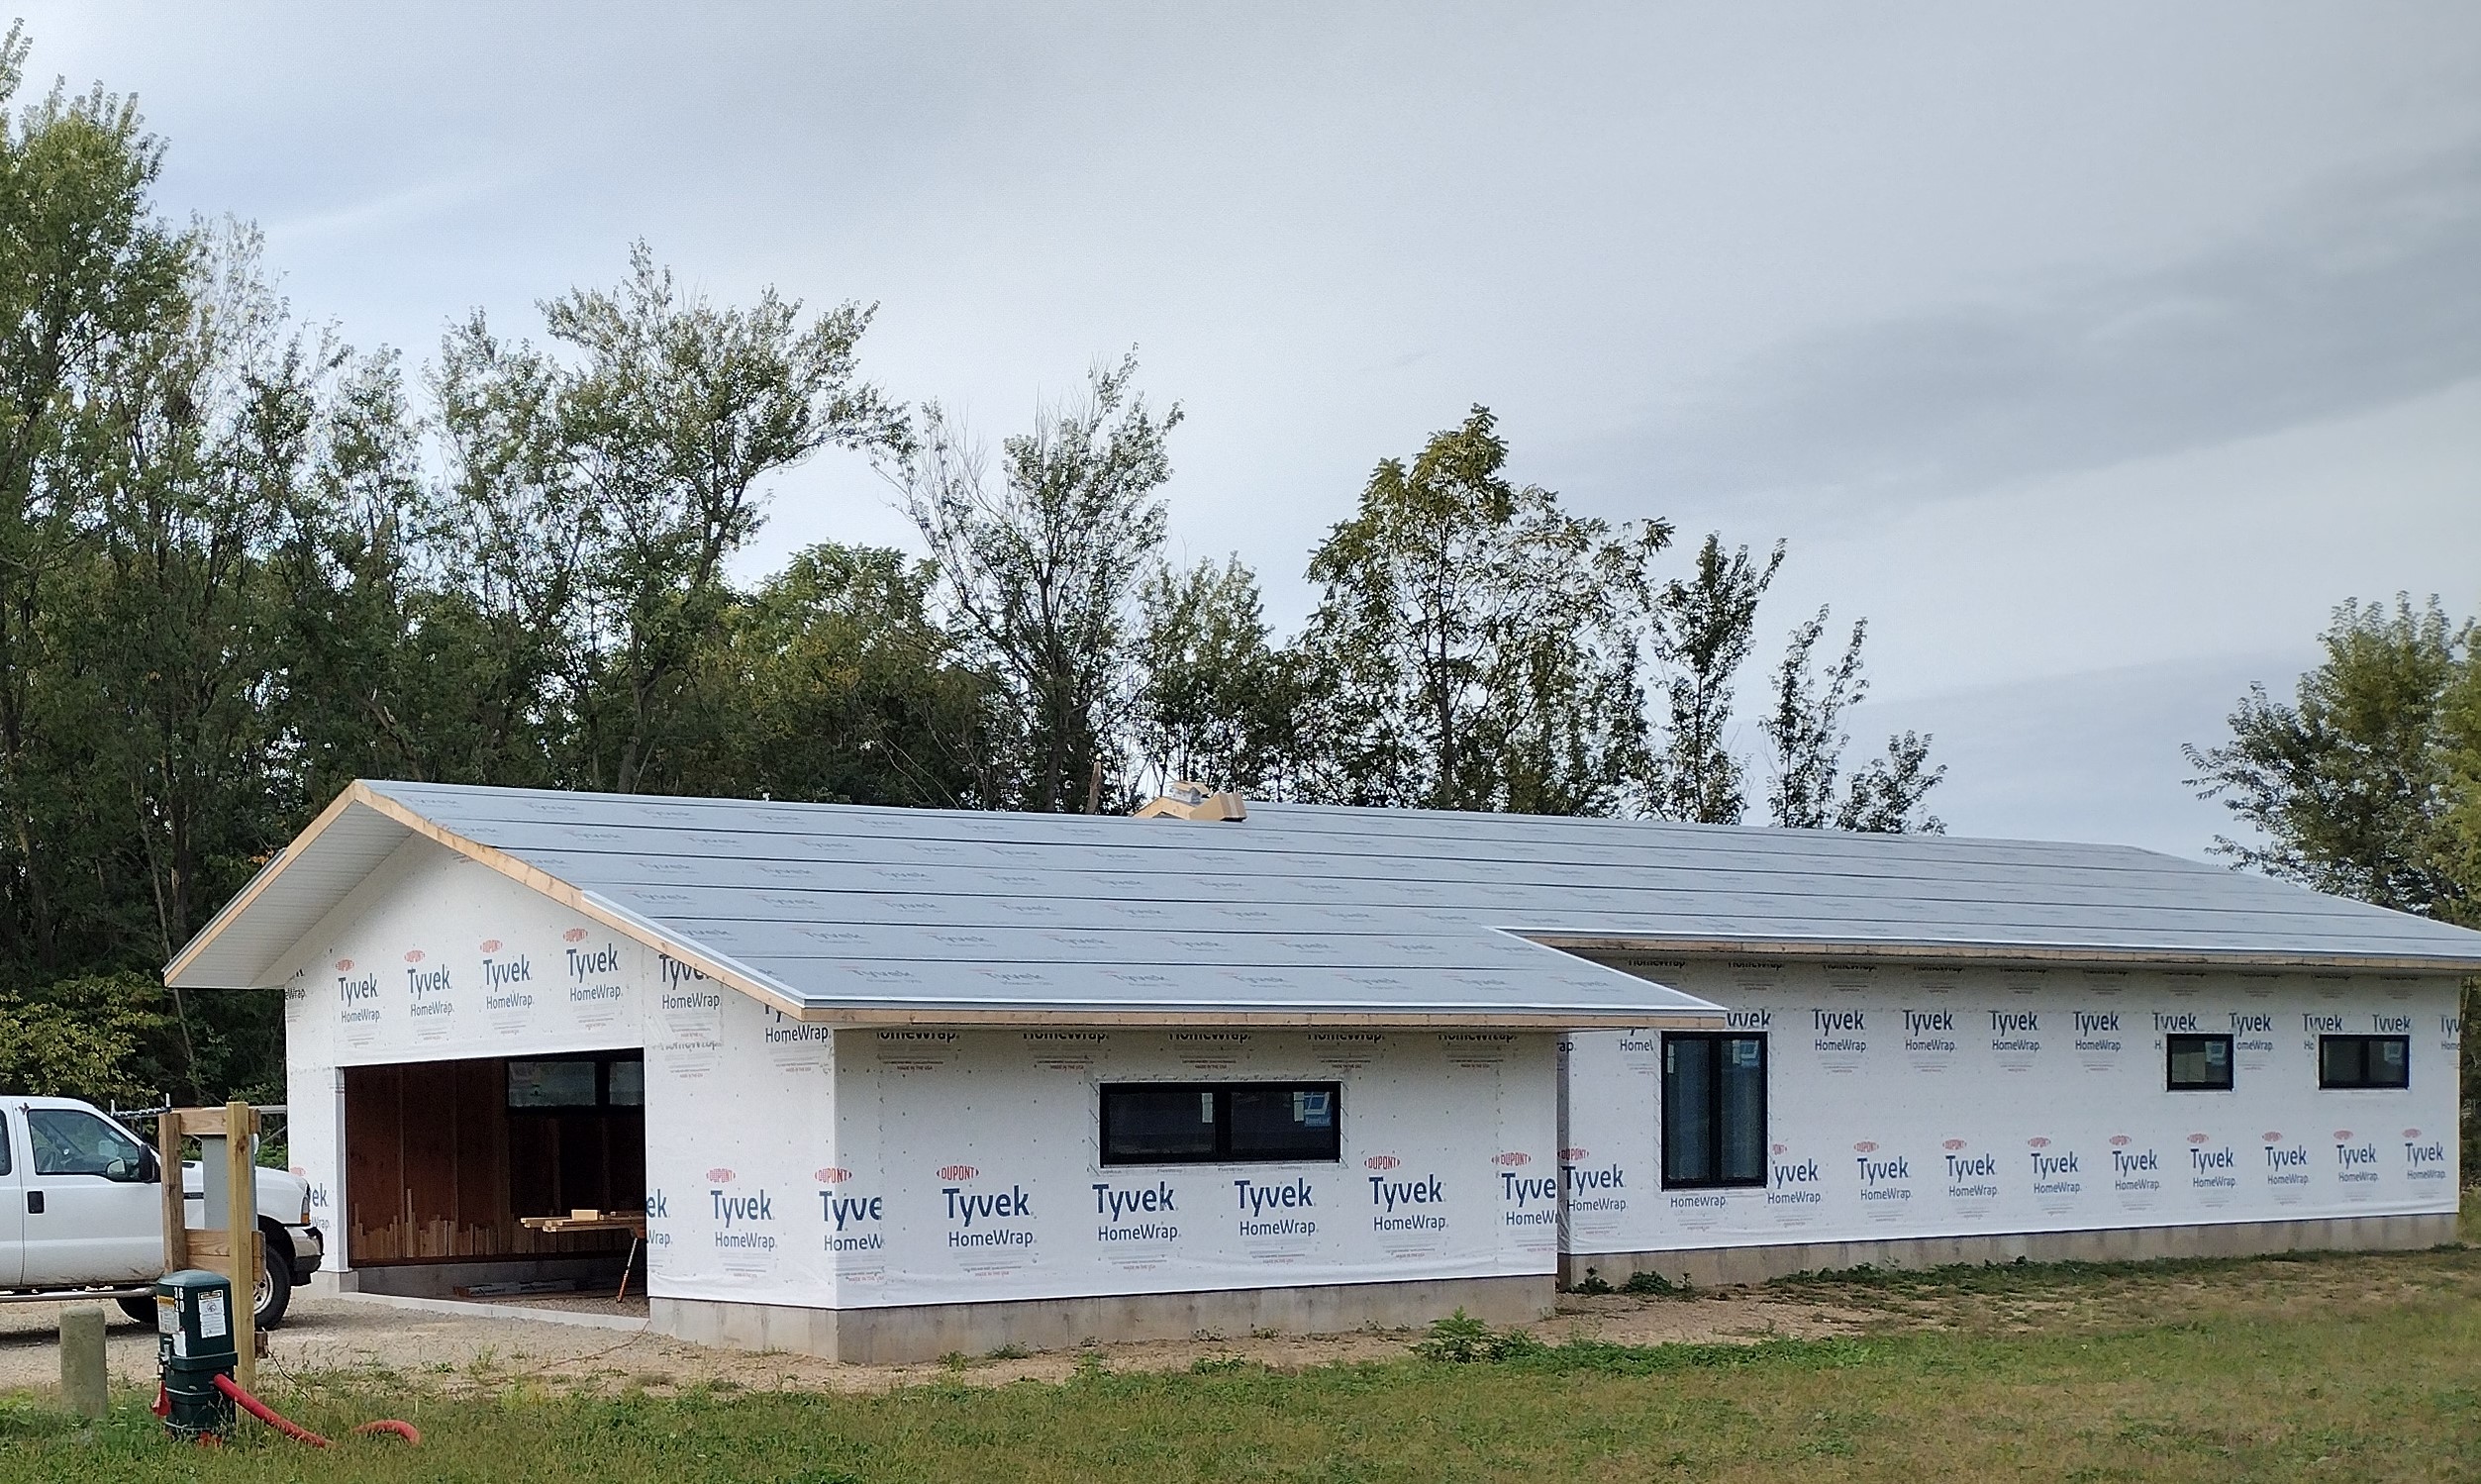
July 15 – Aug 4: Taping, folding, rolling out and wrapping are all satisfying and essential steps to creating a durable, energy efficient home that offers a healthy indoor environment for decades to come. The natural forces of nature wear down any building, but with diligence, water, wind, and moisture-laden air can be stopped, temperature swings slowed, and bugs and dust firmly denied entry. Modern materials, applied to traditional frame construction, are the game-changer.
Plywood seams are sealed with 3M’s “8067”, a paper-backed waterproof tape with a tenacious hold. The blue 6 mil polyethylene vapor barrier previously installed under the sill plate was trimmed, folded up, and taped to create a continuous air barrier from the (yet-to-be-poured) interior concrete slab to the plywood sheathing.
The taped plywood sheathing is this home’s designated “Exterior Air Barrier”.
The truss tail slots, cut in by the carpenters, were also taped. The 2 inch gap at the top of the sheathing was kept open for attic ventilation. Sealing the truss tail slots will protect the (yet-to-be-installed) insulation from air and moisture intrusion, a phenomena sometimes called “wind-washing”.
Our next step was to roll out and tape the WRB (water resistive barrier, or housewrap). Tightly stretched and cap-stapled at each stud line characterize a quality job. This work, together with the 3M taping, is more than ably done by novices. Our crew on this day include my son-in-law Matt, and my friends Laura, JC, and Xin Xuan. All together, we put in 162 “weekend warrior” hours taping, folding, rolling out and wrapping. I’ve observed many a construction site, and I have to say: our work is the best I’ve seen.
Tyvek HomeWrap’s main function is as a rain barrier. It can also be installed as a wind barrier if the bottom edge is taped in the same manner as the top edge and side seams. I elected to keep the bottom edge open for bulk water to escape should the material someday be breached.
Meanwhile, carpenters Dave and Cale were rolling out and cap stapling Tyvek Protec synthetic roof underlayment.
This phase of work generated a number of bags of brown paper backing from the 3M tape, and some Tyvek scraps. The backing was taken to a recycling center that accepts miscellaneous paper. The pieces of Tyvek that were too small or awkward in shape were sent to landfill. The larger pieces and partial rolls are saved for future use or for use as tarps.
All buttoned up:the windows and synthetic roof underlayment, together with the Tyvek housewrapis this home’s designated “Exterior Water Barrier”.
The (yet-to-be installed) steel roofing and the (yet-to-be installed) cement board siding will be the first line of defense against the forces of nature. If or when these finish materials are breached, the underlayment and housewrap, properly lapped, taped, and cap stapled, will stop water intrusion. These two defensive materials are both water-proof AND vapor-open. Should water leak through or condensation build up and wet the underlying wood structure, sunny or dry weather will allow for evaporation. The wood can dry, preventing mold or mildew from taking hold and causing rot and a build up of unhealthy indoor air.
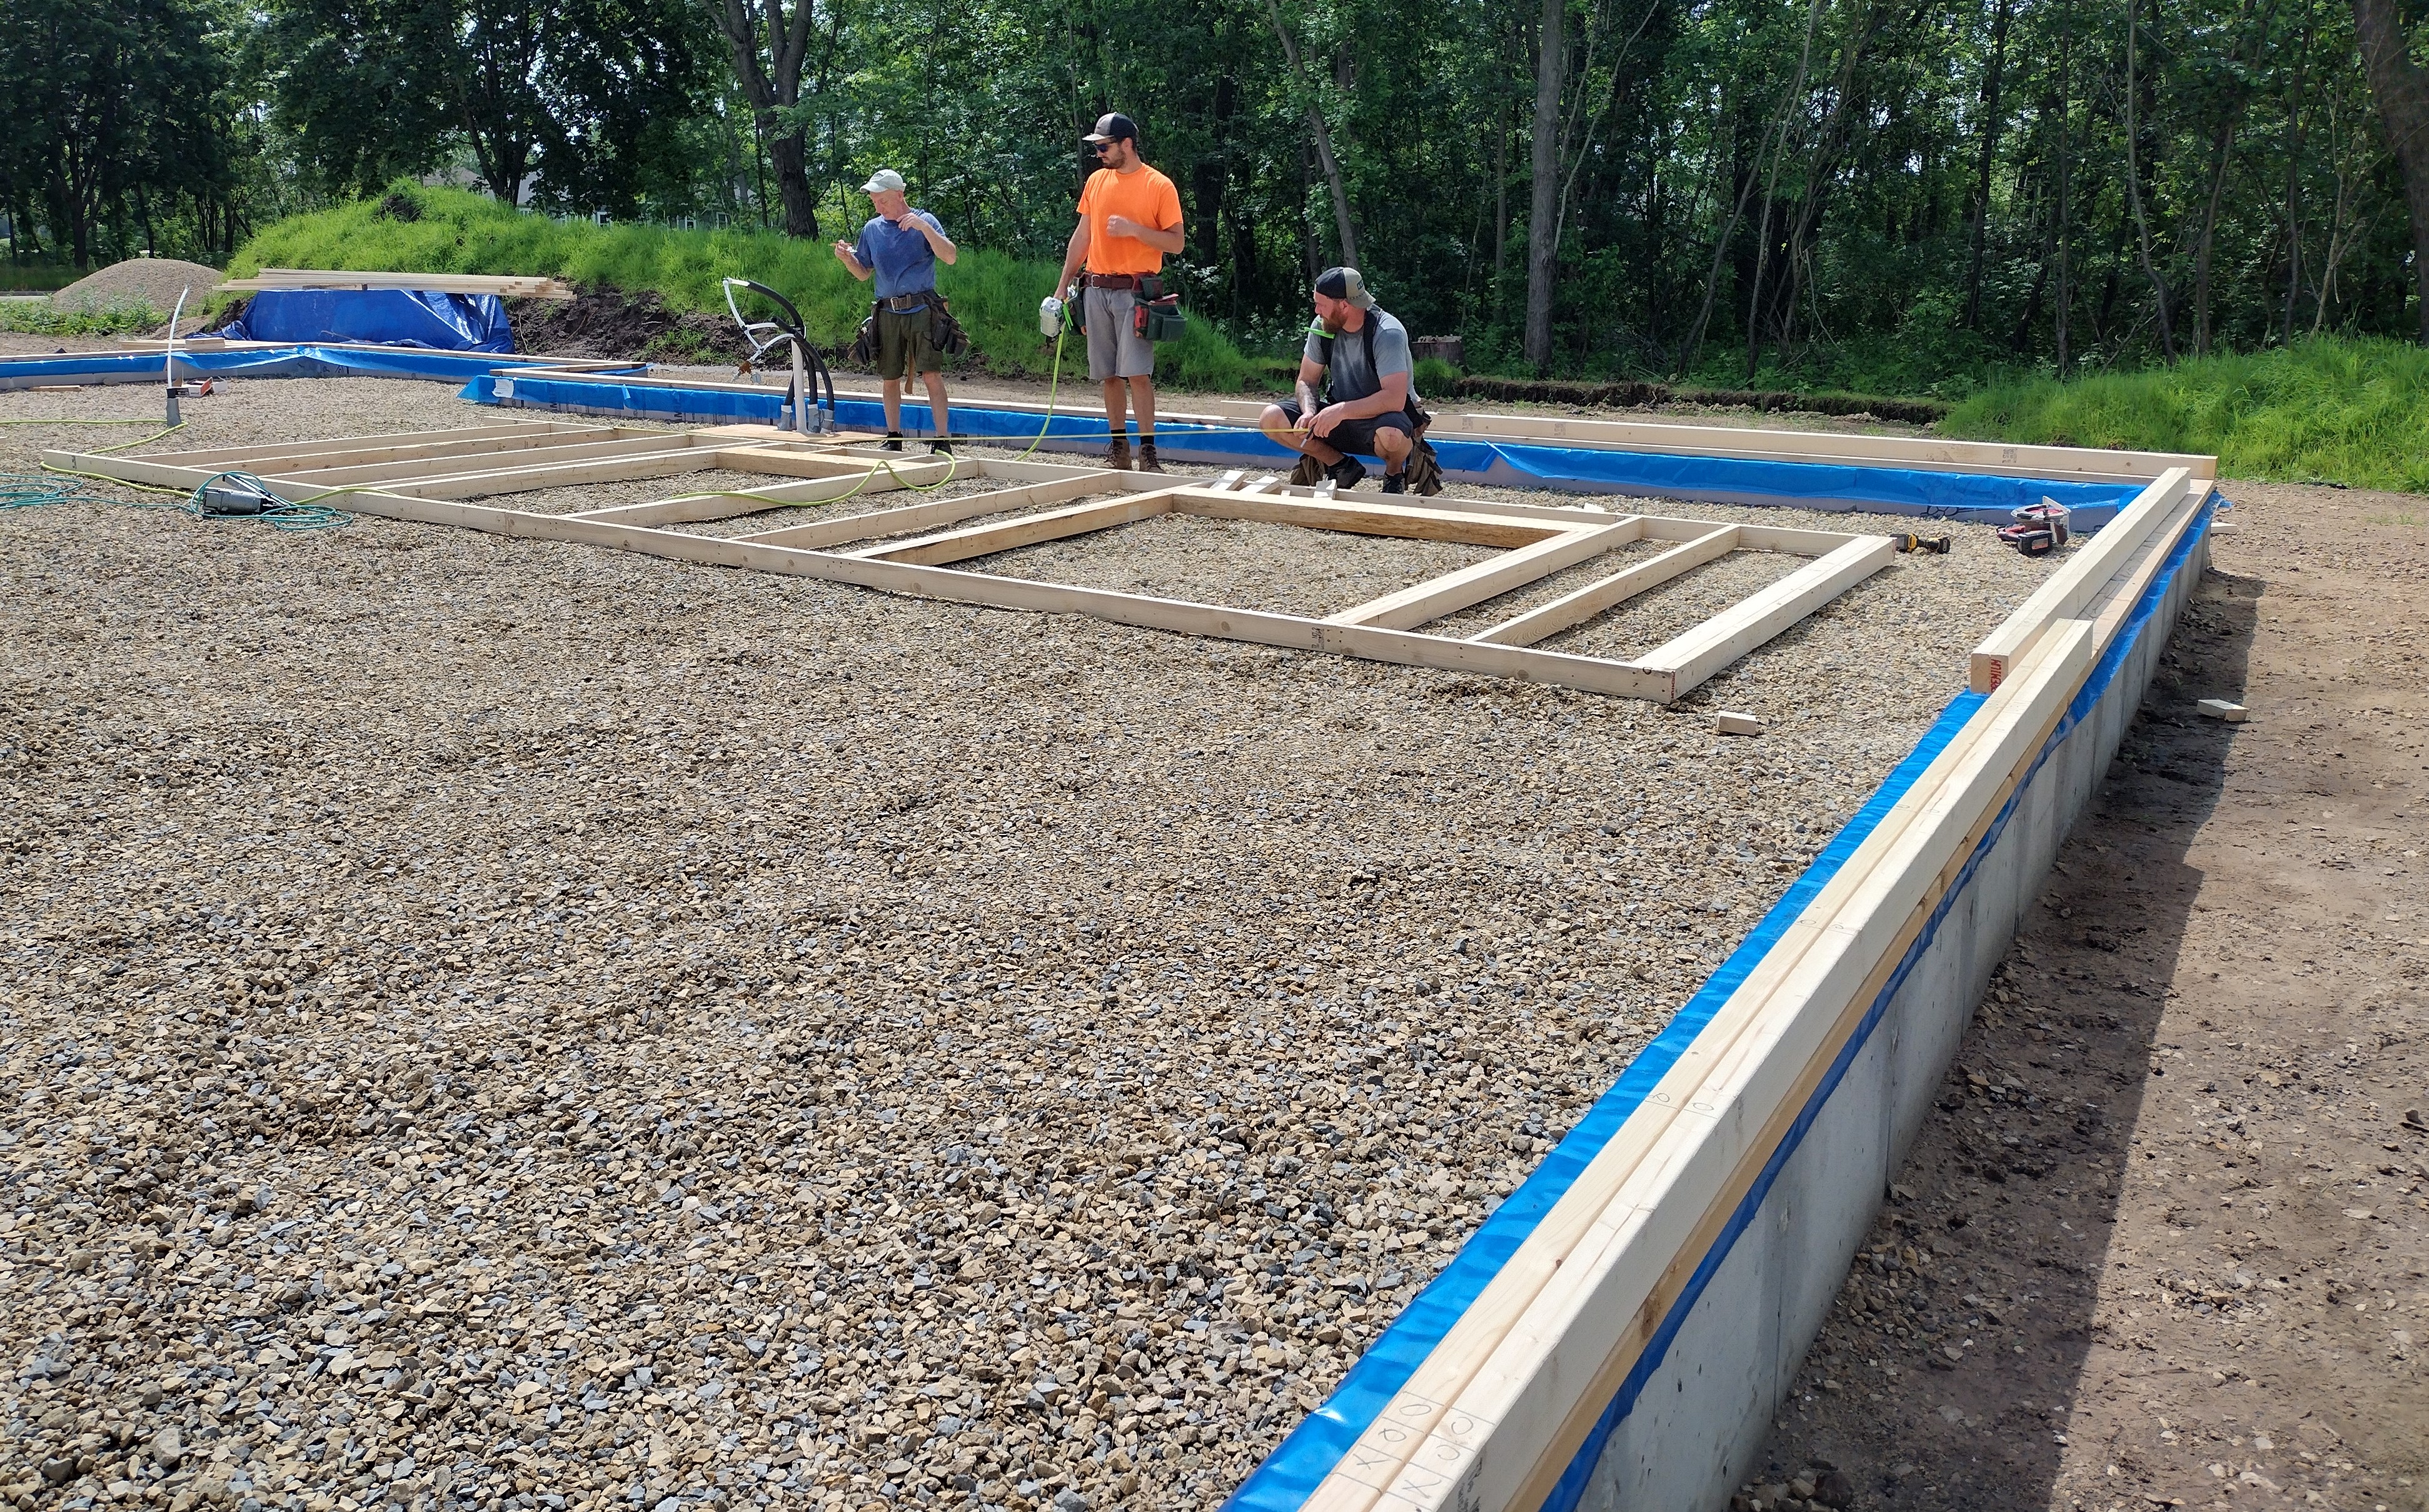
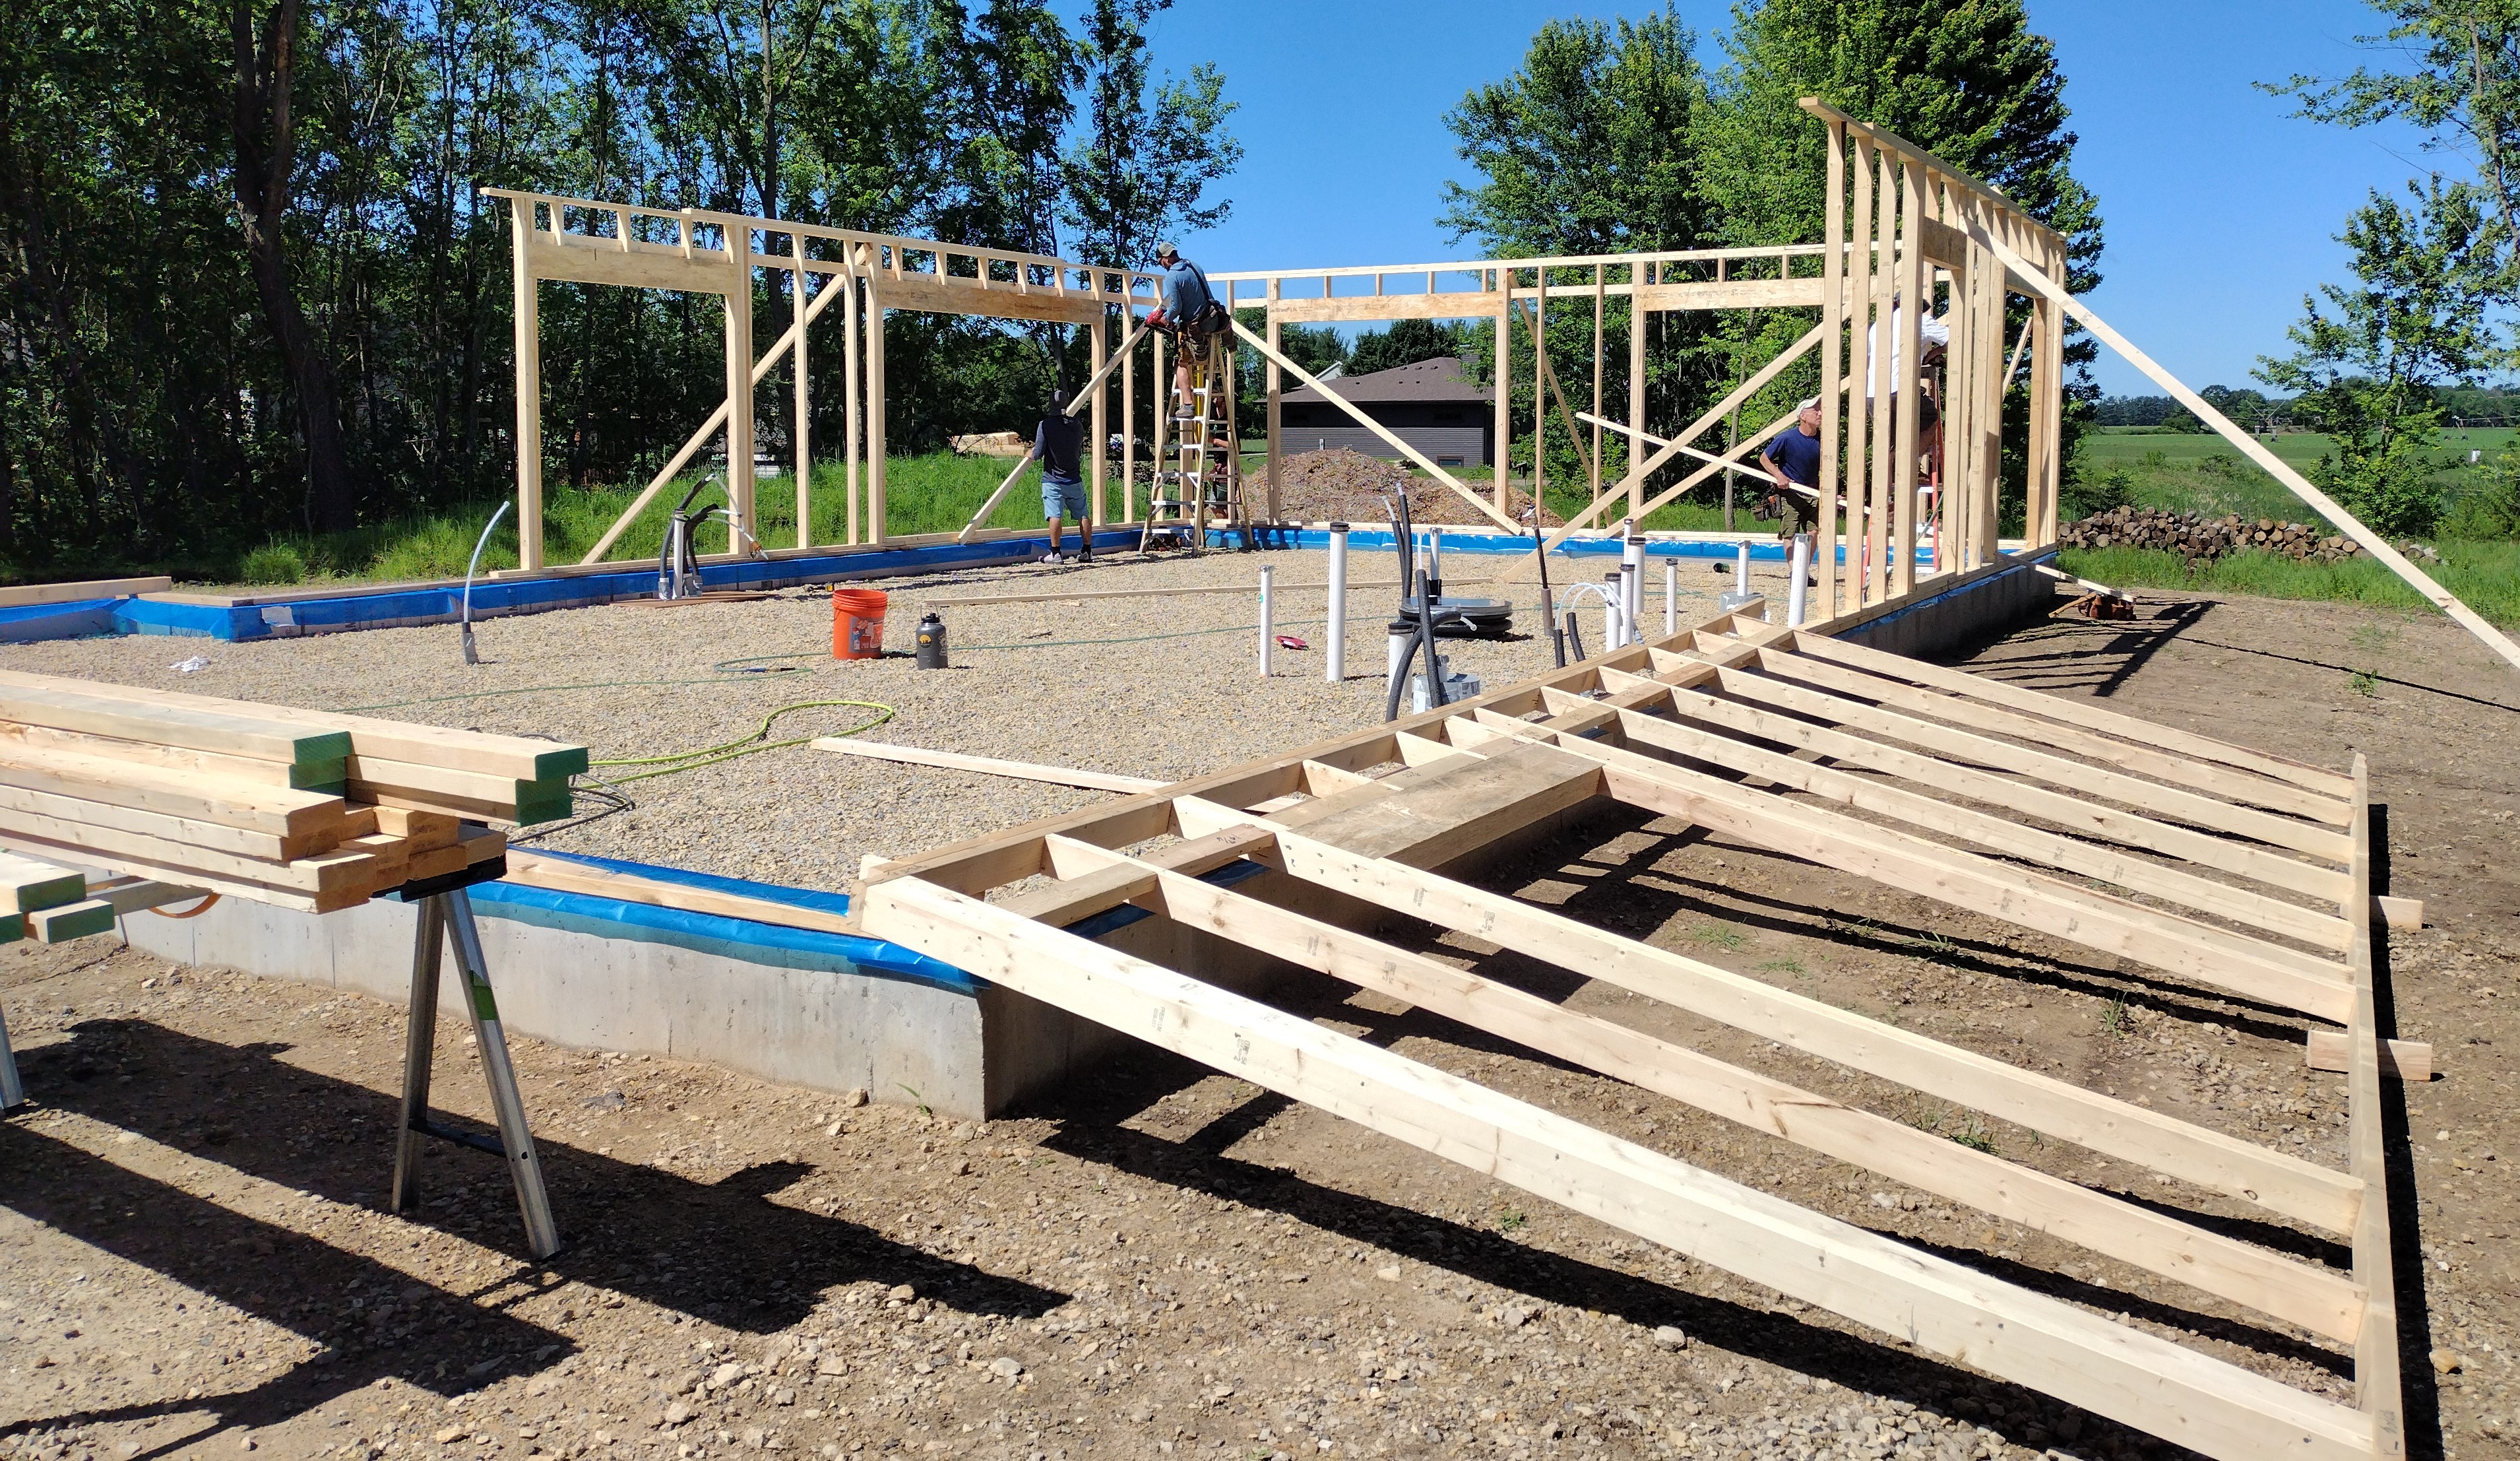
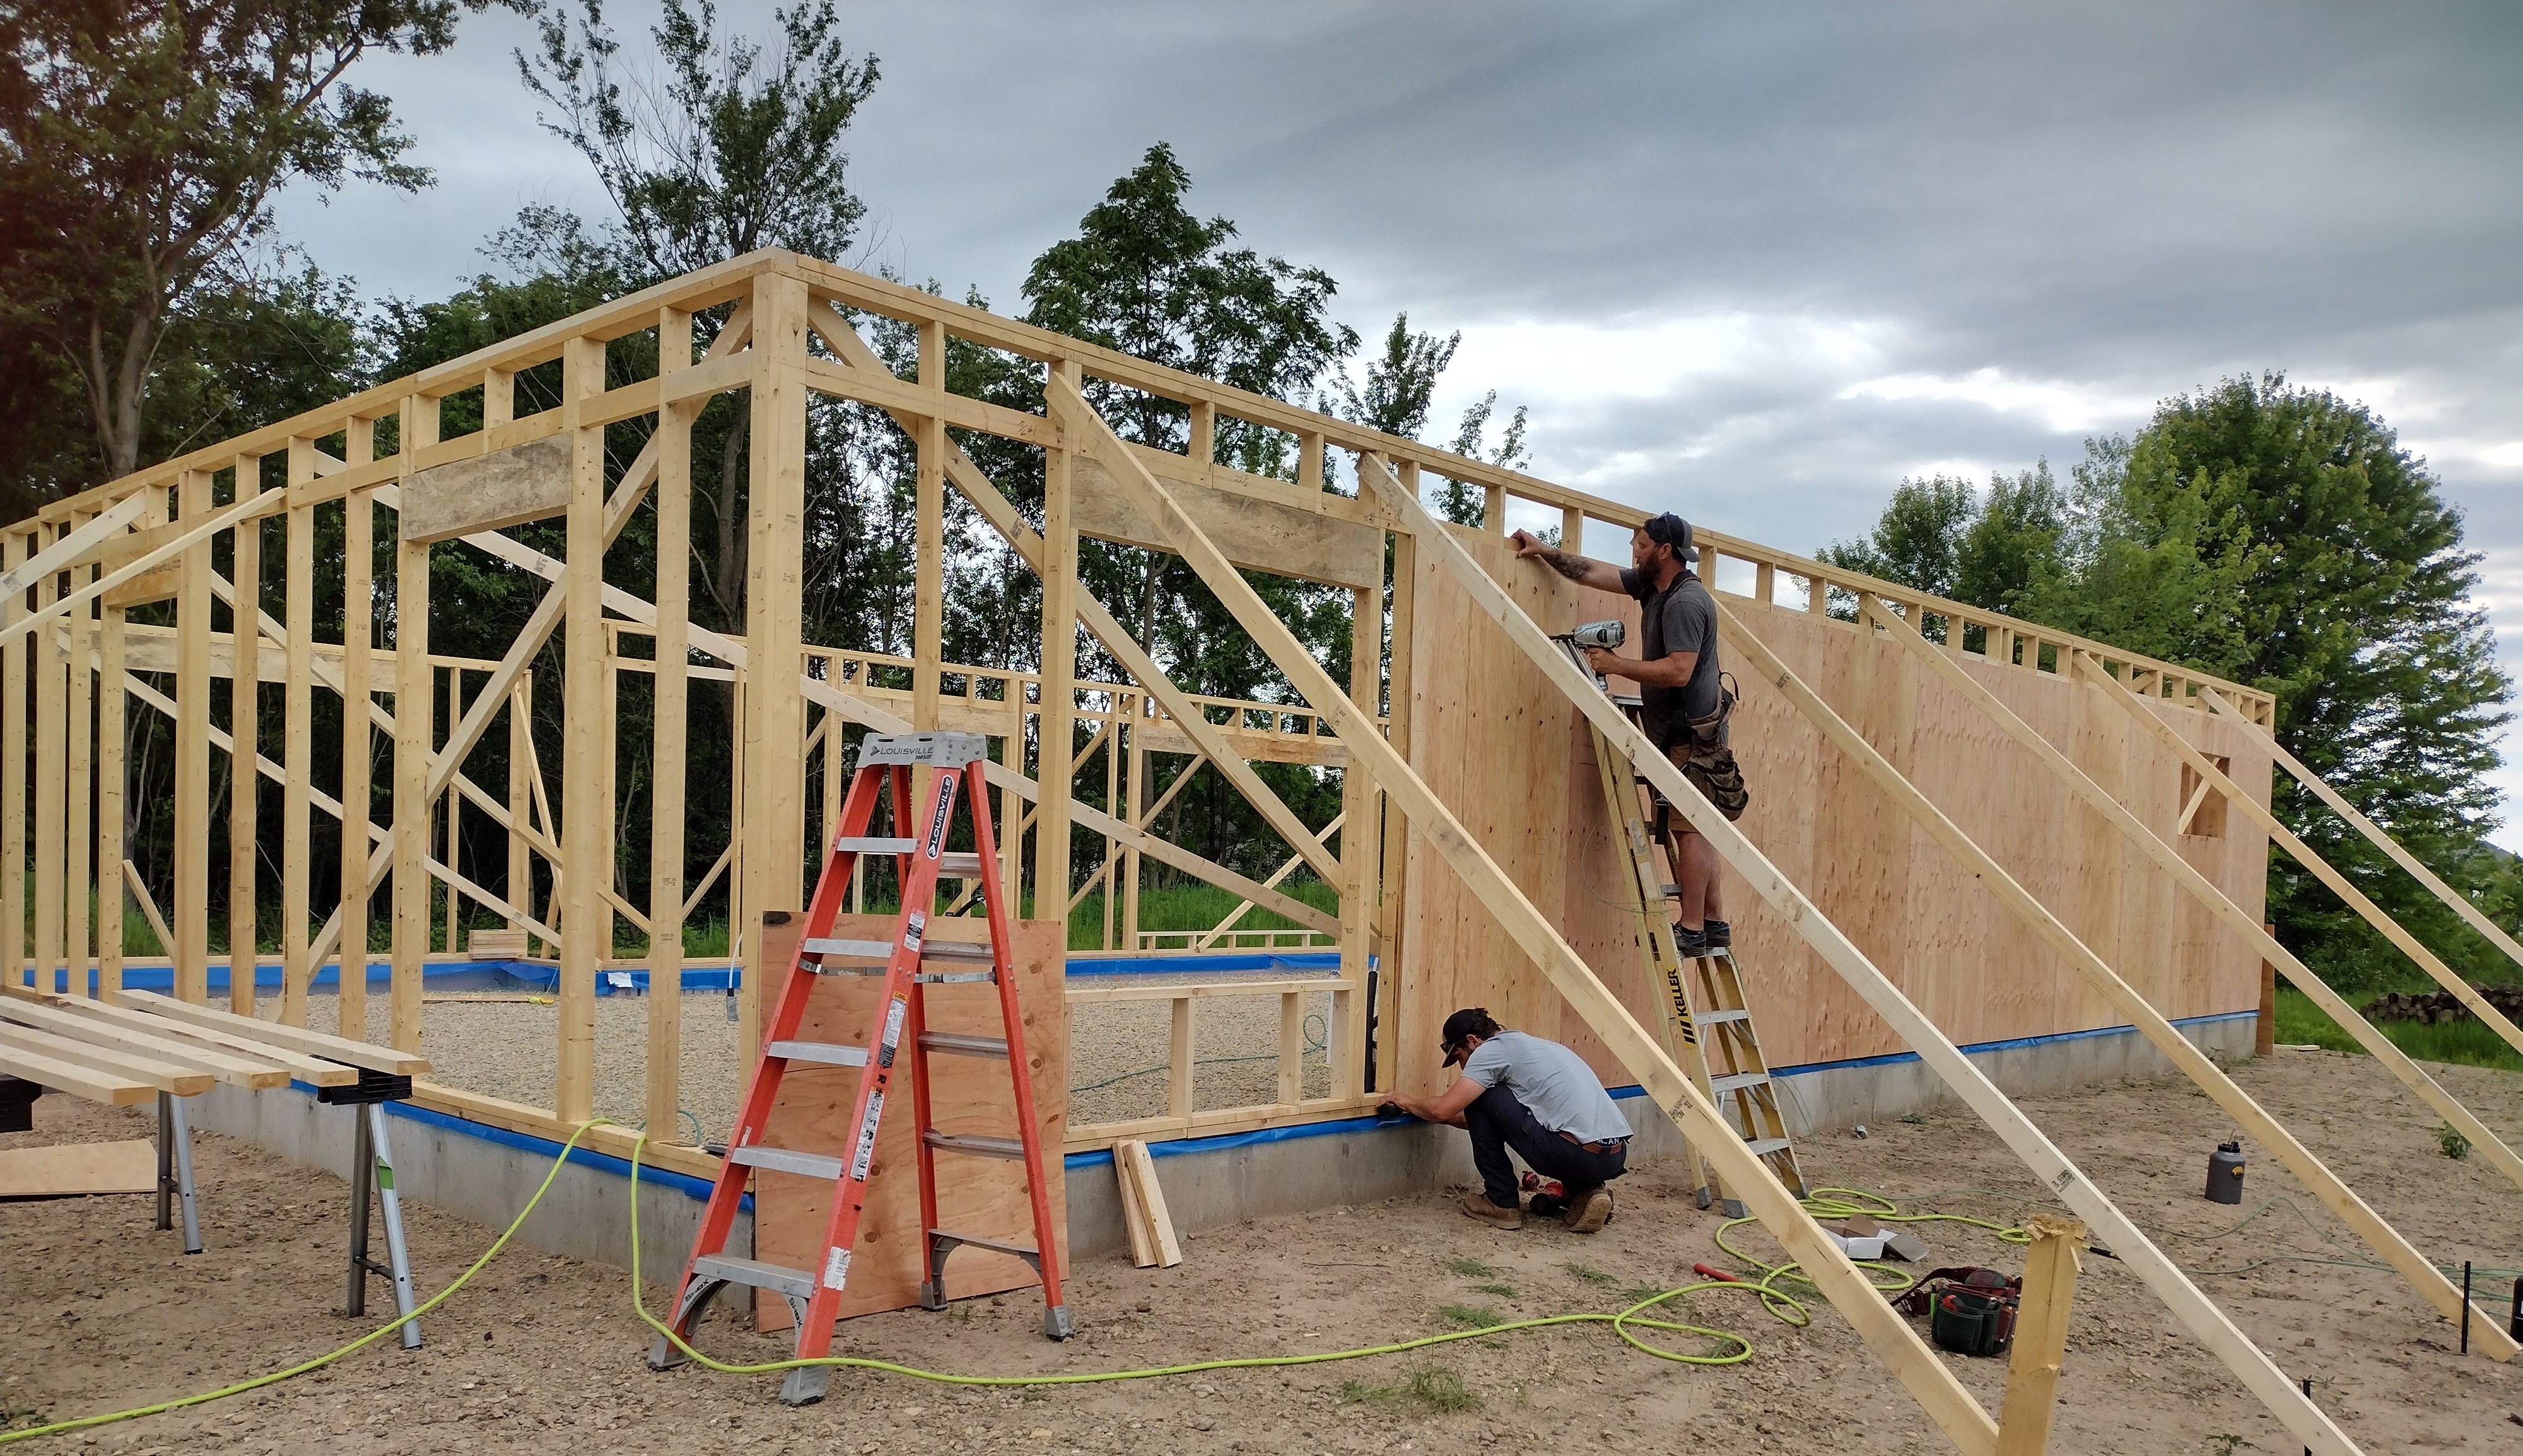
June 4-July 22, 2024: As soon as the cedar sills were set, the crew laid out their stud pattern on the plates and began framing up the walls. Working on rough gravel instead of a typical (flat and smooth) wood subfloor wasn’t as difficult or time-consuming as predicted, but it did mean that the wall couldn’t simply be framed, sheathed, and tipped up: each section had to be hand-carried into place. To reduce weight, the wall sheathing was installed later. Shown here is Mike Larson’s crew: Cale, Dave, Blake, and Wilmer.
The exterior 2×4 wall is the bearing wall for the roof, and studs align with the roof trusses at 24″ on center. Corners have 2 studs, instead of the usual 3 to save on wood and allow for more room for insulation. Other resource-efficient strategies recommended by the American Plywood Association’s “Advanced Framing” protocol include: single top plates, minimal jack studs, minimal cripples, and single ply headers or no headers at non-bearing walls. For this project, we stuck with the usual double top plate for ease of constructability and for compatibility with standard drywall, and solid engineered headers at all window openings.
This was my first project using Timberstrand engineered headers. The price, including my estimate for labor, was less than for built-up headers (2×10’s or 2×12’s or LVL’s gang-nailed on site). The only hitch was that the material had to be pre-ordered well ahead of time. To ward off mistakes and do my part to keep things moving along quickly under the hot sun, I created a detailed plan, cut sheet, and window schedule for the carpenters to follow.
For the same reasons of speed and economy, I chose appearance grade Glue Lam’s for the porch beams. This one-and-done solution works well with my overall aesthetic of “honest use of materials”. It’s also more durable: a typical beam is built up from multiple layers of 2x dimensional lumber, pocketed into the wall framing, then covered with finish boards. If or when seams fail and moisture creeps in, the assembly would have a hard time drying out.
The Glue Lam’s are installed on Simpson’s Concealed Joist Ties, which gap them away from the house wall, allowing the beam to dry through its end grain. A section of WRB (water resistive barrier, or housewrap), was cap-stapled in place prior to bolting the connector.
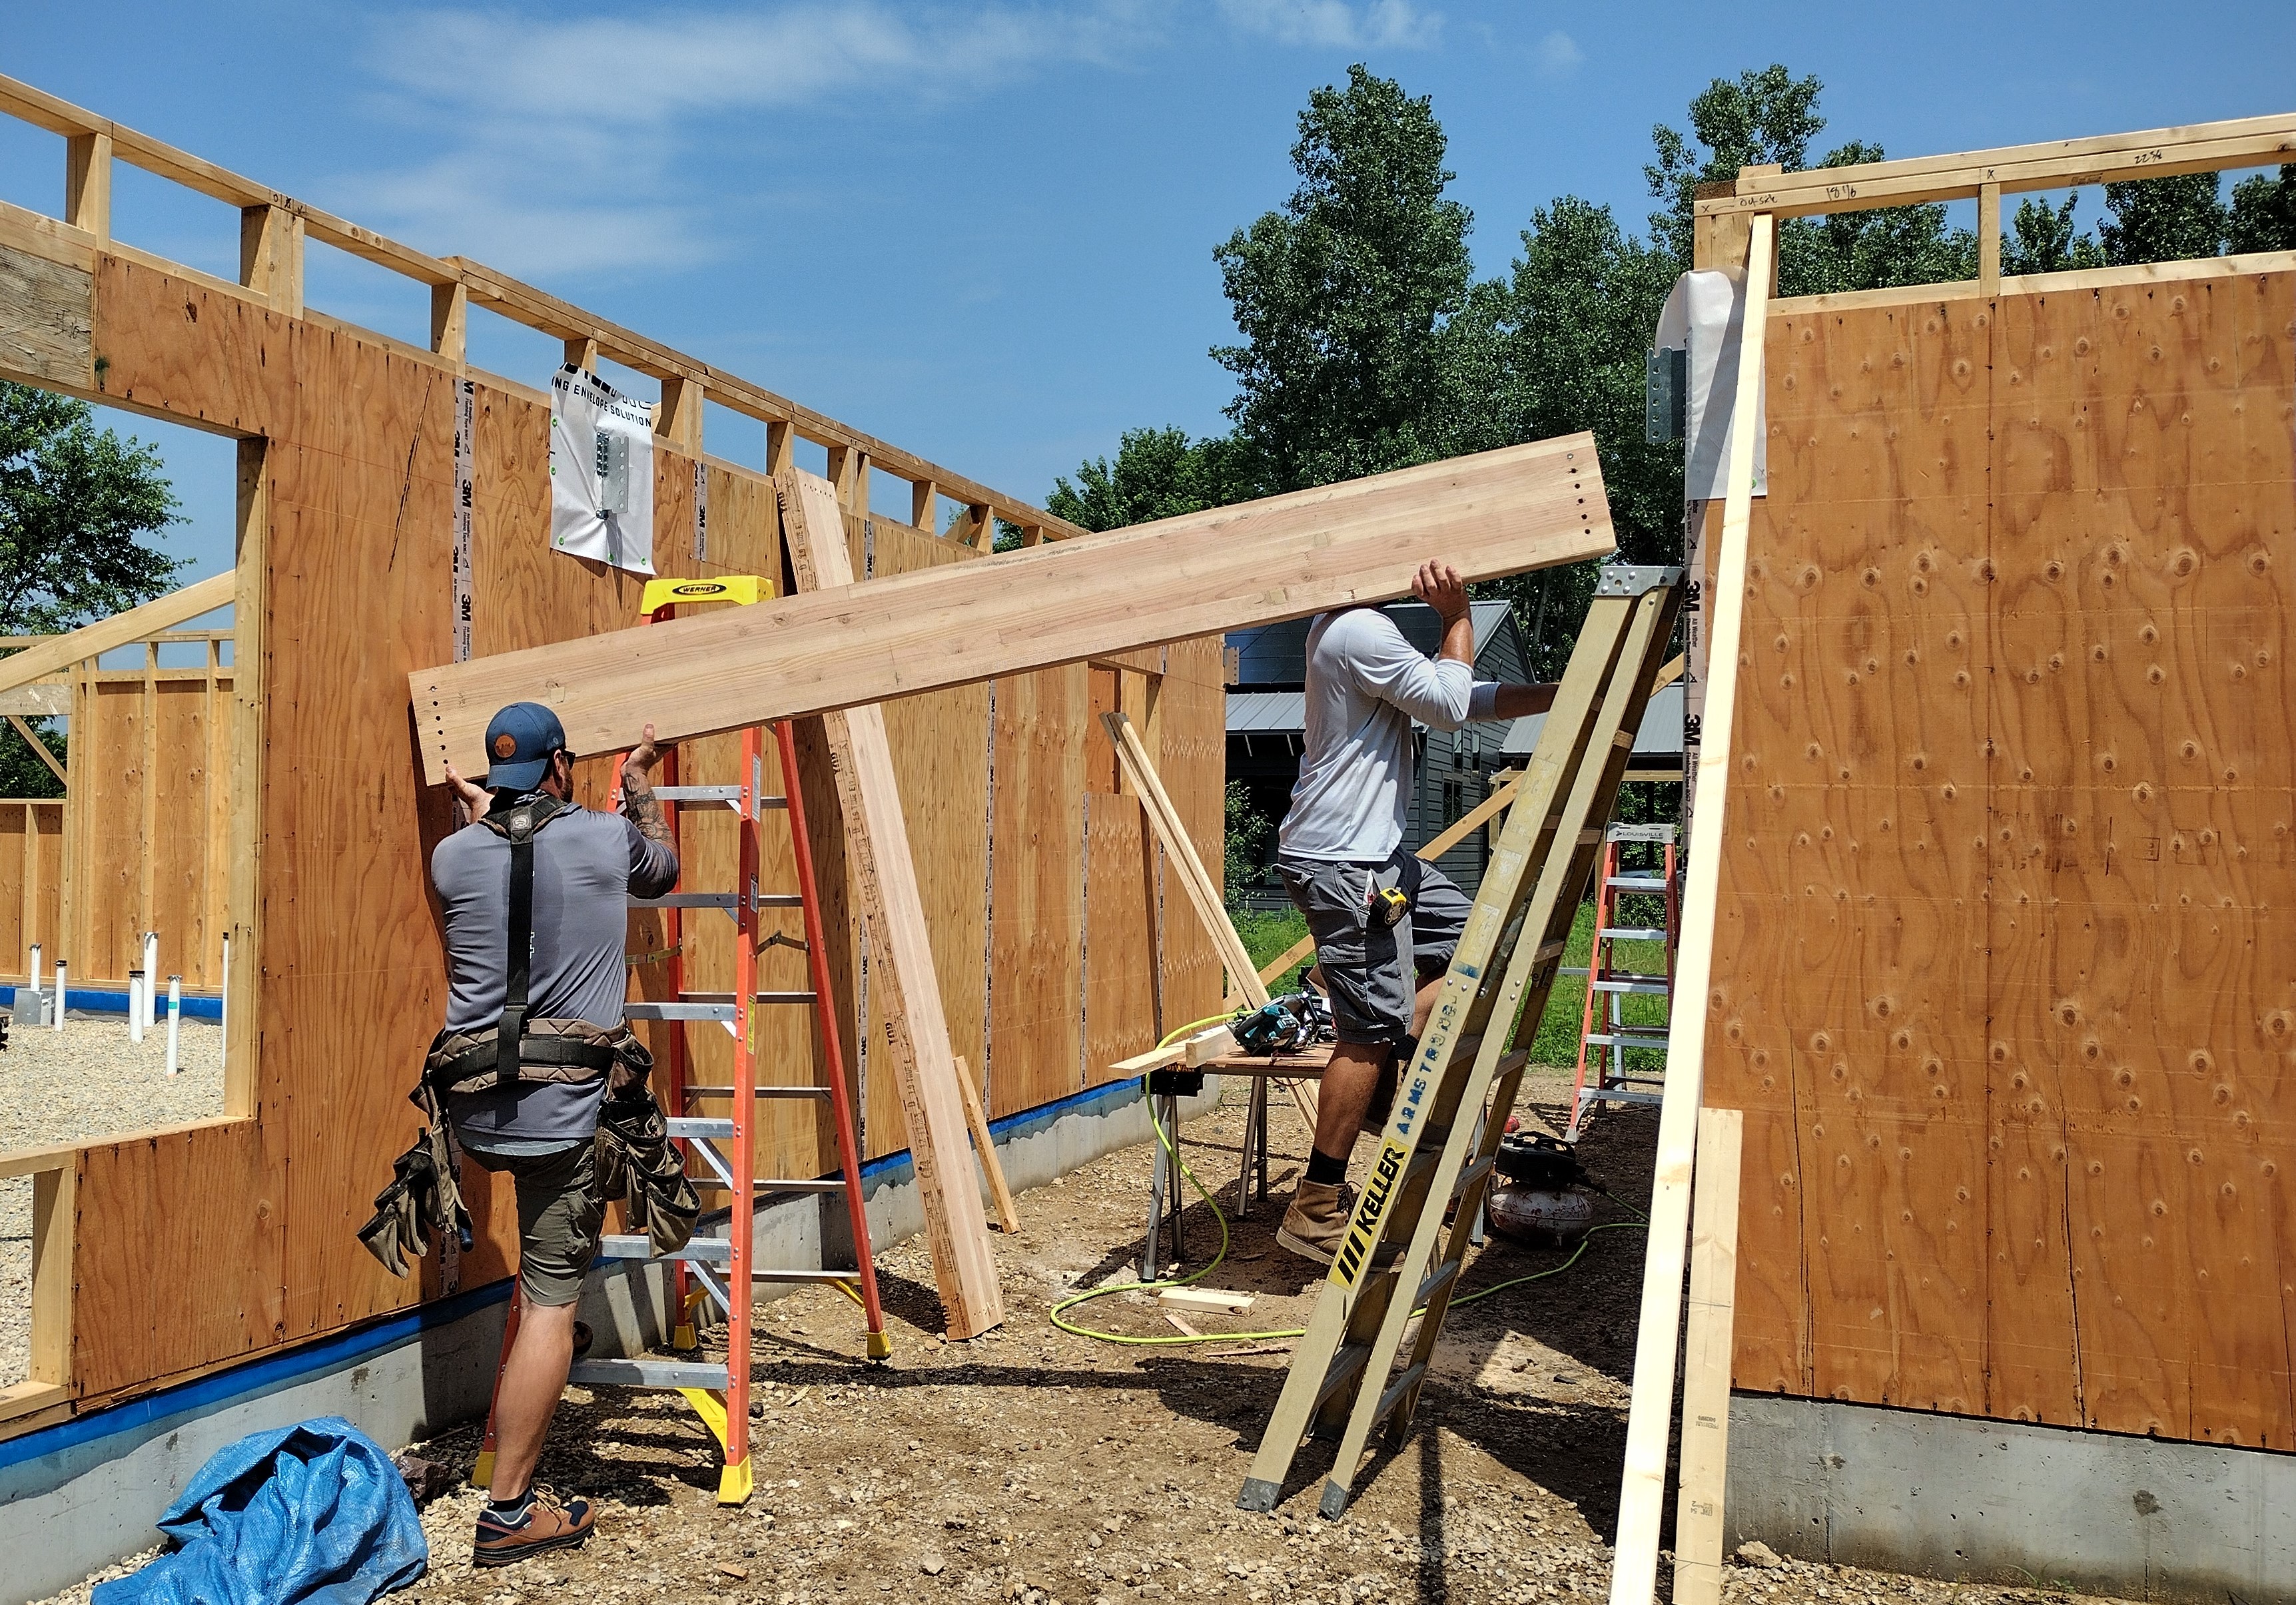
Plywood sheathing is preferred over OSB (oriented strand board) sheathing for super-insulated walls like ours, according to many builders and building scientists who have studied the moisture resiliency of the two competing products. Here’s a great article from my favorite magazine, Fine Homebuilding, about the kind of walls we’re building:
We installed vertical 2×4 blocking to catch the top edge of the 4×8 foot plywood sheathing panels. Later a 30 inch strip of plywood will be installed above to tie the 9 foot stud wall to the roof trusses, a very strong shear connection that contributes to our upgraded wind resistant construction protocol. Our nailing pattern goes above and beyond Code Minimum too, with nails 4 inches on center at panel edges and 6″ on center within the panel field. The roof sheathing (also plywood), will be nailed at 4 inches on center at all locations within 48 inches of roof edges, and elsewhere at 6″ at panel edges and 12″ in the field.
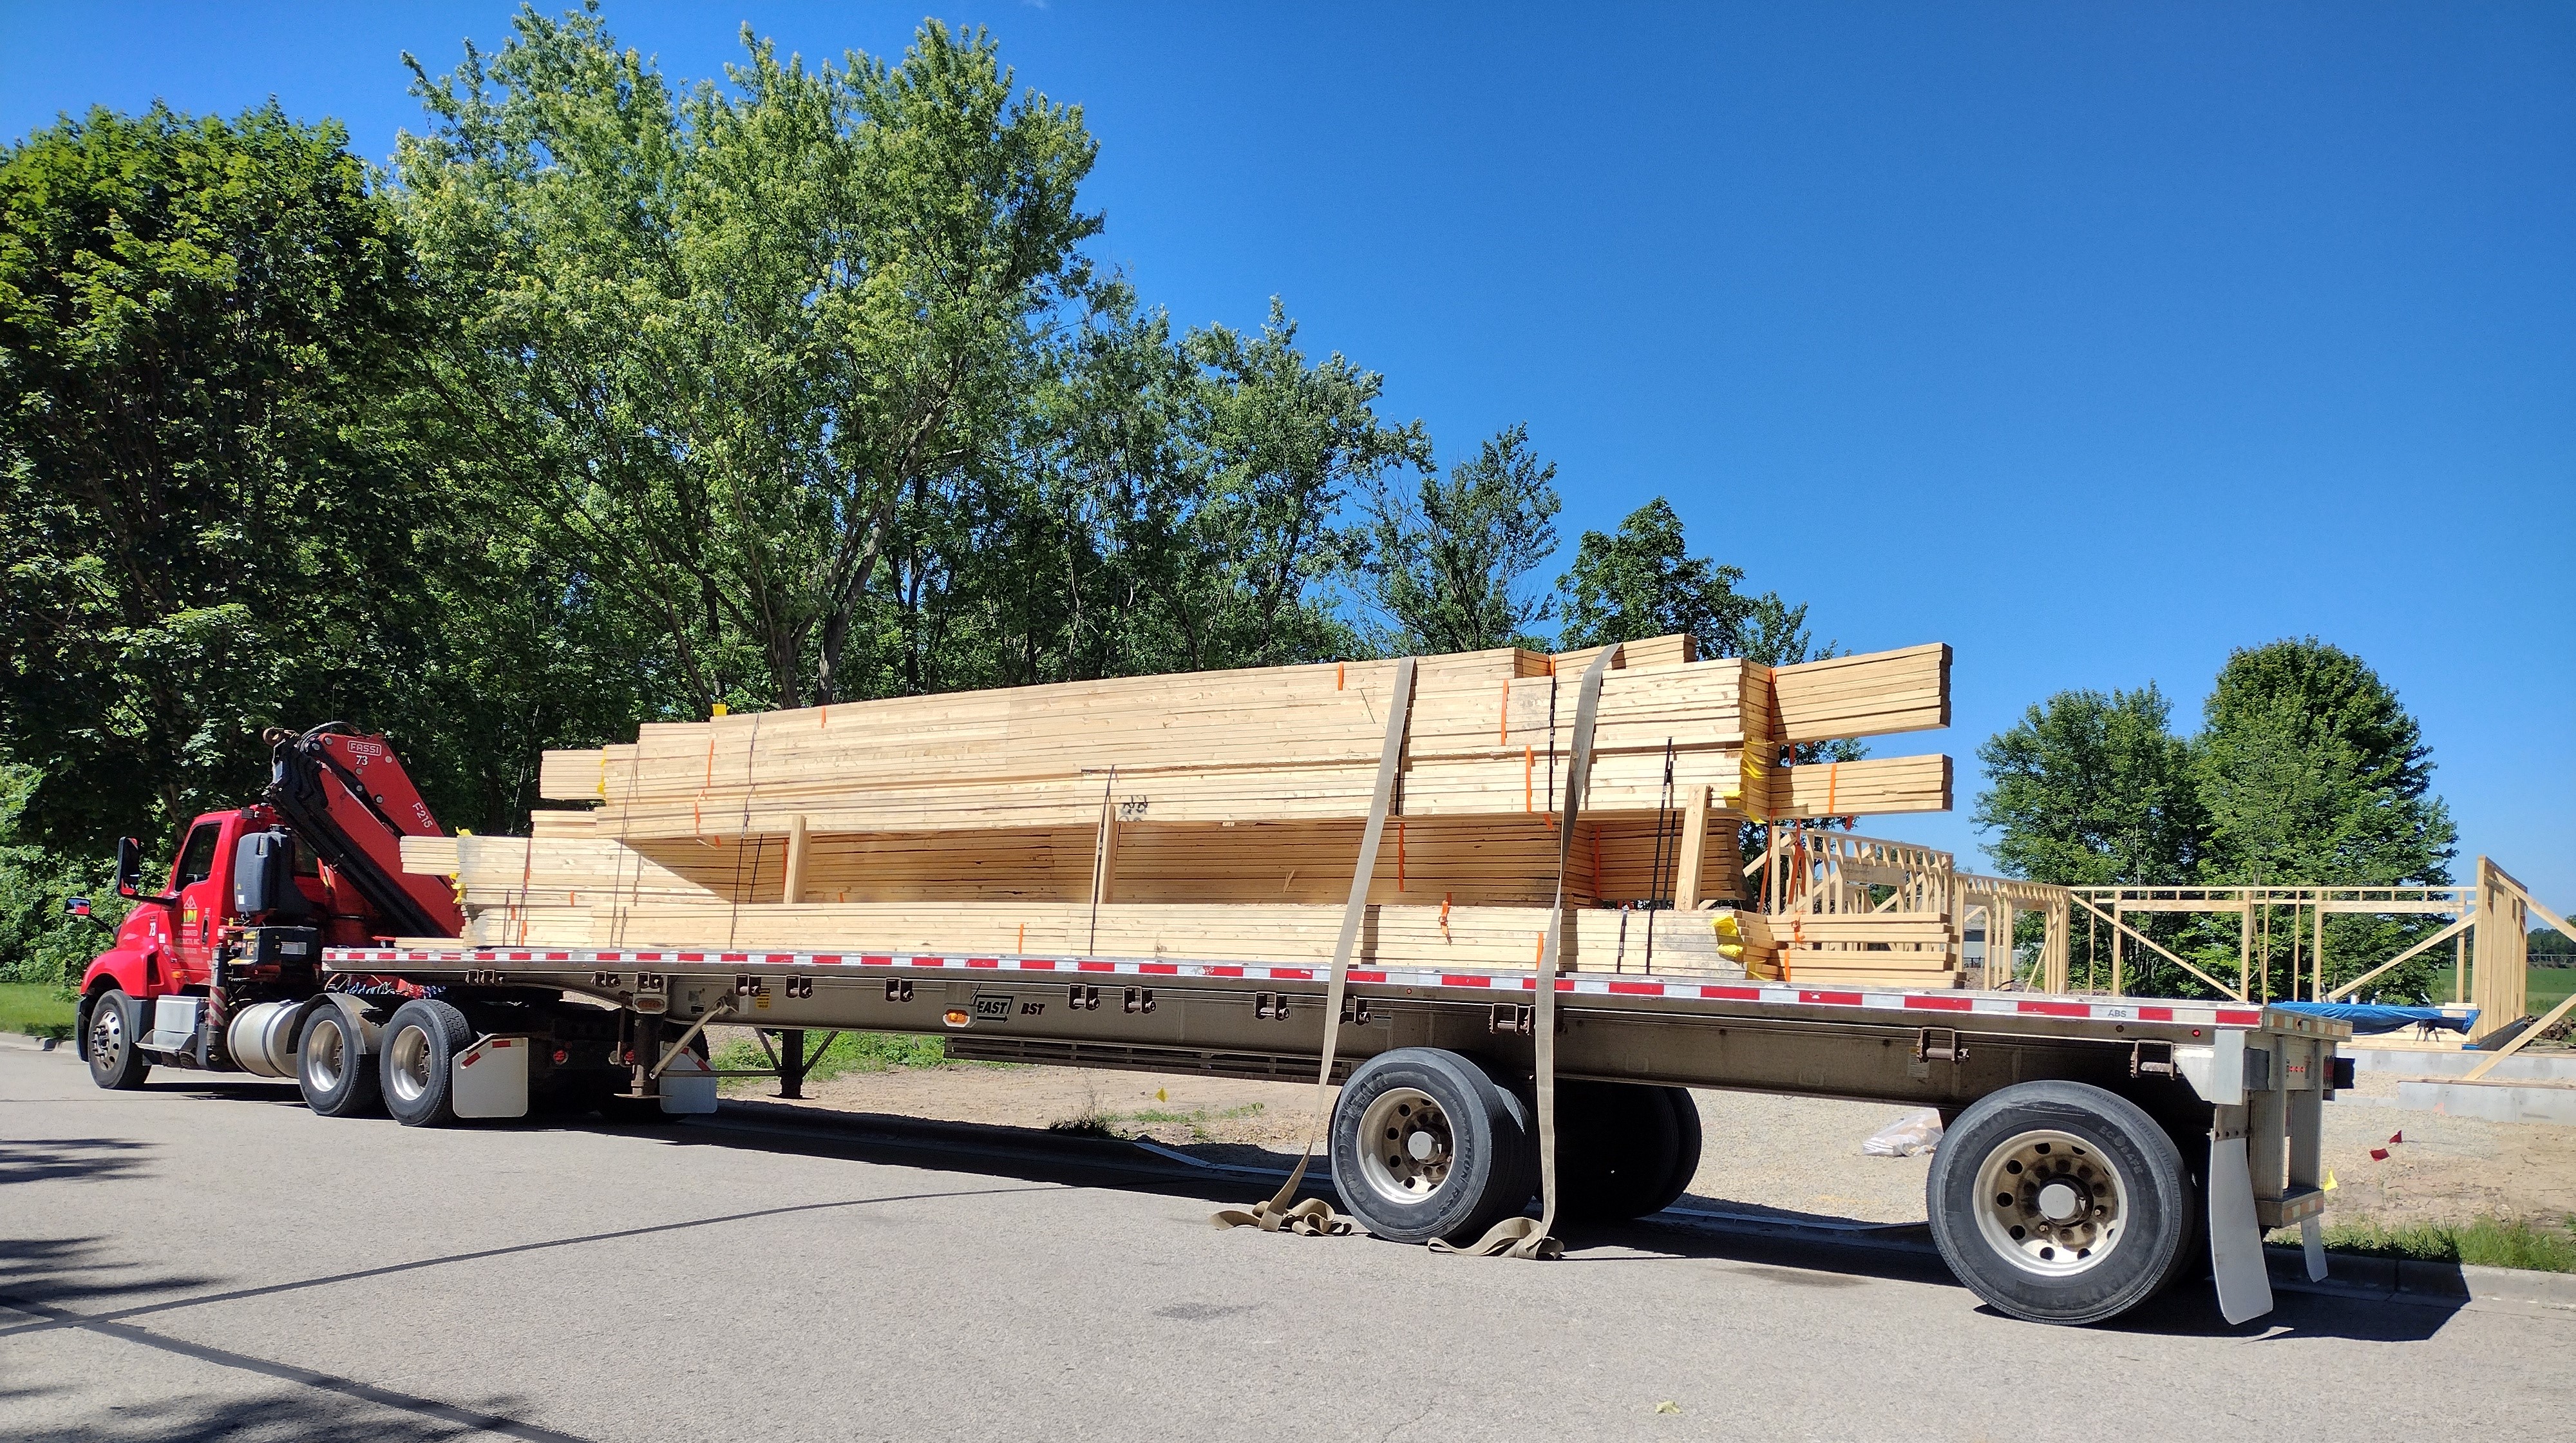
The trusses were boomed into place in quick order. My crew had already unbound the truss bundles, sorted them for pickup from west to east, and rolled out and stapled a strip of 6 mil polyethylene to the top plate (blue plastic).
Shade at last!
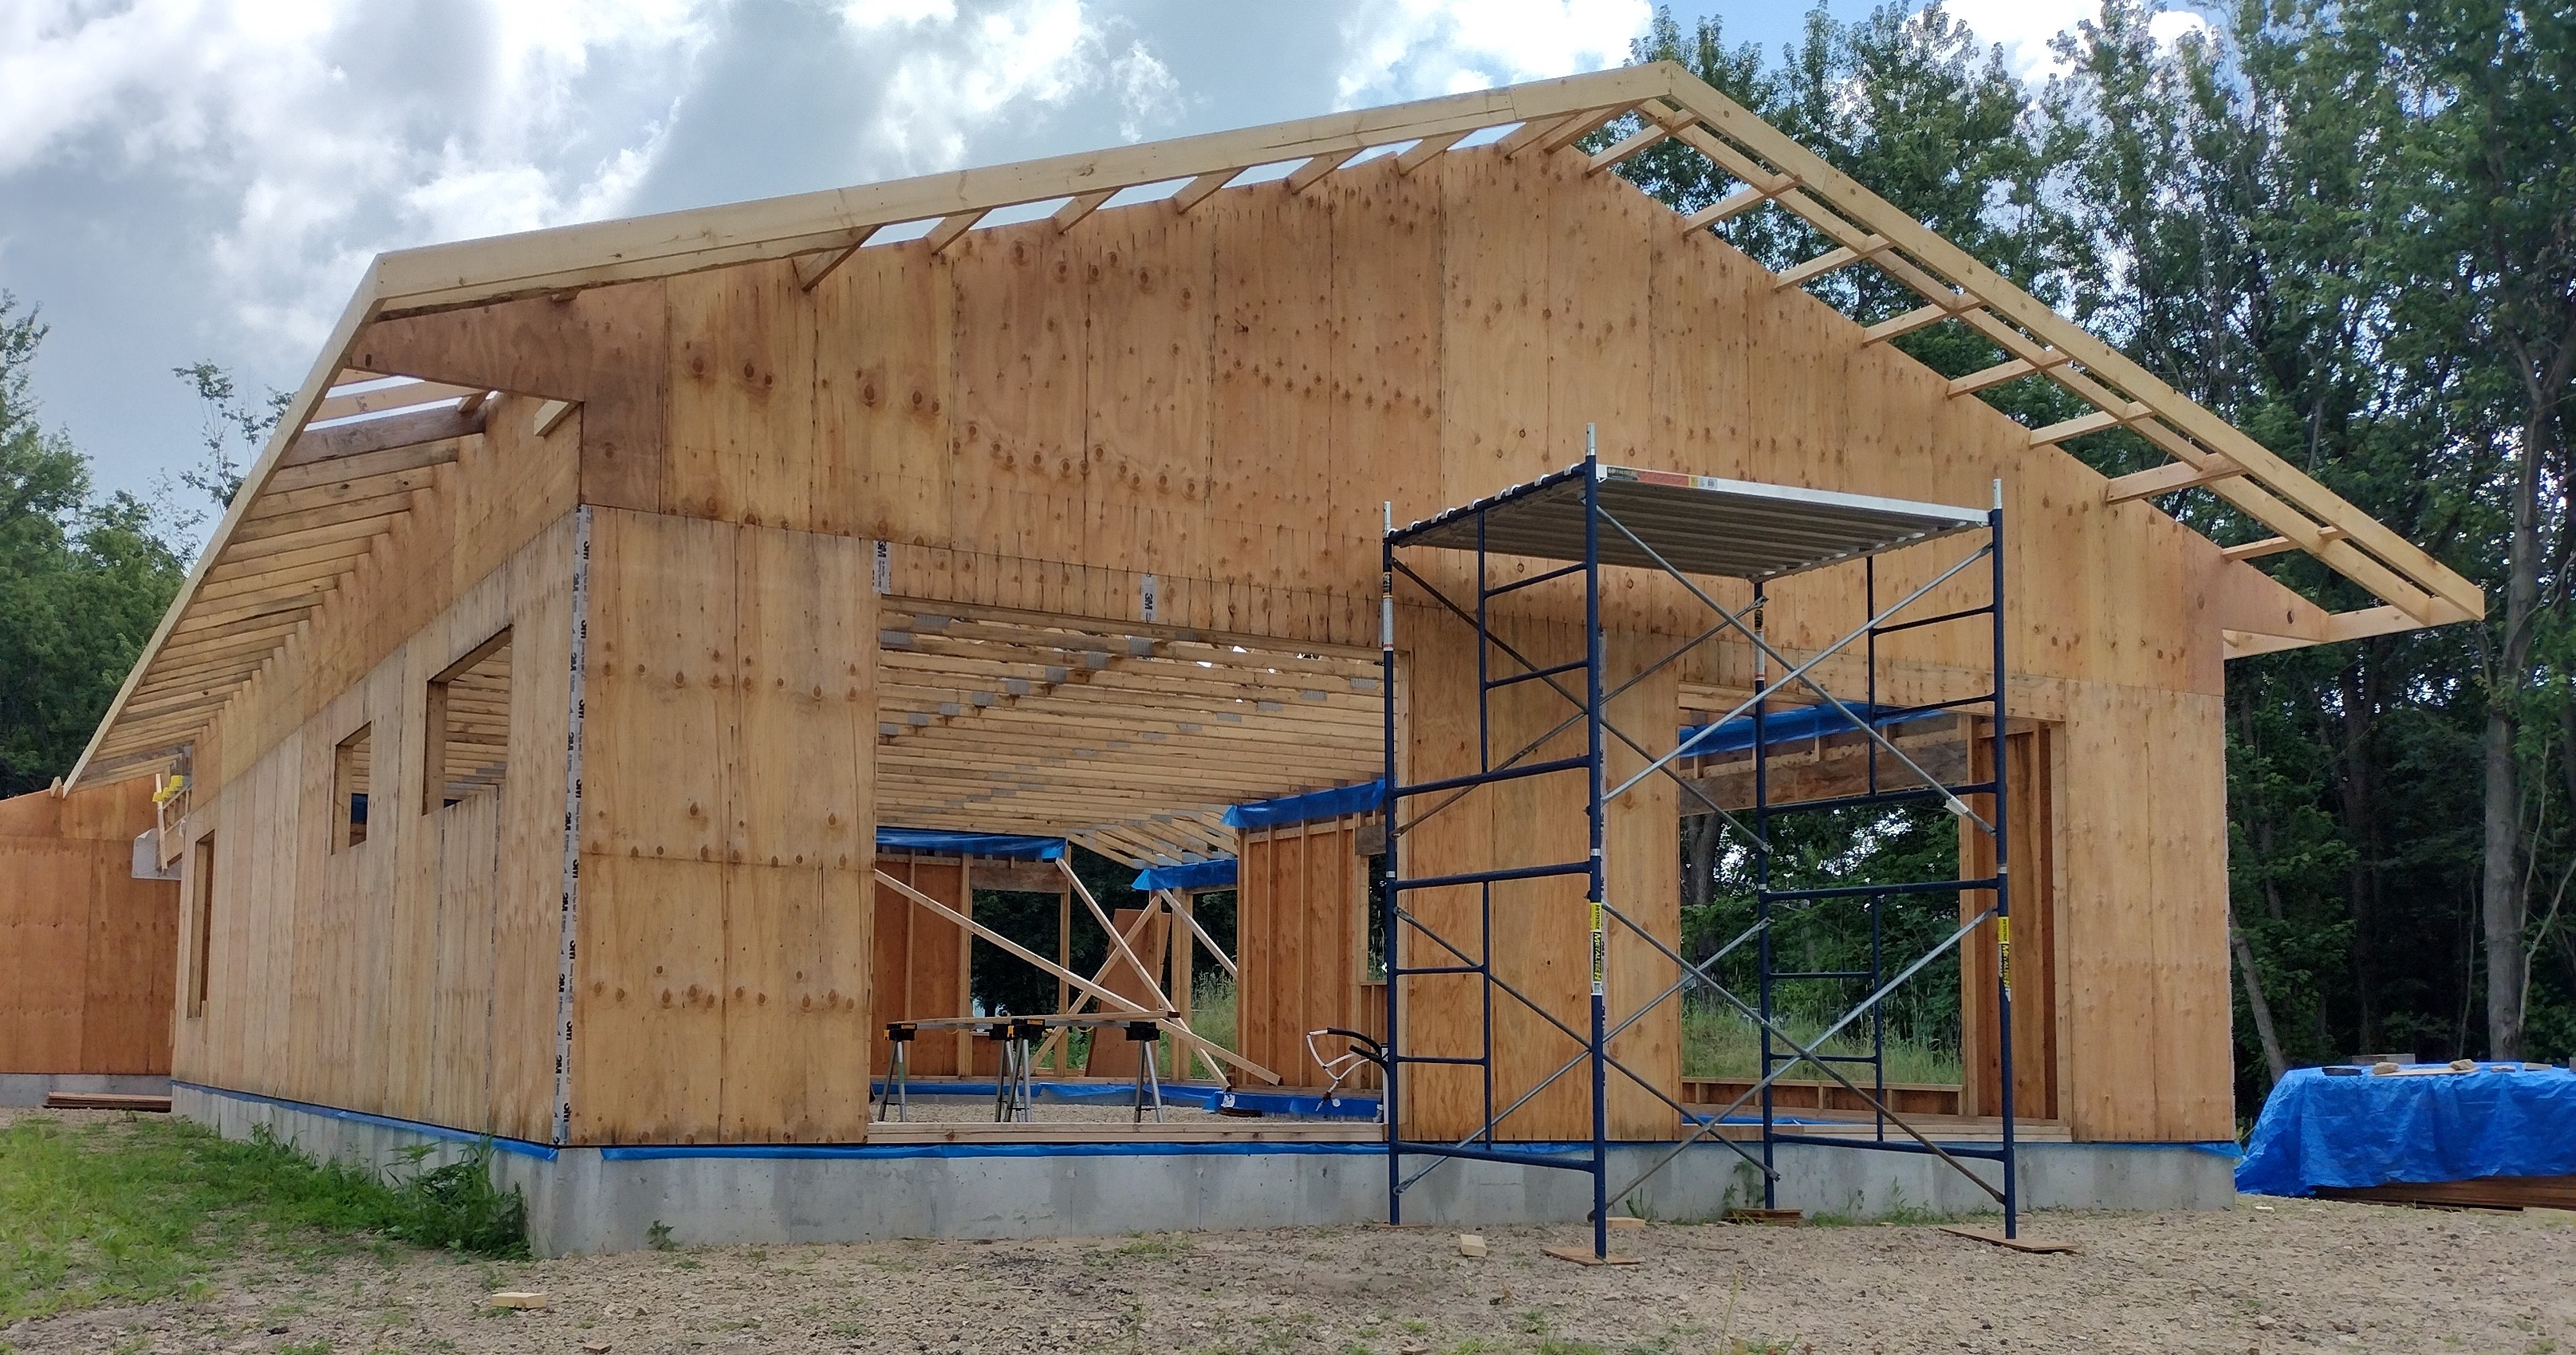
The overhangs and east and west rakes extend 3 feet beyond the wall, creating a robust shelter from driving rain. The wall sheathing was notched to accept the truss tails and outriggers, leaving a 2″ gap at the top for attic venting.The 2×8 fascia ties it all together.
A strip of WRB (water resistive barrier, or housewrap) was installed on the house wall prior to setting the breezeway/garage trusses. Later, a strip of peel-and-stick membrane sealed the wall to the roof sheathing, prior to rolling out synthetic roof underlayment.
This detail shows the assemblies we installed, as described above:
Timberstrand window header
Vertical 2×4 blocking to catch the top edge of the 4×8 plywood sheathing
Plywood strip above, tying the 9 foot stud wall to the 20″ truss heel
That same plywood strip notched for the truss tail but held short 2″ for attic ventilation
Strip of blue vapor barrier used to tie the exterior air barrier (wall sheathing) to the interior air barrier (red vapor retarder)
36″ overhang and 2×8 fascia
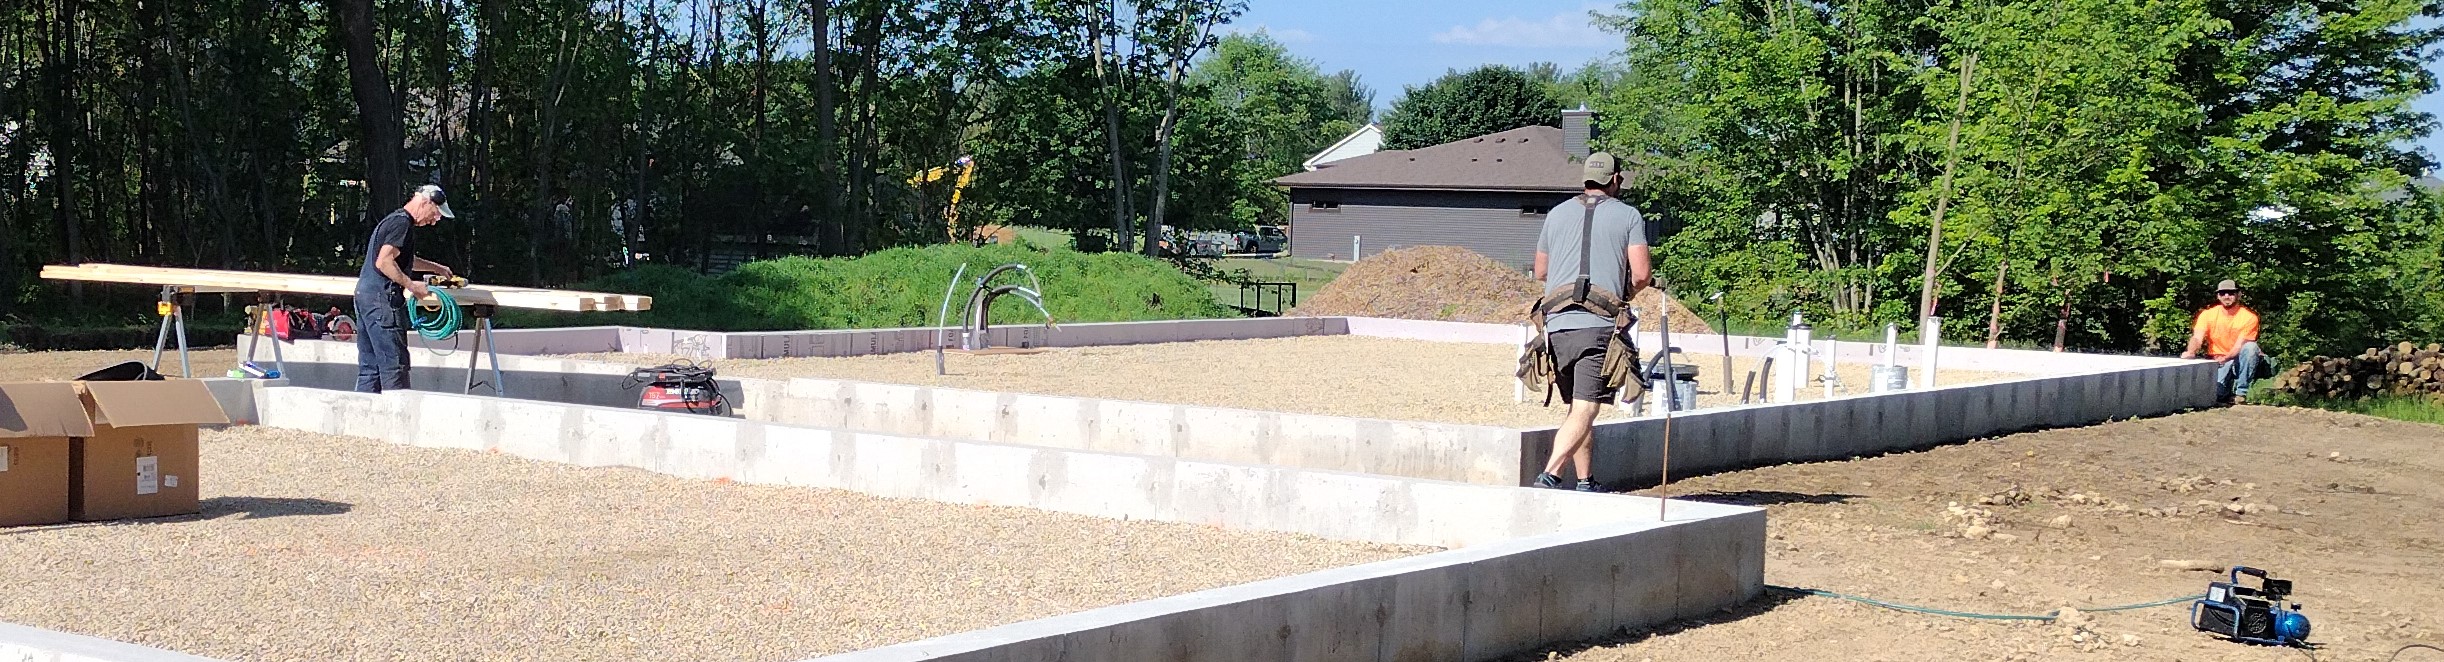
Our construction site has no dumpster. At the end of each day, my crew and I sweep up and sort out material. Lumber scraps are saved for future blocking, or if too small, for firewood. Engineered lumber, like the glue lam beam and header cut-offs, as well as plywood scraps are stacked and taken to a wood recycling facility. Cardboard packaging is flattened, and one-time use cans or plastic bottles are tossed into a recycling bin. Crates and pallets are set at the curb: so far, they’ve all been taken.
May 23-29, 2024: If you’ve ever had bugs or mice or snakes (!!!) in your house, they probably got in through gaps, seams or rotted sections of the sill plate and adjacent framing. The sill plate is the very first piece of wood that gets laid down on top of a foundation wall in a typical wood framed home. Any joining of two different building materials is vulnerable to seasonal expansion and contraction, resulting in micro gaps just the right size for bugs. When wood gets wet and can’t dry out (like when it’s located close to the ground), it can rot, inviting more trouble.
Building Codes give some guidance for installing sill plates, but the quality of execution is left up to the builder. For a high performance home like we’re building (one that’s energy and resource efficient as well as durable over the long haul), you want high quality materials, redundant layers, and better-than-average workmanship.
My carpentry crew, headed up by Mike Larson with help from Blake and Dave, began by squaring up the sill plates on the pretty-good but not-perfect foundation wall and setting up the saw station. I’d ordered a pile of fine-looking Western Red Cedar 2×6-16′ lumber in place of the usual chemical-laden pressure treated Southern Yellow Pine. Cedar is more expensive, but naturally decay resistant. These “appearance grade” boards were arrow-straight and a joy to work with. To save money and minimize waste, I handed the carpenters a “cut sheet” that called out the placement of each board. The few “shorts” left can be used later for hobby projects or firewood. No lumber will end up in a dumpster or a landfill.
Next, the crew marked out and drilled holes for the anchor bolts.
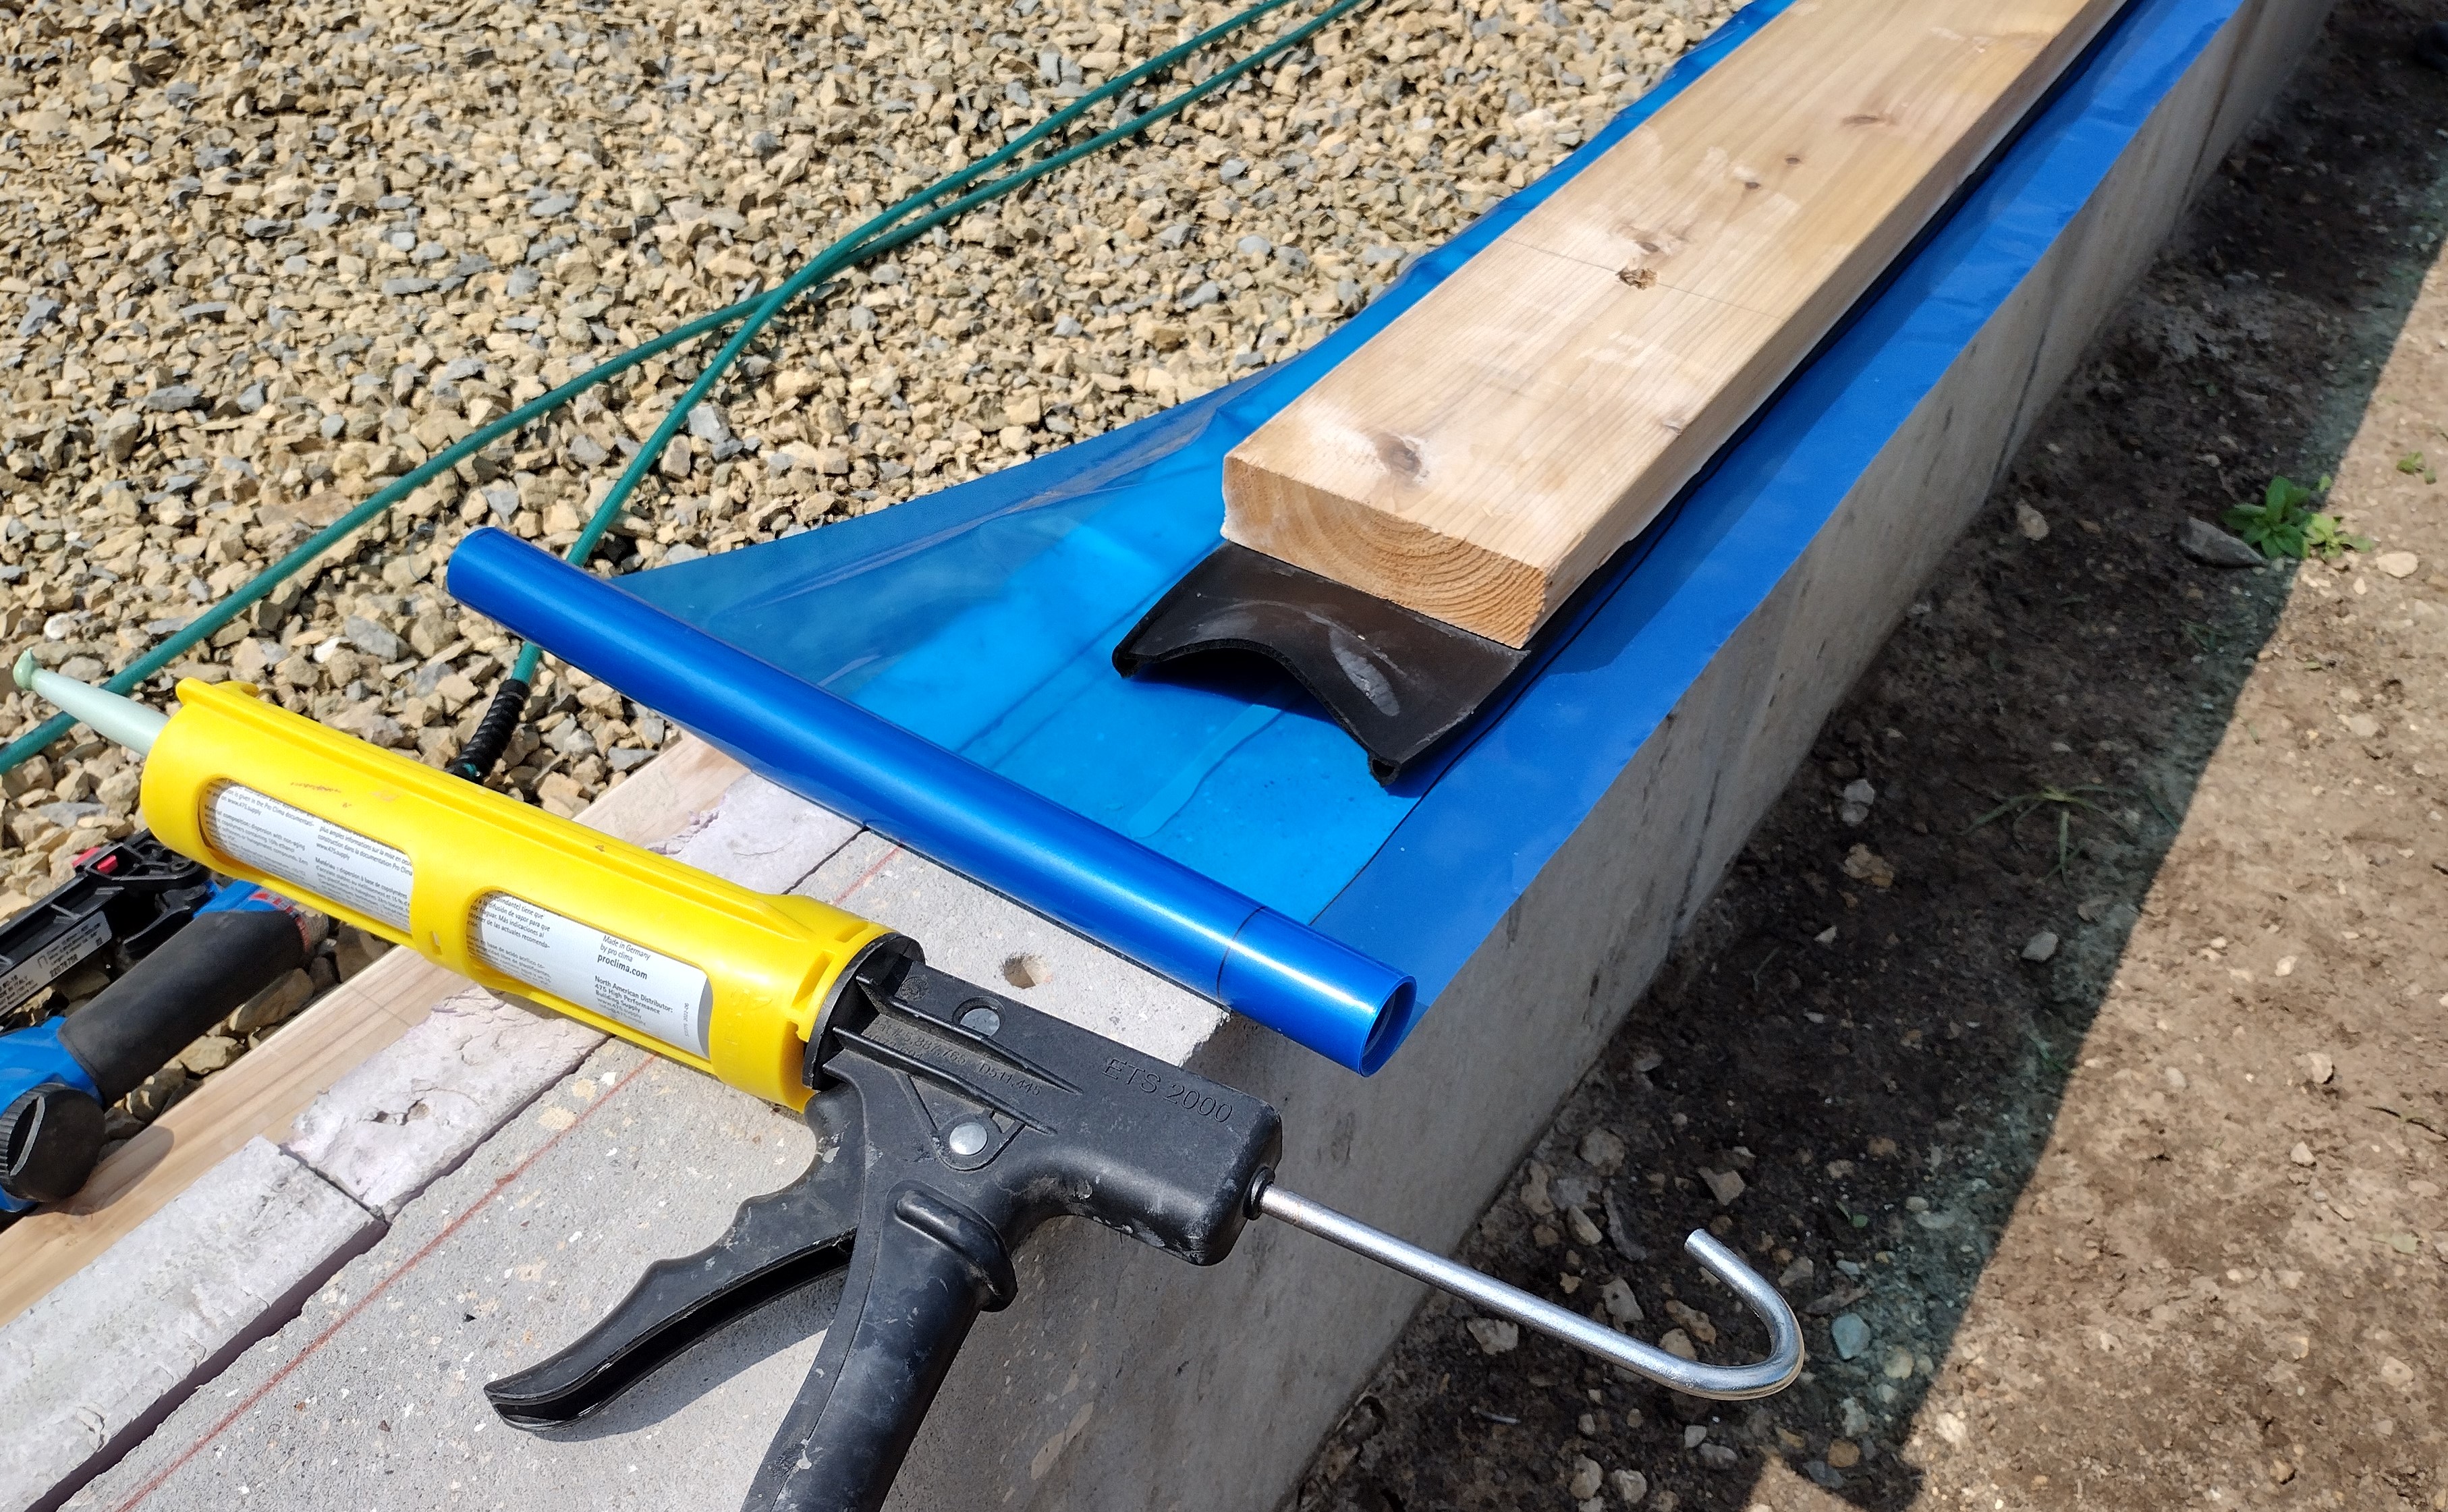
With the holes and surface of the concrete wall blown clean of dust, we laid down a bead of adhesive caulk around and between the bolt locations. This non-toxic, ultra-low-VOC product from 475 Supply makes a permanently elastic bond between the blue 6 mil polyethylene vapor barrier and the concrete wall, our first bug-and-rodent defense mechanism. As important, the adhesive will seal the inside of the home from the exterior, stopping all air and vapor movement.
Instead of the usual (flimsy) foam gasket commonly called “sill seal”, I upgraded to this black EPDM (synthetic rubber) structural gasket from Conservation Technology. Stapled to the underside of our 2×6 cedar sill plate, the 3/8″ bulbs on each edge can “ride” the irregularities in the top of the foundation wall for a better long-term seal; our second bug-and-rodent and air-and-vapor defense mechanism.
To increase wind resistance well above Code minimum, I specified a tighter spacing of the anchor bolts. I like the ease and accuracy of screwed in place anchor bolts (instead of the usual poured-in-place bolts) and also the integral washer available from Simpson Titen HD. It’s part of my strategy for greater resiliancy in the face of the more severe storms predicted as a result of global climate change.
Here is my section drawing showing the sill plate and surrounding materials. The 2×6 cedar sill plate is bolted to the foundation wall. Next week, before we stand up the exterior 2×4 wall, the carpenters will drill a 1/8″ deep hole in the underside of the bottom plate to accomodate the depth of the washer. The cedar sill sits atop the black EPDM gasket and blue vapor barrier. Later, the blue vapor barrier will be folded up and taped or caulked to the plywood wall sheathing on the exterior and folded down and taped or caulked to the red vapor barrier before the slab is poured, creating a continuous barrier against air and vapor.
There a many interesting and effective ways to solve the sill plate problem. I “cut and pasted” my own solutions from the examples so generously contributed by my fellow designers and builders, who can be found at Journal of Light Construction, Fine Homebuilding and Green Building Advisor.
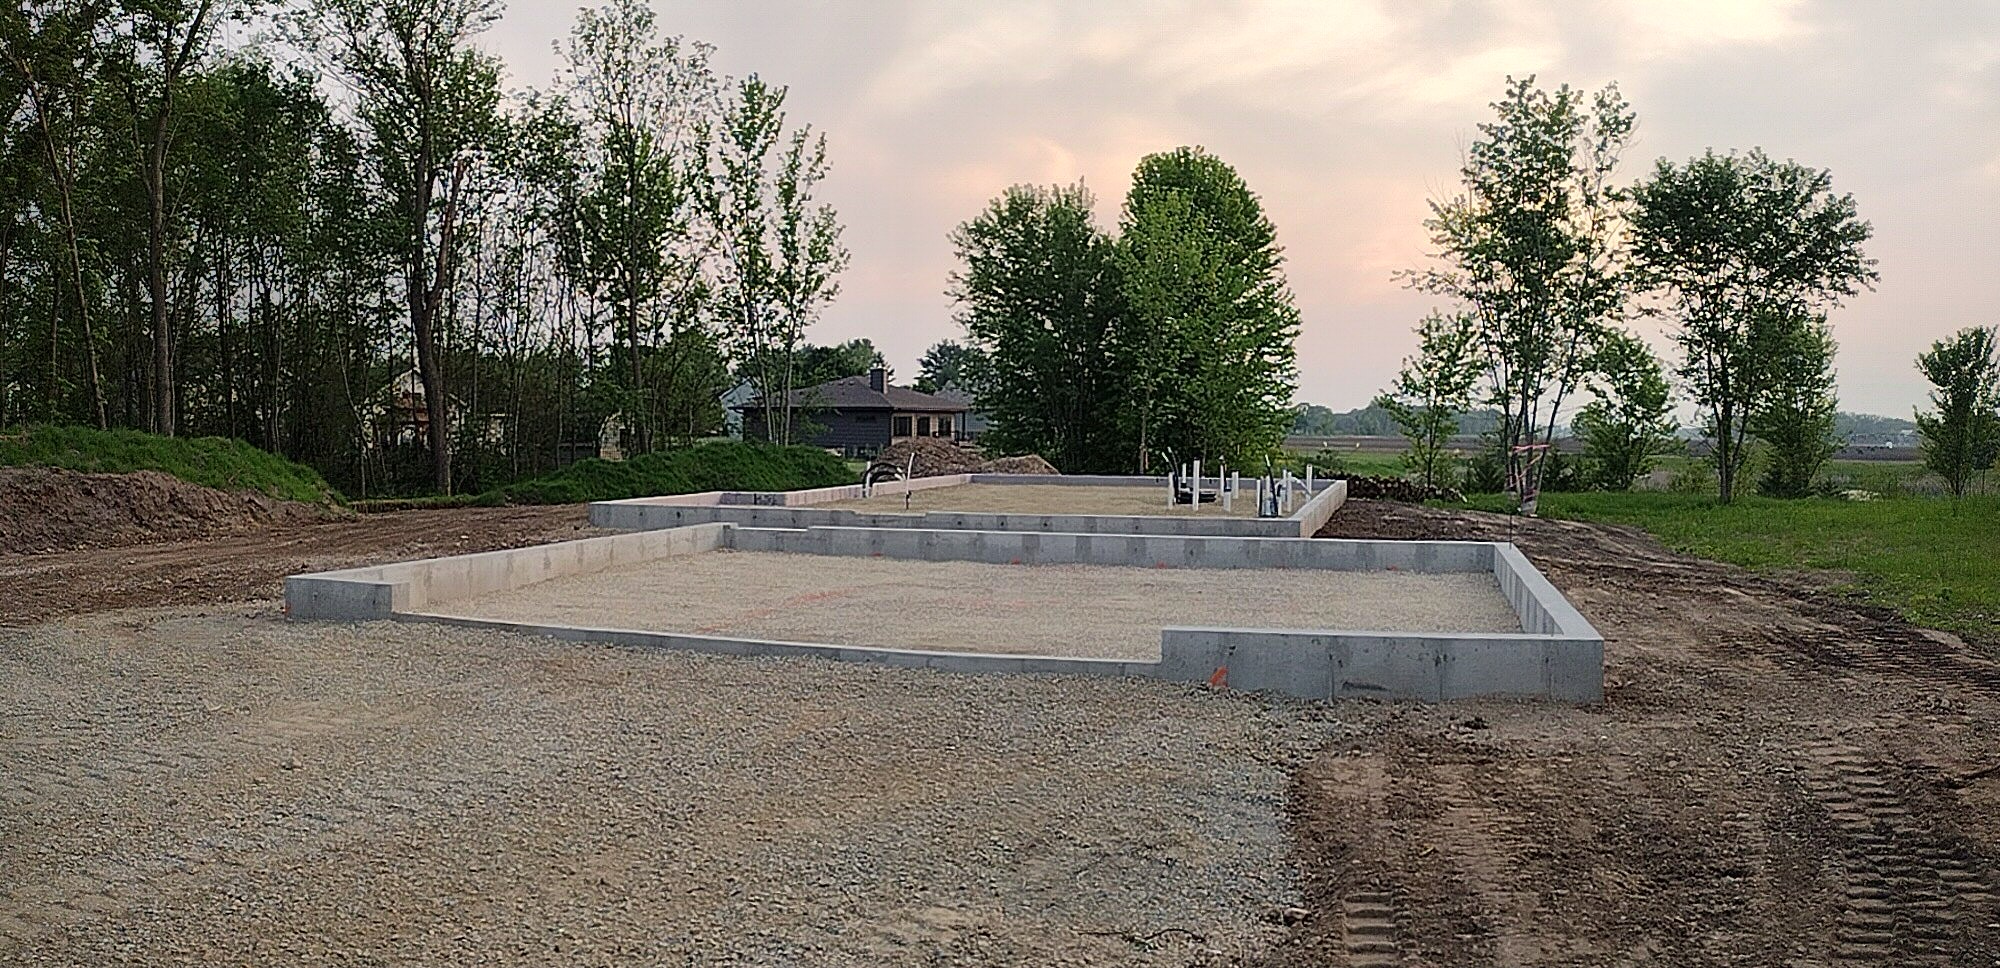
April 2 – May 15, 2024: It’s a relief to see the foundation finally tucked into the ground and the uncertainty of excavation and the no-going-back finality of a concrete pour behind me. It was also: exciting, picturesque, and fun!
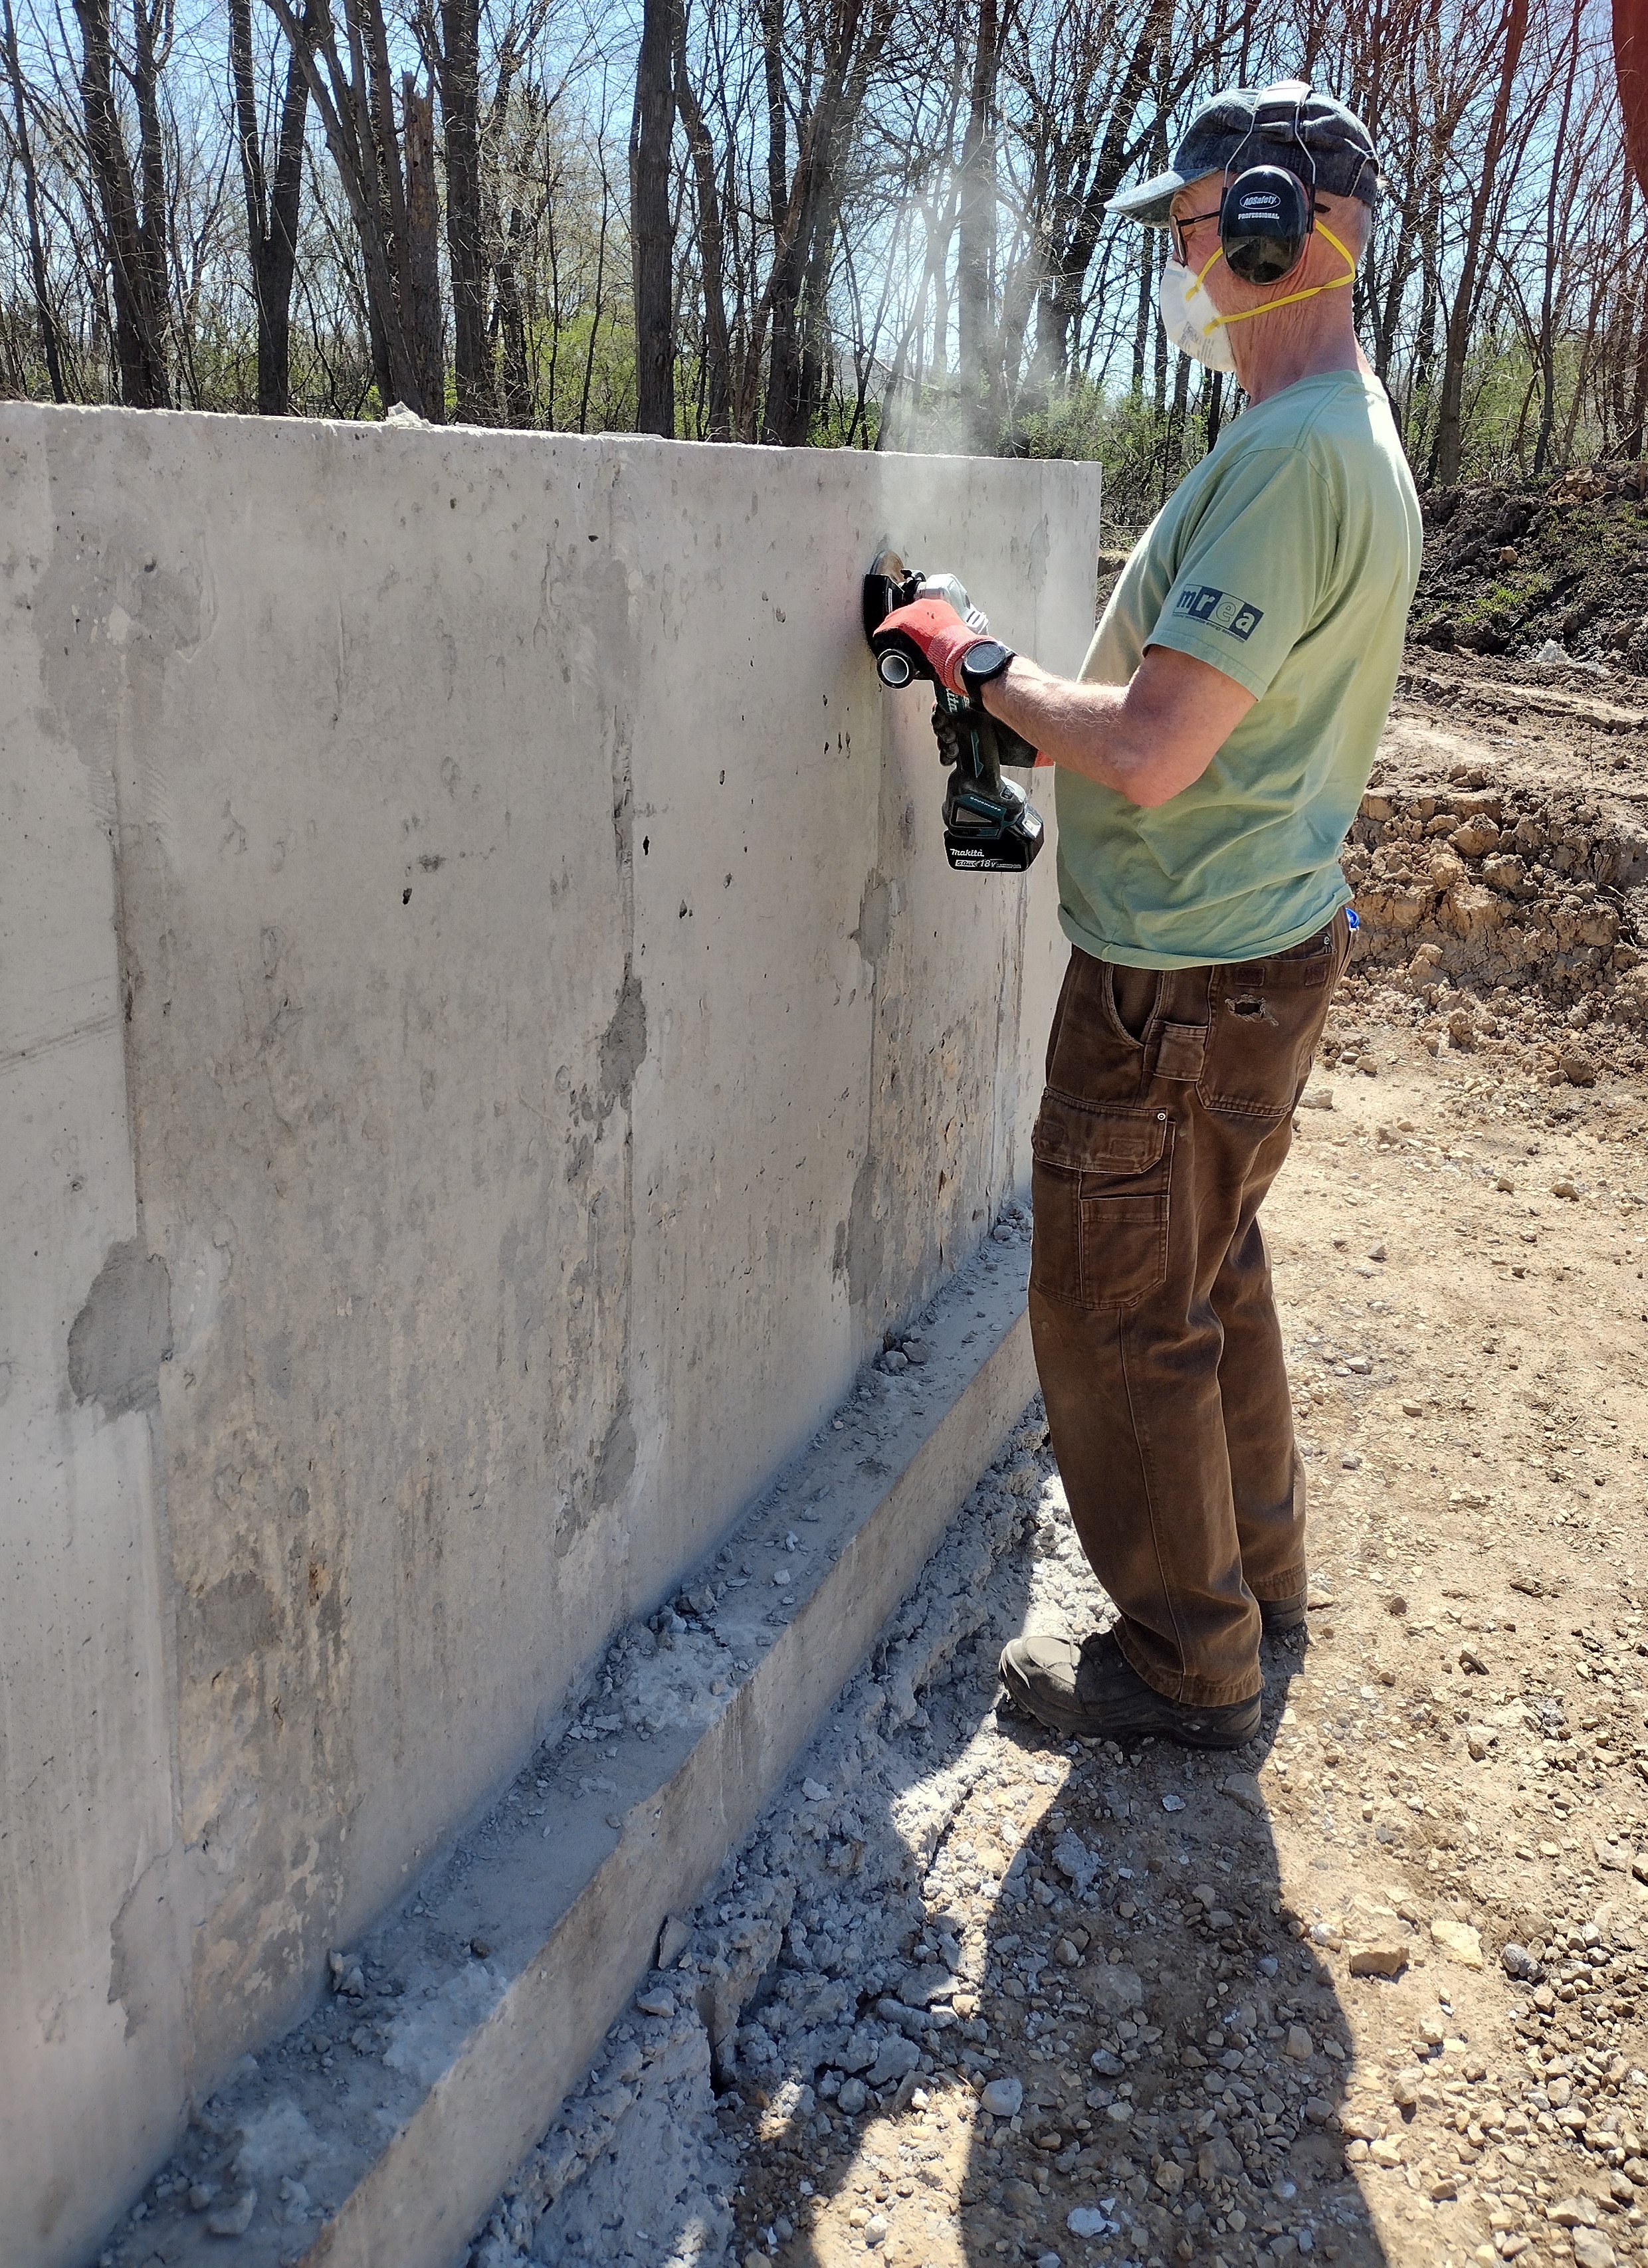
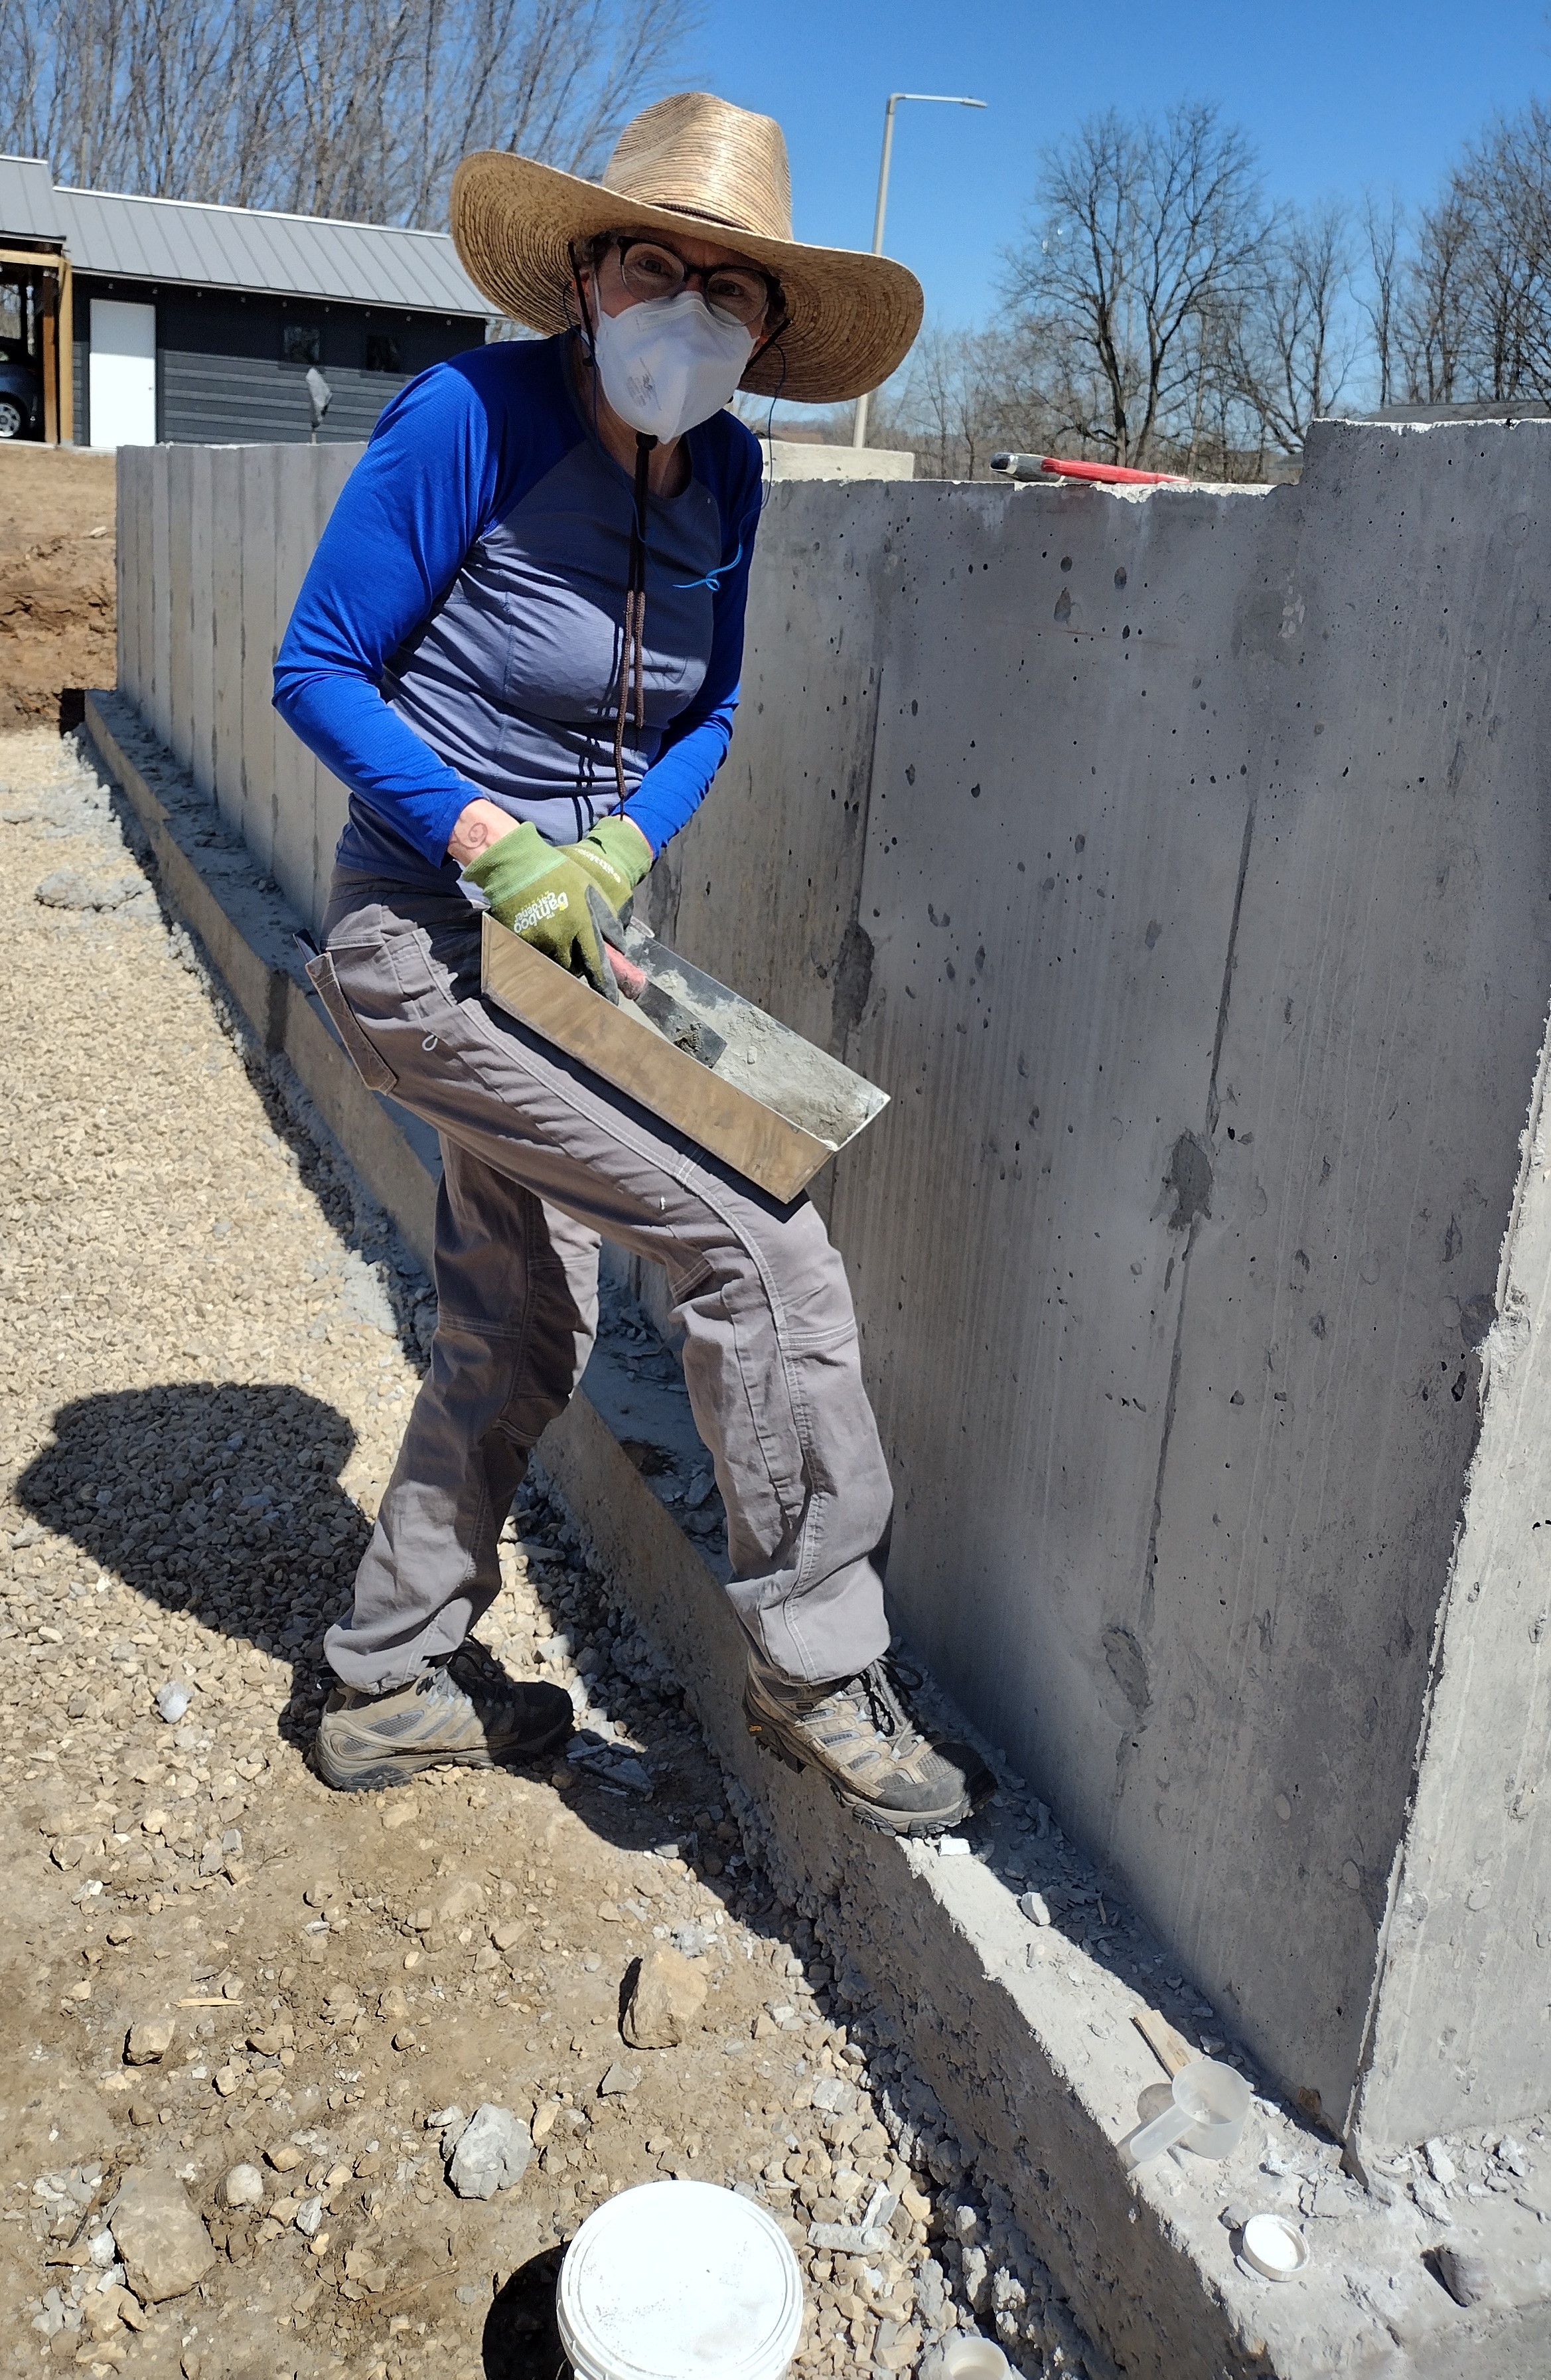
Our second Weekend Warrior Work Day found us (Glenn, JC, Laura, and me) knocking off form ties, grouting the holes left behind with hydraulic cement, then grinding our handiwork smooth. Later, I spent many a miserable hour grinding the top of the wall smooth of bumps and dips (it had rained shortly after the pour).
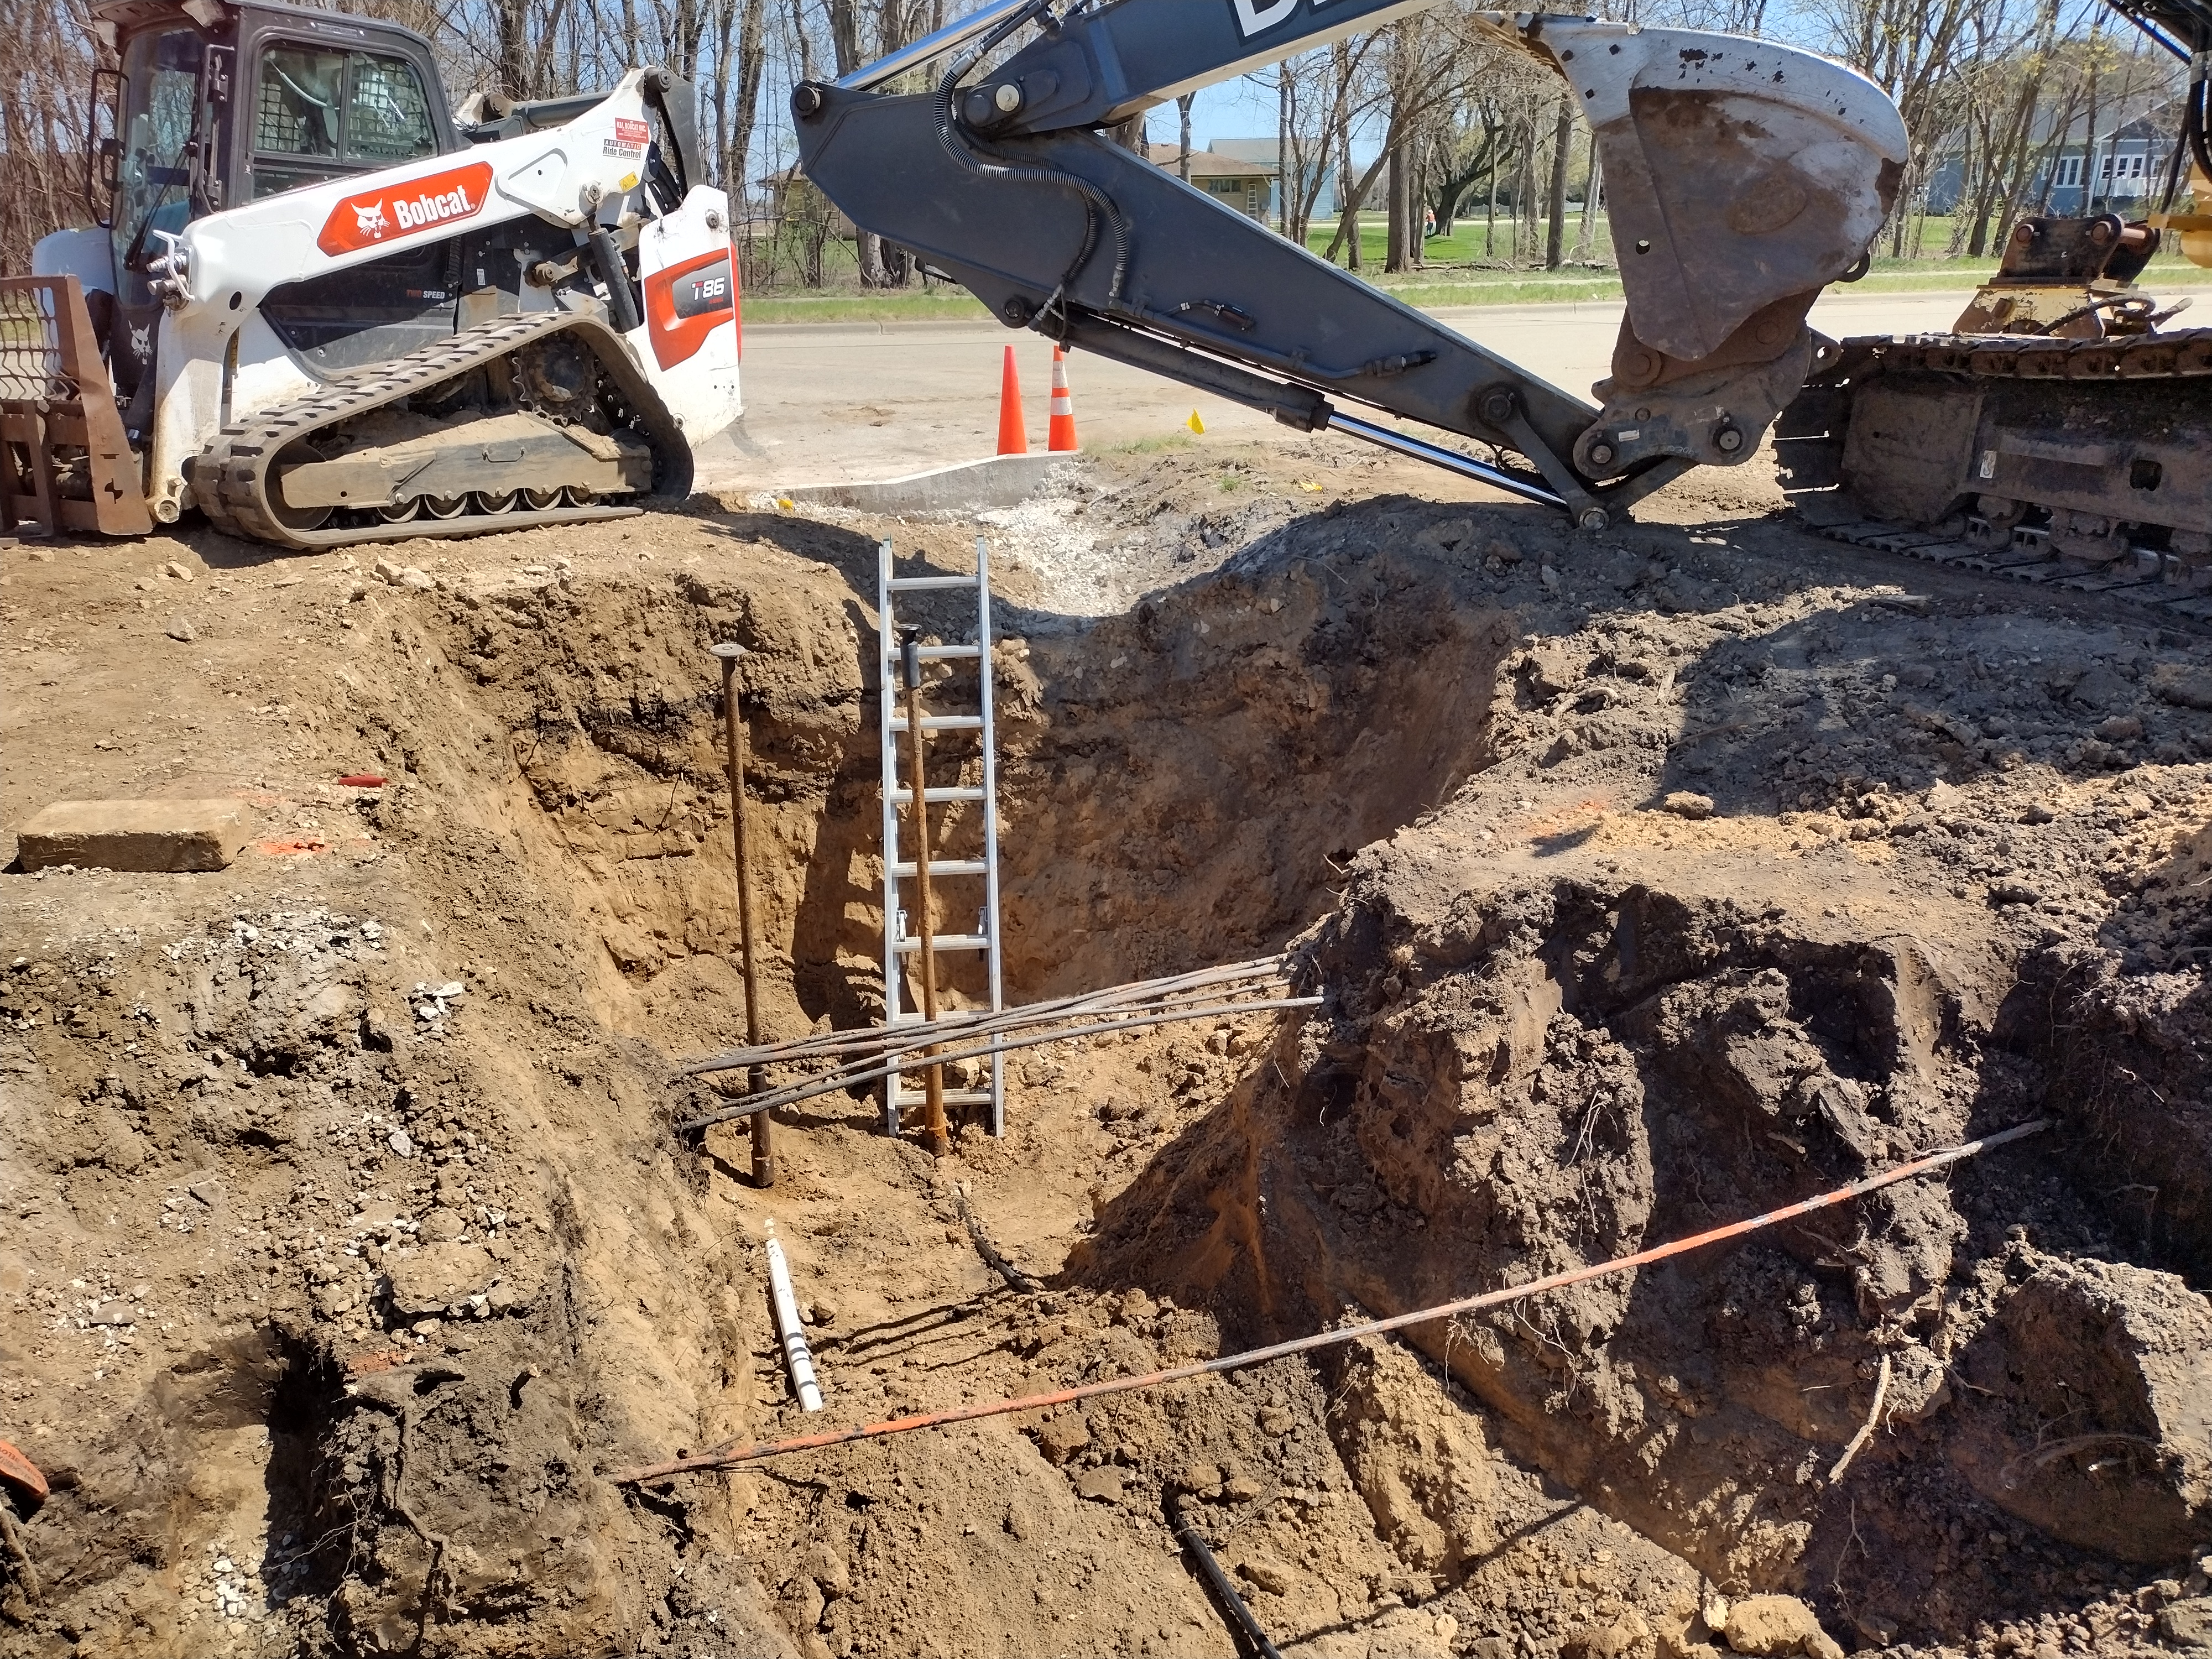
Plumbers Lance and Luke arrived from Collins & Hying to install the laterals, with the help of Shawn Slaney the excavator. Laterals are the pipes that connect the Village water and sewer lines to my house via the green PVC tube placed before the footings were poured.They had to work under and around many electrical and communications wires.
The water and sewer lines run to a grinder pump—an unfortunate expense that all homeowners in my subdivision must bear. The plumbers returned after the foundation was filled in and stubbed drains and vents, followed by “the waters”.
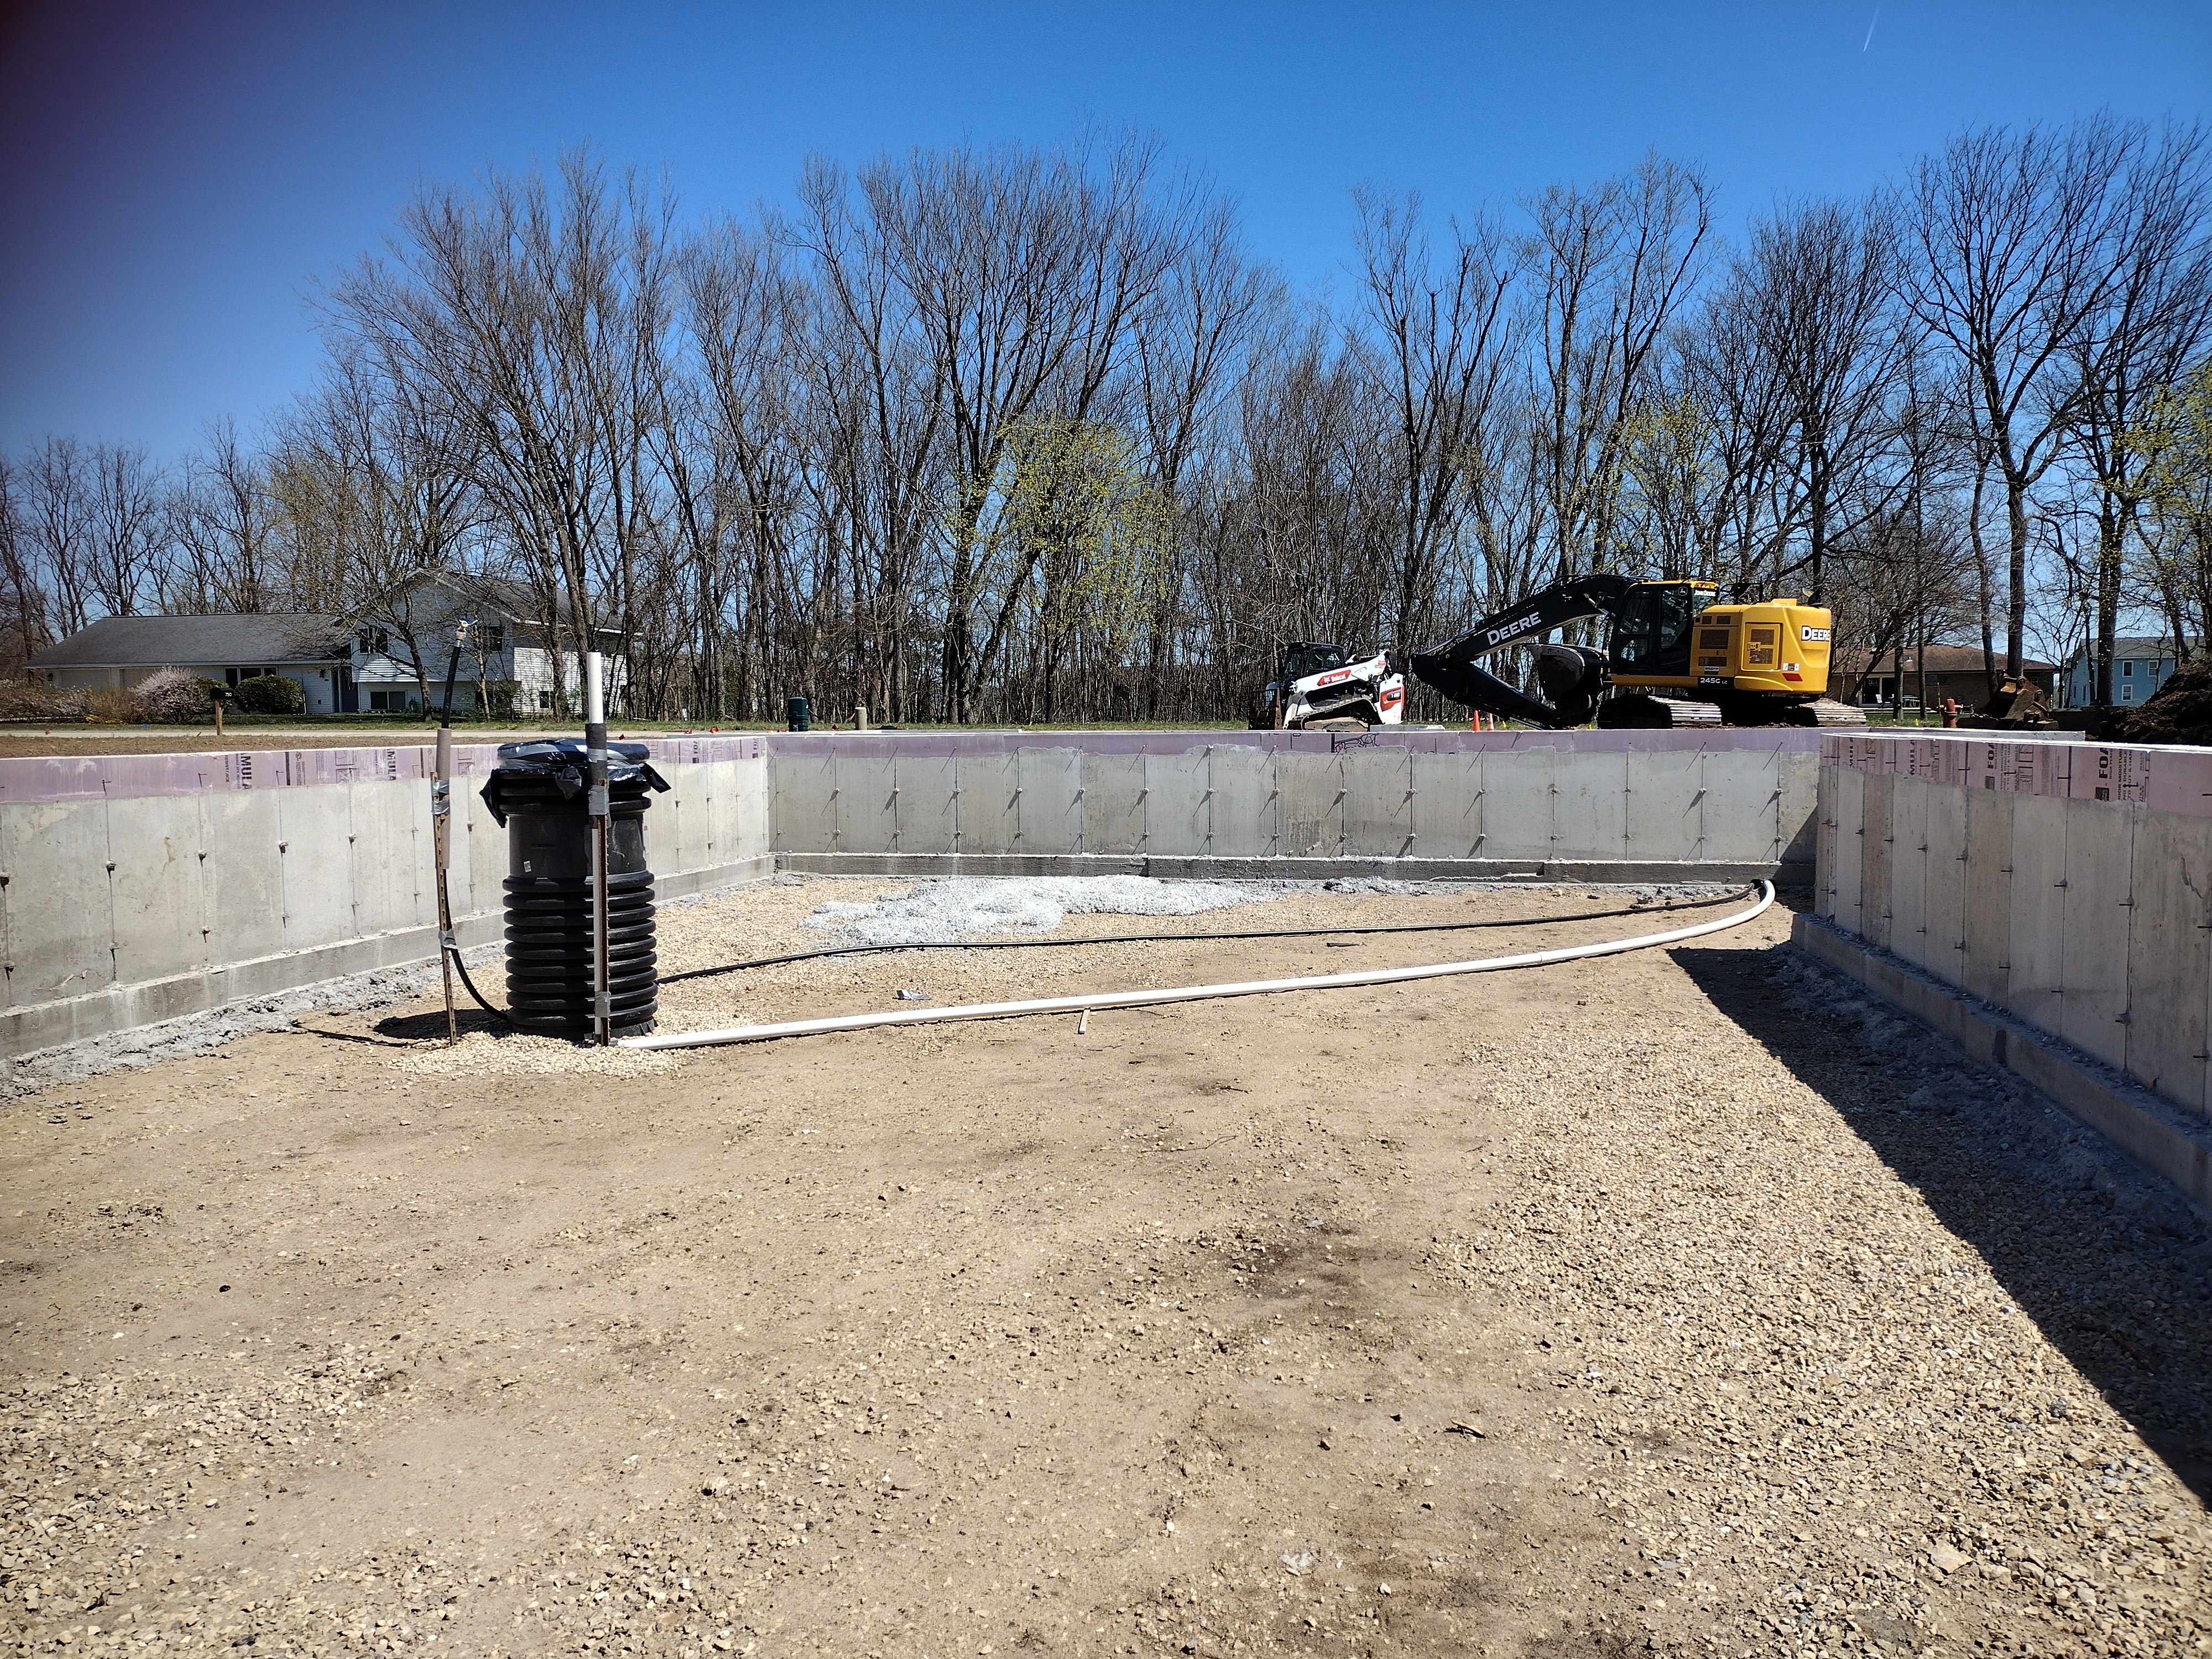
Finally, Slaney Excavating and Landscaping returned with a conveyor belt to “gently” place a 6″ thick layer of “clear stone” (1″ gravel with no fines) over and around the pipes.
The 6″ layer of clear stone does double duty as a capillary break between the ground and the slab and as a future radon bed (should radon gas be detected after the house is occupied).Note the “T” shaped PVC pipe with integral screen to allow air to be drawn up from the interstices of the gravel into the vertical pipe.
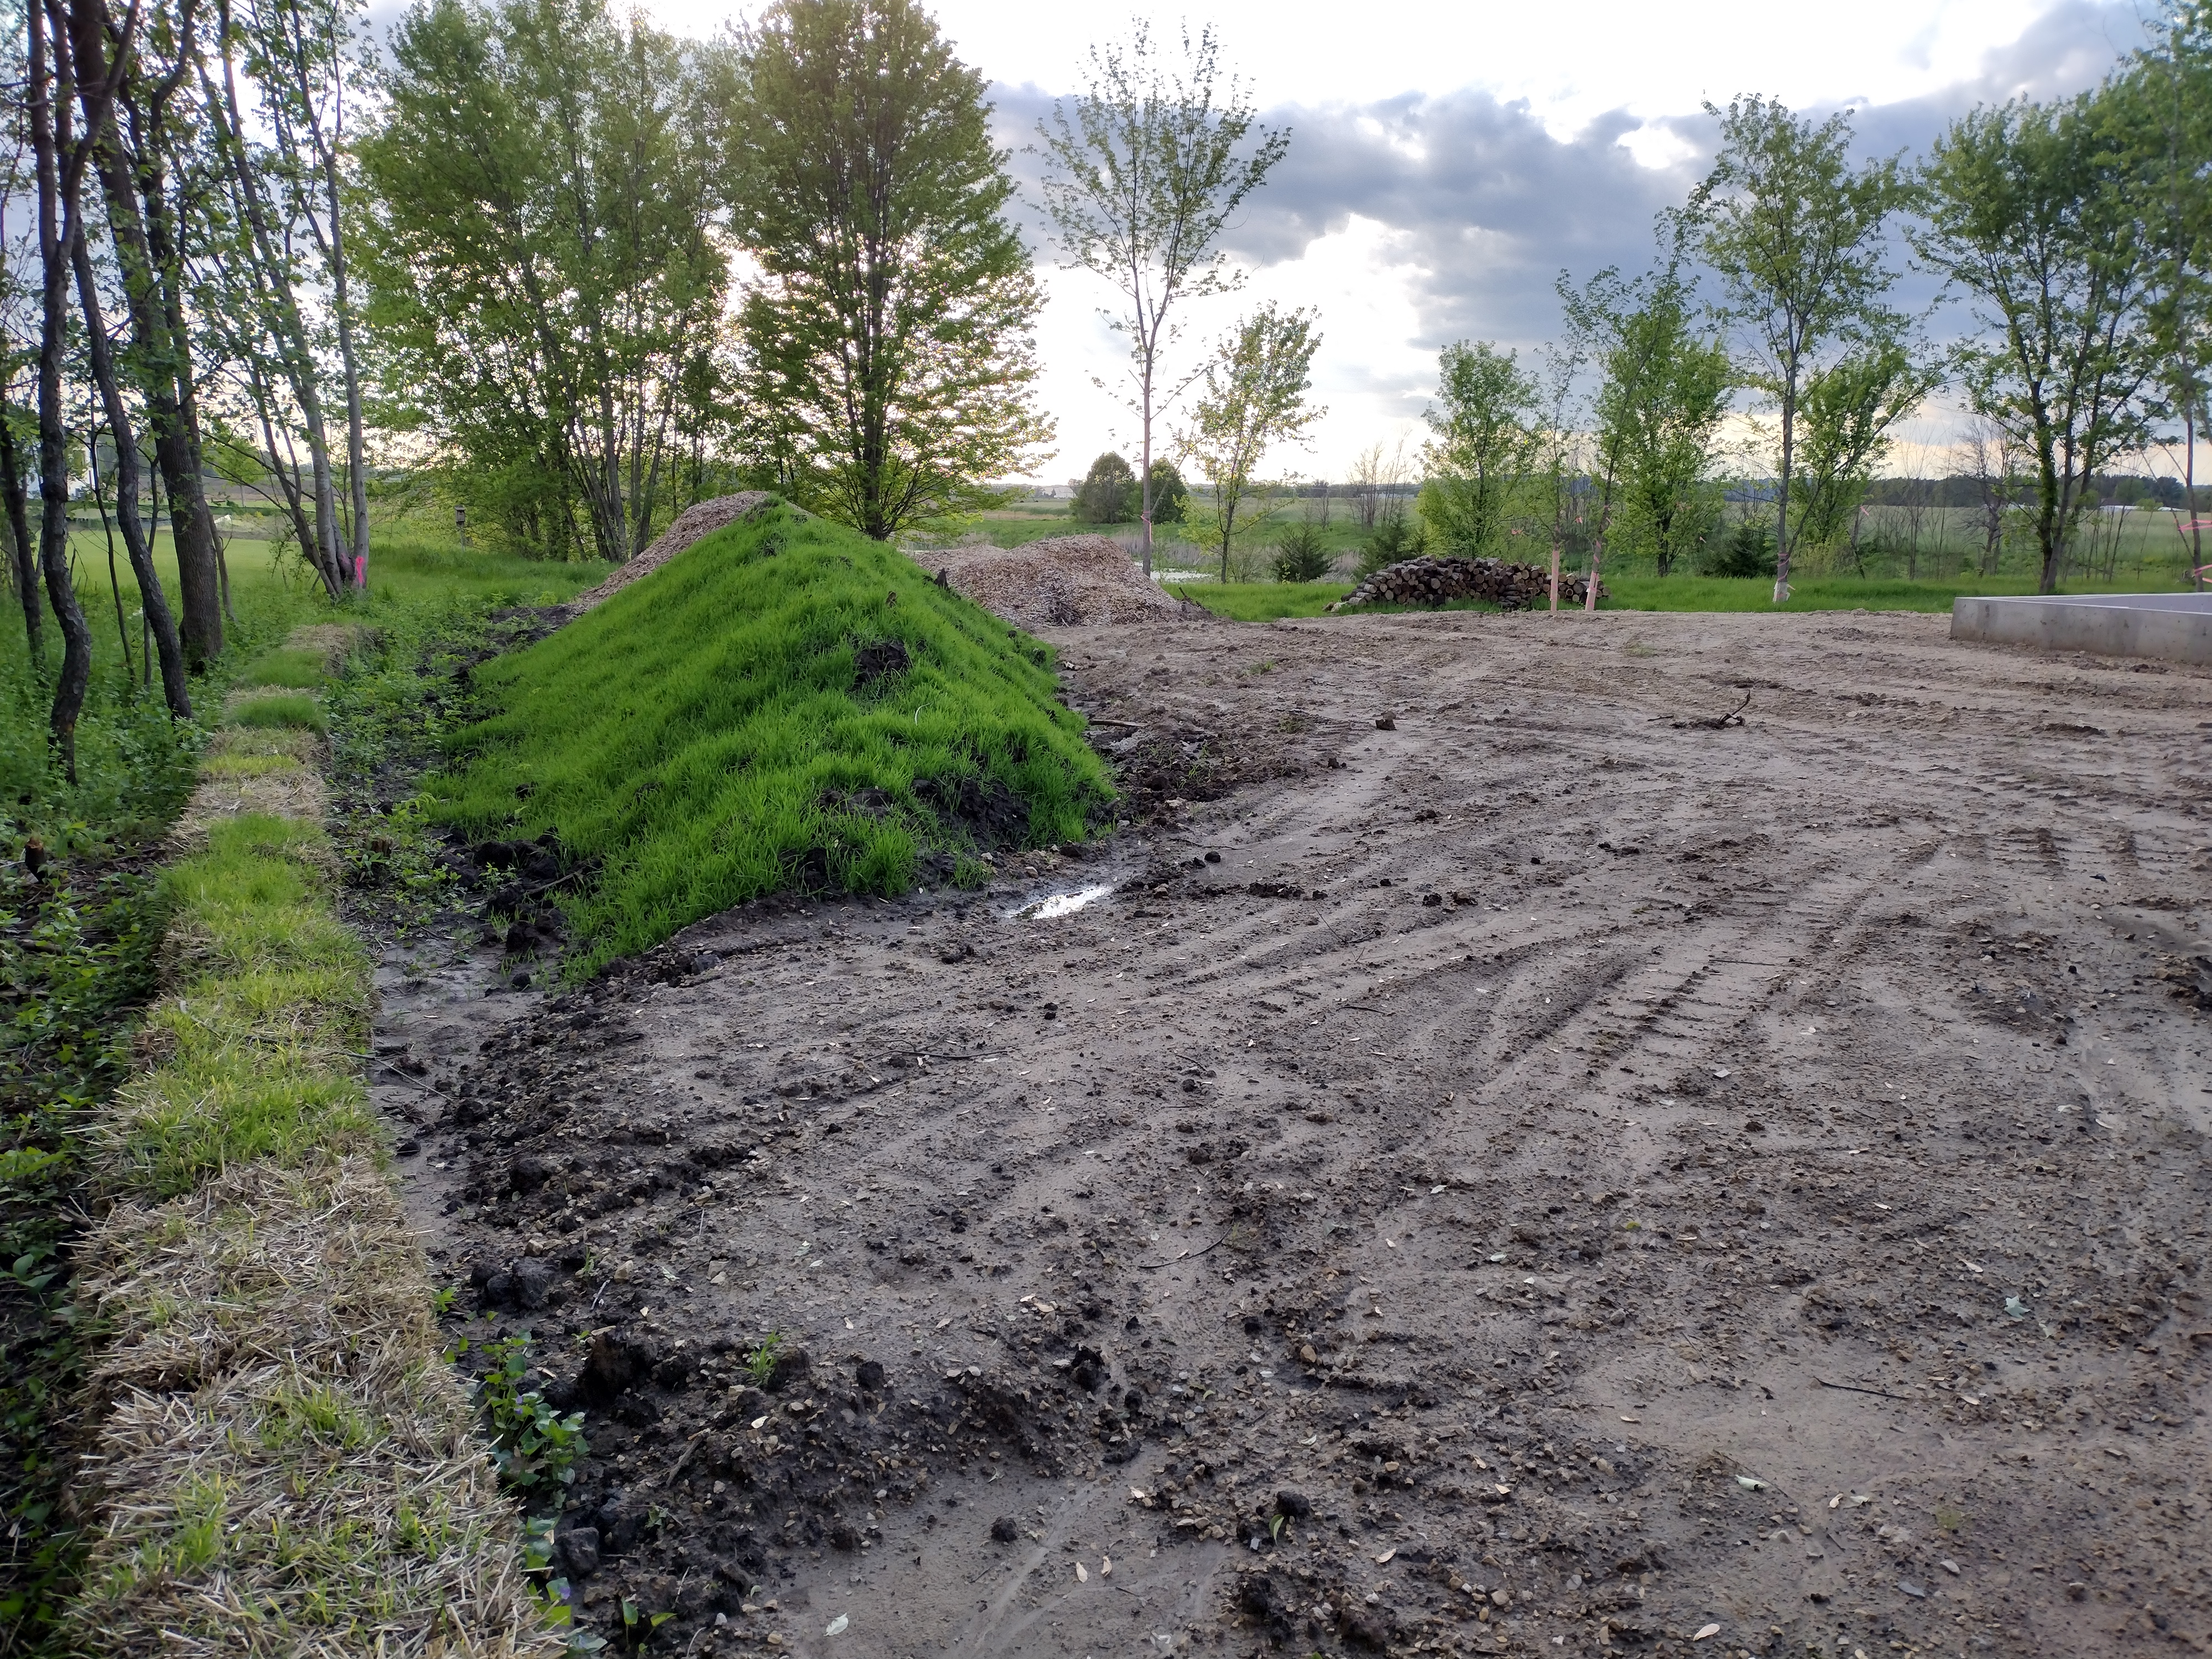
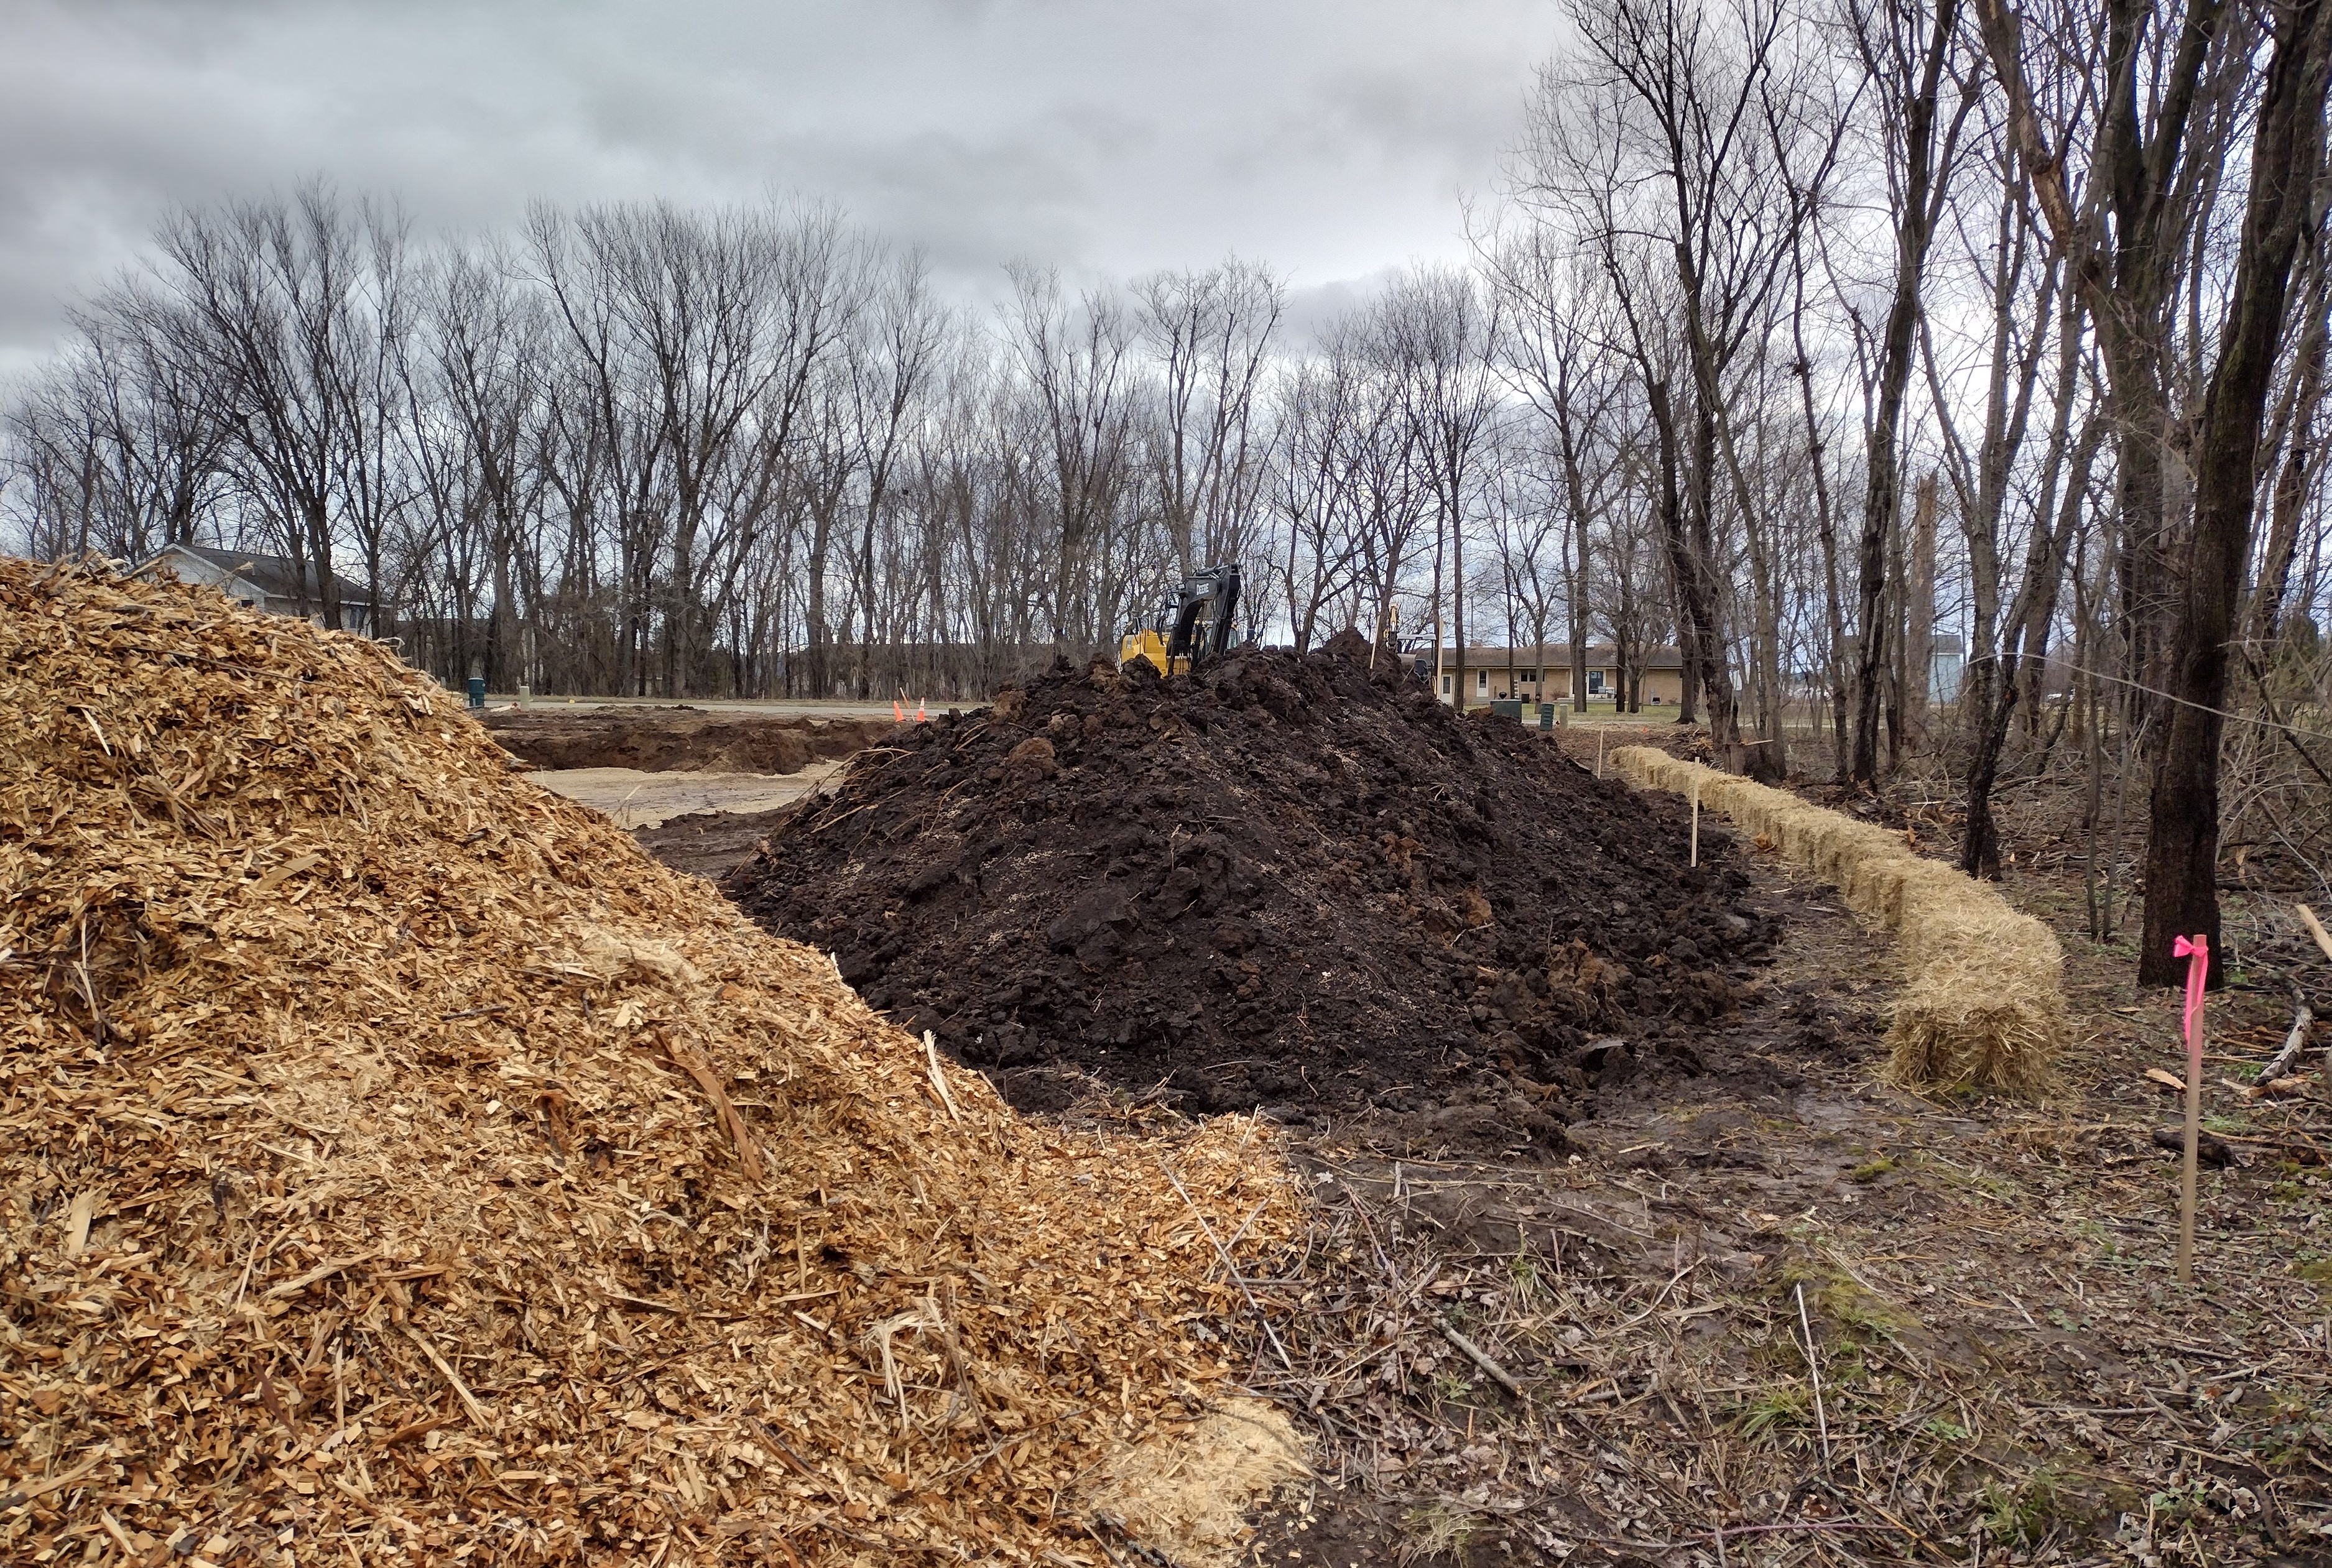
I couldn’t be more proud of how tucked in and tidy the foundational work looks. As a bonus, the topsoil pile and strawbale erosion control “fence” is holding firm and the rye grass is thriving!
Sunset on a project well-executed!A big thank you to my crew!
March 27 –April 2, 2024: Concrete is an amazing, durable material (and fun to watch pouring out of the mixer), but it imposes a heavy toll on the environment. It’s one of the worst building materials to use if you’re concerned about global warming and if you’re counting your project’s carbon emissions debt like I am.
There are concrete mix alternatives (replacing a portion of Portland cement with other binders) and alternative structural systems that use less concrete or completely eliminate it, like pressure treated wood foundations or wood beams on elevated piers. Many people, organizations, and businesses are working hard to employ better strategies: but for a middle-of-the-road “green” builder like me, a poured concrete foundation is the easiest and (usually) the cheapest to implement.
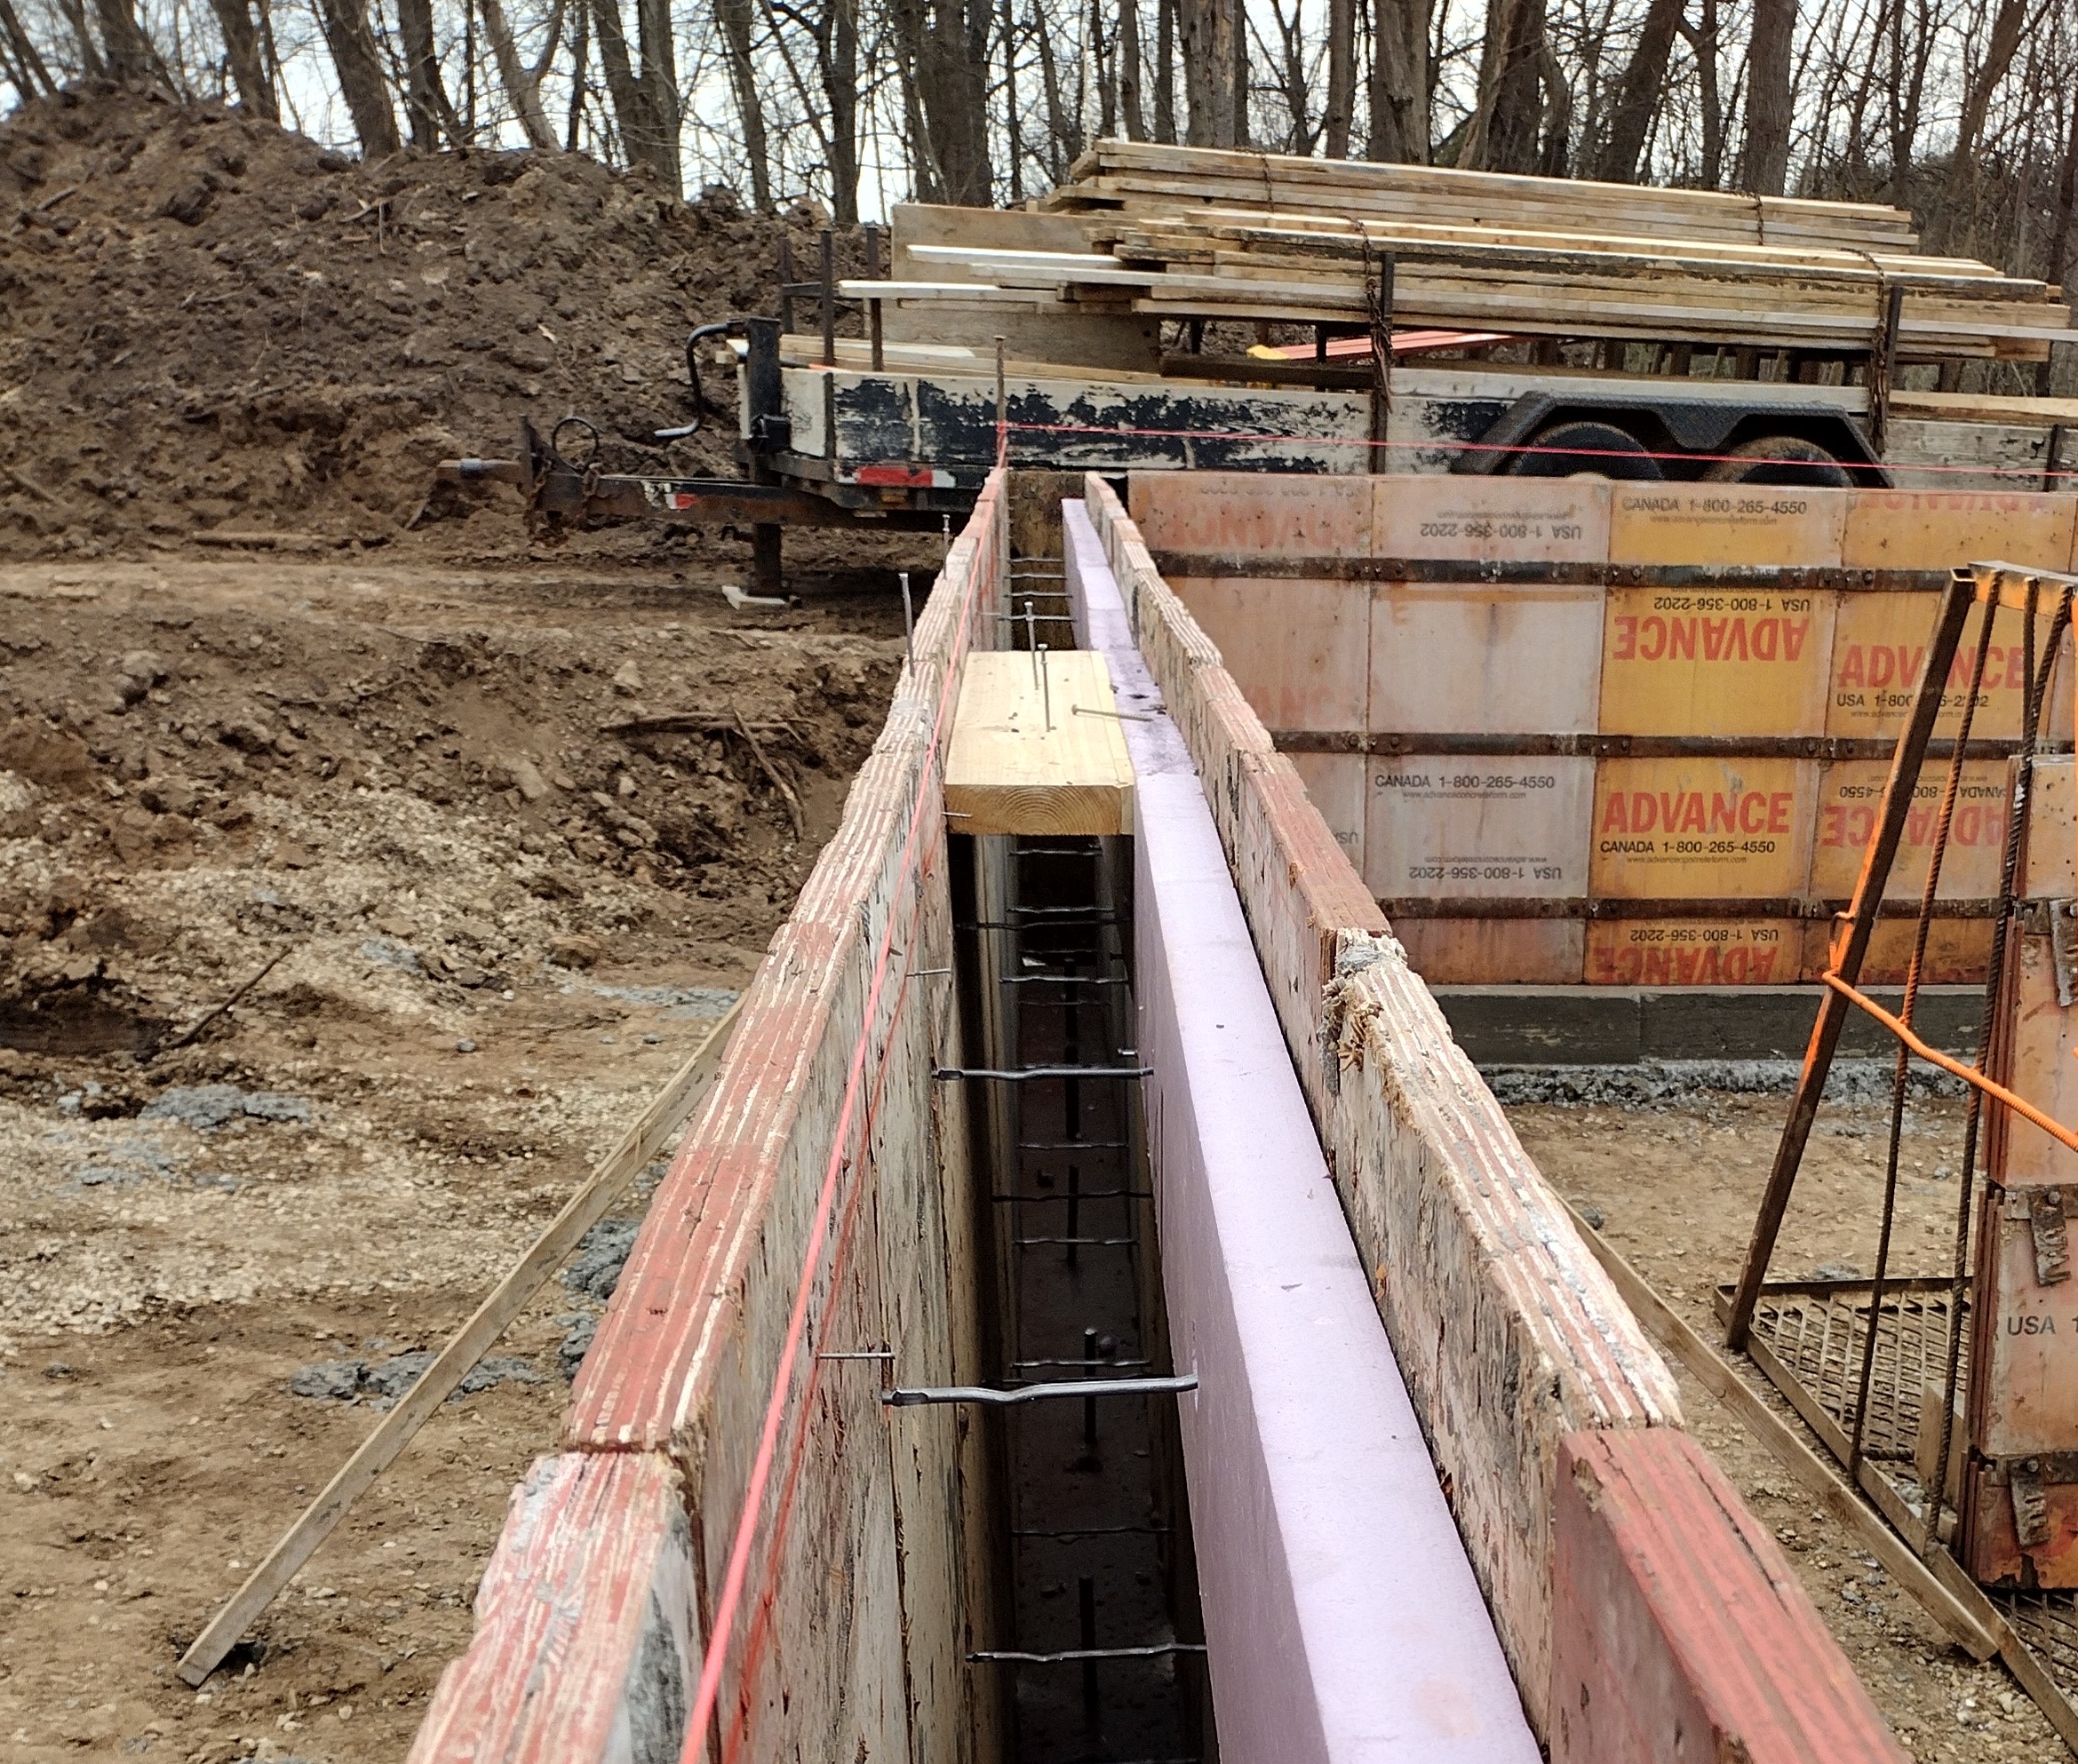
Just as I did for my first project (Poem Homes 2020), I chose a concrete slab floating within a conventional concrete stem wall, bearing on a continuous concrete footing. The footing depth is calculated to be 48″ below “finish grade”, Southern Wisconsin’s assumed depth of frost penetration.
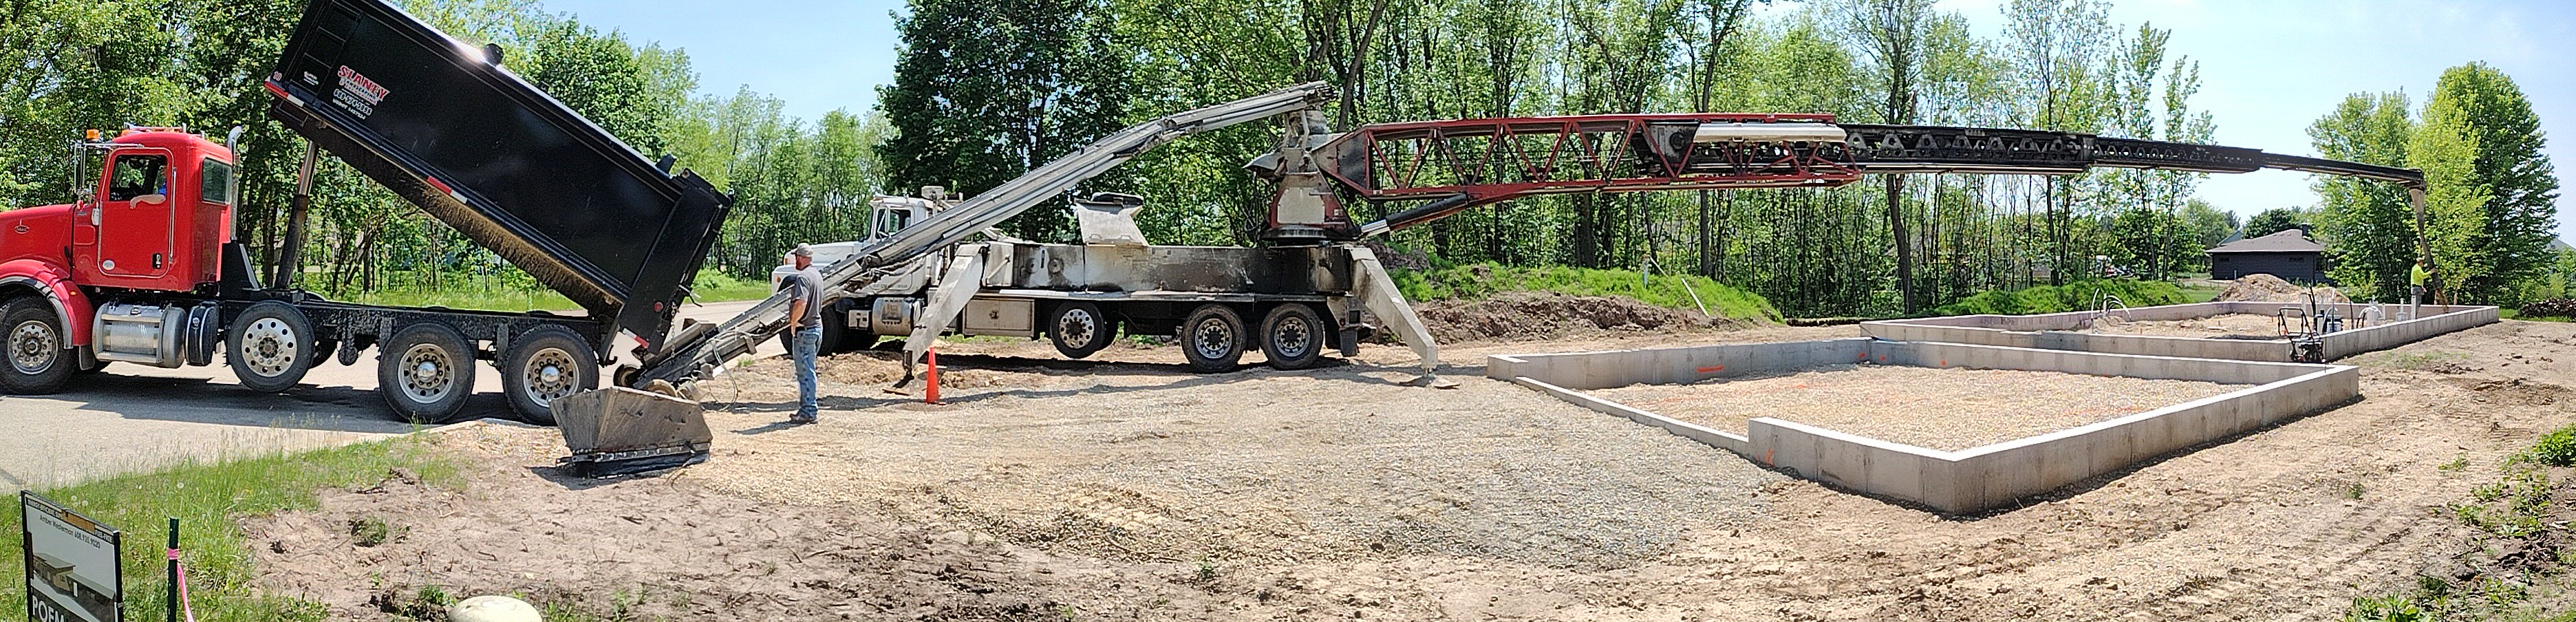
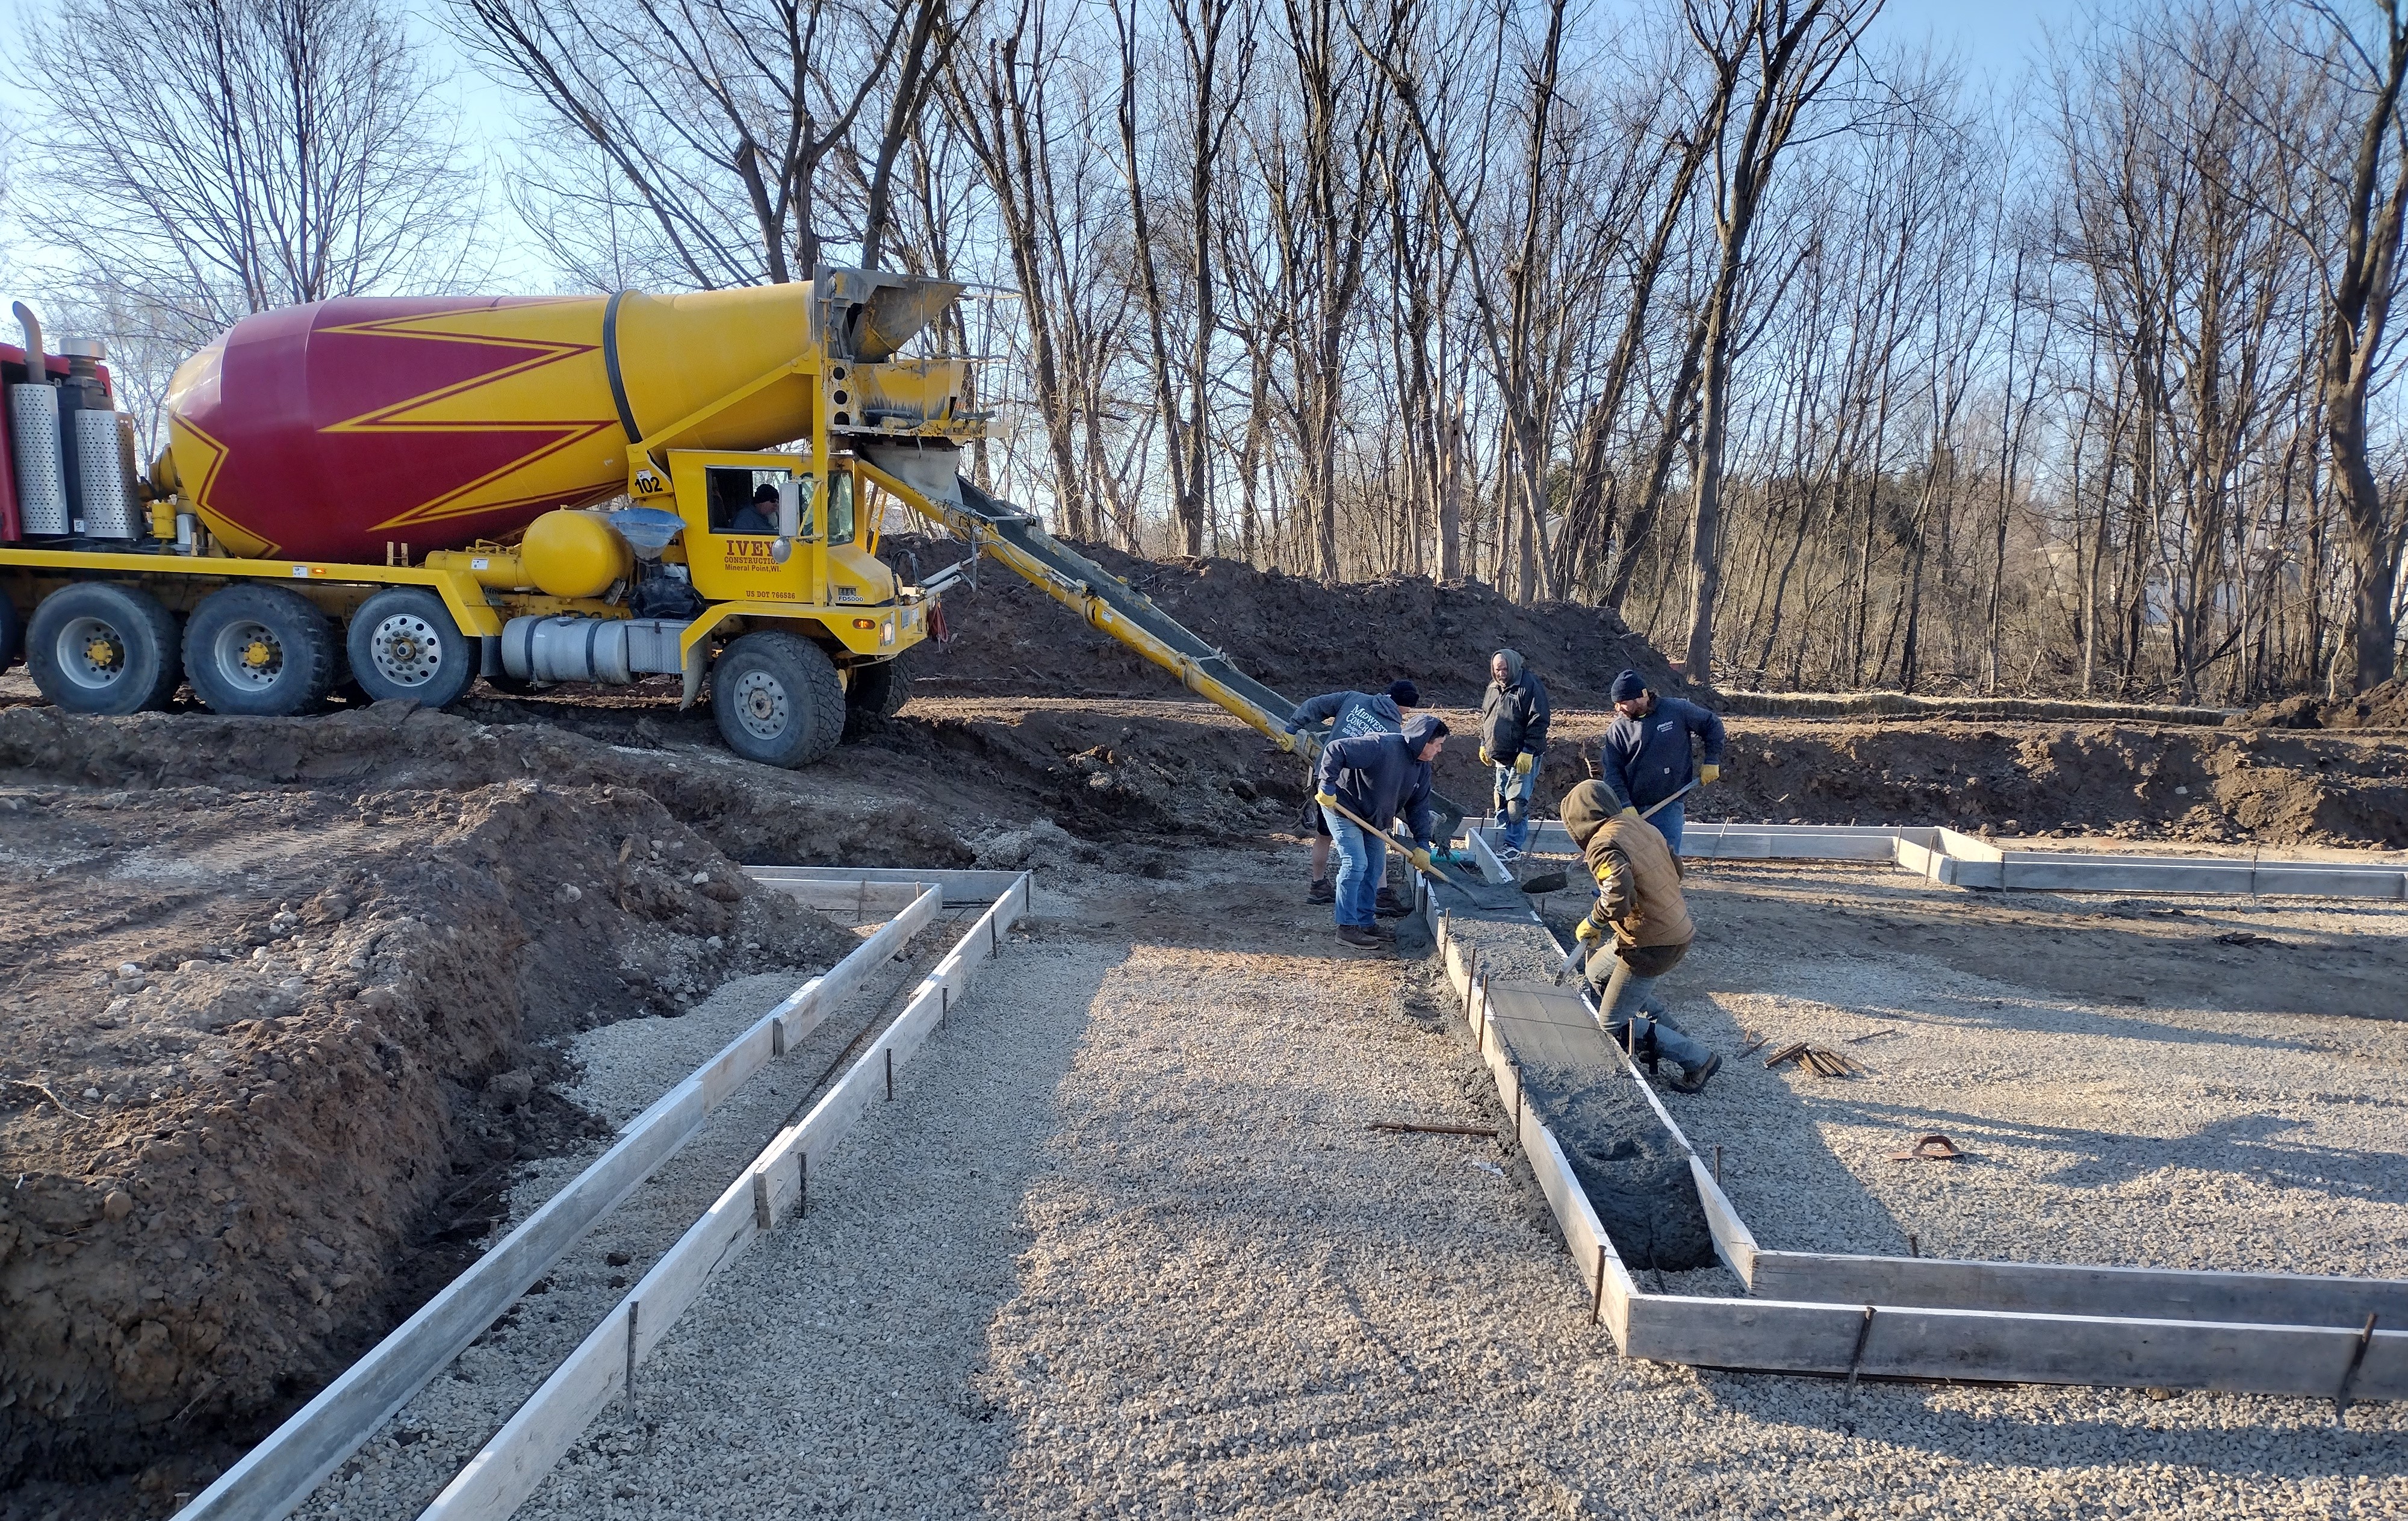
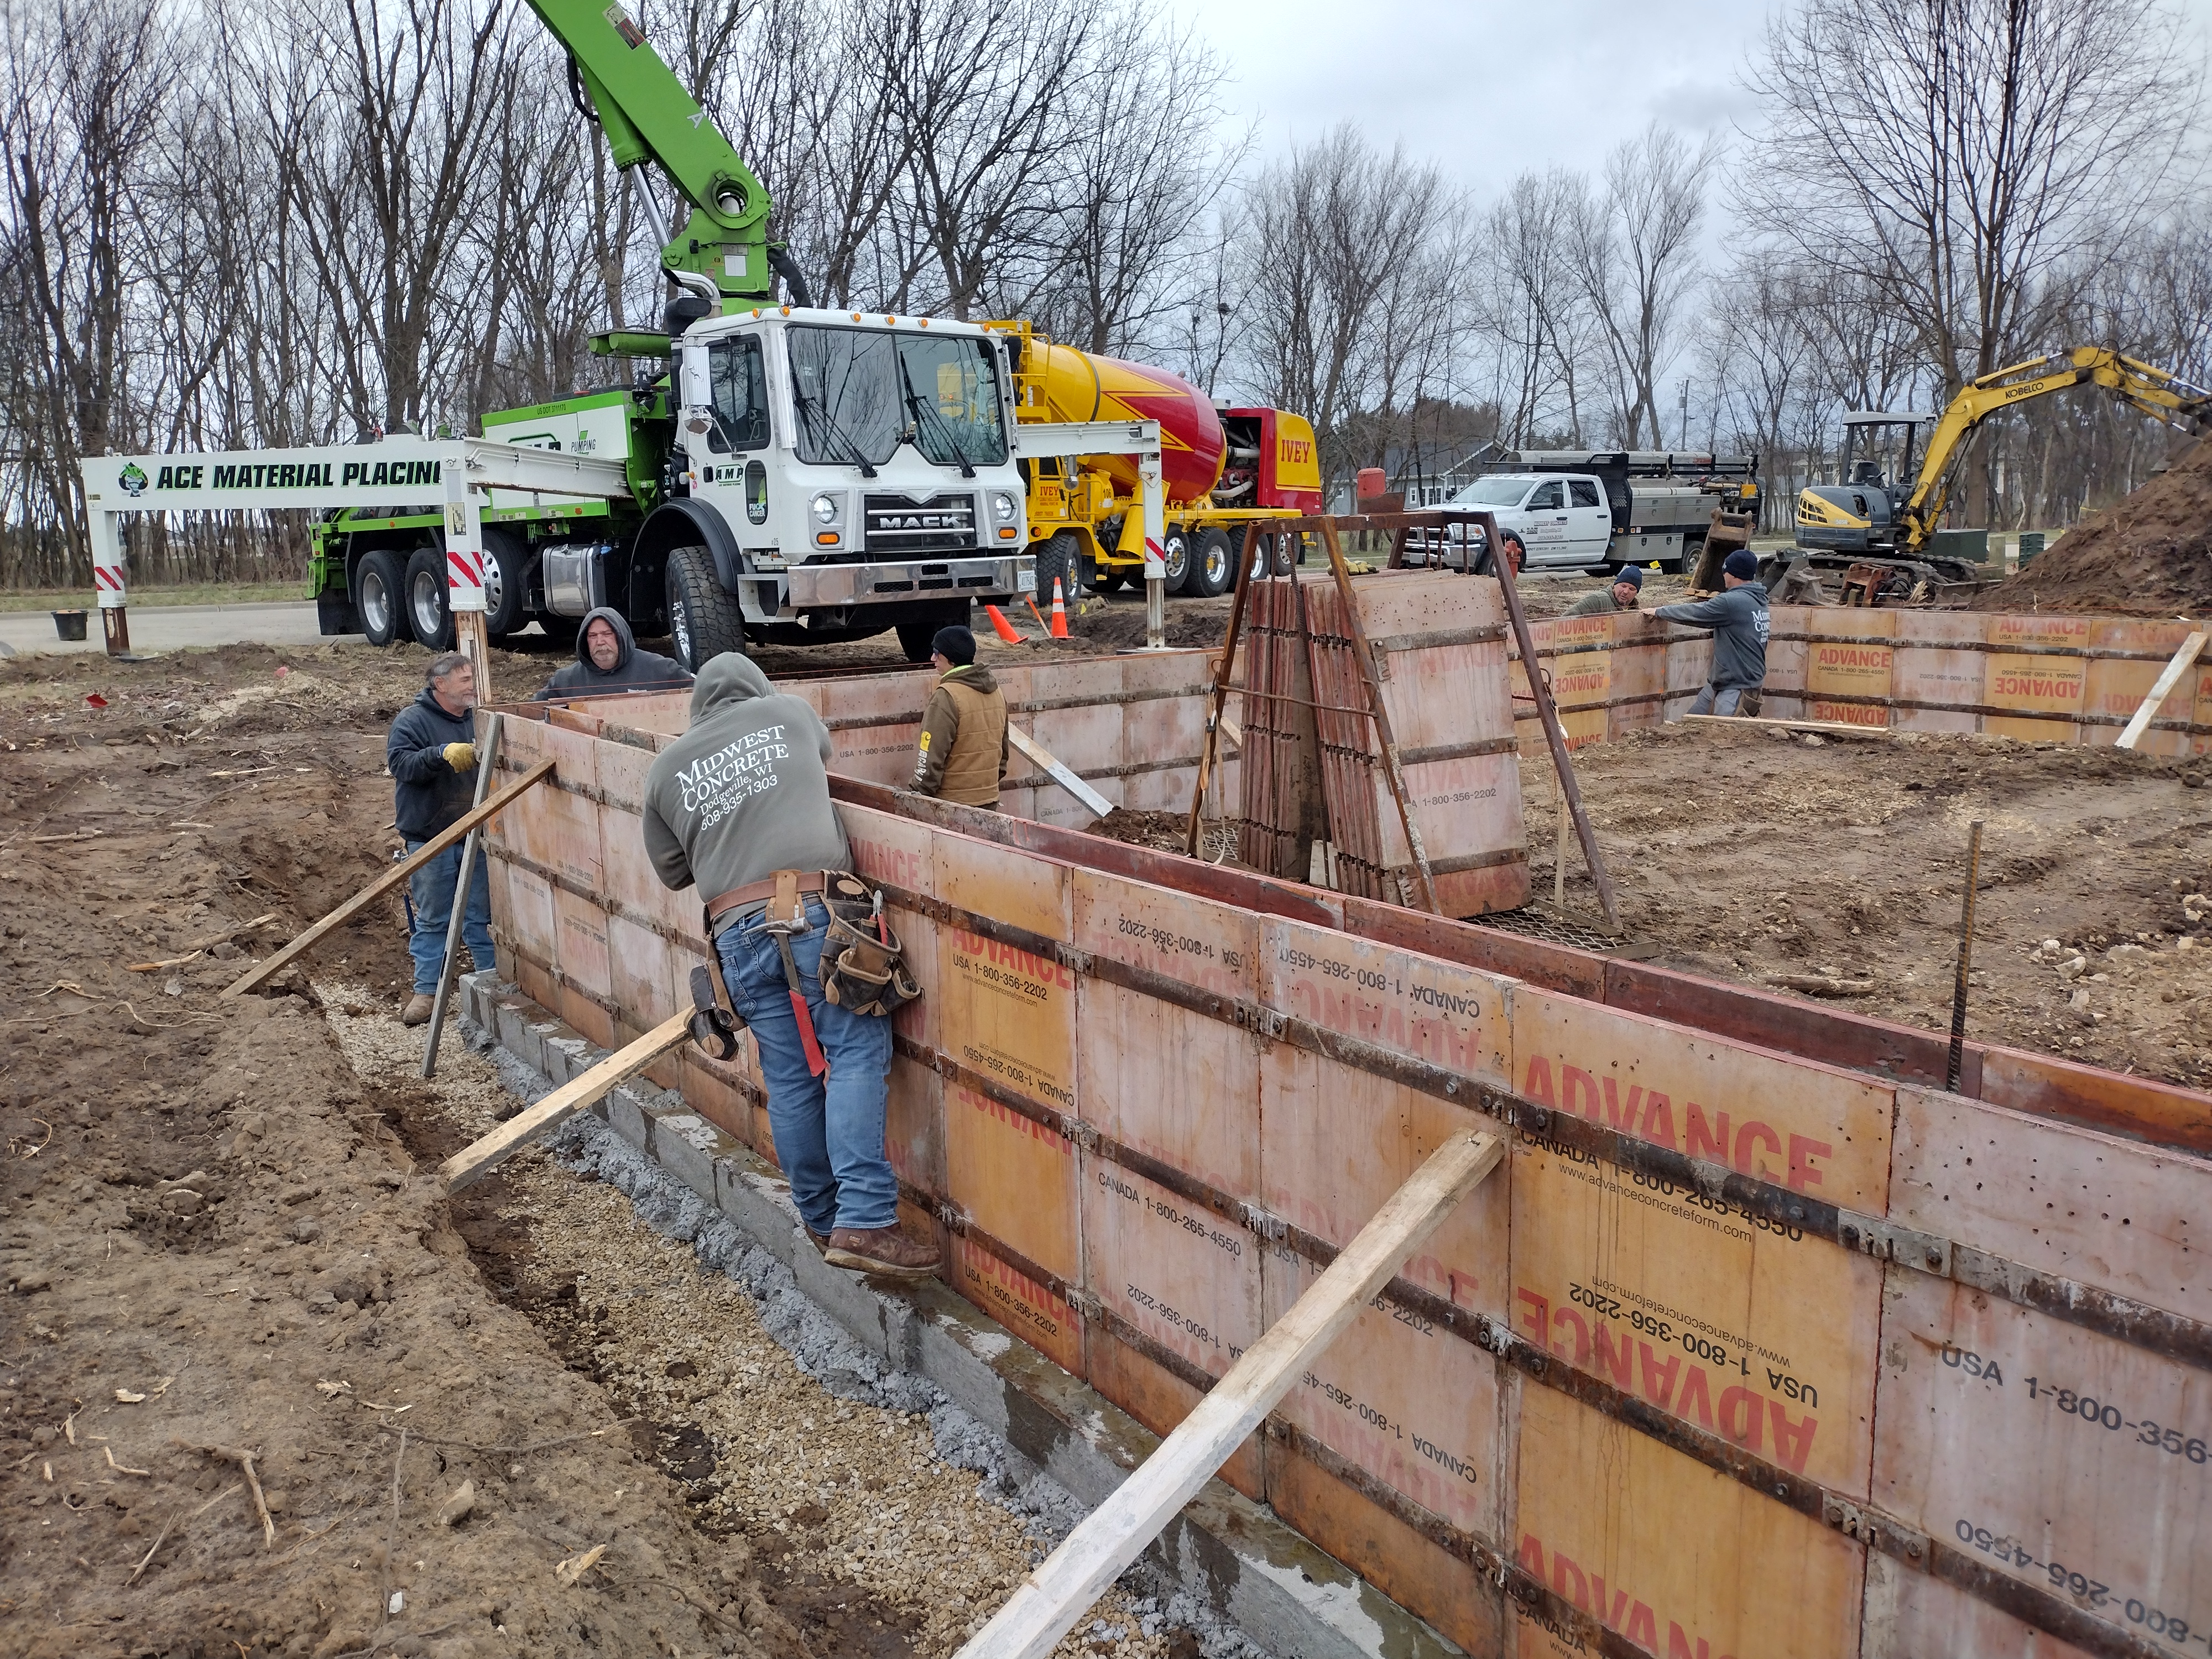
Midwest Concrete Contractors kicked things off just a few days after the gravel pad was in place and compacted. After setting 2×8 footing forms, they called for concrete.
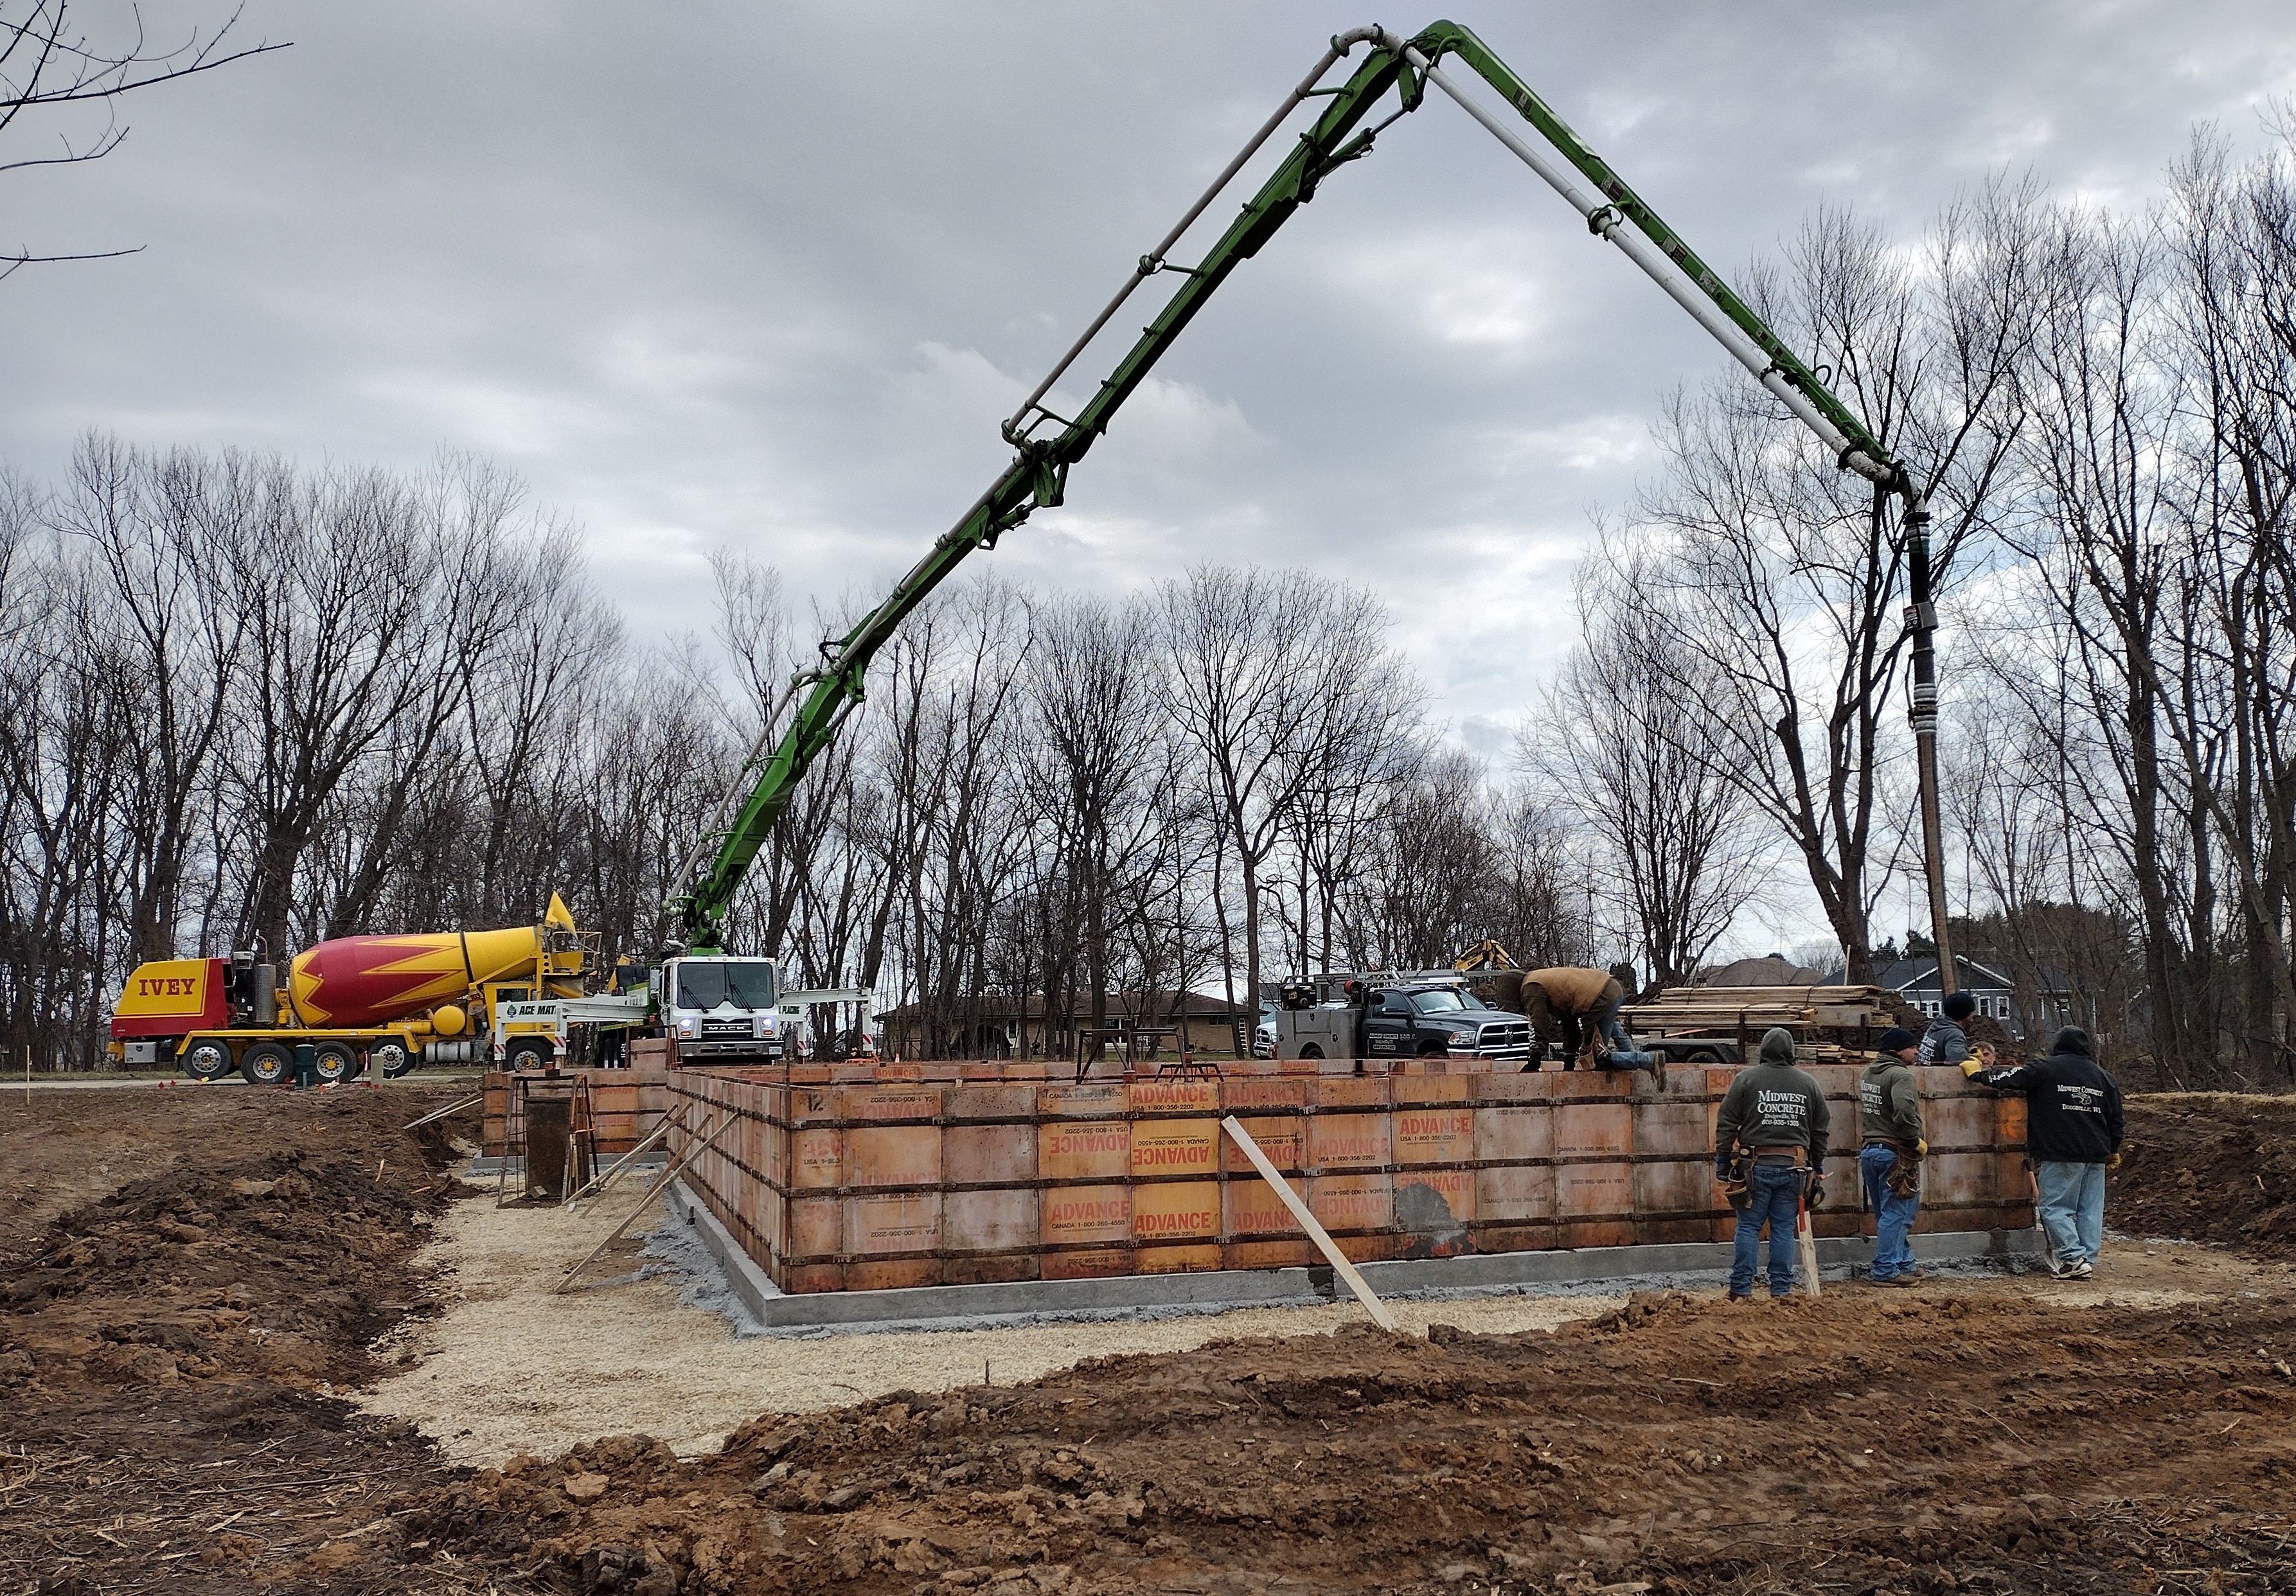
The next day, the footing forms were stripped, and the crew was back to set the plywood wall forms. A boom was used to place the concrete.
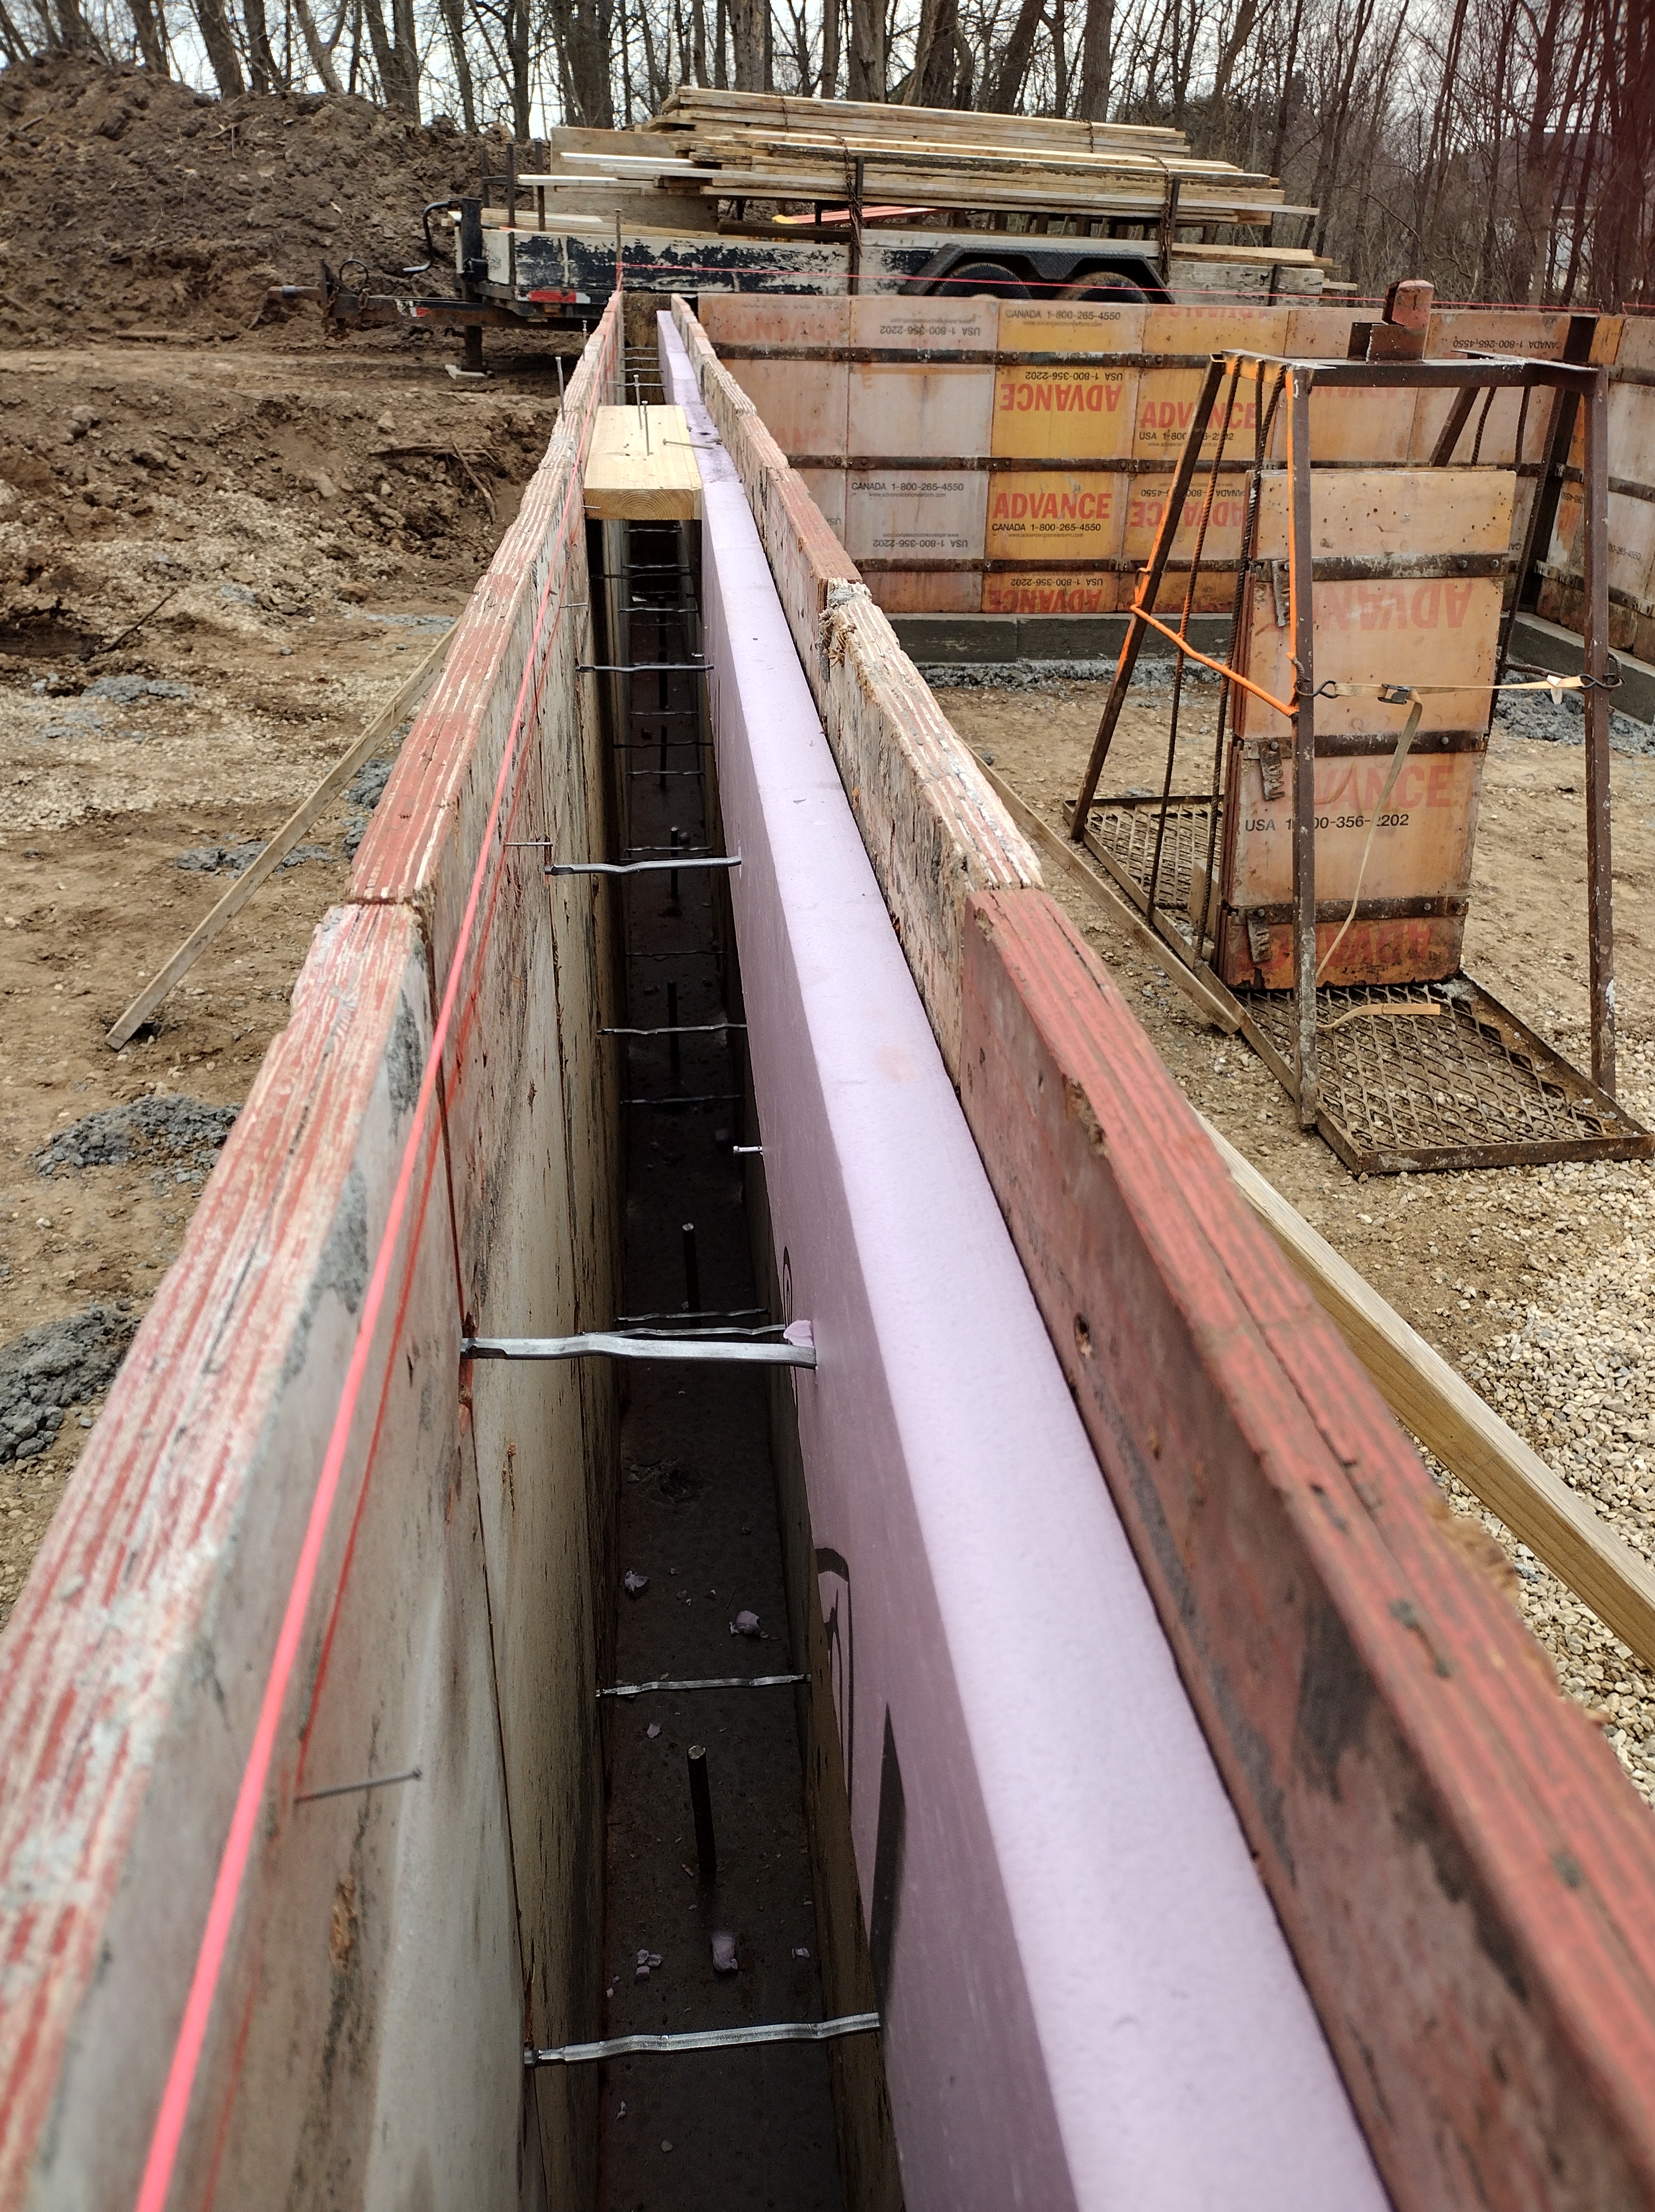
My job was to rip 2″ thick XPS (expanded polystyrene AKA styrofoam) in 8″ strips to form a “reverse brickledge” on the inside face of the concrete wall. This genius move will provide a thermal break between the wall and the slab edge. Later, I’ll add another two layers for a total insulation value of R-30.
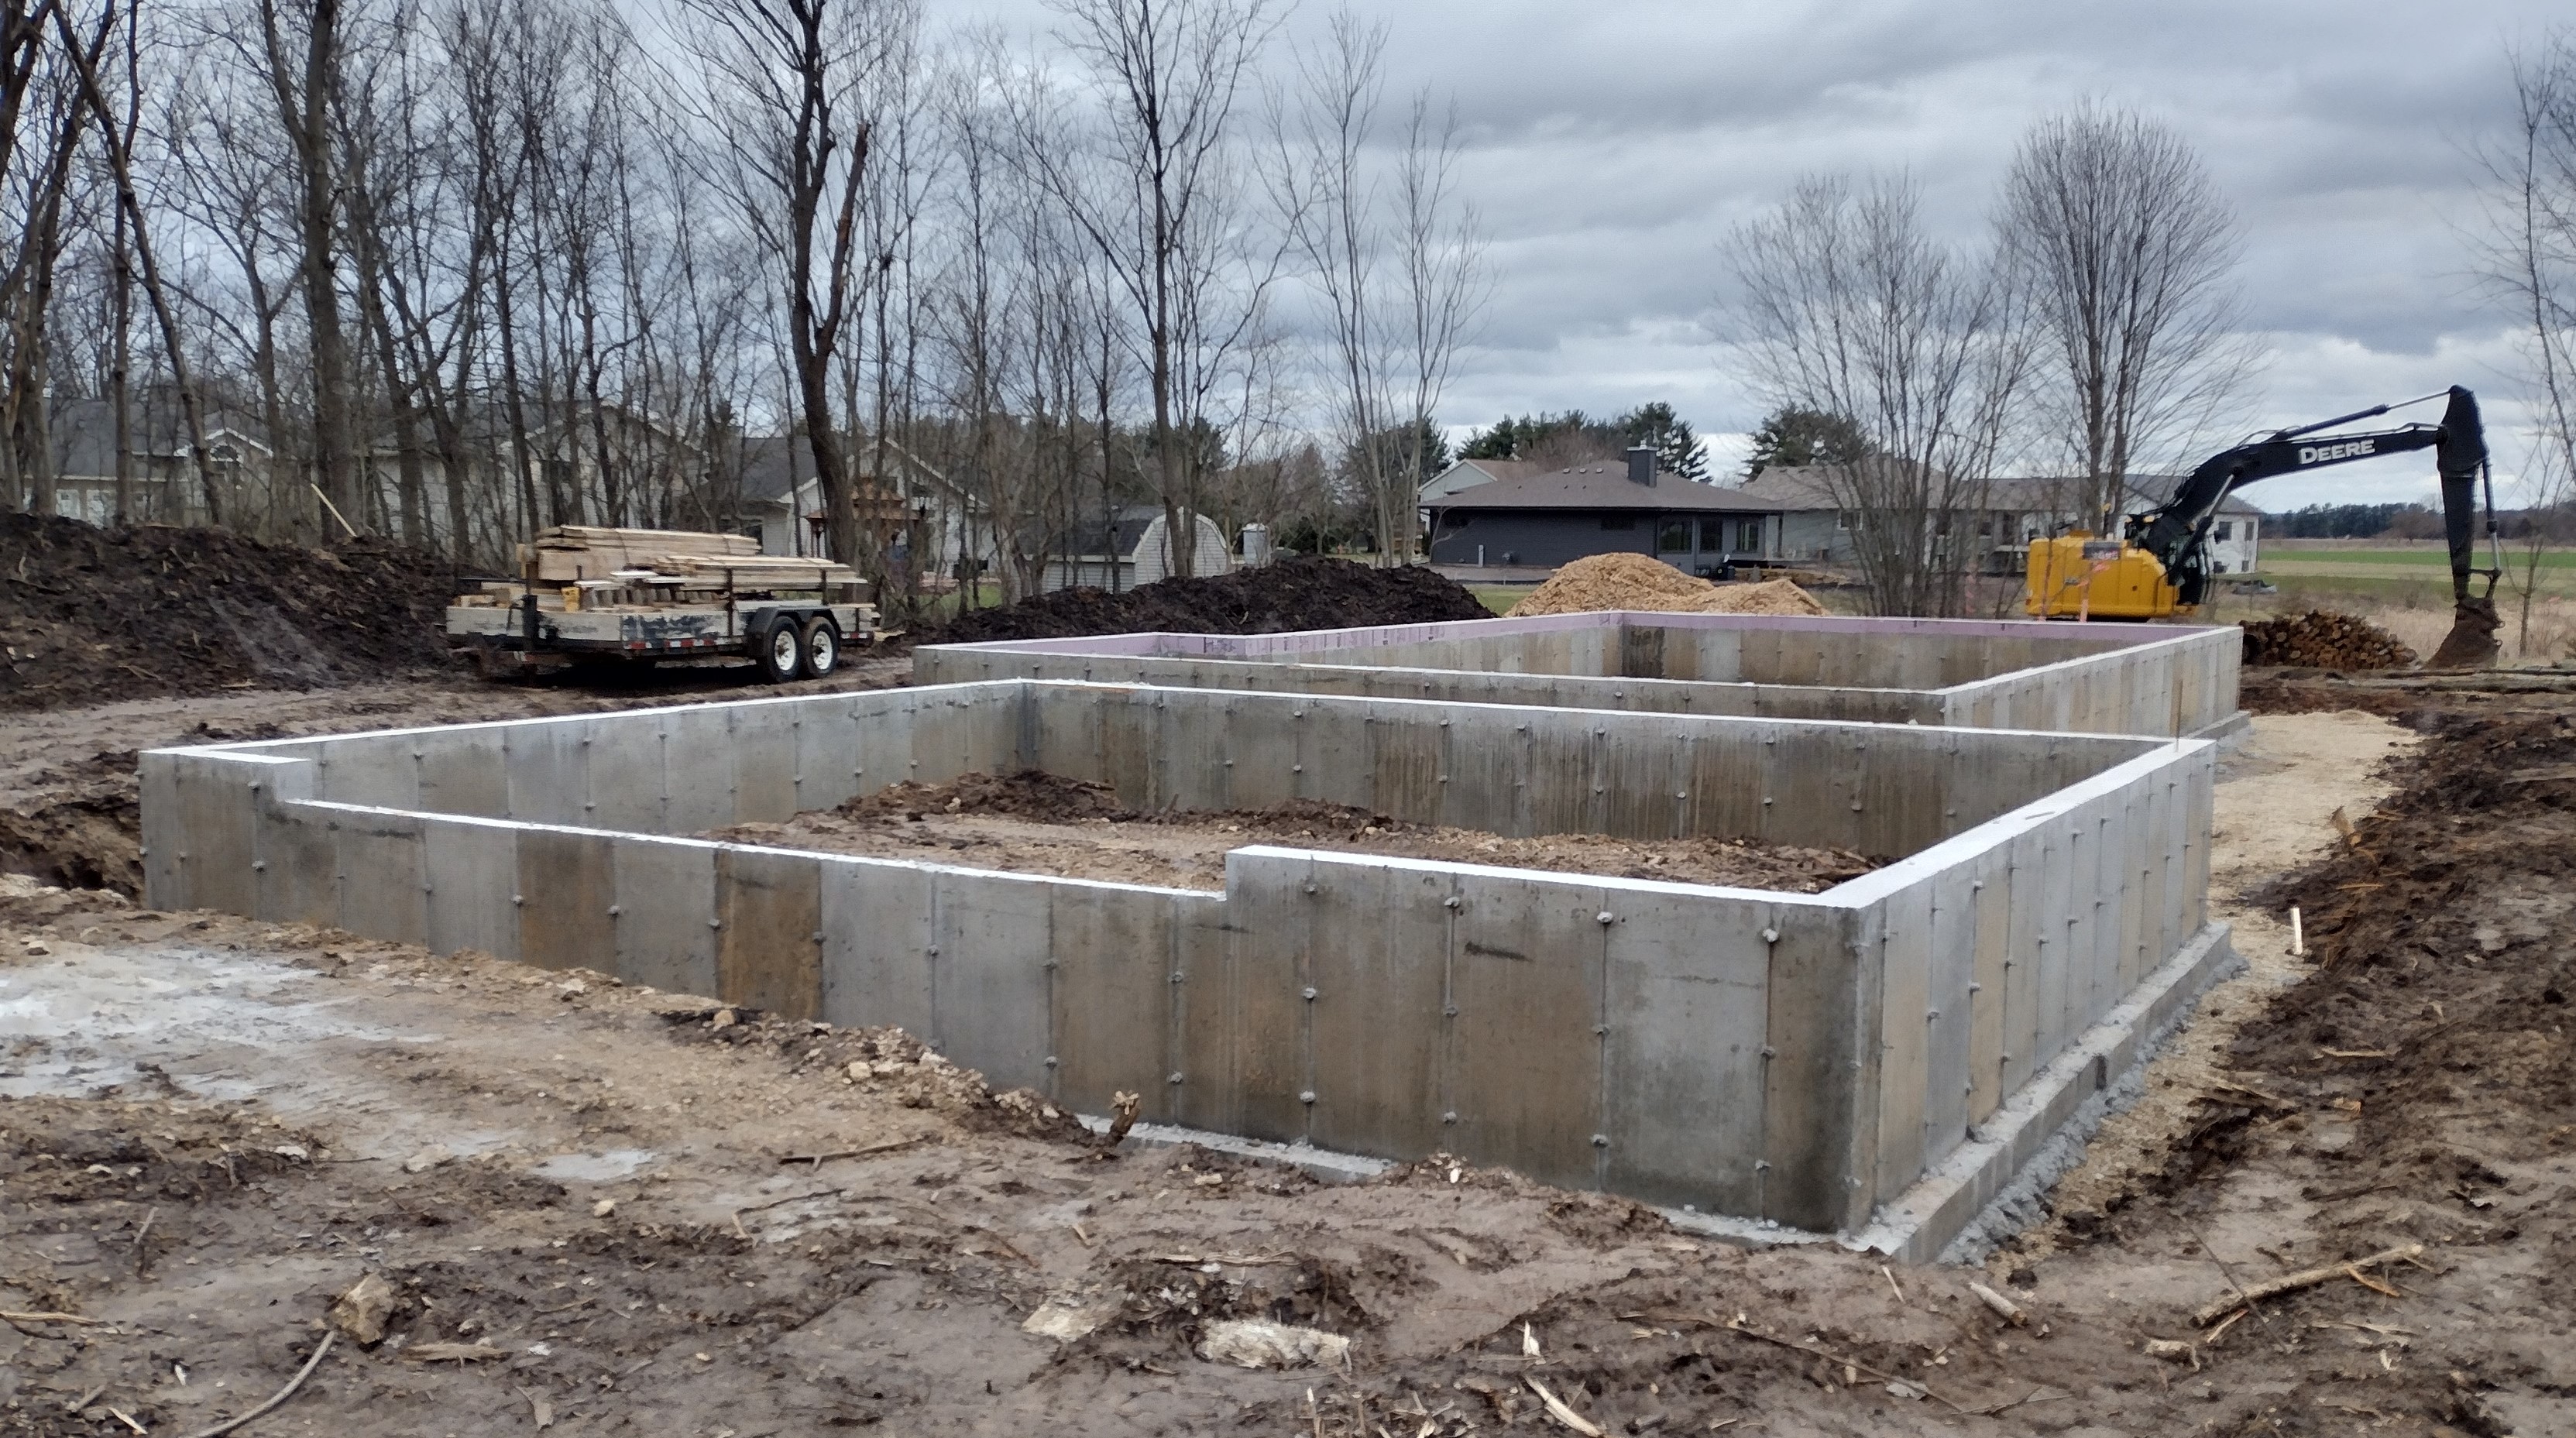
The crew worked hard to give me a wall that’s level, plumb, and square.
The concrete you see here represents 21.5% of my projects estimated carbon emissions debt.That’s equivalent to driving an average gasoline powered car 22,407 miles.
If you like to geek out on numbers, check out Builders For Climate Action’s BEAM carbon calculator. I started playing around with the software program last year, and was eager to try it out on this project. BEAM attempts to put a number, in “kilograms of Carbon Dioxide equivalent”, on the most commonly used building materials. The estimate includes the carbon debt to acquire or mine the material, transport it to a manufacturing facility, and transform it into a useful building product. The estimate doesn’t include transporting it to the building site or the cost to put it into service. It’s what they call a “cradle to gate” estimator. BEAM doesn’t include mechanical systems, finishes, fixtures, or landscaping.
It takes some time to input a projects geometry and chose the correct materials from a series of drop down menus. When the program spits out a final number, it can feel a little confusing and a little deflating, because you know it captures just a fraction of the project’s total carbon footprint (that “cradle to gate” thing).
A light goes on when you discover you can substitute one product for a better one. For instance, if my local batch plant offered a low carbon concrete mix that replaced some or all of the Portland cement with by-products from industry such as fly ash or slag, my “kilograms of Carbon Dioxide equivalent” drops from 8761 to 5549. So instead of driving 22,407 miles, I’m only driving 14,192 miles, according to EPA’s greenhouse gas calculator.
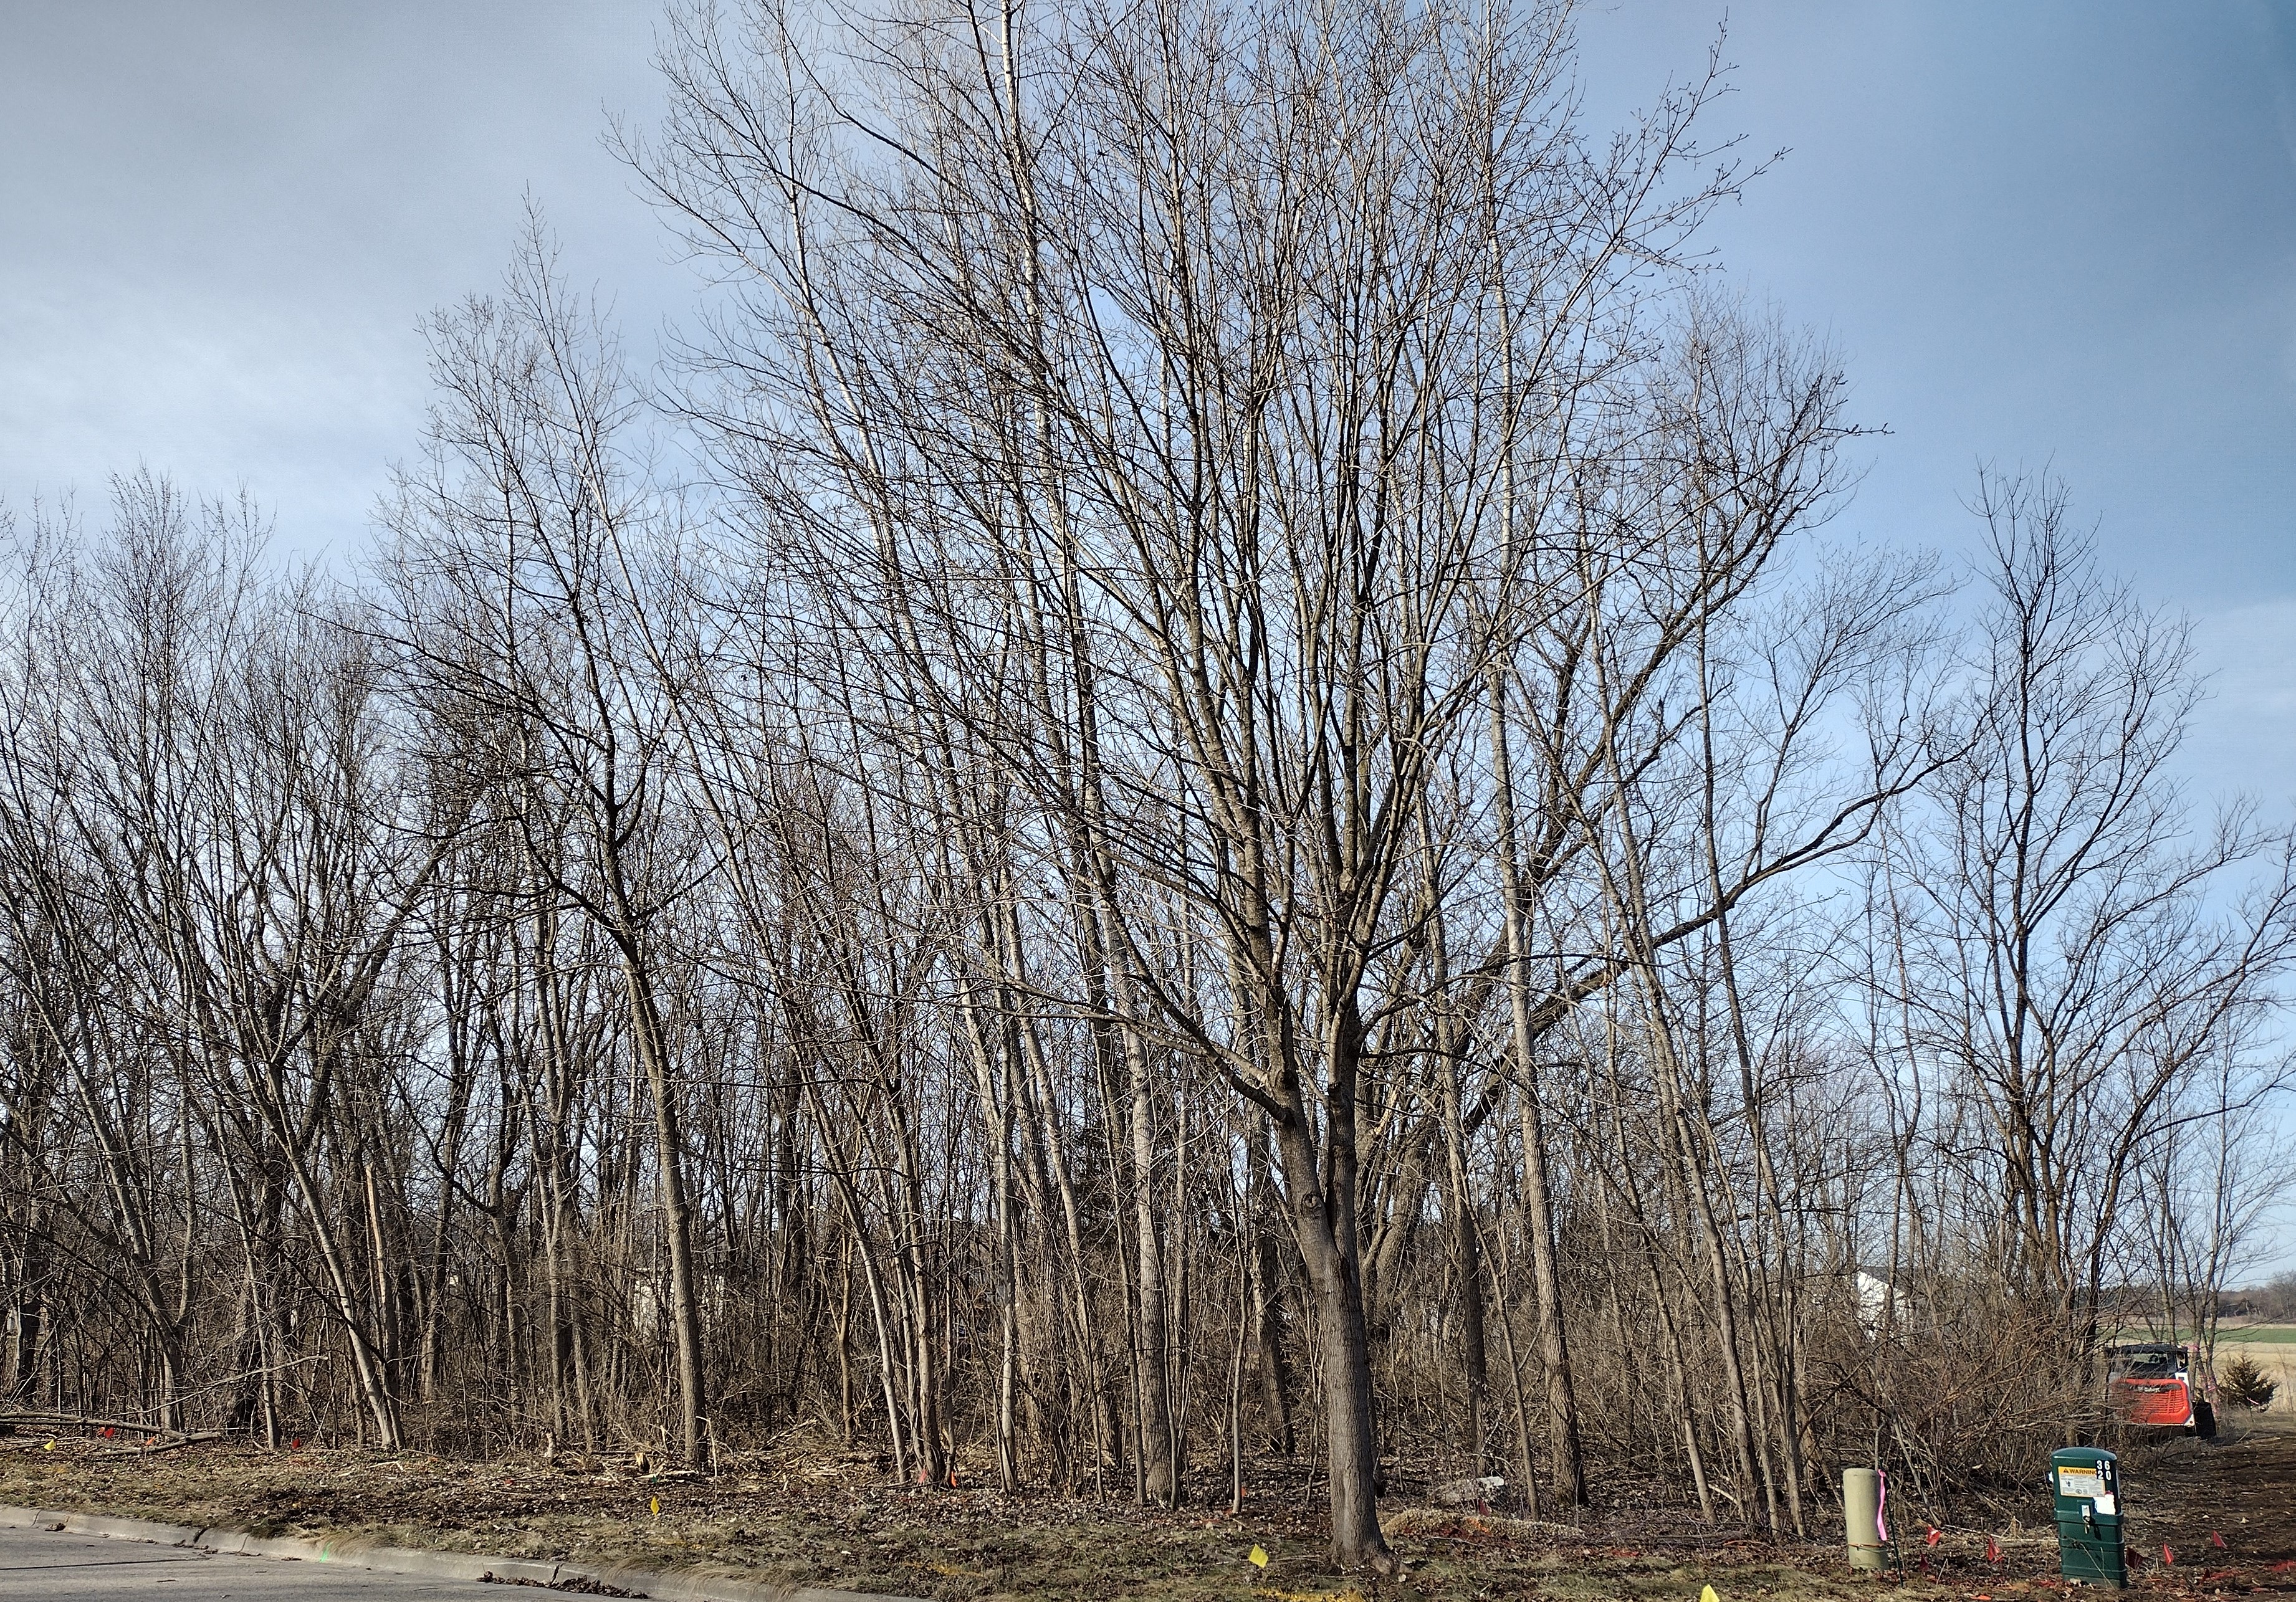
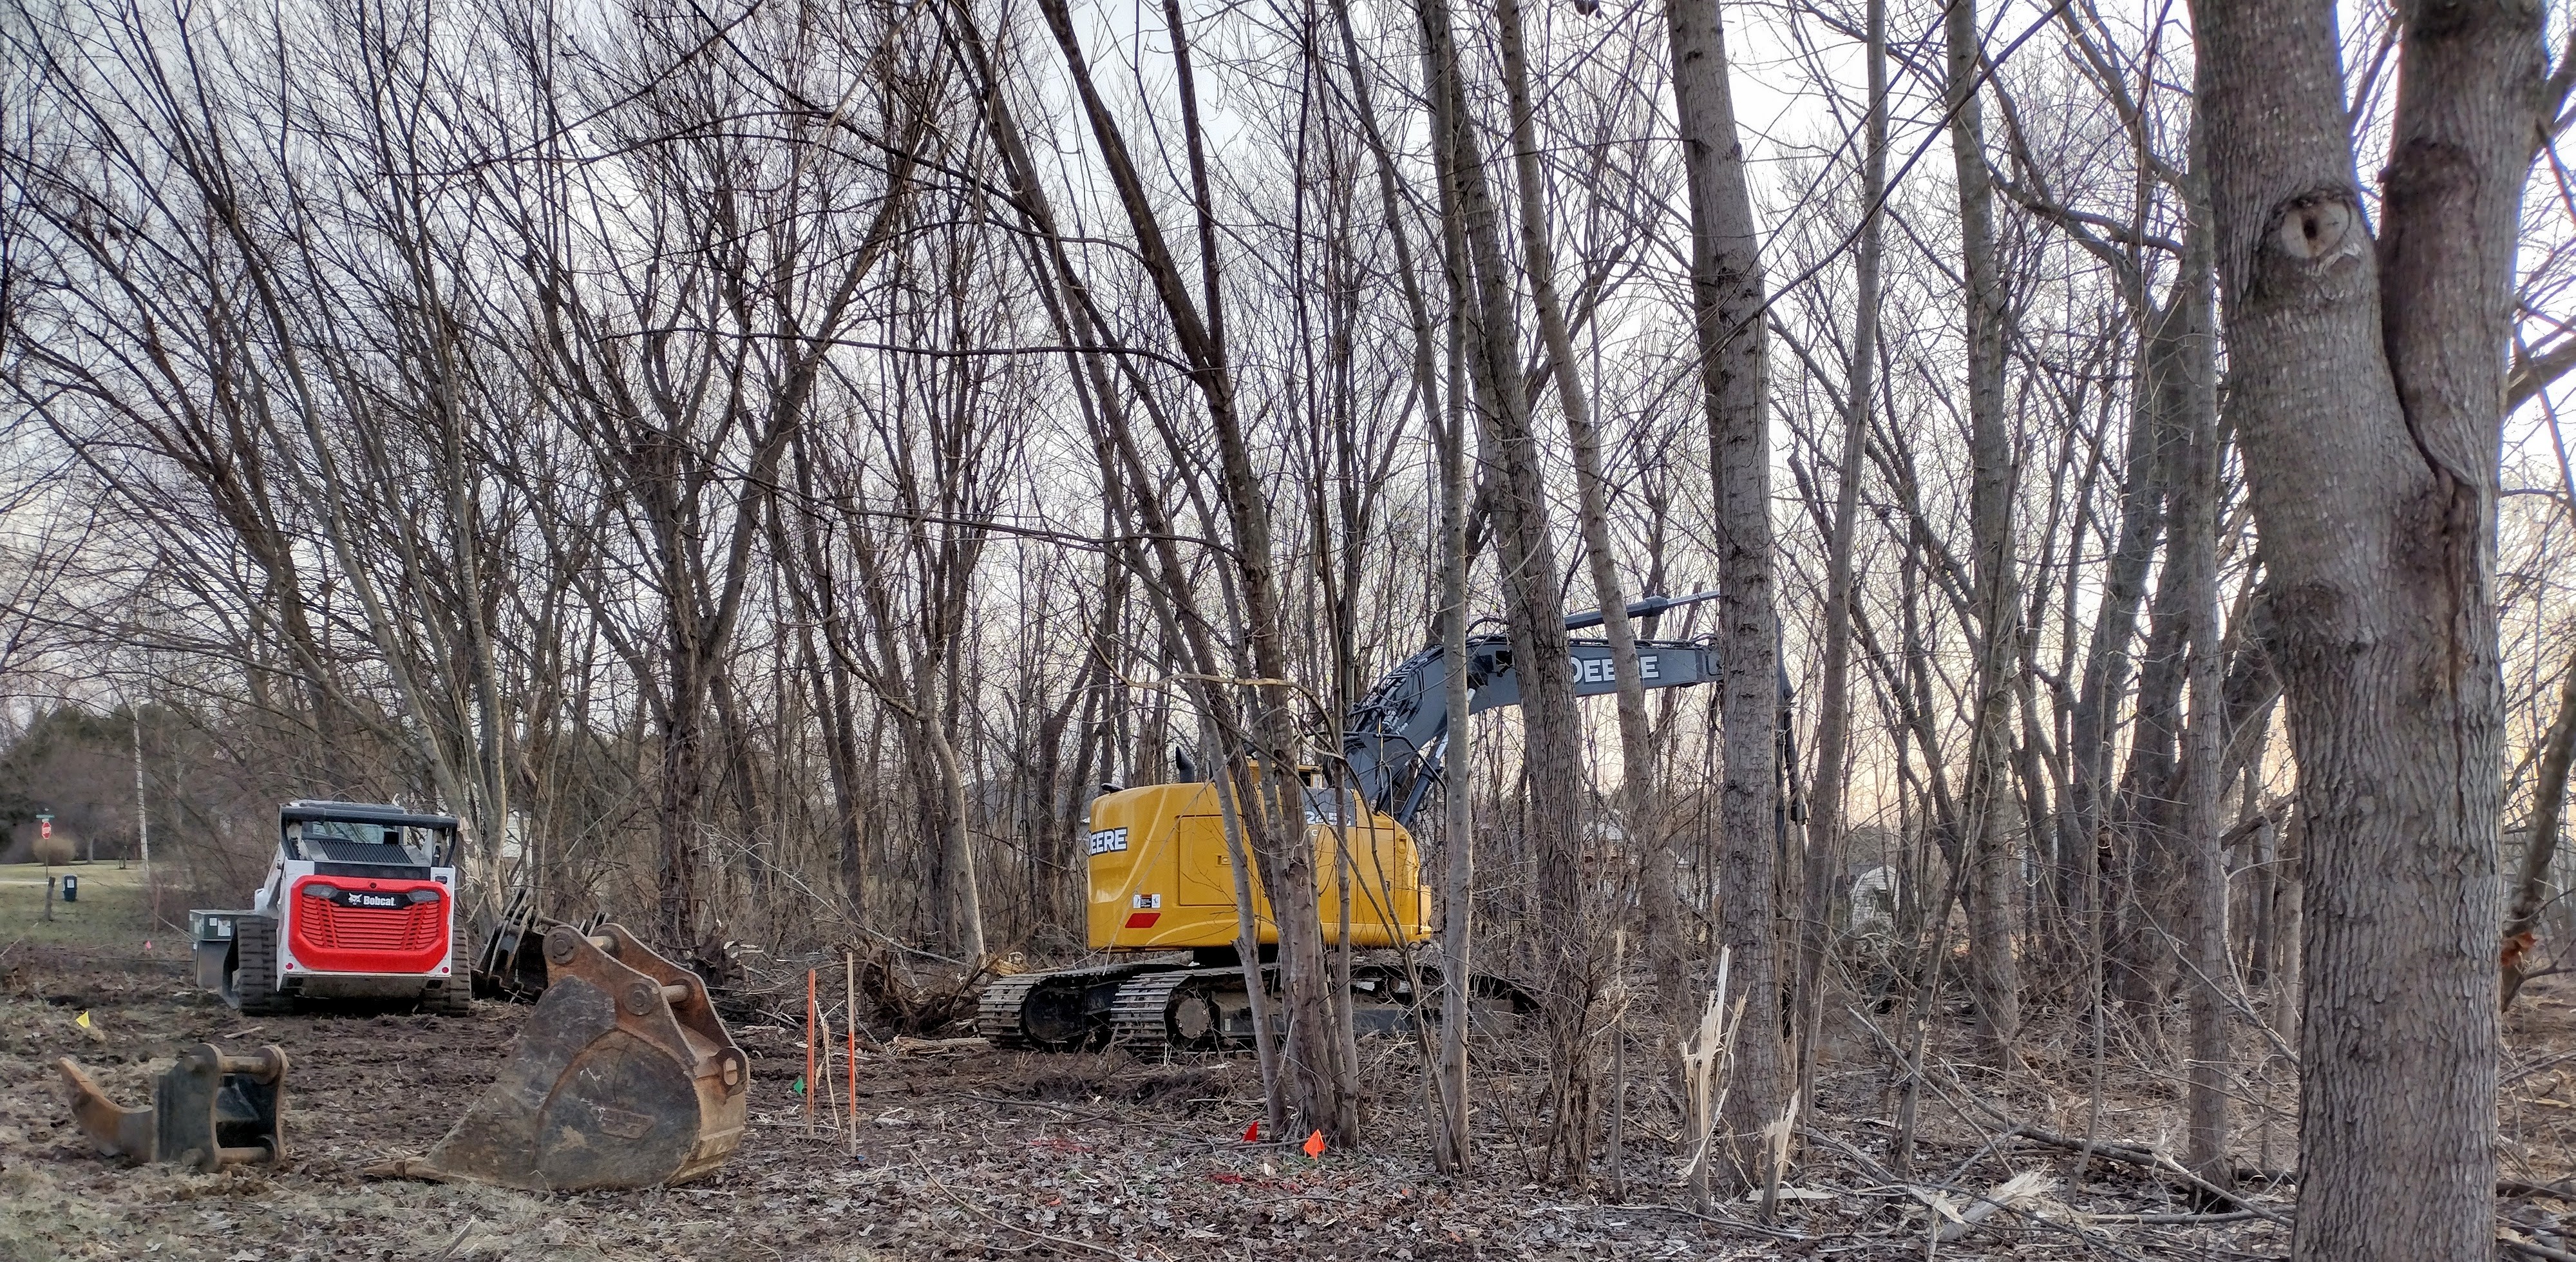
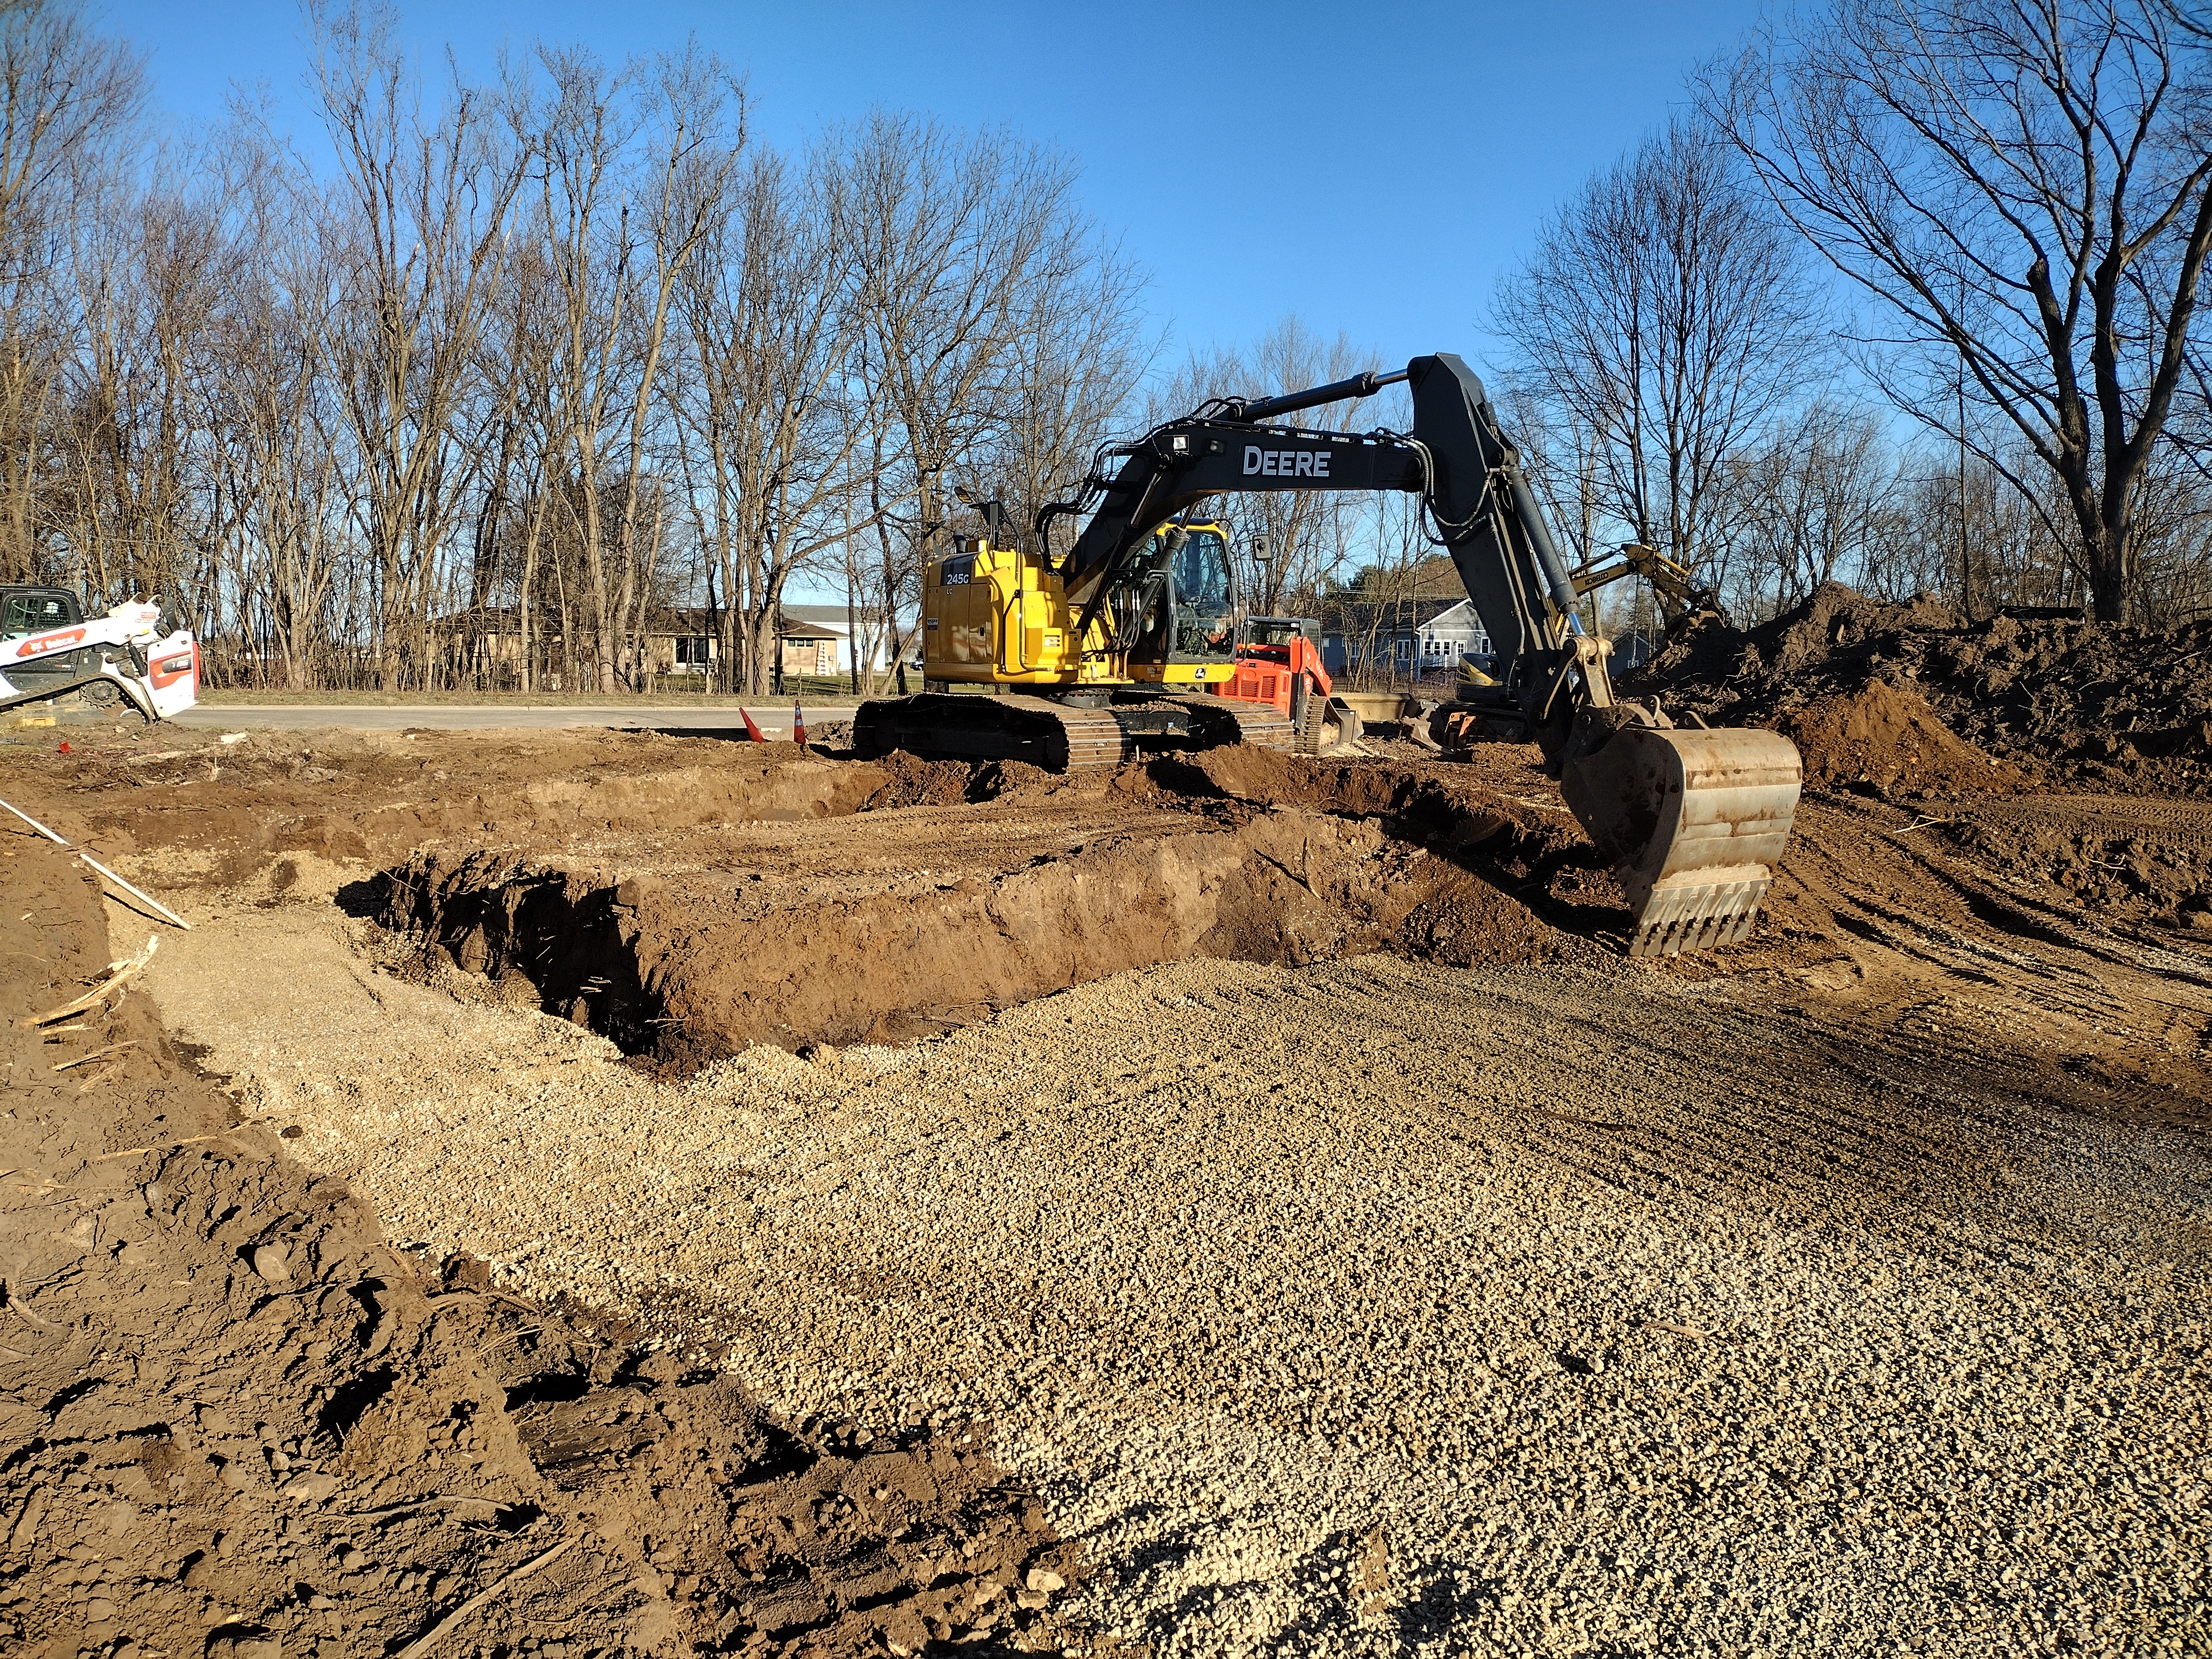
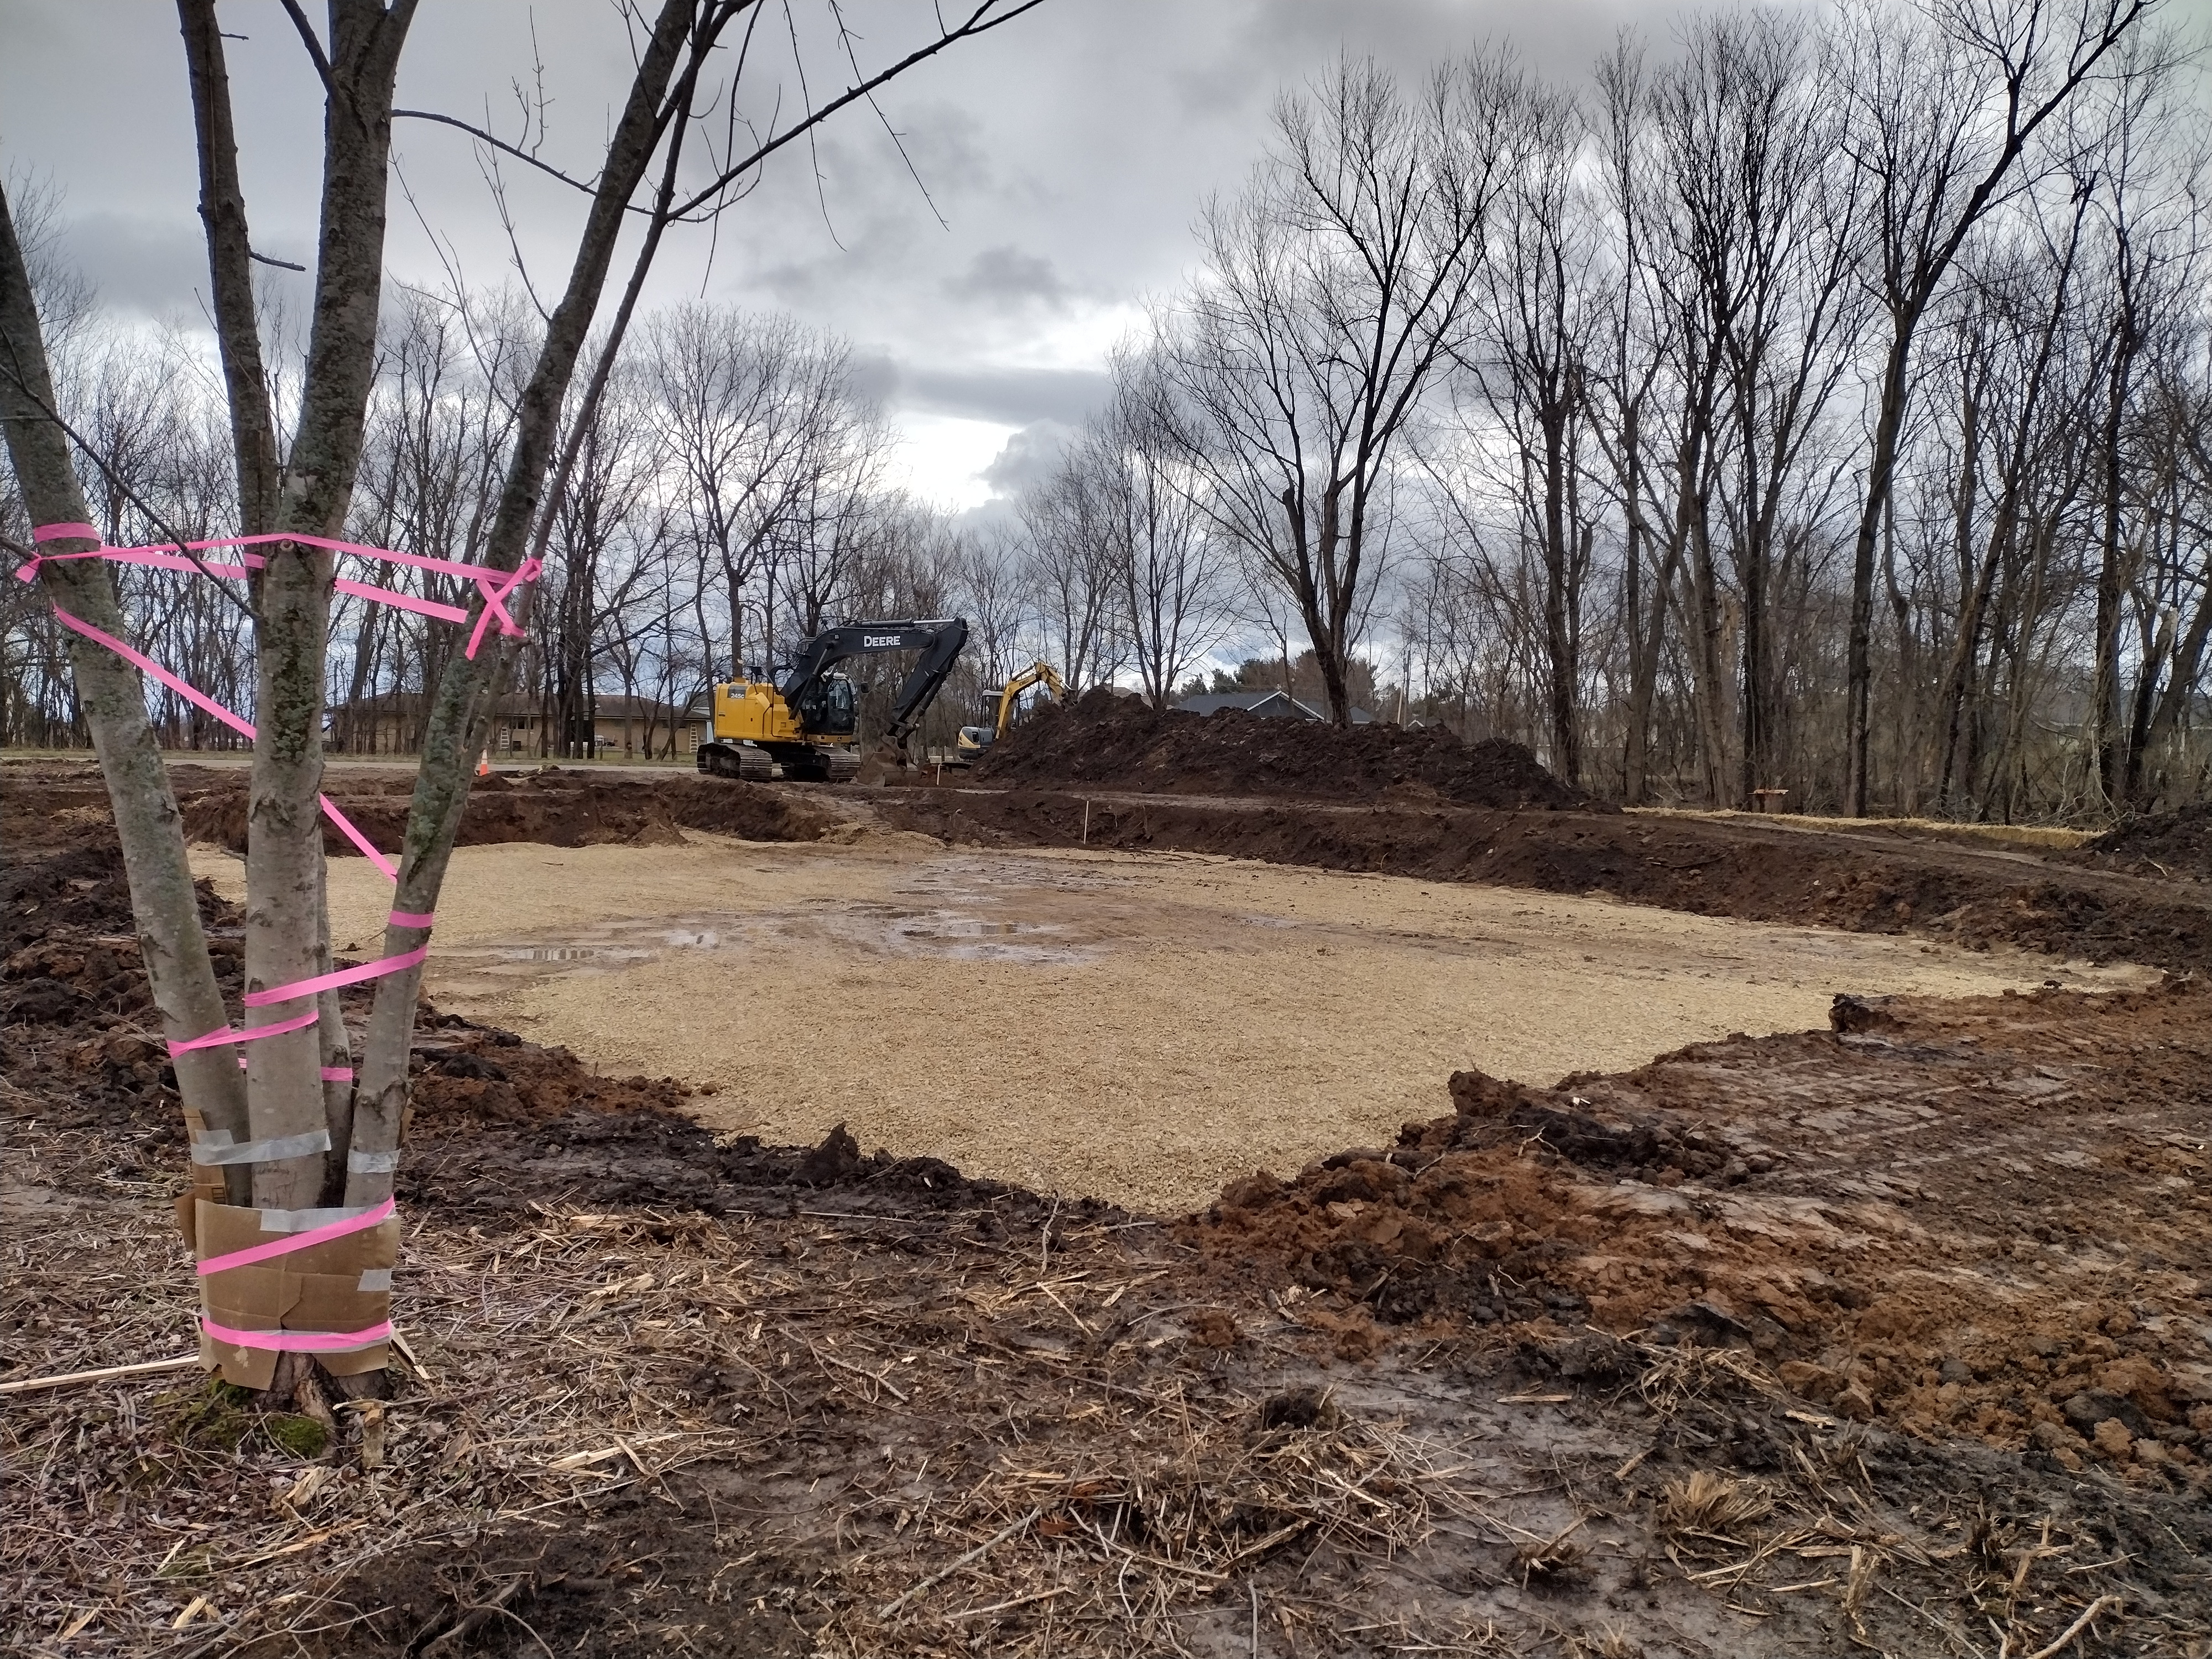
March 12 – 23, 2024: Between rainstorms and the ebb and flow of other work, our crew broke ground and tidied up the site for foundation work in just 10 days time.
a patch of woods is now a building site
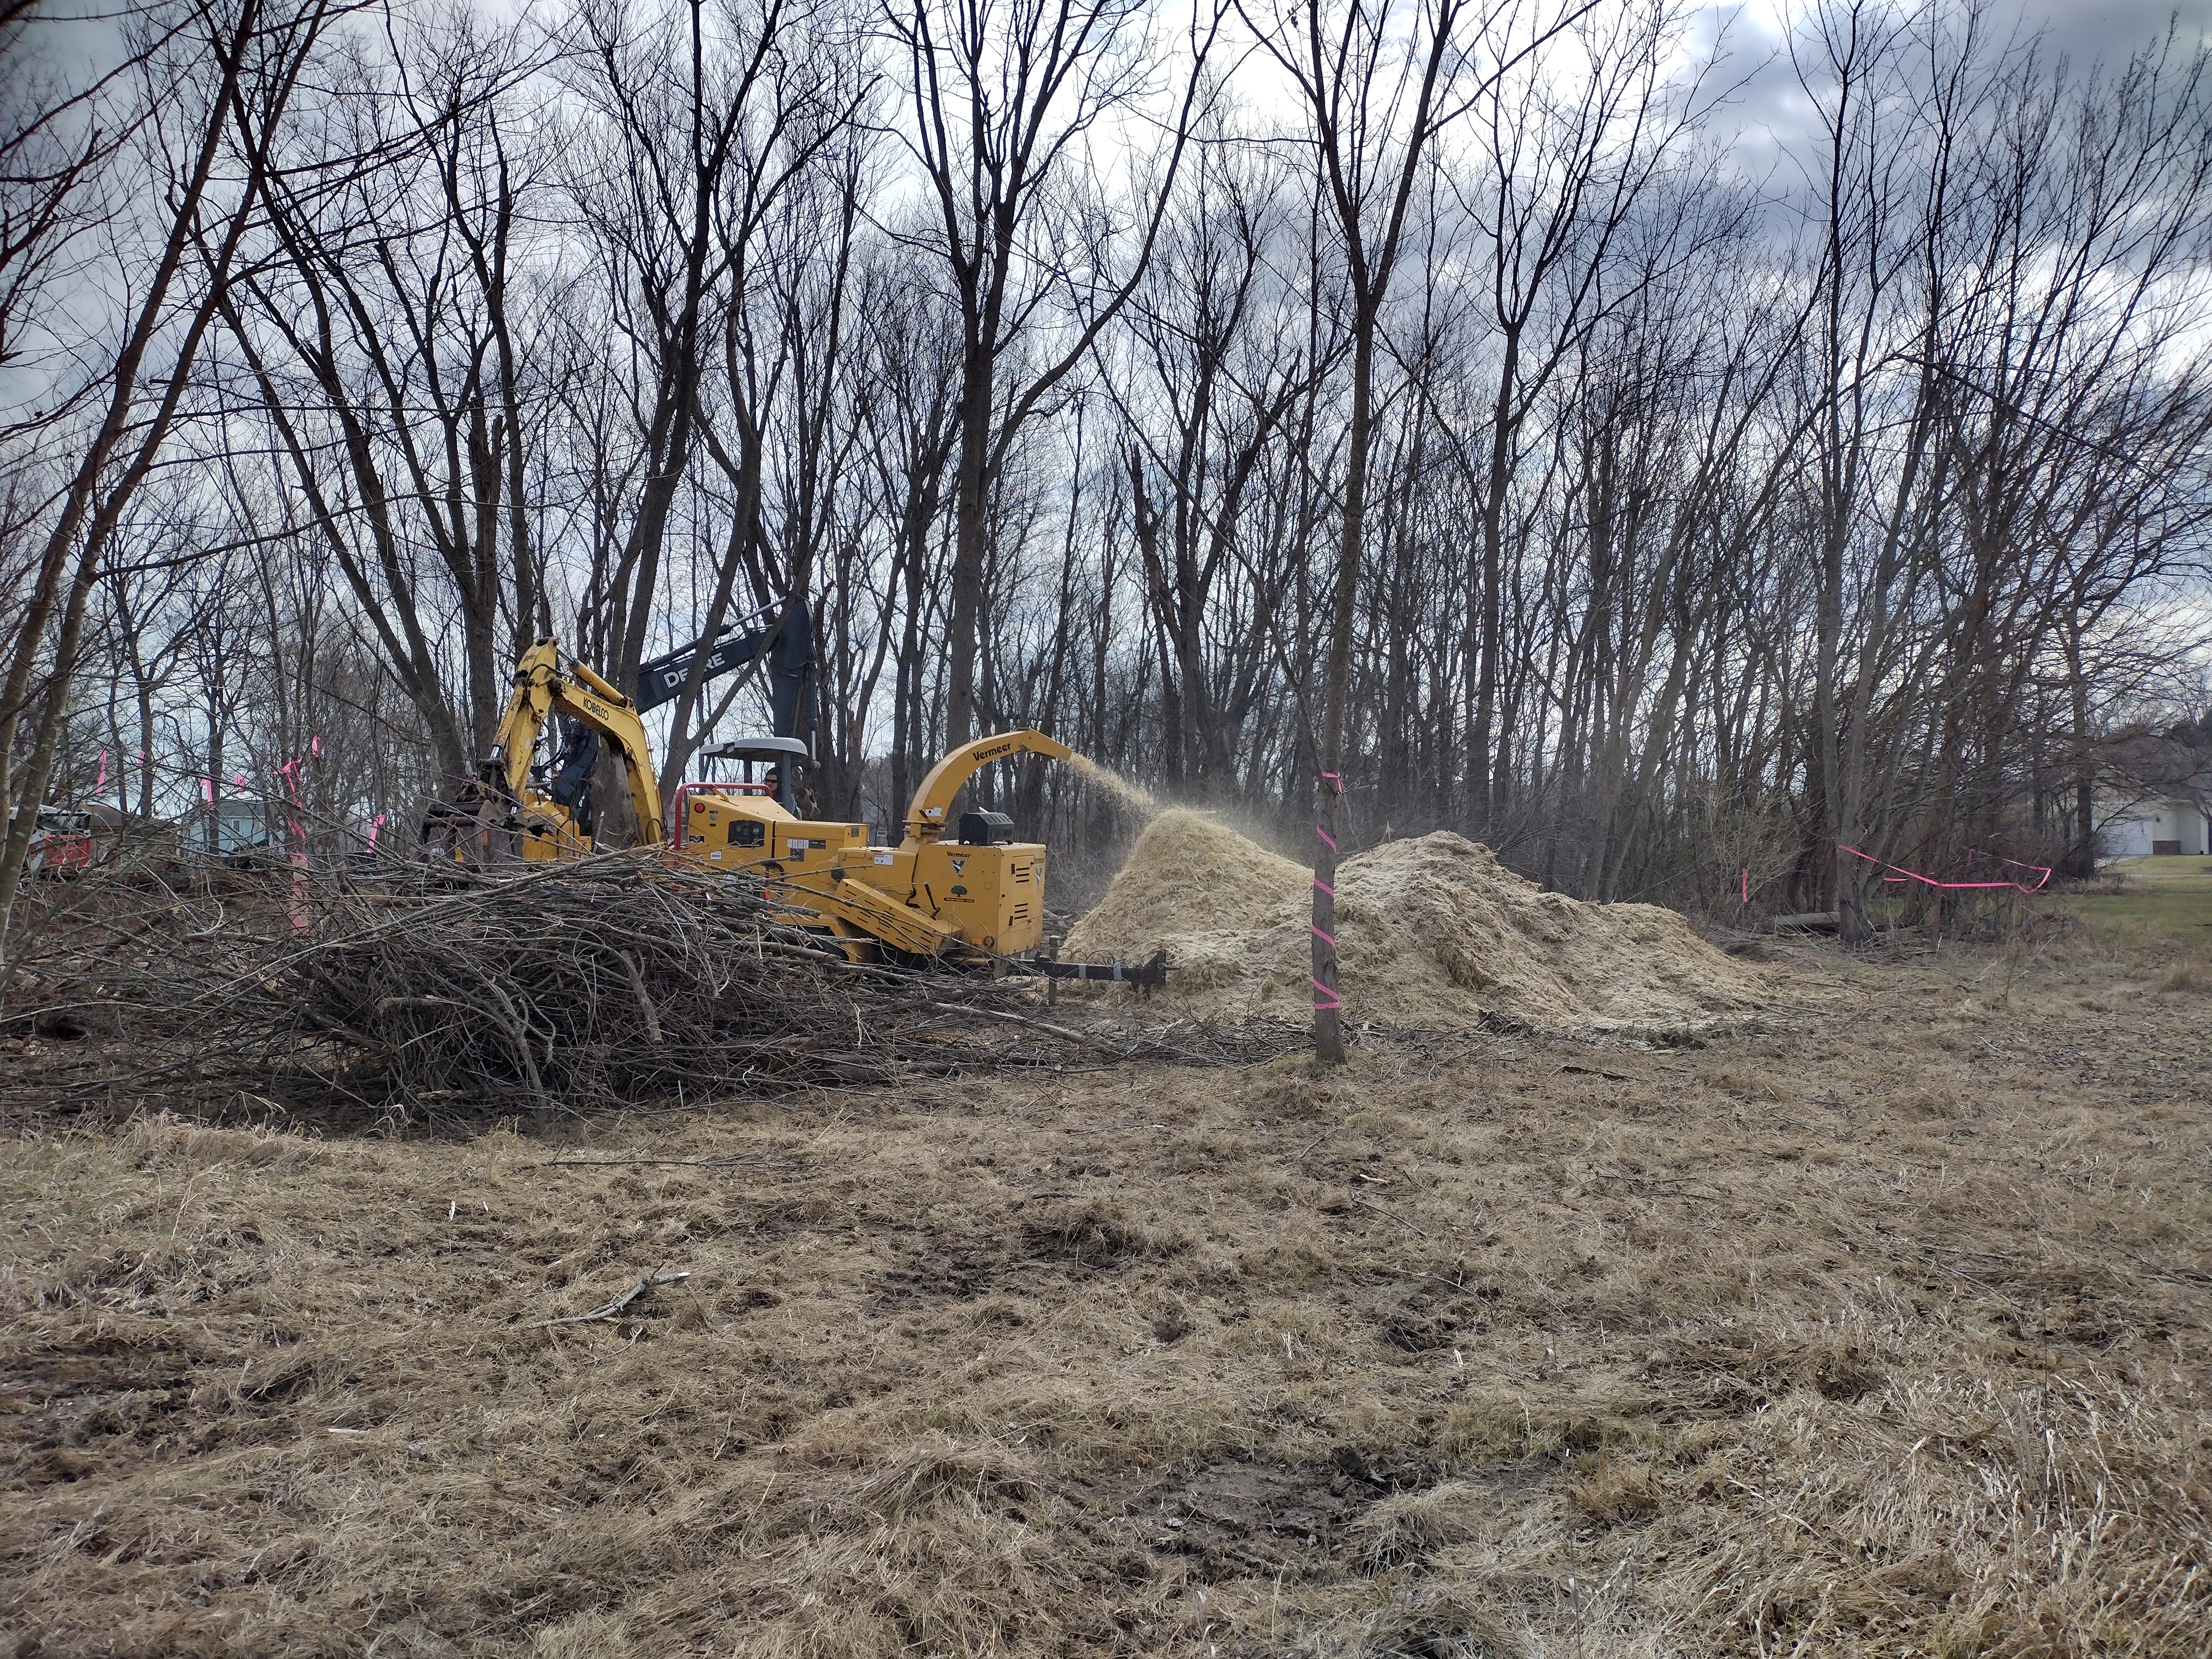
The first step was to mow down the smaller trees and bushes, ably done by Tyler from Slaney Landscaping & Excavating. Then the big equipment was called in. And a big guy with a very big chainsaw to scare out the last of the birds and bees and furry creatures.
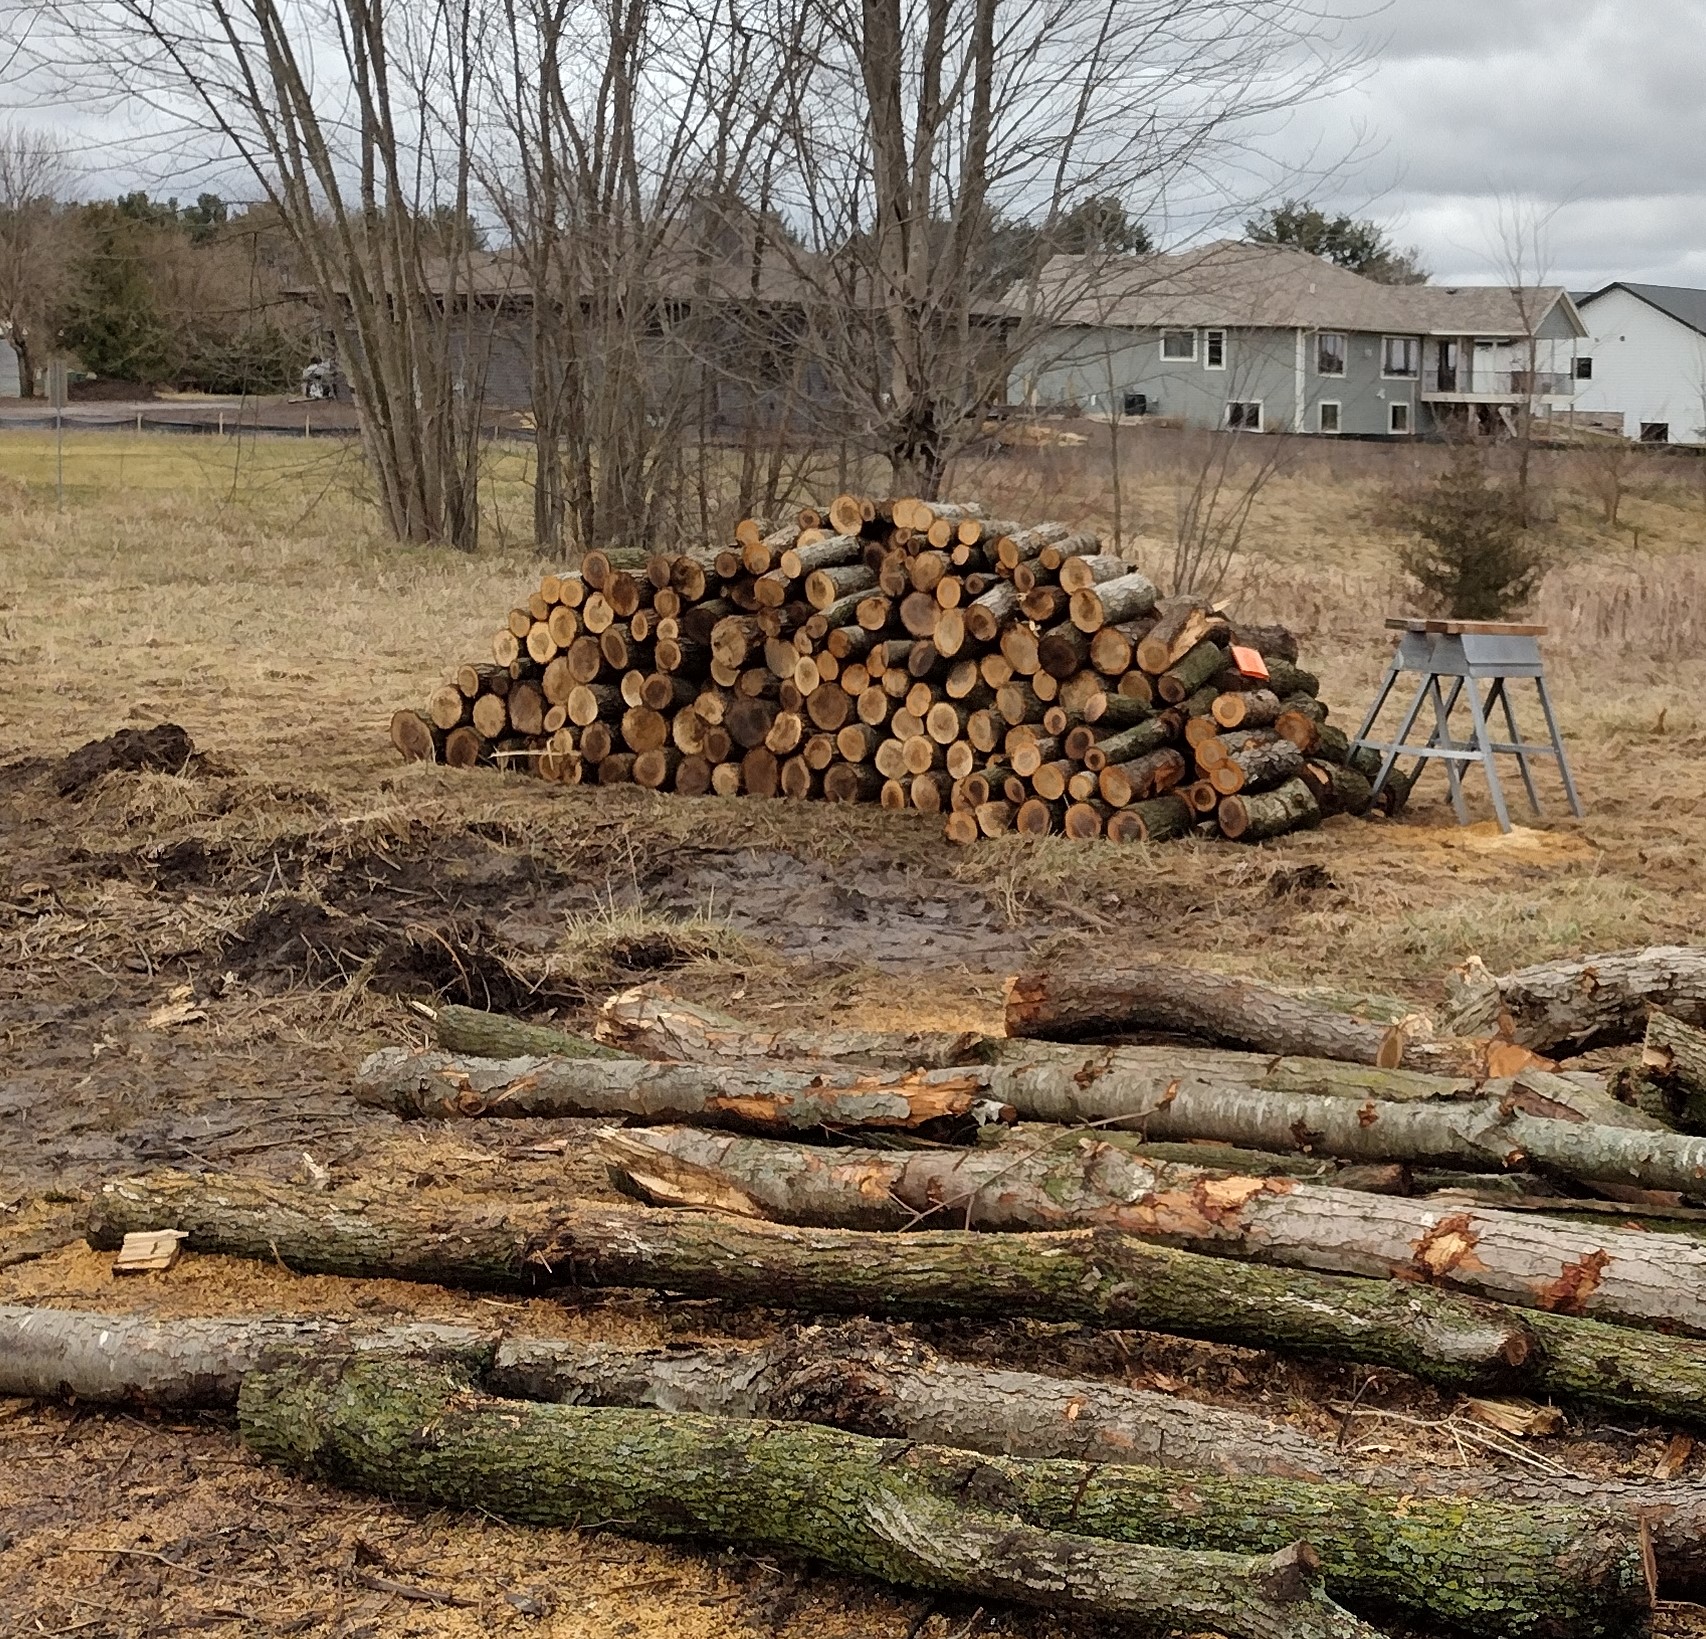
The tree tops and smaller logs were chipped. Medium size logs were stashed to the side for campfire wood. The really big logs were trucked away to a guy to split for home fuel. And the stumps and ungainly chunks were taken to the Village dump, where they will be chipped and sold for mulch.
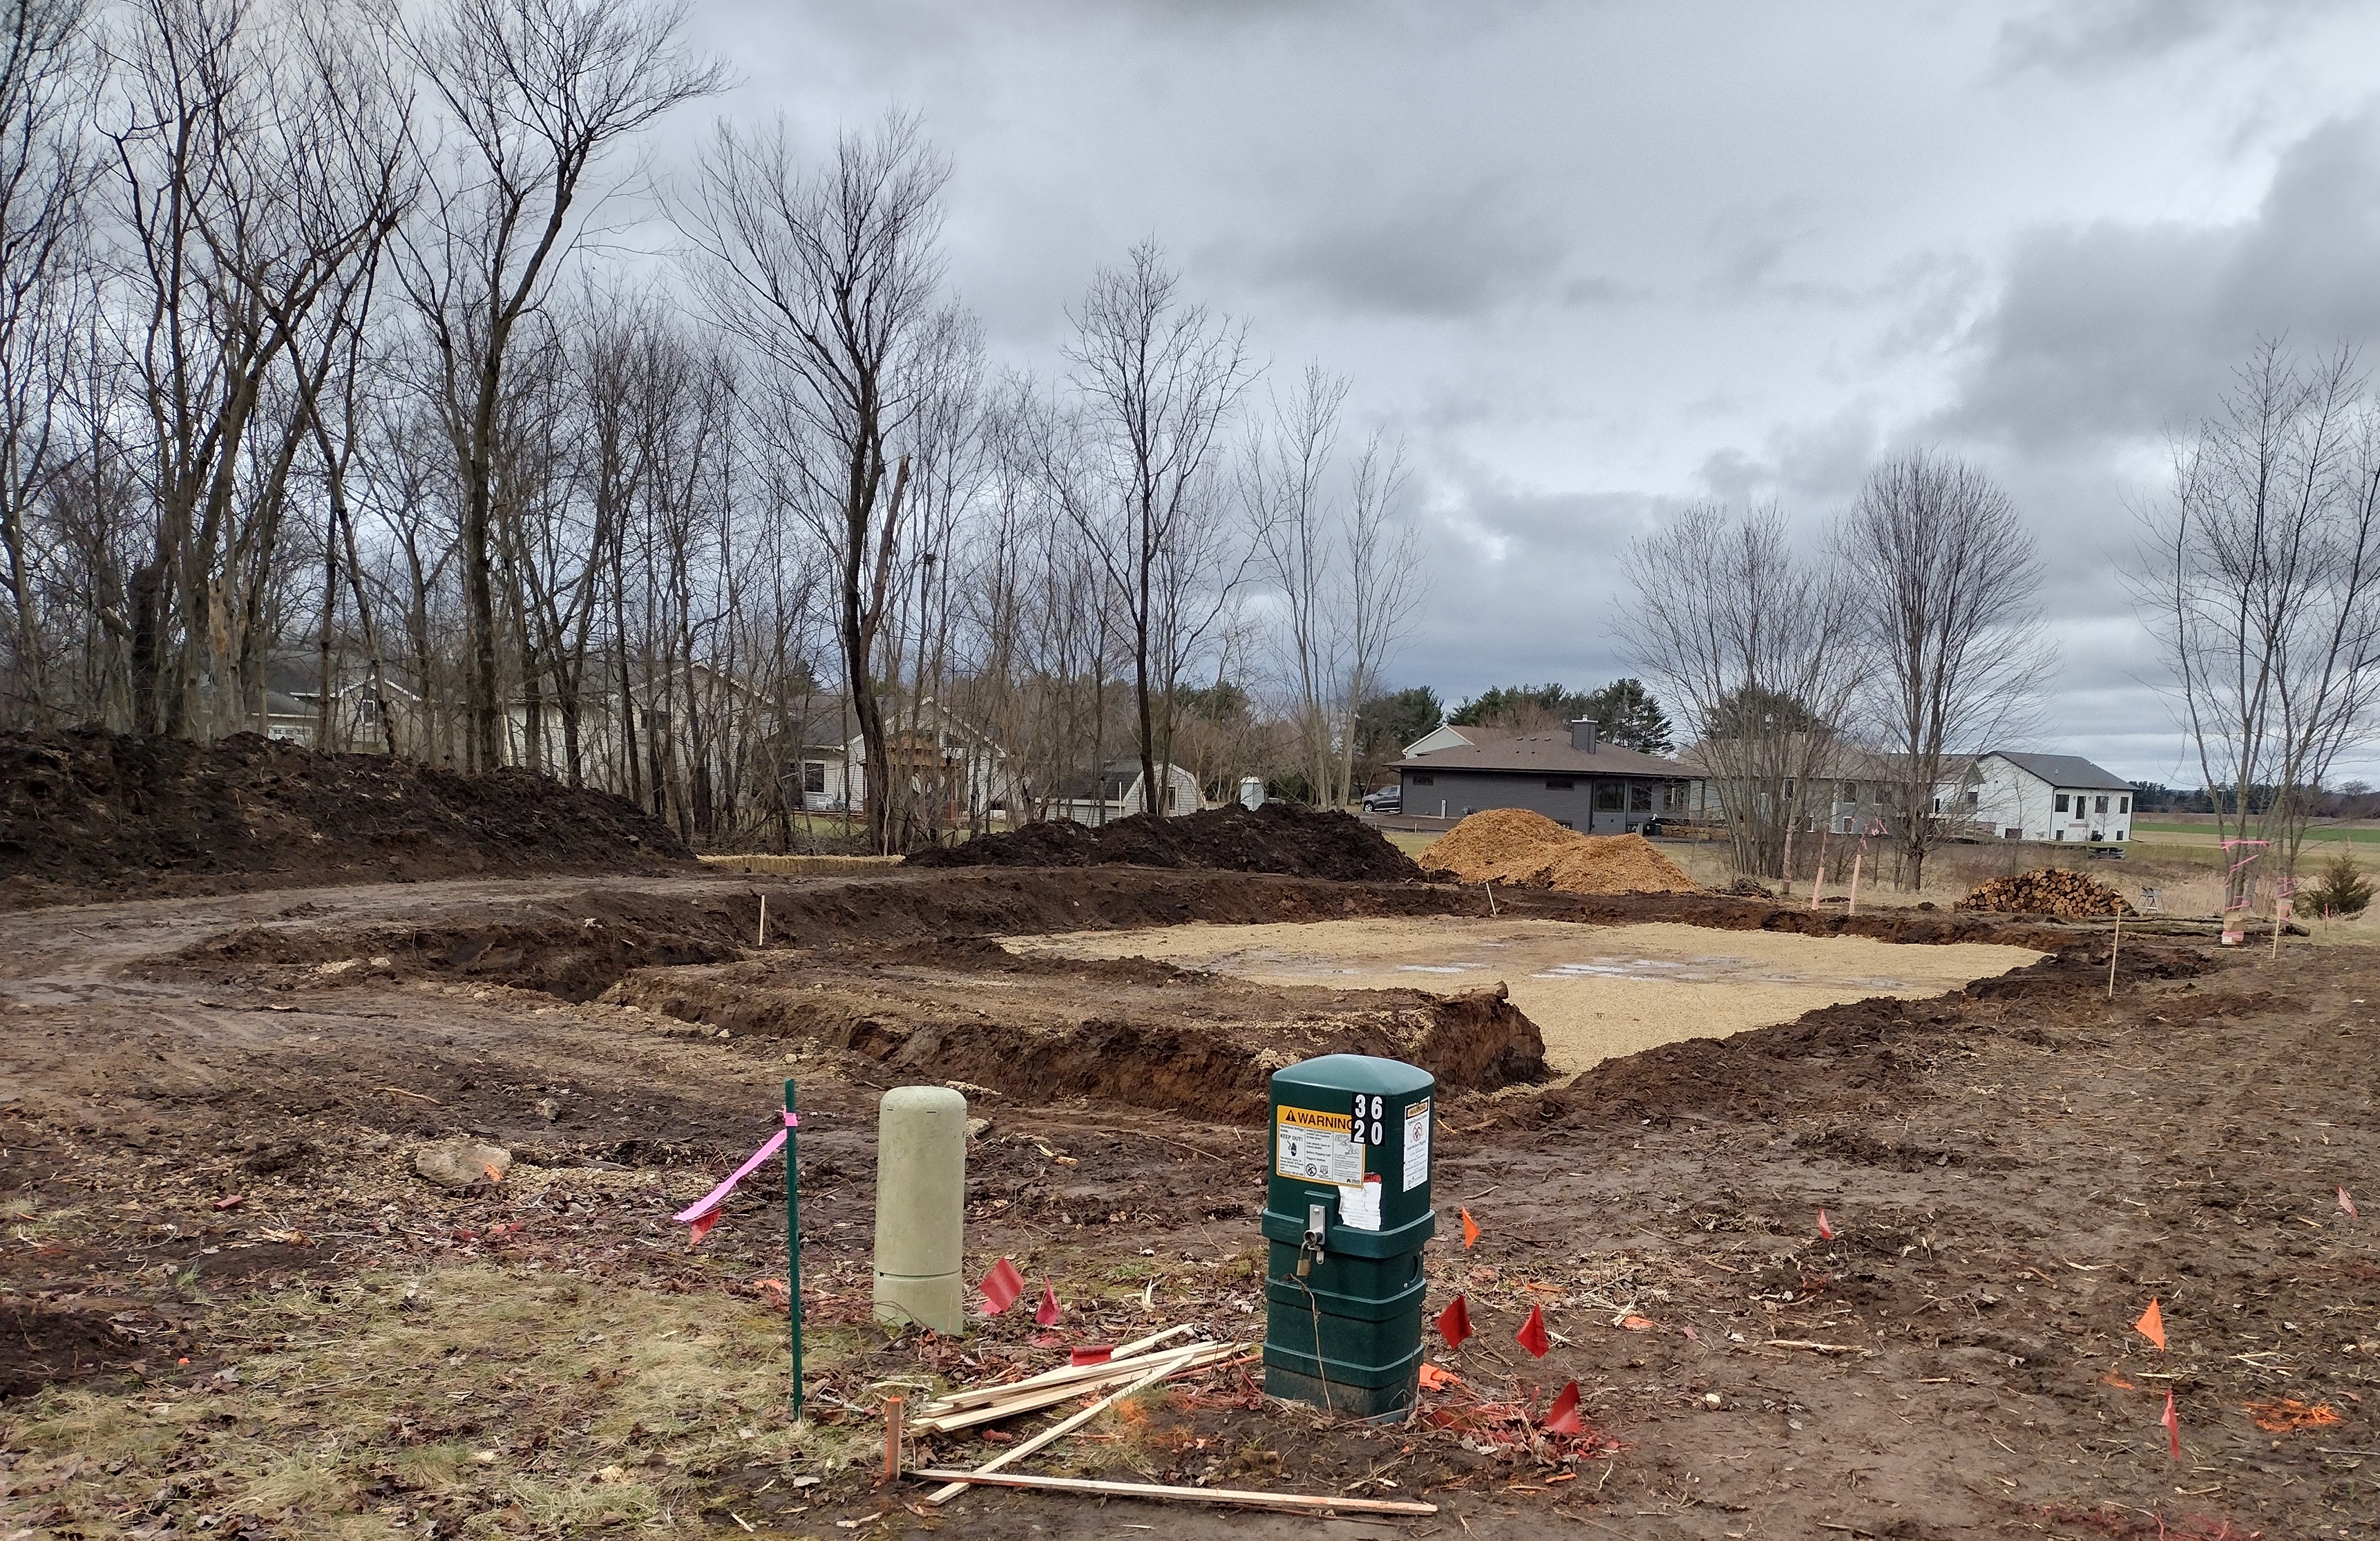
Shawn Slaney stripped the topsoil and set it aside. Then he began trenching for footings. But not so fast: he ran into an unfortunate, thick layer of “muck” —-black sticky spongey clay running in veins that had to be scraped out. The trench grew into a hole. Finally, firm gravelley soil was struck a foot or two lower than we’d hoped and was deemed acceptable.
Clean fill was brought in by the truckload and compacted firm, creating a generous pad for the concrete contractor to place the footings.
Saturday broke clear and crisp for our first Weekend Warrior Work Day. My friends Glenn, Laura, JC, and I staked straw bales along the south edge of the lot to catch any runoff from the soil piles. We cut and stacked firewood. We broadcast cereal rye (a quick growing grass) over the soil piles that, when it sprouts, should hold and feed the soil over the next 6 to 9 months. We picked up random debris and made a little campfire for a mid-afternoon coffee.
I feel pretty good about the eco-friendly choices we’ve made so far. We destroyed a wildlife habitat but promise to plant yard trees and pollinator gardens. The machines burned up a bunch of petroleum, but we’ll make good use of the bio-fuels. The topsoil is protected, and the erosion control barrier is biodegradable (no plastic netting or plastic fencing) and will be used later for mulch. And just as important: we worked together and had a good time!
March 1, 2024: Today is a monumental day for Poem Homes! I closed on the sale of a lot just down the street from me and will begin building the second Poem Home, this one on spec. Construction will begin as soon as possible, starting with clearing the lot and stripping away the topsoil for safe-keeping. Here’s a picture of me after we found and flagged the property corners. Other various color flags were placed by Digger’s Hotline, showing where underground utilities lie. Stay tuned!