
June 21, 2018: Follow my progress as I build the first-ever net-zero home in Spring Green, Wisconsin.
POEM HOMES
modest homes for modern living
Site Prep
March 23, 2024: Between rainstorms and the ebb and flow of other work, our crew broke ground and tidied up the site for foundation work in just 10 days time. The first step was to mow down the smaller trees and bushes, ably done by Tyler from Slaney Landscaping & Excavating. Then the big equipment was called in. And a big guy with a very big chainsaw to scare out the last of the birds and bees and furry creatures.

The tree tops and smaller logs were chipped. Medium size logs were stashed to the side for campfire wood. The really big logs were trucked away to a guy to split for home fuel. And the stumps and ungainly chunks were taken to the Village dump, where they will be chipped and sold for mulch.
Shawn Slaney stripped the topsoil and set it aside. Next up, trenching for footings. But not so fast: he ran into an unfortunate, thick layer of “muck” —-black sticky spongey clay running in veins that had to be scraped out. A trench grew into a hole. Finally, a gravel layer was struck and deemed acceptable. Clean fill was brought in by the truckload and compacted firm, creating a generous pad for the concrete contractor to place the footings.

Saturday broke clear and crisp for our first Weekend Warrior Work Day. My friends Glenn, Laura, JC, and I staked straw bales along the south edge of the lot to catch any runoff from the soil piles. We cut and stacked firewood. We broadcast cereal rye (a quick growing grass) over the soil piles that, when it sprouts, should hold and feed the soil over the next 6 to 9 months. We picked up random debris and made a little campfire for a mid-afternoon coffee.


I feel pretty good about the eco-friendly choices we’ve made so far. We destroyed a wildlife habitat but promise to plant yard trees and pollinator gardens. The machines burned up a bunch of petroleum, but we’ll make good use of the bio-fuels. The topsoil is protected, and the erosion control barrier is biodegradable (no plastic netting or plastic fencing) and will be used later for mulch. And just as important: we worked together and had a good time!
Introducing Poem Home #2
March 1, 2024: Today is a monumental day for Poem Homes! I closed on the sale of a lot just down the street from Poem Home #1 (my own home). Construction will begin as soon as possible, starting with clearing the lot of trees and stripping away the topsoil for safe-keeping. Here’s a picture of me after we found and flagged the property corners. Other various color flags were placed by Digger’s Hotline, showing where underground utilities lie. Stay tuned!

On the Boards
March 1, 2024: It’s been 2 years since I brought you up-to-date on my progress working with homeowners interested in building super-insulated,net-zero or net-zero-ready spaces. Of the 6 homes I featured in my March 2022 “On the Boards” blogpost, 4 were built. I hope to show you pictures soon. Two homes are on indefinite hold, due to rising construction costs and difficult timeframes.
P.S. “On the Boards” is designer-speak for “Watcha Working On?”
Frustrated by the slim pickings and poor condition of the housing for sale in Spring Green (pop 1600), my determined clients figured it would be more satisfying and in the long run more economical to build new. There was a strict budget, but by keeping the form and details simple, we could use higher quality materials and allow a few splurges. I chose Zip System R-12 sheathing on a 2×6 frame wall for a total R-value of 34. The ceiling was insulated to R-49 and R-13 thermax was attached to the interior face of the basement walls. My clients are delighted with the house and moved in last month.


Work-from-home is common now, but some people still want a bit of a commute. How about a scenic stroll from your country home to an all-purpose garage–homebrew kitchen–office not far away? The exterior takes its cues from my client’s Taliesin Architects designed prairie style home, with a lighter band of stucco above a darker band, both in rich earthy tones. Our bold move was to attach the hip roof of the office to the spacious volume of the garage and kitchen, thereby fusing a prairie element to a shed roof, expansive enough for a large solar array. The walls call for 2″ of foam attached to the sheathing on a 2×6 wall, for a total of R-30. The ceiling calls for R-60 in the vaulted truss space. Plans are out for bid.

With pleasant views all around, an oak grove for shelter, and a sloping meadow facing southeast this home nestles easily into the site. The small footprint belies all the extra space gained with a walkout basement and under-the-eaves studio above. Preliminary plans call for an R-45 double stud wall, and R-60 within site-built rafters at the ceiling. Preliminary Plans are complete. Final Construction Plans are on hold.


It was a pleasure working on this handsome family home with a semi-attached barn-look garage. Children’s bedrooms are in the walkout basement, with the parents suite on the main floor and tucked behind a work-from-home office. This home plans for R-45 double stud walls and R-60 to 80 on the (non-habitable) attic floor. Plans are out for bid.


This large and striking home will sit atop a meadow, now planted in native prairie by the owners who long to move from the city and enjoy this special spot. Preliminary Plans call for R-45 double stud walls and R-60 in the vaulted ceilings. Some revisions to the Preliminary Plans are pending.

A cabin on the North Shore of Lake Superior is a wonderful vision, and I was eager to help my clients see their graph paper sketches transformed into fully scaled plans and a 3D model. This project is on hold.

When your house is too small to host your extensive family, who love to gather to cook, eat, play cards, and hike around the farm, you build a party barn—right? This design calls for an R-45 double stud wall and R-60 in the vaulted ceiling. This project has received preliminary zoning approval. The next step is finding a suitable general contractor and preparing Final Construction Drawings.


Roadmap to Net-Zero
November 16, 2023: Writing clarifies, and putting together a piece for my most-relied-on publication, Greeen Building Advisor, was an honor and very satisfying experience. Anyone who knows me well will know that (hopefully, only when asked), I’m not shy about making my opinion known or giving out advice. When it comes to home design, I came up with this pithy statement:
“Become curious about the space around you.”
Amber Westerman
In the article, I lay out 7 steps in the design process, with links to free or low-cost calculators, websites, or software that make the work easier.
- Think in 3D
- Know your Budget
- Study the Site
- Do a Heat Loss Calc
- Get a Blower Door Test
- Chose HVAC Equipment Based on Data
- Size a PV (photovoltaic) System
The upshot is that if you use space wisely, and insulate and air-seal beyond IECC (residential code), you can downsize the equipment needed to heat, cool, and power your life.

“Great article. You are a gifted communicator using words, pictures, and illustrations. This article is a great help to those of us contemplating building something similar”.
Green Building Advisor reader
Another Year, Another Fair
June 15, 2023: Like shining an apple (only a little more harried), I’m putting the polish on two presentations for this year’s Midwest Renewable Energy Fair. Both are topics I took a big bite into while building the Poem Home featured on these pages:
How to Reduce Construction Waste
A Barrier-Free and Non-Toxic Home Explained
When I began my research in 2018, actionable information was hard to come by. It still can feel that way, because these are big topics and uh…..things change. But it’s gotten easier. More and more people are working these topics, sharing their information, nudging industry, and offering alternatives to business-as-usual.
“Say NO to a Dumpster!” is how I begin my Construction Waste talk. I found logical (and a few unconventional) ways to save money and the environment by drafting up “cut plans”, using bio-degradable materials, and donating, repurposing or recycling packaging and excess materials.

“Be a Host, Don’t Be a Jerk!” is my warning for the Barrier-Free talk. I show pictures of my house and how I…so far…fall short of being a gracious and generous host. The entry path from the street to my front door is still gravel. But, should they stay overnight, they’ll enjoy the accessible shower!
I tend to be an open-windows fresh air freak, and can worry myself sick over what we’re doing to our precious planet. But I count my blessings that I don’t suffer like some people do with asthma, allergies, and chemical sensitivities. For the Non-Toxic Home Explained talk, I present the “Top 6 Things to Avoid”, share my material picks for Poem Homes, and a list of websites for more information.

The Fair runs from Friday June 23rd through Sunday June 25th. The keynote speaker on Friday evening is Amy Goodman. My talks are on Sunday at 11 am and at 1 pm. I’d love to see you there!
How I Built a Net Zero House
February 17, 2023: That’s how I’m going to start and then I’m going to talk through it step-by-step to whoever’s interested at the upcoming Duluth Energy Design Conference, on February 21st. This will be the furthest away and most professional audience I’ve presented to and I’m pumped to do well.
I’ve had a few “issues” now that I’ve gone through 3 winters…..and I have data. I’m going to fess up about some problems with condensation and uneven heat. And I’m going to brag about my net-zero status and how truly blessed I feel to live here.
In my first winter, I had liquid condensation and chunks of ice clinging to the corners of my windows during cold snaps (let’s say 10 degrees and below). I wiped it down, ran fans, and chalked it up to the conventional wisdom that “it takes 1-3 years for a new house to dry out”.

But I had the same problems the second winter and now this one. My big revelation came when I borrowed a good humidistat (no, the hardware store one wasn’t accurate enough) and compared my house with Dave’s.


Dave moved into his new house next door last fall. It’s very similar to mine: slab on grade, 12″ thick double stud walls with dense pack cellulose, a super-insulated ceiling, Marvin fiberglass windows with standard glazing, and MemBrain installed as an interior air barrier. He heats with a Mitsubishi Air Source Heat Pump (ASHP) like mine and brings in fresh air with a Lunos Heat Recovery Ventilator (HRV) like mine. But he’s had no window condensation and certainly no icing.

The only thing we could think of is that he doesn’t have house plants. Yet.
It could be that, or it could be that he runs his HRV on high. I usually run mine on low because on high it’s too noisy. He also has his ASHP located in a more favorable position: in the main room on the lower level, not in the loft like mine.
In any case, the humidistat told the story:
Amber: Relative Humidity 38 – 45%
Dave: Relative Humidity 20 – 25%
I’ve since adopted more aggressive tactics (no, I haven’t thrown my plants out in the snow). Running my HRV on high and running a small fan in the loft on high to better distribute the heat pouring out of the the ASHP, I was able to bring the humidity down to 30% (but it liked to go up to 36% when I wasn’t looking). Now we just need a cold snap to see what the windows do. But you probably don’t want that and I don’t blame you.

A happier topic is the data on my solar production. I’ve updated the “NET ZERO” page on my website, and if you’re wondering whether it’s possible to go all-electric and ditch fossil fuels, check it out!
OPEN HOUSE Monday November 7, 2022
Monday November 7the from 5 to 7 pm: Join me and other business leaders in Spring Green as we mingle and talk about eco-friendly housing and how to get more built. Thanks to the networking magic of our local Chamber of Commerce, I expect a good turnout for this month’s “Business After Hours”. Here’s what they’re saying:
“This forward-looking home was completed in 2020 by Amber Westerman Building Design. Amber lives and works in the home, and uses it as a model for the construction arm of her business, Poem Homes.
You’ll tour a modest home with a modern sensibility. At only 1208 square feet, the home is spacious, with a linear kitchen tucked under a loft and two bedroom suites flanking a generous living area. There’s a feeling of shelter and of a life lived close to nature.
Indoor air is healthful, with building materials and finishes selected for their non-toxic content. Rustic wood, stone walls, and raw concrete contrast with more polished surfaces and furnishings to create an authentic and appealing atmosphere that blends inside space to outside space.
The home is super-insulated and net-zero. Roof-top solar panels supply all the electricity that’s needed for heating, cooling, and plug loads. Amber’s monthly energy cost is just $6.50.
Look around, ask questions, and learn how a few simple design strategies can improve your own home or one you might build someday.“

Ecos Paints
August 8, 2022: When it comes to wall paint, I have just a few simple criteria: it must be easy to apply, durable, and non-toxic. Mainstream paint companies have the first two down pat, but non-toxic? Not so much. That’s why I chose Ecos Paints, a small company in South Carolina who actually list their ingredients right on the label. Check out what they said about my project in their latest blog post. A Demonstration Home in Wisconsin

Taliesin Summer Camp
June 30, 2022: I was thrilled to be invited to talk with the high school students attending Taliesin’s Summer Camp. Their topic this week is “From Detail to City: Exploring the Concept of Scale in Architecture & Design”. Earlier in the week, they explored the scale of personal space. Later in the week, they’ll explore the scale of the city. My mid-week presentation was on the scale of a house.

I brought in the cardboard model of my first Poem Home design, the Construction Drawings for the house built in Spring Green (the students are deep into section drawings right now), and slides showing the construction from excavation to framing to insulation to trim and finally to the installation of the solar panels. We passed around material samples as we followed the story: styrofoam, 2×4’s, plywood, cellulose, housewrap, wood and cement siding, tape, gaskets, steel angle iron, and other fun stuff.
We talked about drawing software, what things cost, how an eco-friendly house can fit into a neighborhood, and how to know in advance if your design will work. The students asked good questions and were able to draw on their personal experience to help them understand design concepts, how people use space, and how we create community. For me, the most rewarding idea we discussed is how the study of architecture involves subjective (and sometimes objective) observation combined with the designer’s imagination. Architecture is a fascinating field for these student to consider as they make their way. All I can say is: Look out world!
Energy Fair
June 10, 2022: Do you like to learn new things, think new thoughts, and meet new people? Does “Summer Camp for Adults” sound like fun? That’s why I make a pilgrimage every June to see what’s going on at the Midwest Renewable Energy Fair in Central Wisconsin.

Sample a variety of workshops, stroll the fair grounds for interesting displays, catch lunch from a food cart, and pop in to the Big Tent for speeches (of the interesting kind), music (of the danceable kind), and people watching (of kindred spirits). I’ll be giving 3 workshops. Will you stop by and say hi? I’d be delighted to see you!
How I Built a Net-Zero House
Saturday June 25th at 3 pm
How to Minimize Construction Waste
Saturday June 25th at 4 pm
A Barrier-Free and Non-Toxic House Explained
Sunday June 26th at noon
Fine Homebuilding
May 19, 2022: It’s been my career-long goal to get a major piece published in Fine Homebuilding and with the completion of my first Poem Home, I made the pitch—and it was accepted! The process of working with the editor, the illustrators, and the photographer to put this professionally composed and colorful piece together was gratifying.
You may find it interesting that my pitch rose to the top of the pile because it’s in the Midwest (most of their featured projects are in New England), it’s small at 1208 square feet, and it was built by a woman! I hope you’ll check it out.
https://www.finehomebuilding.com/digitalissue/485081
NOTE: Some people are having glitchy problems with the link above. Here’s the PDF version: https://www.finehomebuilding.com/membership/pdf/482537/021307048.pdf

On the Boards
March 7, 2022: “On the boards” is designer-speak for “whatcha working on?” Since I began building my first Poem Home in 2018, I’ve had the opportunity to design 6 new super-insulated homes for my clients. Each one reflects their unique place in the world and their owner’s design sensibility.
Up north, overlooking a pristine lake (a God’s Drop if you think like Thoreau), an iconic-looking summer camp is taking shape. This stunner is not only complex and a serious undertaking, but also being built almost entirely by the owners, a couple who are truly living their dream. This home has 2×6 framing and 4 inches of sheet foam for an R-40 wall.


Further south and situated along a quiet street in a mid-size city, will soon be an accessible home for a single retiree. It’s an R-45 double 2×4 wall house on a slab, with an R-60 vaulted ceiling in the great room. The design is modern and bold, with a single concrete pillar holding up the front porch.

Overlooking the fields and forests of central Wisconsin, a simple and sturdy home will be built by a capable couple with young children. It’s also a double wall house on a slab with a vaulted ceiling. The exterior will be clad in “barn steel” and the south facing windows will be shaded by a wood post & beam “rooflet”. At one end of the house is a 3-season room with bi-pass windows that can be thrown open in good weather.

When you have an alley behind your house and you need a garage and a workshop, why not also add solar panels, a hot-tub deck, and guest quarters? This double wall house on an ICF (insulated concrete form) foundation with a vaulted ceiling and triple-pane windows will meet the highest standards of energy-efficiency. It will be a place for fun, family, friends, and projects.


A lovely meadow overlooking a quaint town is the perfect place to be. This home will be enjoyed by the owners as a second home and also rented out to the many tourists who frequent the nearby art galleries. The design is an almost-replica of the Poem Home in Spring Green, except the second bedroom and bath are in the lower level. This home will easily achieve net-zero.


Could it be a trend? This ambitious young couple are going to “GC” (general contract) and do most of the work to construct their own home. Located down a country lane and overlooking the Wisconsin River Valley, it will make an enviable retreat from the world. My clients came to me with a well thought out floor plan, a building section, and a list of specifications that needed only a little refinement on my part. It has 2×6 walls with 4″ of sheet foam on the exterior, an ICF foundation, and high-heeled roof trusses for all-around really great R-value.


Do you know someone (maybe you?) who’s thinking about a new house and understands that we really can do better than conventional construction? I have a wealth of knowledge and experience that I’m happy to share, in whatever way is most helpful. Let’s get in touch!
Zero Energy Project
January 14, 2022: I’m thrilled to be included in Zero Energy Project’s newsletter with my article “My Net Zero Home Got Me Through a Wisconsin Winter-Here’s What I Learned”.

Zero Energy Project has tons of good information about how to improve our built environment, and a “zero energy home professionals near you” search option. Did you know there are only 9 zero energy projects listed within 100 miles of Madison? People, we need to get going!
I’m going to be taking a deep dive into their articles on zero carbon building. Instead of just looking at operational costs like we do with “net zero”, “zero carbon” looks at the embodied energy of the materials used to make the building. Stay tuned: if I can figure out the math, I’ll let you know how I came out on that score.
OPEN HOUSE Saturday October 23, 2021
Saturday October 23 from 10 am to 6 pm: When I show people the house and we stand in the yard and look up at the solar panels on the roof, they often say something like, “That’s it?”
Yes, that’s it. If you do all your details right, and the house is relatively small—this is how many solar panels you need. It doesn’t look like so many. It doesn’t look impossible. And it’s not crazy expensive. Stop by and have a look, ask me questions, and get some ideas about what you might do to ease the burden your house places on the environment.

OPEN HOUSE Saturday, October 2, 2021
Saturday October 2 from 9 am to 6 pm: Solar energy sites across the United States are open for tours on Saturday, and Poem Homes is on the tour map! The tour is organized by the American Solar Energy Society. I hope you’ll stop by and have a look, whether your interest is in solar or small homes or sustainable materials.
Finishing Touches: OUTSIDE
September 27, 2021: Flowers and vegetables run riot right outside the back door captures the essence of the way I want to live. I gave my long-time neighbor and friend Lew Lama of Wood & Stone Works free reign—but for a few flags stuck in the ground where I envisioned a walled garden. It all started when a dump truck off-loaded a few boulders found on a farm in nearby Ridgeway. Then, salvaged barn foundation stones and other stones of mixed provenance snagged on the cheap as overage from Lew’s other projects. These were sorted and stacked for bottom layer, middle layer and cap layer. Loads of crushed limestone, washed river stone, and assorted fill material stood at the ready.


The wall rose steadily, battered back and keyed together to reach a string line set at house grade. The boulders anchored the corners and mid-points, only later revealing themselves to be steps. Large stones were set on the diagonal. Smaller stones filled in and arched over.


Chunks of old lime mortar and patches of lime-wash told the story. Shell fossils were found. Finally, the cap—a rhythm of cut stones and rough stones—a handy walkway from one end of riotous garden to the other. Thank you Lew for this sublime creation that may very well outlast the house!


I wondered how we might use up some long and stout but too-wavy pine boards—left-overs from the loft build. After I over-filled the garden with topsoil, I needed a way to contain it on the house side. My friend Marken D’elene of Savanna SG figured out a fast, simple, cheap, and reversible way to hold back the soil—he simply set the boards on edge, ran a few screws down, and anchored them with 3 foot long steel form stakes (already black). He charred the back side of the boards with a blow torch, an ancient Japanese method of preserving wood called Shou sugi ban. There’s a pleasing unity of form and material as you gaze out to the garden while tucked into the loft. You see knotty pine and you see black bars.

When I was planning the house, I hadn’t fully appreciated how much we would end up using the north facing breezeway. Sitting there and even walking back and forth from garage to house felt too exposed to the neighboring house. I had intentionally set the garage wall close to the north setback line to maximize my south yard and to extend views from my mostly south-facing windows—-but now it felt like a mistake.

My solution was a 1×4 pine board privacy screen, gapped to match the roof soffit. Little did I realize how bouncy and insubstantial the boards would be when spanning the 10 feet between posts nor how my carefully planned gaps disappeared when one board bowed down and the next one bowed up. I called my good friend Mark Morgan of Bearpaw Design and Construction in a semi-panic, but he had a solution right away: get a strip of screen molding and weave it through the boards.


Like magic, the whole thing stiffened and the inconsistent gaps became lost in the overall pattern. The screen has become one of our favorite features of the house—it gives privacy while still offering ground-views and sky-peaks, it adds a subtle texture, and it feels enclosed in a breezy-like way. Thank you Mark for always having a good idea!

The last and final project for Poem Homes 2020 was a shade trellis over the patio door. The design was worked out between me and Bob Rowen of Rowen Electric before the walls were enclosed. We knew we had to get some blocking between the studs at the appropriate height.


The idea was to use steel for the structure and boards for the shade in a way that the boards could be switched out when they eventually rotted. Bob devised a simple scheme using angle iron and flat bars that uses a minimal amount of material—stainless steel is expensive but worth it because it will never rust. The design repeats several features found in the loft—suspending a structure from above and the use of angle iron.


I doodled iterations in SketchUp until we had something we liked. The steel was cut, drilled, and installed by Mark and Joel Morgan of Bearpaw Design and Construction. Luscious lengths of 2×6 cedar were spaced and bolted to the bottom flange of the steel brackets. When the sun shines, a lovely pattern of stripes are cast on the Living Room slab. Really beautiful!

Finishing Touches: INSIDE
September 27, 2021: A few years ago I clipped a quote from Dwell magazine that helped me better understand what I was thinking about with Poem Homes. Founder Lara Deam put forward that “modern” isn’t a style.
“Modern is a way of communicating with our culture and attempting to make our dreams—big and small—come true. While I love a flat roof as much as the next person, modern isn’t just about design details. Nor is it necessarily a way to live with less or build more cheaply—although both are worthy goals. Modernism is an exploration of authenticity, materials, and function; it involves problem solving, testing different ideas, and expressing a little idiosyncrasy. Most important, it’s about work that responds to the time in which we live.”
Lara Deam, founder of Dwell
I’ll add to that: Modernism is about building a community of makers—traditional tradespeople and freelance craftspeople who come together to test their skills and try something new.

I no longer notice it, but my visitors do: the house is infused with the scent of fresh wood. The loft was built from a towering white pine that was felled just a few blocks away. My friend Jim Birkemeier of Spring Green Timber Growers cut and milled the wood, set it to dry in his solar kilns, and rough sawed it into the 2×6 joists and 2×8 ledgers I needed for this project. I left it raw and unfinished: random smudges and strap marks still show. A big thank you to Bob Rowen of Rowen Electric for masterminding the build.


Leftovers were used for the kitchen’s floating shelves. My finish carpenter and friend Eric Wallner of WALLNER DESIGN-BUILD and I brainstormed the idea of hooking the ends around the drywall window jambs and setting one shelf high and one shelf low.

Window sills are extra-thick planks of rough-sawn cedar (ordered from the lumberyard). They visually extend to the exterior sill that acts as a drip cap above the course of lower lap siding. Ditto for the door jambs—a visual trick that channels Frank Lloyd Wright who famously set panes of glass into grooves cut into stone to “dissolve” the barrier between indoors and out. I was adamant about keeping the texture, but Eric wisely counseled that a light skip-sanding would take down the splinters. A damp cloth run over the surface is all that’s needed to wipe away dust.


The rustic nature of the loft and cedar trims contrast with shinier finishes and materials worked smooth by the human hand. The windows are wrapped in drywall, which slots into an integral black plastic channel (called a sheetrock return) for a look that’s clean and shadow-free—and much cheaper than the more conventional wood frame.


Interior doors are off-the-shelf birch veneer single panel prehungs from made-in-America Koch Doors. The engineered wood cores are “CARB phase II compliant” for reduced formaldehyde emissions and the finish is low VOC. The jambs, casing, and adjacent baseboard are finger-jointed poplar, primed in the factory and finished on site with non-toxic, zero-VOC Ecos Paint in the same white as the walls (but one step up in sheen). I like how the casing and baseboard blend into the walls and allow the doors and their black hinges to pop. I’m grateful to Eric for his sure hand and keen eye—each reveal is perfect.
Eric also built the ladder, the refrigerator panel, and the loft window seat. I fiddled around on SketchUp until I got a design I liked.


Eric refined the details (some of which are best felt, not seen) and rightly insisted on an inset skid strip at the front edge of each tread. The ladder is made from stock 2×6 Doug Fir and the handles are from Bold Manufacturing and Supply.

A pet peeve (designers relish pet peeves) are bulky refrigerators. With my budget, I couldn’t consider a cabinet-depth refrigerator or even an attractive one that could stand on its own merits. Instead, I asked Eric for a plywood wrap that would complement the unit he built for the entryway. He devised this attractive and smooth-as-silk built-in in a way that can be minimally altered should the refrigerator be replaced with a larger one. He used 3/4” thick 11 ply formaldehyde-free Purebond birch plywood, tweaking the design and edge-gluing where needed to minimize waste. A not-to-be-underestimated advantage of a refrigerator panel is that it eliminates a crumb gap.

Throughout the build, I stacked siding cut-offs and 2x scraps in the garage and it was to this pile that I directed Eric when it came time to build the 27 foot long window seat along the back side of the loft (He did have to pick up a few sheets of plywood). His design is simple and elegant. The seat floats above the mechanical chase and juts back at the ends to create tabletops. Custom cushions were too pricey, so after some online searching I found narrow futons (sold as RV mattresses) with a non-toxic mix of cotton and poly fibers, wrapped in a zippered cotton canvas. What was a walk-through space is now transformed into a place to read and lounge and gaze down at the garden.


A small home like mine can live bigger with a few sleight of hands. My good friend Megan Fields of Rivendell Design Works sewed a curtain that when drawn back—voila!—reveals the washer. What was a small passageway between bedroom and bath becomes a generous working area for laundry sorting. Thank you Megan for finding just the right shade of blue!


Dining in semi-darkness began to seem normal, even inevitable. I couldn’t find a light fixture I liked or could afford. In stepped dear friend Cait Boldt who scoured resale shops for just the right piece at just the right price. The texture, color, and vibe go with the other objets d’art that came with me from my old house. Cait also found several new paintings and photos for my collection.

I like to think that my house is, like Lara Deam says, authentic and a little idiosyncratic. It’s a home that reflects me and my problem-solving and color-chosing and proportion-deciding friends. I’m deeply grateful.
Mind the Gap: Take Three
July 9, 2020: The Day of Reckoning had arrived. When I first set out to build an energy-efficient house, I knew that I had to solve three key problems:
- How much insulation to use in the slab, walls, and ceiling
- How to seal the inevitable gaps between different building materials and where mechanicals penetrated the building shell
- With such an air-tight envelope, how to get adequate fresh air inside


While still in the planning phase, I contracted with Jim Kjorlie of Kjorlie Design Services to test my progress at the completion of three milestones. His first visit was after we were “dried in” (roof on and windows in) and I had meticulously taped, caulked, or foamed gaps in the exterior shell. I reported his test results and what we found out in my blog post “Mind the Gap: Take One”.
Jim’s core business is testing Focus on Energy (Energy Star) homes for large builders—the kind who put up look-alike homes across cornfields on the outskirts of Madison. To be certified, they need to test out at 4.0 air changes per hour (literally the amount of times the volume of air in the home is replaced through leaks in the building shell). To their tribute, these builders are averaging 2.0-2.5 air changes per hour. Code won’t red-tag you unless you test leakier than 7.0 air changes per hour.

The lowest number Jim has seen was 1.2 air changes per hour. I told him at the outset that my goal (for the final blower door test) was 1.0. Here’s how I did:
Blower Door #1=590 cfm or 2.20 ach@50Pa or 0.13 cfm50/sf shell
Several months later, Jim came back when the ceiling was insulated and drywalled and the mechanicals were in and sealed to the exterior shell—but before the walls were insulated and drywalled. It was my last chance to find any holes before they were forever covered up. We did find holes. See “Mind the Gap: Take Two”.
Blower Door #2=230 cfm or 0.86 ach@50Pa or 0.05 cfm50/sf shell
Today’s test was not so much about finding holes as it was to see how well the fresh air systems were working and to award me a final score for all my efforts. The walls were insulated and drywalled. Cabinets and other finishing touches were going in.

Jim tests with a contraption called a “blower-door”. A fan and related gauges simulate a 20 mile per hour wind bearing down on all sides of the house—and while a good proxy for our Wisconsin winters—it’s the industry standard for measuring air-tightness. The moment of truth was at hand.
Blower Door #3=101 cfm or 0.38 ach@50Pa or 0.02 cfm50/sf shell
Reader, this is a VERY GOOD number. My house will save energy because it will lose so little, but the more important point is that the wall and ceiling cavities will stay dry. Any hole, however big or little, lets in moisture-laden air. Warm moist air from inside the house in the winter makes its way through and condenses on the cold surface of the exterior shell. In the summer (when air-conditioning) it’s the reverse: warm moist air migrates inward toward the cool surface of the interior drywall and condenses. The walls and other structural cavities of an airtight home stay dry and don’t degrade; they are free of mold, mildew, dust, allergens, and pests.
Why is this obvious lesson in physics still a new concept in residential building? Take a look at this recap of What We Knew back in 1979.
An airtight home can of course trap indoor pollutants. The pandemic has raised awareness about the quality of our indoor air. We now know to worry about viral transmission as well as the more familiar but still vague dangers of mold, CO2 (from breathing), formaldehyde, VOC’s (volatile organic compounds) and other additives embedded in building materials and everyday household products that can off-gas, causing both short-term breathing problems and long-term health concerns.
Codes and the residential building industry are way behind on implementing best practices now recommended by building scientists. While improvements in building materials and demand for energy-efficiency have made homes more air-tight, eliminating harmful products is rarely discussed, and properly sized mechanical ventilation for good health is hit-or-miss.
See my blog posts for detailed information about the non-toxic products I chose at each step of the way. The EPA has some good information about IAQ (indoor air quality). Also check out Healthy Building Network.
The standard market-rate home relies on exhaust-only bathroom fans—the kind that exhaust stale air but pull makeup air through the cracks and crevices of the building envelope. This accelerates moisture dump in wall and ceiling cavities, and delivers “dirty” air to the inside.

A better choice—and the one I used—is what’s called a “balanced heat recovery ventilator” or HRV. These fan systems exhaust and draw in the same volume of air. This balanced air flow neither pressurizes or depressurizes the building shell—a phenomenon that helps stop unwanted air infiltration through holes. These types of systems also recover the heat energy of exhausted air for further comfort and energy savings. See my blog post “Electrical & Mechanical” for a detailed look at the Lunos HRV’s we installed.


There’s nothing more satisfying than learning something new, seeing how it can apply to the situation at hand, defying all nay-sayers and bean-counters, executing said new thing to the best of one’s ability, and having a hard number that proves success!
OPEN HOUSE Sunday September 26, 2021
Sunday September 26 from 10 am to 6 pm: Our work is done. Except for a few little touch-ups and someday a patio or deck. I would love to have you over for a look around. The house has continued to perform well from howling winds and minus 17 degrees this past winter to the muggy 95 degree weather we suffered through this summer. This first Poem Home is not merely net-zero—-after one year living here, I’m proud to report that the rooftop PV solar panels produced 53 percent more electricity than the house consumed!
The house got a full-on stress test recently when my daughter, her husband, and kids age 3 and 5 took over the place for the summer. The living area was big enough, there was plenty of counter space in the kitchen, and while an extra room for an office would’ve been nice, remote working got done. There were plenty of places to play both inside and out, what with art projects on the porch, hobo encampments in the garden, and on rainy days puzzels and books up in the loft AKA the “Kids Clubhouse”.
“The best places always make you feel like all is well with the world”
ANDREI CODRESCU
Home and a sense of place has always been important to me. That’s probably what drew me in and kept me engaged in the design business all these years. And as a young teen, I began reading about solar powered homes and what was called “appropriate technology” in the early 1970’s. Building this house and showing it to my neighbors and friends and people from far and wide who have travelled here to see it and learn from it has been my great pleasure.


My house is sweet, but not as sweet as this little nest. Talk about local materials. It’s lined with this shaggy dog’s fur!
Barrier-Free
September 11, 2021: If you want people to visit you and you want to be a gracious host, you need a home that’s barrier-free. Every one of us is a sprained ankle or aging knee away from needing a home that’s easy to navigate. At minimum, this means a zero-clearance entry and a bathroom on the first floor. If you want to “age-in-place” the list gets longer.
My one-story house is designed to be convertible to a fully accessible home. The major features are in place, but some things need to be added and some things subtracted. Safe passage from car to inside is key and as it is now, my design falls short. I have yet to install a smooth, non-slip walkway from the street to my front door. The entry porch is covered but not enclosed, and wind and rain do get in. The front door and door to the garage have ADA (Americans with Disabilities Act) low-threshold sills, but both are a 7” step up from grade. Future plans call for a non-slip deck that will connect the two doorways. Of course, a directly attached garage with a concrete slab continuous to the street would be ideal.


The entry door as well as the interior doors are 36” wide and have lever handles, not knobs. If fumbling for keys is a problem, the deadbolt can easily be switched out for a keyless punch or fingerprint pad. There’s negotiating and approach space on either side of doorways, especially important when a walker or wheelchair is used. The windows are casements and awnings with smooth crank mechanisms—much easier to operate than sliders or double-hungs. However, some windows are too high to access and the patio door slider is heavy. Motorized openers controlled by hand-held remotes could be installed.


Both bathrooms are on the first floor, and can be made fully accessible with some adaptation. While the space is compact, it meets the basic ADA clearance dimensions. Public restrooms are huge to allow for a wheelchair turning radius of 60 inches, but at home a T-turn can serve—in my case by using the adjacent bedroom or hallway space. For good reason, public restrooms have outswinging doors. Should someone fall in my master bathroom, the sliding barn door provides rescue access. However, the main bathroom door swings in—a potential hazard.

The bathroom sink is set in a 36” high vanity cabinet with counter, providing a good gripping edge. The working space is nice to have, but at 42” wide it takes up a lot of room. If side-transfer from a chair to the toilet is needed, the vanity could be switched out for a wall-hung sink. This arrangement would also allow a wheelchair user to approach and use the sink at a height that works for them. Any exposed supply or waste pipes should be insulated or covered to prevent harm. The mirror could be lowered or switched out for one that can be adjusted at a downward angle.
The bathroom sink and shower faucets have single-lever ADA controls. The toilet is ADA height (16-3/8” plus height of seat) and is spaced away from the sidewall for an 18” clearance to the centerline. The one-piece design and skirted trapway are a bonus for easy cleaning. The slow-close seat is quiet. It has a push-button flush but better would be a lever control for those with arthritis or other manual challenges.
I installed 3/4” plywood blocking between the studs before the drywall was installed to provide anchorage for a 52” long ADA grab bar that doesn’t look like a grab bar. I can add a second grab bar behind the toilet if needed. Recommended height is between 33-36” above the floor. The toilet paper holder also meets recommendations. The plywood blocking continues across the wall and through the shower.

The shower is curbless. Before the concrete truck arrived, my carpenter placed a 2×6 frame the size of the shower to block the pour. Later, the tilesetter filled it with Sakcrete, a Schulter pan, and a 1” grid of non-slip tiles. The shower has a 36” wide opening, and measures 36” x 72”. No door or curtain is needed—eliminating a possibility of grasping for something that’s not stable (and eliminating a cleaning hassle).
A vertical grab bar at the opening serves upon entry or exit and when standing or sitting. A movable shower seat could be used, and is more flexible than a built in tiled seat. Placing the shower control at the entrance instead of in the end wall would be a safer choice. Likewise, a movable or handheld shower head on a slide bar would be more accommodating. The anti-scald faucet I chose has a dual-control that allows you to maintain a preset temperature while adjusting the flow.


In the kitchen, food is within arms reach in the pantry, and pots & pans are in the full extension drawers. Everyday dishes now stored on open shelves above the counter could be relocated in the drawers. For future wheelchair access, one or two of the standard height (36”) base cabinets (and the sink cabinet) could be removed and replaced with a 30” high counter with knee space below. Instead of knobs, I chose long graspable handles. Note the ends of the handles return into the cabinet face instead of sticking out where they can catch on clothing.
My straight-line plan is good—it allows for easy sliding of heavy objects between sink, stove, and refrigerator. My stove could be switched out in favor of an induction cooktop with front controls for better safety and access. My refrigerator could be switched out for a side-by-side, for access to the freezer. My clothes washer/dryer could be switched out to a front-loader.

Good lighting is essential as we age and is a safety measure for everyone. I’ve found that my choice of window size and placement has worked well to create an evenly lit interior whether it’s sunny or cloudy outside. One advantage of a small house is that each room (excepting the bathrooms) can have windows on 2 sides, eliminating glare as well as dark areas.
Just as important is the quality of artificial light in your home. Incandescent bulbs replicate natural daylight perfectly, with a CRI (color rendering index) rating of 100. This makes our interior surroundings look more normal and allow us to see details more clearly, easing eye fatigue and strain. But no question, LED bulbs are they way to go because they use 75%-90% less electricity and can last decades. However, a CRI rating of 95 is about tops. The track lights in my kitchen have a CRI of 80 (considered “good”) and are easily adjusted for shadow-free work. The bathroom mirror light has a CRI of 90. There is also a wet-rated LED bulb in the shower.
Electrical switches and outlets are within ADA standards at 42” and 16” above the floor. I chose standard toggle switches, but rocker switches are easier for most people to use. The main panel is within reach in case of emergency or a tripped breaker.
Control of the interior environment is important as we age and tend to be more sensitive to hot and cold. The thermostat can be controlled by a hand-held remote. The bedrooms are pre-wired for electric-resistance baseboard heaters if needed. And most switches are wired to control the top outlets in a room, for easy operation of fans, lamps, or other electric devices.
What is more life-giving than fresh air? My home was designed from outside to inside to resist mold, mildew, and pest infestations. The materials and finishes were selected for their non-toxic qualities. Here’s a quick run-down, but please see my other blog posts for more specific information:
- SLAB radon mitigation system, non-toxic zero-VOC sealer
- WALLS & TRIM non-toxic zero-VOC paint
- CABINETS, DOORS, COUNTERTOPS low formaldehyde plywood/particleboard, low-VOC finish
- RUG natural wool, no backing
- HEATING & COOLING ductless, quiet, single source forced air
- VENTILATION ductless, ultra-quiet filtered fresh air for each room

An accessible and barrier-free house not only has safety and functional features built in, it’s clean and uncluttered, with visual contrast throughout. A fall can be devastating. Near-at-hand storage keeps household objects in their place. A continuous slab floor means no steps, interior thresholds or transitions—except at the tiled showers. I do have an area rug in the living room, but not in traffic areas. I’ve found that the concrete is slippery when wet, and caution people coming out of the shower or when spills happen in the kitchen. Contrasting colors at changes in surfaces are important visual aids. The shower’s tiled floor is darker than the adjacent slab. The countertops are black and darker than the cabinets and adjacent walls. The doors are darker than the walls. Let me know if you have any questions, suggestions, or experiences that would help us all think smarter about inclusive design.
Plumbing
August 24, 2021: My goal was a simple, cost-effective plumbing system that minimized both cold and hot water use. I looked at—but rejected—a number of newer products and innovative strategies that (for my situation) seemed too expensive or too complicated. I reasoned that my habits were conservative already, that water here isn’t scarce or expensive, and that solar—not a fossil fuel—was heating my hot water.
WATER CONSERVATION The average American uses 88 gallons of water per day. Having done my share of camping and also living in an unimproved cabin for many years, I was confident I could beat that by at least half. If I just look at indoor use (by checking my water bill for the winter months only), I didn’t do too bad: 51 gallons/day. I used much, much more in the growing season while I was getting my yard and garden established: a shocking 400 gallons/day.
The Environmental Protection Agency has a lot of good information and a labeling program that can help you save on water. Wherever possible, I chose EPA WaterSense labeled products.

Toilets are the main source of water use in most homes, accounting for nearly 30% of indoor consumption. Older toilets use as much as 6 gallons per flush (gpf). My WaterSense labeled single flush toilet uses 1.28 gpf. A better choice would be a “dual flush” toilet (the kind with 2 buttons or levers)—which could save me something like 3 gallons/day.
Showerheads are limited to 2.0 gallons per minute (gpm)—the Delta unit I chose is rated at 1.75 gpm and claims to save on hot water with its innovative “thermal dynamic” design. It features a dual-control valve that allows you to turn off the flow of water mid-shower and still maintain water temperature for extra water savings while soaping up.

The bath faucet I chose meets the limit of 1.5 gpm. Interestingly, WaterSense is silent on kitchen faucets, though Wisconsin sets a limit at 2.2 gpm. The commercial style one I chose is rated at 1.75 gpm. I know it’s weird, but I like to hand-wash dishes and didn’t install a dishwasher.
Clothes washing machines are also not addressed by WaterSense, but the average Energy Star labeled appliance uses 13 gallons per load. To save on up-front costs, I bought a decades-old washing machine from my local appliance shop after they convinced me that it was so sturdy and simple it would probably never need servicing—unlike today’s bells & whistles models. However it has no water-saving features whatsoever, and may be using 30 or 40 gallons per load. All I can do is select for load size, and run it on cold.
Heating water for washing is typically a home’s second largest energy user, after space heating and cooling. As much as 15% of heated water is lost in distribution. Waiting for a tap to get hot isn’t fun, and watching all that cold water run down the drain is a drag. Back to back bathrooms or a compact arrangement of “wet rooms” with short pipes is an obvious solution—noted but not followed in my design. The two bathrooms in my house are at opposite ends, but do align with the centrally located hot water heater for straight runs. For no good reason other than I forgot to tell the plumber before he nailed them in place, my hot water pipes are sans insulation. Here’s a good article explaining how to optimize your system: “Why Your Hot Water Takes So Long”.
HOT WATER HEATERS Water heaters can be powered by gas, electricity, or solar thermal energy. They can be either “on-demand” (tank-less) or “storage” (with a tank).
Installing solar thermal panels to heat domestic hot water was for many years considered the most cost-effective way to transition to renewable energy. Solar energy can supply a significant amount of the heat energy needed, but it’s highly dependent on climate, solar orientation, and location. In all but tropical climates, some backup source of fuel will be needed—usually requiring a second tank to boost the insufficient temperature of the solar heated water.
According to GBA’s “Solar Thermal is Really, Really Dead”, this redundant system no longer makes economic sense. That’s because the cost of PV (photovoltaic) systems has dropped significantly. Another reason is that operational glitches are much more common with thermal systems, and finding installers or repair technicians can be difficult.
Tank-style According to“All About Water Heaters” the majority of water heaters sold in this country are tank-type water heaters heated by natural gas, propane, or electric-resistance elements. They’re widely available and inexpensive. Natural gas is by far the cheapest fuel, but electric-resistance are cheaper to install and they avoid the problem of venting.
Heat Pumps The newest technology to replace the common electric-resistance or gas-powered tank-style hot water heater uses a heat pump that extracts heat energy from the space around it. They represent the best value over the long term, but initial costs are high. In “Heat-Pump Water Heaters Come of Age“, the author explains that while the efficiency of electric-resistance water heaters is 100% (all the electrical energy sent to a resistance element is converted into heat)—-the efficiency of air-source heat pumps can be as high as 250%.
Besides initial cost and long payback period, there are other disadvantages. Heat pumps are bulky, noisy, mechanically complicated, rob space heat from the house during the winter, and require a condensate drain. According to energy expert Marc Rosenbaum, monitoring shows that the efficiency specifications provided by manufacturers of heat-pump water heaters are probably exaggerated.
For those households who have taken all measures to reduce their consumption, a high-efficiency, high-tech, expensive hot water heater makes less sense—the savings are too small to justify. On the other hand, for those households (or commercial buildings) that use a lot of water, heat pumps can pay off. A caution though: when large volumes of water are drawn off at once, efficiency suffers.
The best location for a heat pump is in a basement or large utility room where temperature drops of 2-6 degrees are acceptable and noise won’t be a problem (sound level can be 60 decibels—louder than a refrigerator). A small room isn’t big enough and the heat pump will over-cool the room—losing efficiency (warmer rooms are better). The room should be at least 750-1000 cubic feet, be above 50 degrees, be able to accommodate a unit height of 63-82”, and have a condensate drain.
Tank-less In “Are Tankless Water Heaters a Waste of Money?” the author explains that while more efficient that traditional tank-style heaters, tank-less heaters are more expensive. The appliances are mechanically complicated (and come with more maintenance problems)—meaning a few service calls could wipe out any energy savings. In one study, researchers concluded the natural gas tank-less heaters would break before they saved enough energy to justify their high cost, especially in retrofits.
On the plus side tank-less units are compact and can provide “endless” hot water. For single households or for families who use a modest amount of hot water, they might make more sense than keeping 40 gallons of hot water ready for use around the clock. A good application is a remote sink or a weekend home.
“Storage vs Tankless Water Heaters” points out that the electrical current draw is huge—40 to 60 amps if two showers are being used at the same time—this takes special wiring and special circuit breakers—both are expensive.
The author of “Point of Use Electric Tankless Water Heaters” declares himself an evangelical of the technology. While realistic about the problems, he’s installed several systems that work well.

I chose a 30 gallon Rheem Marathon: these tank-style hot water heaters are in a category of their own. They use high quality electric-resistance elements in a super-insulated seamless polybutylene tank. According to the forum on GBA “How to Chose an Electric Water Heater” these units will last much, much longer than enameled steel tanks—they simply can’t rust out or leak. The manufacturer backs this up with a lifetime warranty.
Because the unit is lightweight and doesn’t contain an anode rod, installation is easy and maintenance virtually nil, according to this review. The heaters are insulated with 2.5” of foam (free of CFC and HCRC’s) to R-20 and will lose only 5 degrees in a 24 hour period (compared to a standard heater that can lose up to 30 degrees).
According to Green Building Advisor’s Martin Holladay, the Marathon might use 4 kwh/day vs. a heat pump that might use 1.5 kwh/day. That said, he thinks the Marathon plus a few extra PV panels is a better bet than the current generation of heat-pump water heaters.
My plumber, Gerry Thuli from Collins & Hying ably installed my unit. He was skeptical that a 30 gallon tank would be large enough to meet a household’s needs, but a recent family visit proved that 2 showers can be taken simultaneously, with hot water left over for a third person to do the breakfast dishes.
OPEN HOUSE Sunday June 27, 2021
Sunday June 27 from 10 am to 6 pm: Stop by and have a look at our latest projects. There are only a few left. My friend and favorite carpenter, Eric Wallner, installed this 27 foot long window seat in what I’m now calling the Library. What was a walk-through space is now transformed into a place to read and lounge. If you sit down. You MUST sit down because the ceiling height in this not-covered-by-Code “attic” space is a mere 5 feet. That’s my office in the cubbie beyond.

Eric used mostly scrap from the garage, although a few over-priced sheets of plywood and 2×4’s had to be purchased for the structure. Under the seat are the mechanical runs, still accessible if necessary. Here’s what it looked like before, viewed from the opposite direction with the storage cubbie beyond.

I look forward to seeing you and showing you all the features that make this home both a joy to live in and uber energy-efficient!
OPEN HOUSE Saturday May 15, 2021
Saturday May 15 from 10 am to 6 pm: After Farmer’s Market and after brunch but before the day gets away from you, please stop by and see a nearly-complete Poem Home. It’s been 10 months since my last Open House and I bet you know why. I moved in and hunkered down and unpacked after 10 “homeless” years. It’s been a pleasure finding just the right furnishings and plants and decorative objects for this modern/rustic fusion of a design and I’m grateful to the many people in my life who’ve helped with ideas and gifts and things they made. My latest swoon are the massive oak stumps I traded for some consulting (thank you Paul and Burdell). When you visit, ask me about insulation, fresh-air systems, non-toxic paint or anything else you’re curious about or will help you make more environmentally sound decisions about your own home improvements or future dream home.


The Loft Explained
July 17, 2020: Perhaps the most common question I get is about the loft. My daughter’s was the bluntest: “What’s it for?”.
I’ll admit it’s unusual. Lots of modern-style homes and rustic-log homes have lofts but they’re living space like bedrooms. Mine’s more like a catwalk or an attic. By Code, my loft doesn’t qualify as “habitable space” because the ceiling is under 7 feet. A stairway isn’t required and neither is a guardrail (for details on how we built the loft see my post “Building a Loft out of a Pine Tree”).
The idea for the loft evolved as my floor plan and 3D exterior model took shape. I began with 2 bedroom suites flanking a main living area, sloped ceilings to expand the feeling of spaciousness in relatively small rooms, and an uninterrupted expanse of roof to maximize PV capacity.
 I ended up with a shed roof—south-facing of course—with the added benefit of draining rainwater to the garden. Shed roofs are simple, economical, and instantly modern. I kept the slope low—just 3:12—but that still left me with a too-tall 13 foot high wall on the north.
 I like spaciousness but I like cozy even more. One of my favorite hobbies is to watch how people use space—where people sit and where they don’t sit, what they notice and say they like and try to connect that to architectural artifacts. As a young designer, I’d been invited to a lovely new home with a 2-story living room—a popular feature in the late 1980’s. My hosts complained that they couldn’t get anyone in there. Everyone gravitated to the kitchen and the little sun porch adjacent. They fretted over solutions and eventually painted the ceiling and 3 feet down dark brown, in hopes of scaling down and warming up the space. I never did hear how that worked out.
Of course, the master of space manipulation was Frank Lloyd Wright. His living room at Taliesin is a PhD level course in how to make a human habitation grand and expansive and uplifting yet intimate and deeply comforting at the same time.
My loft runs the length of the living room and brings the kitchen ceiling down to 7 feet with a rough-sawn pine trellis-like structure overhead. The loft softens the space, acts as a sound-deflector/absorber, and provides a walkway to each of two storage rooms situated above the bathrooms. The living room and bedrooms get vaulted ceilings, but not too high. The kitchen and bathrooms get intimate ceilings that bring the outdoors in. And a little bit of storage for a little bit of junk is allowed in this modest home meant for a down-sizer.


I never imagined it until the paint was dry but why not put my office into the east storage room? I can’t stand up and stretch, but it’s a good reminder to break from the computer every couple hours. For now, I’m using my aluminum construction ladder for access, but a cool design for a wood one is in the works. I’m happy and productive up there. To keep mechanicals accessible for future and to keep them out of outside walls, I built a chase along the backside of the loft. It’s not visible from the living room. Don’t you think a generously wide built-in bench running 26 feet long over the chase would be a lovely place for reading and afternoon naps?

Cabinets & Countertops
April 15-July 14: Putting the kitchen and bathrooms together was fun. All the planning, purchasing, and staging were done and it was time to open boxes. CABINETS: I looked and looked and LOOOOKED for cabinets made with formaldehyde-free plywood. There aren’t many suppliers out there. I finally hit on Barker Cabinets. They had the style I liked, the price was mid-range, and they came with these green credentials:
- made in America (Oregon)
- cabinet boxes built with NAUF Purebond plywood from U.S. producer Columbia Forest Products
- door frames are solid wood
- inset panels are MDF CARB Phase 2 compliant or better
- prefinished with clear-coat low VOC varnish
- RTA (ready to assemble) cuts down on shipping
 The cabinets were a breeze to put together. I was really impressed with how well-made the wood parts were, and the hardware was good quality.


I especially like the soft-close, full-extension, undermount Blum drawer glides.
 I chose a simple, straight-edged shaker style door and drawer front on a full overlay style cabinet box for a clean and uncluttered modern look. I had my heart set on painted cabinets, but gulped at Barker’s upcharge (clear coat is much less expensive). Barker had a solution that worked well for me. I could get the cabinet boxes and drawer boxes prefinished, but the doors and drawer fronts “raw”—sanded and ready for my own finish. I ordered “paint-grade alder”. I saved money, got to chose my own color, and didn’t get too bogged down because the work involved only the fronts.
 PAINT: Just as I did for the walls, I chose paint from Ecos, the first American paint manufacturer to meet the strict labeling of both DECLARE and Red List Free. The paint is non-toxic, low-odor, and has zero VOC’s (volatile organic compounds).
 I used semi-gloss in the same color as the lap siding on the exterior of the house—a dark grayish green. This is one of several ways that I brought the materials, colors, or finishes from outside to inside, creating a more cohesive environment.
COUNTERTOPS: If you’re trolling for “eco-friendly” countertops, you’ll see just about everything from granite to bamboo to poured-in-place concrete. What makes them “green” is complicated. You could justify just about any selection, and maybe that’s okay. I was interested in old-style linoleum after seeing it used in the Little Kitchen at Frank Lloyd Wright’s Taliesin. The material is appealingly soft and has good green-cred (linseed oil and sawdust)—but takes time and skill and when added up a little pricey. A friend could gift a stainless steel countertop with integral sink yanked out of a restaurant remodel, but I’d have to piece it in with something else to make it work with my cabinet order. I blanched at the cost of Paperstone and its cousin Richlite. Granite was out—it’s too cold and hard and over-used. Plus it’s shipped from overseas. My mind began to turn in a direction that surprised me. What about laminate?
Plastic laminate dominated the countertop market for decades. As a young designer working a kitchen showroom, so-called “postform” was the default. Only my more well-heeled customers even considered dropping several thousand dollars (instead of several hundred) on something better. Laminate was cheap to buy, cheap to install, durable, and came in fun colors and patterns like boomerang.
It’s still cheap and it’s still durable. And……it still looks and feels like plastic. But with a bit of sleigh-of-hand, I thought I might be able to make it look less cheap and more cool. Here are my tricks:
Matte Black: I like boomerangs, but not enough. Instead, go for a color and texture so low-key it disappears.
No Backsplash: nothing says 80’s laminate more than the rounded integral backsplash that the industry calls postform. I’ll use a strip of porcelain tile instead.
Square Edge: for a modern sensibility. The tell-tale “black line” of laminate veneer disappears in the matte black.
Seam: so the problem with laminate is that it comes only so long—my supplier could deliver 12′ max. My longest stretch is 13′. Other countertop materials can be made seamless or nearly so but not laminate. I ordered a 10′ and a 3′ and placed the break over a cabinet seam (not shown in photo below).  Once I’d resolved my aesthetic concerns, I looked into the eco-friendly part. Laminate is made from kraft paper impregnated with formaldehyde based binders that when fused under heat and pressure turn into a purportedly inert plastic. The Formica I chose is GREENGUARD Gold certified for low chemical emissions.
A good start, but what about the rest? The laminate needs to be glued to particleboard—and particleboard is right up there with carpet for its reputation for off-gassing. Remember the FEMA trailer debacle right after Hurricane Katrina? And new-car smell? Kind of satisfying in a new car, but it doesn’t have quite the same charm in a kitchen. Formaldehyde is prevalent in the building industry, especially in wood sheet products, glues, adhesives, fabrics, carpet, and insulation.
Formaldehyde is a naturally occurring VOC that dissipates quickly when exposed to air, but when trapped in an enclosed space can build up. It can cause throat irritation, burning eyes, coughing, nausea, and itchy skin. It can trigger asthma. Long-term exposure is linked to cancer. Some people have no reaction but other people like me do. I’ve walked onto many a construction site (and finished new home) only to have my throat immediately constrict and a headache start.
The EPA regulates formaldehyde in building products and recognizes these third-party tested labels:
NAUF no-added urea formaldehyde
NAF no added formaldehyde
ULEF ultra low emitting formaldehyde
An online search turned up ULEF labeled “Skyblend” particleboard. It took a few phone calls and a few puzzled salespeople, but my local lumberyard came through. Their supplier could get it.
The squishy thing about the label is that even though it cuts emissions by about half (compared to non-labeled particleboard), no one seems to know how much exposure is too much. Background levels of formaldehyde in a typical urban area are 0.03 ppm (more in heavy traffic). ULEF particleboard must test out at 0.05 ppm (90% of the time). Manufacturers, trade associations, and the EPA itself are silent on the actual benefits of ULEF other than that the product met the number. For now, I’ll think of it the way I think about organic vegetables: surely better for my health and a small way to vote with my pocketbook. So far, my countertops haven’t made me cough and I haven’t had a headache!!


I would have been nervous, but carpenter Eric Wallner was unfazed about the install. The tops were delivered by Tri County Building Supply well wrapped and in perfect shape. Eric executed the splined seam and cut the holes for the sinks. The sinks were set in a bead of non-toxic, low odor silicone caulk called DuraSil from ChemLink—a product I ordered from Green Building Supply.
 I couldn’t be more proud of my somewhat green and I’ll admit it down-market countertops. Tile backsplash to follow.


FLOATING SHELVES: I kicked the upper cabinet habit 25 years ago when I remodeled my former farmhouse, and I’m glad to see it’s now trending. There were a couple of thick planks left over from the loft project that would make fine rustic shelves, about 7” wide. They came from a towering pine that stood just a few blocks from here. My friend Jim Birkemeier felled the tree and milled it up at his farm north of town. The planks were dried in a solar kiln. Eric and I chose a section with a ribbon of bark, and another stretch with some interesting knots. We got the idea to stagger the height and notch the ends around the window opening by playing around with them. They are held in place by hidden steel pins screwed into studs behind the drywall.
Who Knew Plywood Could Be Elegant?
October 30, 2019 to May 11, 2020: I’d long admired the cabinets and furniture made by my friend Eric Wallner for his own home. The design is simple, functional, and inspired by the work of Frank Lloyd Wright. Just like at Taliesin and dozens of his Usonian homes, they are made of humble plywood. Doors swing and parts attach by way of “piano hinges”—-full length strips of steel just like you’d see closing the lid of a piano.  Built-in cabinets were promoted by Wright as a way to save space and save money. Tucked along hallways, they became an integral part of his post-World War II design vocabulary. Now the “everyman” could afford a thoughtfully designed space—not just another cookie-cutter box. Plywood was celebrated as new and modern—an industrial material beautiful in its own right.
  Like Wright’s, Eric’s design is constrained by the dimensions of a 4×8 sheet of plywood. Here is his initial sketch for two 48” wide x 24” deep x 72” high units. I needed a wardrobe for each bedroom and one for coats at the entryway. Plus a linen cabinet.
  When I later asked for 72” long units—-48” for hanging clothes and 24” for shelves, Eric devised this pleasing asymmetrical scheme. He ordered 15 sheets of 3/4” thick 11 ply formaldehyde-free birch plywood and got to work. He promised that all that would be left on the shop floor would be a pile of sawdust.


I chose birch over a more exotic veneer for the built-ins because it’s super cheap. Birch plywood is considered “case grade”—meant to be used for cabinet backs and sides, not fronts. Look closely and you’ll see the telltale “footballs”. These patches are glued in at the factory to replace troublesome knots and are quite certainly not meant to show. We think differently.

photos by Eric Wallner

Inexpensive stainless steel furniture legs from IKEA take the place of boxed-in toe kicks. Slender stainless steel handles take the place of knobs or latches for barrier-free accessibility. Cabinet backs are dispensed with because painted drywall is fine. Butt seams are banished in favor of elegant offsets. Edges are left exposed, not hidden behind a strip of veneer. And every inch is lovingly sanded to baby bottom smooth. The wood grain becomes almost iridescent and the whole assembly is a pleasure to use and look at.

photo by Beth Skogen Photography http://www.bethskogen.com
Eric’s dining table and chair set and his lounge chairs take more complex cuts, but are as spare, elegant, and zero-waste as the built-in cabinets. I chose a walnut veneer, with black leather cushions for the dining chairs and a nubbly deep brown fabric for the lounge cushions. Everyone comments on how comfortable the chairs are. Dinner conversations can last hours! Thank you Eric!


furniture photos by Beth Skogen Photography http://www.bethskogen.com
Mud & Paint
December 27-April 14: It’s a good thing that the dreary work of mudding & taping coincided with the dreary days of winter (and the better part of the shut down). It was 20 years since I’d last picked up my drywall trowel and unspooled a roll of tape, but the skills came back. I started in the attic to make sure.


Drywall and the mud that makes it seamless are one of the few modern building materials that are relatively benign. Drywall is approximately 75-90% gypsum (calcium sulfate), 10% cellulose and “trace amounts” of proprietary additives. Gypsum is considered an abundant resource and available worldwide. It’s most commonly extracted from vast open pit mines, manufactured in vast factories, and shipped in vast quantities. Mud (joint compound) in it’s conventional ready-mix form is 60% limestone, 32% water with the rest talcum, mica, perlite and a mix of proprietary ingredients including fungicides, preservatives, and polymers. The USG compound I used has been granted a Green Guard Gold label—a third party certification that tests for chemical emissions to the indoor environment (mostly VOC’s).
I could have made the more environmentally sound choice (were I willing to shoulder more work) by buying compound in its powdered form. This product has less packaging waste (all those 5 gallon buckets), transportation waste (all that factory added water), and doesn’t contain nearly as many mystery ingredients. I did order the bulk of my ready-mix in boxes (with plastic bag liners), not buckets.


The drywall scraps (despite all efforts, there were a lot), got tossed to the edge of my property and covered with rotten straw. Gypsum is a good soil amendment when you want to raise the pH of your soil (to make it more alkaline). I chopped a few scraps and threw them in the hole where I planted a lilac bush. This unconventional solution may have raised eyebrows in the neighborhood, but saved me the expense and hassle of a dumpster. 
For paint, I chose a soft white in a matte finish for its timeless appeal. An eggshell finish is more practical but I object to the shine and was worried that my mud job wouldn’t be up to the challenge. A flat or matte finish hides better.
Just as I did for the exterior, I purchased organic, low odor, zero VOC paint from South Carolina manufacturer Ecos Paint. The paint is certified Red List Free (free of “worst in class” chemicals prevalent in the building industry).

It’s non-toxic and biodegradable. It doesn’t contain any algicides, mildewcides, pesticides, herbicides, or fungicides. Ecos is one of few companies with a completely transparent label—all ingredients are listed. Their product is especially needed for those with chemical sensitivities and other vulnerable people.
The paint covered well and was reasonably priced. I think companies like this who are striving to make a difference should be rewarded with our dollars.
Once the brushes and rollers were put away and the tarps folded up, I breathed a sigh of relief. I was finally able to enjoy the feel of my transformed space without scrutinizing every dip, drip, skip and bubble.

OPEN HOUSE Saturday July 18, 2020
Saturday July 18 from 10 am to 5 pm: Are you looking for something interesting to do this weekend that’s not too far away? Why not stop by and have a look at Spring Green’s first net-zero energy home? Construction is almost complete, except for a few finishing touches. I now have 6 months of solid numbers on solar production—and if you ignore a few nitpicky details—Poem Homes is not just net-zero. It’s producing twice the energy it consumes! But wait, I’m not getting rich. As of July 8, I’ve banked just $35.13 with the utility company.  Speaking of finishing touches, my favorite (so far) is the cedar window sills and the cedar door jambs. What was in my mind’s eye has become a beautiful reality thanks to the careful attentions of Eric Wallner. Check out the patio door jamb, a real Frank Lloyd Wright move the way it goes from outside to inside with seemingly no break (but there is).


When you visit, you’ll find masks and hand sanitizer at the door. Outside, we can be more free. I look forward to seeing you—and it doesn’t matter whether you’re thinking of buying or building or remodeling. Poem Homes is all about learning and conversations, the exchange of ideas and contacts, and being grateful for the chance to fashion a way to live more sustainably. 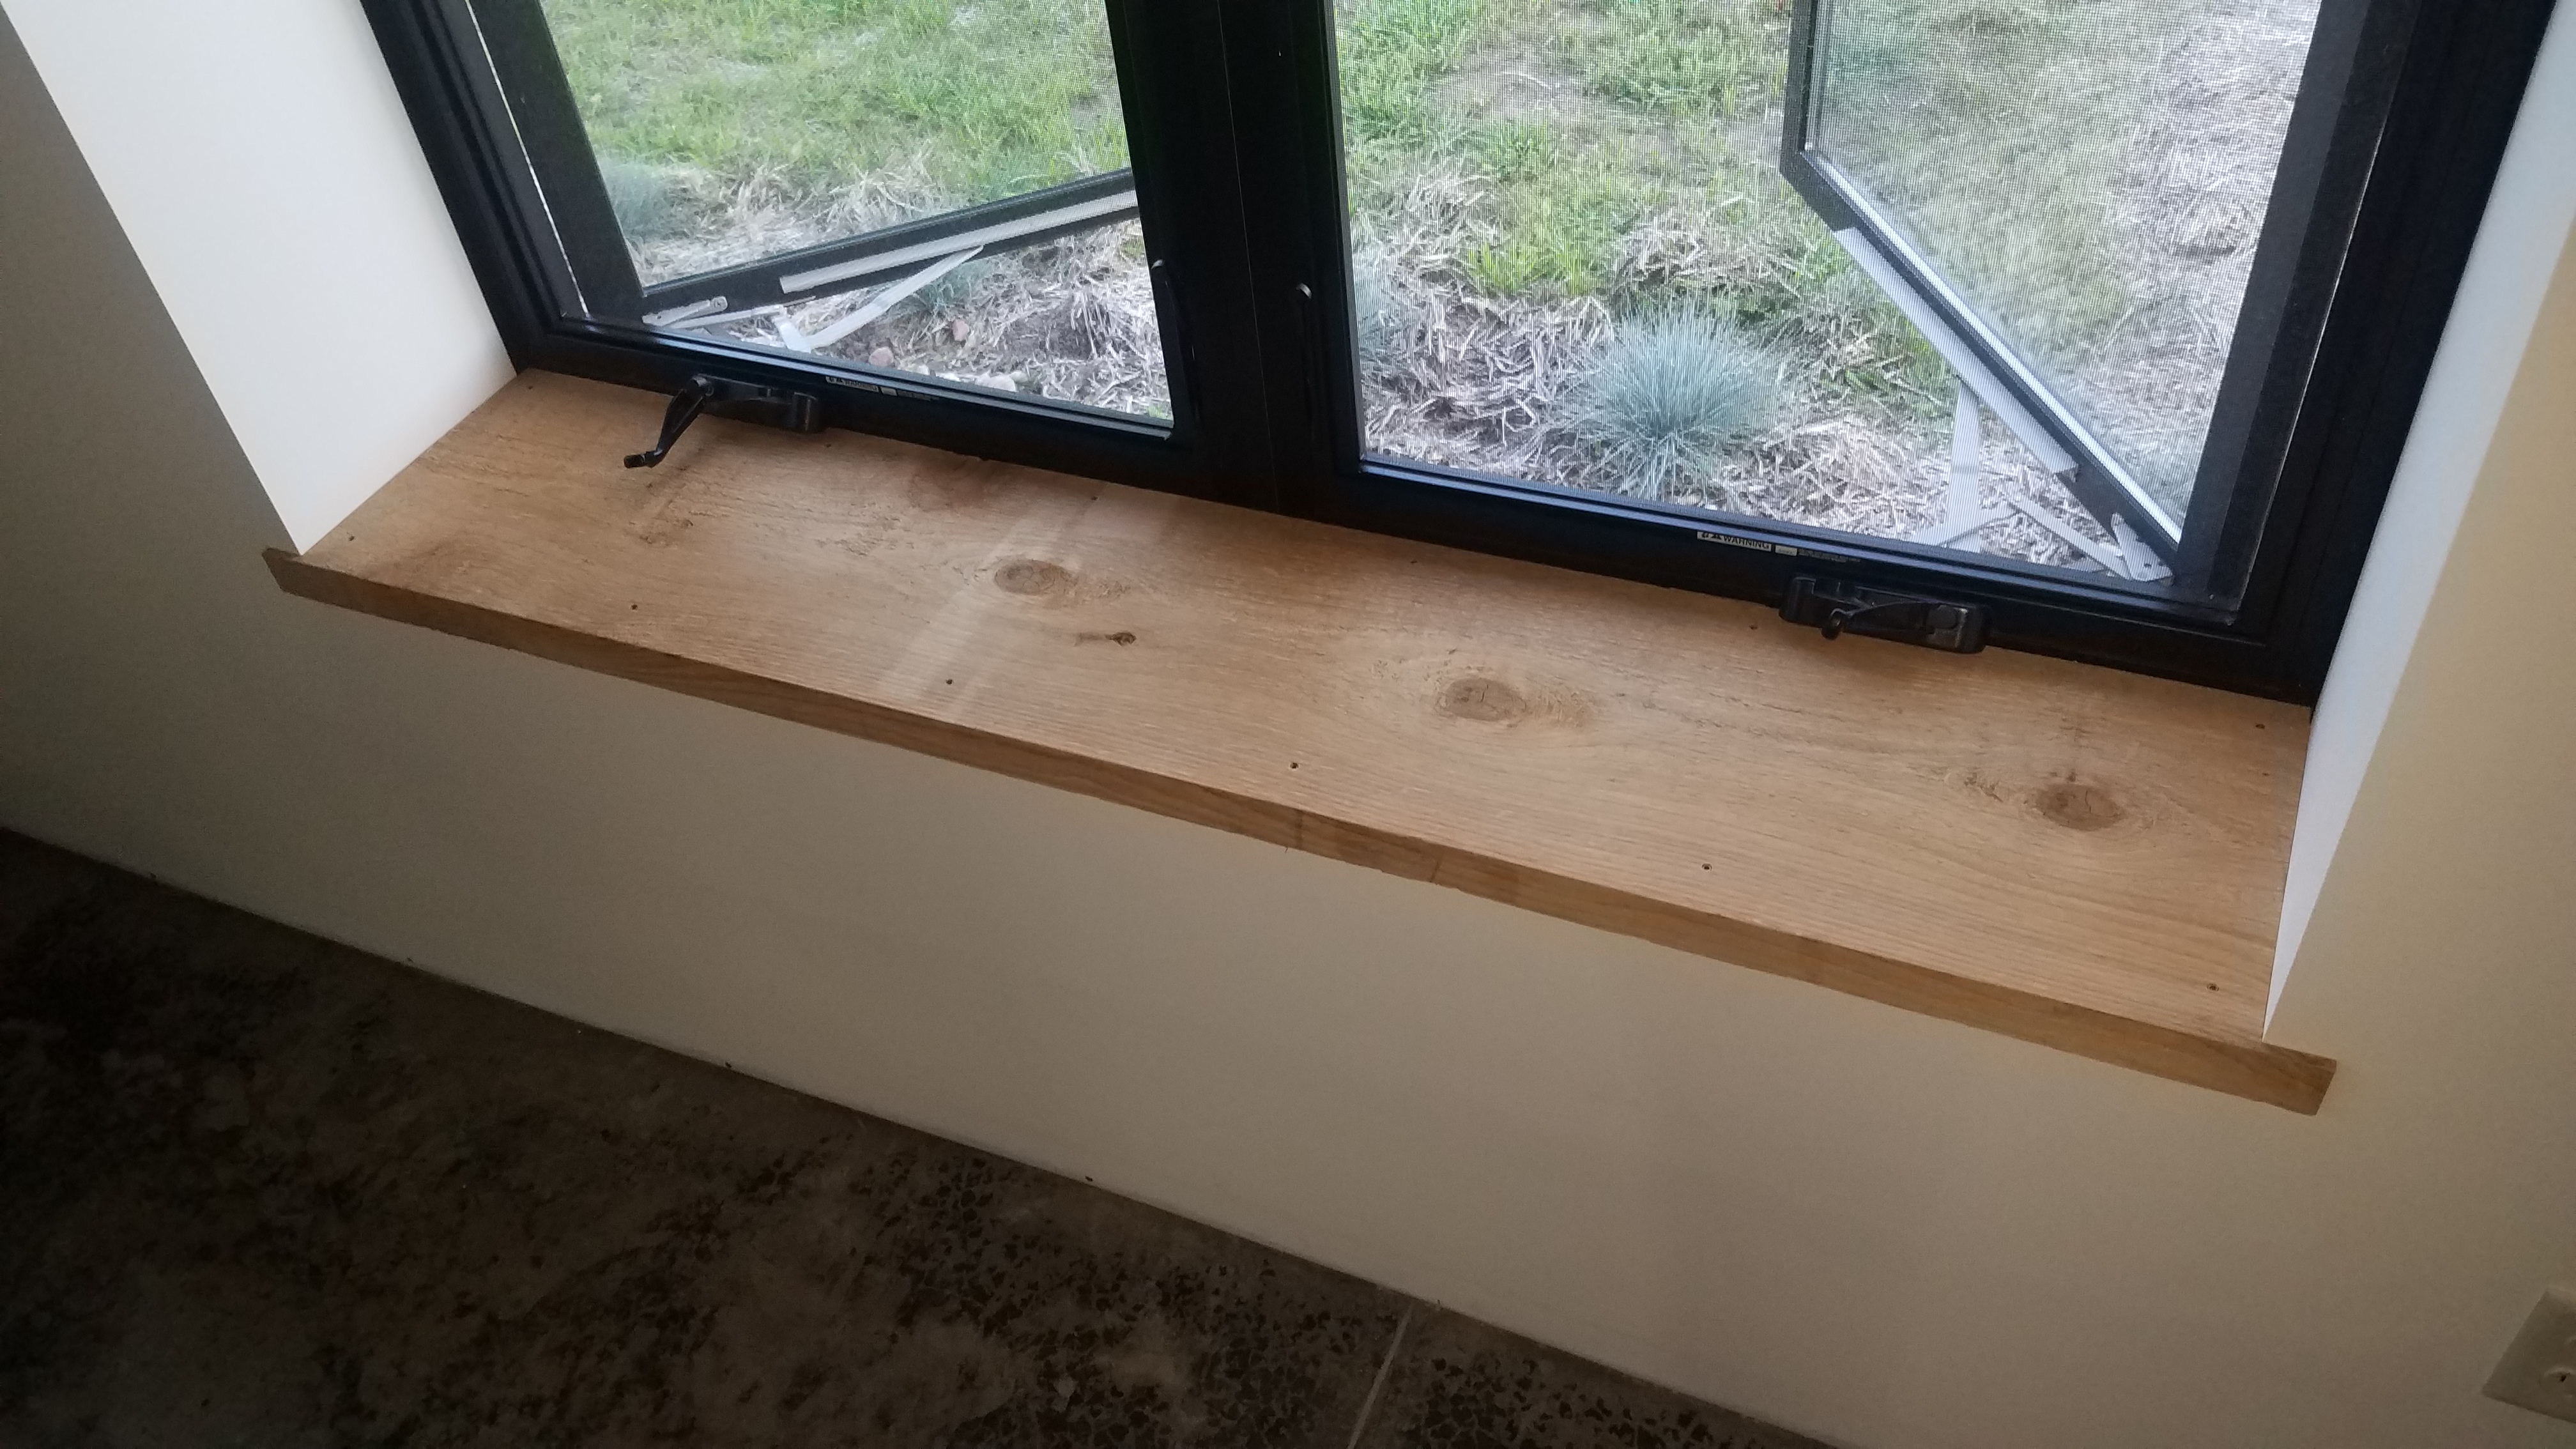
OPEN HOUSE Saturday June 13, 2020
Saturday June 13 from 10 am to 5 pm: Are you net-zero curious? Stop by today and check out our 7kW solar array and learn how it powers this super-insulated all-electric home. Equipment is installed and we now have modern conveniences like bath vents, AC and lights. Super energy efficient, quiet, LED, and dark-sky friendly of course. Flush toilets are nice too—especially at 1.28 gpf (gallons per flush). Cabinets, countertops, and other finishing touches are going in, all vetted for ultra-low chemical additives like formaldehyde. Notice too the features that make this home barrier-free.

Because of Covid, I’ll be asking all visitors to wear masks and use hand sanitizer upon entering—both of which I’ll have on hand for your use. Outside, we can social distance. I’m looking forward to seeing you!
OPEN HOUSE Saturday February 15, 2020
Saturday February 15 from 10 am to 5 pm: Stop by today and see what we’ve done! Drywall is up and mudding the seams is “in process”. Over the next few months, finishes—from paint to cabinets to counters—will be installed, all vetted for their ultra-low or non-toxic properties. Ask me anything you want about the construction so far—like how to source healthy materials, what makes it super-insulated, what makes it low-carbon footprint, and what makes it zero net-energy.
A beautiful, sparkly snow fell on Sunday. It shut down solar production for the day and the next and the next. That’s the downside of a roof-mount install. A ground-mount (on a rack) could be swept clean. My low pitch roof (3:12) doesn’t help. Snow would slide off a steeper roof faster.
How do I know when the PV (photovoltaic) system is working? The easiest way is to look at the meter on the side of the garage. If the arrow is pointing toward the street, I’m sending kWh’s to the grid, and getting paid. If the arrow is pointing toward the house, I’m buying from the utility. Of course, it constantly varies depending on sun and clouds and whatever equipment I might be running. I’m paid 3 cents/kWh for my production. When I buy, it’s at 12 cents/kWh.
There’s also an app for that. I can look at my phone to find out exactly how much the panels are producing, hour by hour. Last week a clear day with no snow netted me 31 kWh of electricity. That’s equivalent to running an efficient refrigerator for 19 days. It’s also equivalent to the greenhouse gas emissions of driving a car 53 miles.
Dense Pack: Take 2
December 16-January 16: Nothing is more motivating on a building project than knowing you have put 100% into a task, that it is done, and you are now free move on to something new. As if it were Christmas, I tore open 4 boxes of plastic MemBrain vapor retarder and began hanging it like a curtain on my walls. Of course, it quickly became another labor of love and laborious. Each electrical wall outlet and switch, each wire and pipe, each window opening had to be carefully lapped around and caulked before I could confidently call in the drywallers and the insulators.


I explained the necessity and benefits in my previous posts “The Whys & Hows of Vapor Retarders” and “Hanging the Lid”, written after I’d draped and drywalled the ceiling.
Just as before, the vapor retarder hung long and the drywall stopped short at the edges. Running along the ceiling perimeter and under each window was a 6” gap—just enough room to stick in the insulation hose.
My crew from Accurate-Airtight Exteriors arrived with a box truck fitted with a hopper and assortment of hoses, and a trailer full of bales. They were eager to see how my house was coming along. Last time they were here was in June, when it took them 3 days to pack the ceiling. This trip, they’d need 4 to pack the walls. A lot of their work is retrofit and crawling around in attics and basements. My house was going to be a nice break in the routine, easy—even a little boring.


My walls are 11-3/4” thick. The north wall is 13′-6” tall and 56′ long, with few windows. The bales were slit open in the garage and slowly fed into the hopper. The hoses were draped through a window and down through each frame cavity. Cellulose—non-toxic, biodegradable, and 100% a byproduct of the paper mills up in the Fox Valley—trickled out. It was going to be a slog. Wallace Kennedy and son Nicholas took it in stride, and were a delight to have around.


There are many ways to build a super-insulated wall. My goal was “double Code minimum”—about R-38 to R-45. Here are the basic options I considered:
MANUFACTURED COMPONENT
- SIP’s (structural insulated panels)
- ICF’s (insulated concrete forms)
FRAME WALL WITH EXTERIOR INSULATION
- 2×4 or 2X6 with sheet foam or sheet mineral wool
- 2×4 or 2×6 with I-joist exoskeleton with fiber insulation
THICK FRAME WALL
- 2×6 with horizontal or vertical strapping with fiber insulation
- 2×4 double-stud with fiber insulation
All are interesting and have their advantages. To decide, I turned to my most trusted source for practical advice and solid building science, Green Building Adviser. What method—for my situation—would be the most build-able, affordable, least toxic, and have the lowest carbon footprint? I settled on a 2×4 double-stud wall with dense pack (not loose fill) cellulose, for a “nominal R-value” of R-44.
The most important feature of any super-insulated wall is that it breaks the “thermal bridge” of the framing. Wood studs have an R-value of only 1.25 per inch compared to cellulose at 3.75 per inch. I get the full value of my insulation in the cavities between the studs (R-44), but less at each stud pair (R-26.5).
Another important feature I used to maximize R-value is to space the studs at 24″ on center, instead of the usual 16″ on center. Even so, my “effective wall R-value” drops to R-41.8 (the studs make up 12.5% of my wall area). If I factor in my windows, which cover 10% of my wall area and are rated at R-3.5, my “whole wall R-value” drops to R-38.
A Wisconsin Code-compliant home is required to have a minimum R-21 wall. The least expensive way to meet this is with an R-21 fiberglass batt in a 2×6 wall at 24″ on center. With a more typical 15% window area at R-3, the “effective wall R-value” is R-9.6. This is only 46% of its “nominal R-value” compared to my thermally-broken wall, which comes in at 86% of its “nominal R-value”.
When I include the ceiling, my “whole thermal envelope R-value” increases to R-51.5. Of course, it’s because my ceiling is insulated to a “nominal R-value” of R-82.5. Let me know if you’d like me to talk you through this. And have a look at this article from Journal of Light Construction Understanding R-value.

Double 2×4 Wall
The house was, of course, noticeably warmer (and quieter) by the time my crew left. On sunny days, I can turn off the heat and coast on passive solar energy. Next step: mudding & taping the drywall.
Mind the Gap: Take Two
December 10, 2019: Finally, it was time to find out how well I’d done. In the last few days, the electrician had made a lot of holes. Had I followed up with each one? Did they all get hit with caulk or tape?
![Mind-the-Gap-600px-400px[1]](https://poemhomes.files.wordpress.com/2020/02/mind-the-gap-600px-400px1-1.jpg)
Subway Station, somewhere in Great Britain


An airtight building shell is essential for the kind of house I’m building, and a blower door test is the only way to know for sure you have it. Jim has tested hundreds of homes in the Madison area. The best result he’s seen is 1.2 ACH (air changes per hour)—literally how many times the volume of air in the home is changed out with fresh air from leaks in the building shell.
Wisconsin’s Uniform Dwelling Code allows a new home to be as leaky as 7.0 ACH, though studies have shown that the average new home here tests out at 4.0 ACH. Some neighboring states mandate 3.0 ACH. Some really meticulous builders are hitting 0.5 ACH or less. Is all that caulking and taping worth the extra cost? I’d argue that a well-sealed home insures against more than high utility bills: it insures against moisture, mold, mildew, and insect problems. Even so, out of curiosity I ran the numbers on my house through a modeling program called REM Design:
Poem Home @4.0 ACH = $908/year heating costs @0.12/kWh
Poem Home @0.6 ACH = $630/year heating costs @0.12/kWh
YEARLY SAVINGS = $278
Jim set up his equipment by propping open the front door and replacing it with a fan attached to an adjustable shroud. The fan slowly depressurizes the house to simulate a 20 mph wind bearing down on all sides. Drafts that normally aren’t felt are suddenly amplified. My friends Eric and Lew stopped by to see how it’s done, and thanks to their sleuthing, we found two major leaks.
Cold air from the mini-split was pouring out the narrow gap between the unit and the drywall. We later found out that the installer hadn’t sealed or insulated the line set connecting the outdoor unit to the indoor unit. I can stuff this with fiberglass.


The second leak was at the fixed panel of the patio door. A steady draft was easily detected by waving a hand over the crack between the frame and the sash. I can caulk this.
So how did I do? We got a 0.87. Yeah! “Don’t celebrate yet, Amber” is what Jim didn’t say but implied. He’ll be back for a final test when the house is complete.
Electrical & Mechanical
October 14 to January 7: Now we punch holes. After all the careful air-sealing, after all the work and worry with caulk guns and rolls of tape and spray-foam—it was time to make intentional holes, lots of them.
ELECTRICAL My electrician got started by extending the service from the panel in the garage to the far corners of the house. I got to help, drilling holes and running wire. It was all new to me, and interesting. Bob Rowen of Rowen Electric insisted on straight runs, artful bends, and minimal slack.


The installation required a few extra steps and probably more wire compared to a conventional home, but in several ways is more environmentally friendly. Most critical is the extra attention paid to air-sealing. Each line coming in and going out is sealed with flexible silicon caulk or flexible tape. Electrical boxes have integral gaskets that compress when drywall is attached. And the vapor retarder was taped to the gasket, providing both a continuous air-seal and vapor-seal.


In other posts, I’ve extolled the virtues of a slab-on-grade home, but here I have to admit that it made running mechanicals harder. In a conventional home, you run freely through wall and ceiling cavities but on this job site they are “Sacred Space” reserved for insulation. You also run through the attic (none here), the basement (none here), and the floor cavities (none here). Instead, I built a chase on top of the loft floor, tucked along the back wall and out of sight from the living room below.
The electrical runs are attached to the loft flooring, covered by a plywood lid that can be flipped up for service at any time in the future. The plumbing pipes are above. Future plans call for a cushioned bench built over top and running the length.
LIGHTING Everything is LED (light emitting diode)—-no incandescent, halogen, or CFL (compact fluorescent lights). LED’s use about 10% of the electricity of incandescents and about half that of CFL’s. LED’s don’t contain the mercury that CFL’s do—and supposedly no hazardous chemicals—but do contain small amounts of heavy metals that can be recycled. I have yet to find a recycler. Do you know one?
LED’s are not only cheap to use, they are cheap to buy. The first bulb I ever saw—just a few years ago–was proudly displayed by a friend who dropped something like $50 on it. For the garage, I chose simple porcelain sockets fitted with 25 cent LED bulbs that are expected to last 22 years, at a cost of $1.20/year. Thank goodness for those “early adopters” who purchase by purchase spur technology along—-but I’m not one of them. Outside, I chose “dark sky friendly” light fixtures. Any fixture that casts light downward instead of upward or outward is good. To be sure, you can look for a compliance label when shopping. For everything you need to know, check out International Dark Sky Association.
A personal pet peeve and (as I learn more), harmful to human and animal health are LED bulbs that cast an eerie, unnatural brightness. It’s the same “blue light” our phone screens give off that we know disrupt our circadian rhythms. When used in outdoor lighting, they brighten the night sky more than other light sources do and effect the survival strategies of nocturnal animals. It doesn’t have to be this way. Look for “warm white” bulbs in the 2700-3000 Kelvin range and a CRI (color rendering index) of at least 90. Notice the difference between my house and my nearest neighbor.
HEATING & COOLING Building an all-electric, fossil-fuel free home in our northern climate would have been a laughable proposition just a few years ago, but is now possible with the latest “mini-splits”. You’ve probably seen these devices installed in a room addition, office, or small apartment. The indoor part looks like an oversized through-the-wall air conditioner, and the outdoor part looks like a rectangular version of an air-conditioning compressor. The technical name is Air Source Heat Pump (ASHP). I chose the simplest version: single-zone and ductless.


These super-efficient appliances are also super-affordable. Where a conventional house might spend upwards of $20,000 on a heating and cooling system, mine came in under $5000. Of course, this is possible because my house is wearing a thick down parka on top of a wool sweater and a turtleneck—not a sporty spring jacket.
A conventional furnace is overkill for a small, super-insulated house. Ductwork is cumbersome, expensive, often poorly sized, and can harbor dust and allergens. With an open floor plan, and for families who can tolerate some temperature differences from room to room— a single mini-split can work. Daily modifications may be needed, like closing and opening doors for better circulation and closing and opening curtains for better temperature control. The Mitsubishi unit went in mid-October. By mid-November outdoor temperatures were dropping and snow was flying. Reluctantly, I turned it on. The ceiling was insulated, but not the walls. We were still wiring and willing to work chilly, but the water was on and the plumbers were coming. As it turned out, 2 months would go by before wall insulation went in. I dreaded looking at my electric bill. Good news: those two months of heat were “paid for” by my solar production in July.
More good news: since I broke ground and tapped into the grid (November 2018) until now, I’ve produced more electricity that I’ve consumed. So far, my construction project is “energy net positive” by 2782 kWh. That’s a “carbon dioxide equivalent” of the carbon sequestered by 2.6 acres of forest/year OR the greenhouse gas emissions from 4881 miles of driving.
VENTILATION People ask me, “Isn’t it true you can build a house too tight?” In a word, no. A conventional house gets its fresh air through cracks in the windows and electrical boxes and random places. That “fresh air” is pulled through dusty crevices and frame cavities and in most homes, formaldehyde-laced fiberglass batts. Along the way, it’s depositing moisture—creating a breeding ground for mold and mildew.
A super air-tight house shuts down random leaks and instead relies on a mechanical system that brings in filtered fresh air. I looked for a system that could dial up or dial down depending atmospheric conditions and how many people and plants and cooks I have over.
Condensation on window panes is the bane of Northern Homeowners and a sign of too much moisture. Stuffiness is unpleasant and a reminder that “indoor air pollution” really is a thing. Damp, stagnant air is more likely to harbor and spread disease. Effective ventilation that dries and dilutes indoor air can limit bacteria, viruses, dust mites, and mold—and prevent allergies and asthma according to the American Lung Association.
Finding the right appliance turned out to be the biggest headache on my “build a house or bust to-do list”. The answer is what’s called an HRV or ERV (heat-recovery or energy-recovery ventilator). Most HRV’s on the market are sized for larger homes or commercial spaces and require complicated ductwork and expert commissioning. They’re not yet common. Contractors I contacted seemed unfamiliar with them or unable to answer my questions. I poured over manufacturers specs and called distributors who could point to a specific unit but not installation details. I finally settled an innovative, ductless, through-the-wall product called Lunos from 475.com My electrician gave his tacit assent.


The units look simple and unobtrusive, were easy to install, and have the best heat recovery efficiency and noise ratings I found. Working in synchrony, each Lunos (1 in each bedroom, 1 in the living room, 1 in the loft) push stale indoor air out through a ceramic core, heating it up. After 70 seconds, the fans reverse direction. Fresh air is pulled through the ceramic core—and a filter—to deliver a stream of clean, warm air to the room. I can chose from three settings: 10, 15, or 20 cfm (cubic feet per minute). This matches favorably with industry standards for a 2 bedroom home, which range from 33 to 54 cfm. When set at 20 cfm, the two pair of Lunos should be delivering 40 cfm.

Lunos Vent (left of bedroom window on south wall)
The bathroom fans are an exception: to meet the high CFM ratings required by Code for year-round bathroom ventilation, we installed 80 cfm ultra-quiet Panasonic fans above each shower. They are set on a humidistat for brain-free operation.

Panasonic Bath Fan (screwed to loft floor)
For all these holes, none had to go through the roof—including the plumbing vent. My north sidewall is tall enough and large enough to accomodate all but two Lunos pentrations (located on the south wall).
August 24, 2021 UPDATE: Is it really possible to survive winter with only a heat pump and no fossil fuel backup? See my post “Net Zero” to hear how my first year went (spoiler: I ended up producing 53% more electricity than I consumed!).
There were a couple of problems though. During a cold snap when nighttime temperatures plunged to minus 17 degrees, I’d wake up to windows with a rather thick rim of ice stuck tight to the bottom sash. If it was a sunny day and I kept up with a mop rag, it was gone by nightfall. If it was cloudy, the ice wouldn’t budge. I ran box fans, turned up the heat, and ran the Lunos at high speed but nothing worked absolutely. My current theory is that the concrete slab is still curing and the wood frame is still drying out. When humidity stablizes several years down the road, I should be fine. Some would argue that triple pane windows would be worth the extra money, just to ward off this one problem.
The other problem isn’t so much of a problem but a prediction that was born out. The bedrooms at each end of the house remained about 4-7 degrees cooler than the main room where the mini-split is located. Likewise in summer, the bedrooms are a bit warmer when I’m running the AC. I have several possible fixes for better air distribution, but so far the uneven temperatures haven’t been bothersome.
Overall, I’m pleased with how these unconventional mechanical solutions are working.
Inground Gutters
September 30-October 4: Gutters are a maintenance headache and generally, pretty ugly. I decided to try “in-ground gutters”.

BEFORE: EROSION & SPLASHING
My excavation crew laid down a 12″ deep layer of washed river stone in a landscape-fabric-lined-trench under the eaves. The trench prevents erosion at grade and splash-back on the siding. Rainwater flows freely through the gaps in the stone, seeps through the fabric, and drains away into the native sand below. The fabric prevents the underlying sand from working its way up through the river stone and clogging the works.


If I had a basement to keep dry and/or heavy clay soils, I’d need a more robust solution. It would include plastic draintile (slots up) laid within the river stone and run downslope to daylight. This strategy would serve the same function as downspouts with extenders—to get the water away, fast.

Shawn & Tyler of Slaney Landscaping & Excavating, Dodgeville
Ringing a house with stone like this is fairly common, and usually done to make mowing easy. Most installations include black plastic bulb-style landscape edging but I decided to take my chances without. It seemed like another maintenance issue (they have a tendency to pop up) and I visualized a “naturalized” edge where stone and grass meet. So far, I’m pleased with the look but worried about future weeds until a friend gave me a tip: “hit ’em with a blower torch”.

AFTER: IN-GROUND GUTTER—SOUTH OVERHANG
Building a Loft out of a Pine Tree
August 5-October 4: The loft is the most unique feature of my design and so far, the most fun to build. I ordered a 4×8 Douglas Fir beam from the lumber yard, and it arrived in pristine condition—28 feet of straight, clean, perfectly milled wood. I called in Mike & Nino, the two strong guys from Wood & Stone to set it in pockets they had framed out a few weeks earlier.


While sturdy on its own, the beam would need support to carry the weight of the loft. My design called for threaded rods, similar to what you’d find around here supporting the hay mow of a “hung barn”. Just like a farmer who wants a wide open milking parlor, I wanted a large living room free from posts.  I turned to my friend Bob Rowen, a master electrician who also happens to be good at solving any sort of mechanical problem. He tinkered with wood scraps and presented me with a mock up that we then took to a local machinist to weld up from steel rods and plates. Thinking ahead, Bob built two wood boxes reinforced with steel channel and installed them between pairs of trusses. At the design stage, I had coordinated with the truss manufacturer to factor in the point load on these trusses, which came with an engineered pattern of webbing & steel plating, along with an extra-wide 2×6 bottom chord.


My worries about drilling the holes and having them come out straight were found-less—Bob devises a jig for everything he does and has a clear road map in his head for each step to be taken. The beam was hoisted up and down several times with block & tackle as we tested fit.


When the last bolt was turned tight, I masked the area with paper and tape and spray painted the steel matte black (note: the spray paint came straight from the hardware store, not vetted for low VOC or other chemical emissions). We think the rods turned out pretty handsome, with their extra-wide bottom plates and over-scaled double nuts.


Road trips to Timbergreen Farm became our pleasant distraction over the next week. Just a few miles up the road, consulting forester Jim Birkemeir runs a milling operation and solar kiln. His stash of lumber from the Driftless includes white oak, red oak, black oak, hickory, black walnut, ash, cherry, and other hardwoods but I had my heart set on pine. Humble, easy-to-work-with, aromatic pine. He had just the thing: rough planks harvested from a stately White that had stood strong in the Village for a hundred years. He agreed to mill it for me. 
Our first haul included 2×8’s for ledgers and 2×6’s for floor joists. We sorted for warp, wane, and knots. We accepted some scant thickness or width and agreed that skips (saw marks) added character. Pieces that had pronounced staining or dark streaks were pronounced “uglies” and went in the mechanical room. Working with minimally processed wood takes a different mindset. You have to love the fresh smell and slight stickiness, the lack of conformity, and the limits of band saws. The payoff is rustic charm and knowing that this is about as low-carbon footprint for a building material as you can get. 
People are surprised to learn that you can build with “unstamped” wood—wood that doesn’t come from a lumberyard and doesn’t carry a grade stamp. The Wisconsin Uniform Dwelling Code allows it, but downgrades it to #3 (most framing lumber is #2). My joist spans are short (under 10′), and the design load is low (“attic with storage”—not “habitable space”).
Just as we did for interior walls, we installed vapor retarder and drywall before attaching the 2×8 ledgers in place. We lag-screwed the ledgers to the inner 2×4 wall and set the 2×6 floor joists temporarily with scraps of plywood. 
The original plan was to support the floor joists on a 2×2 nailer but a mock-up looked clunky. I also considered decorative joist hangers, but they looked busy. Bob had a better idea. Why not use an angle iron? He ordered it up from a local shop (raw steel for the kitchen and stainless for the bathrooms) and we spent several days laying out a pattern of holes and patiently drilling them out. I helped, then set up an ad hoc assembly line to spray paint the dozens of washers and bolts we’d need to attach the angle iron to the ledger and the joists to the angle iron.


Finally, each joist was top screwed into the ledger, blocking, or the beam via a concealed pocket hole.


Our next foray to Timbergreen was to pick up full 1” thick pine flooring, milled from the same tree. Jim had neat piles ready for us which we sorted for width and quality. As before, the best stuff went to the kitchen. Never mind the discoloration from where straps held bundles together in the kiln and unevenness from thickness differences and skips. My job was a hands & knees operation up in the loft—running the air nailer—while Bob manned the saw below.


The loft is a storage loft. By Code, it’s an “attic”. It doesn’t qualify as habitable space, because the ceiling is less than 7′ high. The advantage is that I don’t need to install a guardrail, and I don’t need a proper stair to it. In lieu of a basement, I at least have some space for junk but am still forced to downsize. The disadvantage is that it’s not really convenient, and you can’t really stand up.
The loft is also a mechanical chase way. The electrical runs are now in place along the back wall and plumbing will come next week. Tucked along the back wall, the chase isn’t visible from the living room. 
The idea of the loft took shape in the design phase as I settled on a shed roof (facing south) for the PV solar panels. But even if I kept the slope as low as possible—3:12 for a metal roof is pretty much the limit—I’d still have a lot of space above the bathrooms. Frank Lloyd Wright did it, but I didn’t want a 13′-6” high ceiling in my bathroom. I like vaulted space but I also like cozy. Having a wood trellis-like or pergola-like structure overhead was appealing, and having a low entryway give way to a grand space as you turned the corner into the living room seemed like a better way to channel FLLW. 
The raw and rustic nature of the loft will animate the more contemporary forms and materials I’ll use elsewhere in the house. It will bring my affinity to nature indoors, and restore my spirit especially over the long and drab Wisconsin winters. Research shows that nature-connected design makes people healthier. It improves our emotional state and reduces our blood pressure, heart rate, and stress level. It increases social interactions and creativity. But architect Frank Lloyd Wright said it better:
“Wood is the most humanly intimate of all materials, and the most kindly to man.”
Rooms Take Shape-Interior Framing
July 18-October 10: People seem to like big, open, vaulted spaces and many a visitor has “oohhed” and “aahhed” over the barn-like quality of my Poem Home. I almost hated to call in the crew to build out the interior rooms, but it was finally time. The first step was to install the missing strip of drywall at the ceiling. That’s the 12” gap down the length of the building where the insulation crew accessed the ceiling cavity just a few weeks earlier.  Once sealed up, top plates were screwed through the drywall into blocking between the roof trusses and studs were dropped down to bottom plates anchored in the slab. At exterior walls, the framing was held 3/4” shy and the last stud left loose, so I could slip in drywall later.


This isn’t the usual sequence. Conventional practice has all the framing done before drywall shows up. But for a super-airtight house like mine, you take extra steps to shut down air movement. In the same way that you want your down parka to cinch up at the wrists and waist when you venture out in sub-zero weather, you want your exterior walls to block drafts—-whether those drafts come from outside or from the volume of air inside the building. Insulation works best in a dead-air cavity—-in my case 12” of it sandwiched between plywood and drywall. 
To maximize space for insulation, and to save on the cost of wood, the interior walls abut “ladder blocking” instead of doubled-up or tripled-up studs. The crew from Wood & Stone got the interior walls up in just 2 days. Fitting sections of vapor retarder and drywall between the ladder blocking and the new walls was my job, and that took longer.
Here’s are plan-view sketches that explain why I took this extra step. In conventional construction, interior walls are attached directly to the exterior frame. The first sketch shows that when built this way, air can pass from an opening in an interior wall (like an electrical outlet) into the exterior wall. Even when packed with insulation, air can move through and carry with it warmth and moisture—wasting energy and risking condensation within the colder outside wall. In the second sketch, a continuous vapor retarder and drywall is in place before the interior wall is permanently attached, blocking air movement.

In this house, the drywall serves an additional function. Just as I did for the ceiling, I need to have drywall in place before the insulation crew shows up next month to blow the walls. Conventional batt insulation (like pink fiberglass), can simply be placed in an open cavity but blown-in insulation like cellulose needs an enclosed cavity. One way to do that is to staple a fabric across the wall studs. But my crew asked for drywall, promising it would make for a better job and save money. I’ll need to leave them a 6” gap at the top of each wall and at the bottom of each window so they can access each bay with their tubes.


For the plumber, I built a half wall inboard of a section of drywall at the laundry so his pipes don’t use up space in the exterior wall better left for insulation. This also eliminates any risk of freezing and makes the plumbing accessible for future repairs or replacement.
Next, I installed 3/4” plywood blocking between studs wherever grab bars might be needed in the bathrooms. The blocking runs horizontally behind the toilet and continuously through the walk-in shower. Plywood also covers the 6 foot high shower wall on both sides, for vertical and/or horizontal applications.


It was Bob Rowen’s idea to secure the shower wall with a section of square stock. He sketched out a 5 foot long bar with metal plates and had a local shop weld it up out of stainless steel. It’s bolted through the end studs and to the loft floor above with T-nuts.


While the walls went up fast, the details took time. Fitted out, the rooms have each taken on their own shape, and they feel right. The size and proportion of the bedrooms is pleasing, and the bathrooms work. The “great room” stills feels big, and with the loft in place (see next post)—still feels like a barn. And that’s a good thing.
OPEN HOUSE Sunday November 24
Sunday November 24th from 10 am to 5 pm: Turns out, we got slammed by freezing temps early this year. But not before this stunning rock retaining wall got in the ground, thanks to my friend Lew Lama and his crew at Wood & Stone. Come see it and explore it in all its sublime charm.  It all started when a dump truck off-loaded a few boulders from a farm in Ridgeway. Then, smaller stones of mixed provenance snagged on the cheap as overage from Lew’s other projects. These were sorted & stacked as bottom layer, middle layer and cap layer. Loads of crushed limestone, washed river stone, and assorted fill material stood at the ready.


The wall rose steadily, battered back and keyed together, to reach the string line set to house grade. Mike & Nino set the biggest, baddest bolder at the Southeast corner.


When filled with topsoil, I’ll have a level vegetable garden right outside the door. Please join me on Sunday to talk nice about local materials, craftsmanship, and energy-efficient building.
OPEN HOUSE Saturday October 19
Saturday October 19 from 10 am to 5 pm: Please join me at the building site to talk about how we can transform our homes from energy-wasters to energy-producers. See how our first model home plans to solve the problem of cold, drafty rooms and high monthly fuel bills, and if it’s a sunny day watch the electrical meter “spin backwards”.
And check out our latest project: “in-ground gutters”. Instead of conventional gutters and downspouts, I had my excavation crew lay down a 12″ deep layer of washed river stone in a trench under the eaves. The trench prevents erosion at grade and splash-back on the siding. Rainwater flows freely through the gaps in the stone and seeps through the sand bed below. If I had a basement and/or heavy clay soils, plastic draintile run downslope to a drywell or daylight would be in order. This strategy would serve the same function as downspouts with extenders—getting the water away, fast. My site is easy: no clay, no rocks, no standing water, no muddy boots. The Village is built on the ancient bed of the Wisconsin River. Life is a beach!
OPEN HOUSE Saturday September 28
Saturday September 28 from 10 am to 6 pm: Can you stop by (maybe after Farmers Market and brunch at the General Store) and see what we’ve been up to at Spring Green’s first net-zero energy house?
The loft is taking shape and now instead of pointing up and waving my arms in the air and struggling to find the words to explain my design, you’ll see for yourself how it might work. We’re building it with rough sawn lumber that came from a towering White Pine at the corner of Winstead Street & Monroe. Do you remember it?


My friend Jim Birkemeier of Timbergreen Farm felled it, hauled it home just north of town, milled it into planks, stacked it in the solar kiln, let it dry, ripped it into boards, ran it through the saw to make tongue & groove flooring, and stacked it neatly for me to pick up.


This is about as local and low-carbon footprint as you can get! Have you hugged a tree today?
Wood is Good
June 1-September 13: Working with wood “for show” is rewarding and I spent many pleasant days sealing 1×4 pine boards for the soffit and 1×8 pine boards for siding. By the time my crew showed up, I had an impressive stack.
 We started on the underside of the roof overhang, and hit on what might be an original idea—spacing the 1×4’s apart the width of a nail to create an integral vented soffit. The corners turn like a woven basket.
 Most modern homes or remodeled homes have unremarkable “punched tin” soffit panels or metal strips. So unremarkable that I bet most people (not counting architectural snobs like me) take no notice. Look at a historic home and you’ll see boards—often with a interesting pattern or molding added.
Code requires roof venting where fluffy, air-permeable insulation like fiberglass or cellulose is used. Impermeable sheet foam or spray foam doesn’t need venting. The idea is that if warm moist air from the living space penetrates the attic or roof cavity, it can escape. The slots in my soffit will supply more than enough air flow through the 3” deep vent chute we built back in April (see blog post “Vent Chute”).
I shopped around for siding. Cedar is naturally decay-resistant but pricey. Rough-sawn wood in any species looks great and holds a finish better but also costs more. I looked at locally milled wood and visited several Amish farms. I trolled Craigslist and called up area lumber yards. The best deal I found was from Cedar Direct, just a few miles down the road. They import white pine from forests in British Columbia that are certified SFI (Sustainable Forestry Initiative) or from Central Oregon forests that are “selectively harvested”—not clear-cut. The price was right and the quality was good. Delivery was DIY.


I sealed the the boards with PolyWhey, a water-based sealer derived from whey—a byproduct of cheese making—from Vermont Natural Coatings. Whey is a natural bonding agent that displaces the toxic ingredients found in more common polyurethane. The manufacturer claims their product contains up to 45% renewable ingredients and is made in a plant using 50% renewable energy. When applied, it creates a non-toxic waterproof barrier, and protects again UV degradation, mold, and mildew. I found it easy to brush on, easy to clean up, and had virtually no odor. The matte finish lets the grain and coloration of the pine show through without a plastic-y look.
PolyWhey is ultra low VOC (volatile organic compounds) and meets “CA Prop 65”—the toughest environmental standard now in force in California. The standard disallows any product that contains any of the 900 chemicals that have been linked to cancer, birth defects, or other reproductive harm. PolyWhey also complies as Red List Free—a worst-in-class list of materials found in the building industry.
I ordered the sealer in 5 gallon plastic buckets instead of 1 gallon plastic containers. It wasn’t less expensive this way but I knew I could always use another bucket. Plastic containers are, in theory, recyclable—though as many of us are learning, it’s not so easy to find a facility that takes them or may take them but landfill them.
Leftover product isn’t classified as hazardous waste, and can be dried and discarded—but it’s not clear where. Because I sealed the boards before the crew chop-sawed them to fit, I have quite a few cut-offs. I contacted the manufacturer about burning or landfill. The rep admitted there isn’t any official recommendation, but said he personally would without hesitation burn them in a camp fire. So thats what I’m going to do.
 I hope the fresh appearance of my pine lasts a long time, but of course no one is going to hand me a guarantee. The USDA publication “Build Green: Wood Can Last for Centuries” points out that when wood is installed properly, it doesn’t deteriorate. Decay can be prevented. The culprit is fungi who attack the cell walls of wood in the presence of moisture, air, and favorable temperatures. On siding, we can’t control air or temperature, but we can control moisture.
My wood siding counts as a sustainable choice if I can keep it dry and on the house for a long time. I can’t control the needs or whims of a future owner, but here’s what I can do as the original builder:
- Apply water-proof sealer to clean, dry, freshly milled (not exposed to UV) wood on 4 sides prior to installation and to field cuts (end grain) during or after installation. This repels rain and limits wood movement like cupping, splitting and popped nails.
- Install siding with tight joints and caulk or flash all penetrations. Use bevel cuts at splices and cut any horizontal trim at a slope to shed water.
- Eliminate trees or large shrubs next to the house that cast shade and block air
movement (both slow drying and encourage mold, mildew, and pests). - Provide generous roof overhangs, kick-out flashings, and hold siding away from grade to prevent splash-back (my pine siding starts 32” from grade, above impervious cement board lap siding).
- Hold siding off roof surface to prevent wicking from snow melt.
- Shut down bulk vapor drive by air-sealing each and every penetration through the wall at each layer of material and use vapor-permeable materials to slow or store but not stop vapor transmission where appropriate.
- Install a Heat Recovery Ventilator to maintain optimal indoor humidity
But why go through all the work and worry when I could chose vinyl, steel, aluminum, wood composites, stucco, or brick? All have positive attributes, and promise low-maintenance. Vinyl is the least expensive and most common siding here in the Midwest, and many in the green building community argue its environmental impact isn’t so bad, even though it depletes fossil fuel reserves and uses a slew of chemical additives. It sheds water well, is inherently “back-vented” to allow the wall behind to drain and dry, can last 40 years, can contain some recycled content, and can be recycled (though most tear-offs still land in a dumpster). Here’s a good article: Pro/Con: Vinyl is Green. And here’s another take on it: The Seven Deadly Sins of Vinyl.
Wood is abundant, renewable, low-tech, and requires far less energy to make than metal or cement-based siding products. It can be a source of local jobs and spur on a more regionally-based economy (more on this in a future blog post). Its disposal doesn’t place a burden on future generations. What will our post-post-post industrial society look like in 2060 when today’s vinyl siding or steel is slated for recycling?
Each homeowner has their own preferences, place value on certain architectural features but not others, and bet on different products. Each building material we use has environmental costs associated with their material extraction, manufacture, transport, and disposal—but there is no difinitive source that tells us its durability or carbon footprint “score”. There are just too many variables.
 Green building usually means reducing operating costs by adding layers of insulation and products like high-performance windows. But today, more attention is being paid to the carbon footprint of the products themselves—especially as climate scientists warn of an ever narrowing window of opportunity to reduce our carbon emissions. Does it still make sense to build an uber energy-efficient home if the materials used cause more climate disruption today than the cost to heat and cool the home over these next, crucial years?
Alas, the best choice is to not build at all. Refuse, Reduce, Reuse, Recycle. More on this in a future blog post.
Cement Board Siding
June 26-July 12: My crew was impressed with how sturdy and how easy it was to work with the cement board siding I ordered through my local lumber yard. My design called for lap siding on the garage and as a “skirt” to wrap the base of the house. I chose James Hardie’s extra-thick “Artisan” series in a 7 inch reveal with smooth texture for its strong character and robust shadow lines.
 The crew did a great job planning the joints to reduce visual distraction and material waste. Installer-friendly features include an integral tongue & groove for a tight butt joint and excellent rain-shedding ability. The boards are nailed “blind” and “off stud” to avoid tear-out at vulnerable edges. Alignment is a sure thing with a galvanized steel “joiner” from Simplicity Tools placed under each joint. Corners are finished with another steel accessory, for a look reminiscent of a mid-century rancher. However, the installation left a worrisome gap at the bottom, a place bees might like to nest. I made the hole inhospitable by packing it with inexpensive stainless steel “scrubbies”. A rough-sawn cedar sill caps off the skirt.


Fiber cement sidings “green” credentials are debatable. It’s mostly cement, with cellulose fiber added as a binder. Mixed in, but not disclosed on the packaging or the Safety Data Sheet, are James Hardie’s proprietary ingredients. Cement is simply crushed rock—abundant and benign. But processing it and forming it into something you can nail onto your house burns up a lot of fossil fuels. It’s estimated that cement plants account for 5% of the global emissions of carbon dioxide, the main cause of global warming.
To their credit, James Hardie claims that 75% of the products raw materials are locally sourced, including the portland cement, cellulose pulp, sand, and water. These raw materials are low in toxicity, and the siding poses no health concerns in ordinary handling. However when cut, drilled, or crushed the dust is an inhalation hazard. My crew used a proprietary James Hardie saw blade designed to minimize dust and set up outside, away from people and buildings.
Like most manufacturers, James Hardie is cagey about disposal. Their Saftey Data Sheet says to dispose of in a “secure landfill, or in a way that won’t expose others to dust”. I talked with a representative, and in the end decided to toss my cut-offs on site. They’ll be fill for the driveway, displacing the amount of gravel to be hauled in. Using a high embodied-energy material can be justified if you don’t use much of it and you design for a long service life. I can’t predict what a future owner might do, but here’s what I can do:
- Build a small house with deep overhangs.
- Provide gutters to keep rain away and/or prevent splash-back at grade (more on this in a future blog post).
- Install with care and maintain caulk joints and paint finish.
- Eliminate trees or large shrubs next to the house that cast shade and block air movement (both slow drying and encourage mold, mildew, and pests).
- Minimize waste by ordering accurately and plan the layout for minimal cut-offs.
I love to paint. Sure it can be messy and a pain, but in the category of work I find it enjoyable. Most James Hardie products come with a factory finish, but in the thickness and width I chose it only came primed. That gave me the chance to pick my own hue and to try out a best-in-class eco-friendly paint.
I chose ECOS Paints in a matte gray, and it went on smoothly. Coverage was good, though there was some objectionable odor. Clean up was a breeze. Life expectancy is 15-20 years.


The paint can be purchased directly from the manufacturer, or through a distributor like Green Building Supply. The reviews at GBS were compelling. The paint is non-toxic and has zero VOC’s (volatile organic compounds). ECOS was the first and remains the only paint manufacturer to meet the strict labeling of both “DECLARE” and “Red List Free”.
DECLARE is a disclosure statement with more transparency than the more common Material Safety Data Sheet (MSDS)—it requires listing ALL ingredients, right on the label. Red List Free means the product doesn’t contain ANY of the thousands of known hazardous chemicals. Leftover paint and the empty containers aren’t classified as hazardous waste, so can be left to dry then tossed in an approved landfill.
The house is taking on a handsome look, and I hope you’ll stop by and see for yourself. You’re welcome anytime!
OPEN HOUSE Saturday August 10
Saturday August 10 from 10 am to 6 pm: Stop by and see what we’ve accomplished in the last couple of weeks. The slotted wood soffit is in, looking smart and doing its job to keep the insulation and roof framing dry. Horizontal cement board siding skirts the house and wraps the garage, now sealed with “Red-list Free”, low VOC, made-in-America paint. Inside, rooms are framed out and waiting for mechanicals. Learn how double-stud walls and other energy-efficient details will make this Spring Green’s first net-zero energy home!

OPEN HOUSE Saturday July 6
Saturday July 6 from 10 am to 6 pm: The house is taking on a handsome look as wood siding and soffit go up piece by piece. When we fire up the saw, we’re running on clean energy—the solar panels are now hooked up to the grid. Inside, you’ll still see the skeletal structure of the double stud walls and the barn-like open space. Wait till next month, and each room will be defined by their stud walls. I’m just back from the Midwest Renewable Energy Fair where I gave a talk on our progress and plans for a new vision of suburbia. Come see what we’re doing, ask me questions, and tell me what you’re looking for in a modern home!

pre-sealing pine siding and soffit boards
WORKSHOP at the Energy Fair
Friday-Sunday June 21-23: Have you been wondering what you can do to reduce your carbon footprint? Would you like to help build a straw-bale wall? Get a good look at the latest electric cars? Learn how to raise chickens? Can you picture yourself eating pizza from a outdoor wood-fired oven? Listening to live music while lounging in the grass? If so, you can’t go wrong at one of my all-time favorite events: the Energy Fair in Custer, Wisconsin.
I’ll be giving a talk about building Spring Green’s first Net-Zero Energy house on Sunday at 10 am called “Follow the Build-Part 1”. Here’s the link to my presentation:
I hope to see you there (or at the beer tent).
Dense Pack: Take 1
June 3-5: At last I was ready for insulation. For good reason, the type of insulation, where to install it, and how to install it is of obsessive interest to green builders like me. Other building materials might be the same, but insulation is where we veer off. I chose dense-pack cellulose because there’s no other insulation that takes less energy to produce, uses more recycled content, and is less toxic to people and animals. Not counting direct-from-the-earth materials like straw bale, straw-clay, cordwood, log, and cob.
Yes, I did consider straw. But for my subdivision house geared to taking super-insulation and net-zero mainstream, I’ve heeled close to convention. All I’ve done is make deeper cavities and prioritized initial cost over operating cost.
There aren’t many contractors set up for this kind of work. Wallace Kennedy and sons of Accurate-Airtight Exteriors arrived from Madison to install what turned out to be the most number of bags ever for a dense-pack job. Wallace packed 238 bags in my 22 inch deep truss cavity, for a total R-80. That’s double code minimum.
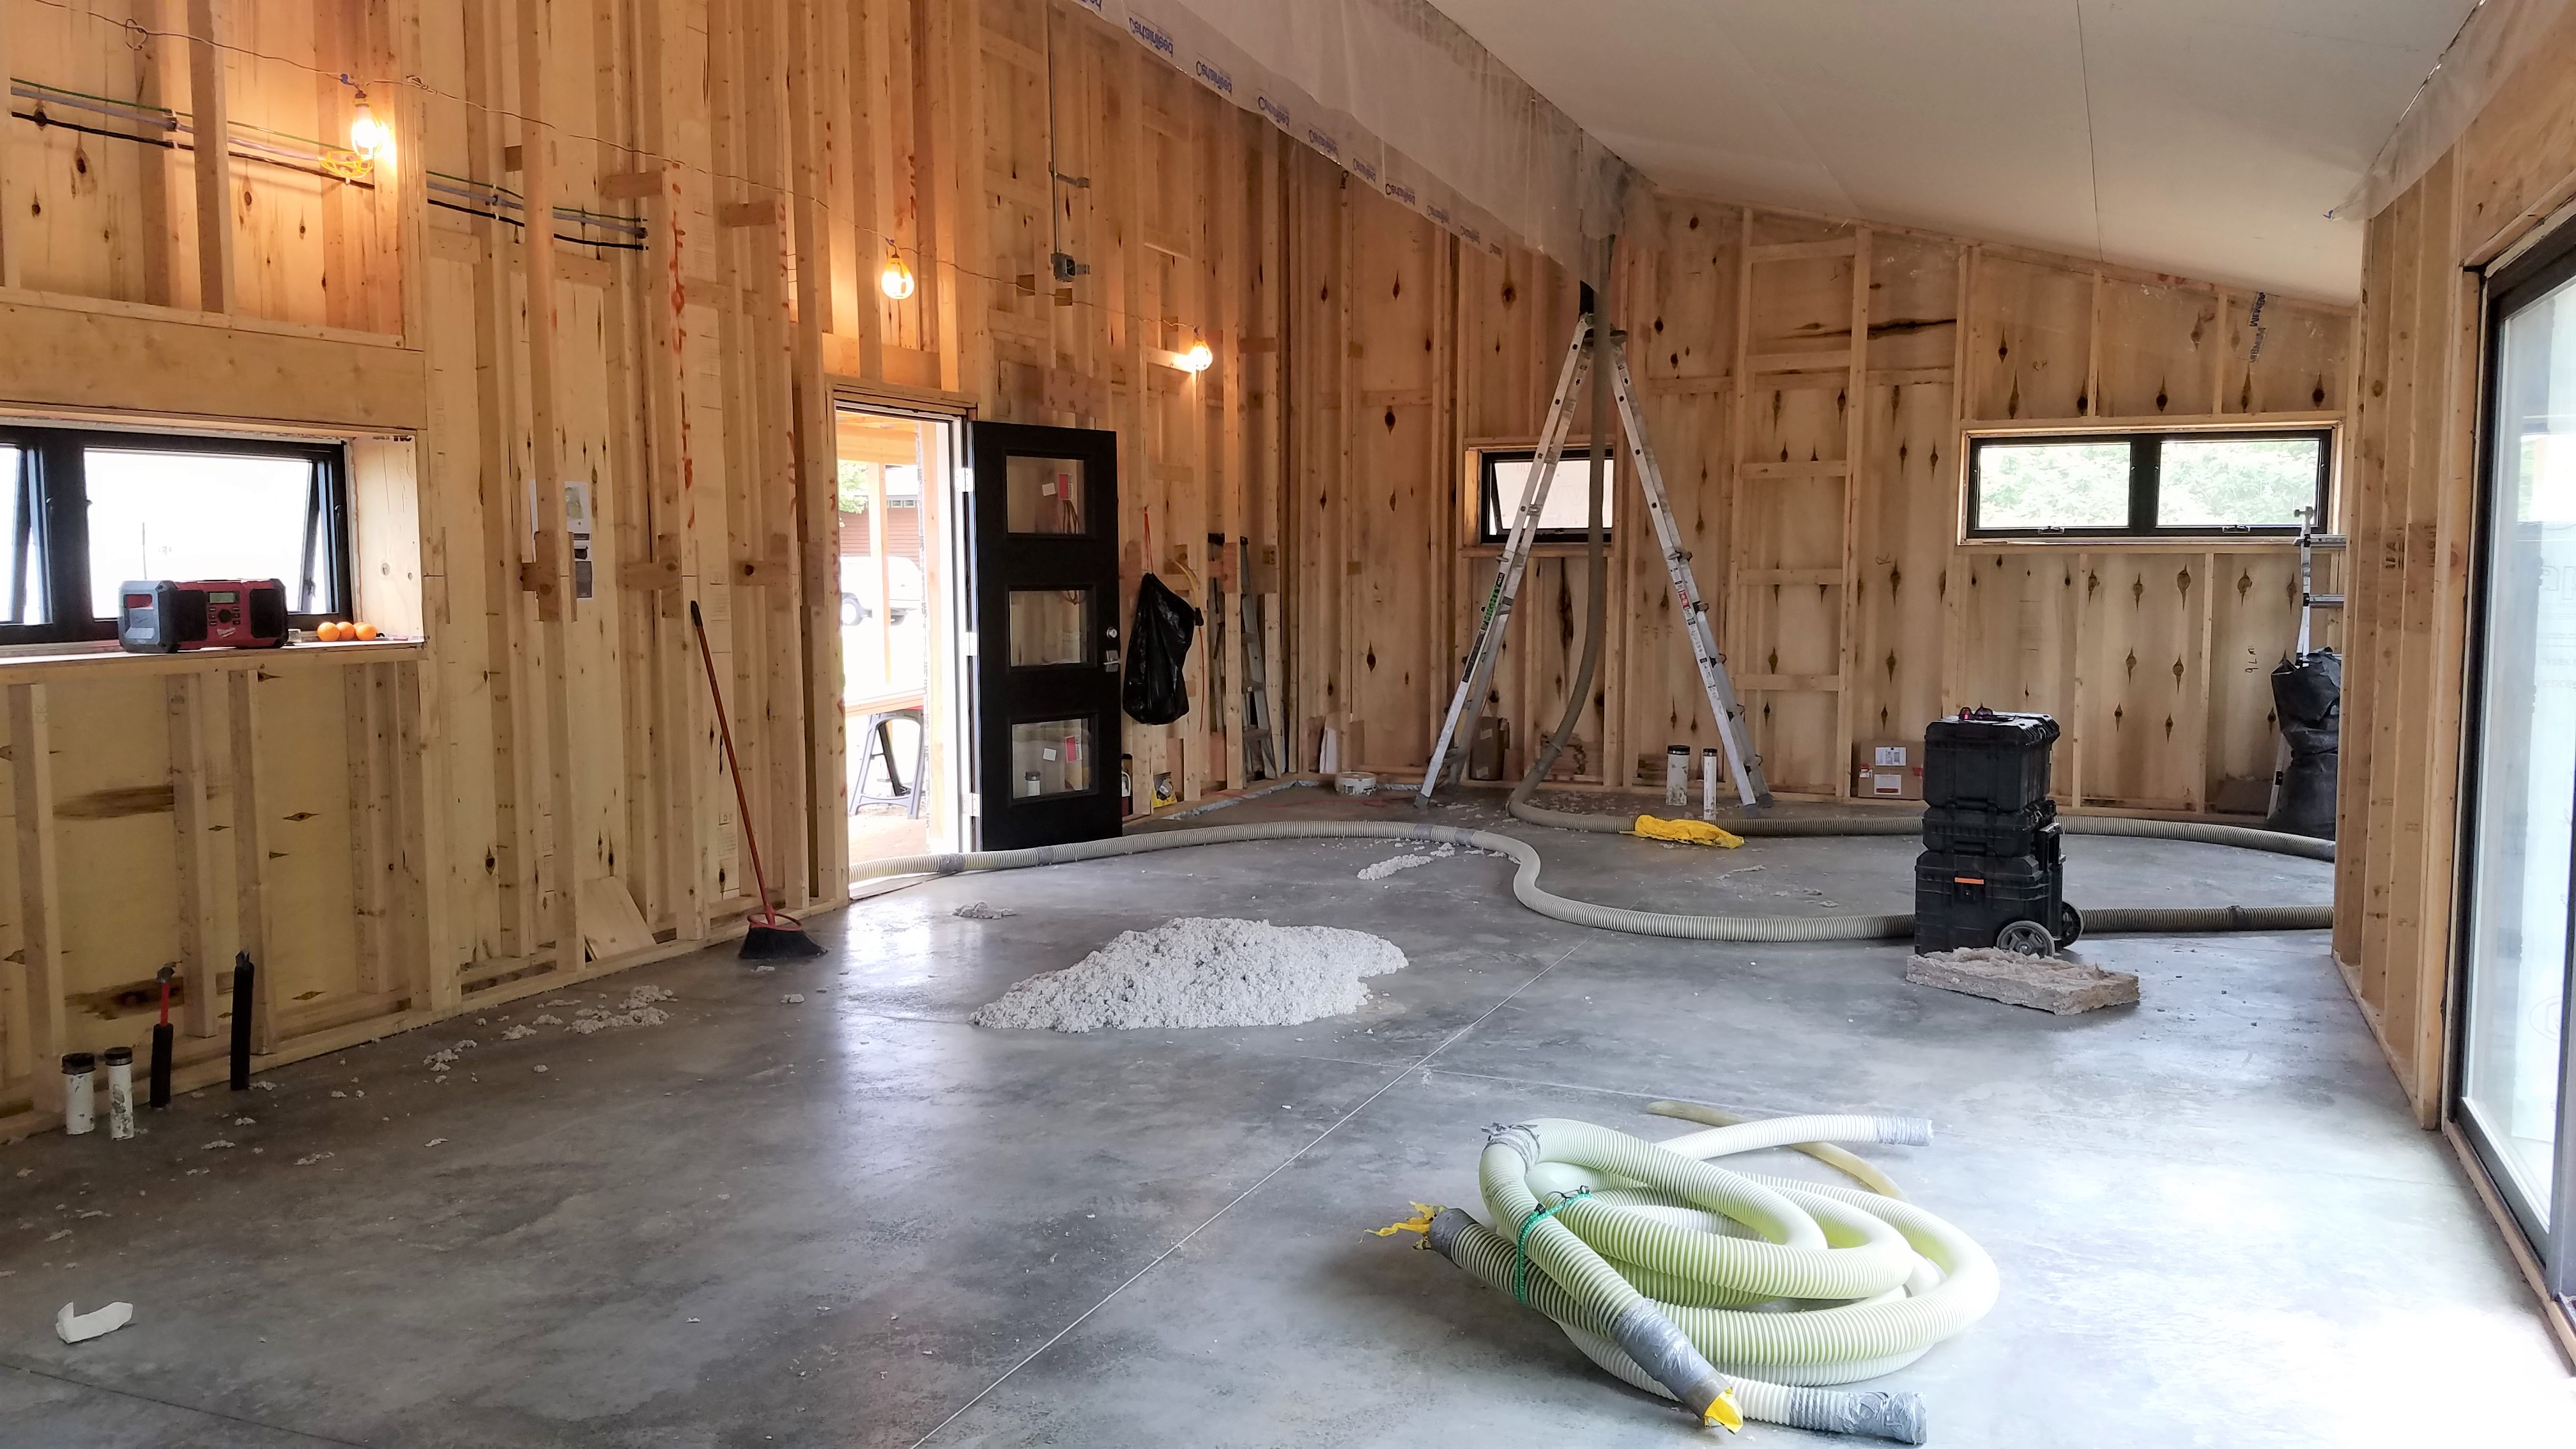
The insulation comes from Champion Insulation in nearby Fond du Lac. It’s made from wood fiber paper stock and claims 85% recycled content. By weight, it’s 84% cellulose, 14% boric acid, and 2% starch—all benign materials that pose no threat to the environment. It doesn’t cause skin irritation like fiberglass, and has little or no smell—though breathing the dust should be avoided.


Cellulose reduces sound transmission, and when dense-packed it resists air movement, fire, pests, and vapor diffusion. Because it’s hygroscopic, it can take on and release moisture from surrounding materials like sheathing. This protective characteristic makes it especially favorable in double-stud walls that lack a layer of exterior sheet foam. The added borate aids in resisting mold and insects.
Cellulose is a “low embodied-energy” material. That’s the energy it takes to source its ingredients, manufacture and transport the product, and dispose of the product at the end of its useful life. Side-by-side comparisons with other insulation types are hard to come by. Cotton, wool, and cork are more energy-intensive and cause some pollution, while fiberglass, mineral wool, and all the foam insulations pose significant risks.

expert installer Wallace Kennedy with owner Torrance Kramer of Accurate Airtight Exteriors
I ran the vapor retarder long and instructed the drywallers to skip over a 12” gap down the center of the ceiling for access to each truss bay. It took the crew 3 (monotonous) days to complete the job. Wallace stayed on hose, while the younger men fed the blower machine. Their final step was trimming & taping up the vapor retarder over the gap, making it ready for the 12” strip of drywall that will complete the airtight lid. I’m grateful for their conscientious work!
Sealing the Slab
May 24-29: Time was running out. I wanted to have things looking nice for my June 2nd Open House, but I could tell after just a few hours of scrubbing that getting the slab ready to seal was going to be a long and grueling ordeal.
During the planning process, I made the decision to go with a “raw” concrete look: no stains, no stamping, no pattern cuts. No grinding or polishing to reveal the aggregate. No faux finish and no visual tricks. Above all: honesty of material. A simple matte finish would save money that could be put towards fabulous area rugs. Plain with a touch of luxury would suit my style.

BEFORE

AFTER
I’m not one to rush out and buy expensive equipment or take a chance on a rental that may or may not get the job done. I also don’t like to hire out if it looks like something I can do. All it is, is work. Stubborn stick-to-itiveness and shear parsimoniousness has made for many a long day.
The slab was well-cured after 6 months and it was finally up to temperature. Over the last several weeks, I watched as my borrowed infrared thermometer read out 40, then 50, then 60 degrees. I had my plumber install a hose bib and the Village hook up a meter. I broke down and bought a shop vac and a stiff push broom. I watched a couple of YouTube videos about how to apply muriatic acid (it micro-etches concrete and prepares it to “grab onto” a sealer), and invested in a spray bottle, rubber gloves and a mask. I was good to go.
By sections, I scrubbed the slab 3 or 4 times (just water, no soap). When the water finally vacuumed up mostly clear, I applied the prescribed dilution of muriatic acid and watched it bubble & mist. I rinsed 2 or 3 times then let it dry for a few days before brushing on a test patch of sealer where the cabinets will go.
I chose ECOS Paint’s “Concrete Sealer”, a zero VOC, no odor, water based acrylic product that was easy to use. It carries the “Red List Free” label from Living Future Institute for not containing any of the worst-in-class materials prevalent in the building industry. I hoped to save time by rolling it on with an 18” wide paint roller but quickly saw it left tiny bubbles. I switched to brushing it out on hands and knees.

BEFORE

AFTER
Two coats got me an interesting finish that I kind of liked but told a friend that “10 out of 10 people will find this unacceptable”. My prediction was way off: at my Open House, many people commented on it and likened it to a natural stone floor. The finish seals out water (I tested it), but took to the concrete in a mottled way. Some areas are shiny, others are dull. The look is growing on me! What do YOU think?
Hanging the Lid
May 20: Sometimes, conventional wisdom should be questioned. In this case, it’s the conventional sequence of residential construction. Today, the drywall crew arrived to “hang the lid”—builder speak for installing ceiling drywall.
 In my quest for a super air-tight house, I decided to eliminate all electrical and mechanical penetrations through the ceiling and to insulate it and drywall it before framing out interior partition walls. While it takes separate set-ups for each crew and some flexibility in scheduling the next phase, it does make the actual job easier and faster.
 Drywall is relatively cheap and it’s common to add a few sheets in case of a miss-cut, but I wanted to reduce waste. I also wanted to try out a product called Insta-Back that eliminates the need to cut drywall back to the nearest truss. I came up with a plan that saved 4 sheets of drywall, reduced the number of seams to be taped, sped up installation, and left me with a manageable pile of scraps at the end.

6 Insta-Back clips can be seen along this butt joint
My plan called for cut sheets at the perimeter only and full size sheets in the field, run past their truss supports. All lengthwise seams are factory. Butt seams are joined by Prest-on’s “Insta-Back” drywall clips that promised a “bump-free” joint with a 1-2 degree taper, similar to a factory joint.

Adam Esch of Esch Drywall appreciated the wide open space to roll his scaffold and did a great job. But I could tell he wasn’t too impressed with the clips. Later, I went back through with a level and determined that of 20 butt seams, only 2 had the requisite taper, while most simply held their own by laying flat. I’ll have 3 or 4 bad joints to deal with. At this point, I’m not sure if the problem can be blamed on the Insta-Backs, or the adjacent trusses. For the walls, I may try another product.
I chose 5/8” thick USG’s “EcoSmart” panels for their long list of green credentials and green certifications. The upcharge was under $20. The panels are significantly lighter and use less water in the manufacturing process. The ingredients are so benign, I tossed scraps at the edge of my lot to decay into the soil.
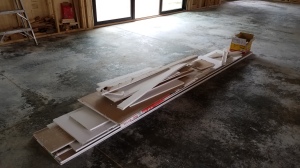
A Neat Pile of Scraps for the Garden
We left a 12” gap down the center of the ceiling at the request of the insulator. He’ll use the gap to snake his hose into the truss cavities. Later, we’ll fill the gap with 1/2” thick drywall for a smooth connection to the factory seams. Here’s hoping drywall mudding and taping will go well, because I’ll be tackling it by myself!
The Whys and Hows of Vapor Retarders
![Resized952019051995153347[163818]](https://poemhomes.files.wordpress.com/2019/06/resized952019051995153347163818.jpg?w=169) May 18-19: The latest buzzwords are “smart & sustainable” and I’m saying them but thinking ruefully of all the things builders and industry get wrong and have to walk back in say, a couple of decades. It was on my mind while on a ladder while wrestling with a 50 foot long roll of so-called “smart” vapor retarder.
May 18-19: The latest buzzwords are “smart & sustainable” and I’m saying them but thinking ruefully of all the things builders and industry get wrong and have to walk back in say, a couple of decades. It was on my mind while on a ladder while wrestling with a 50 foot long roll of so-called “smart” vapor retarder.
Today’s homes are much more vulnerable to mold and decay than older homes because they’re slow to dry out if they get wet. We pack wall and ceiling cavities with insulation, and cover surfaces with materials that trap or retain moisture. When driving rain sneaks past cracks & crevices and soaks in, a day or two of sunshine isn’t enough to make things right.
Inside, a family of four can create 2-3 gallons of water vapor a day when cooking, bathing, and washing—and all that moisture can find an exit through a hundred sloppy construction holes.
An older home is like a wood box. A new home is like a wood box lined with sponges imperfectly wrapped in plastic.
Since the 1970’s, building codes in cold climates have required a vapor retarder installed on the “warm side” of a wall or ceiling. It can be old-school kraft paper that comes with fiberglass batts, but is usually 6 mil polyethylene stapled to the face of the studs and covered with drywall. Poly is a Class I Vapor Barrier, practically impervious to water vapor. Kraft paper, once maligned as too loosy-goosy, is now considered “smart”. It’s a Class II Vapor Retarder, which means it can stop some but not all vapor.
The problem is that with the advent of air-conditioning the “warm side” of the wall in summer is on the outside. How this obvious truth could be overlooked (and why Wisconsin’s building code is still stuck in the past) is hard to fathom, but the building industry has stepped in with a new product—and this is how I ended up on a ladder, wrestling.
CertainTeed’s MemBrain is a 2 mil polymide film that alters its physical structure (!!!) when the relative humidity changes—shifting from Class II to Class III. Water vapor can pass through when humidity is crazy high (60%), but stays “shut down” when humidity is in the normal range. So in winter, MemBrain works like a normal vapor retarder in that it stops warm, moisture-laden inside air from entering a wall or ceiling cavity and condensing on the cold surface of the sheathing. However, should the cavity become seriously saturated, MemBrain will “open up” and allow drying to the inside.
In summer, with air-conditioning running full tilt, MemBrain will stop the warm, moisture-laden outside air from entering the house. But should the cavity become overloaded, it has a chance to diffuse its vapor to the dry air of the interior. Picture a downpour followed by sunny skies. Wood, brick, stone or cement board siding becomes saturated. Solar heat drives the moisture into the building cavity. If traditional poly is used behind the drywall, that moisture will condense and saturate the insulation. With MemBrain, the moisture can pass through.
But many building scientists and high-performance builders say a vapor retarder isn’t needed, except in extremely moist situations like pool rooms and greenhouses, or in homes up north where air-conditioning isn’t used. They argue that vapor diffusion through drywall is minuscule compared to bulk vapor drive through sloppy holes. What’s needed instead is an interior air barrier. Drywall is fine, as long as it’s well-sealed.
Martin Holladay of Green Building Advisor makes an exception for double-stud walls like mine. Because super-thick insulation keeps exterior sheathing extra-cold in winter, the chance for moisture accumulation is greater than in a conventional 2×6 wall. He recommends a vapor-open sheathing like fiberboard or exterior-grade drywall in addition to siding installed on a ventilated rainscreen. Both measures speed drying to the exterior. The other option is to slow moisture diffusion from its source by installing a smart vapor retarder.
My sheathing is plywood, which is more forgiving of moisture accumulation than industry-standard OSB (oriented strand board), but less so than fiberboard. I’ll be installing my siding on DuPont’s DrainWrap, a crinkled version of Tyvek that accelerates drying, but not nearly as well as a dedicated rainscreen. Holladay would say that in my case, a smart vapor retarder is cheap insurance.
While my wall is moisture-forgiving, I’ll bet most of the homes in my neighborhood (built over the last 20 years), are a “moisture sandwich”. Typically, the walls are 2×6 frame with fiberglass insulation and a poly vapor barrier under the drywall with 1 inch of foam over the exterior sheathing. Sheet foam is a good solution for increasing the R-value of a conventionally framed wall, and it really reduces “thermal bridging” but it comes at the cost of trapping moisture. Both foil-faced polyiso and pink or blue XPS are Class I vapor barriers on par with poly. If this wall gets wet, it will likely stay wet for a long time.
My vapor-variable retarder might be cheap insurance, but it’s not cheap. I tried hard to find kraft paper (not attached to a fiberglass batt) that was labeled a Class II vapor retarder, but no luck. I looked at vapor retarder paint, allowed with special permission in Wisconsin, but only found the usual toxic mixtures.
Installing MemBrain wasn’t really too hard. It was more durable than I imagined it might be, and held up to hanging and stretching without tearing. I lapped seams by 12 inches and sealed the perimeter with ChemLink’s DuraSil, a non-toxic, low odor silicone adhesive. In this way I achieved both a continuous vapor retarder AND a continuous air barrier.
Some type of vapor-variable retarder is the only option I’d consider for a smart and sustainable home—given the current level of building science and available technology. But it’s not a hill I want to die on: what will progressive builders be doing in 20 or 50 years? Will my so-called high-performance assembly look antiquated?
Mind the Gap: Take One
May 15: There’s a lot of confusion out there about how tight is too tight. Some builders say a house “needs to breath”, and that sealing every gap is a waste of time. This is how I see it: we all want fresh air. Some of us with allergies need filtered fresh air. What we don’t want is “fresh air” filtered through the building materials in our walls and ceilings. If we leave gaps we are:
1. Wasting energy (losing heat in winter, coolness in summer).
2. Allowing moisture-laden air a route into walls and ceilings, where it can condense on cold surfaces, creating a breeding ground for mold and mildew.
3. Allowing dirty or polluted air a chance to dump dust and allergens into walls and ceilings, or directly into the indoor air.
4. Creating a pathway for insects, or worse—rodents.
In the summer, I can open windows. But in the winter, I’ll need a mechanical system to bring in fresh air and exhaust stale air. Later, I’ll explain the quiet, energy-efficient ducted heat-recovery ventilator (HRV) that will be installed.
Just as I did for exterior air-sealing, I took an enthusiastic approach to interior air-sealing. I used canned spray foam to seal window and door rough openings. It was easy and fast. I’m a little worried about reports I’ve read that foam can crack and separate from it’s wood substrate over time. A bead of caulk or a run of tape over the foam would be prudent, but I haven’t found a way to do that in my particular situation. Where spray foam wasn’t appropriate, I used caulk or tape.

 Foam in all its guises is one of the worst building materials for carbon footprint. I chose a low-pressure polyurethane foam called Handi-Foam. It’s a Green Guard Gold product certified for low chemical emissions and is non-toxic when cured.
The electrician has run a few pipes. I sealed those with DuPont’s FlexWrap EZ, a butyl-based peel & stick tape that’s a breeze to install.
With air-sealing complete, the moment of truth arrived—my first Blower Door Test. I asked Focus on Energy rater Jim Kjorlie of Kjorlie Design Services to come out and test my house three times: before insulation, after insulation and before drywall, and finally upon completion. With his help, I hope to achieve a final rating of 1.0 ACH (air change per hour).

Blower Door tests aren’t too common around here, but in neighboring states where stricter energy codes have been adopted, they’re required. Jim set up a large fan in the front door, turned it on, and brought it up to speed. The idea is to depressurize the indoor air to simulate a 20 mph wind bearing down on all sides of the house. Air leaks that on a still, windless day wouldn’t be obvious become quite noticeable. Jim fiddled with various gauges and after a few minutes, we had the number. Here’s how I did, expressed in air changes per hour (ACH)—literally how many times the volume of air in the home is changed out with fresh air each hour:
Wisconsin Code (2009 IECC national code) =7.0 ACH
Focus on Energy New Home Program =3.8 ACH
Test #1 =2.2 ACH

That’s pretty good for this stage. Jim went around with a “smoke stick” that detects leaks by showing a trail. Tell-tale puffs shot out at the base and top of the patio door—the usual places, he said. He suspects that the fiberboard vent chute—which comprises 40% of the interior surface area is much more air permeable than the plywood sheathing on the walls. He suggested I find air-perm ratings for both materials, but so far I haven’t found any definitive information.
I’m stoked to bring that number down, so stay tuned for Test #2!
OPEN HOUSE Sunday June 2

Sunday June 2 from 10 am-6 pm: Progress continues at Spring Green’s first net-zero energy home. Since our last Open House, we’ve completed the roof vent chute, installed the PV solar panels, drywalled the ceiling, started interior wiring, conducted our first blower-door test, and sealed the concrete slab. You’ll still see the skeleton double-stud walls. Look around, meet new people, enjoy refreshments, and ask me questions! Find us one block north of the High School at 770 North Westmor Street. For more information call or text Amber at 608-935-9020.
Vent Chute
April 18-28: Icicles sparkling and draping from a roof on a vacay-snow-day is a beautiful sight, but when you know more you see trouble. You see heat loss, hidden pools of water, and stained ceilings.

My super-insulated, super-airtight, super-vented roof will even out and slow down snow melt. Warm moist inside air won’t find a route through and condense on cold surfaces and soak insulation. If I worry about sealing up every single little-bitty gap now, I won’t have to worry about mold, mildew, or rotting structure later.
 A flat ceiling is easy to insulate and easy to ventilate. A sloped ceiling like mine takes extra steps. I’ll use eco-friendly cellulose, made from recycled newsprint. But there are two hurdles: it settles and drifts unless “dense-packed” into a cavity, and Code requires it be top-vented to allow any moisture migrating from below a route of escape. The usual solution is a manufactured “vent chute” made of cardboard, plastic or foam—but dense-pack would crush it.
 I ordered up a few bundles of 1×2’s and a stack of fiberboard from the lumberyard and had on hand a case of low-VOC caulk (ChemLink NovaLink 35) from Green Building Supply. We air-stapled the 1×2’s to the sides of the top truss chord, fitted in rips of fiberboard, then went back to caulk the gaps and tape the seams. This left us with a 3 inch deep continuous chute separating the roof from the insulation. Any warm, moist air that migrates through will be whisked away, through soffit vents we’ll install in a few weeks.


Fiberboard is an old-school building material and nowadays, a special order. It’s used for wall and roof sheathing, for insulation (R-2.5 per inch) and for sound-proofing. It’s classified as non-hazardous and is recyclable if you can find a facility. It’s made from recycled wood fibers, wax, and usually has a black asphalt coating on one side. It’s vapor-open and sturdy. I could have used OSB (oriented strand board) for slightly less cost and but greater environmental impact. We found the fiberboard easy to work with and not too dusty.

We did a pretty good job with waste, although there were the inevitable cut-offs and caulk tubes that had to be landfilled.


OPEN HOUSE Saturday April 20
 April 20 noon-5 pm: We’ve made some good progress on Spring Green’s first net-zero energy home. Take a tour, snap some pictures, ask questions. You’ll see the skeleton structure and what double-stud walls and raised-heel roof trusses look like. Admire the views through the recently-installed windows and ask about their energy-efficiency backstory. Have a look at the still-to-be-trimmed-out galvalume standing seam roof. Find us one block north of the High School at 770 North Westmor Street. Bring the kids, stay for s’mores. For more information call or text Amber at 608-935-9020.
Windows & Doors
March 29-April 14: My favorite thing so far is the 12 foot wide patio door we installed on a glorious spring day. It’s what’s going to open the living room up to my garden and help heat the house in winter. I chose a Marvin aluminum clad wood slider, with a heavy-duty fiberglass sill. Thank goodness for my crew of Very. Large. Men.
I prepped the sill by securing the under-slab vapor barrier to the edge foam with caulk and measuring out a length of 5” EPDM sill gasket. The patio door sill will sit directly on these materials, completing a continuous thermal-barrier, air-barrier, and vapor-barrier to the exterior.

edge foam with caulk

EPDM gasket
Mark of Bear Paw Design & Construction and “the boys” hustled the thing into place.
 Here’s Mark finessing the gasket, bathed in sunlight. “Passive Solar” was the buzzword of the 70’s that got me excited about architecture and back to school to take a drafting class. Since then, the idea that south-facing windows can serve as heating appliances has been disparaged. Those early, hippie homes with their wall of factory-seconds windows skimped on insulation and leaked like a sieve. They overheated during the day, and without thermal curtains lost all that heat at night. We now know that thick layers of insulation and a double-down on air-sealing are far more important than trying to capture solar energy.
Many high-performance builders shooting for net-zero are building conventional-looking homes without regard for window orientation. Even so, I’m inclined to cling to my roots. My design follows the recommendations of Dan Chiras and his seminal book The Solar House which balances “solar glazing” to “thermal mass”. During the winter when the sun is low in the southern sky, sunlight will stream through my south-facing windows and patio door and its heat energy will be absorbed by my concrete slab. There will be some lag. Some days, it will be cloudy. Other days, the house will get too hot. Thermal mass is slow—it’s slow to absorb heat and it’s slow to release heat.
Here’s where I divide company with the mainstream—I don’t need and I don’t want to live in a thermostat-controlled environment that never, ever varies. I’ll live in a house that responds to our flight across the sky and I’ll save energy by accepting indoor air temperatures that climb to 80 degrees on sunny afternoons and drop to 60 degrees overnight. So it’s slippers for me.
One of the most-asked questions I get is if the slab is heated, meaning with PEX hot-water tubing run through or under the slab. Heated slabs are wonderful. They’re warm to the touch and can carry a well-insulated house through most of the winter with supplemental heat turned on only for the coldest days. But because thermal mass works slow, the PEX system really should be left on continually—leaving very little absorptive capacity for incoming solar. And because it’s slow it can’t respond to a sudden change of weather. Most homes need a backup heating appliance that ideally also supplies air-conditioning. So while wonderful, heated slabs are more expensive than unheated slabs because you’re investing in two—not one—mechanical systems.
To satisfy my curiosity, I ran my design through modeling software REM-Design. Per recommendation, my “solar glazing” is 12% of the area of my “thermal mass”. When I remove the slab, annual heating costs increase by 3.5% and surprisingly—cooling costs rise by 9%. Southern Wisconsin is hot in the summer, but has enough temperature differential between daytime and nighttime (about 20 degrees) to power up the “thermal flywheel” effect. While overhangs will mostly shade my south windows from the direct rays of the sun, August heat will warm the slab during the day. If I keep the windows open and there’s a breeze, that absorbed heat will flush out and by morning, I’ll feel a nice cool underfoot. 
Besides the cooling effects of the slab, windows placed for cross-ventilation in each room will keep the air-conditioning off most of the summer. Casements or the patio door can be cracked open a little or a lot to funnel prevailing Southern breezes out North-facing awning windows. High windows enhance the “stack effect”, naturally drawing warm air up and out, all hurried along by the sloped ceiling. The speed of the air can be increased even more when the area of opened window on the windward side is small compared to the area of opened window on the leeward side. Awning windows are perfect for passive ventilation because they can be left open all summer long without any worry about rain.
I chose Marvin Integrity All-Ultrex windows for their rot-proof, maintenance-free finish and long-term durability. They’re less expensive than Marvin’s wood aluminum clad windows but more expensive than common vinyl windows. They’re made from pultruded fiberglass, which takes 39% less energy to manufacture than vinyl. And because they’re 60% glass (silica sand), the frames expand and contract at nearly the same rate as the glazing, making the units less likely to break seal.
Window glazing comes in a dizzying combination of features that effect energy performance, and I gave them all an equal run through REM-Design. Turns out, the most commonly available is also the most cost-effective. I chose “dual-pane, low E2 with argon” which is rated for year-round comfort in Northern and North-Central states. The equivalent R-value is 3.4, the same as one inch of cellulose or fiberglass insulation—not too impressive. There are several (mostly Canadian and European) window manufacturers that make up to R-10 windows, but they are far outside my budget.
Other high-performance builders in our climate zone upgrade to triple-panes and low E1 coatings where south-facing. If I did the same, I could save $59/year in operating costs. However, the package would cost me $2,785 extra or about 28% more. Even when amortized over the expected service life of the windows (30 years), the triple-pane windows never pay for themselves.
The argument then comes down to comfort. It’s true that dual-pane windows are colder and more prone to condensation problems. If you’re sitting next to a cold window in the evening, you’re going to feel a chill as your warm body radiates heat to the cool glass. And you might experience a waterfall-like spill of air and be tempted to turn up the thermostat. Curtains or thermal shades are the answer here, or to paraphrase Frank Lloyd Wright: “move your chair”.
I saved money and resources and kept to budget in another way: my home doesn’t really have many windows. If my design answers the need for natural light, views, and cross ventilation—it works. If the windows are well-proportioned and well-placed to create a harmonious whole with other architectural elements—I have style. But the biggest savings of all: the house is small.

flexible sill flashing

flexible corner flashing
Installing the windows was a satisfying step for me. I chose DuPont’s Tyvek system of flashing products. While it can sometimes seem like you’re wrapping a Christmas present, tape and Tyvek are stronger and long-term more reliable than old-school caulk and tar paper. The products had a quality feel and were easy to use.


I used FlexWrap NF, StraightFlash, and FlexWrap EZ—all butyl rubber flashings that are solvent- and VOC-free. They can be installed in cold weather on cold surfaces, are self-healing, and don’t off-gas. There’s no waste except for the peel-off paper backings. With windows in, the house is warmer and a better place to be.
Roofing
March 29-31: Spring construction got off to a big start when Mark Morgan of Bearpaw Design & Construction arrived with his sons to install the metal roofing. The pre-cut-to-length roof panels flew on and by Sunday afternoon the work was nearly done—all except for the “gingerbread”. That’s Mark’s term for edge and ridge trims.
 We had a good rhythm going with Mark cutting and bending panels at a workbench, Nate carrying and sliding them up to Joel who screwed them down, and me filling in where needed. My work included peeling off the shrink-wrap that protected each panel from the next. I grew more and more dismayed as trash bag after trash bag filled up. Technically, plastic like this is recyclable but the reality is different. Do any of you know a facility?
The panels came drop-shipped in large wooden crates (wrapped in more plastic). The 2x material isn’t good quality and some of it will split when I bang it apart, but I plan to reuse what I can for blocking and bracing. The rest will be firewood. My sales rep recommended I order two extra panels in case of a miss-cut or the wind taking one but we had no mishaps. Mark will take the extras for his shed and I can take scraps to the local recycling place.
 The roof is standing seam steel with a galvalume finish that comes with a 25 year warranty. Most estimates put its lifespan at 50+ years, a nice match to the lifespan of the PV (photovoltaic) panels that will cover a third of the house roof. An installer I spoke with told me that to take down and put PV panels back up for a re-roofing job he’d need $2000—-a cost best avoided.
Metal roofs aren’t very common for homes in our area. They’re more expensive, so to recoup your costs you need to be in the house a LONG time or be confident there’s resale value. Many people find them too stark, too commercial-looking, or too modern-looking and in some cases I agree.
I chose galvalume instead of a painted finish because I like the way it looks and it goes with the casual, contemporary style of my house. You can get steel in lots of colors but unless it’s gray I think it looks cheesy (think Pizza Hut). The galvalume fits my aesthetic because it will take on a weathered patina much like a well-used cutting board. The more common choice—asphalt shingles—wouldn’t meet the long-term durability and low-maintenence goals I set for this project. They last only 15-20 years and while in theory can be recycled, usually end up as landfill. Steel is recyclable at the end of it’s useful life. But to honestly evaluate the “green credentials” of various roofing options you’d have to compare their embodied energy—a moving target that only a few scientist-types have attempted. It includes the energy to extract, to transport, to manufacture, to install and maintain, and finally to dispose of.
With the roof on, I can now turn my attention to windows and doors!
OPEN HOUSE Sunday March 17th
Noon to 4 pm: You’re welcome to stop by and see my house under construction in Spring Green, Wisconsin. The walls are up and the roof is on so you’ll see what double-stud framing looks like and how the raised-heel roof trusses create space for an extra-deep layer of insulation. If you’re curious about what a smallish (1200 square foot) home feels like or want to learn more about super-insulated, passive solar, net-zero energy design I’m there to answer your questions. We’ll have a little campfire and refreshments too!
Throwback
March 2, 2019: My house is a throwback to 1955. That’s the last time the average new home built in America was 1200 square feet. By 2014, the average new home ballooned to 2657 square feet—even while families got smaller. Today 62 out of 100 households are just one or two people.
I meet people all the time who want to down-size. As an empty-nester myself, I can relate. A big house is too much work. It takes a lot to heat and cool. Steps can become a problem. Older homes need updates and don’t adapt well to modern lifestyles but newer homes are big and boxy and lack character. Living in the country is nice but can be isolating and you’re forever driving back and forth to town.
As a designer who’s listened to hundreds of families describe the good and the bad of their living situations, and as a builder who wants to make a difference, I see an under-served market.
At first, I didn’t think I would be able to build the house I wanted on the lot I wanted. Like most subdivisions, mine has Covenants—certain minimum requirements laid down by the developer to insure a sort-of uniformity to the neighborhood. The minimum size for a one-story home was 1500 square feet.
Turns out, rules are negotiable. My Offer to Purchase was contingent on approval to build a 1200 square foot home. As soon as it was accepted, I hit the drafting board.
Whittling down a wish-list takes some time, a little work with a tape measure, and a bit of inspiration. Of course, not everyone will make the same calculation I did, but here’s what made the cut and what didn’t:
 NO HALLWAYS: Eliminating hallways is hard to do in a large home but pretty easy to do in a small home. Each bedroom is on either side of the great room, not lined up along a bedroom wing. The kitchen is a galley with standing space doing double duty as the main circulation route. The laundry is a smallish “room” that you walk through to get to the bathroom and bedroom.
NO CLOSETS: Instead, there are built-in cabinets for coats, clothes, pantry, and cleaning supplies. This saves space usually taken up by 2×4 wall framing.
NO STAIRWAY: There is no basement and no second floor. Instead, there’s a narrow ladder-stair to attic-like space for bulk storage.
NO DINING ROOM: A nook off the Living Room is convertible to informal dining, homework, crafts, games, or TV area.
NO FOYER: Instead of two rooms—one for guests and the other a mudroom, there’s a single way in with a place to hang coats and drop boots that does double duty as the main circulation route.
NO LAVISH MASTER BATH: Each of two bathrooms is a modest size with a tiled walk-in shower. There’s no tub.
YES WINDOWS: The number of windows is modest, but their size varies from small view-port to over-scaled, adding drama and bringing attention to particular views. Each room has windows on two sides to balance light and draw in fresh air. Each bathroom has a window.
YES VAULTED CEILINGS: I splurged on volume but keep things cozy by layering in wood beamed ceilings over the kitchen, entry, and bathrooms. The rooms feel bigger and airier and more spatially complex. Diagonal views both up and out extend views and expand space.
YES OUTDOOR LIVING SPACE: There’s a breezeway-style porch for summertime dining and lounging and a walled garden/patio for campfires and watching the stars, both just steps away from the kitchen. I’ll live mostly outside 6 months of the year!
Eaves
December 10-21, 2018: Watching the crane swing the roof trusses in place was a thrill, and once all were set into place the house began to take on a shape you could feel.
Manufactured roof trusses are an economical choice and at 24” deep can clear-span the width of my house. The deep cavity provides a built-in space to fill with insulation (more on this in a later blog post).
The style of my house calls for deep overhangs and generous rakes. Like the brim of a hat, the eaves will deflect rain away from the walls and provide the shade I need to help keep the house cool in summer. I used Sketchup, a 3D modeling software to visualize my design. I played around with thickness and depth of eave to get the look I wanted, and dialed in day of month and time of day to find out where shade lands on the Summer Solstice, when the sun is highest in the sky. I found out I needed a 30” overhang to get full shade on my south-facing windows. On the Winter Solstice, when the sun is lowest in the sky, the windows are in full sun, capturing free heat energy.
 The problem is that mid-June isn’t the hottest month, and December isn’t the coldest month. To optimize shade, I should look at July which weather data says has the most “cooling degree days”. To optimize passive solar heat gain, I should make sure my windows are in full sun in February, the month with the most “heating degree days”. I found that cutting the overhang back by 8” gave me full sun on February 15th , but exposed the windows to way too much sun on July 15th. (Note to fellow building science geeks: also play around with truss heel height, wall height, and window placement).
 To build a strong, wind-resistant overhang, I upgraded the truss “tail” (top chord) from the usual 2×4 to a 2×6. For each rake, I specified two dropped top chords supporting 2×4 flat “lookouts”. These cantilevers were then reinforced with 2×4’s on edge.


Instead of the usual 2×6 “sub-fascia” covered with a 1×6 “finish fascia”, I kept things simple and straightforward with a 2×8 cedar fascia screwed directly into the truss ends. Cedar is naturally decay-resistant and needs no paint or stain. In this way, I haven’t “sandwiched” materials that might get wet and stay wet, hiding rot from view. My overhang is what’s called a “boxed-in eave”. You see it on farmhouses around here that retain their vintage forms, although their roof edge would have a “square cut” not a “plumb cut” like mine. I’ll need the plumb cut to attach the large gutters I have planned.
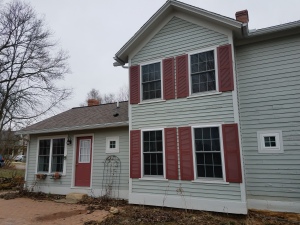 Newer homes or remodeled older homes usually have “soffited eaves” that while practical, can look awkward. High-end newer homes or Arts & Crafts homes sport “exposed eaves” which I love but are considerably more complicated and expensive to build.

 Each roof truss was secured to the wall framing with a Simpson truss screw instead of the usual hurricane anchor. It’s simpler and faster and can be installed from the inside. I upgraded the nailing protocol for the roof sheathing to match the wind-resistant specifications I used for the wall sheathing. For underlayment, the crew rolled out a double layer of Titanium UDL 25—a synthetic air, water, and vapor barrier—and attached it with cap nails. It’s rated to perform up to 240 degrees, a requirement where PV (photo-voltaic) panels are installed.
 It’s become common practice to roll “ice & water” peel-and-stick membrane at the lower edge of a roof as a hedge against ice dams. I’ll save the expense because my roof will have:
1. uniform heat loss across the entire roof area (insulation doesn’t thin @wall)
2. minimal heat loss with 20 inches of dense-pack cellulose
3. minimal heat loss because of air-sealed ceiling cavity
4. vent chute above insulation keeps underside of plywood sheathing cooler
5. metal roof promotes snow shedding
December 21st was a pretty sweet day because the crew got the underlayment down even as night was falling and we enjoyed a beautiful sunset. It was our last day before the holidays and as it turned out, our last day. Winter arrived and hasn’t let up. We’ll be back in March……for sure by April!

Exterior Air-Sealing
December 10-21, 2019: While my crew was busy framing the eaves and laying down roof sheathing, I tackled the exterior air-sealing.
Stopping air from whistling through random cracks is an essential step to meet my net-zero goals. Taking the time to caulk and tape each and every joint adds up to energy savings. It also makes a home more comfortable by eliminating drafts, cold spots, and uneven indoor temperatures. I can be confident that my house will last for the long haul because moisture-laden and dust-laden air can’t enter the wall and roof cavities. My insulation and framing will stay dry, which means mold, mildew, and wood decay can’t take hold. And a not-to-be-taken-lightly side benefit: carpenter ants, cluster flies, Asian beetles, and mice are stopped cold.
With all these benefits, you’d think exterior air-sealing would be standard practice in residential construction—but you’d be wrong. Sheathing seams are left untaped. Builders assure themselves that a layer of housewrap is enough to ward off wind and rain. But from what I’ve observed, it’s often hastily tacked up. Seams are sloppy and mechanical penetrations are haphazardly sealed. Siding covers all sins and buyer beware!

Several visitors to my building site have been surprised to see my use of plywood sheathing—not the more common OSB (oriented strand board). Plywood is a reliable air-barrier and can tolerate some saturation. OSB has been found to leak air when pressurized during blower-door testing (more about this in a later post), and is more vulnerable to decay when repeatedly wetted. A good alternative to stock OSB is Huber’s ZIP sheathing which has a factory applied coating that replaces housewrap.
Plywood scores worse for efficient use of wood resources (it requires larger diameter trees and generates more waste), but it uses less glue than OSB. It’s also more expensive: I chose 5/8” 5-ply fir, a significant upgrade from code-minimum 1/2” OSB. My decision to use plywood came down to its durability, and the advice of many building scientists who say it’s the “least risky” choice for thick double stud walls like mine. When packed with 12” of insulation, the plywood sheathing will stay cold—much colder than in a thin wall that rapidly loses heat to the exterior. The plywood can become a “condensing surface” (like window glass) if the drywall is breached and moist indoor air finds a convective pathway.
My first step was to caulk seams wider than 1/4” and tape narrower seams. I chose the same caulk (ChemLink M-1) I used for the under-slab vapor barrier where it seals to the top of the foundation wall. It’s a waterproof, non-shrinking, low VOC sealant that can withstand joint movement in excess of 35%. It was very easy to work with and had no apparent odor. The tape is 3M’s All Weather Flashing Tape 8067, selected for its good track record.


 Caulk and tape are more reliable than foam products because they remain flexible. They hold up to thermal expansion, structural settling, lumber shrinkage, and wind stresses. Foam is brittle. It can pull away, leaving hairline cracks that link outdoor air to indoor air.
At the bottom of the wall, I folded up and taped the under-slab vapor barrier that I had let run long (see blog post “Sills & Slabs”). Now married to the plywood sheathing, it completes the continuous air barrier at this critical juncture.

At the gap between the truss tails and the wall sheathing, I used DuPont’s FlexWrap EZ, a flashing tape that takes a curve. Later, I’ll use it for mechanical penetrations. On the inside, a “vent chute” will complete the air-barrier at the top of the wall (more on this in a later post).


 My next step was to roll out the housewrap. A few green builders swear by old-style tar paper (asphalt impregnated felt), but most agree that synthetic products tear less and hold up better under repeated wetting. They are also lighter and easier to install. Known to the trade as “Weather Resistive Barriers”, a good quality housewrap is wind-resistant, waterproof, and vapor open.
I chose DuPont’s Drainwrap which has a slightly crinkled surface to facilitate water drainage behind the siding. With help from friend Bob Rowen, we got a nice tight fit around corners and secured it with caps. Simple stapling wouldn’t hold up in my windy location. We kept clear of window and door openings.
 The caulk/tape/housewrap method takes patience and many steps. There are other ways to air seal including sheet foam, spray foam, fluid-applied membranes and peel-and-stick sheets—all more expensive in material but may come with a savings in labor. What I’ve chosen is simple, readily available, and easy to execute or adapt when future changes are made.
When spring comes around we’ll install a combination of vertical wood and horizontal cement board siding. Siding is the first line of defense against rain, wind, and snow. Any water that sneaks past will hit the housewrap and drain down. If the housewrap is breached, the plywood can take the blow. Each layer deflects water and wind, and does so while staying vapor-permeable. Any moisture that’s absorbed can eventually evaporate. The wall can dry to the exterior when the sun comes out and warms surfaces. Or it can dry to the interior when the indoor air is warmer and drier than the outdoor air (more on this in a later post).
I hope what I’ve described here makes sense to you whether you’re a fellow builder or a homeowner. Please let me know if you have any questions or insights of your own on the fascinating topic of air-sealing!
OPEN HOUSE Sunday noon to 5 pm
December 16, 2018: Everyone is welcome to stop by and have a look at Spring Green’s first net-zero super-insulated home. I’ll be there to show you around and explain anything you might be curious about. My POEM HOME is at 770 Westmor Street, one block north of the High School and on the same side of the street.
Rough Framing
November 30-December 10, 2018: Framing is underway! The wall panels arrived from a factory up north, along with the roof trusses. A large flatbed truck off-loaded them onto a flat area I had the excavator prepare next to the curb. 

My crew, brothers Pat and Jamie Rogers, immediately set to detaching the stacks from their shipping lumber. By noon, the crane arrived from Dodgeville and the first panel became airborne a half hour later. By 3 pm, all but the east wall was set and secured.
Most homes in our area are built on site, stick by stick. The promise of prefab homes has long been held out as “the future of home construction”. I’m not sure why it isn’t more commonplace. In my 32 years as a home designer I’ve only collaborated on two. But I decided it was a good bet for this house.
One reason is that my salesman at Tri-County Building Supply in Spring Green was experienced with it. Jim Barnicle became my partner in reviewing the shop drawings supplied by the factory to make sure they lined up with my blueprints. The idea is to think things through on paper instead of on-the-fly at the job site. I wanted to apply the principals of “advanced framing”—-using as few studs and headers as possible to reduce waste and structural redundancy while also providing more room for insulation. This protocol is promoted by building scientists and “green builders” like me but isn’t well known or well accepted.
Prefab homes—or in my case panelized components—are built in a climate controlled facility and are erected in days, not weeks. The wood isn’t exposed to the weather as long so it stays dryer and straighter. The factory is incentivized to minimize waste, and spares me the work of stacking, saving or dumpstering cutoffs. What’s the downside? The cost and energy to transport and erect the panels. Renting a crane is expensive. This one is $170/hour and it’s not always easy to stage a project for fast action. Sometimes, it idles.
The next day, my crew set the interior wall panels, finished the house shell and got the garage up. We called the crane off for the next day to fiddle around with details but brought it back the following day to set the roof trusses.

My plans call for a “double stud wall” and “raised heel trusses”. The exterior walls are 2×4 studs spaced 24” inches apart (instead of the usual 16”) with a matching 2×4 interior wall to create a 12” deep cavity for insulation. The roof structure is 24” deep, to accommodate up to 22” of insulation. The sheathing is 5/8” 5-ply plywood—a premium choice over the usual 1/2” OSB (oriented strand board). Thicker sheathing is stronger and less likely to bow across the wider spacing. Plywood is better than OSB at taking on and recovering from any water or vapor intrusion and is more airtight.

The idea is to go above and beyond code minimum for long-term energy-efficiency, durability and occupant safety. I specified an aggressive nailing pattern and other structural upgrades, based on the American Plywood Association’s protocol for wind-resistant construction. Their research shows that when homes are carefully constructed, they can withstand—with minimal damage—95% of tornadoes. This comprises EF-0, EF-1, and EF-2 tornadoes. We don’t exactly live in Tornado Alley, but most of us around here remember the EF-2 tornado that tore up homes and a wide swath through our beautiful Governor Dodge State Park in 2014. Here’s a map showing the incidence of EF-2 and stronger tornadoes.
Rough framing has got to be the most glorious stage of new home construction. Plans on paper become three-dimensional forms you can finally walk through and feel. Elevations sketched with nicely proportioned windows finally become picture-perfect views. Here’s sunset from the west bedroom (with pond).
